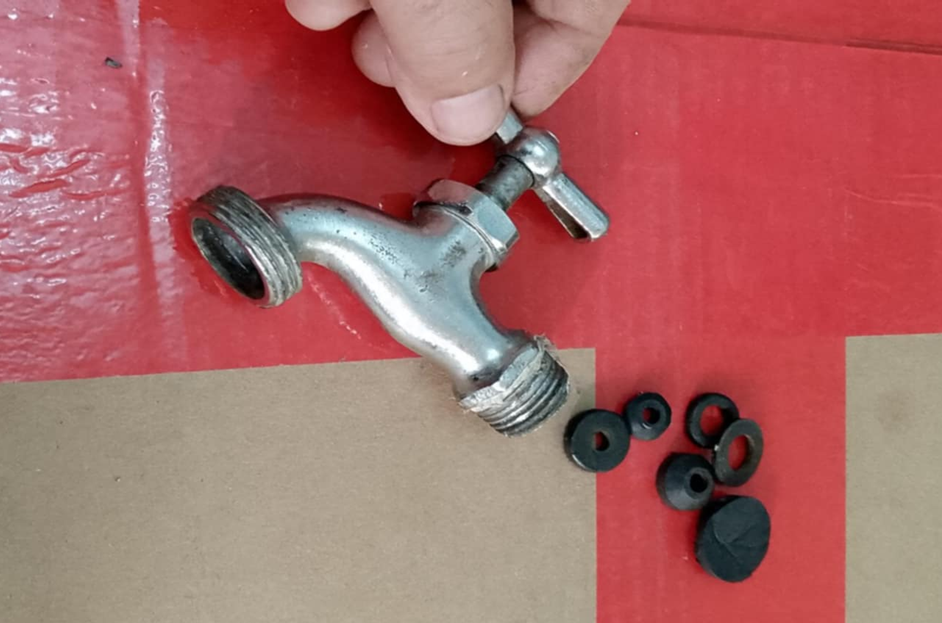
Hola amigos, la verdad es que hoy en día con la tasa de inflación tan imparable, cada vez se nos hace más difícil reemplazar algunos electrodomésticos en nuestros hogares, por lo que no nos queda otra opción que intentar repararlas, y dentro de este renglón podemos incluir algunas piezas como las válvulas de chorro cuando se dañan y comienzan a gotear.
LES CUENTO, que desde hace varias semanas la válvula del lavandero de mi casa había comenzado a gotear, esta misma válvula ya la había reparado hace más de un año, porque goteaba como ahora, para aquel entonces, lo que hice fue cambiarle la goma y así pude solucionar el problema, por lo que ahora pienso volverla a reparar esperando que no tenga desgaste en la parte metálica donde precisamente asienta dicha goma, porque de ser así, entonces tendría que comprar una válvula nueva.
IN ENGLISH:
Hello friends, the truth is that these days, with unstoppable inflation, it's becoming increasingly difficult to replace some appliances, so we have no choice but to try to repair them. This includes parts like the jet valves when they become damaged and start to leak.
I'll tell you that for several weeks now, the valve in my sink has been leaking. I had this same valve repaired over a year ago because it was leaking just like it is now. Back then, what I did was replace the rubber seal, and that solved the problem. So now I'm planning to repair it again, hoping the metal part where the rubber seal sits isn't worn out. If it is, I'd have to buy a new valve.
Reparando la válvula de chorro que gotea // Repairing a leaky jet valve
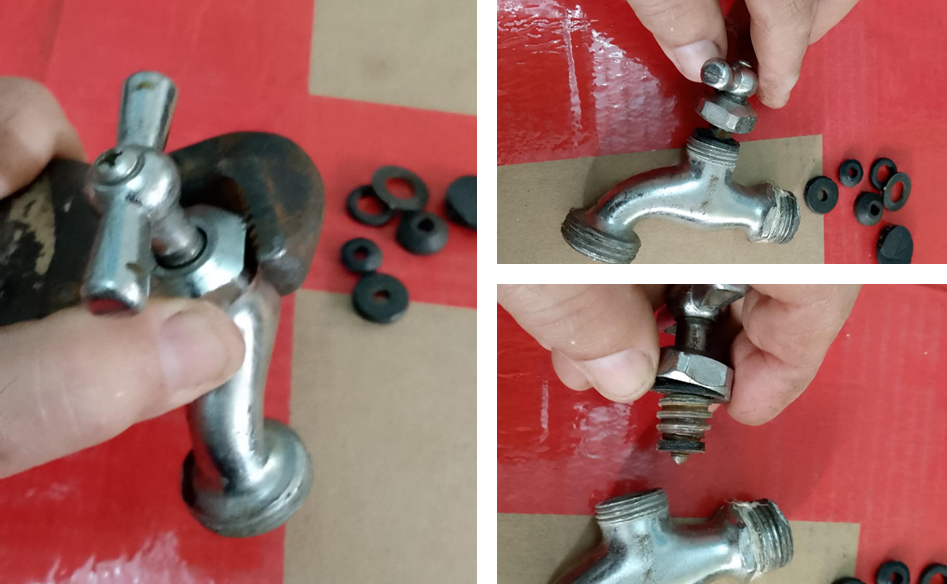
Bueno amigos, como les decía al comienzo, desde hace más o menos como 3 semanas la válvula de chorro del lavandero había comenzado a gotear por lo que hay sábado aproveche el día para revisar el sello de coma que va en la punta del vástago, la cual es la que generalmente se daña, ya que con el uso frecuente se va aplastando y pierde el esponjamiento y además de esto, también se ponen muy rígidas que aun apretando fuente la manilla, sigue saliendo agua.
Well friends, as I was saying at the beginning, for about 3 weeks the jet valve of the laundry room had started to leak, so this Saturday I took advantage of the day to check the comma seal that goes on the tip of the stem, which is the one that usually gets damaged, since with frequent use it gets crushed and loses its sponginess and in addition to this, it also becomes very stiff that even when you squeeze the handle, water continues to come out.
Revisando la parte interna de la válvula de chorro. // Checking the internal part of the jet valve.
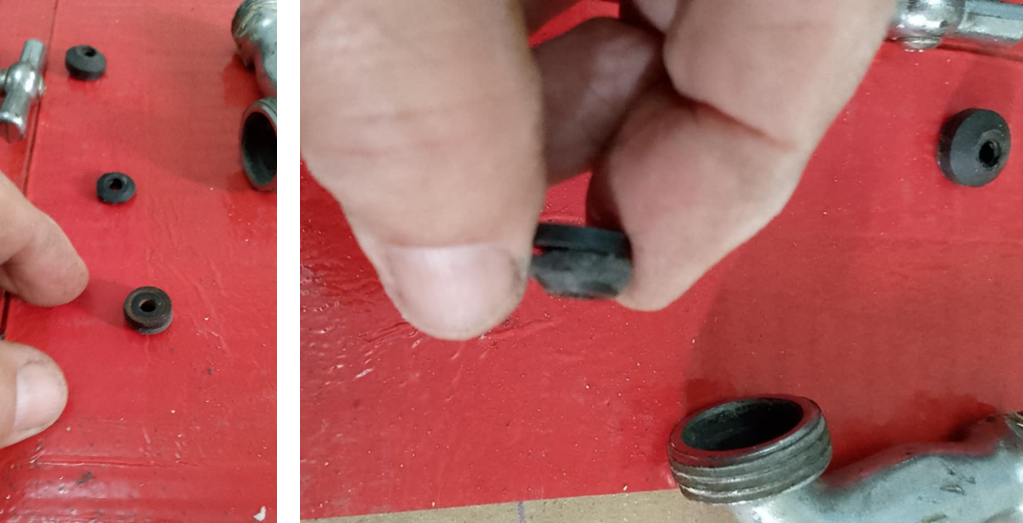
Bueno amigos, para revisar las gomas internas de esta llave de chorro, primeo hay que aflojar la tuerca superior, la cual sostiene el vástago o émbolo que poseen la goma, este proceso es sencillo, solo tenemos que utilizar una llave de tubo o una llave ajustable, por lo menos ya consegui entre mis herramientas varias gomas.
Well, friends, to check the internal rubbers of this jet wrench, you first have to loosen the upper nut, which holds the rod or plunger that has the rubber. This process is simple, we just have to use a socket wrench or an adjustable wrench. At least I have several rubbers among my tools.
Desmontaje del vástago de la llave de chorro: // Disassembling the jet wrench stem:
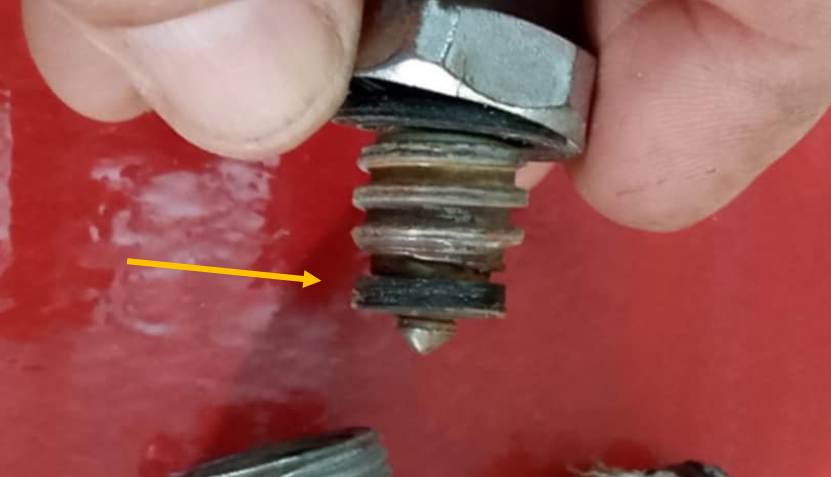
Miren como se encuentra la goma del vástago: // Miren como se encuentra la goma del vástago:
La verdad, es que se ve bastante delgada, así que tendré que reemplazarla, porque lo más probable es que esta goma no estaba sellando bien la salida del agua.
The truth is, it looks pretty thin, so I'll have to replace it, because most likely this rubber wasn't sealing the water outlet properly.
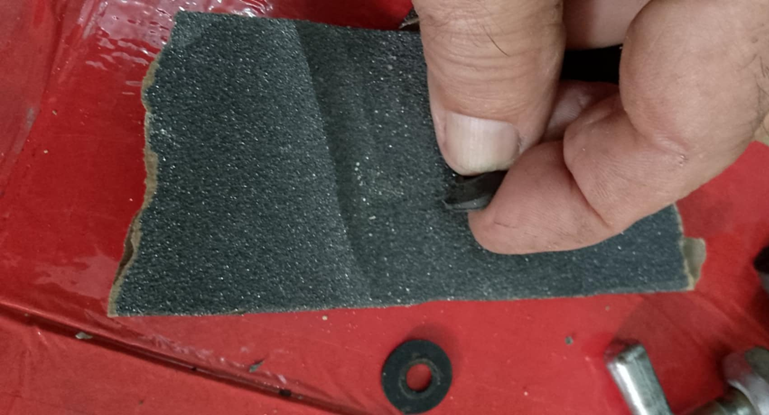
Les cuento que lo malo es que dispongo de varias gomas, pero ninguna de ellas tiene el diametro de la dañada, así que tendré que recortar alguna de las que tengo, para que tenga diámetro de la anterior.
The bad thing is that I have several rubber bands, but none of them have the diameter of the damaged one, so I will have to cut some of the ones I have, so that they have the diameter of the previous one.
Recortando la goma con un cuchillo: / Cutting the rubber with a knife:
Ahora le pasaré una lija a la goma para que quede lisa y del mismo diamtro que la goma dañada:
Now I will sand the rubber so that it is smooth and the same diameter as the damaged rubber:
Ya logré rebajar la goma y ahora posee el mismo diametro que la dañada:
I have already managed to lower the rubber and now it has the same diameter as the damaged one:
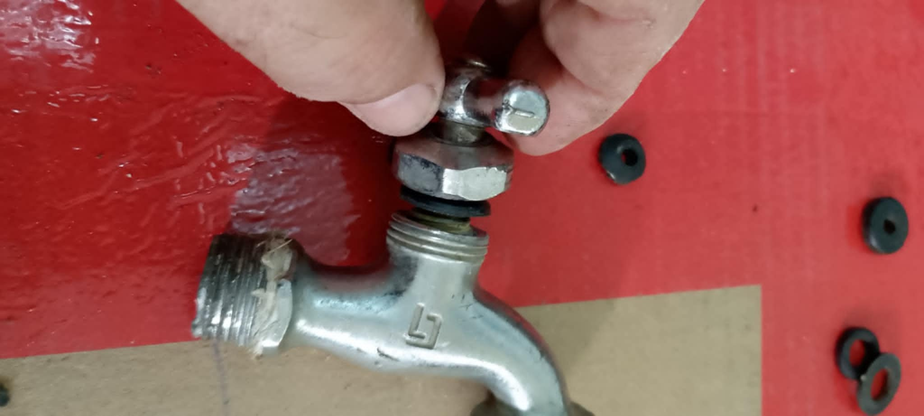
Colocando la nueva goma en la punta del vástago de la llave de chorro: // Placing the new rubber on the tip of the jet wrench stem:
Colocando nuevamente el vástago en la llave de chorro: // Putting the stem back into the jet valve:
Bueno amigos, ya coloqué la nueva goma en la punta del vástago, la verdad es que quedó más gruesa que la goma dañada y el diámetro es igual, por lo que debe funcionar bien, así que voy a proceder a instalar el vástago, para esta instalación solo hay que girar el vástago hacia la derecha y luego ajustar la tapa roscada y listo:
Well friends, I have already placed the new rubber on the tip of the stem, the truth is that it is thicker than the damaged rubber and the diameter is the same, so it should work well, so I will proceed to install the stem, for this installation you just have to turn the stem to the right and then adjust the threaded cap and that's it:
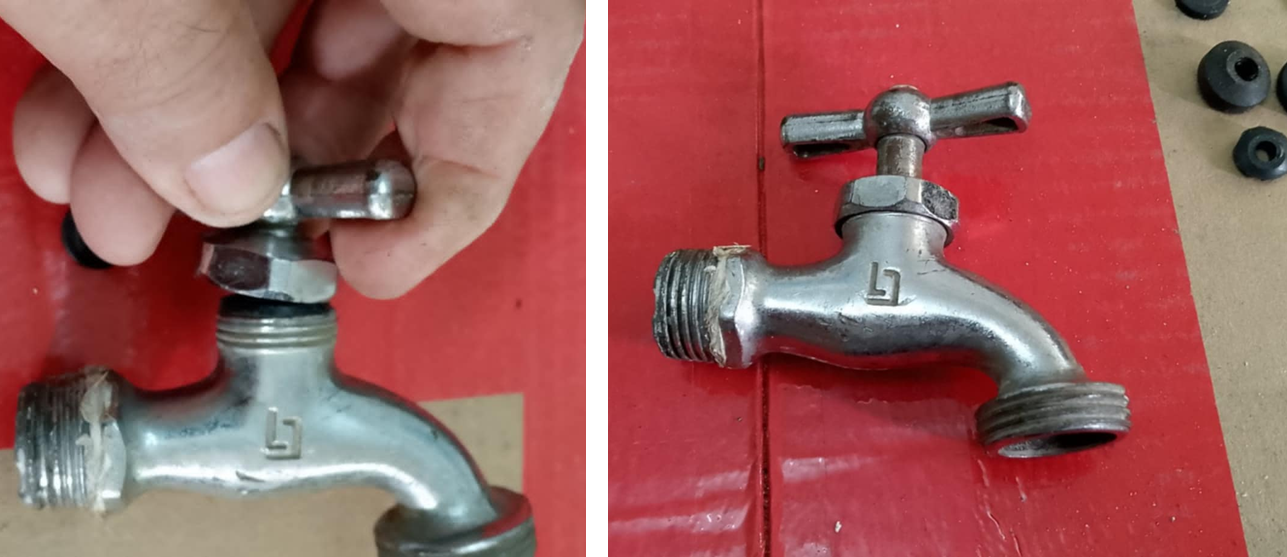
¡LISTO! La válvula de chorro quedó muy bien // DONE! The jet valve turned out great.
En realidad, tenemos muchos aparatos domésticos en nuestro hogar que podemos fácilmente repararlos, y entre tantas cosas que podemos reparar podemos incluir las "válvulas de chorro", porque generalmente cuando estas piezas comienzan a gotear, es porque la goma se ha dañado y solo tenemos que reemplazarla y listo, para ello venden en las tiendas un kit en una caja, el cual contiene varias gomas de diferentes tamaños, en este caso no quise comprar este Kit, por que solo necesitaba una sola goma, bueno, aunque las gomas que yo tenía no era del mismo diametro de la dañada, por lo menos logré cortarla para que pudiera funcionar y la verdad es que quedó muy original.
Actually, we have many household appliances in our home that we can easily repair, and among so many things that we can repair we can include the "jet valves", because generally when these parts start to leak, it is because the rubber has been damaged and we just have to replace it and that's it, for this they sell in stores a kit in a box, which contains several rubbers of different sizes, in this case I did not want to buy this kit, because I only needed a single rubber, well, although the rubbers that I had were not the same diameter as the damaged one, at least I managed to cut it so that it could work and the truth is that it was very original.
Saludos, Dios les bendiga, hasta pronto.........Greetings, God bless you, see you soon