🌻🌻🌻🌻🌻🌻🌻🌻🌻🌻🌻Español.
Saludos mis amigos artistas en las artes manuales, porque hay artistas de otra índole, pero yo soy en las manualidades como todos los que estamos en esta comunidad.
En otras oportunidades les he traído rosas de foami, en papel crepe, otro material que no recuerdo.
Las de esta ocasión son unas rosas en espiral, si creo que muchos sabemos lo que es un espiral que es una linea curva que se puede empezar desde adentro hacia afuera o viceversa, pero como todo esta idea no es original mía, pero si le di mi toque mi sello personal para diferenciar de la otra.
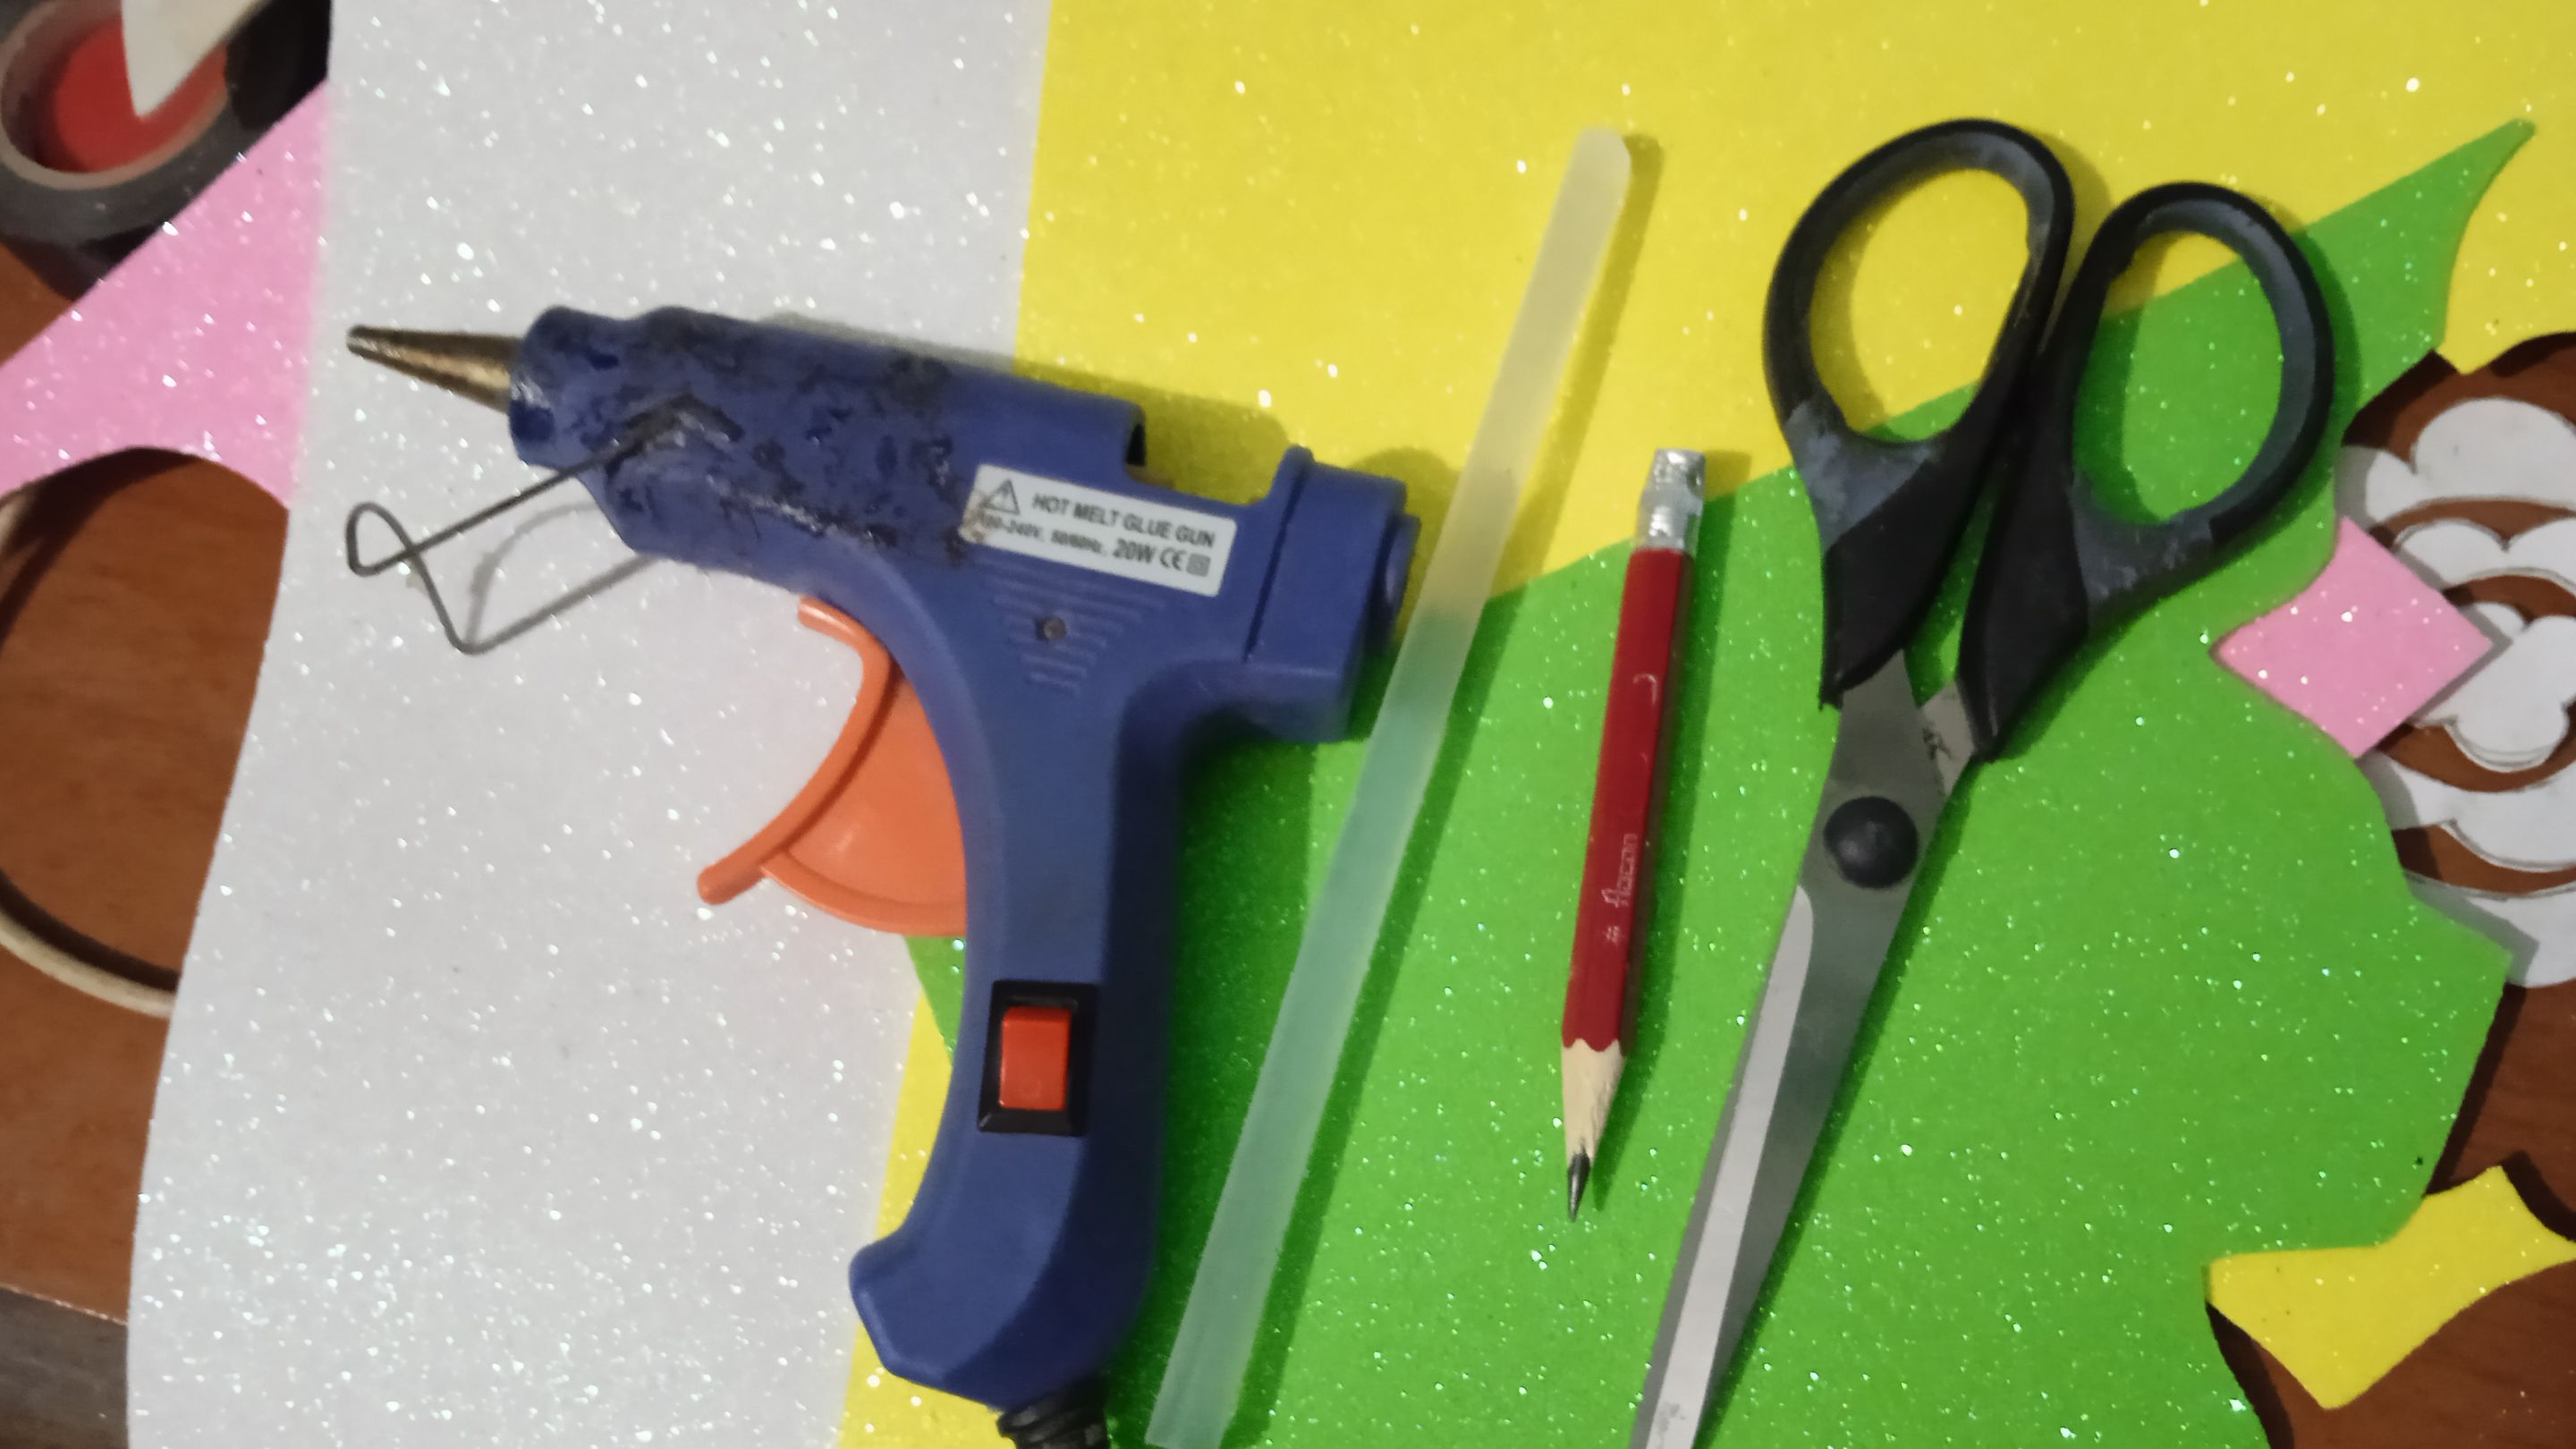
Materiales y herramientas empleadas:
-Hoja de papel reciclada.
-Cartón de caja de cereal.
-Foami en el color de su gusto.
-Tijera, pega blanca, lápiz.
-Pistola y barra de silicon.
-Patrón de la rosa.
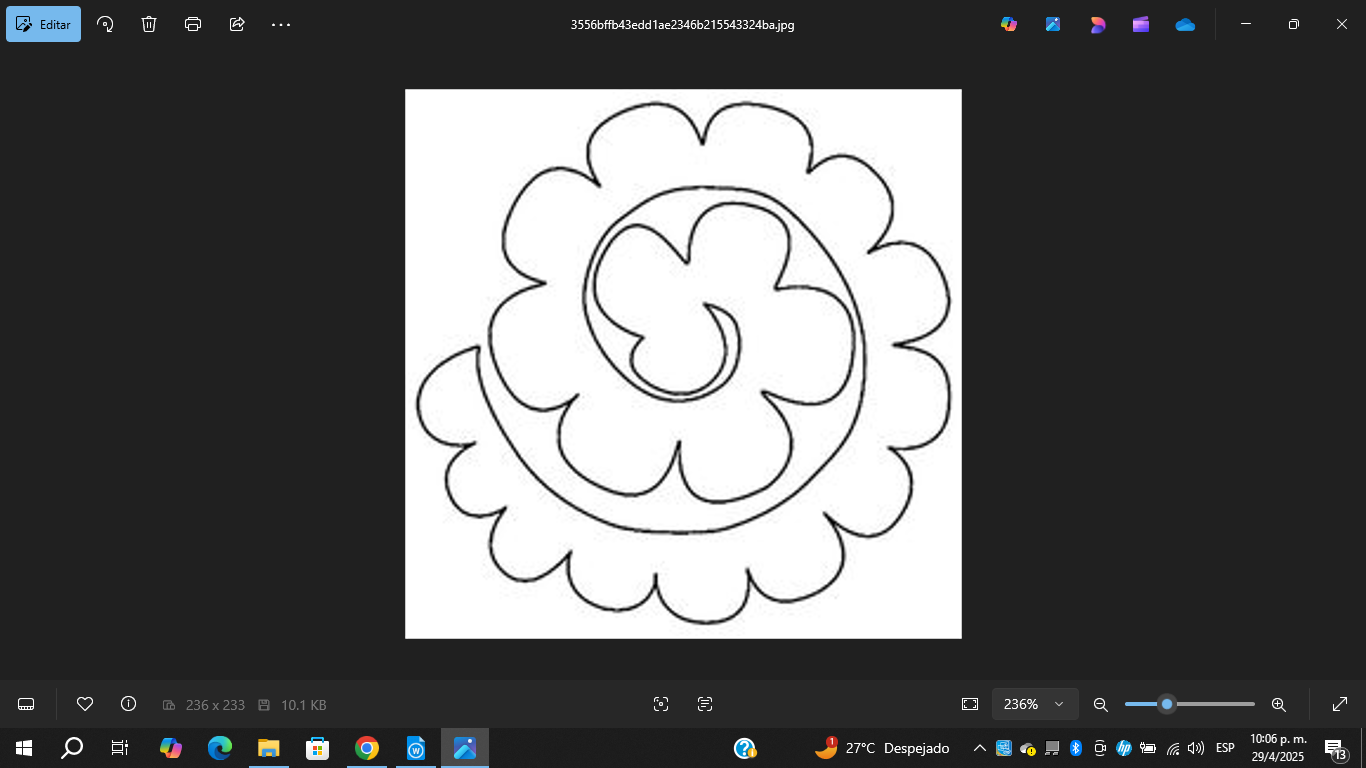
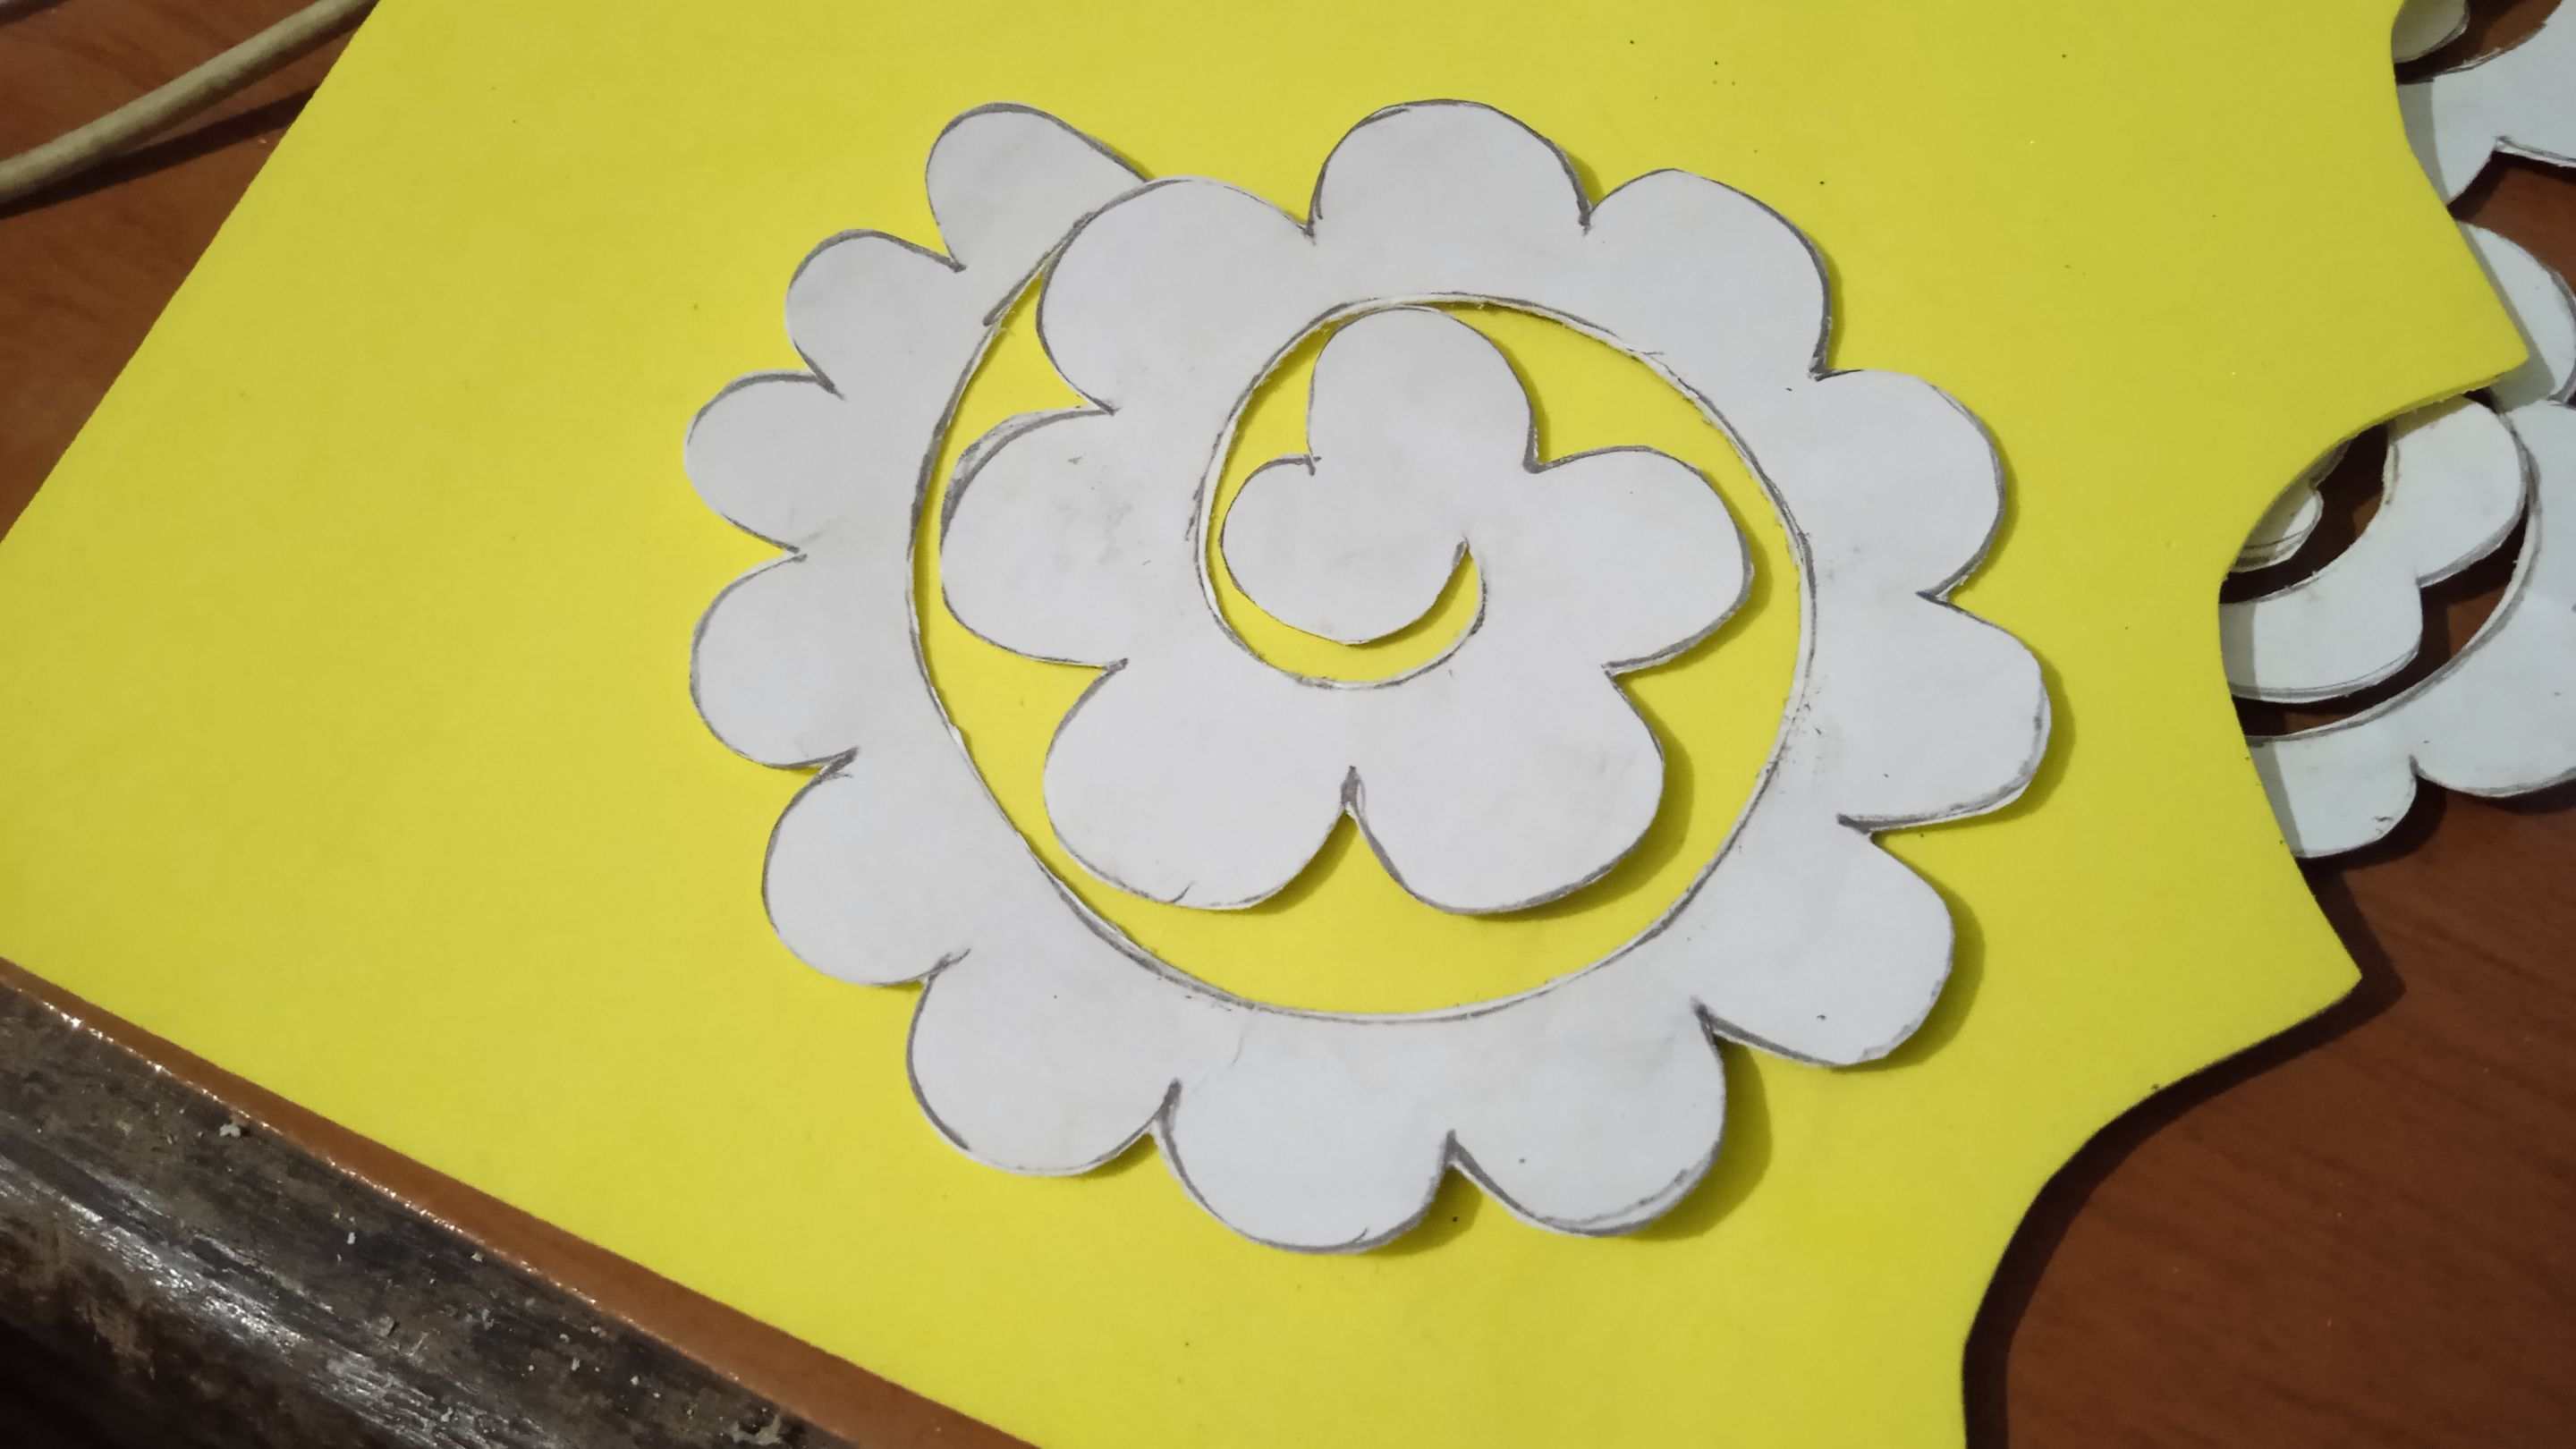
El patrón:
Como dije la idea no es completamente mía, pero que la adapte a mi necesidad o como creí que me quedaría mejor. Busque y guarde en mis carpetas uno de los modelos de rosa en espiral, si así mismo lo pueden buscar en la internet: Moldes de rosa en espiral.
Ya con el molde o patrón en la pc lo amplio al tamaño que creo conveniente. Y de la misma pantalla lo copie al papel con lápiz.
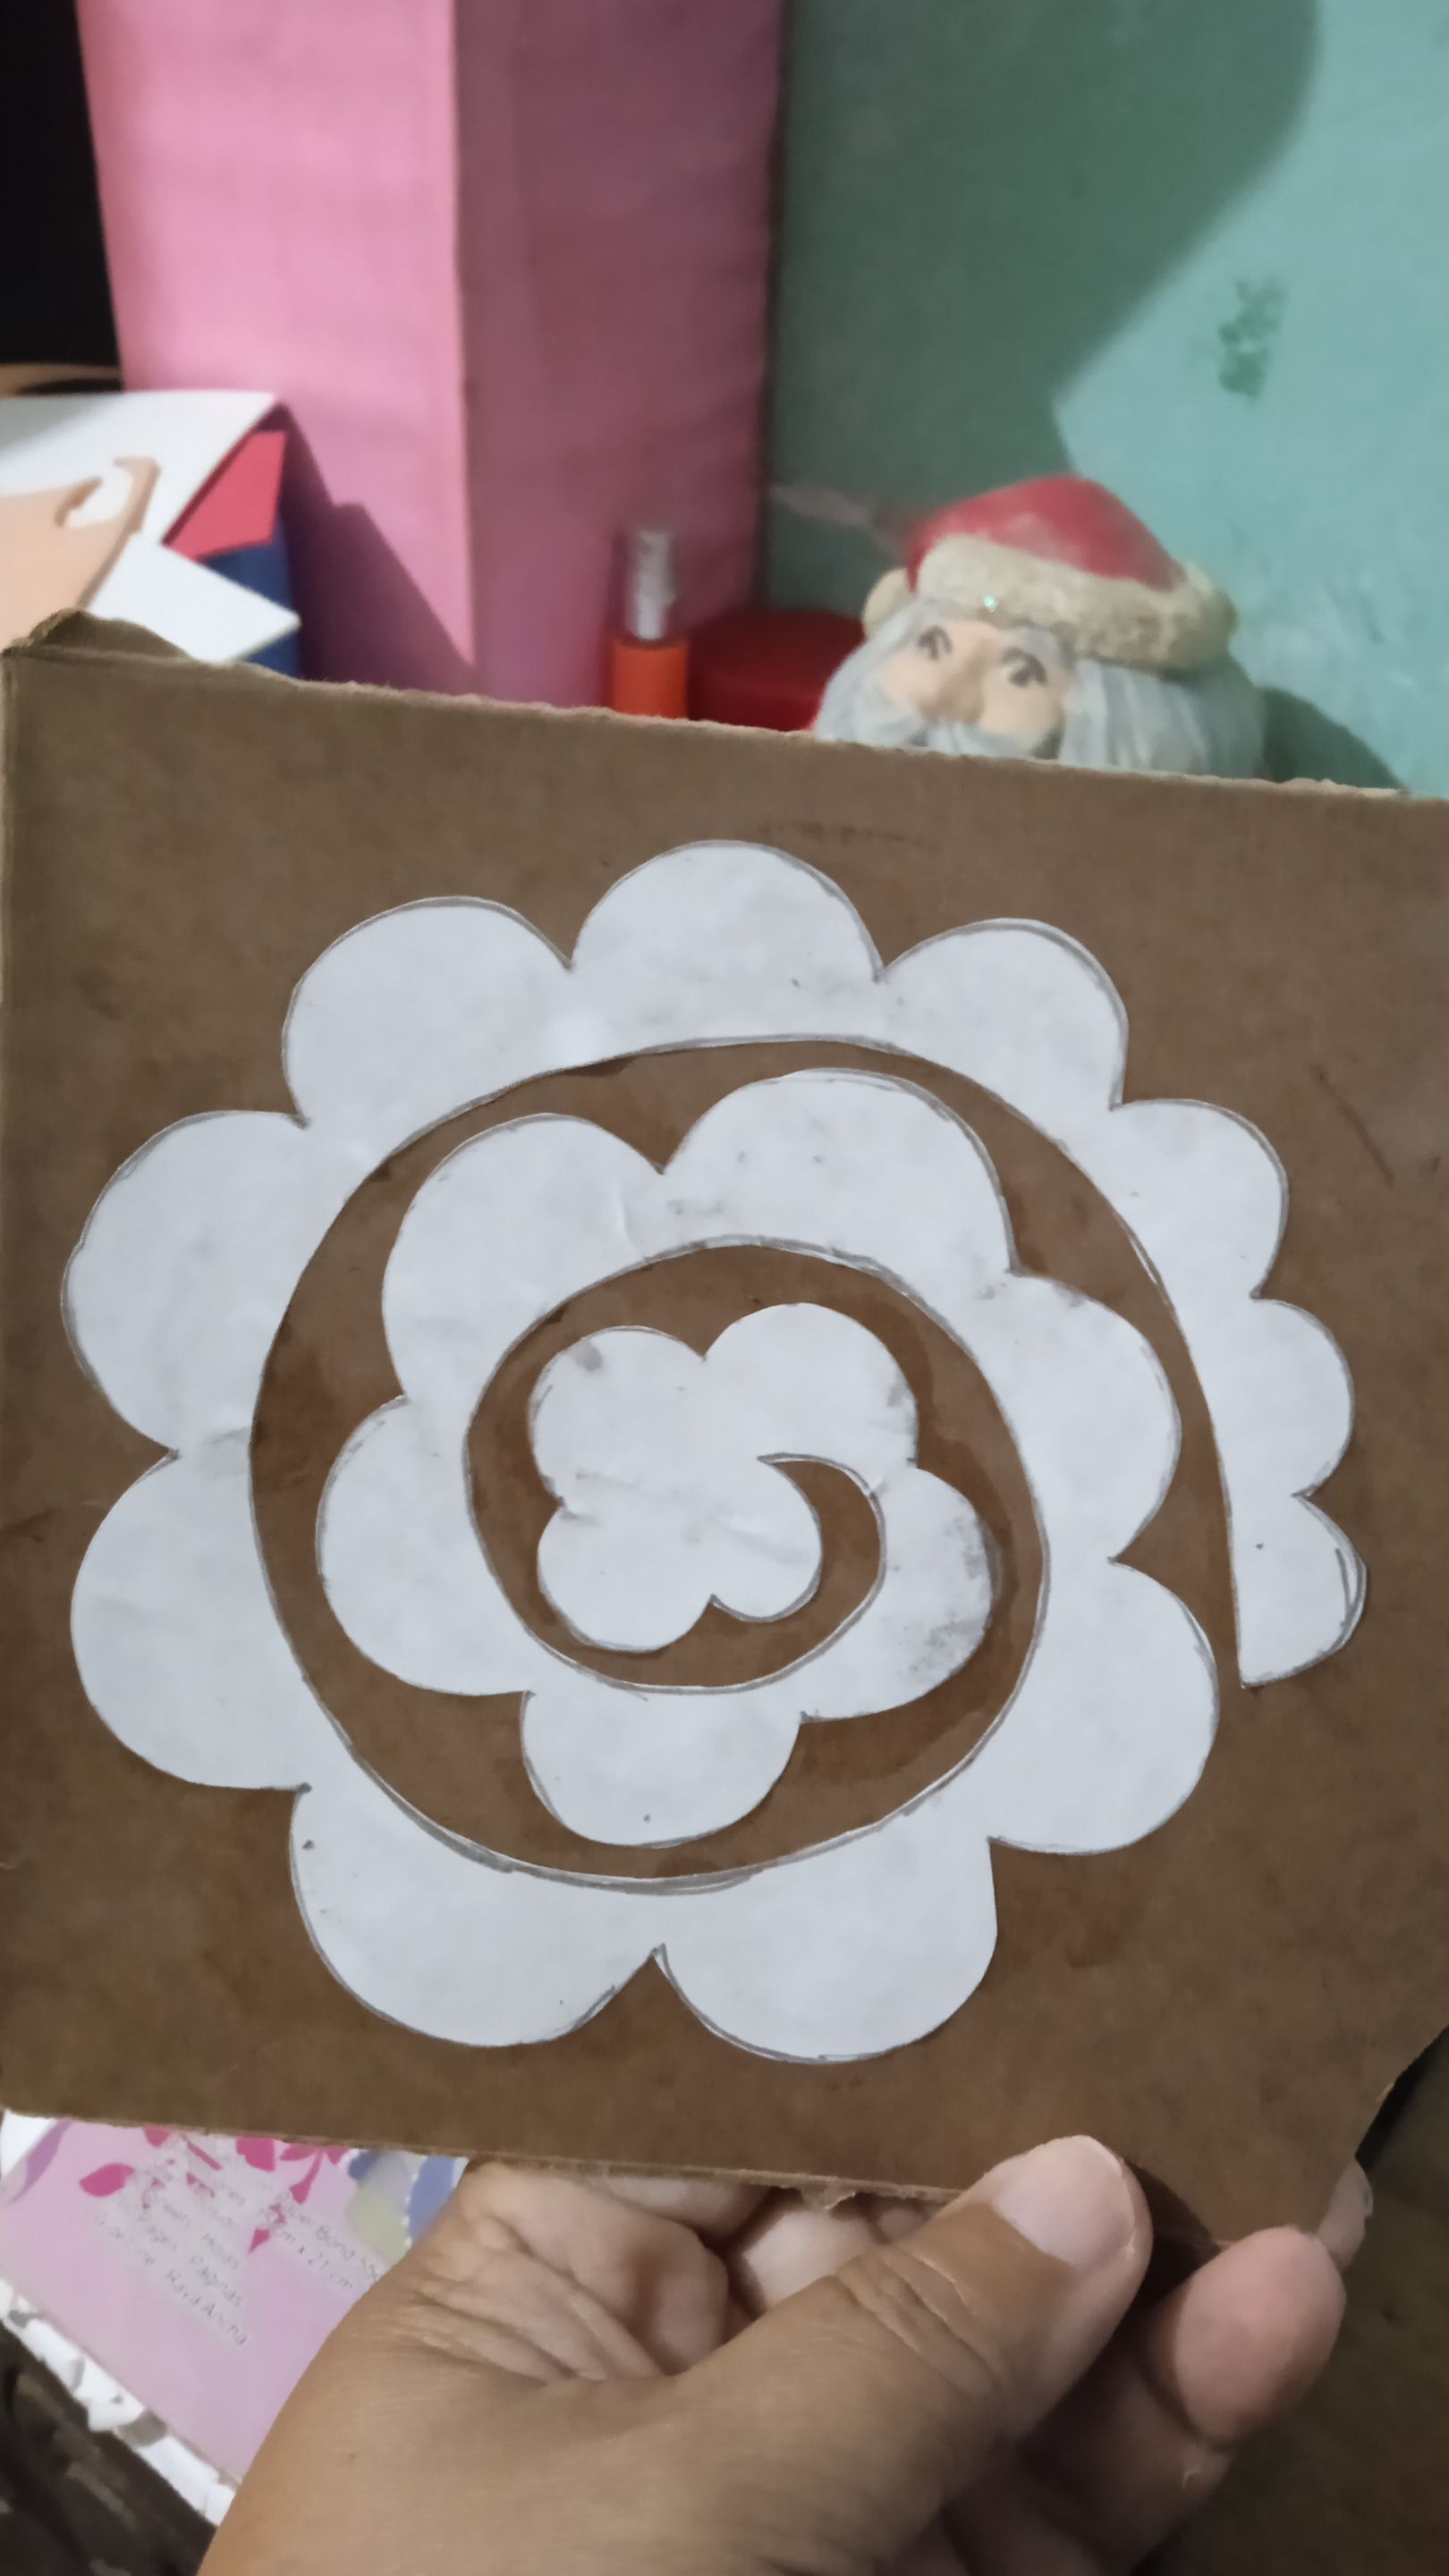
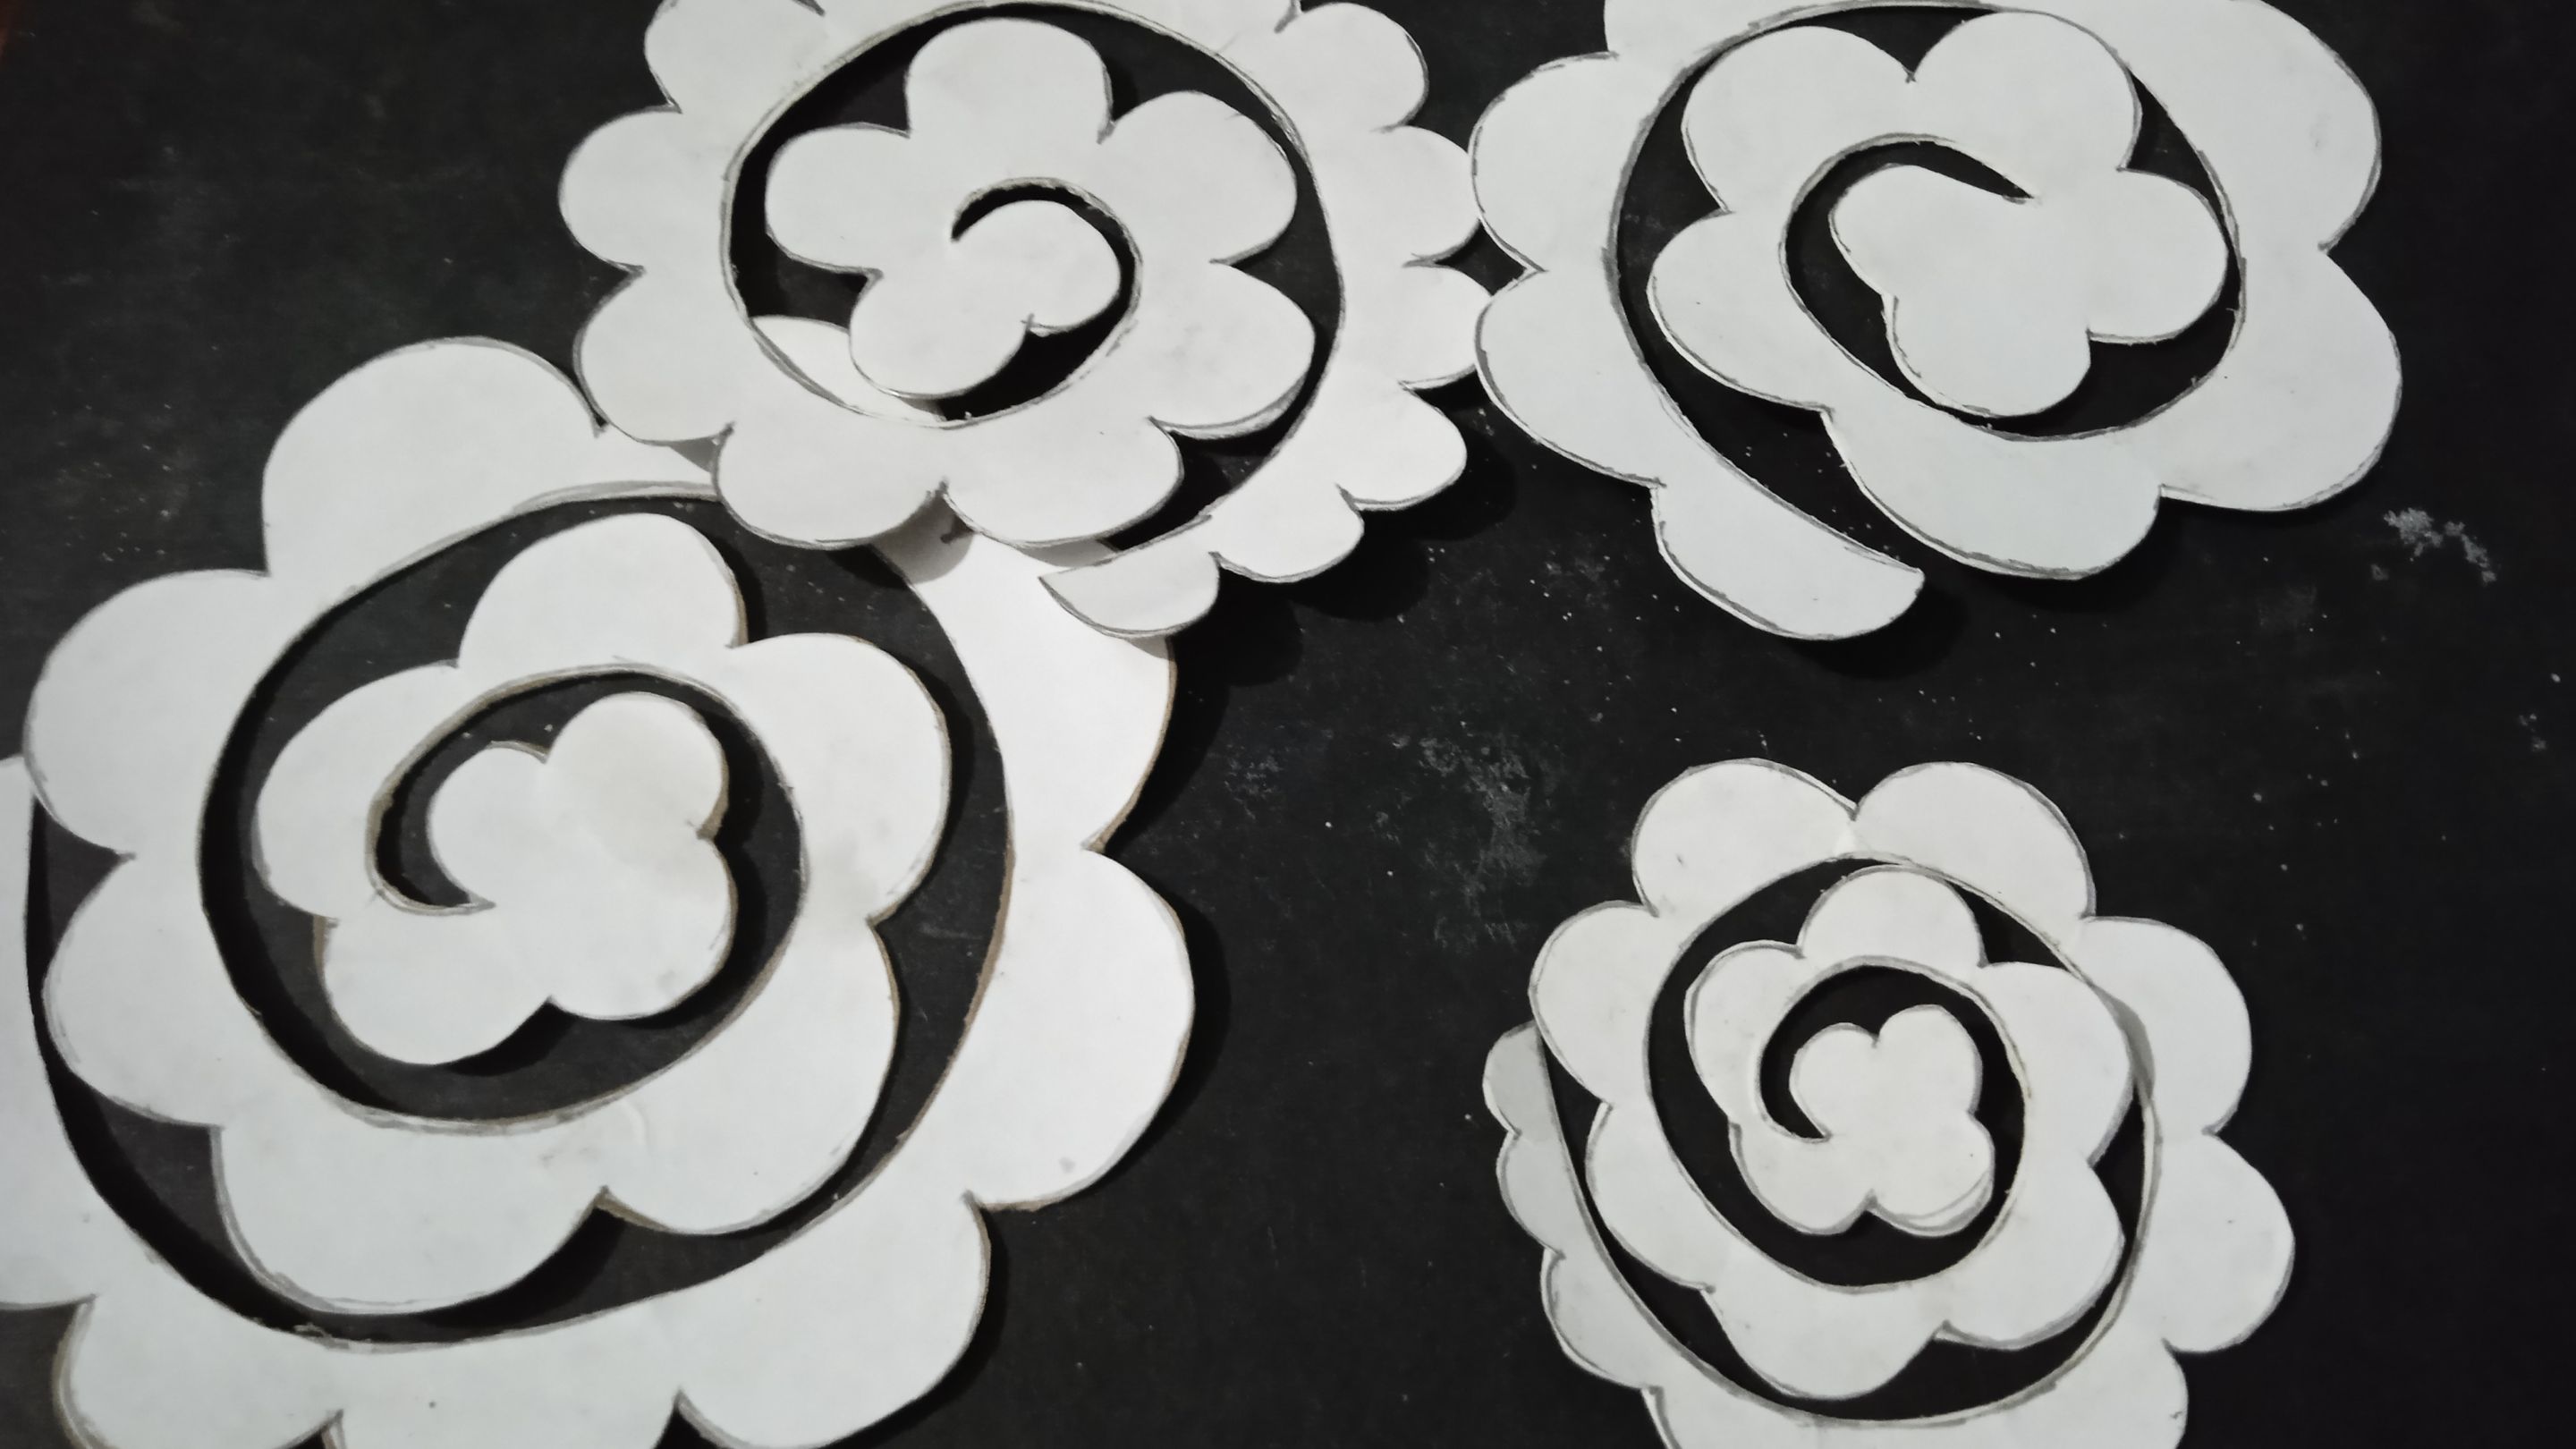
Recorte y lo pegue en el cartón de la caja de cereal porque es menos grueso y mas fácil de recortar que los otros cartones. Ya listo el patrón o molde de la rosa en espiral ahora vamos hacerla.
La Rosa:
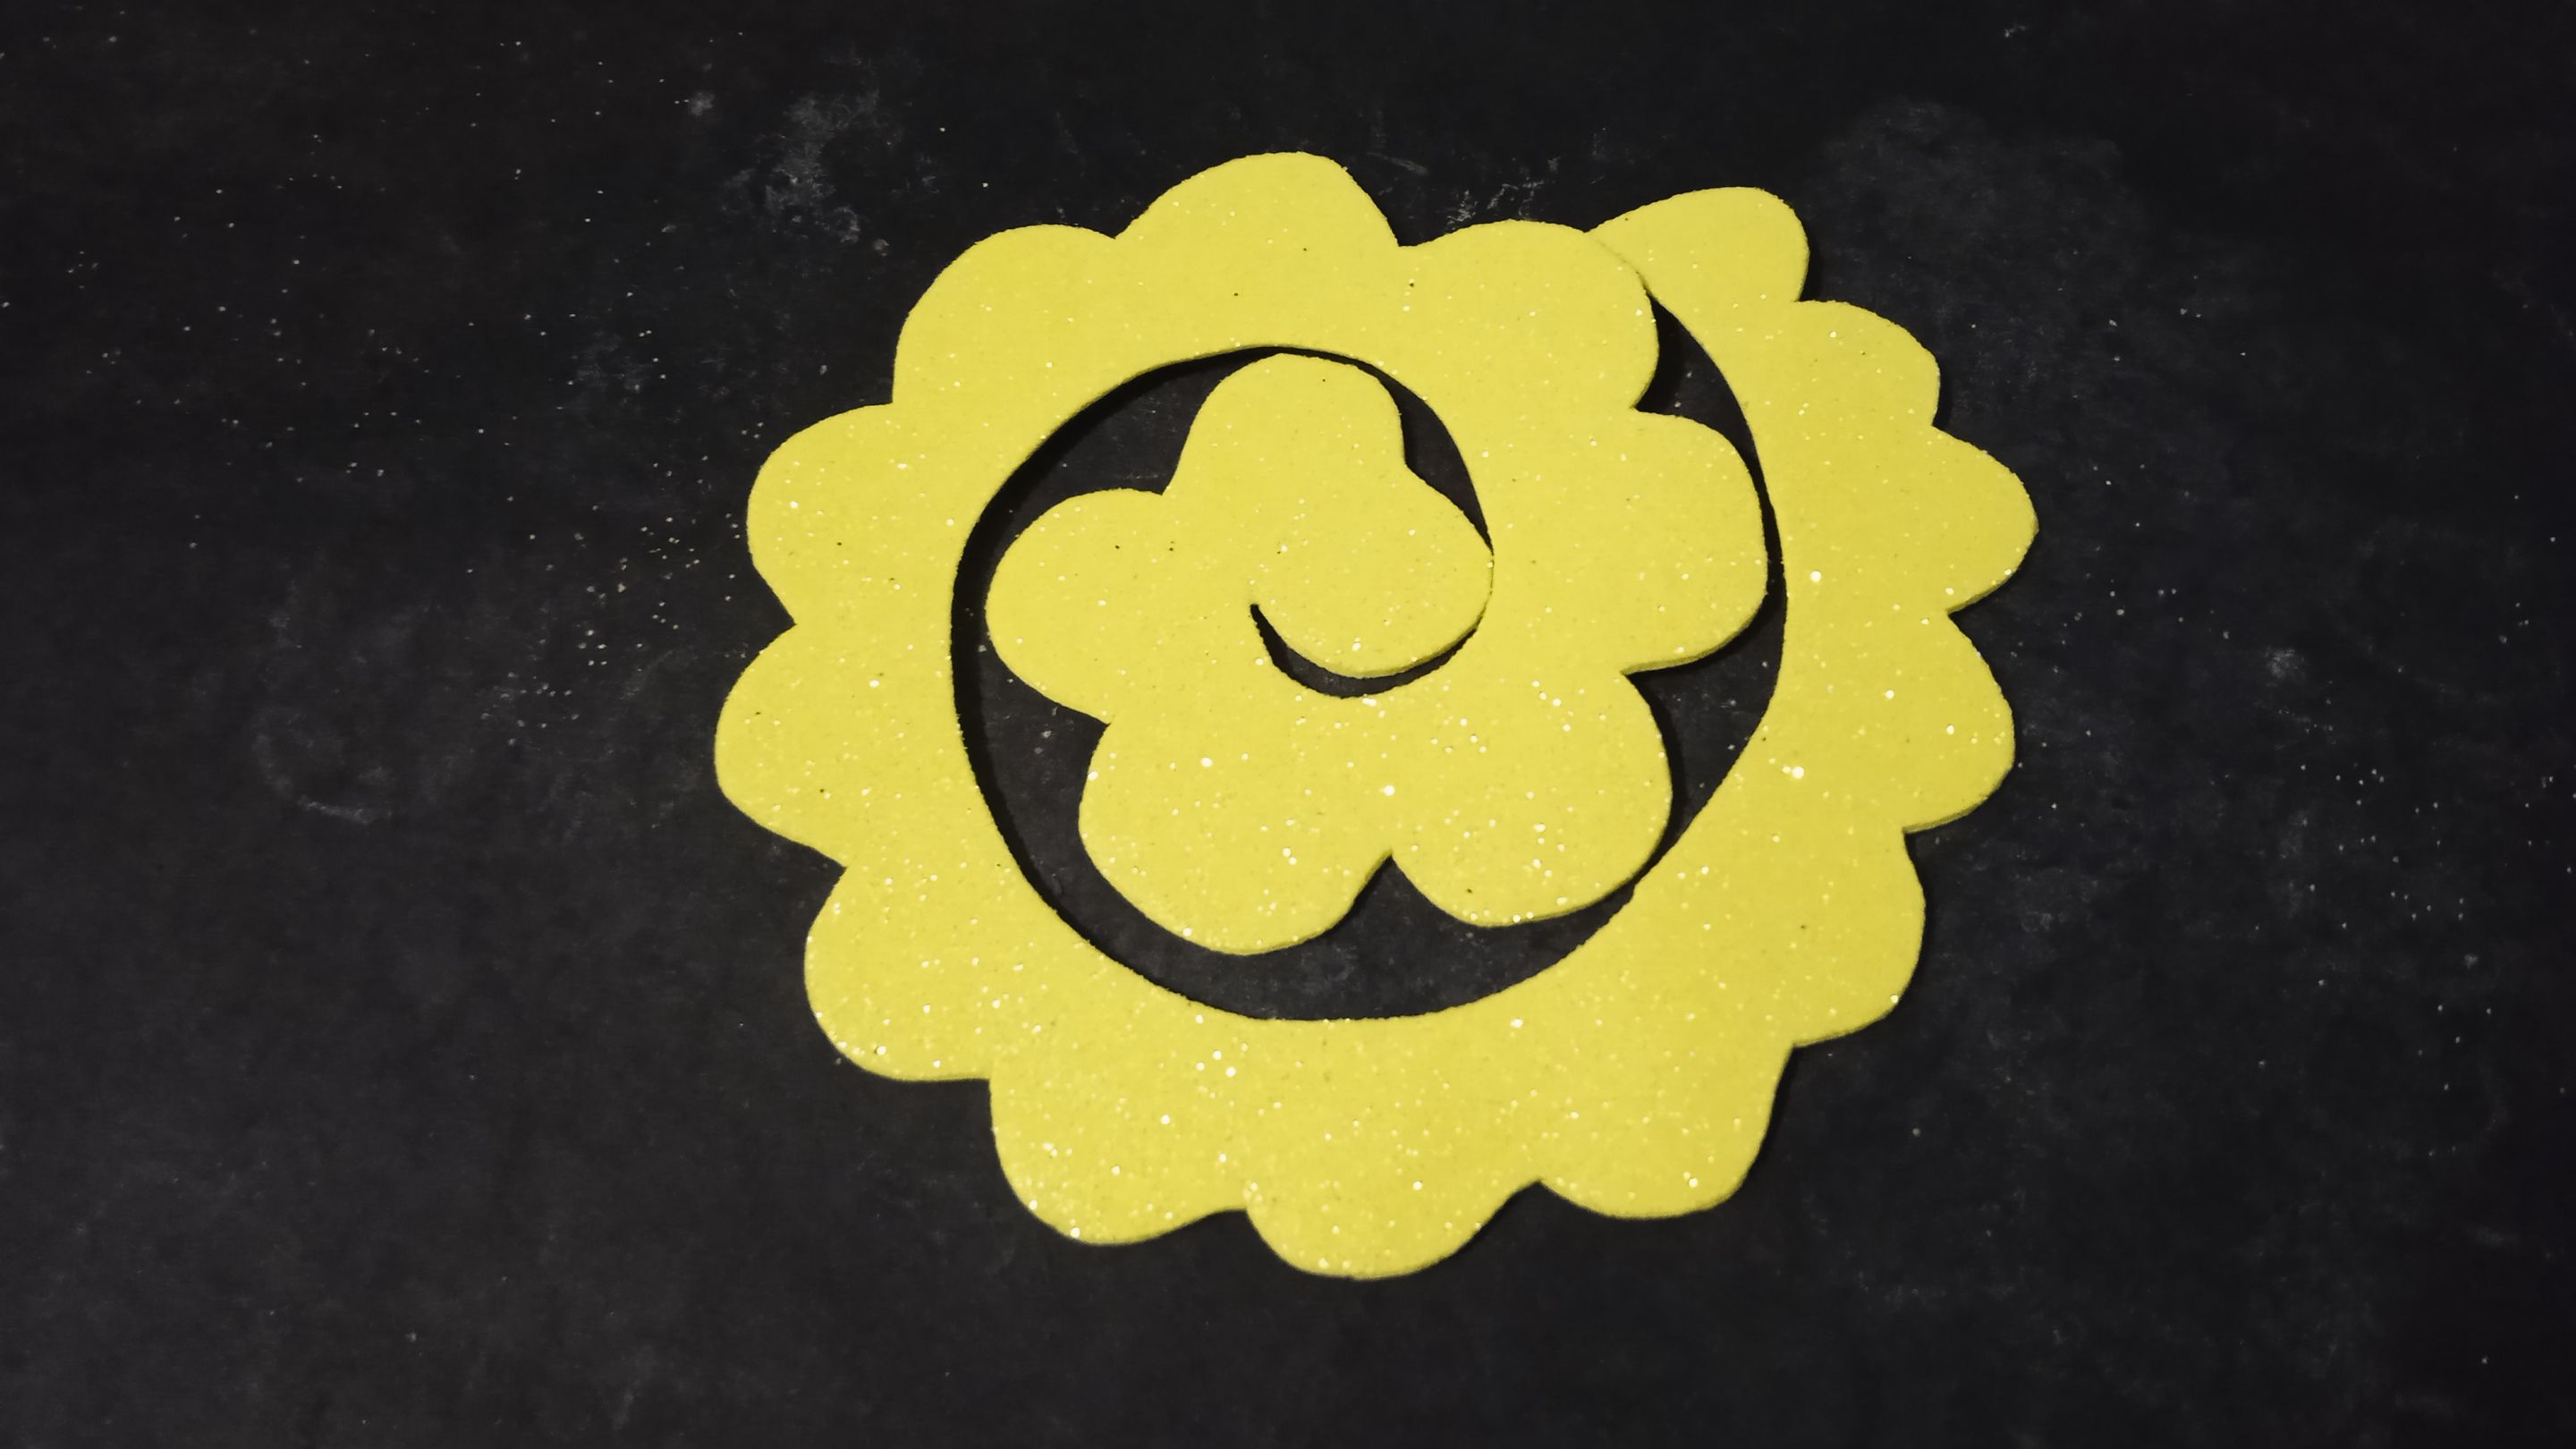
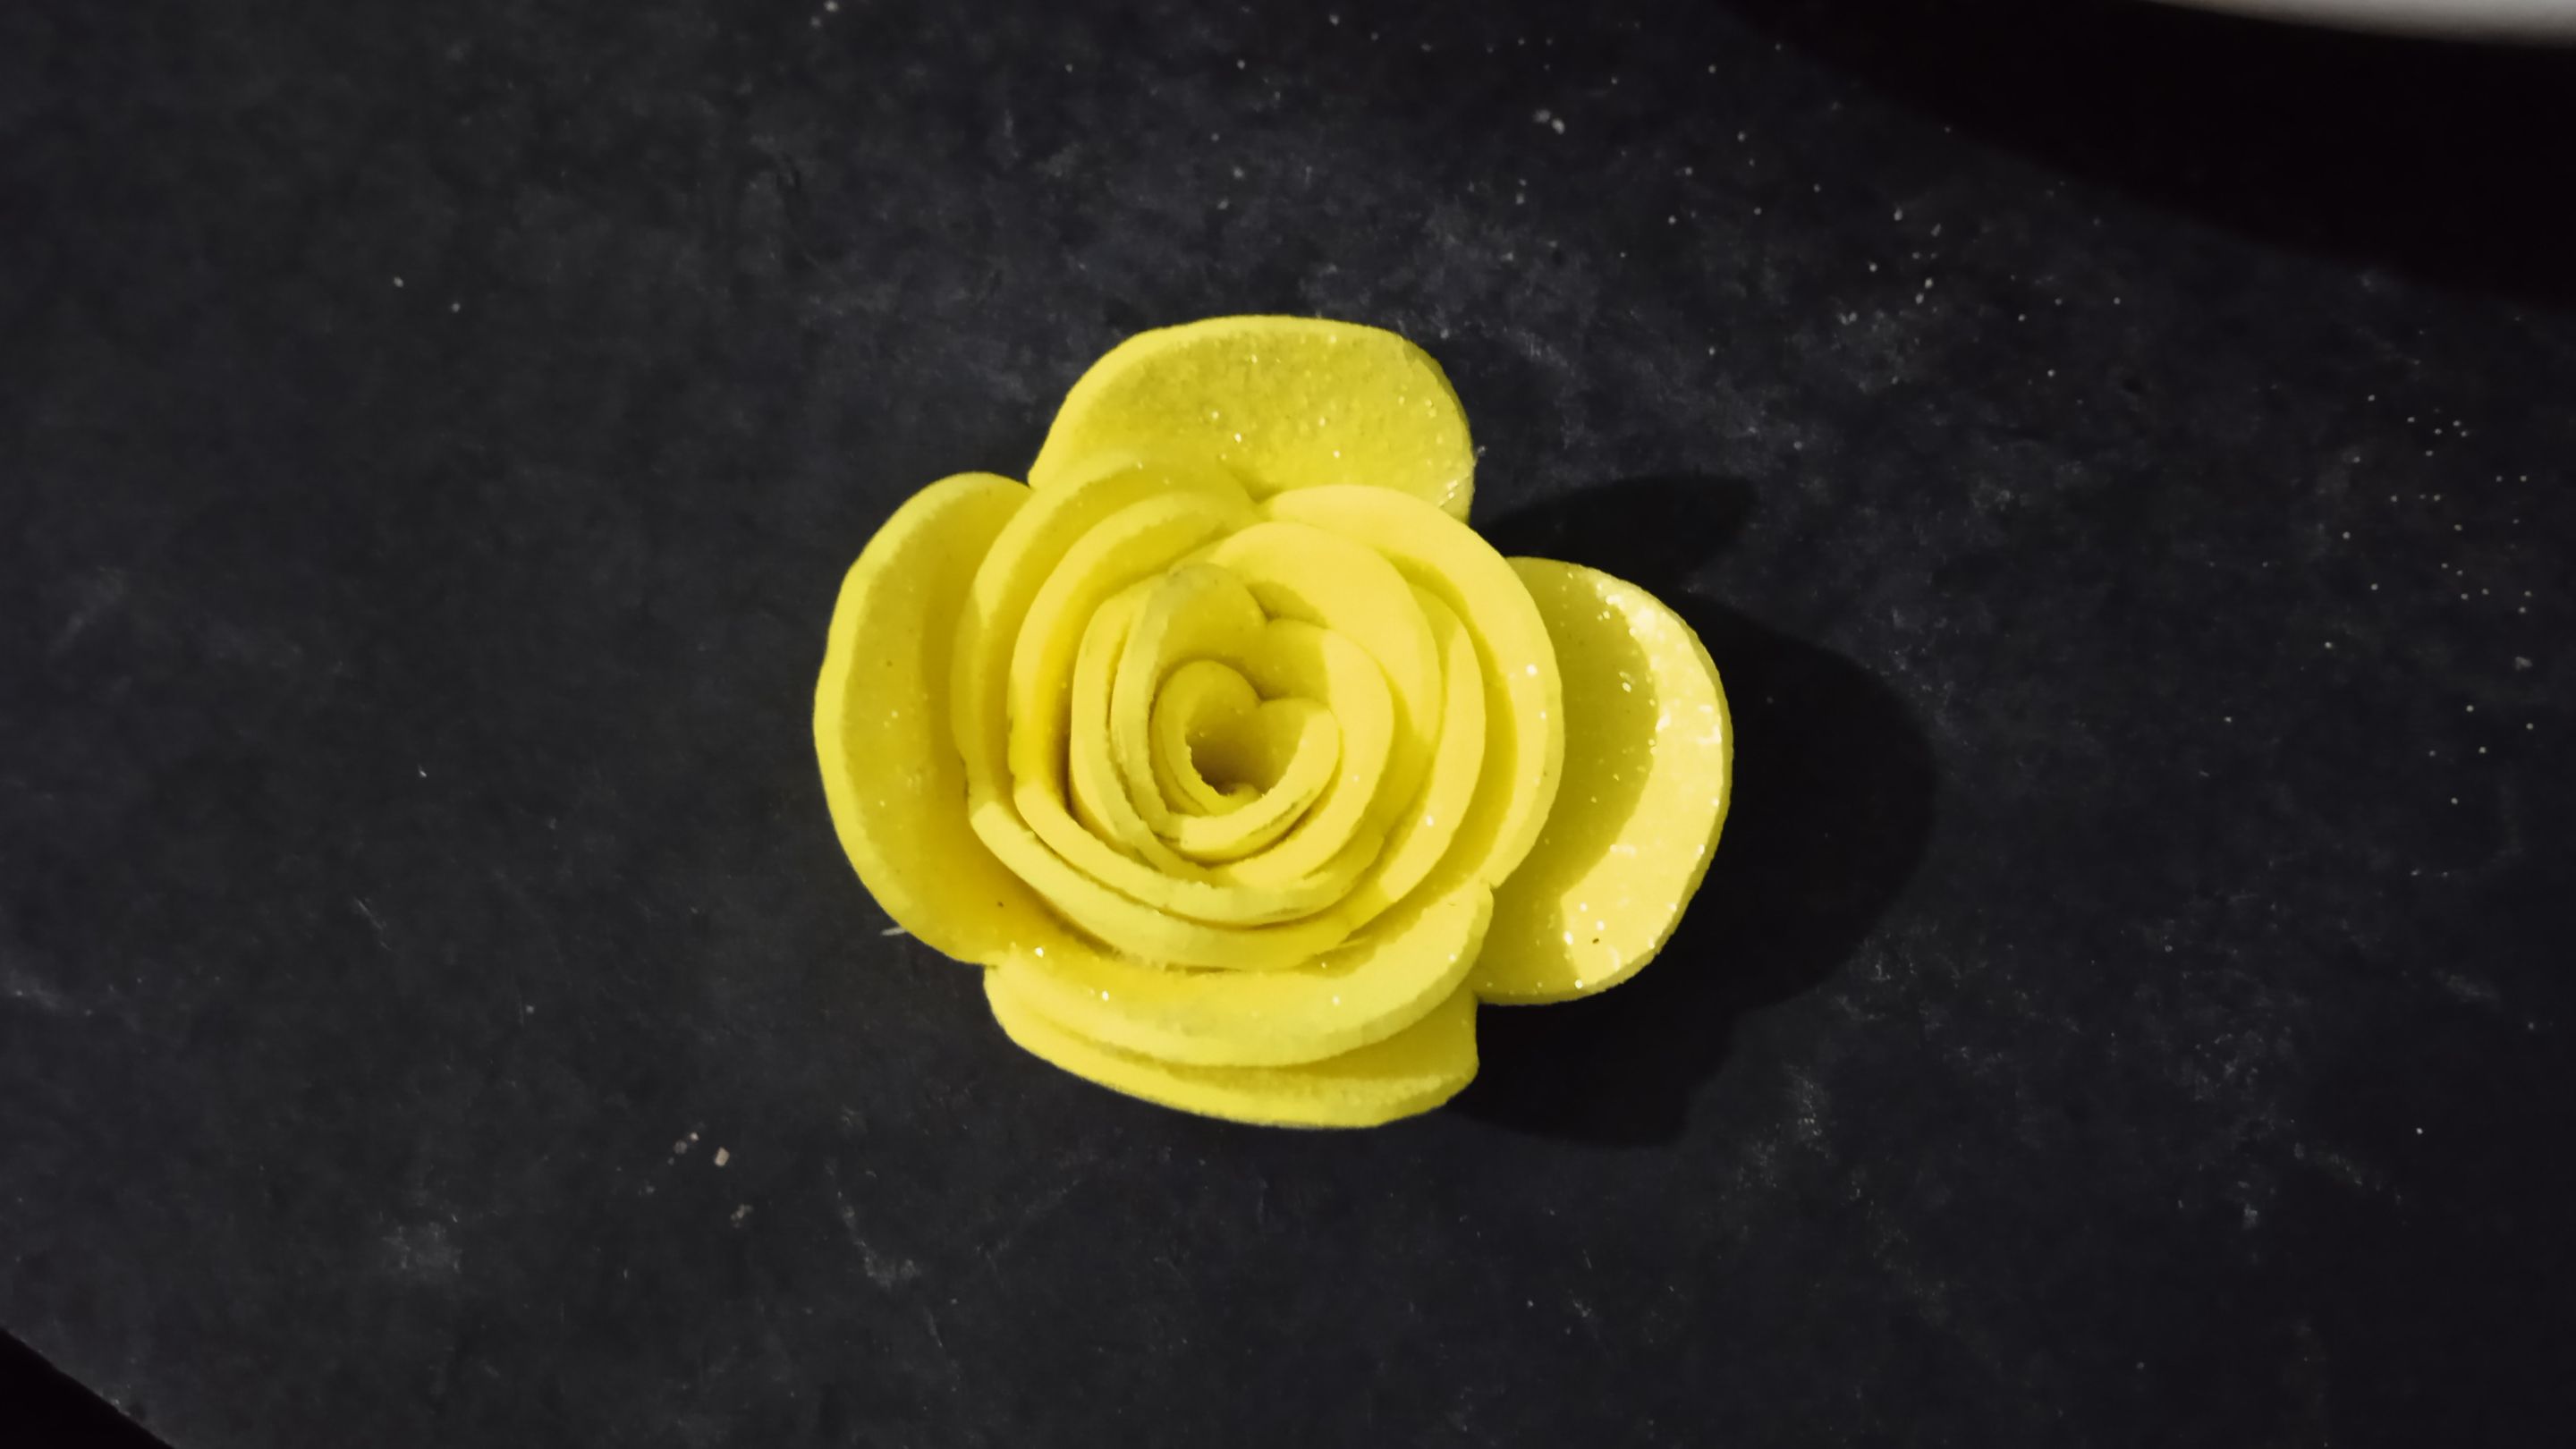
Pasamos el patrón al foami, como es escarchado escogí uno amarillo de paso tornasol o nacarado, se pone al revés, el patrón aquí no importa mucho si va al revés o al derecho, el resultado va ser el mismo.
Ya marcada la rosa, recortamos, aquí hay que hacerlo con mucha delicadeza el foami mal recortado se nota y hace que el acabado quede feo.
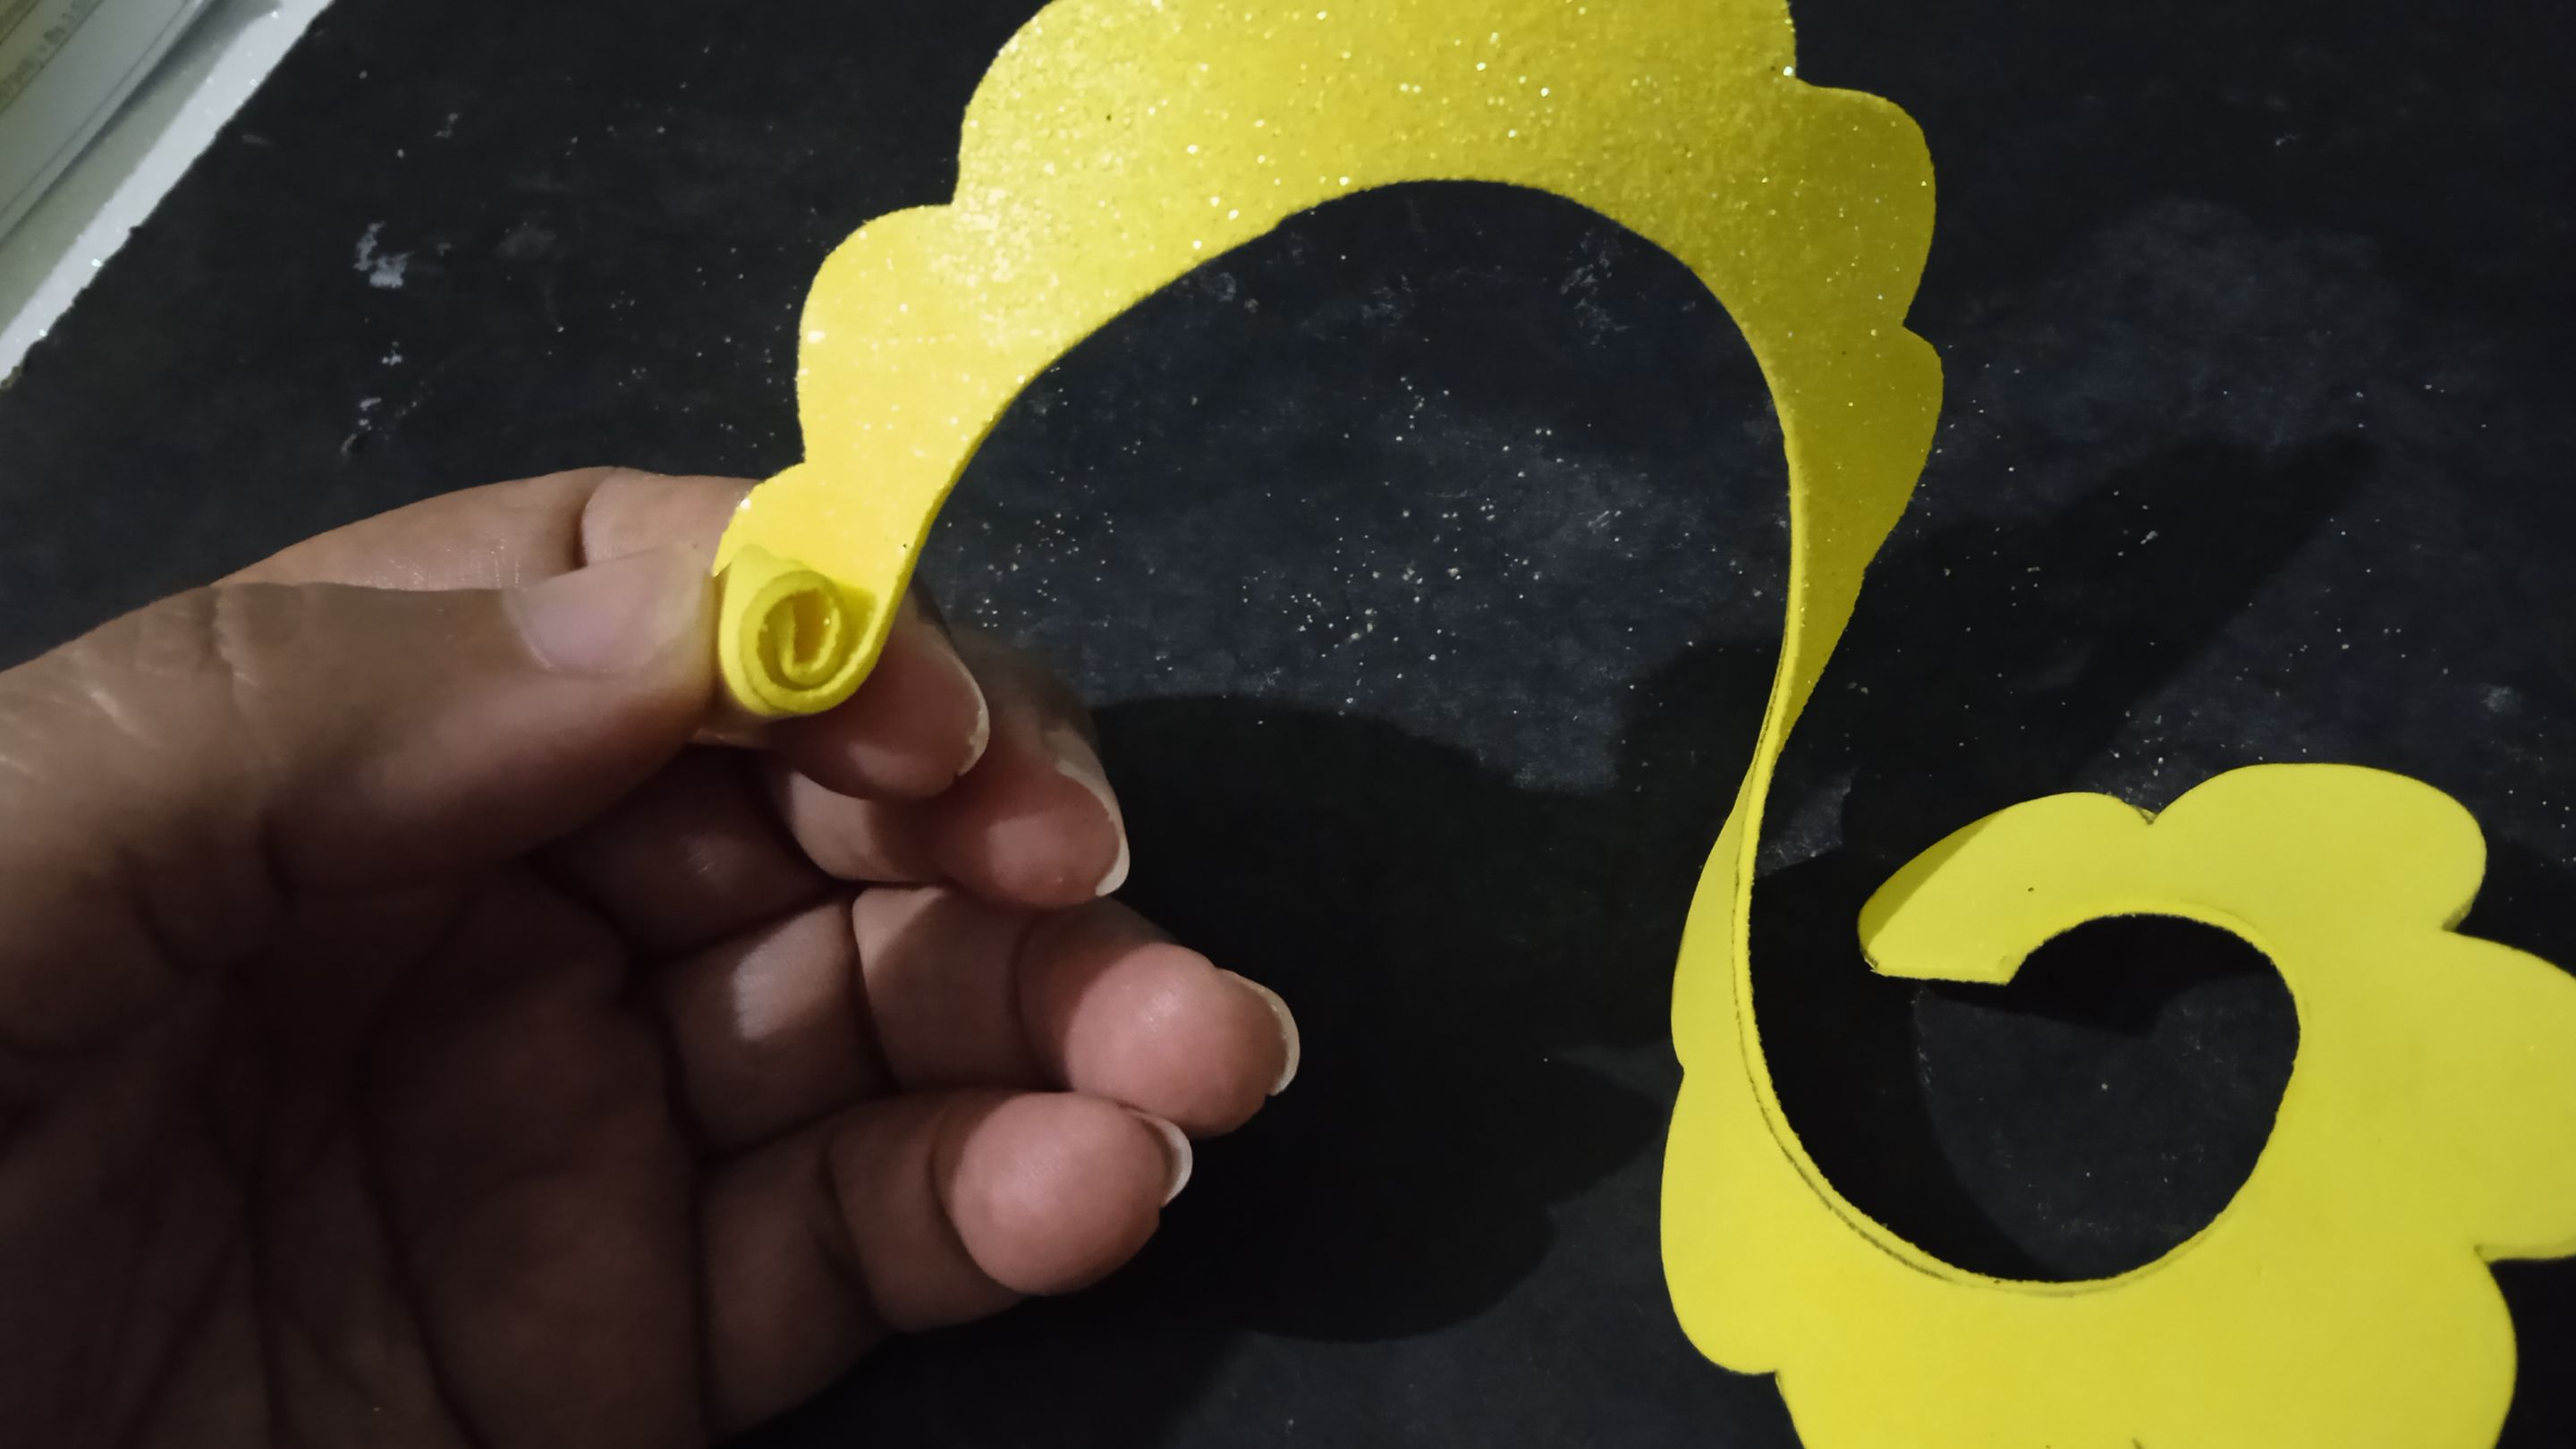
Listo la rosa recortada en espiral, ponemos a calentar la pistola de silicón, cuando ya este lista, procedemos a enrollar la rosa de adentro hacia afuera, y en algunas partes se le pone silicón para asegurar y que no se suelte.
Seguimos enrollando, al final asegurar bien con silicon.
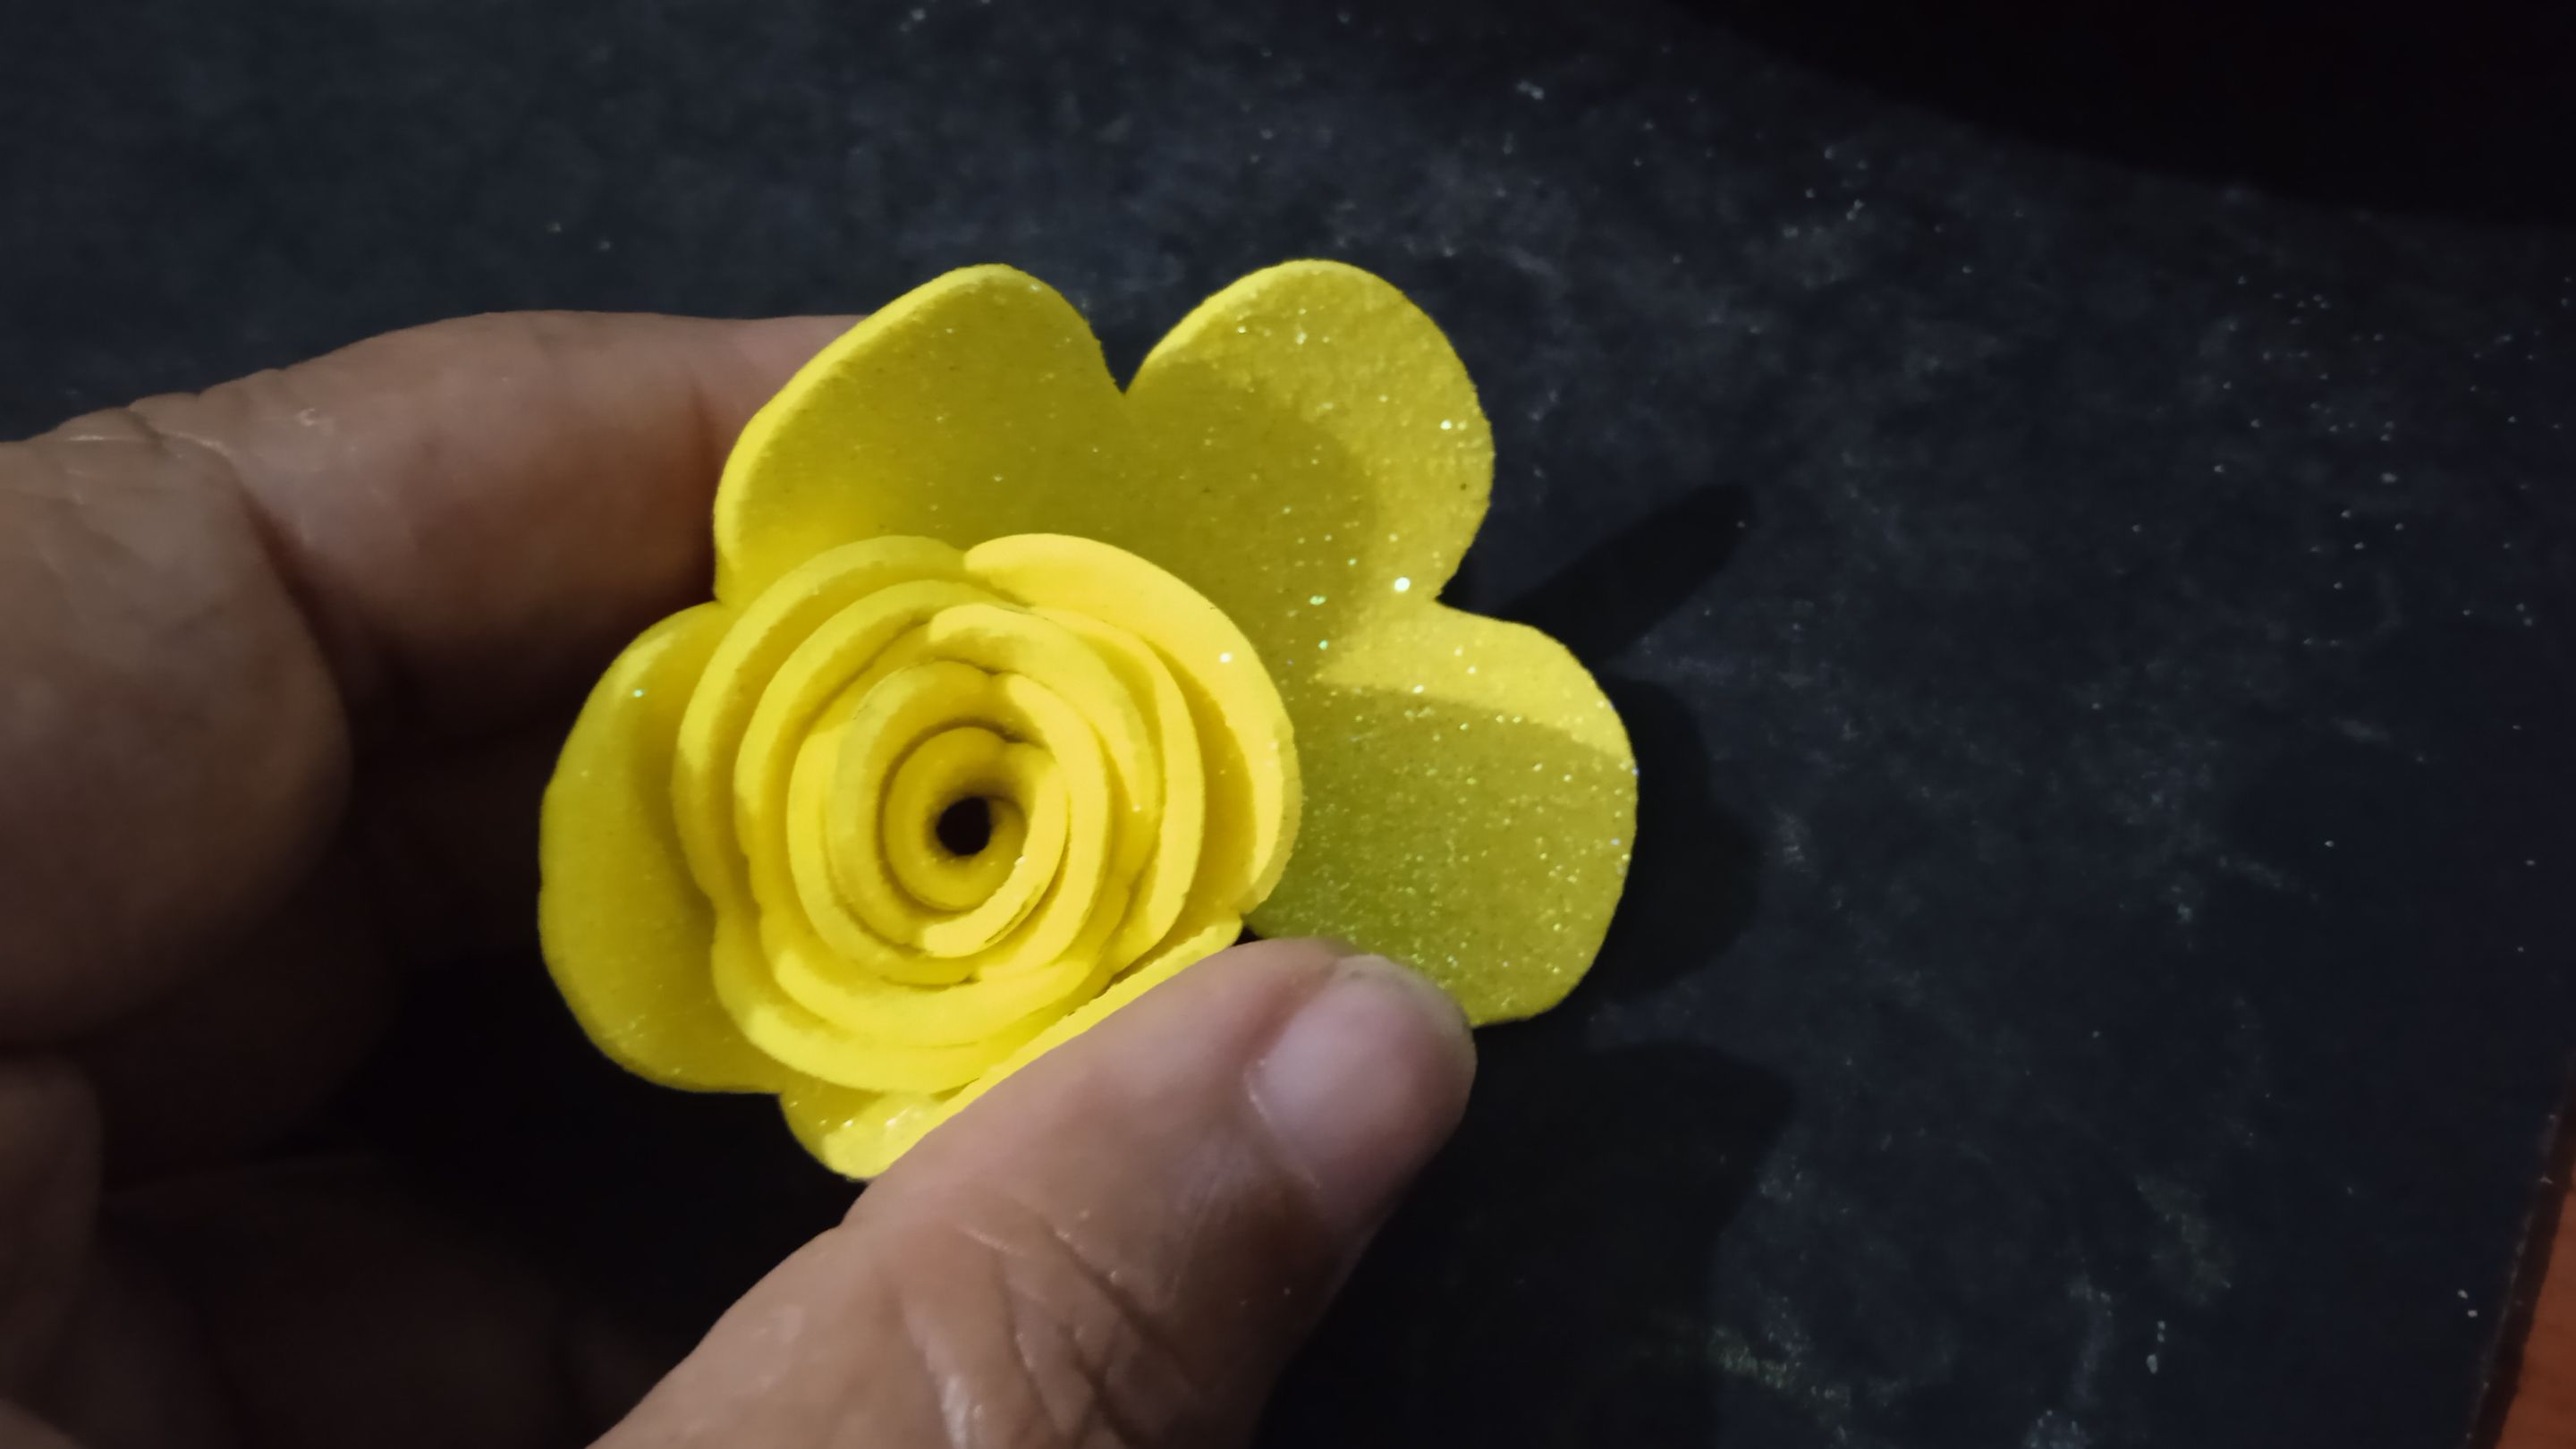
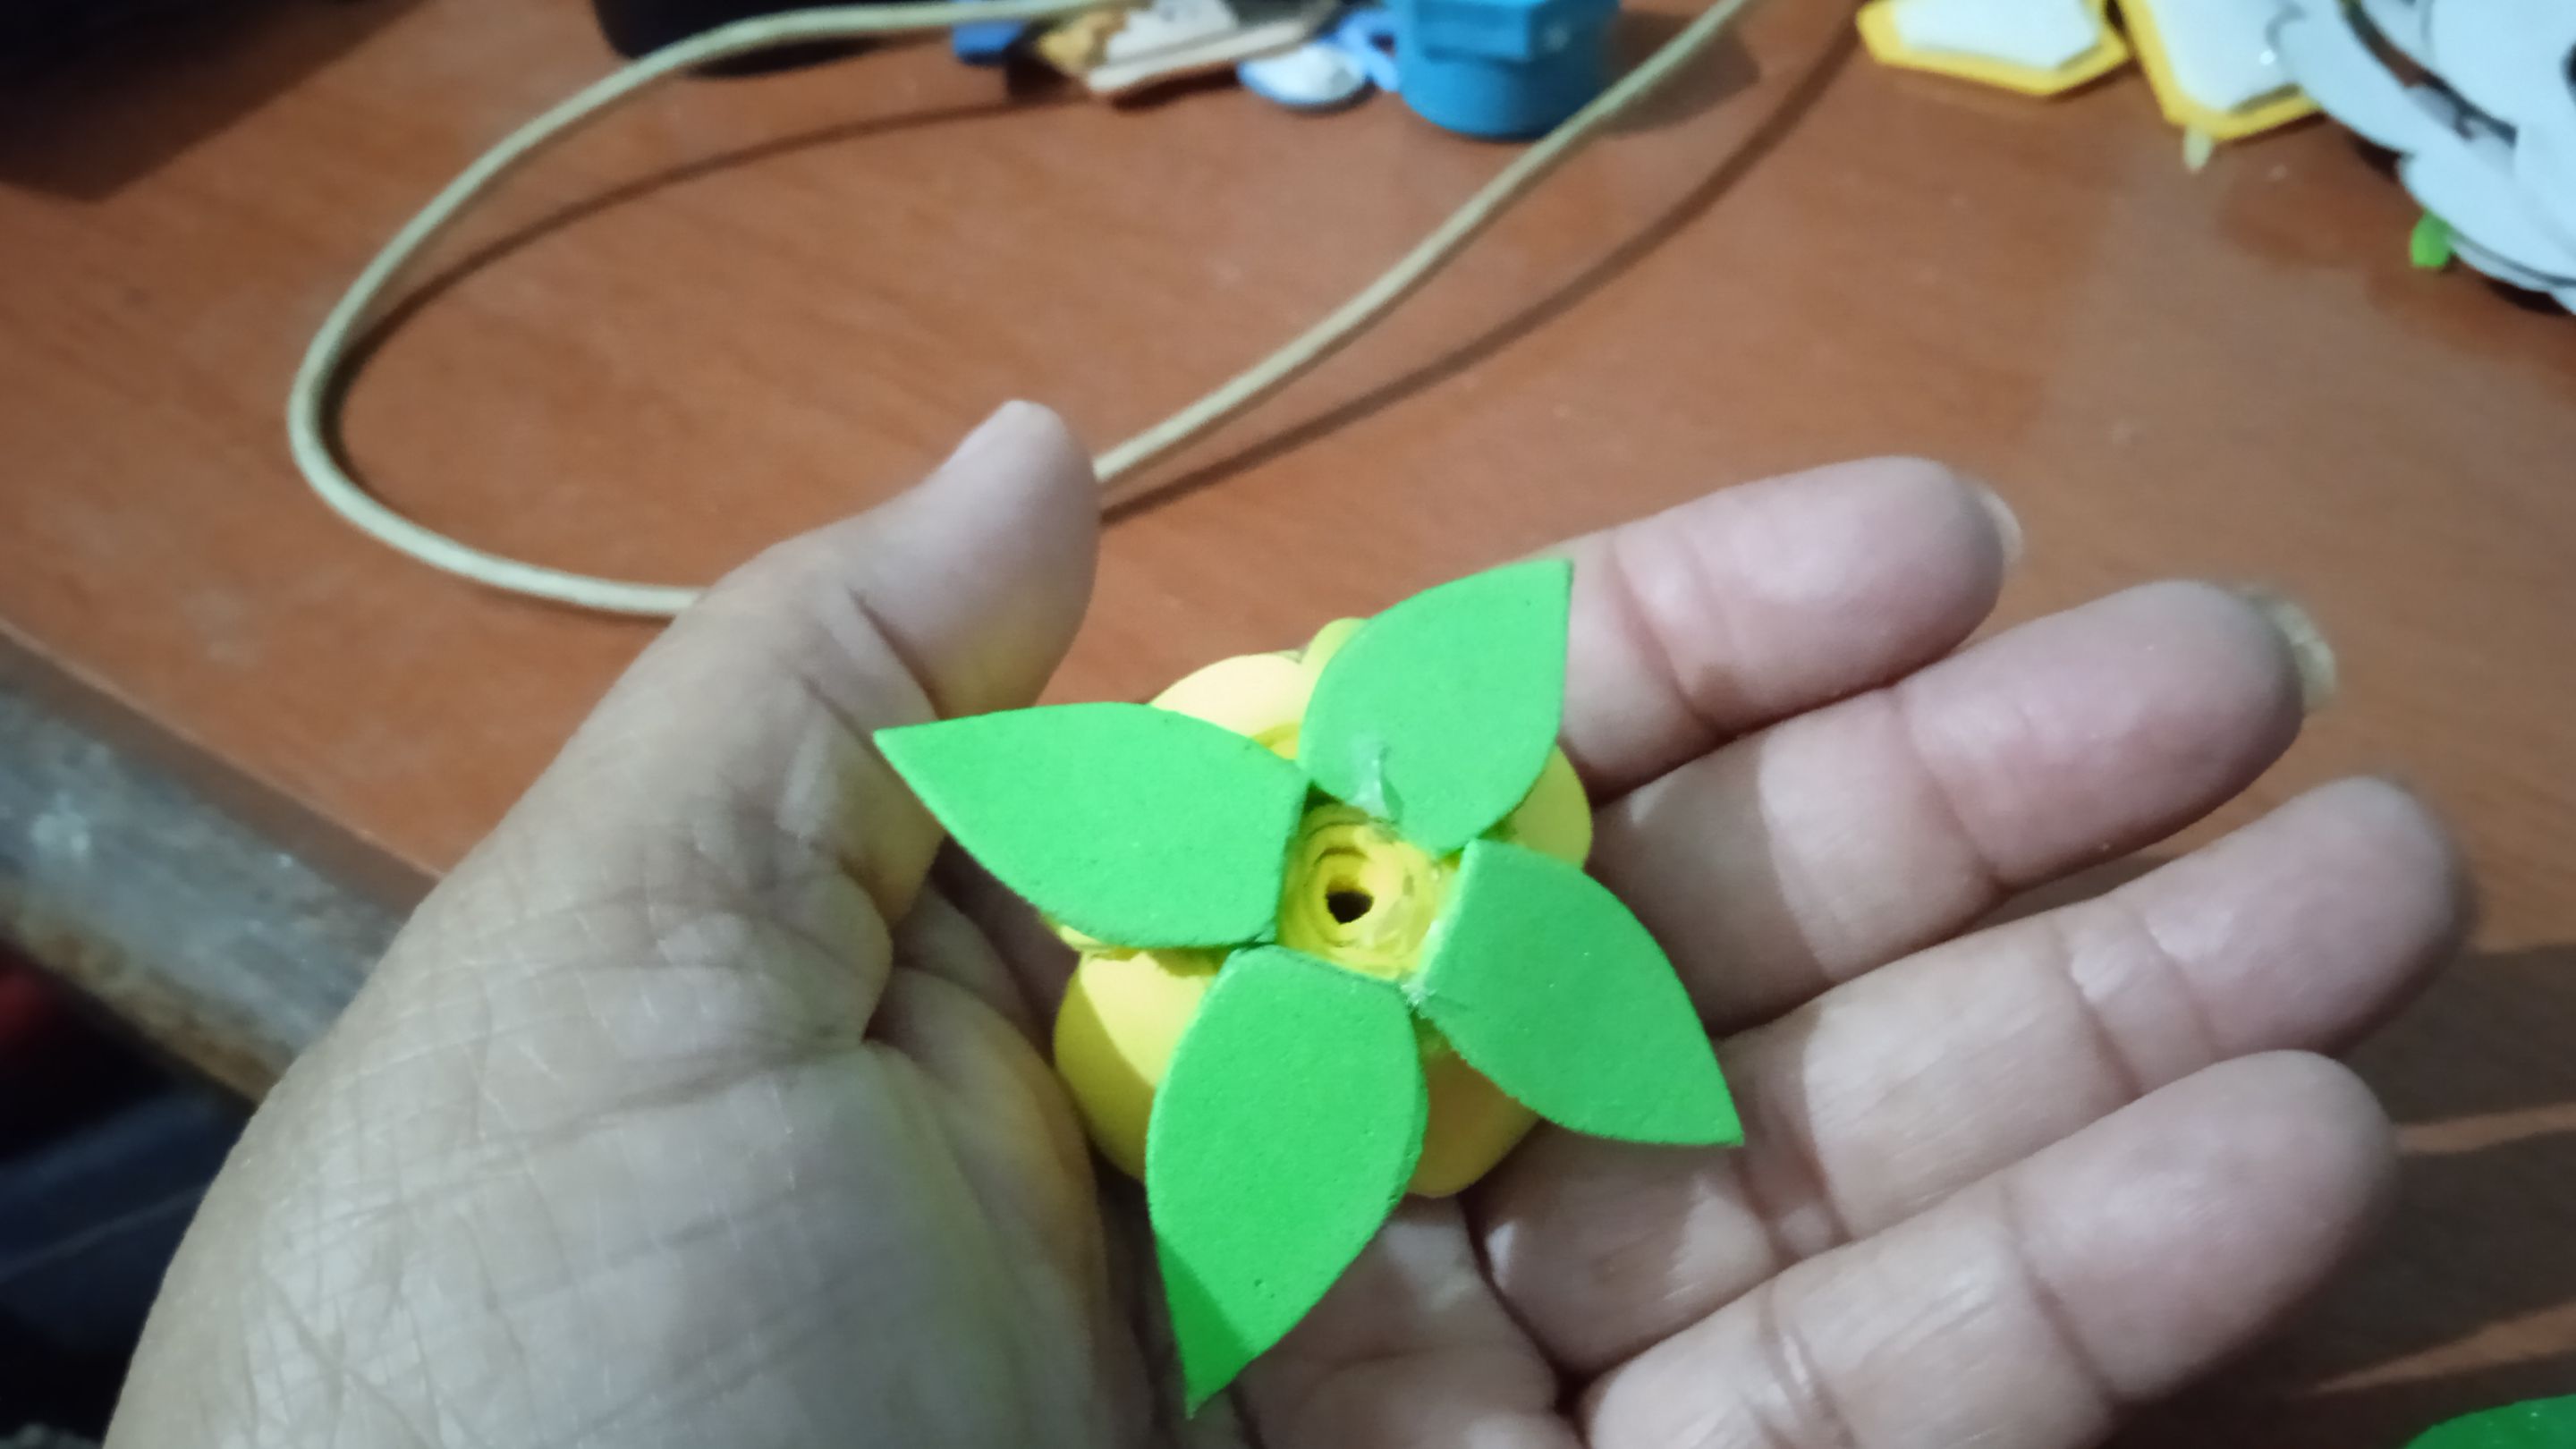
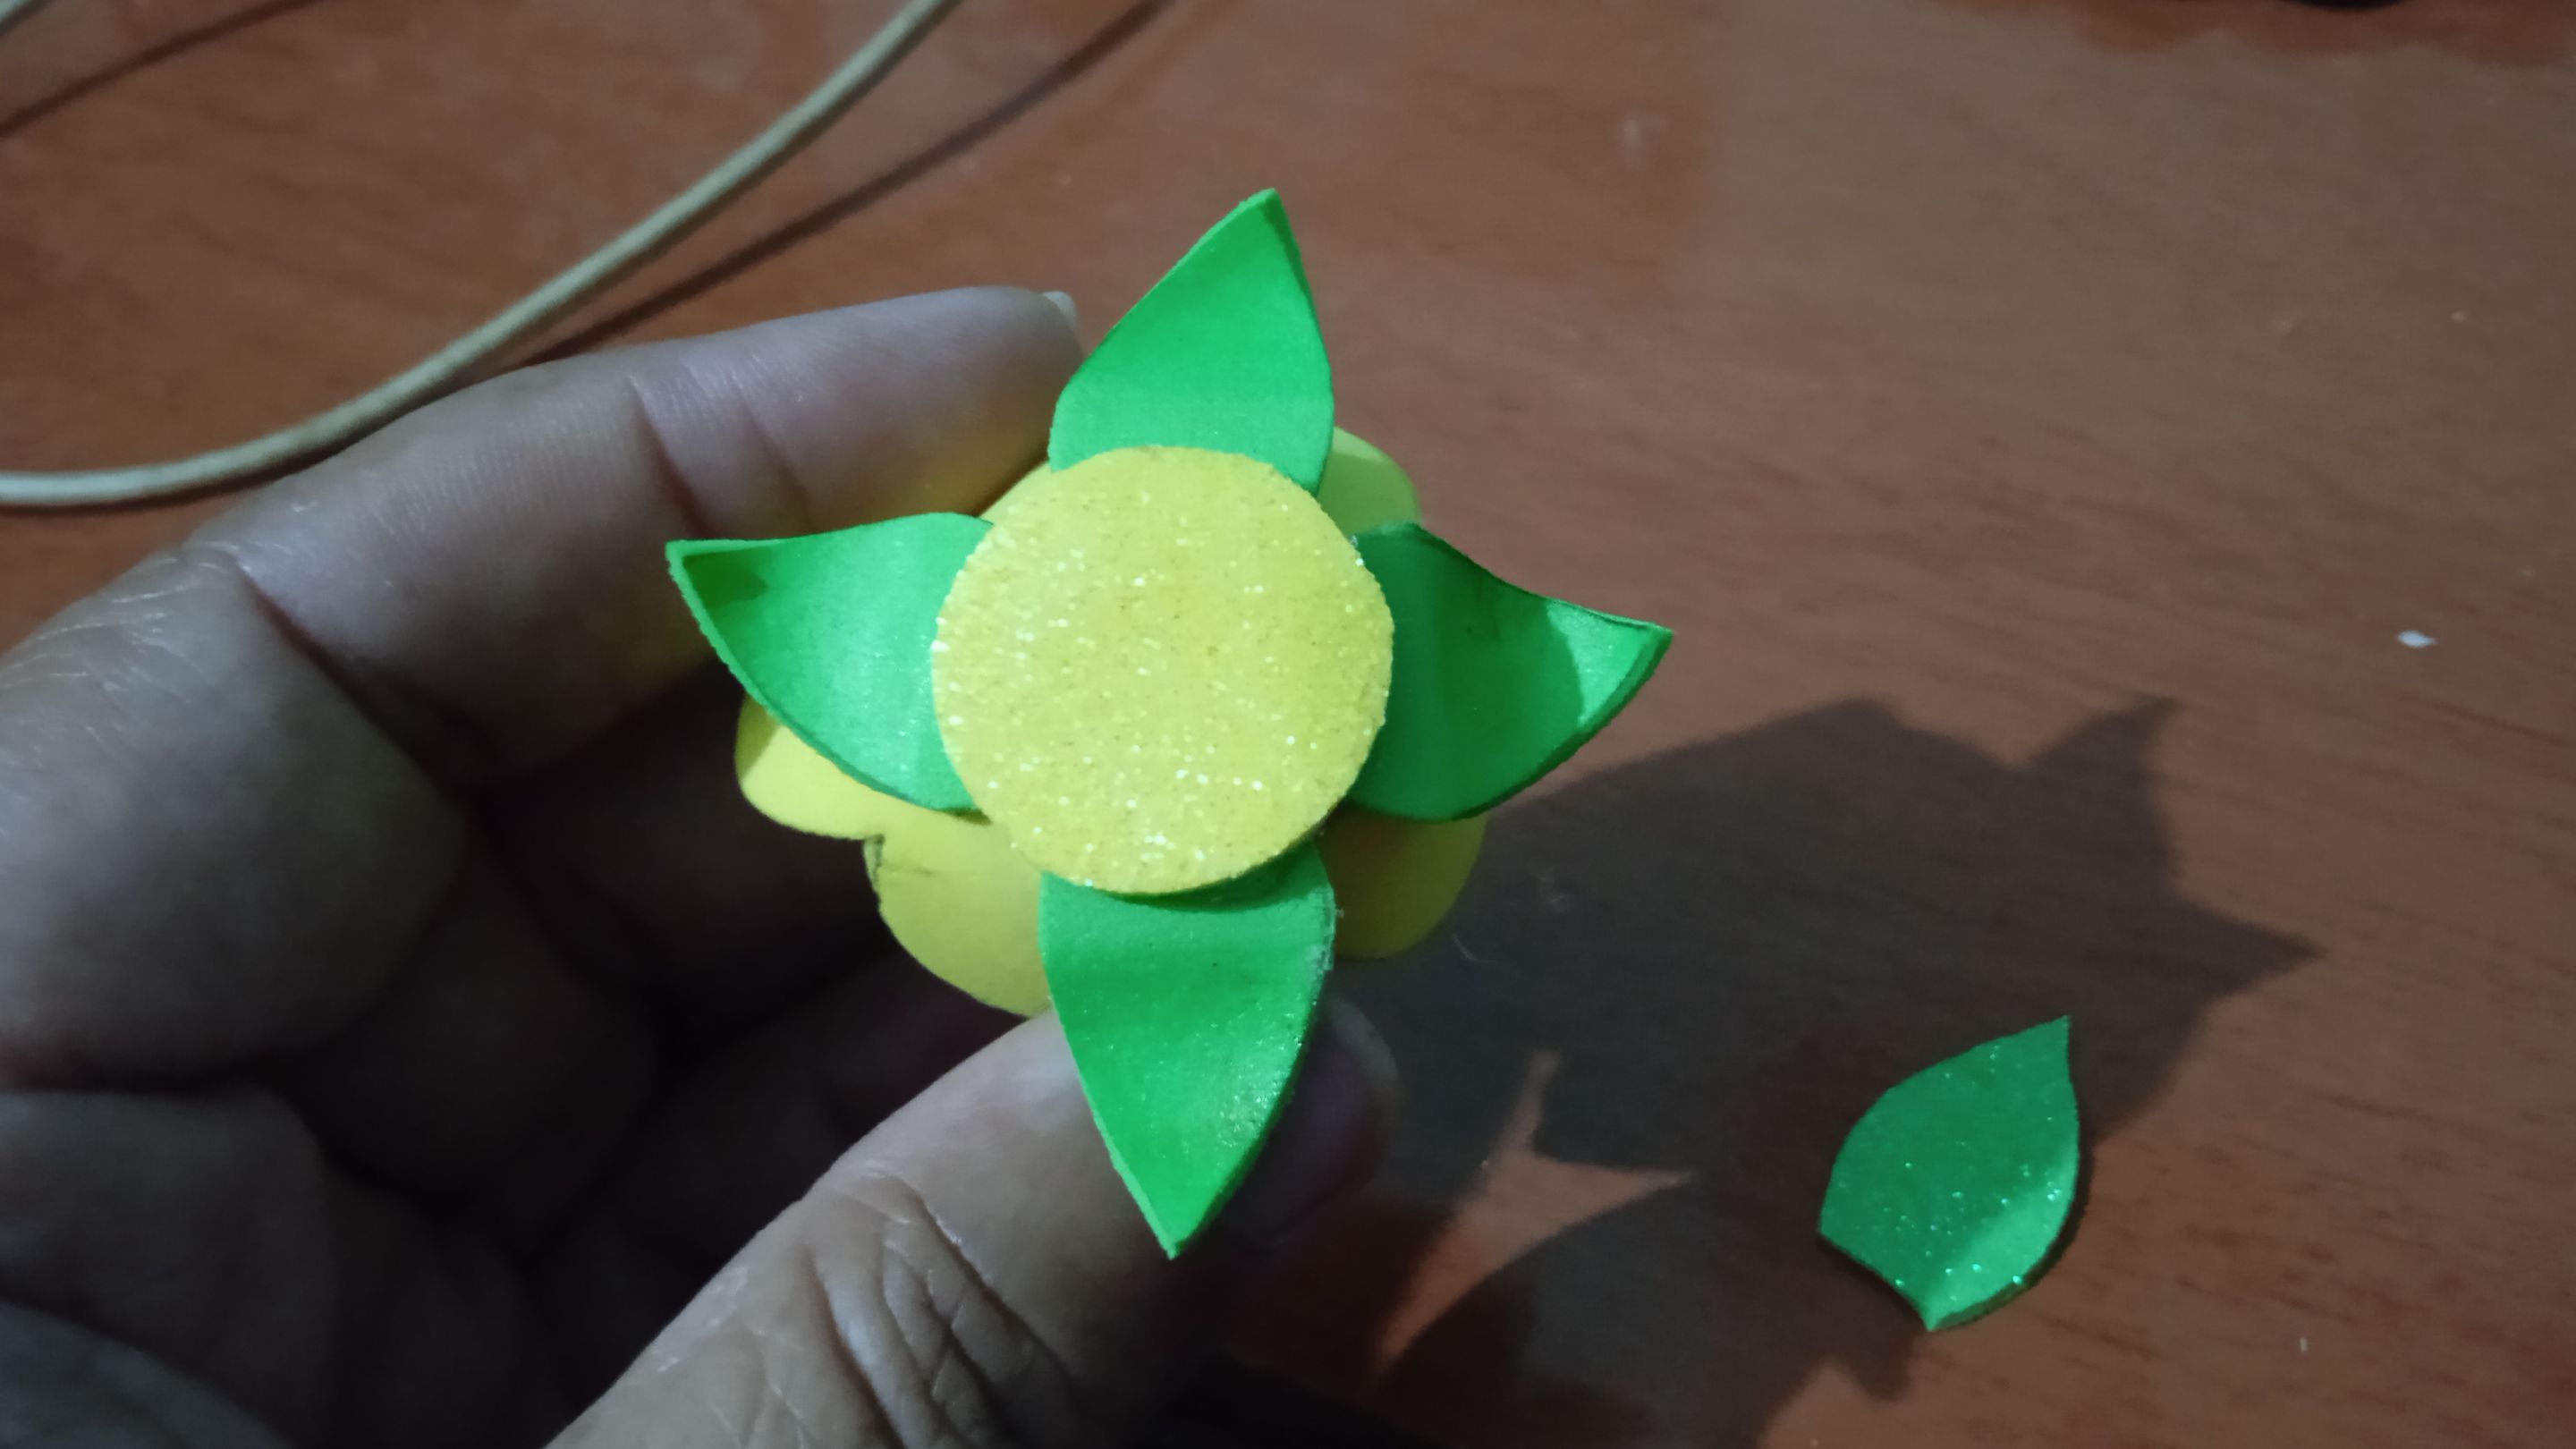
La base nos debe quedar parejita, plana, ahora los sépalos de la rosa, están son unas hojas diminutas pegaditas de la base de la rosa, las hojas son otras que van mas abajo en las ramas, pero aquí solo sépalos.
Marque y recorte 5 sépalos pero solo use 4 no me daba para mas porque la rosa es pequeña, las pegue con el brillo hacia arriba también use foami escarchado, eso ayuda a no matizar los bordes, con el foami normal si lo hago para que quede mas bonita.
Ya pegados los sépalos, con la misma pistola le di calor en la punta y las doble hacia adentro algo, para el final con una moneda trace un circulo para que sea la tapa de la rosa, tapando así los sépalos.
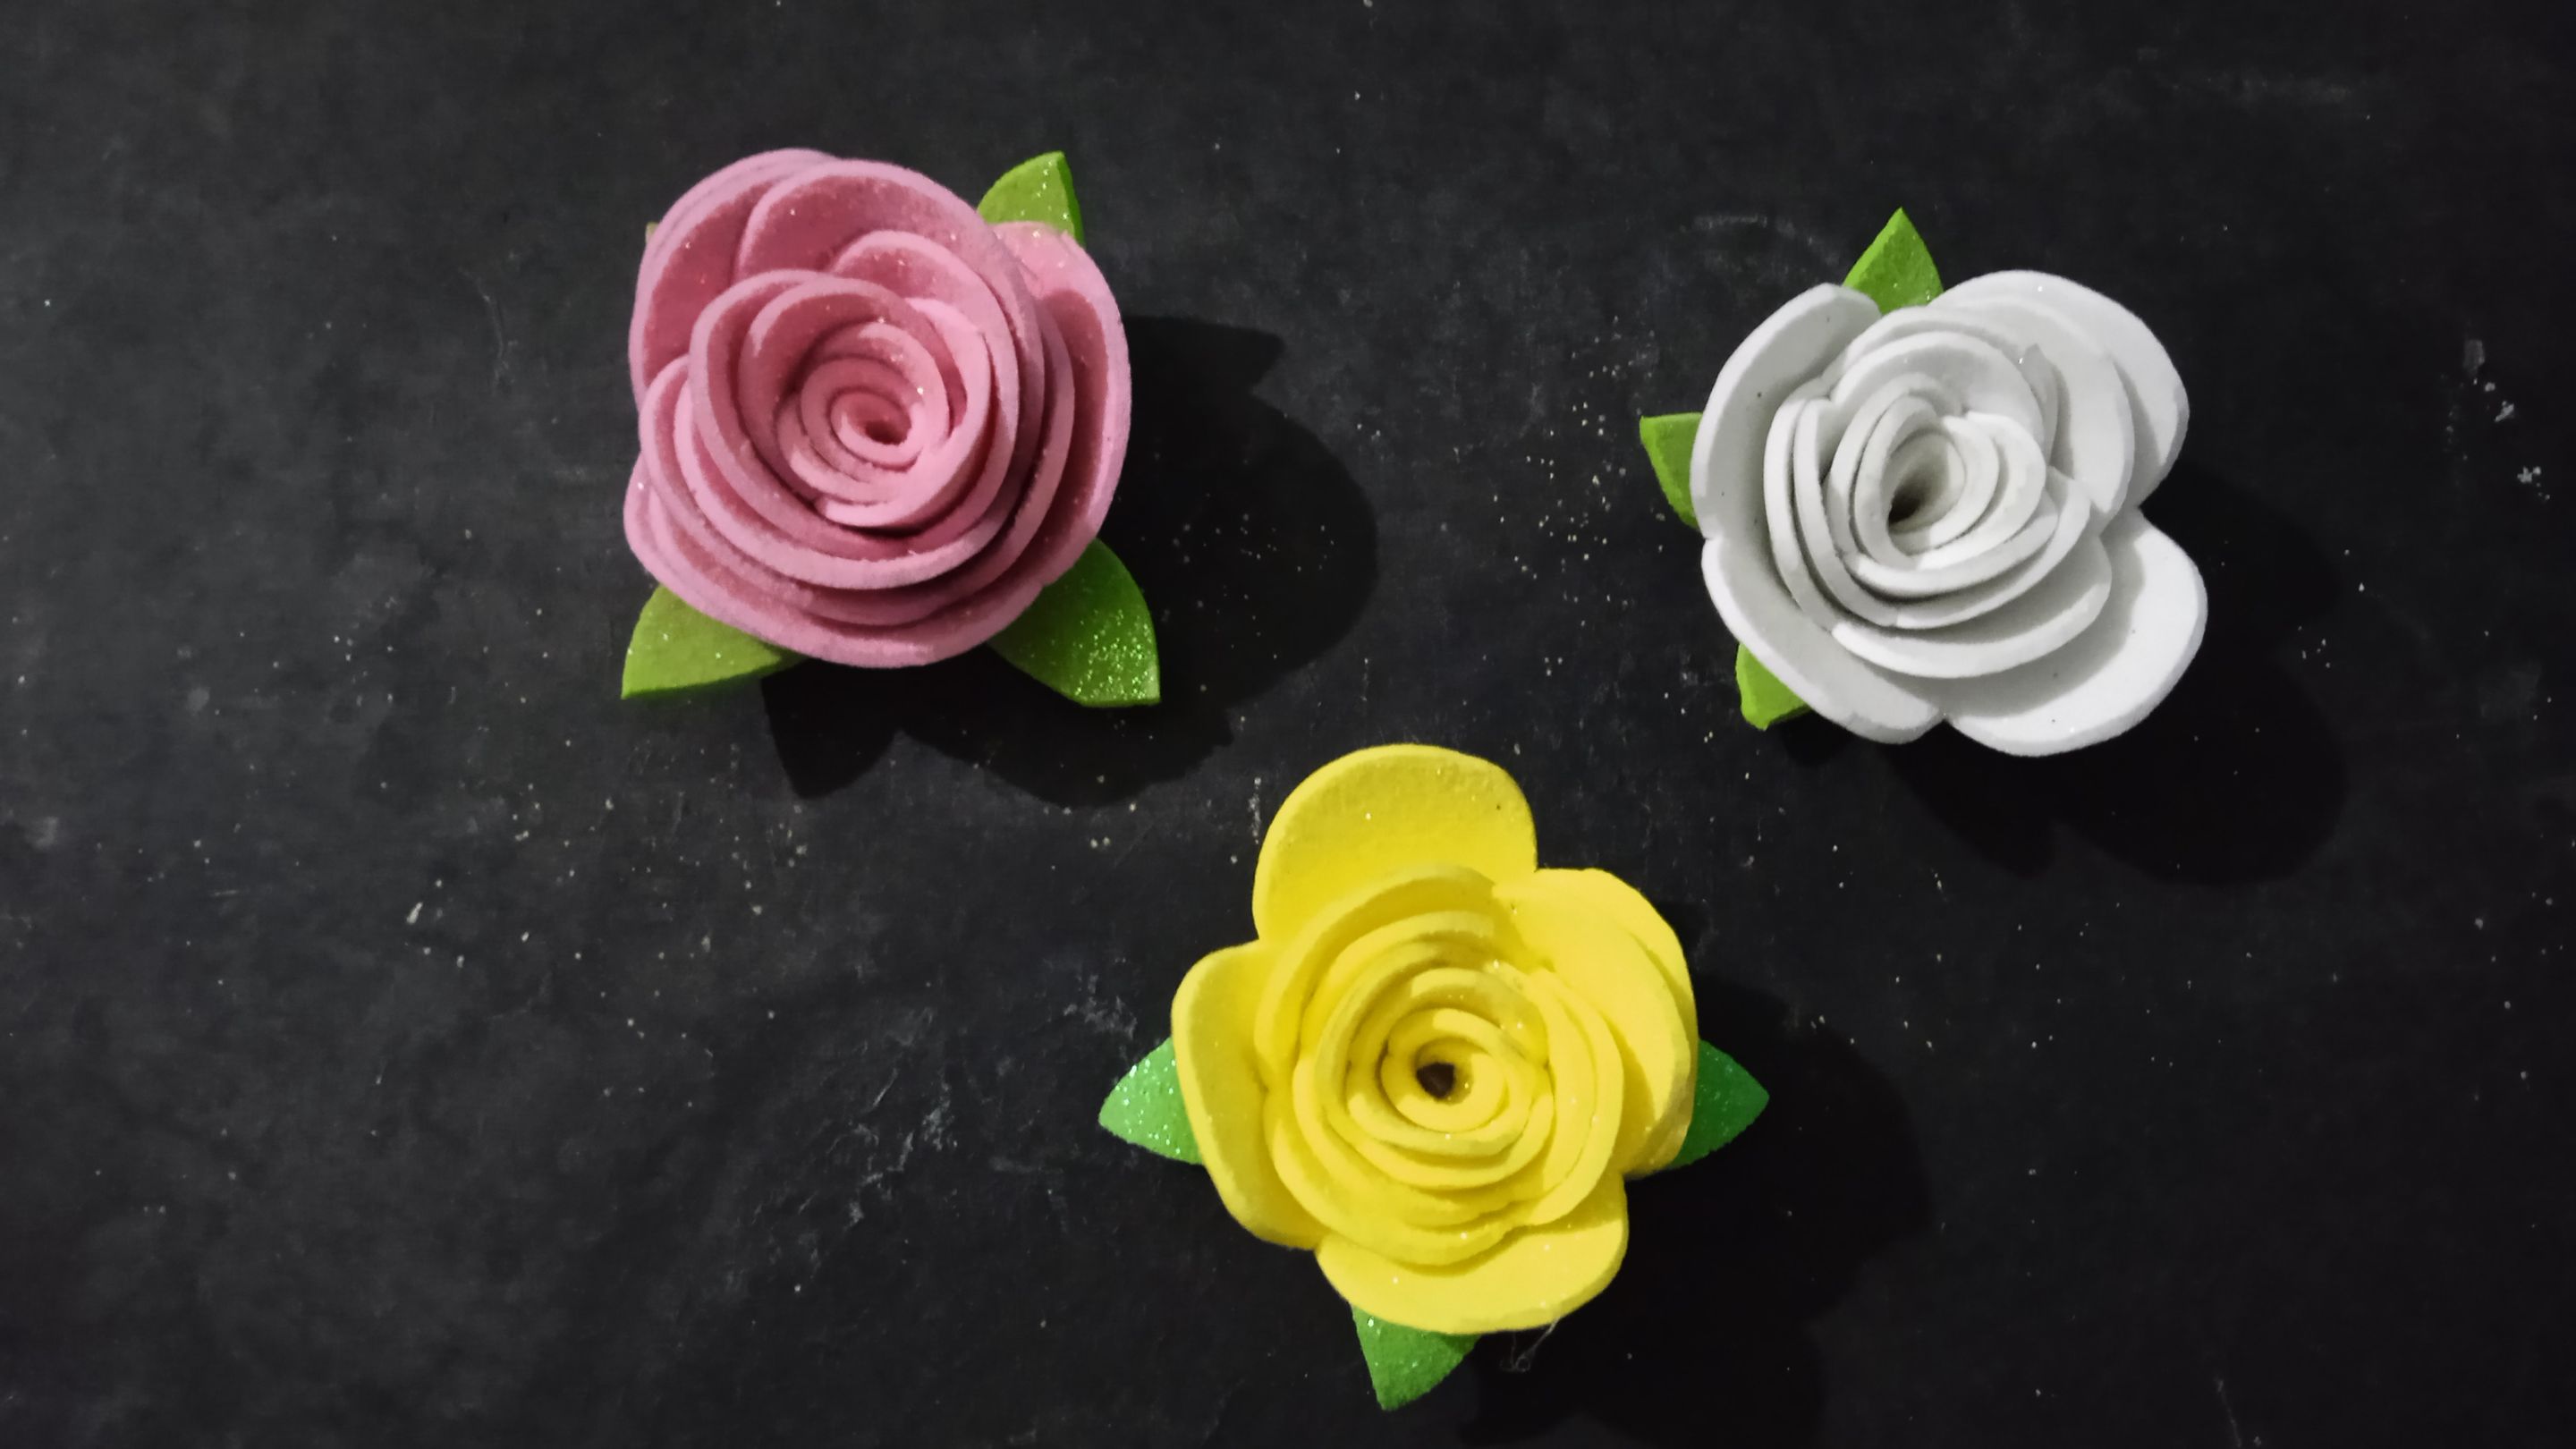
Con esta rosa la pueden usar para decorar lo que deseen, si le ponen una nodriza sirve como prendedor, ideal para el día de las madres que ya esta cerca.
Fotos tomadas con celular Redmi 9A.
Traducción con la app DeepL.
🌻🌻🌻🌻🌻🌻🌻🌻🌻🌻🌻
Cover edited in Canva.
🌻🌻🌻🌻🌻🌻🌻🌻🌻🌻🌻English.
Greetings my friends artists in the manual arts, because there are artists of another kind, but I am in the crafts as all of us who are in this community.
In other opportunities I have brought you roses of foami, in crepe paper, another material that I do not remember.
This time are a spiral roses, if I think many know what a spiral is a curved line that can be started from the inside out or vice versa, but like everything this idea is not my original, but if I gave my touch my personal stamp to differentiate from the other.
Materials and tools used:
-Recycled paper sheet.
-Cereal box cardboard.
-Foami in the color of your choice.
-Scissors, white glue, pencil.
-Silicone gun and stick.
-Rose pattern.
The pattern:
As I said the idea is not completely mine, but I adapted it to my needs or as I thought it would look better. Search and save in my folders one of the spiral rose patterns, if so you can look it up on the internet: **Spiral Rose Patterns.
Already with the mold or pattern in the pc I enlarge it to the size that I think is convenient. And from the same screen copy it to paper with pencil.
Cut and paste it on the cereal box cardboard because it is less thick and easier to cut than the other cardboards. Now that the pattern or mold of the spiral rose is ready, let's make it.
The Rose:
We pass the pattern to the foami, as it is frosted I chose a yellow one of litmus or pearlescent step, it is put upside down, the pattern here does not matter much if it goes upside down or right side up, the result will be the same.
Once the rose is marked, we cut it out, here it is necessary to do it very delicately, the badly cut out foami is noticeable and makes the finish look ugly.
Ready the rose cut in spiral, we put to heat the silicone gun, when it is ready, we proceed to roll the rose inside out, and in some parts we put silicone to ensure that it does not come loose.
We continue winding, at the end secure well with silicon.
The base should be even, flat, now the sepals of the rose, these are tiny leaves attached to the base of the rose, the leaves are others that go lower on the branches, but here only sepals.
I marked and cut out 5 sepals but I only used 4 because the rose is small, I glued them with the glitter side up, I also used frosted foami, that helps not to blur the edges, with the normal foami I do it to make it prettier.
With this rose you can use it to decorate whatever you want, if you put a nanny it serves as a pin, ideal for Mother's Day that is already near.
Once the sepals were glued, with the same gun I gave heat at the tip and folded them inward a little, for the end with a coin draw a circle to be the lid of the rose, thus covering the sepals.
With this rose you can use it to decorate whatever you want, if you put a nanny it serves as a pin, ideal for Mother's Day that is already near.
Photos taken with Redmi 9A cell phone.
Translation with the app DeepL.