Hey everyone! How are you?
I wanna share the process behind my latest illustration. I had something planned for it 😏 but you’ll get that later. I’m currently working on the second round of the contest from the last post, this time with a little fire 🔥. But you’ll see that once it’s finished yes, right now, it’s time to talk about this piece.
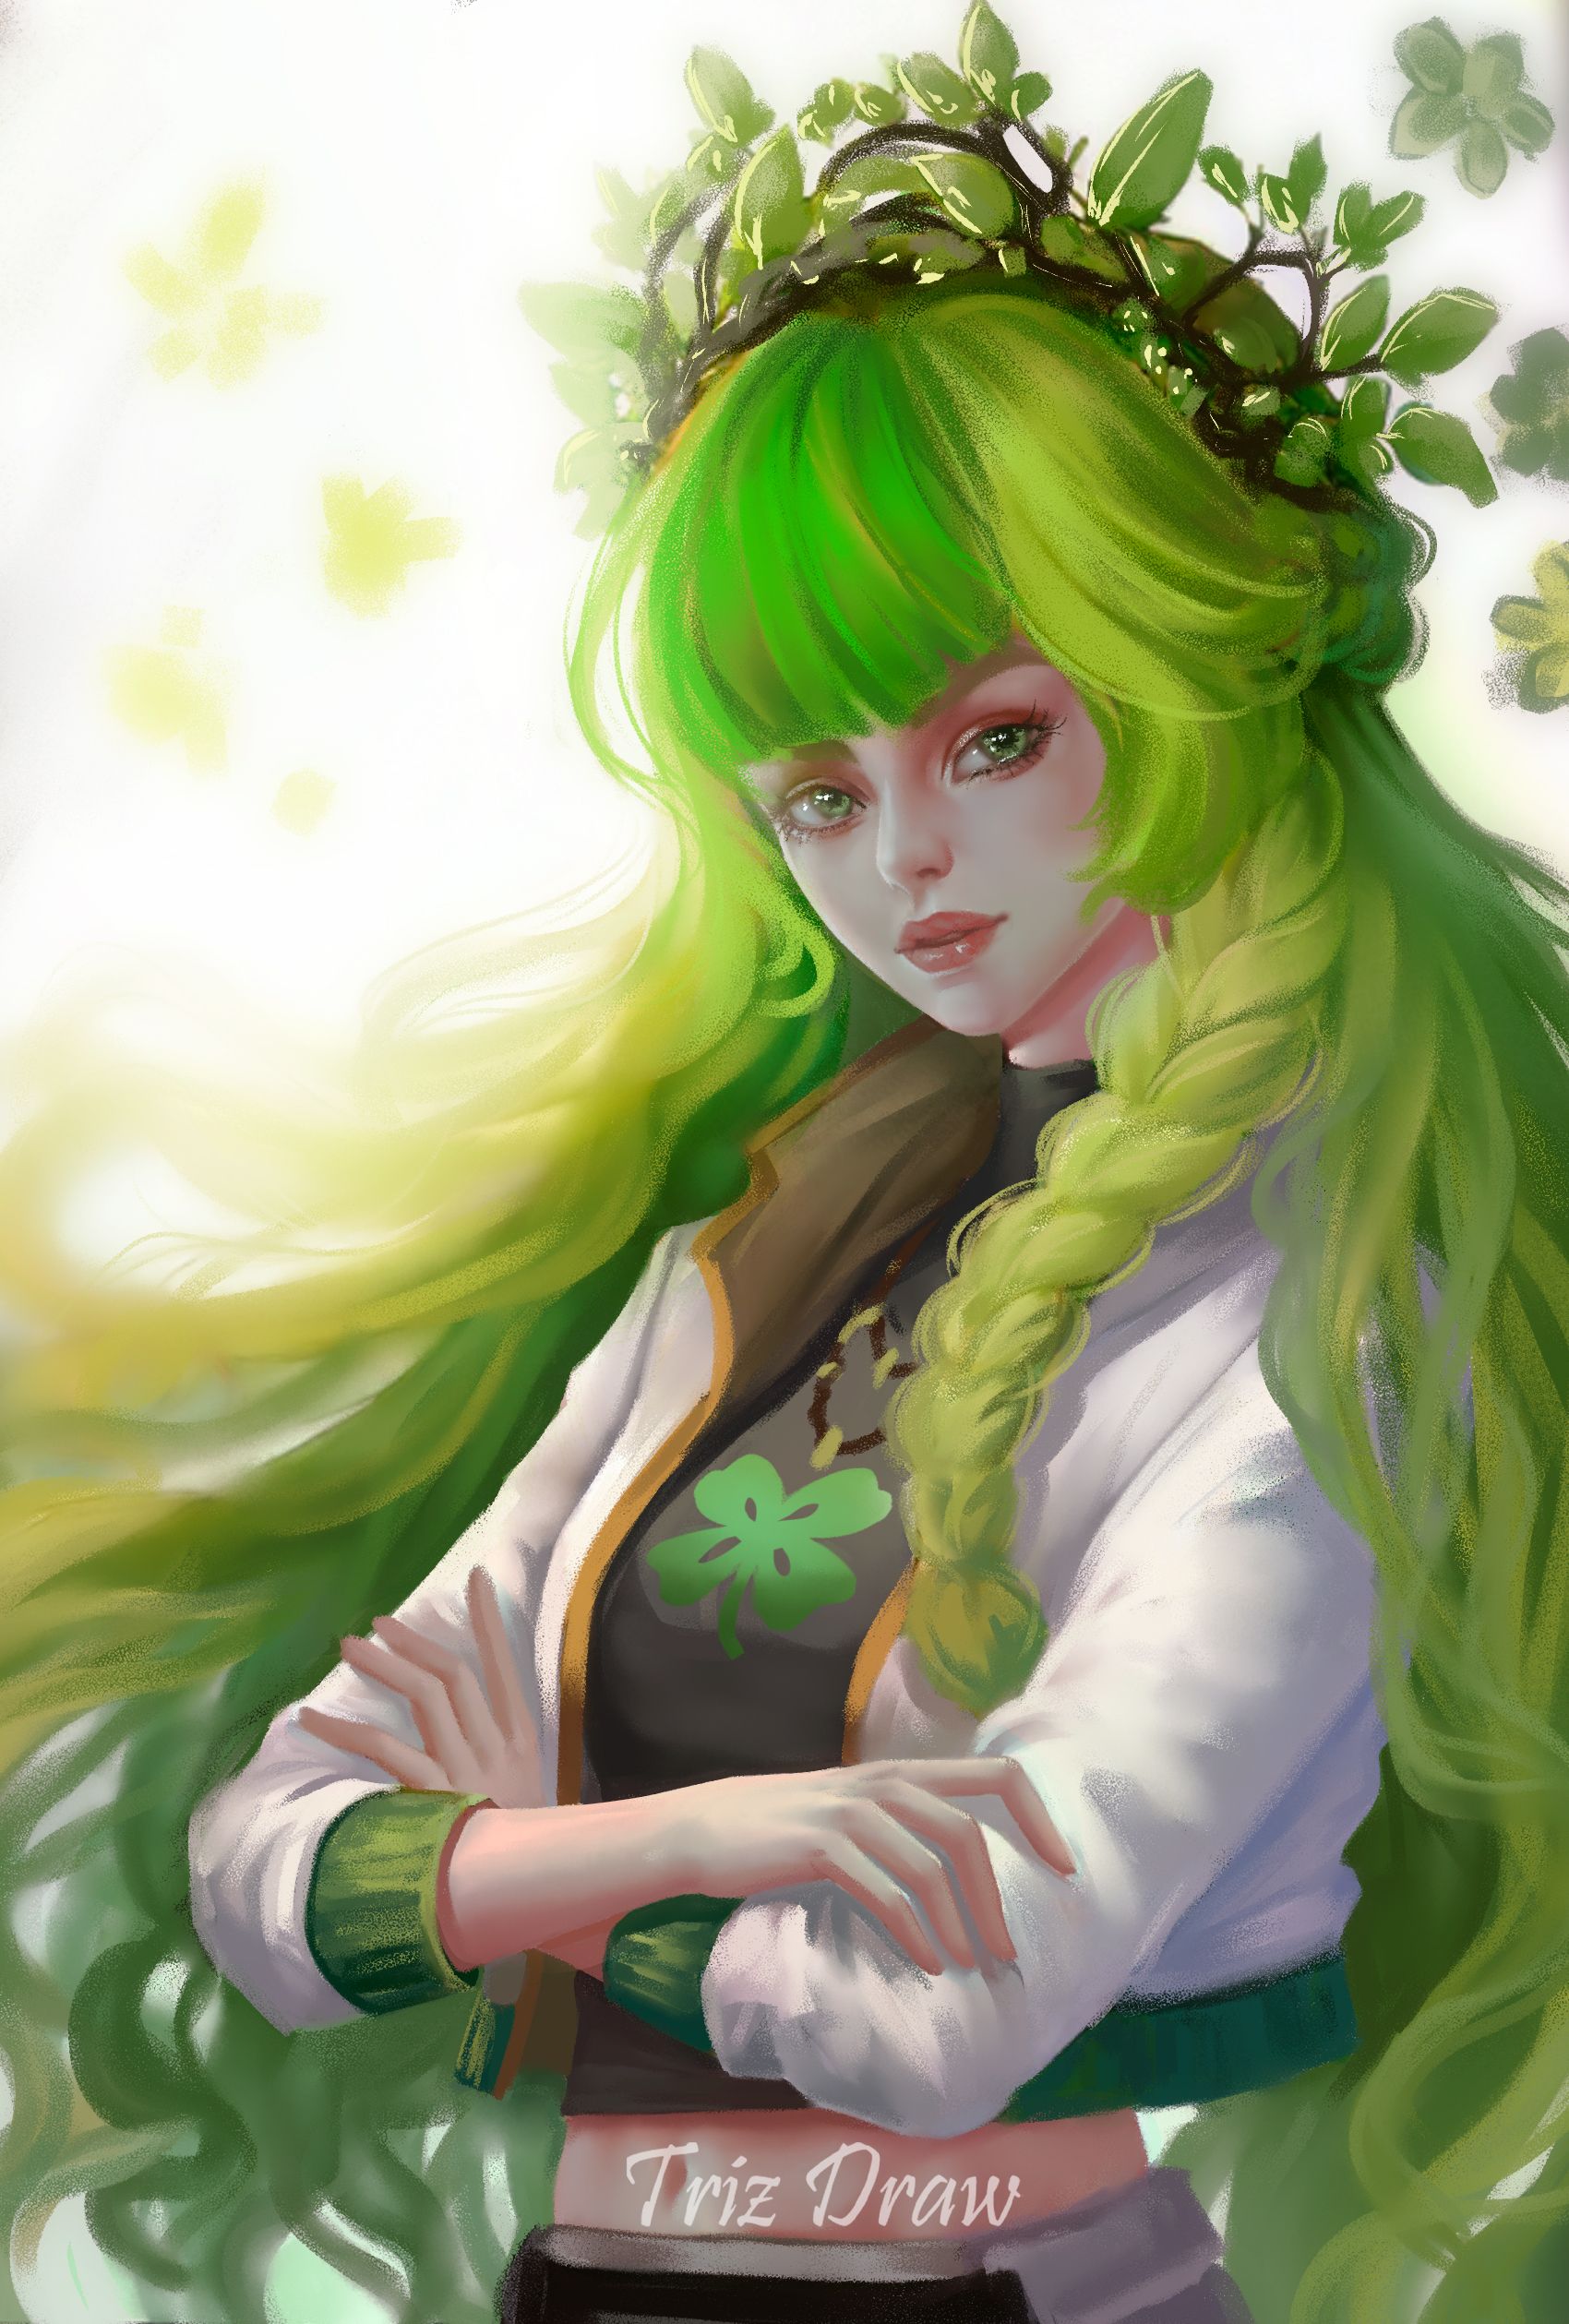
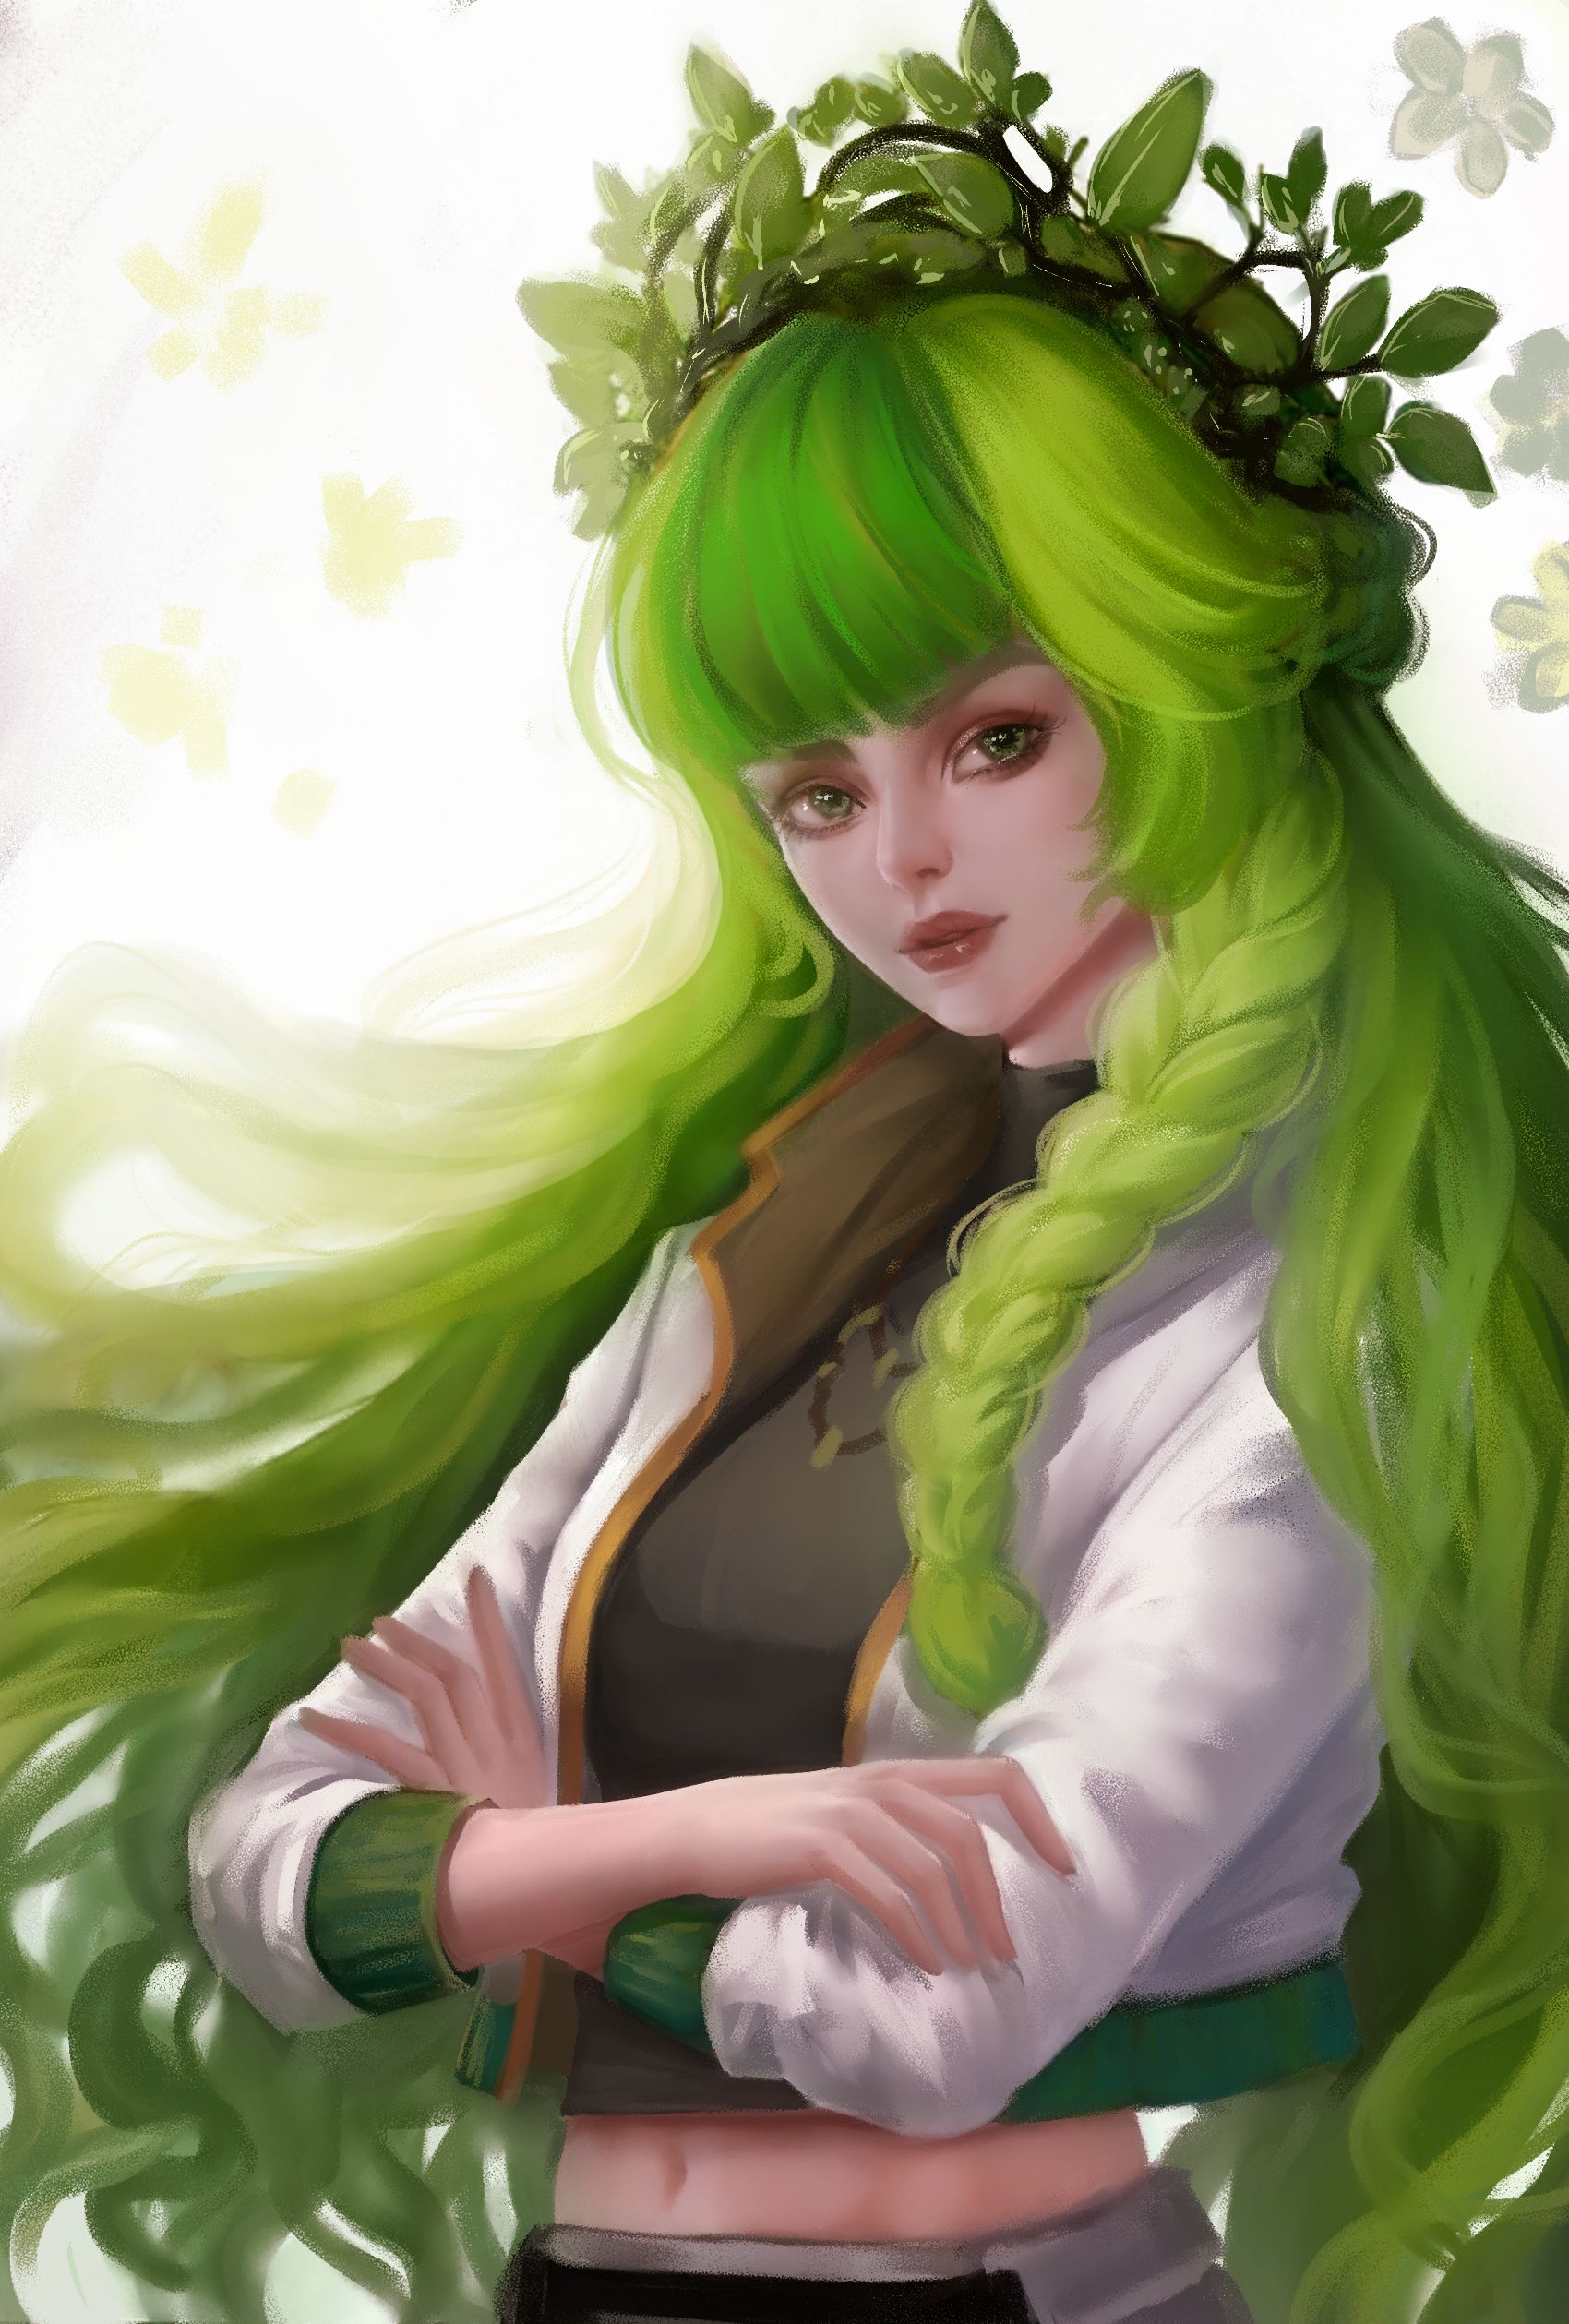
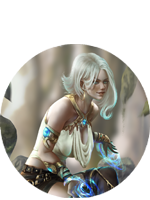
I wanted to do something that popped into my head something simple but fun so I chose the Forest Healer. I like her, she reminds me of nature and how beautiful it is. Anyway,😍😍😄 moving on I didn’t make it too complex mmmmmm it was something quick because I have other things to do and time flies.

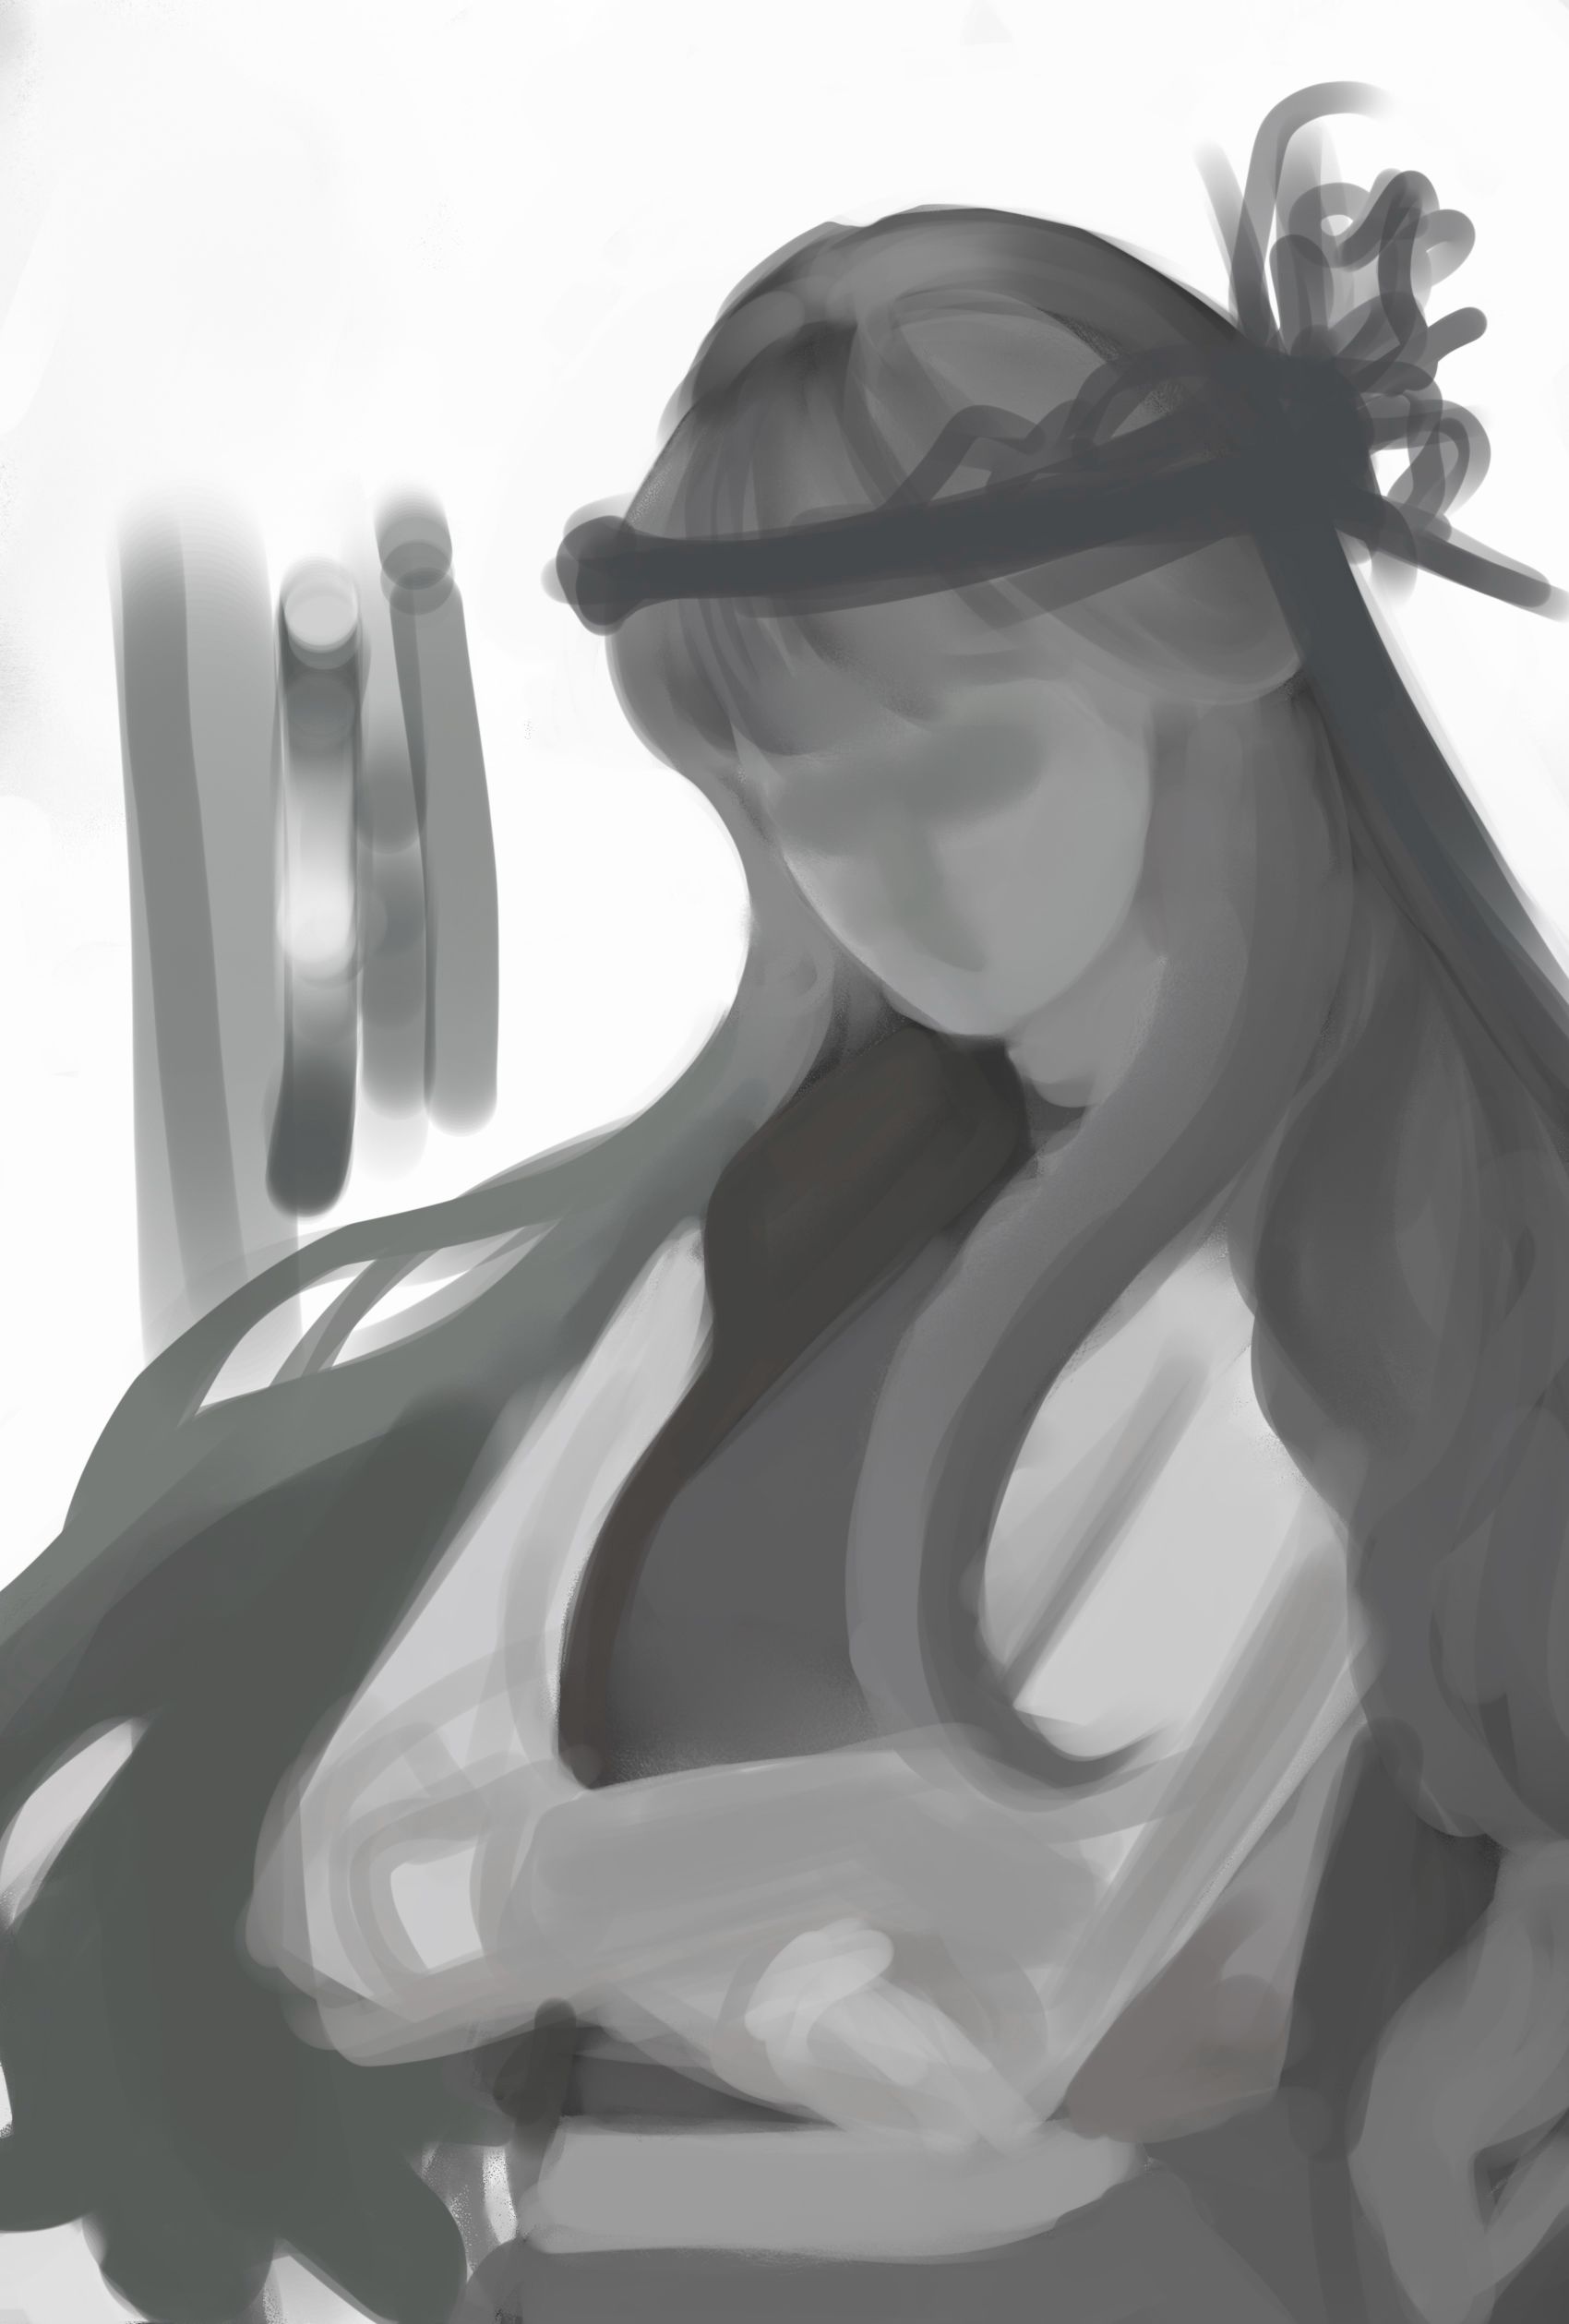
I started sketching a couple of poses and liked this one, so I went with it. Nothing too detailed, but I already had a clearer idea of how to move forward.
As I progressed, I began refining the details more, which helped make everything clearer. The thing is to just keep going and building on top since it’s a single layer yes! no erasing or stepping back. In fact, I rarely use the eraser at all. I also used a simple brush, and later one with a bit of texture, the usual ones I go for.
When I’m working in grayscale, everything needs to be well defined exactly how I want it at the end before I move to color. If not, it just won’t work. So after spending the necessary time to get it to a point I was happy with, it was time to move on to coloring.
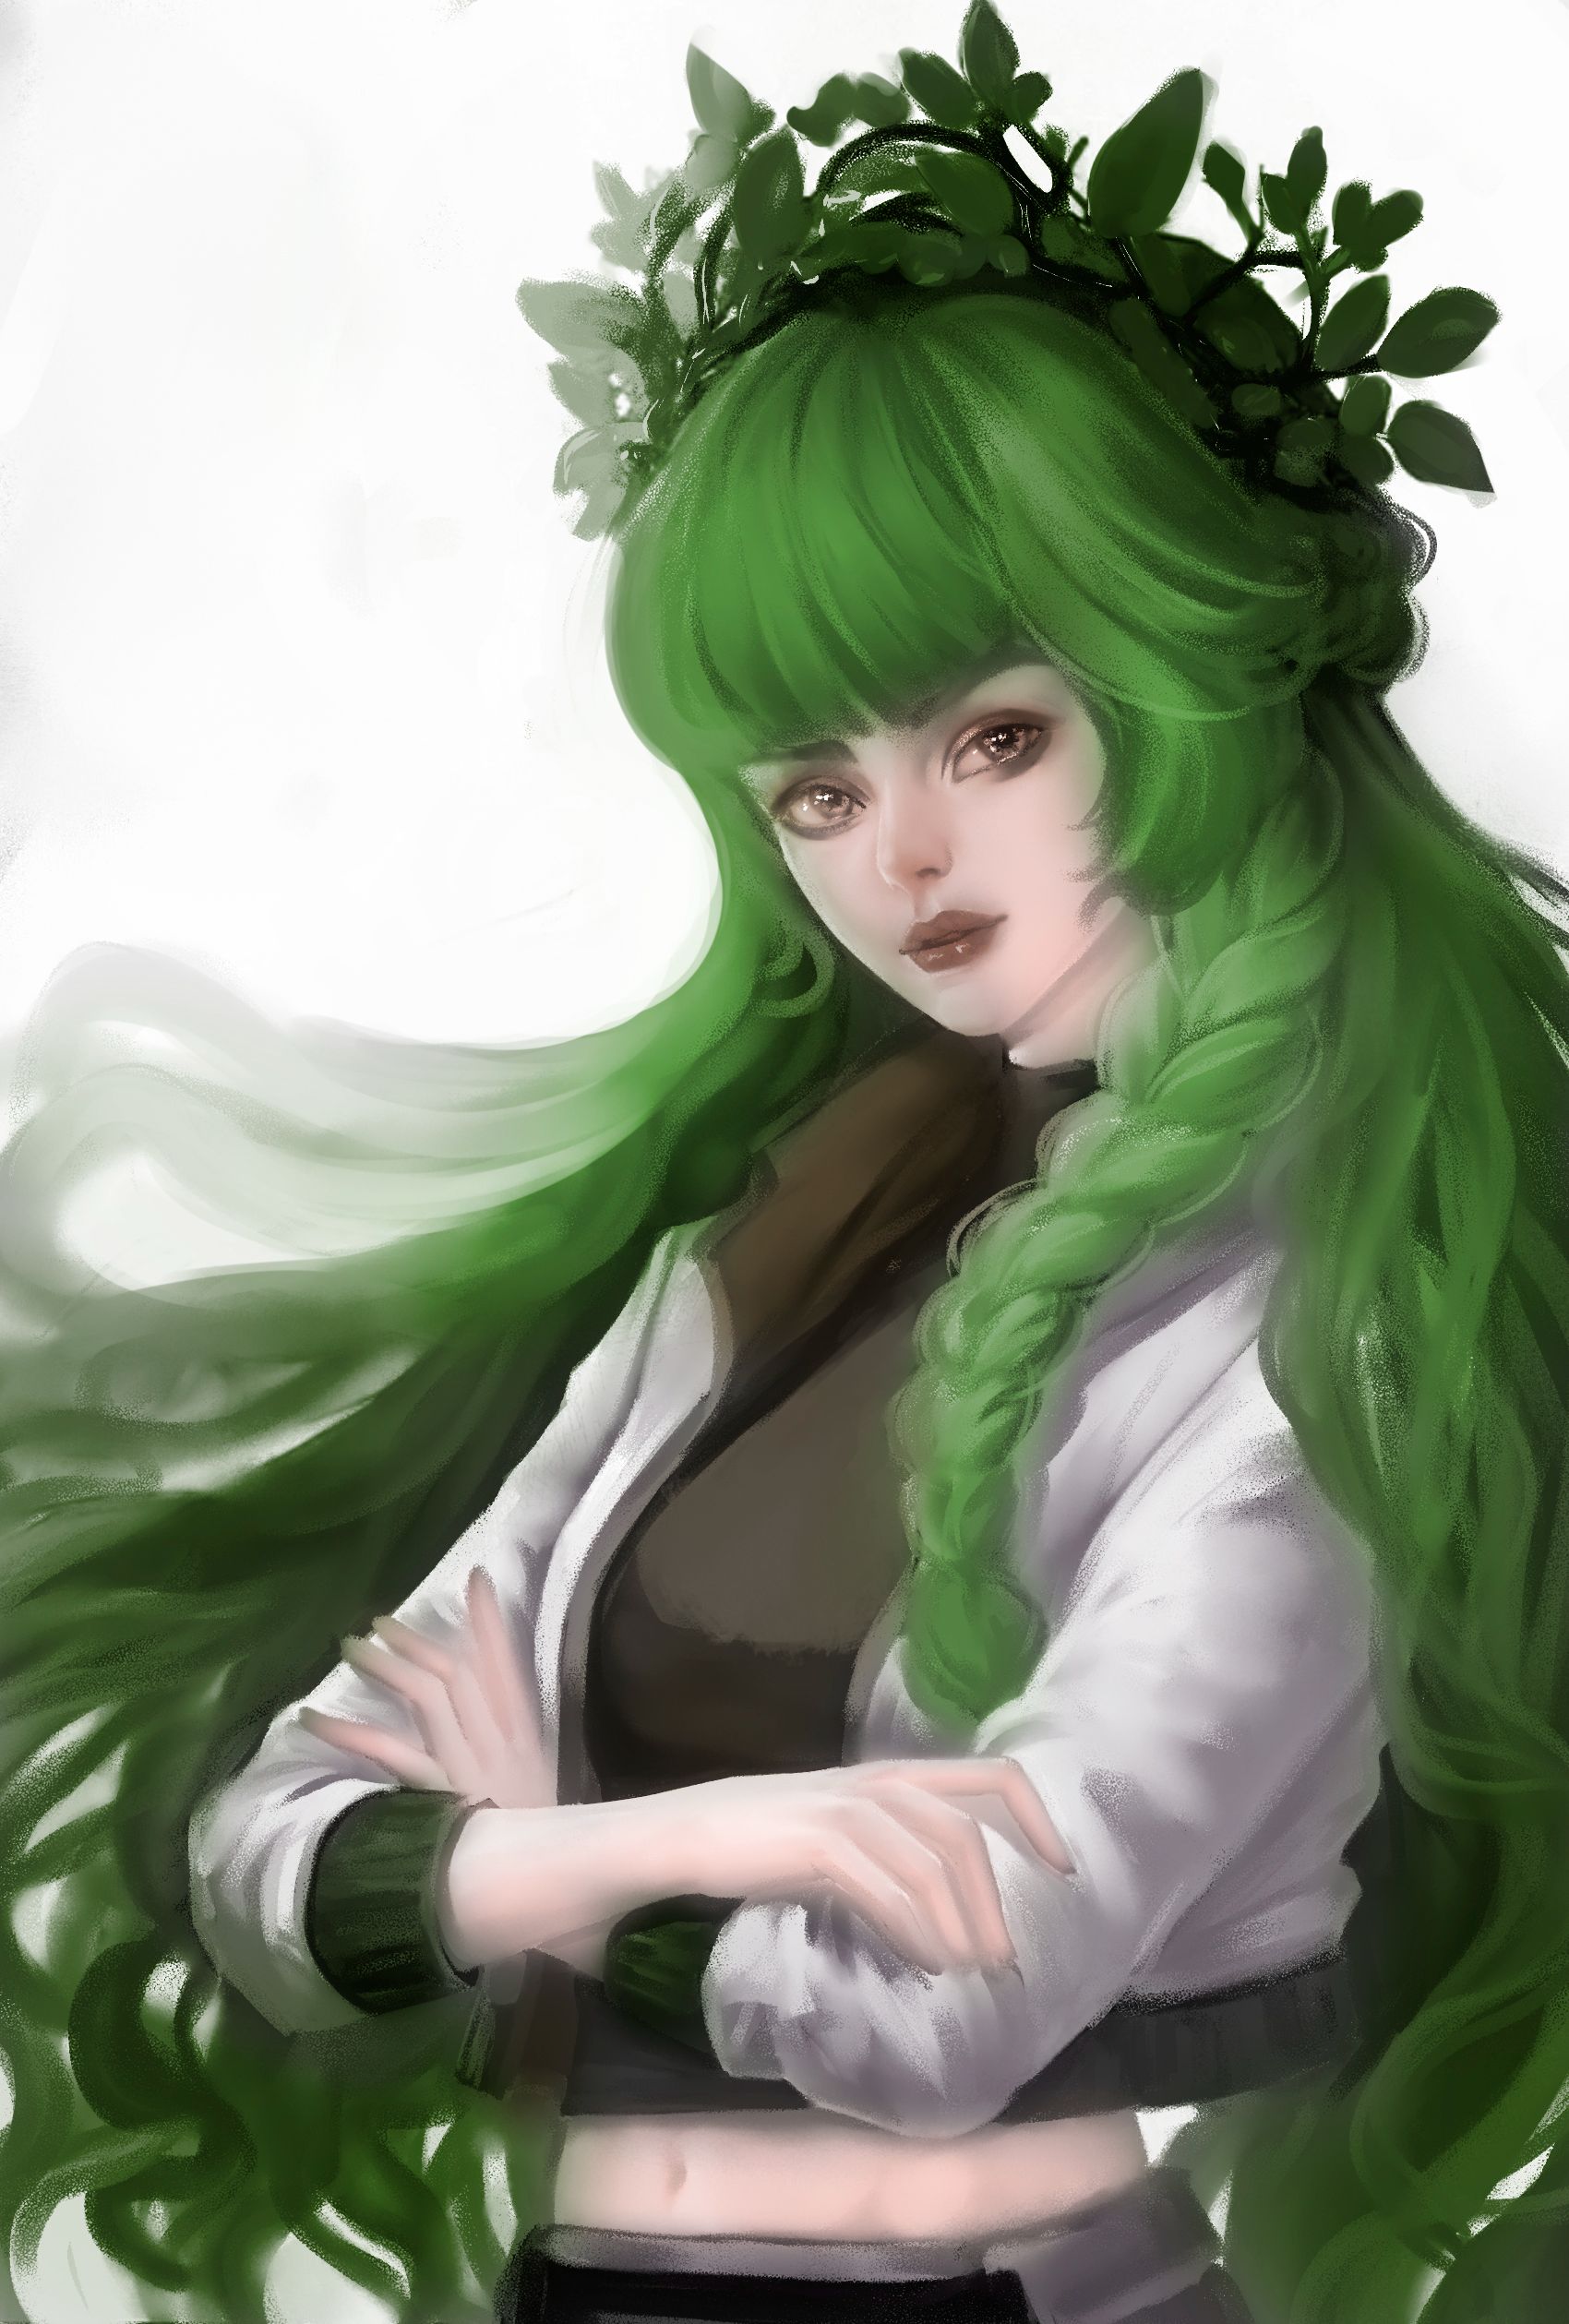
Using an overlay layer mode, I added a base color layer, picking colors from the reference image. It was something simple, but an important step to keep progressing. Up to this point, it was looking pretty good to me 😂.
To add more detail in terms of color, still using overlay mode, I added some more intense tones to bring depth to the piece adding shadows and a bit of lighting. I also took the chance to add some small details. Hmmm… I hadn’t done anything with the background yet because I wanted to keep it simple for now. I’ll change it later 🙂.
After merging all the layers, I overlaid them with the original and added some highlights on a new layer. I used the “finger ” tool which is one of my favorites, I’ve shown it before—it gives a kind of blending effect, but not like a round brush.
-.-
✨✨✨

✨✨✨
Finally, I always make some final adjustments like tweaking the colors and adding small details I usually save for the end. Oh, and I added some leaves to the hair and background just some slight changes from the original character design.
-.-
Thank you very much for taking the time to view my work.
✨✨✨

**𝕺𝖍𝖍𝖍 BTW**
============
𝕱𝖔𝖑𝖑𝖔𝖜 𝖒𝖊 𝖎𝖋 𝖚 𝖜𝖆𝖓𝖙
============
👇🏼👇🏼😶😶👇🏼👇🏼
============