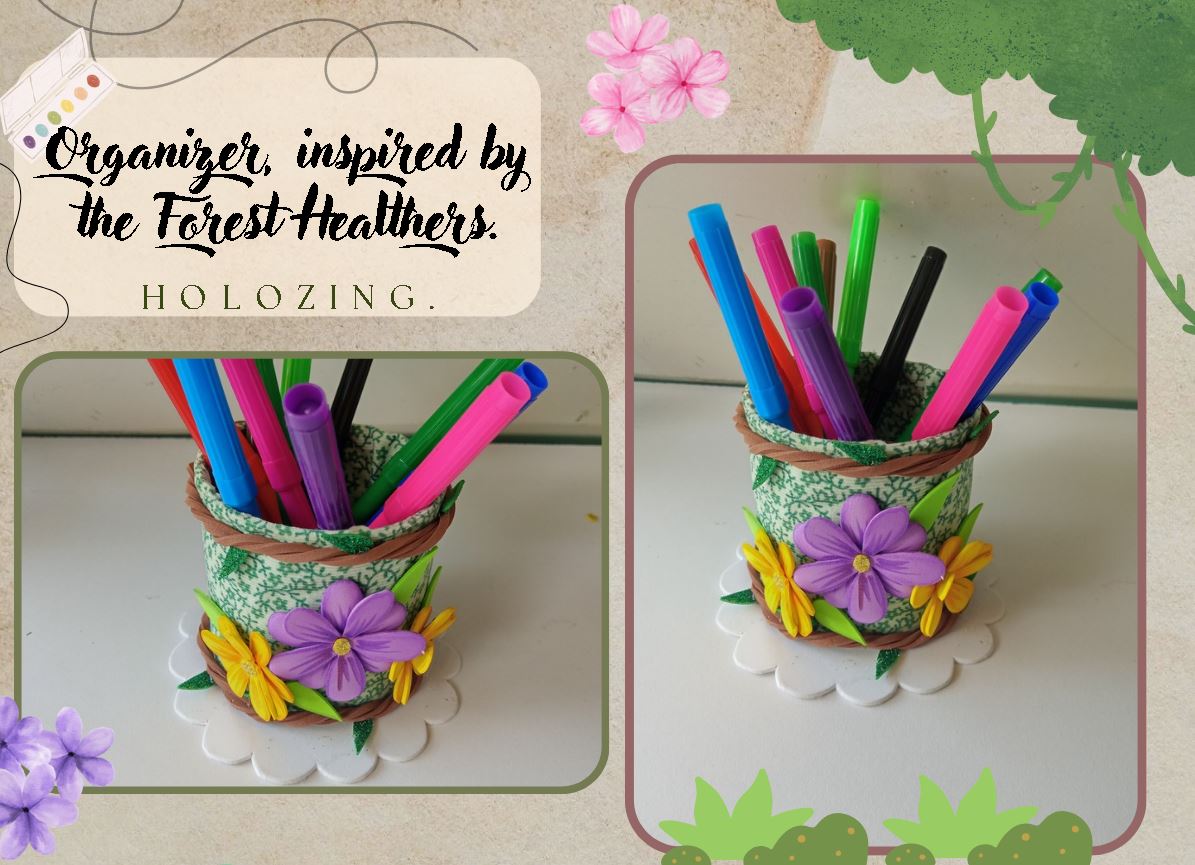
 **✨¡Buenas tardes, amigos de holozing!✨** Como siempre, contenta de pasarme nuevamente por acá a compartirles una bonita idea de organizador, inspirada en los Sanadores del bosque. Tenía esta linda idea hace un par de semanas y, aprovechando que venía una bella princesa a visitarme, pensé en regalárselo a ella una vez que lo terminé, pues ella quedó enamorada y me dijo que le gustaba porque estaba estudiando y podía colocar ahí sus colores. Pensé en colocar las lindas enredaderas que vemos en el cabello de los sanadores y algunas flores que, obvio, los representan.
🔸Sin más que añadir, a continuación los dejo con el paso a paso:
**✨Good afternoon, holozing friends!✨** As always, I'm happy to come here again and share a beautiful idea for an organizer, inspired by Forest Healthers. I had this beautiful idea a couple of weeks ago and, enjoying the fact that a beautiful princess was coming to visit me, I thought about treating her to her once it was over, making her fall in love and telling me that she liked it because she was studying and could put her colors there. I thought about putting the beautiful threads that we see in the hair of the healers and some flowers that, obviously, represent them.
🔸Without more to add, then I leave you with the step by step:
♥️ESPERO QUE TE GUSTE,
¡Empecemos!
♥️I HOPE YOU LIKE IT,
Let's start!

✂️ MATERIALES | ✂️ MATERIALS
- Botella de refresco.
- Tela del color o diseño deseado.
- Foami escarchado verde.
- Foami escarchado dorado.
- Foami blanco.
- Foami marrón.
- Foami verde.
- Foami amarillo.
- Foami lila.
- Pinturas y marcadores.
- Hoja blanca.
- Pegamento.
- Regla.
- Tijeras.
- Lápiz.
- Bottle of refreshment.
- Color screen of the desired design.
- Green coated foami.
- Golden pressed foami.
- White foami.
- Brown foami.
- Green foami.
- Yellow foami.
- Foami lila.
- Paintings and markers.
- White hoja.
- Catching.
- Rule.
- Tijeras.
- Pencil.
✨ PROCEDIMIENTO | ✨ PROCESS
✨ PASO 1:
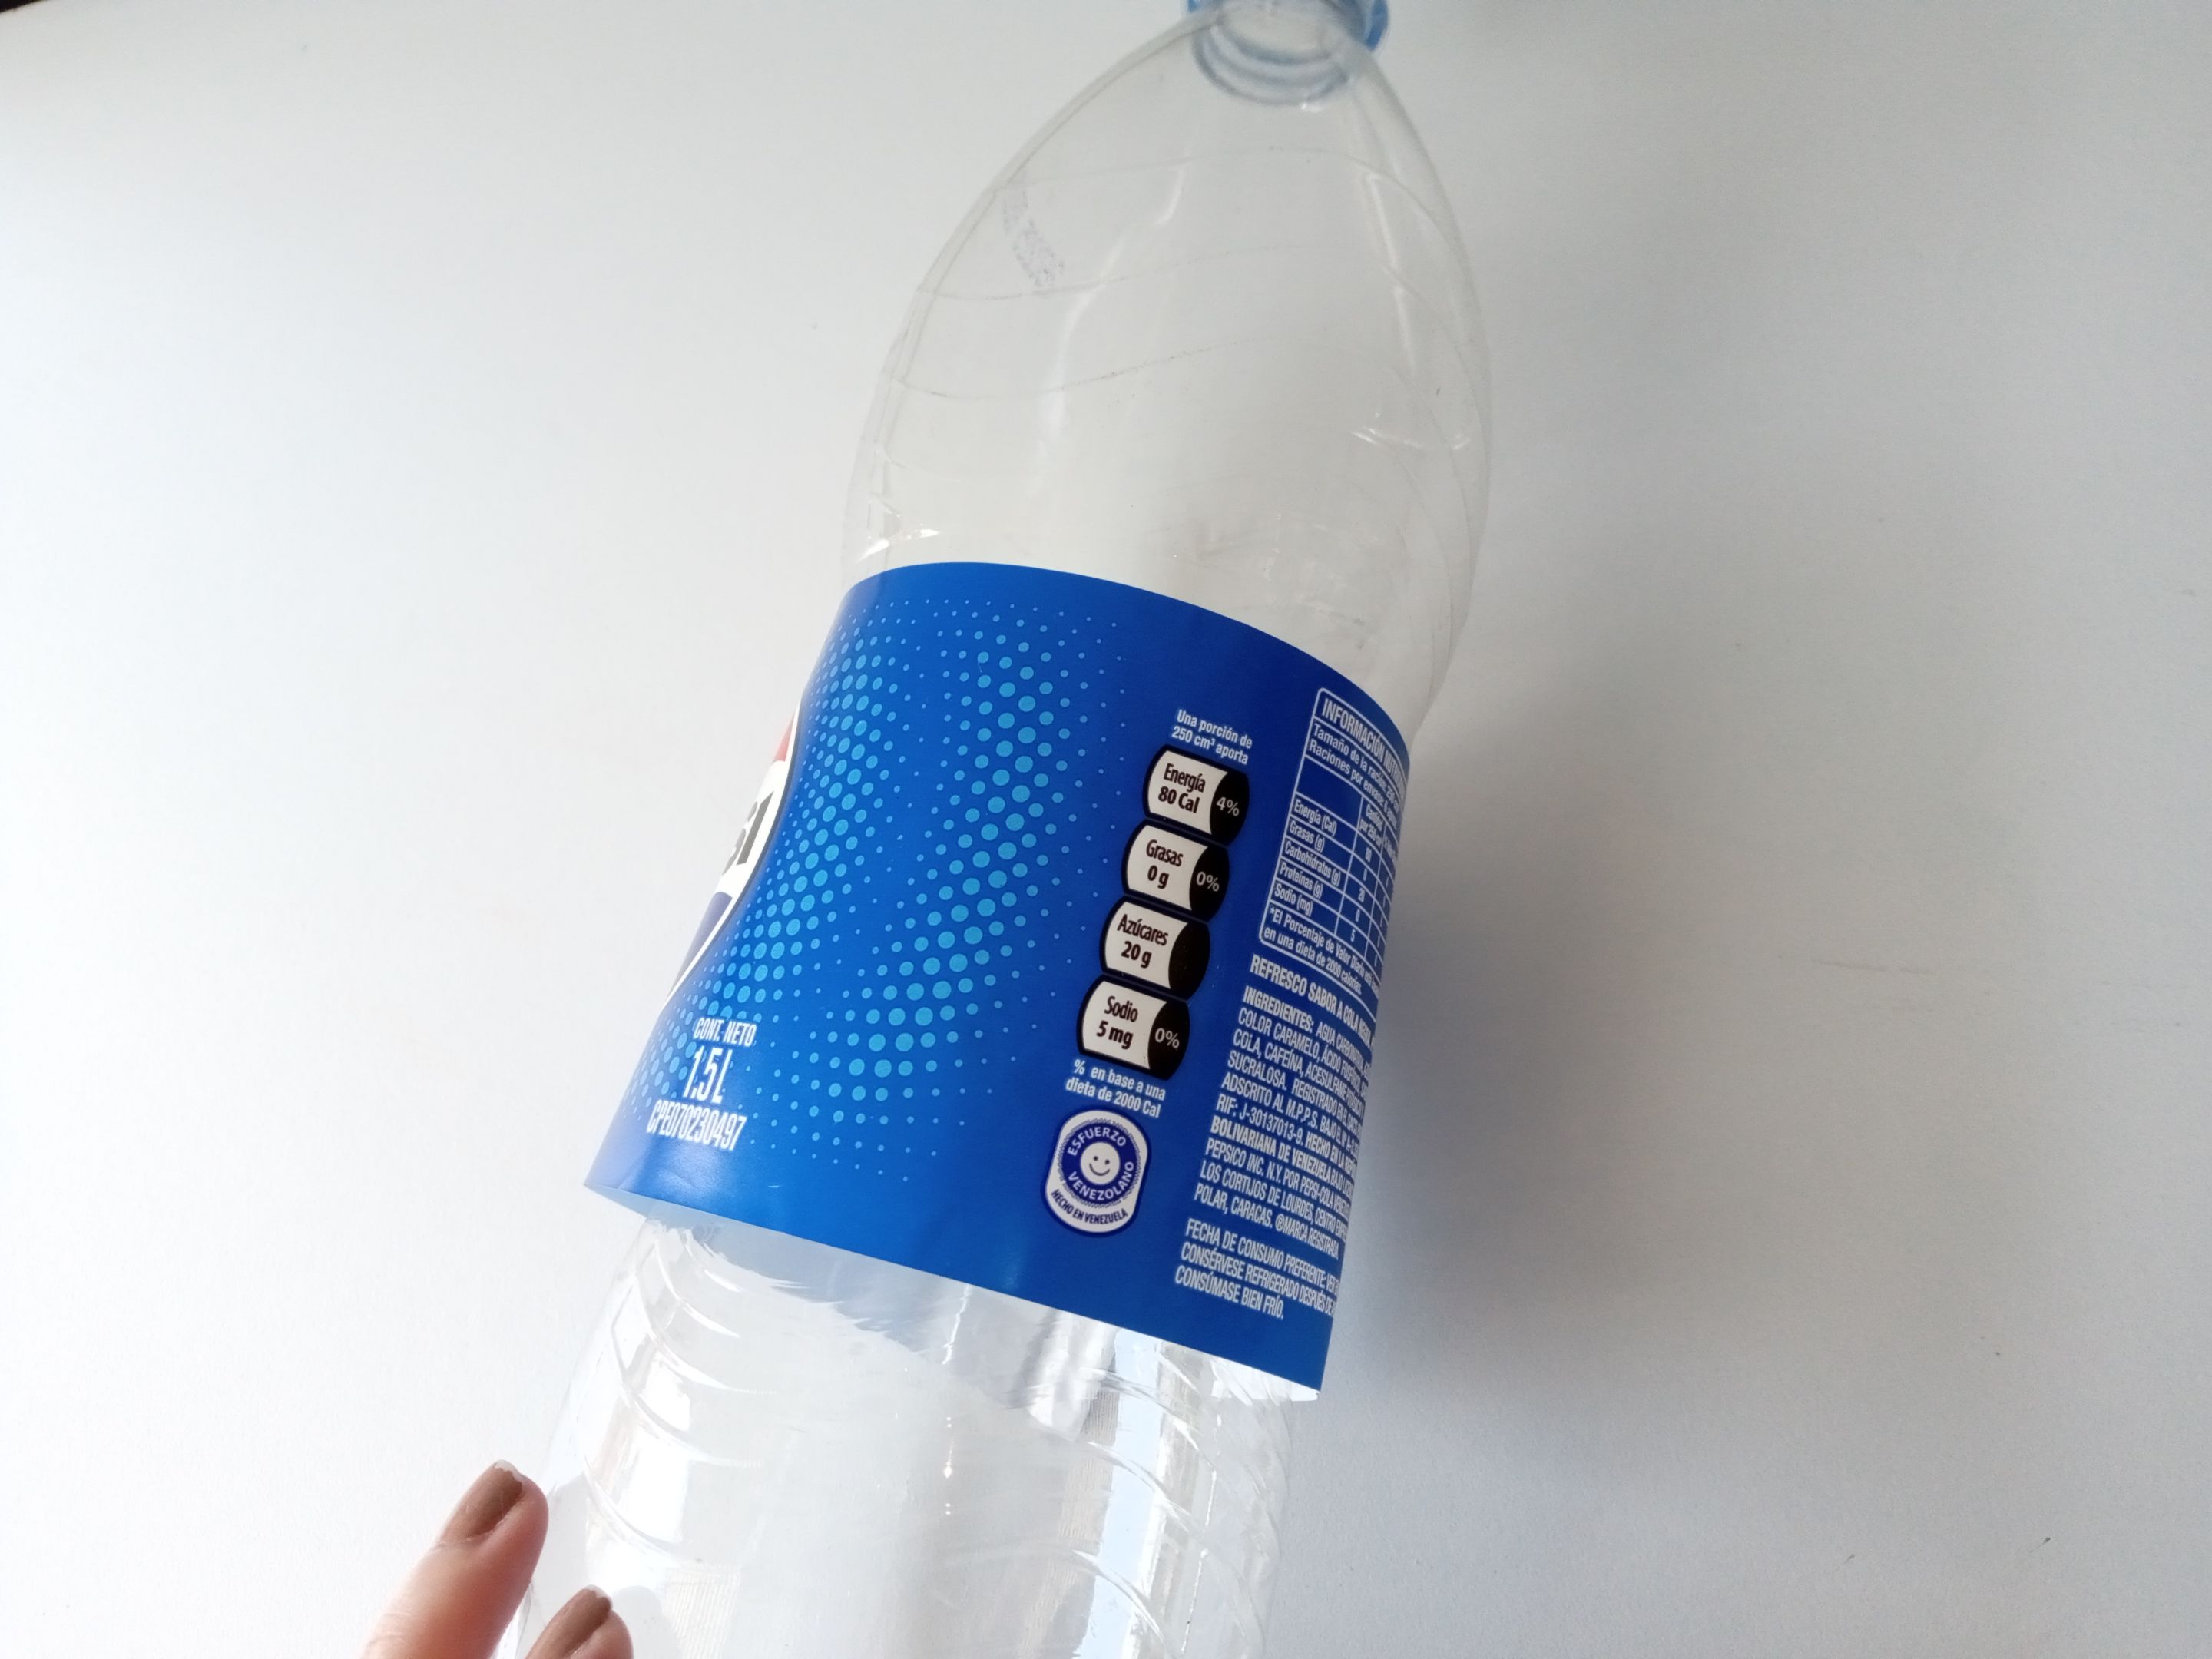
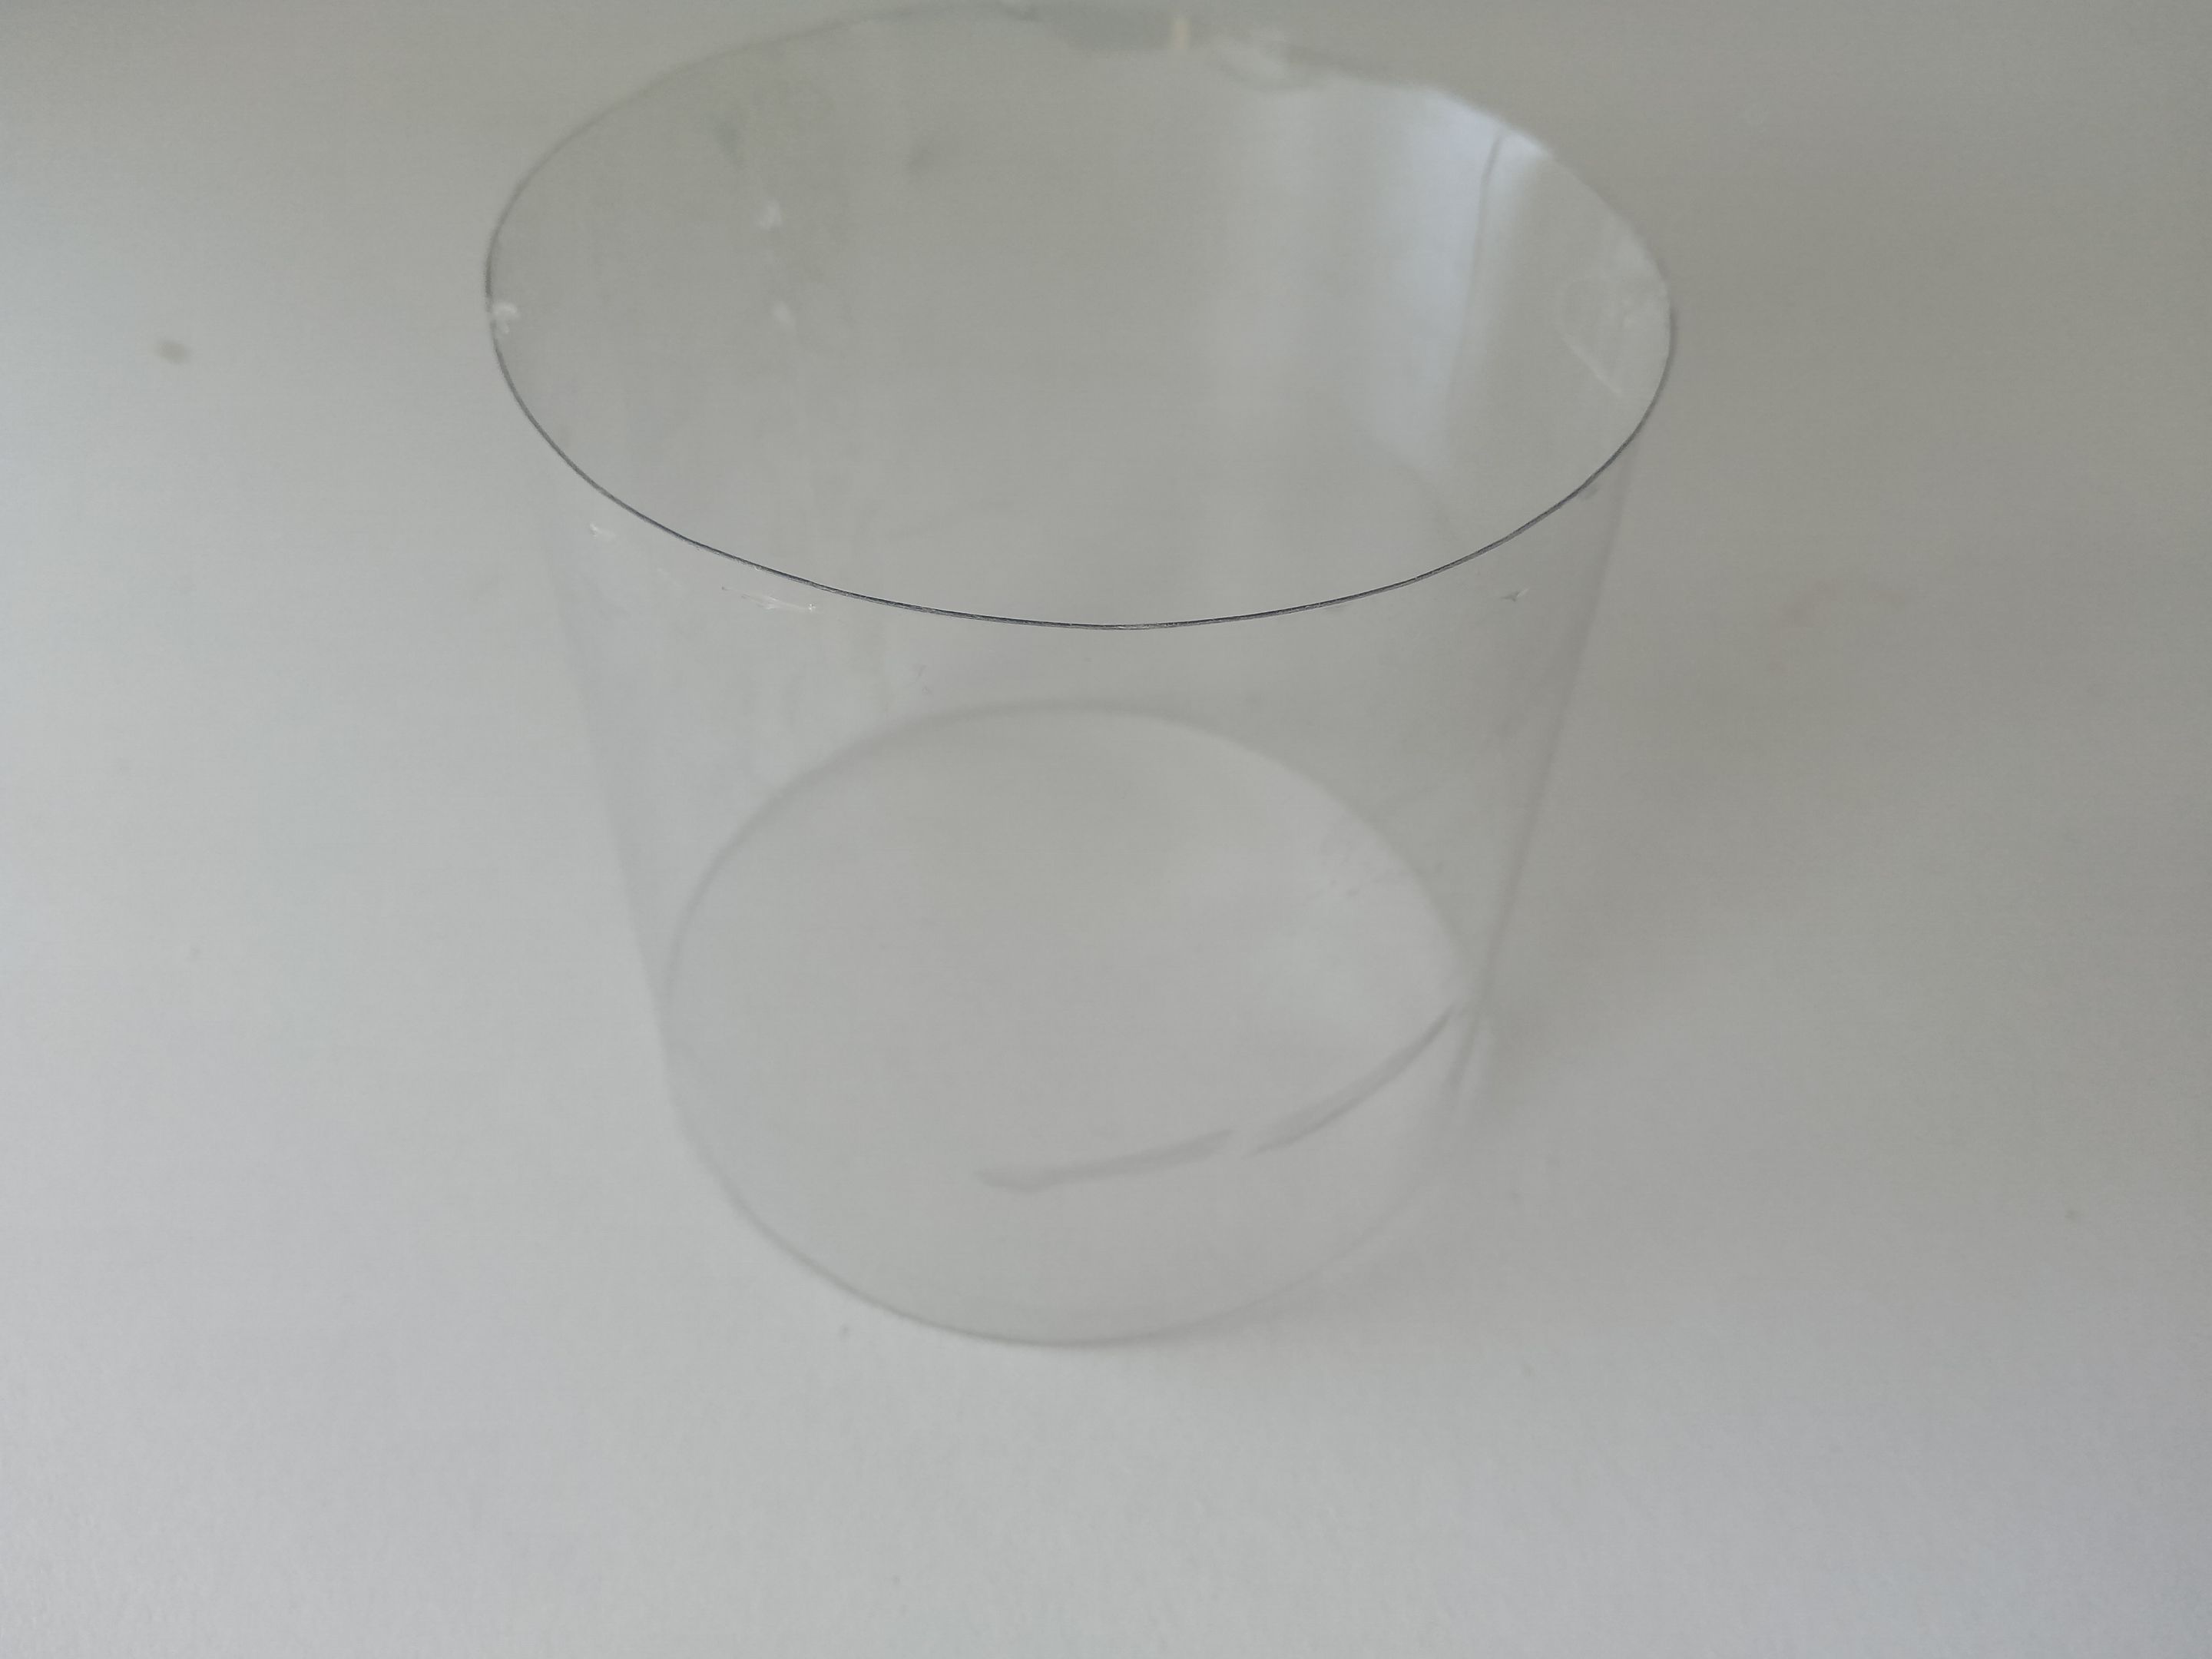
Lo primero es tomar la botella de refresco, retirar la etiqueta y justo donde iba la etiqueta, recortamos ese cilindro, el cual a veces viene con alguna textura o liso, pero en este caso no importa porque vamos a cubrir.
✨ STEP 1:
The first thing is to drink the bottle of refreshment, remove the label and just where the label comes from, we cut out this cylinder, which sometimes comes with some texture or smooth, but in this case it doesn't matter because we are going to cover it.
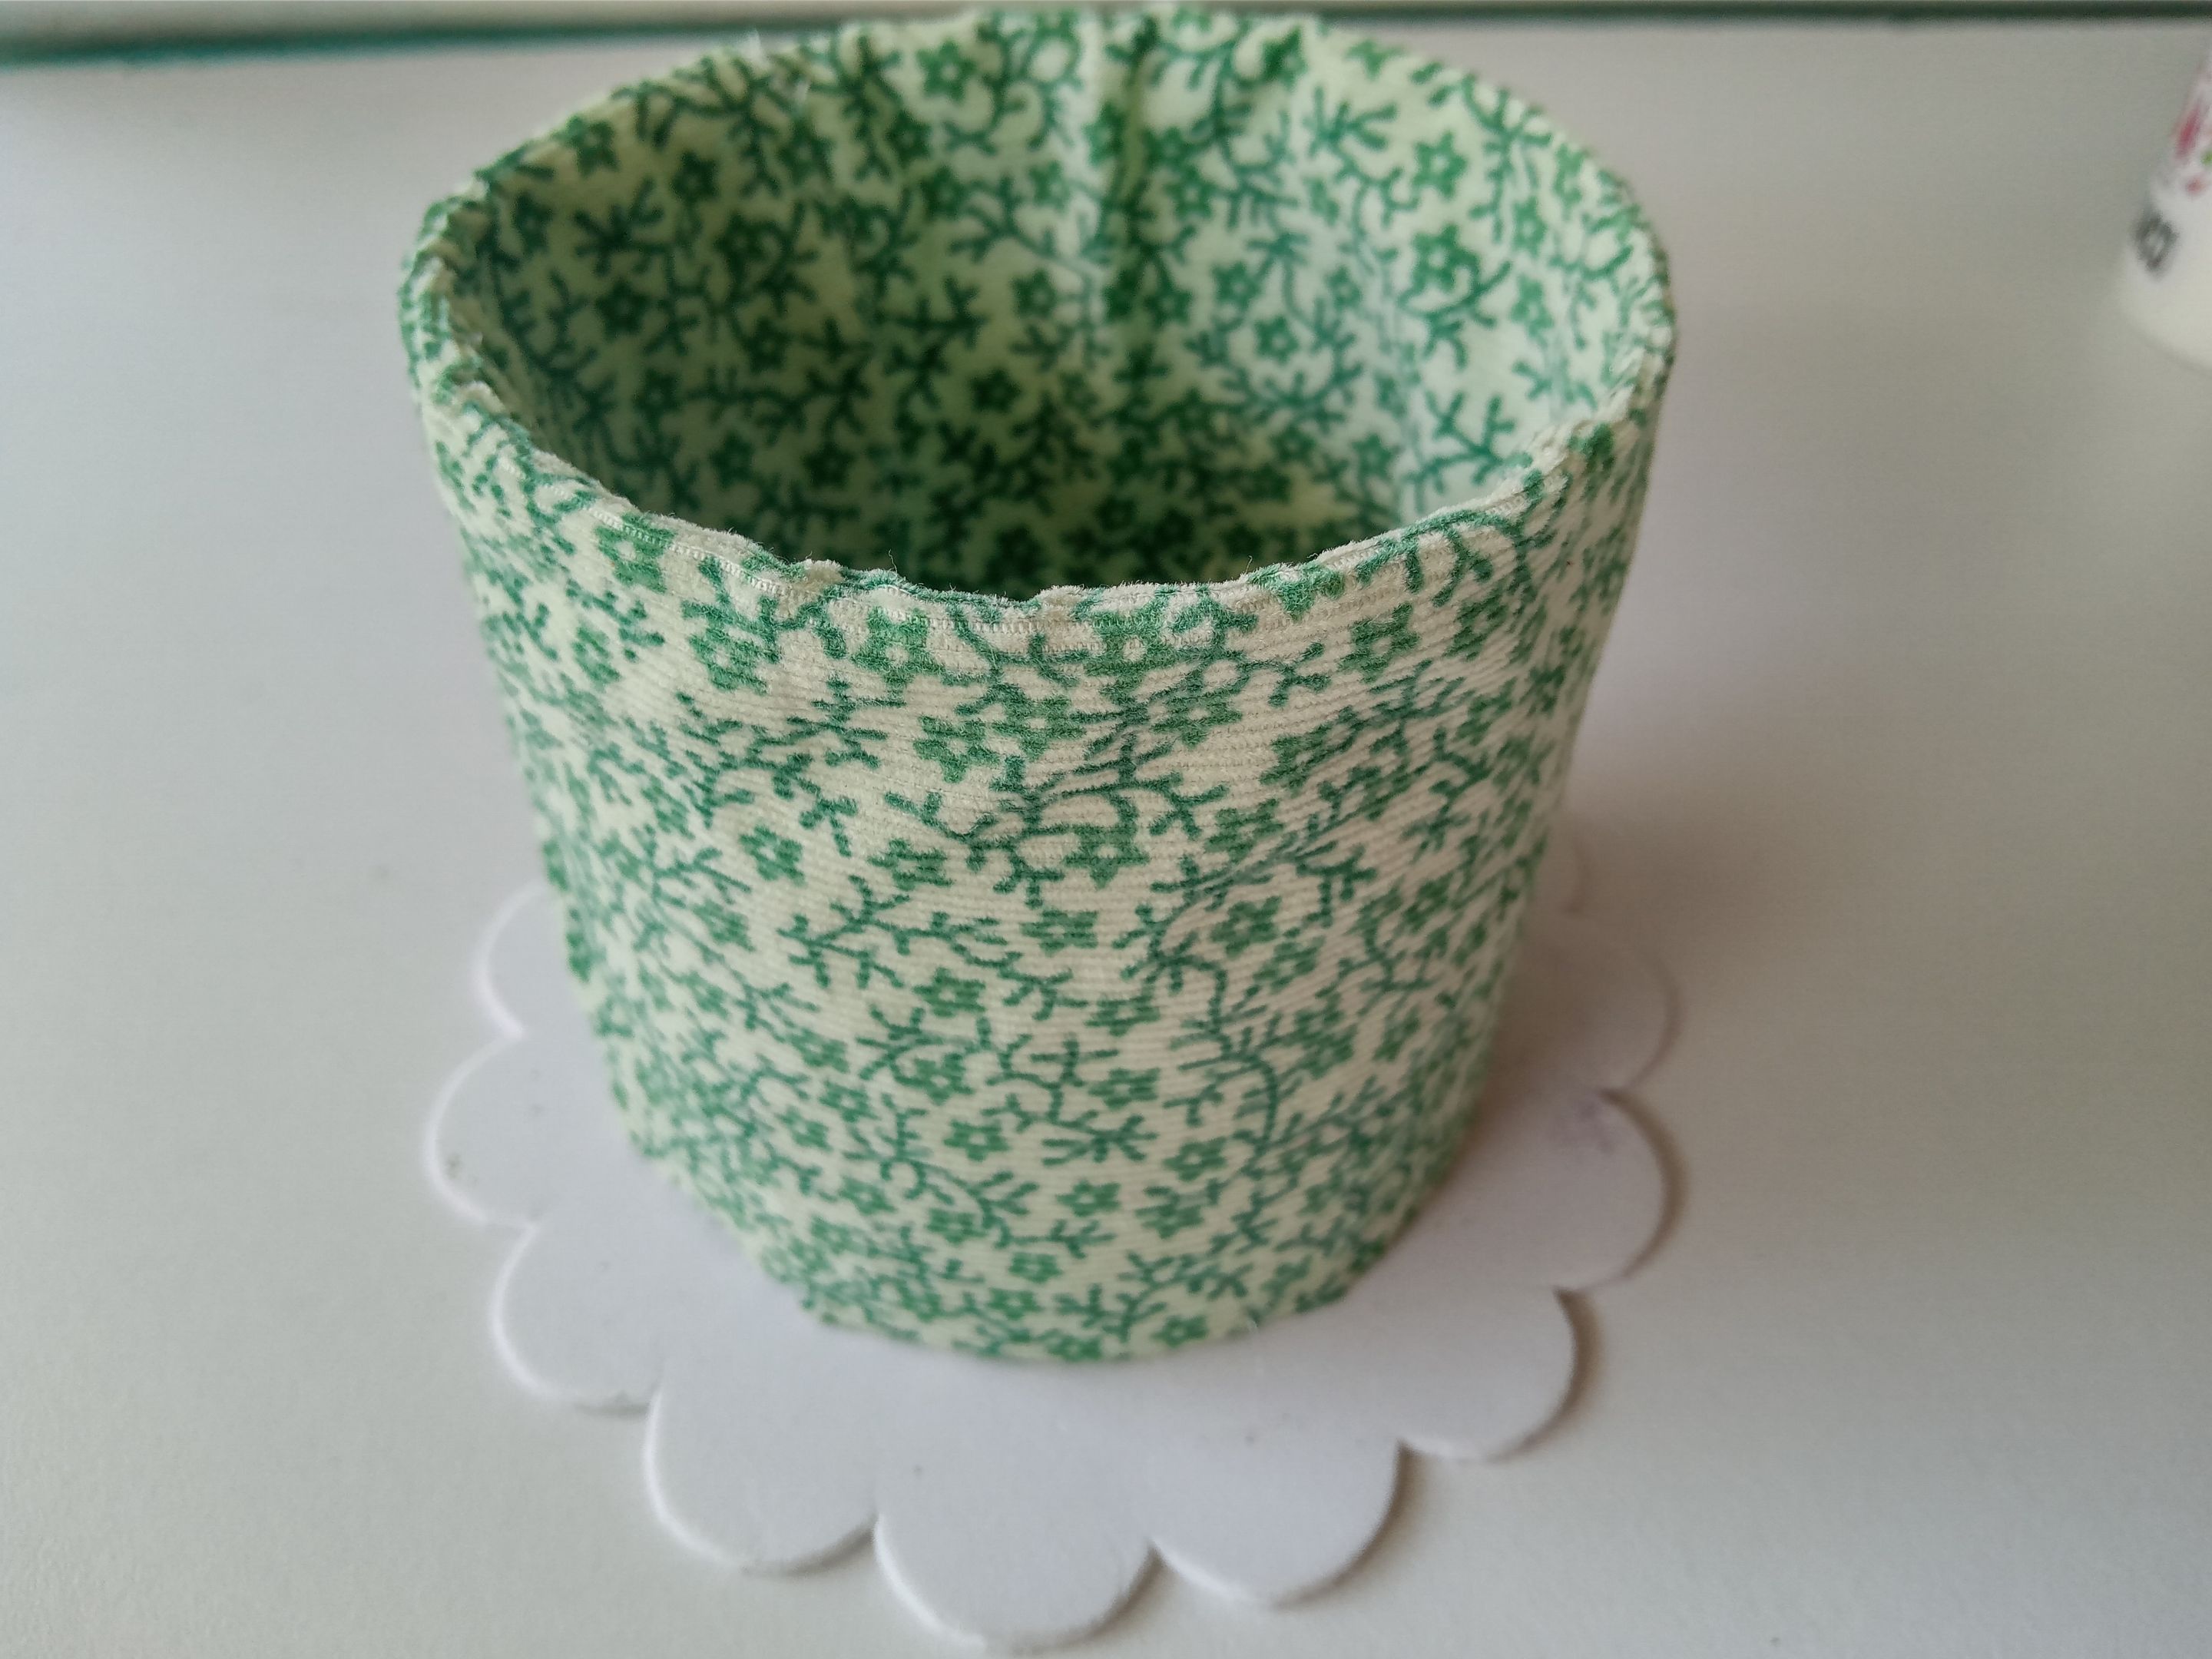
✨ PASO 2:
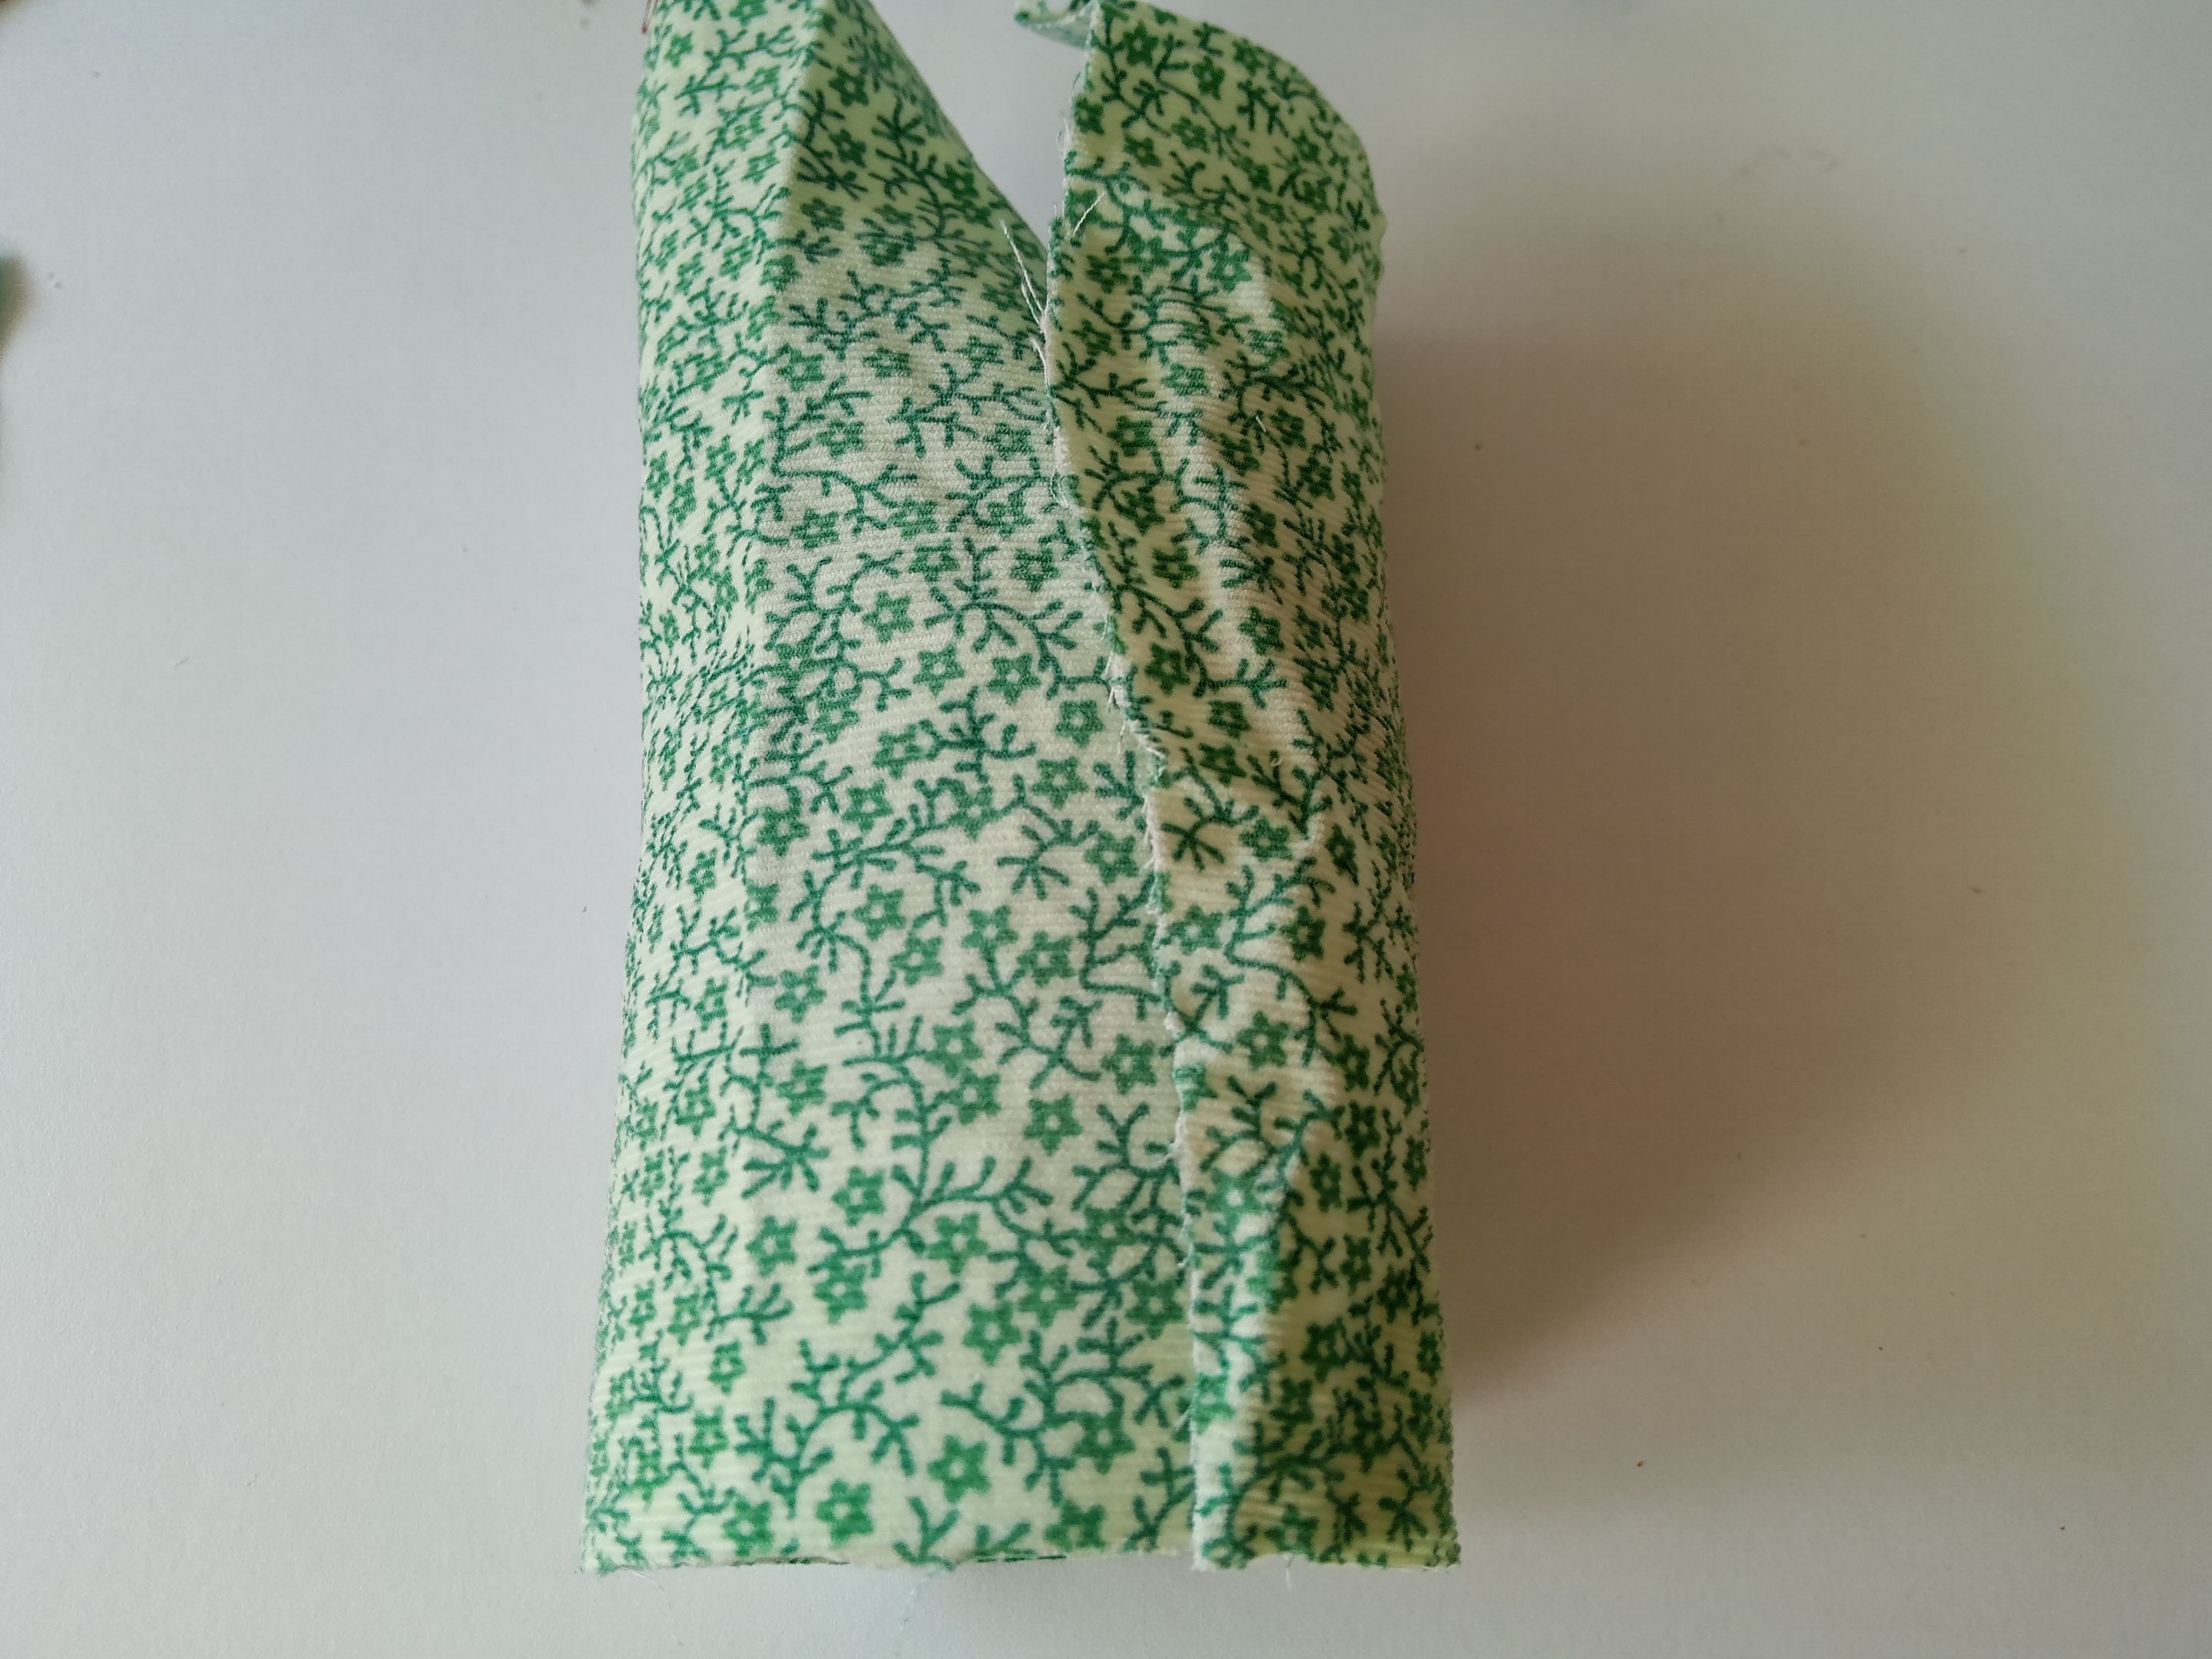
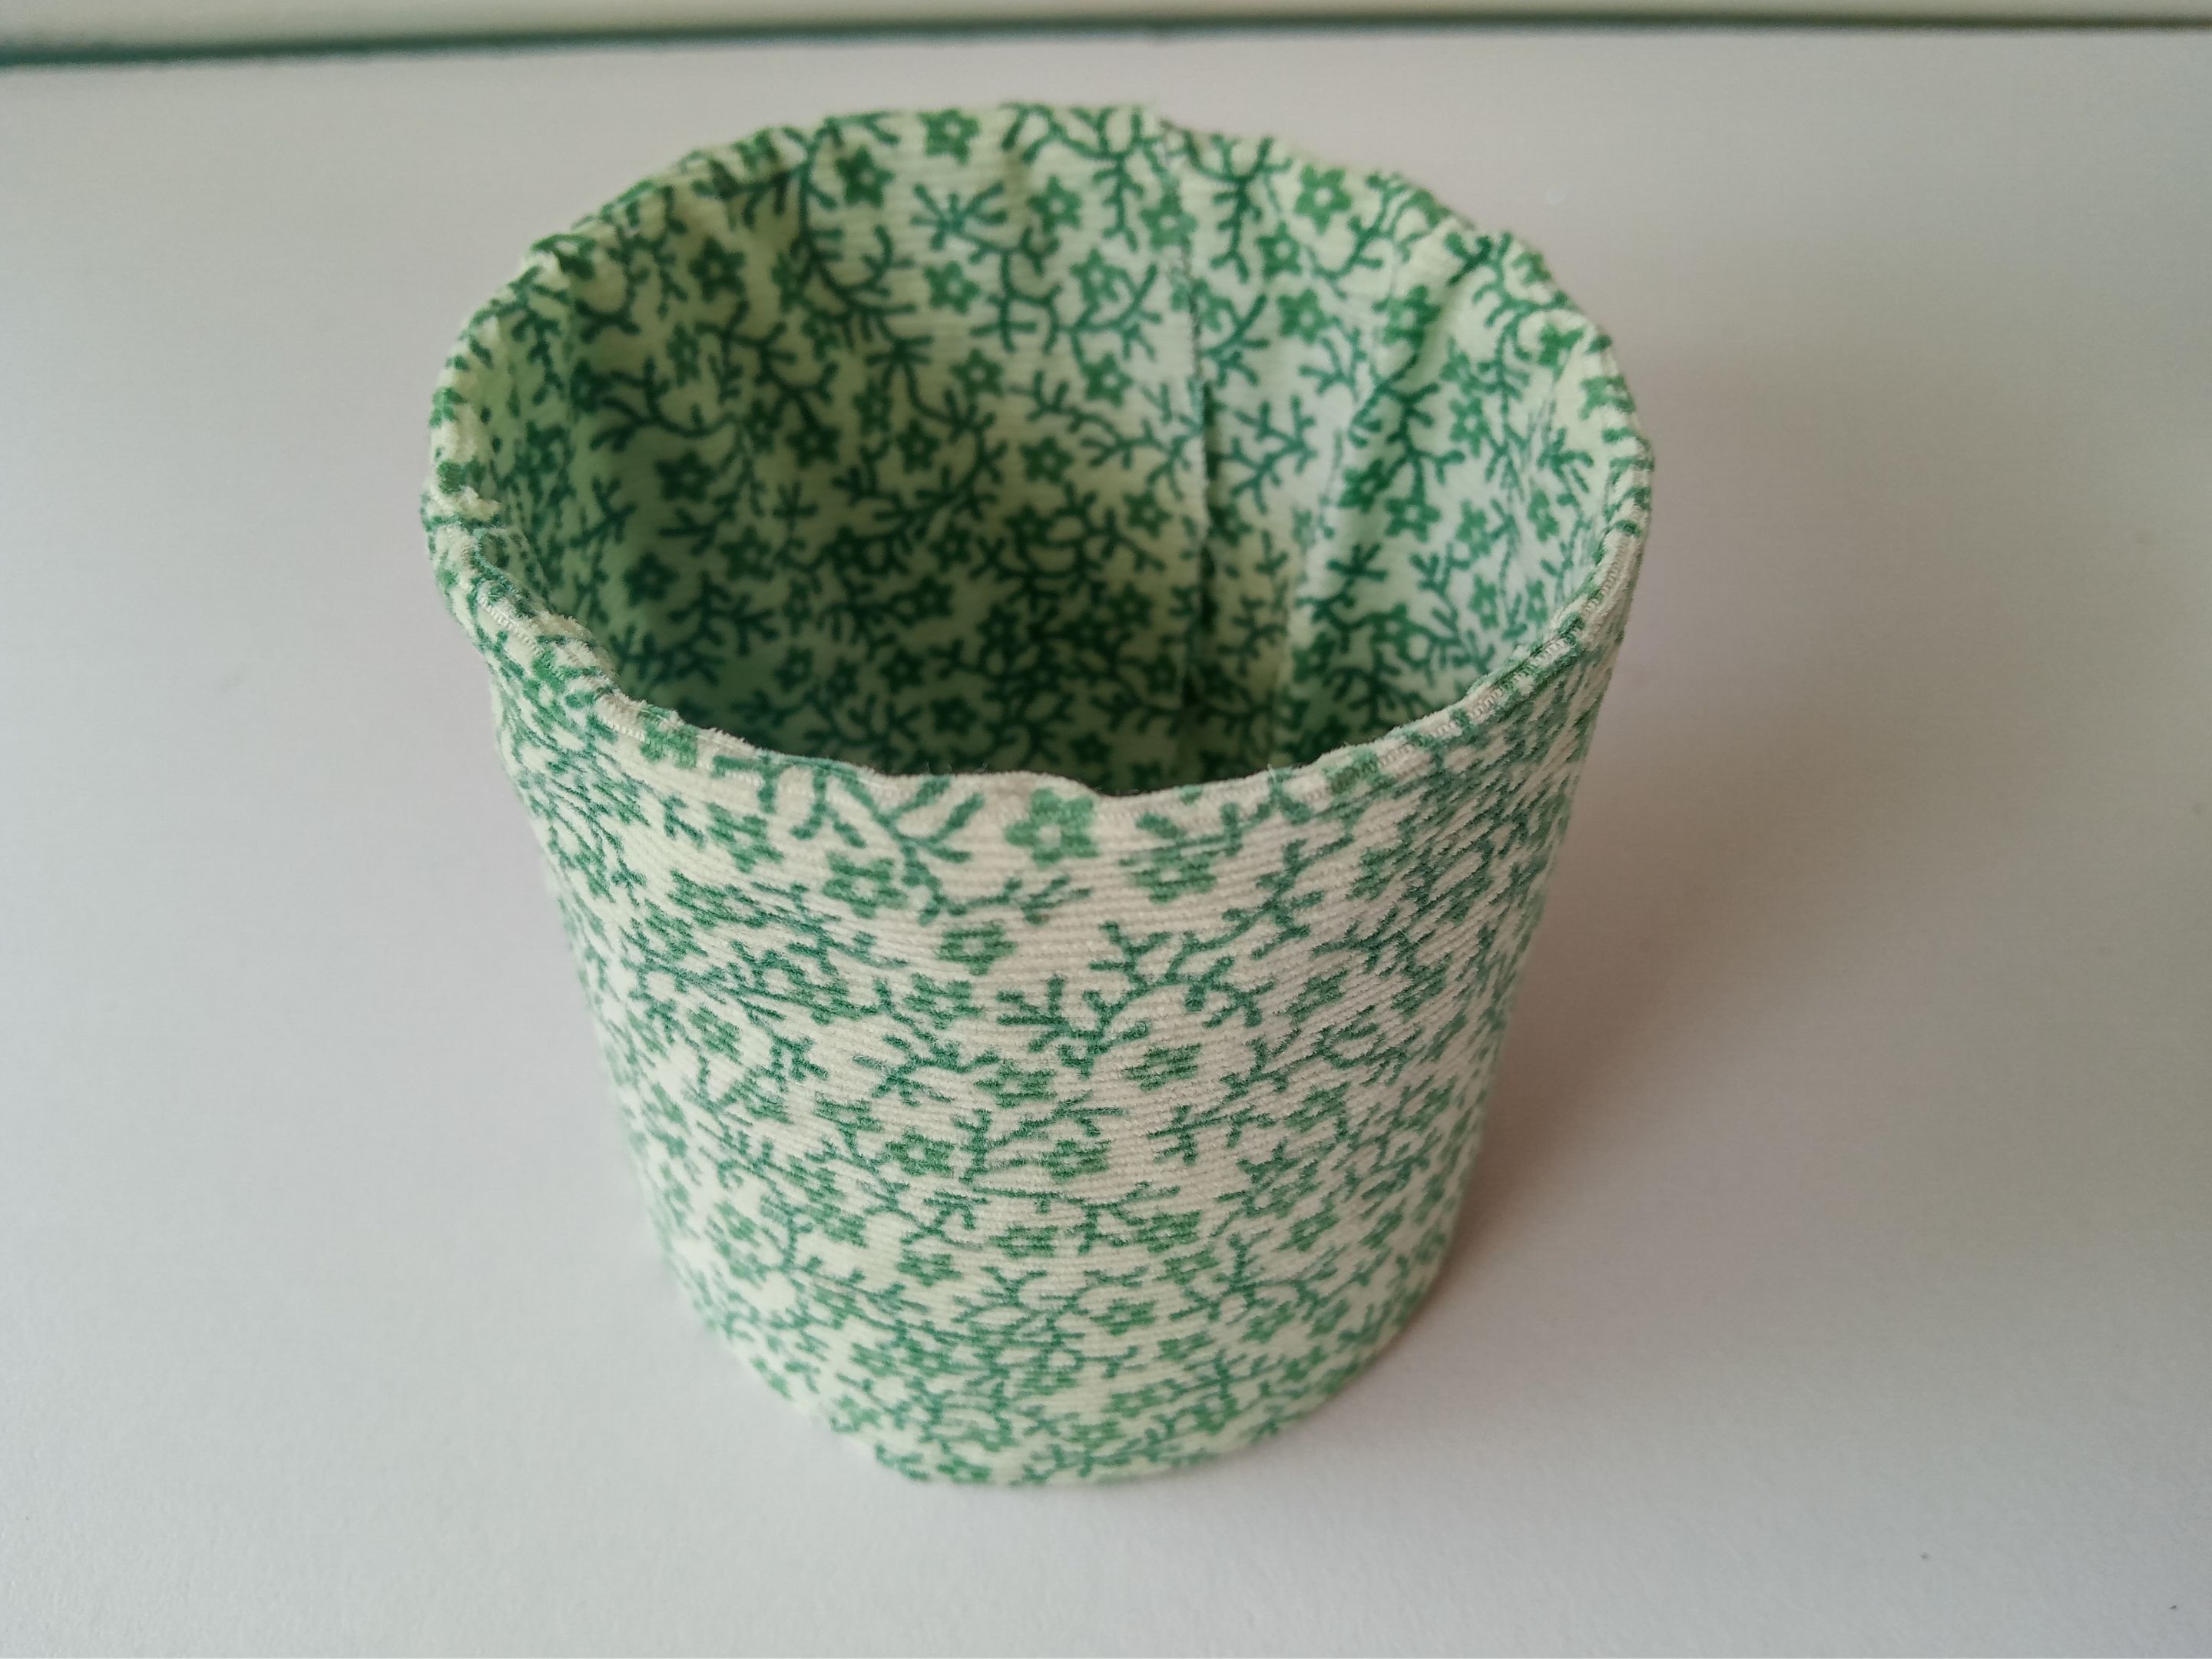
Podemos forrar el cilindro con telas; como es mi caso, decidí forrar con una tela que fuera acorde con la temática, pues es verde con algunas flores y hojitas verdes, así que recorté un trozo de tela el doble de grande para poder forrar el interior del cilindro también. Pero otra opción, si no lo quieren forrar con telas, es pintar con el color deseado el cilindro.
✨ STEP 2:
We can cover the cylinder with fabrics; As in my case, I decided to cover it with a canvas that was in accordance with the theme, which was green with some flowers and green leaves, so I cut out a section of canvas twice as large to be able to cover the inside of the cylinder as well. But another option, if you don't want to cover with canvas, is to paint with the desired color of the cylinder.
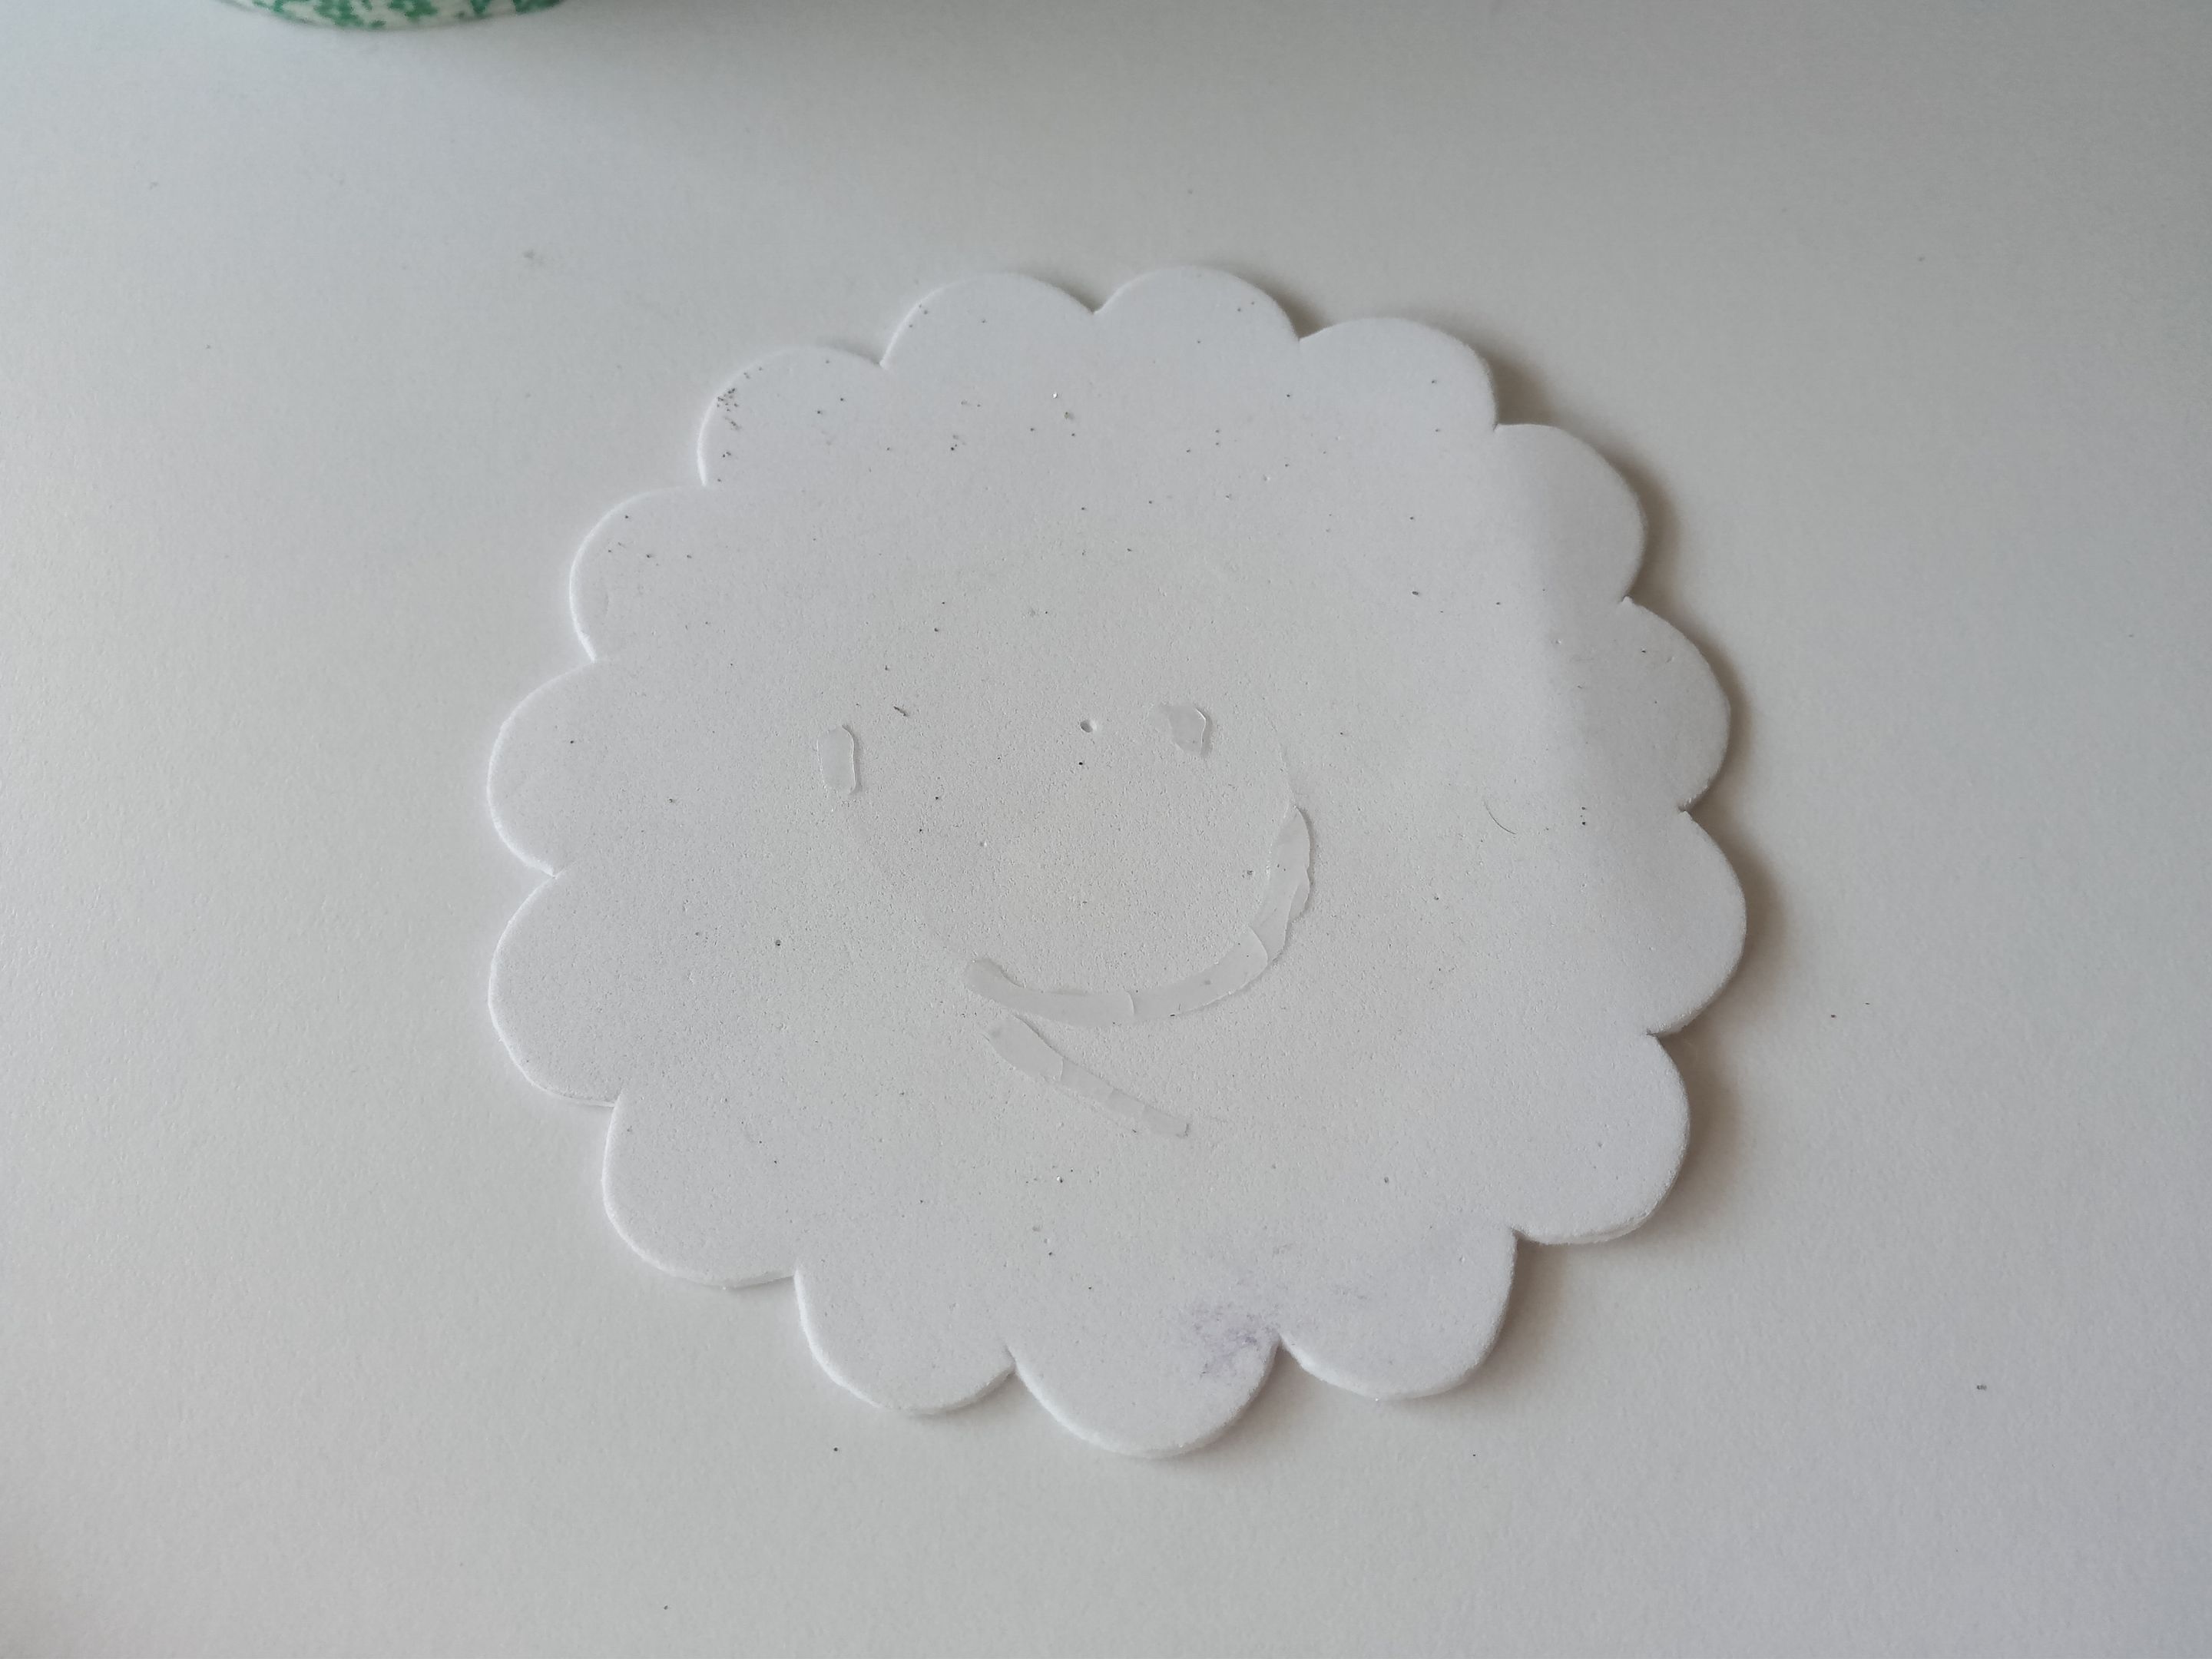
✨ PASO 3:
Seguidamente, recorté la base de unos 10 cm de circunferencia, en foami blanco, con forma en los bordes de flor. Al tenerlo listo, pegué encima el cilindro de la botella para así tener listo el organizador.
✨ STEP 3:
Then, cut out the base of about 10 cm in circumference, in white foami, forming the edges of a flower. When you have it ready, pick up the bottle cylinder on top so you have the organizer.
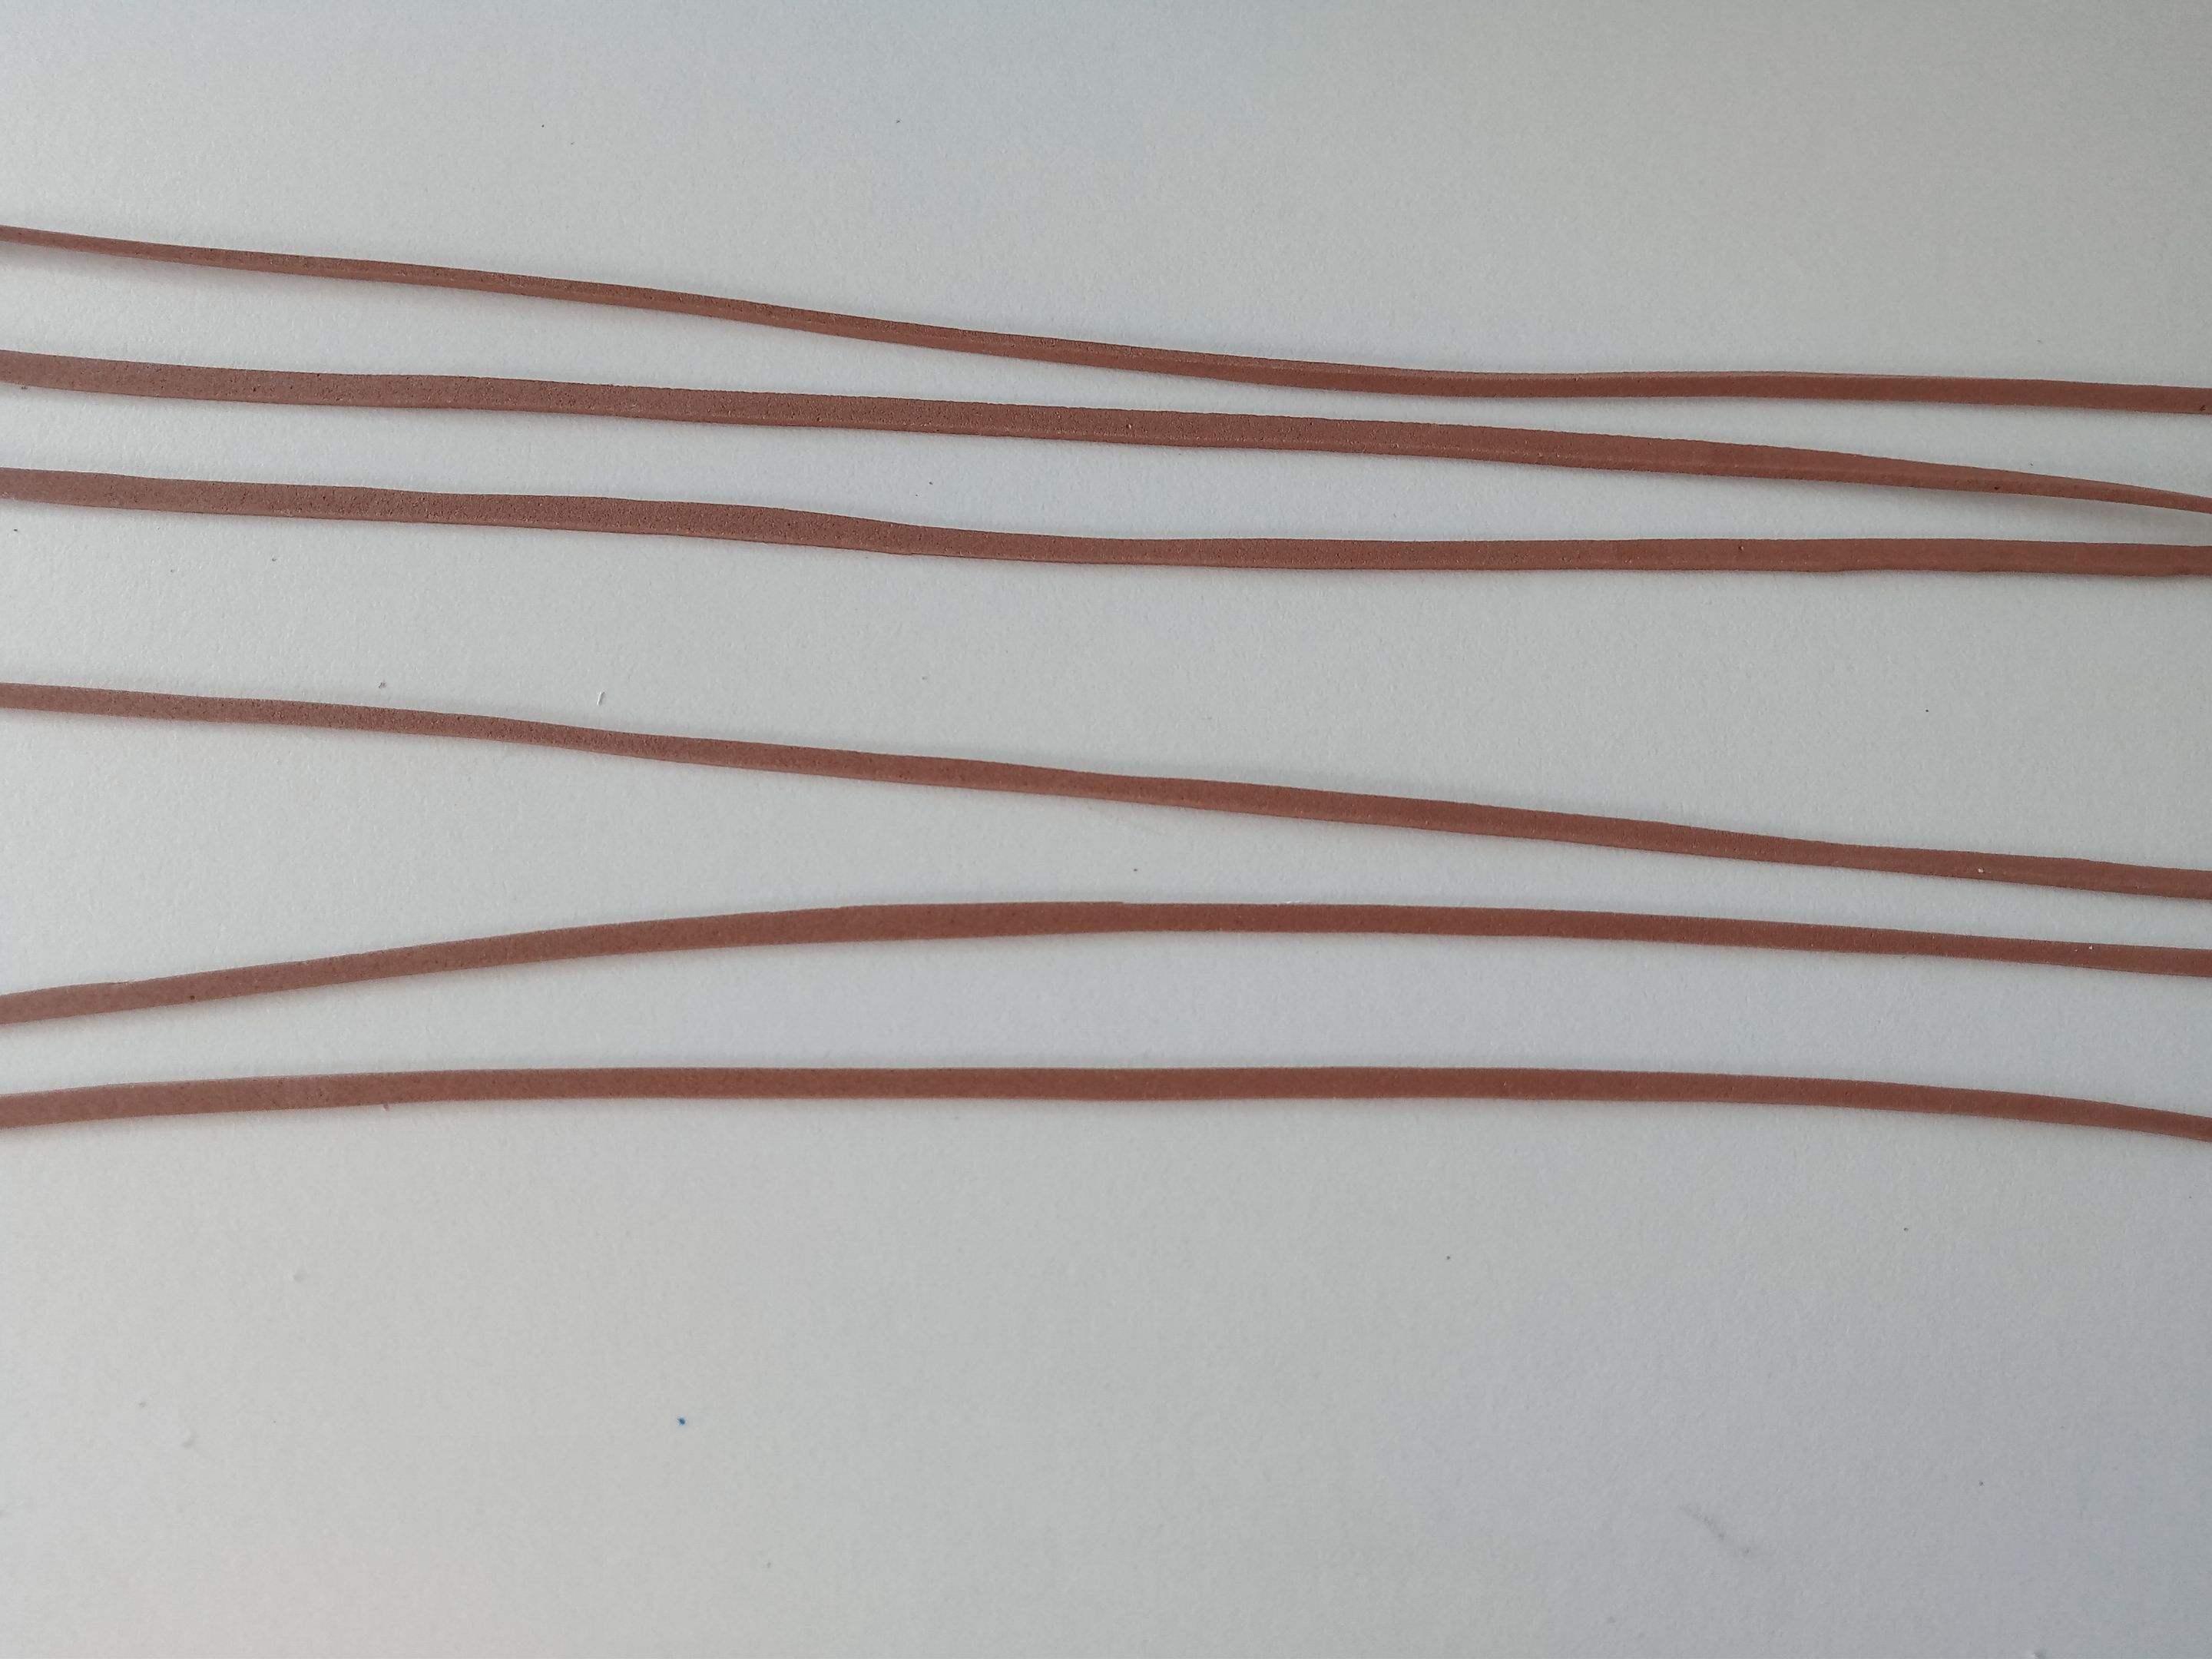
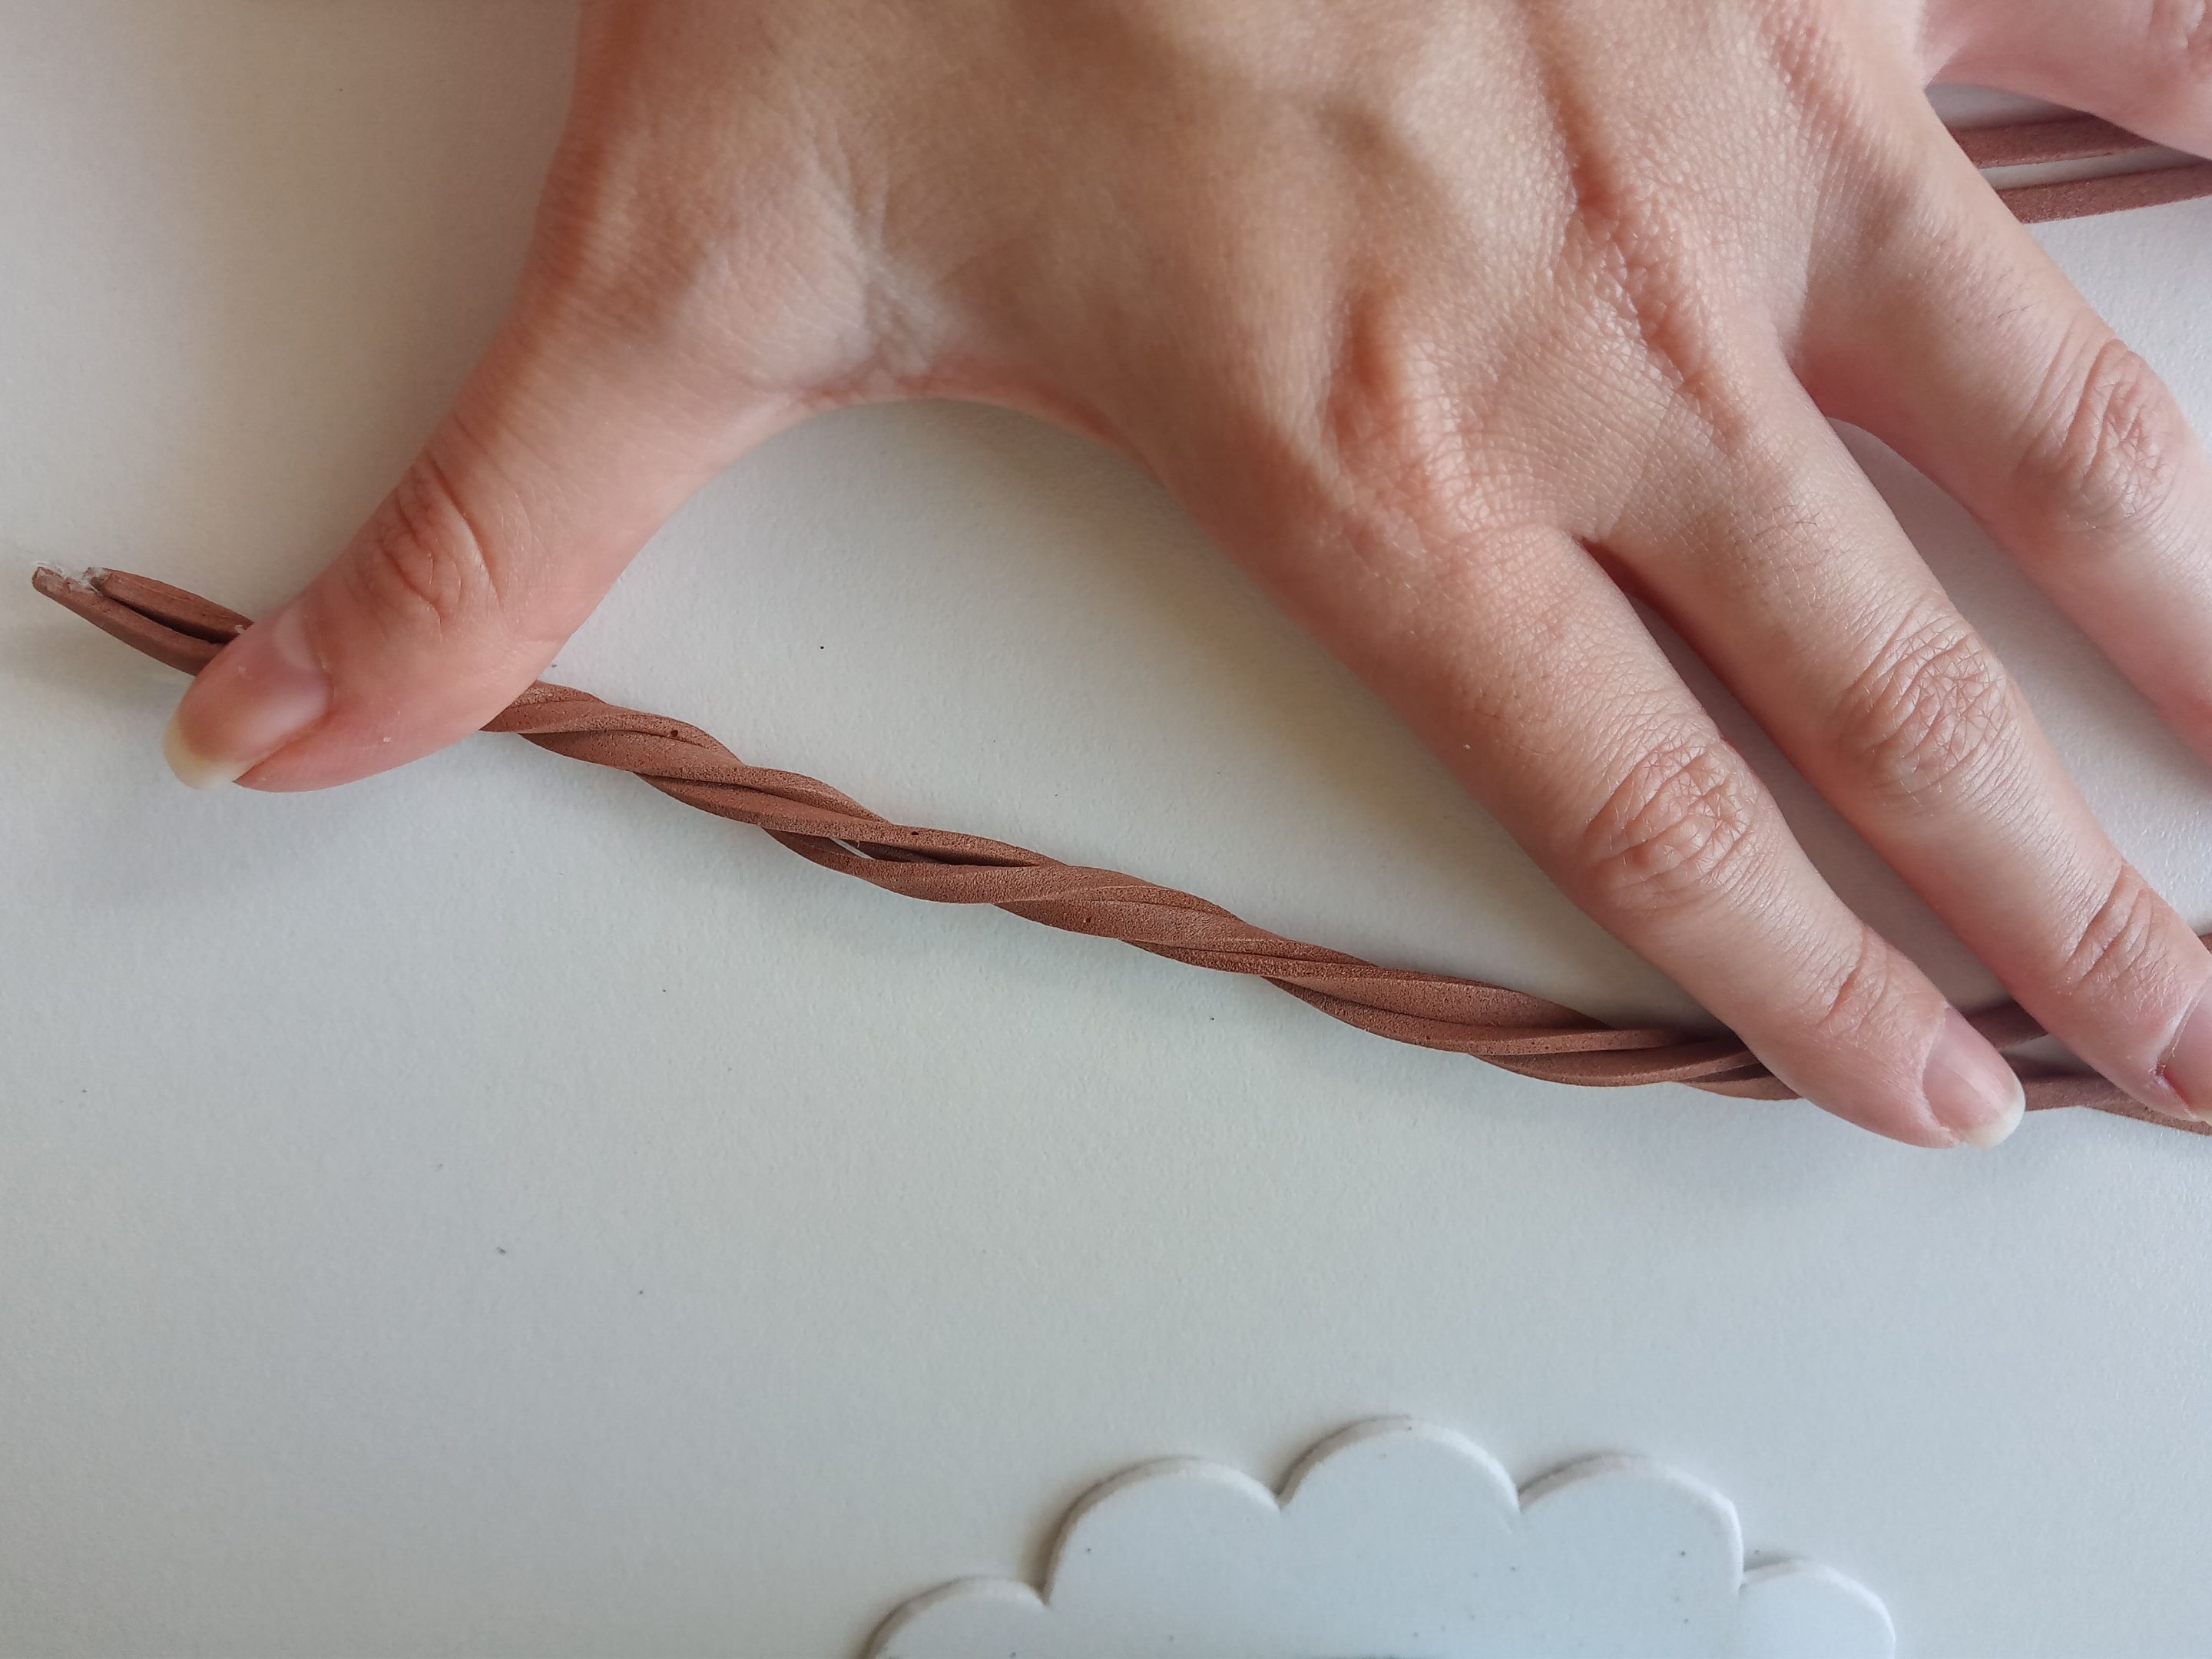
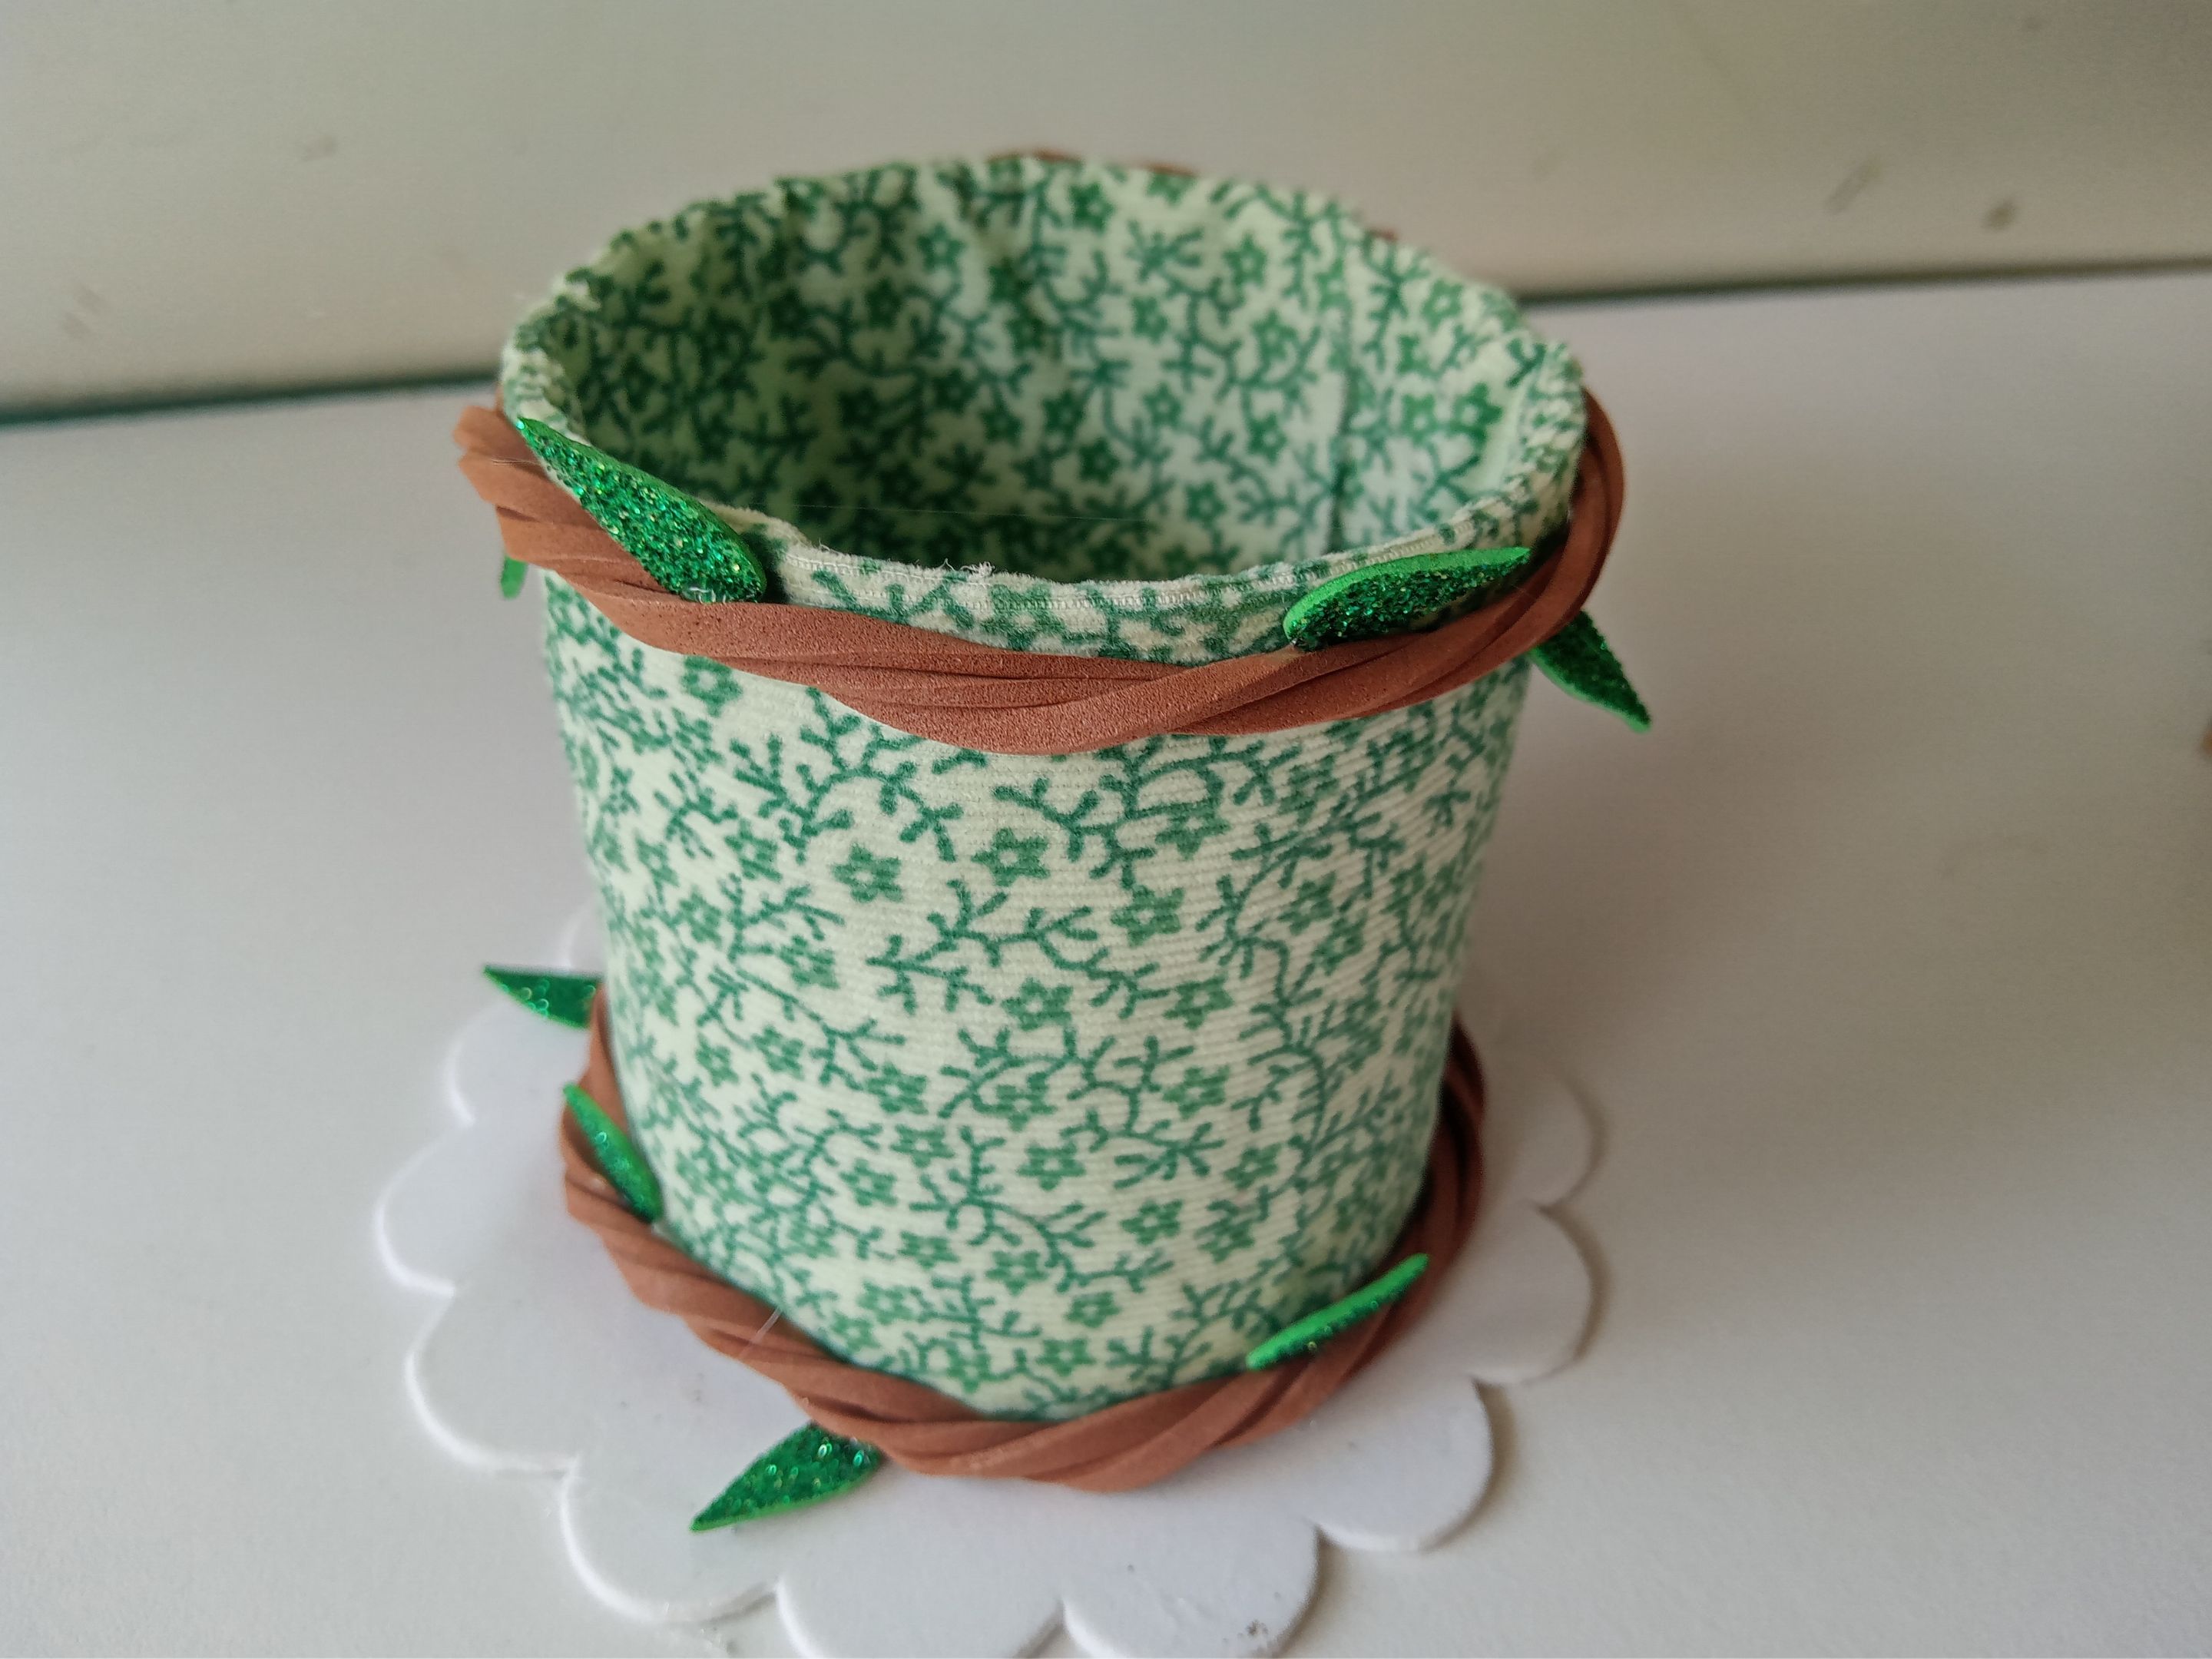
✨ PASO 4:
Ahora es momento de crear las decoraciones que, en este caso, obviamente tuve que incluir las lindas enredaderas que tienen en el cabello con algunas ramitas. Así que recorté 6 tiras delgadas en foami marrón, las cuales separé en grupos de 2, enrollé los grupos para formar 2 enredaderas y estas las pegué al borde superior e inferior del organizador. Luego, recorté 10 hojas en foami escarchado verde y pegué de forma desordenada por ambas enredaderas.
✨ STEP 4:
Now is the time to create the decorations which, in this case, obviously had to include the beautiful entanglements that are tied to the hair with some branches. Then cut 6 thin strips of brown foam, separate them into groups of 2, roll up the groups to form 2 threads and stick them to the top and bottom edges of the organizer. Luego, cut out 10 slices of green foam and place them in a disorderly manner on both plots.
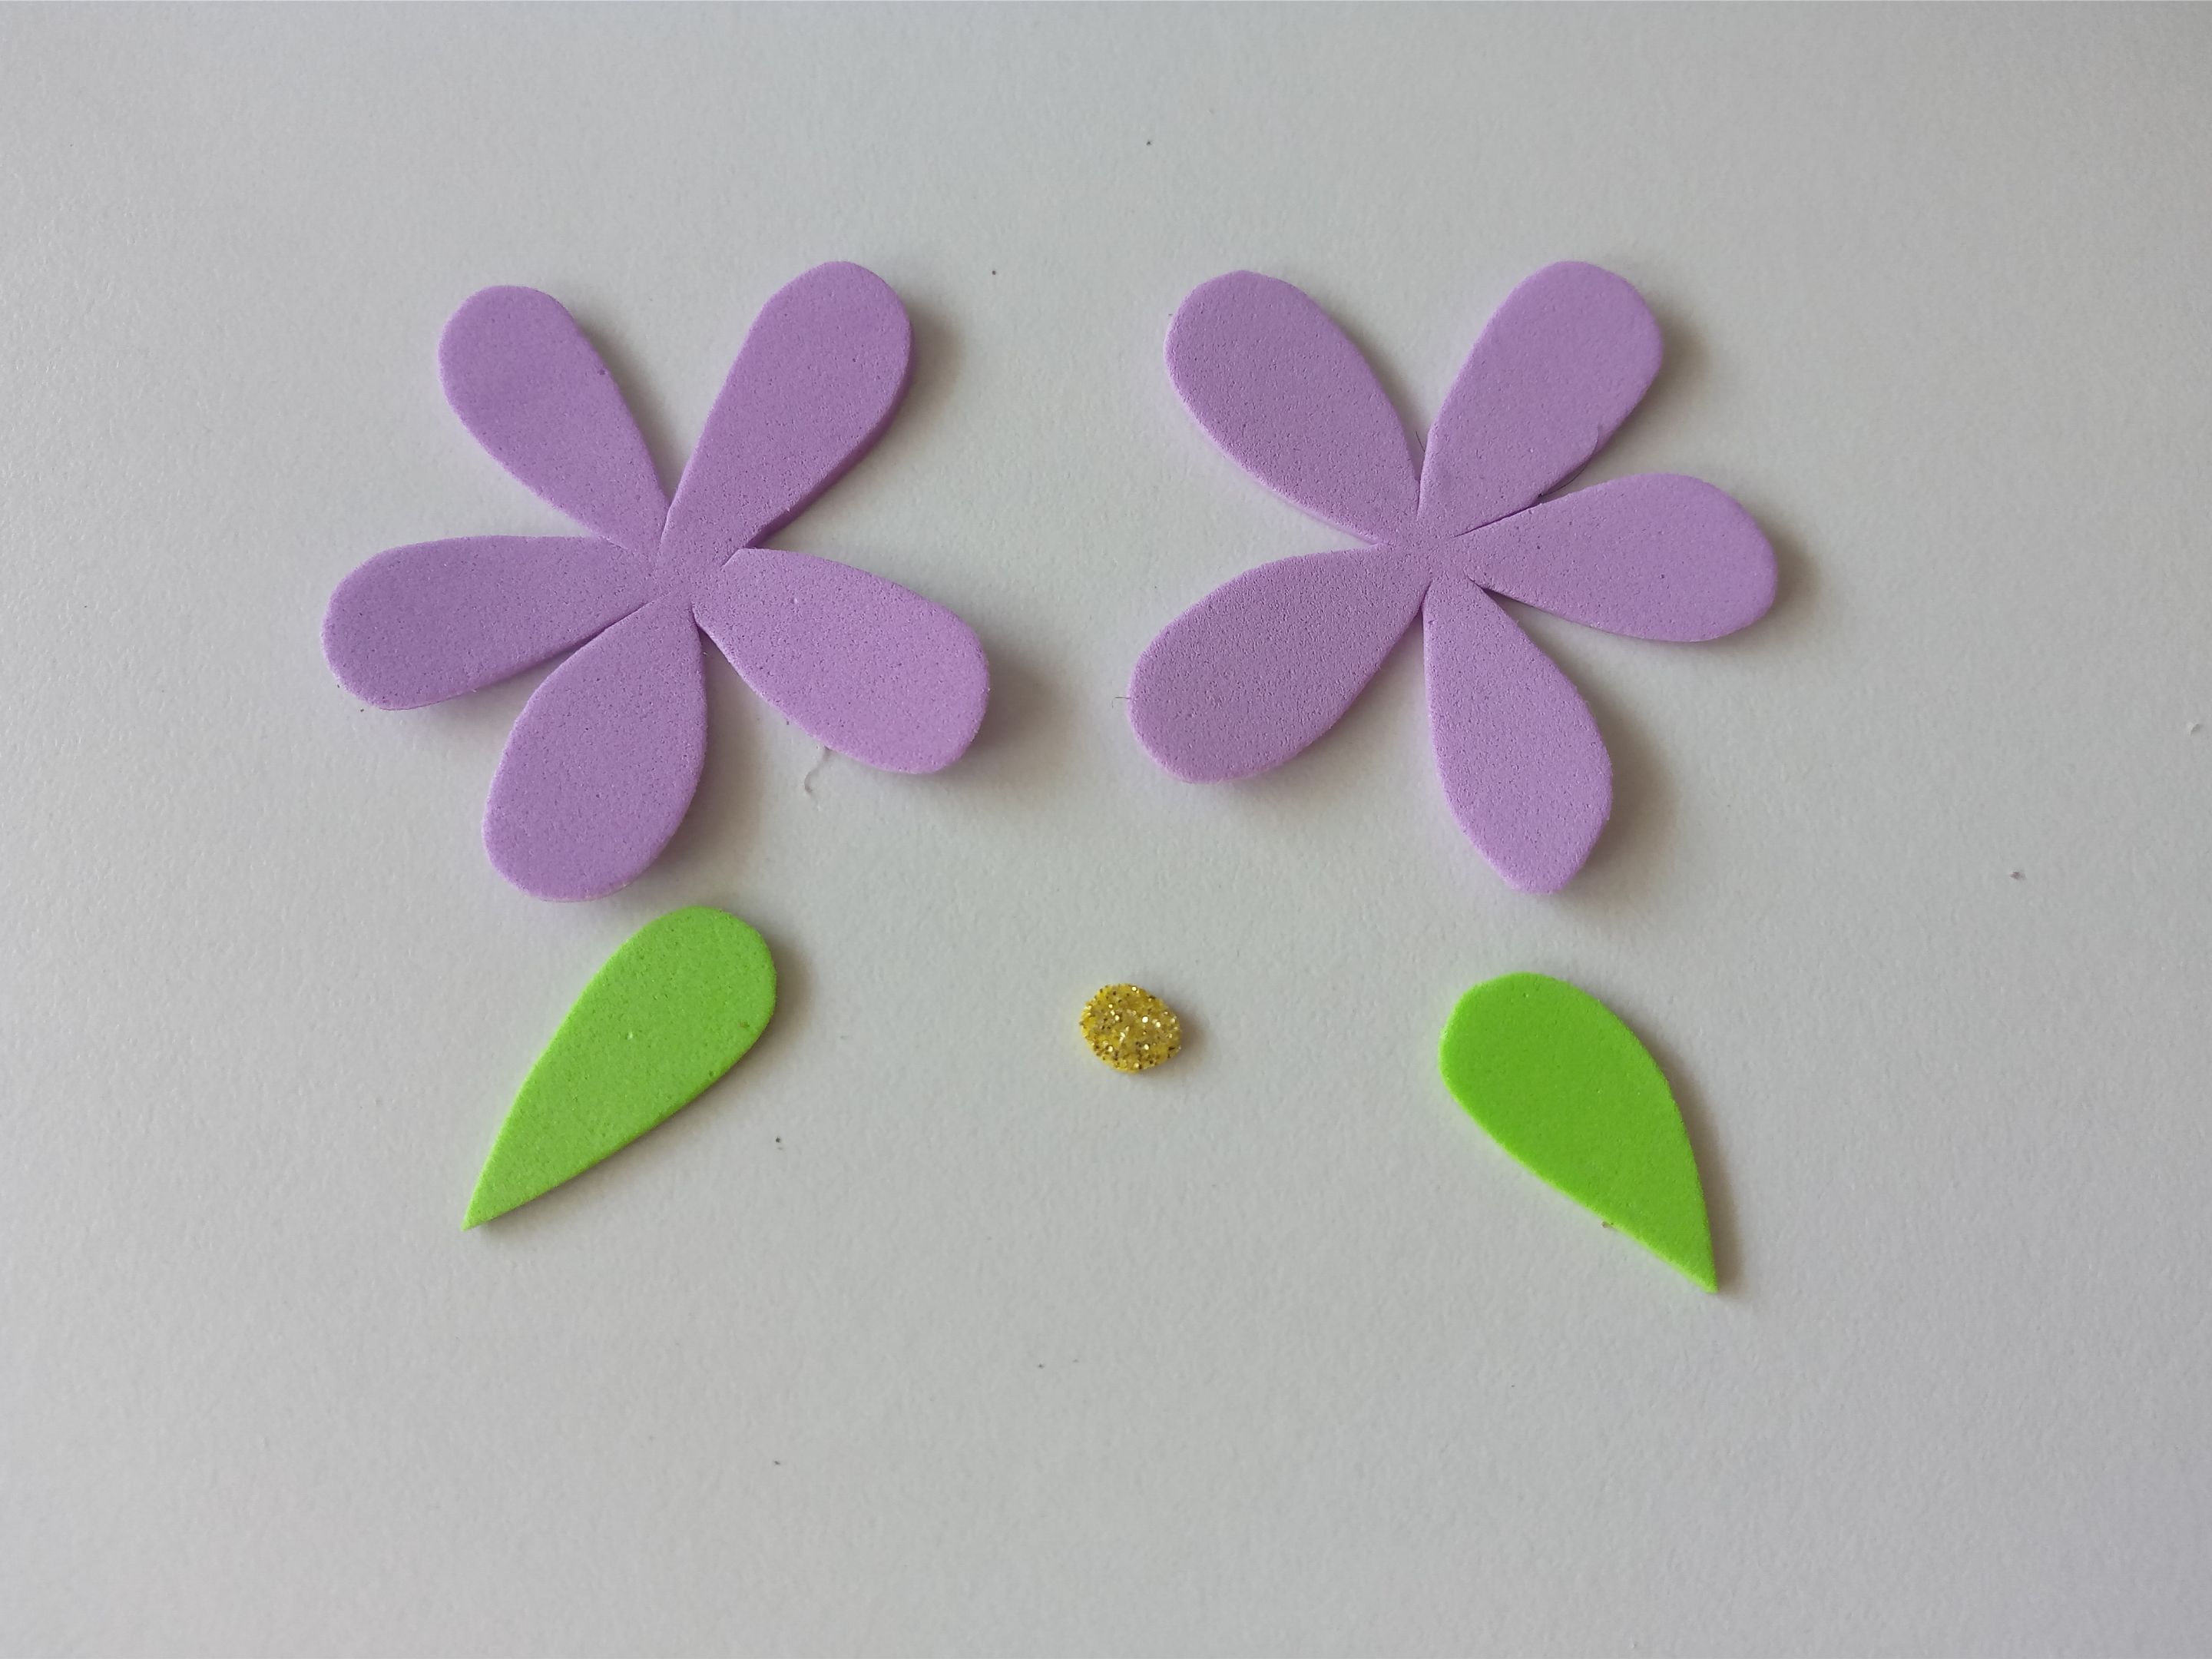
✨ PASO 5:
Ahora sí vamos con mi momento favorito, que es el resto de la decoración. En este caso dibujé el diseño de la flor que quería en la hoja blanca y lo transferí a los colores correspondientes de foami, como explico a continuación:
✨2 flores de 5 cm en foami lila.
✨4 flores de 4 cm en foami amarillo.
✨3 centros de flores en foami escarchado dorado.
✨5 hojas en foami verde.
✨ STEP 5:
Now let's go with my favorite moment, which is the rest of the decoration. In this case, I created the design of the flower I wanted on the white sheet and transferred it to the corresponding colors of foam, as I explain below:
✨2 flowers measuring 5 cm in lilac foam.
✨4 flowers measuring 4 cm in yellow foam.
✨3 flower centers in gold-colored foami.
✨5 leaves in green foami.
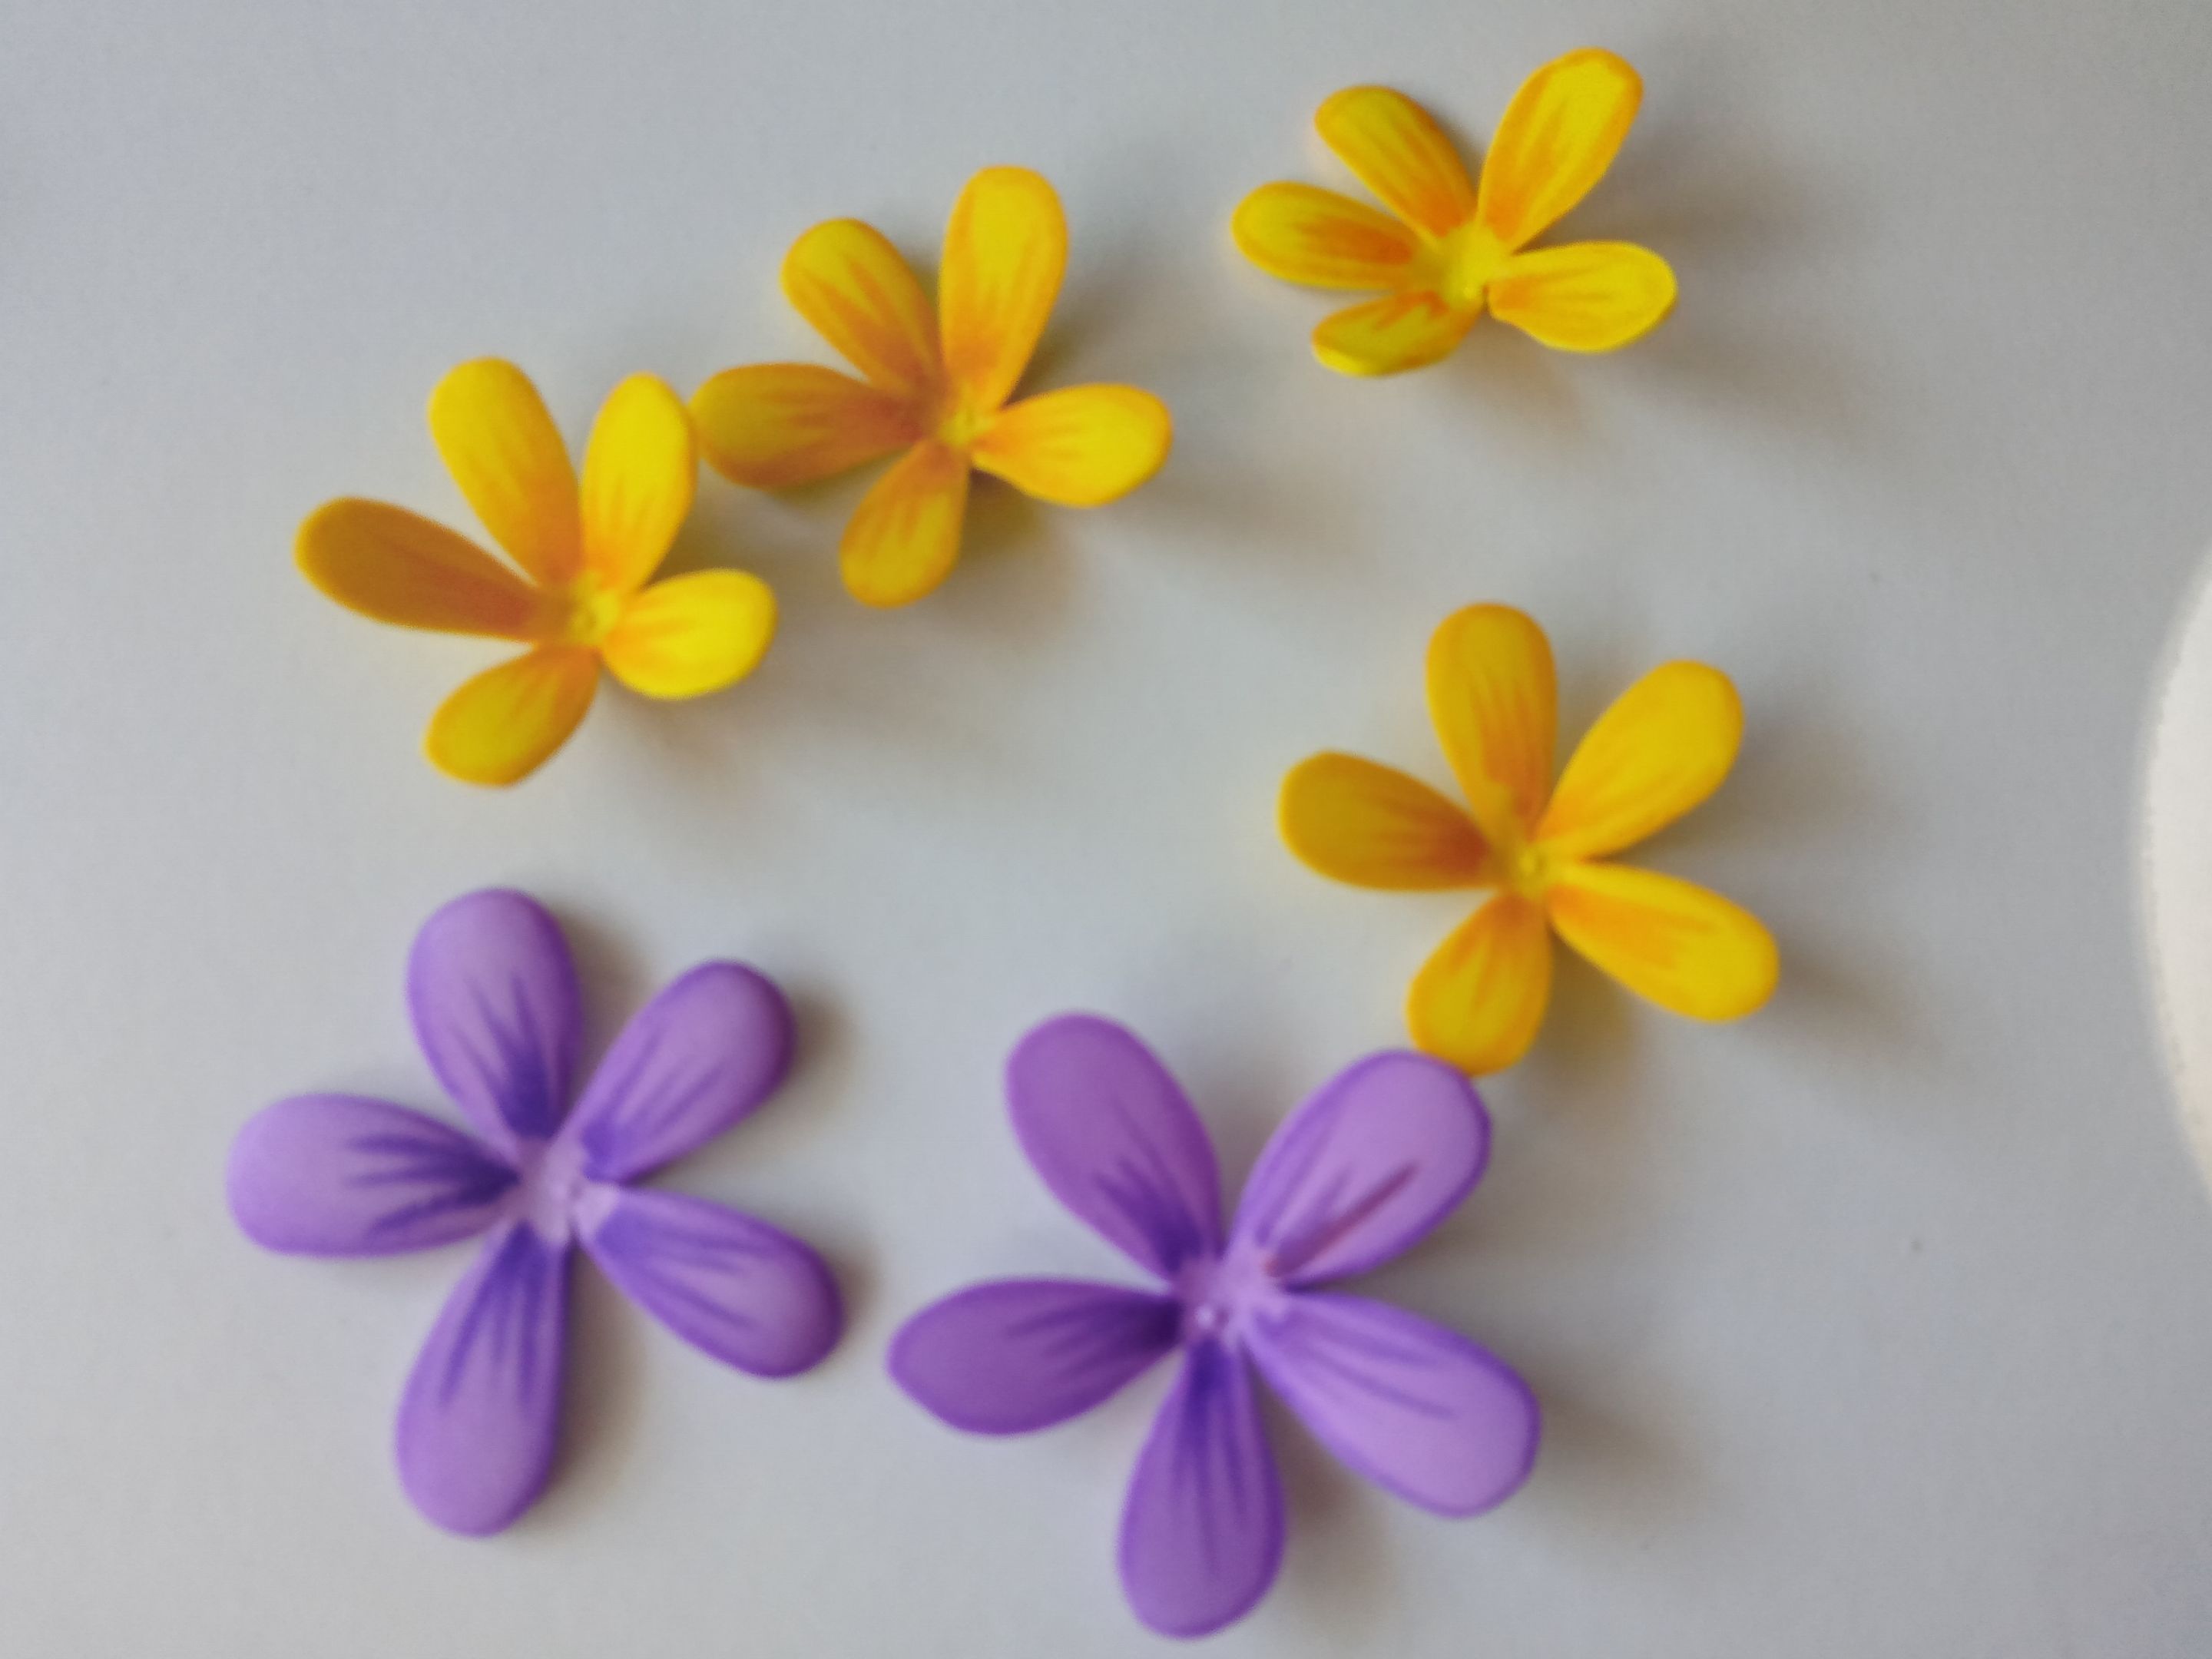
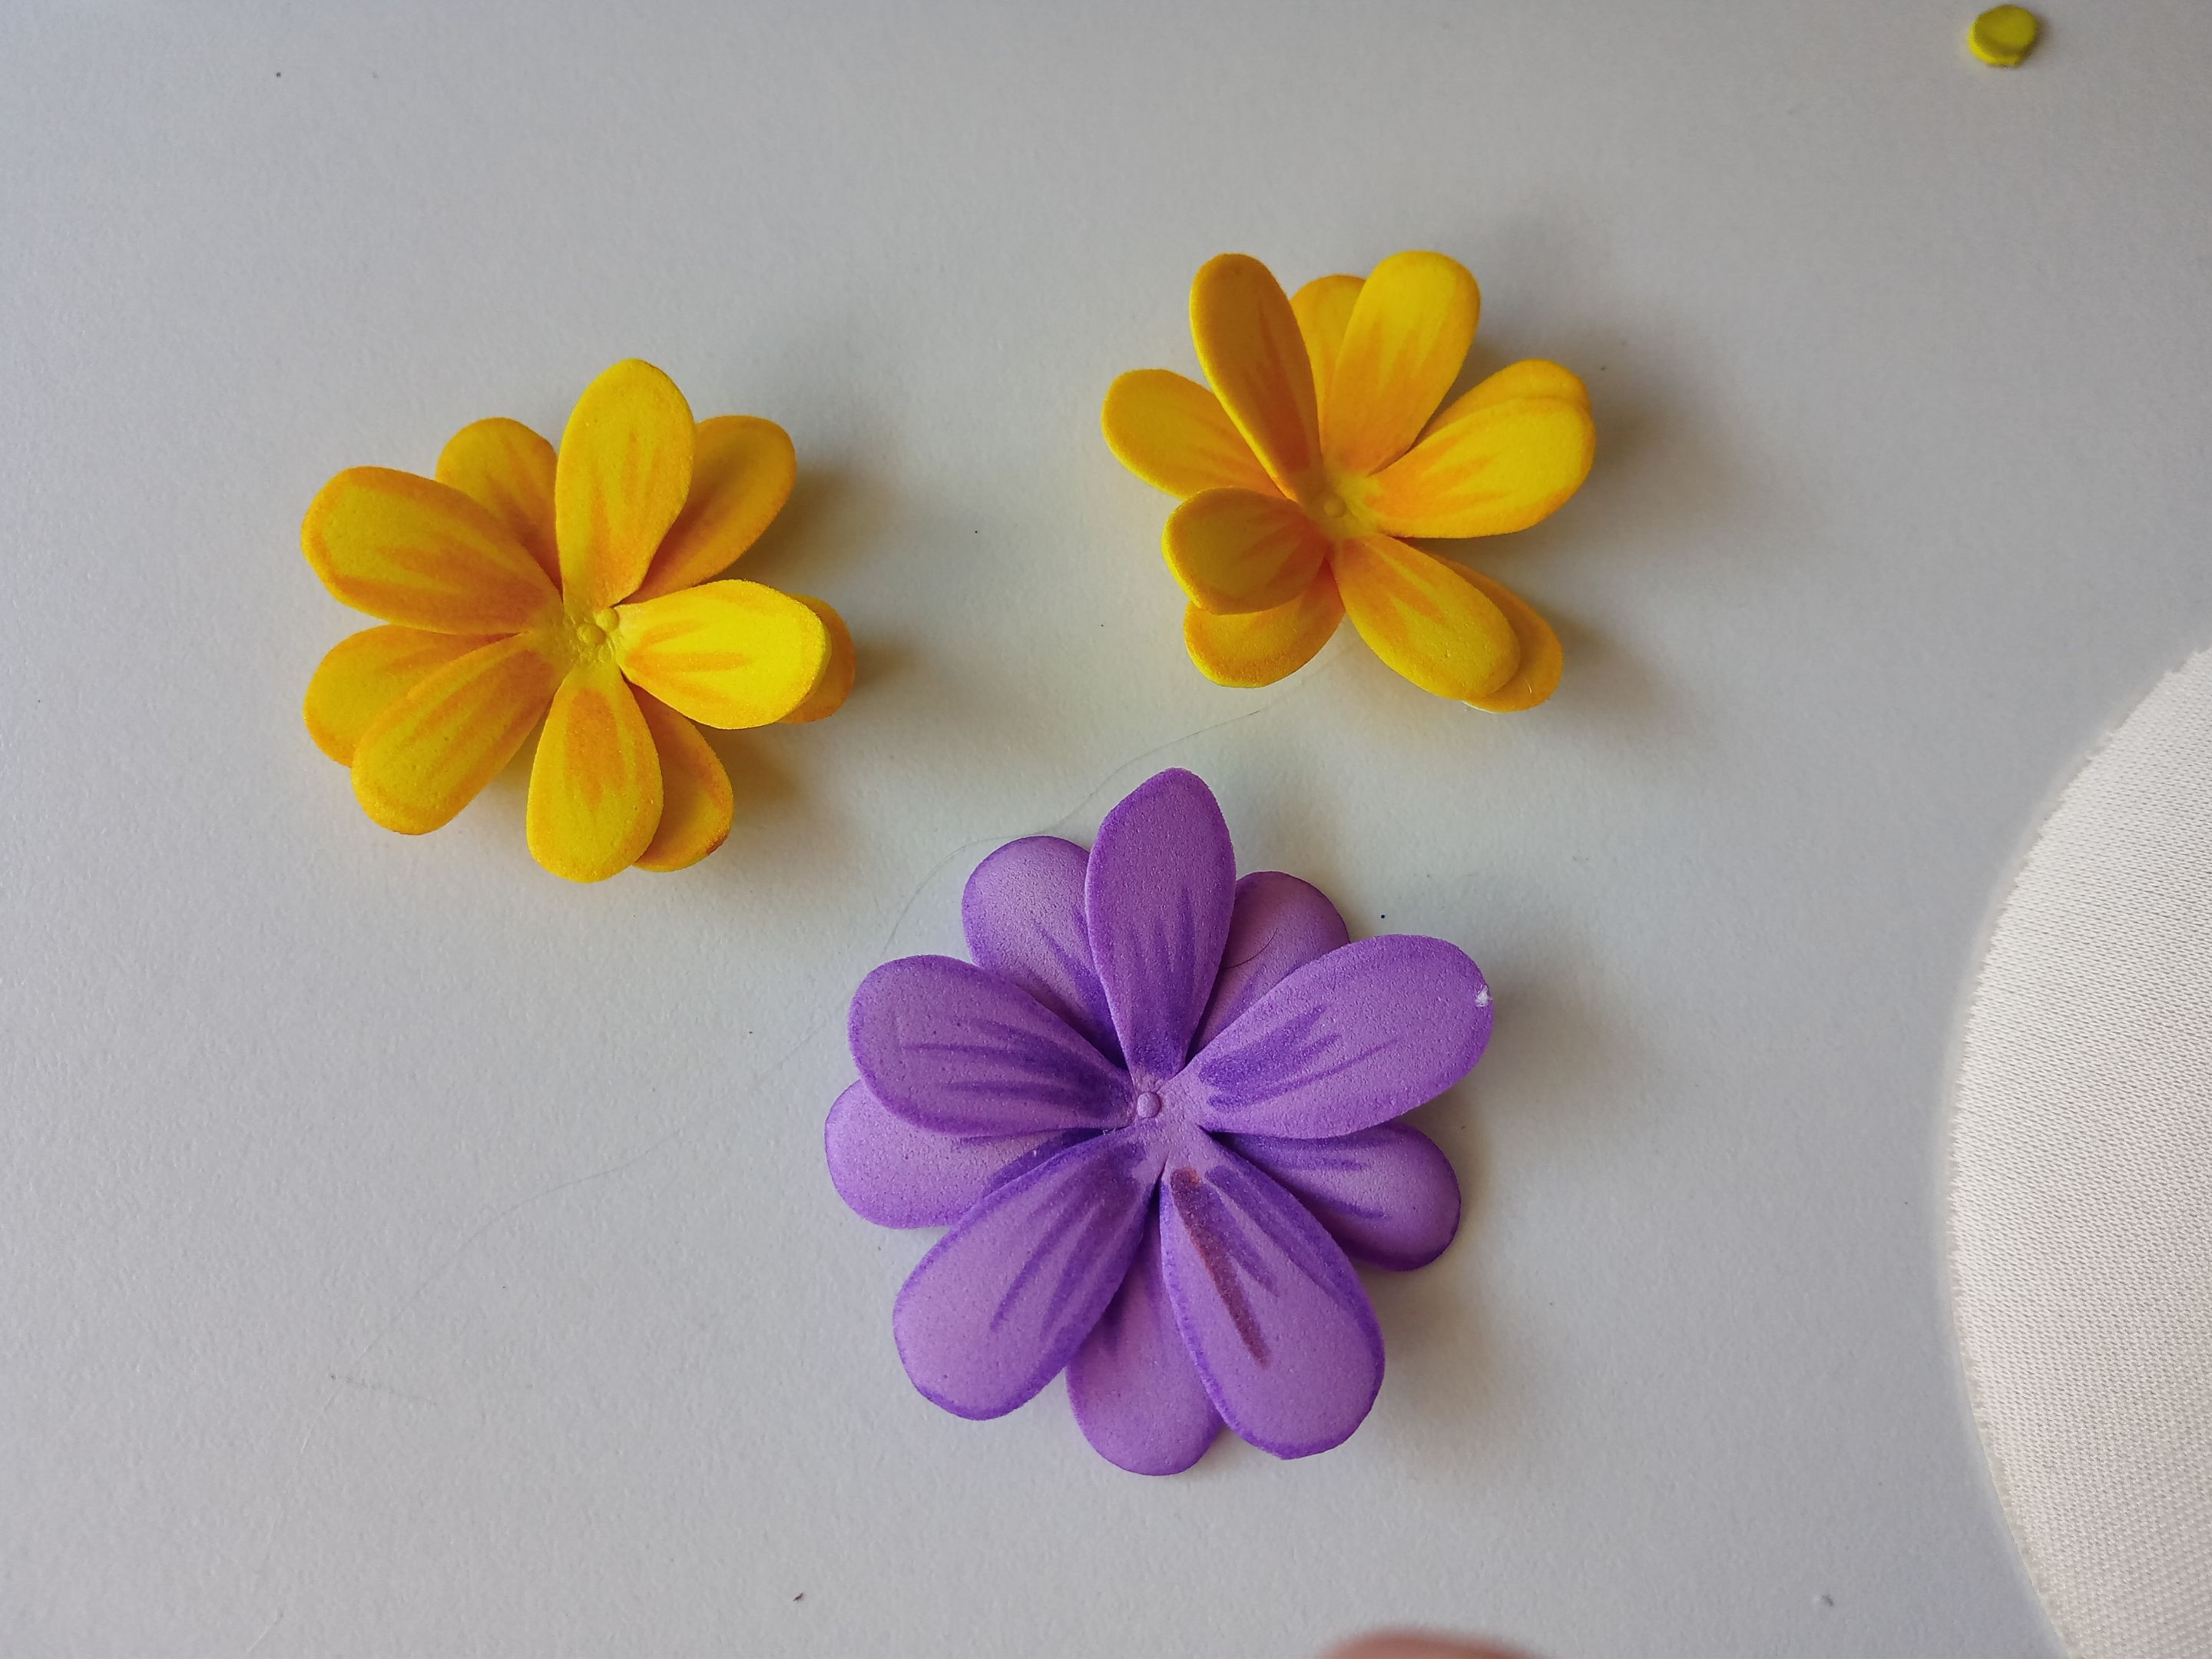
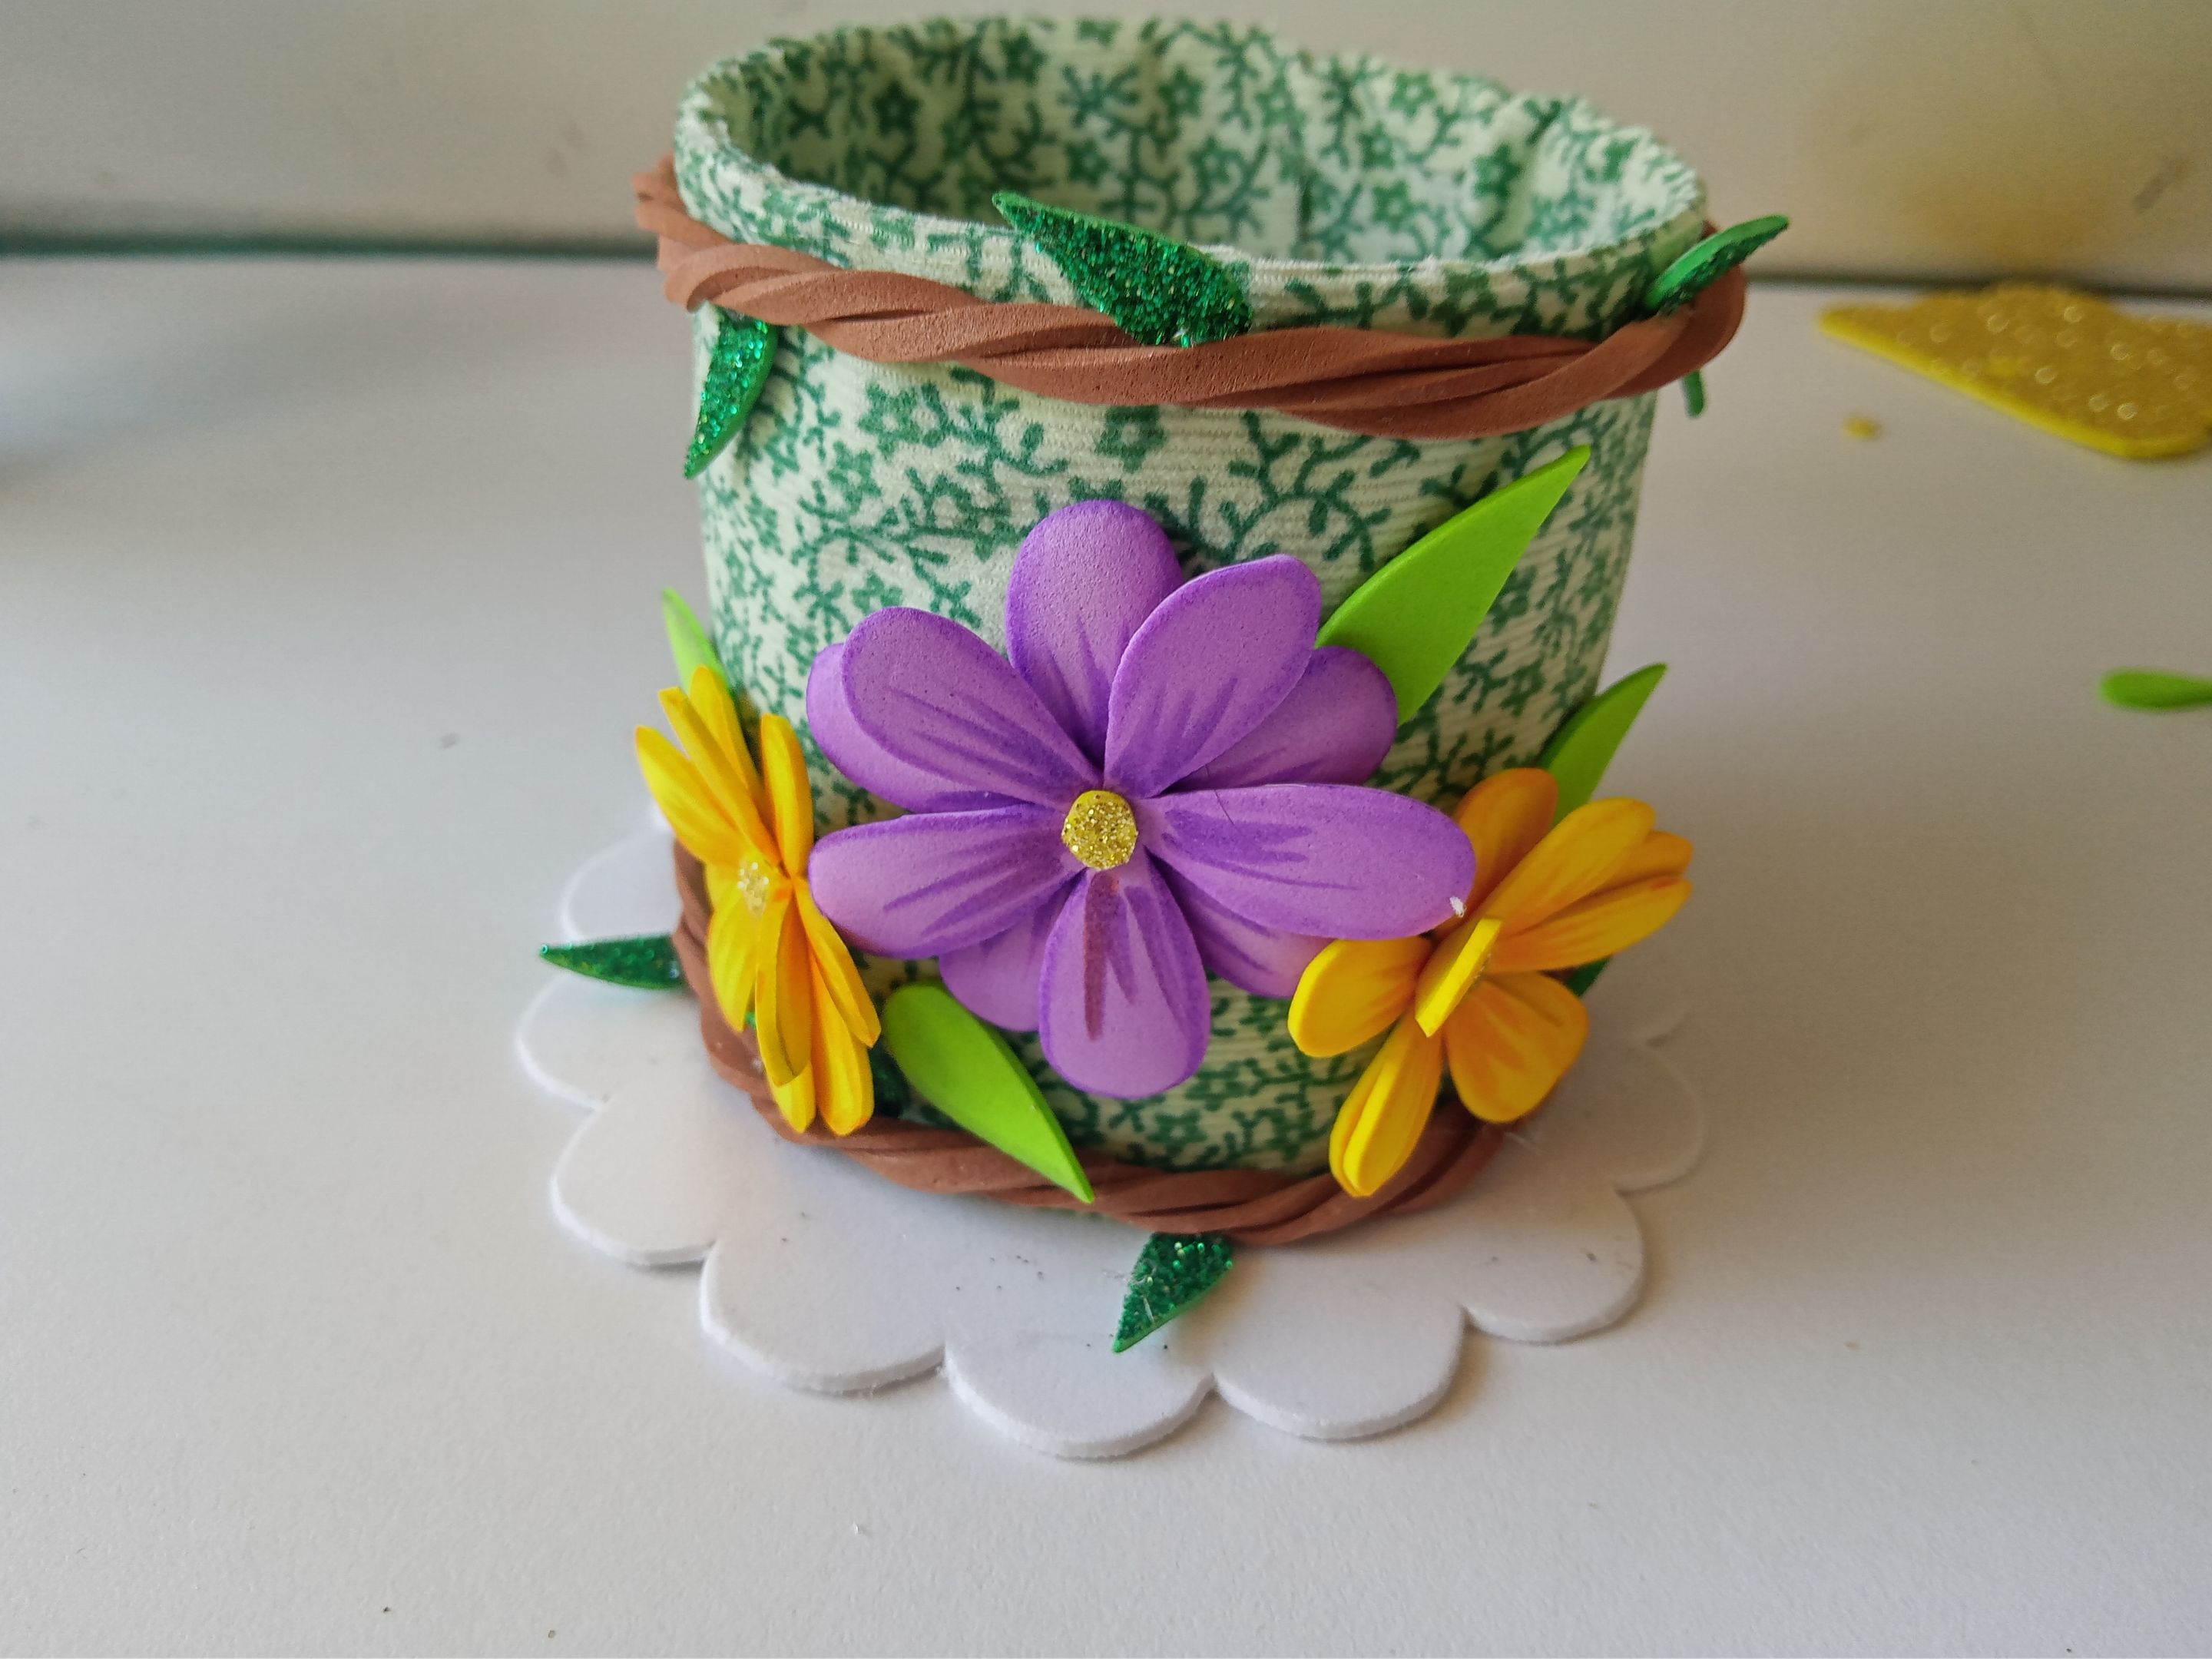
✨ PASO 6:
Seguidamente, di color a los bordes de todas las piezas con pinturas o marcadores. Dejé secar y di detalles más específicos a los pétalos con marcadores del mismo color. Al estar listos, coloqué sobre la plancha, retiré, aplasté en medio y pegué las piezas del mismo color hasta tener solo 3 flores, pegué el resto de las piezas y de ahí, pegué en el orden deseado junto con las hojas en medio del organizador.
✨ STEP 6:
Then, color the edges of all the pieces with paint or markers. Let it dry and add more specific details to the petals with markers of the same color. Once ready, place on the plank, remove, flatten in the middle and pick up the pieces of the same color until you have 3 flowers, pick up the rest of the pieces and from there, pick up in the desired order along with the leaves in the middle of the organizer.
❤️ Hasta la próxima publicación.
❤️ Until the next post.

**!TE DESEO UN GRAN DÏA¡**
Todas las fotografías son de mi propiedad.
Separador y Fotos editadas en [Canva](https://www.canva.com/)
**!I WISH YOU A GOOD DAY**
All photographs are my property.
Photos edited in [Canva](https://www.canva.com/)