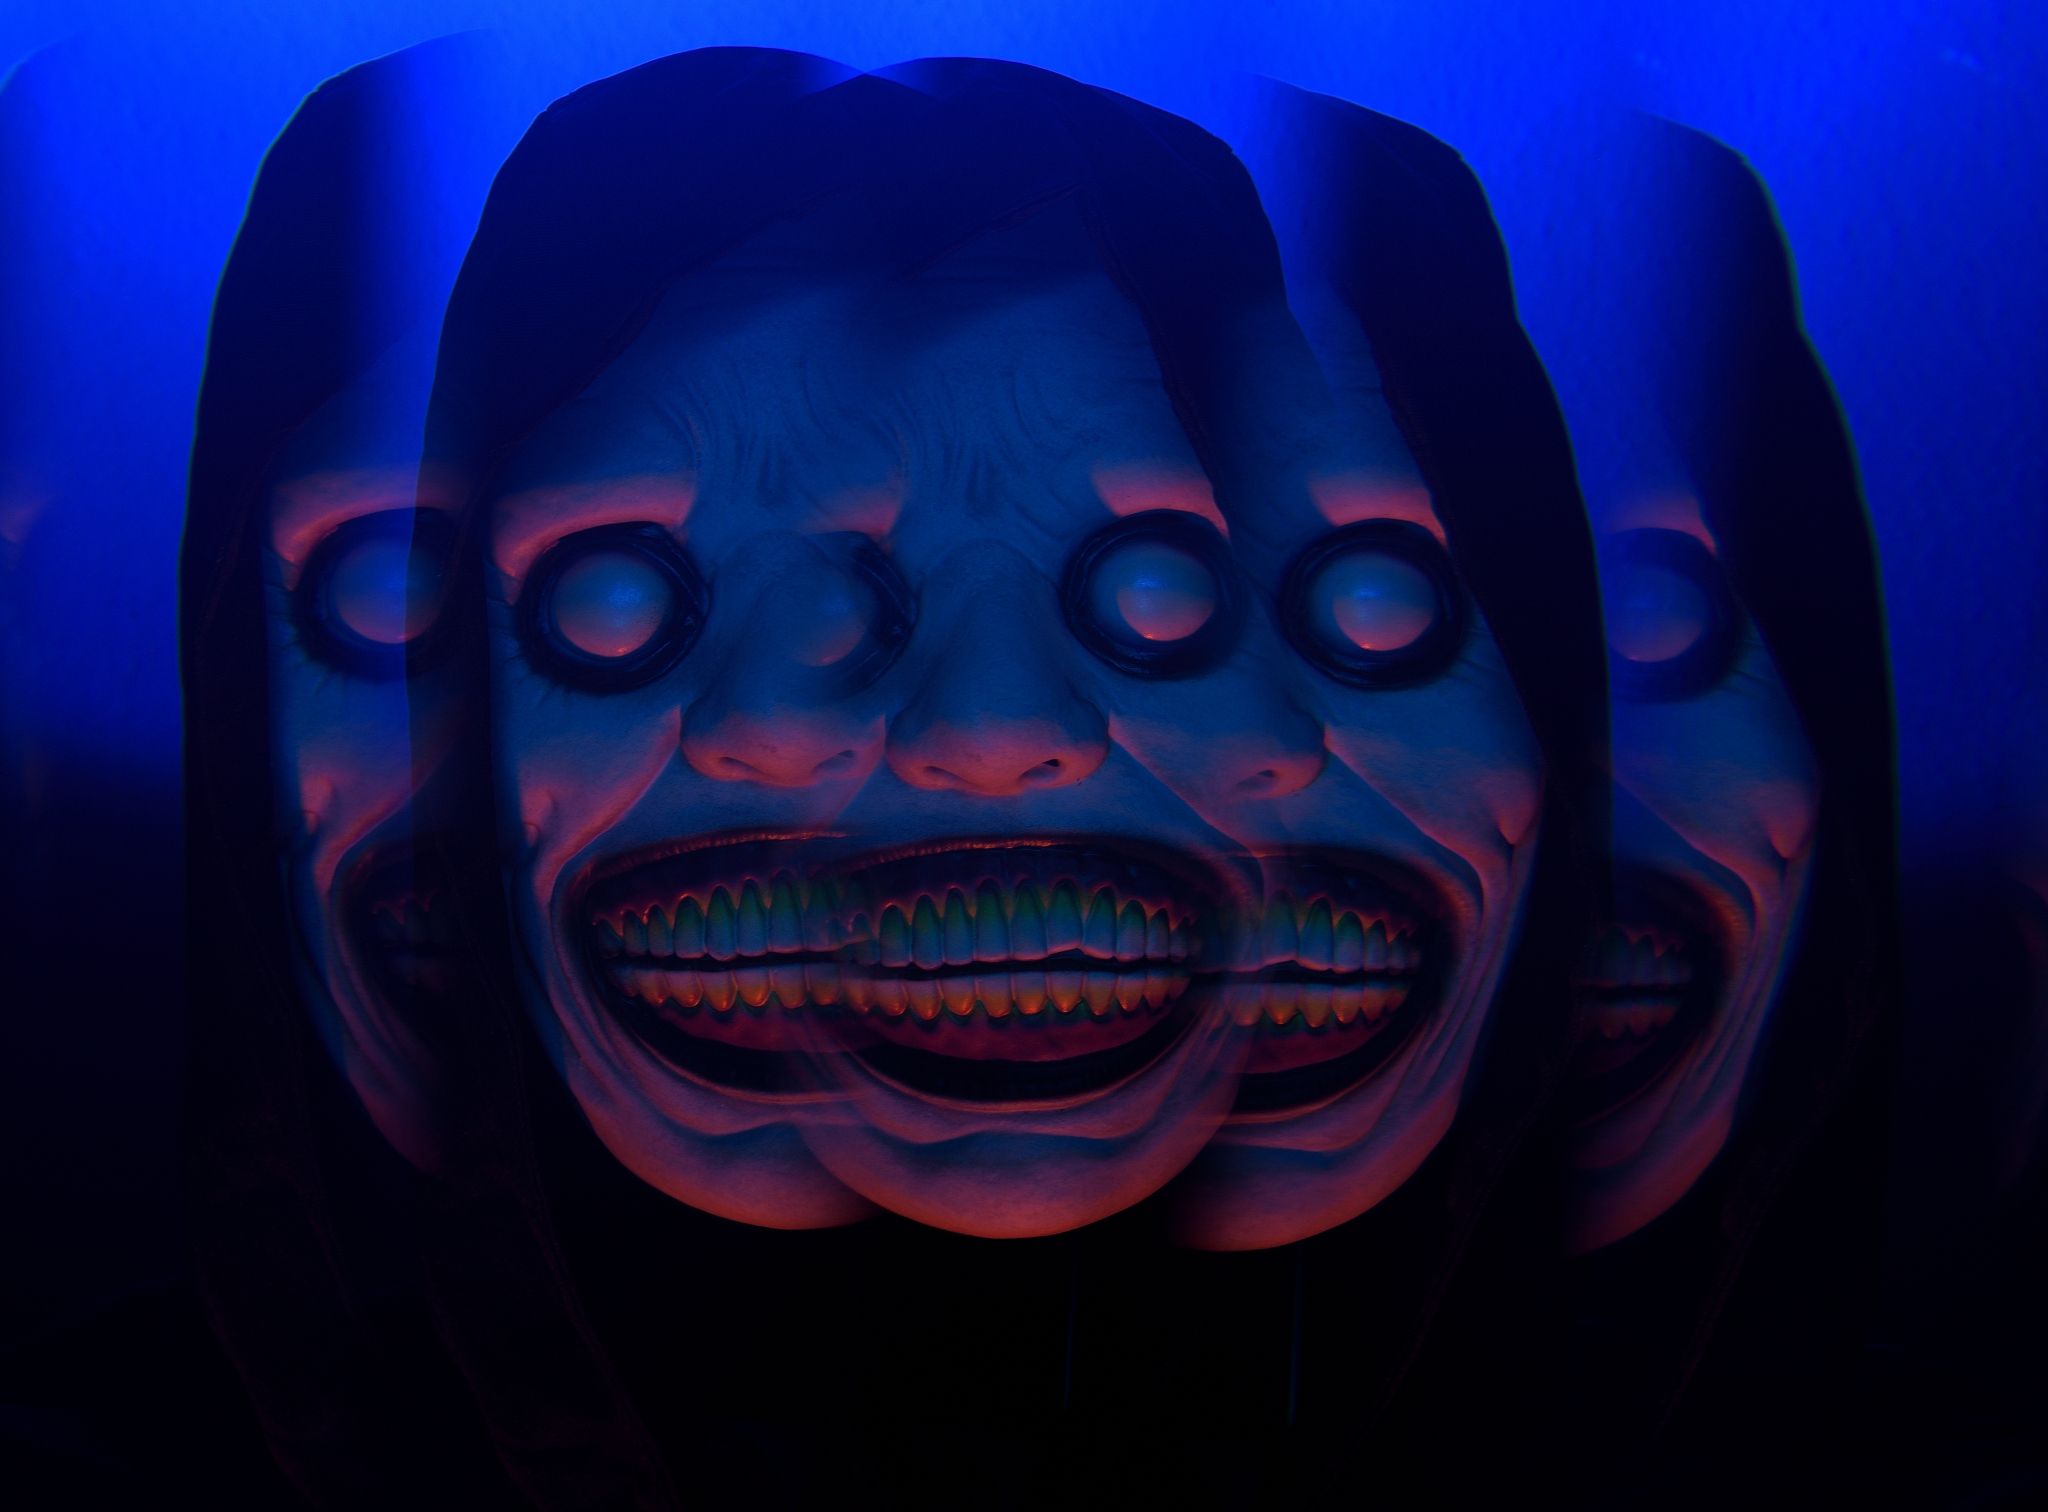
 Nikon D750 | ISO 100 | Sigma 28-70 mm @f/16 | 105 sec. exposure time
 Good afternoon, friends of cultivated light art photography.
Guten Tag, Freunde der gepflegten Lichtkunst-Fotografie.

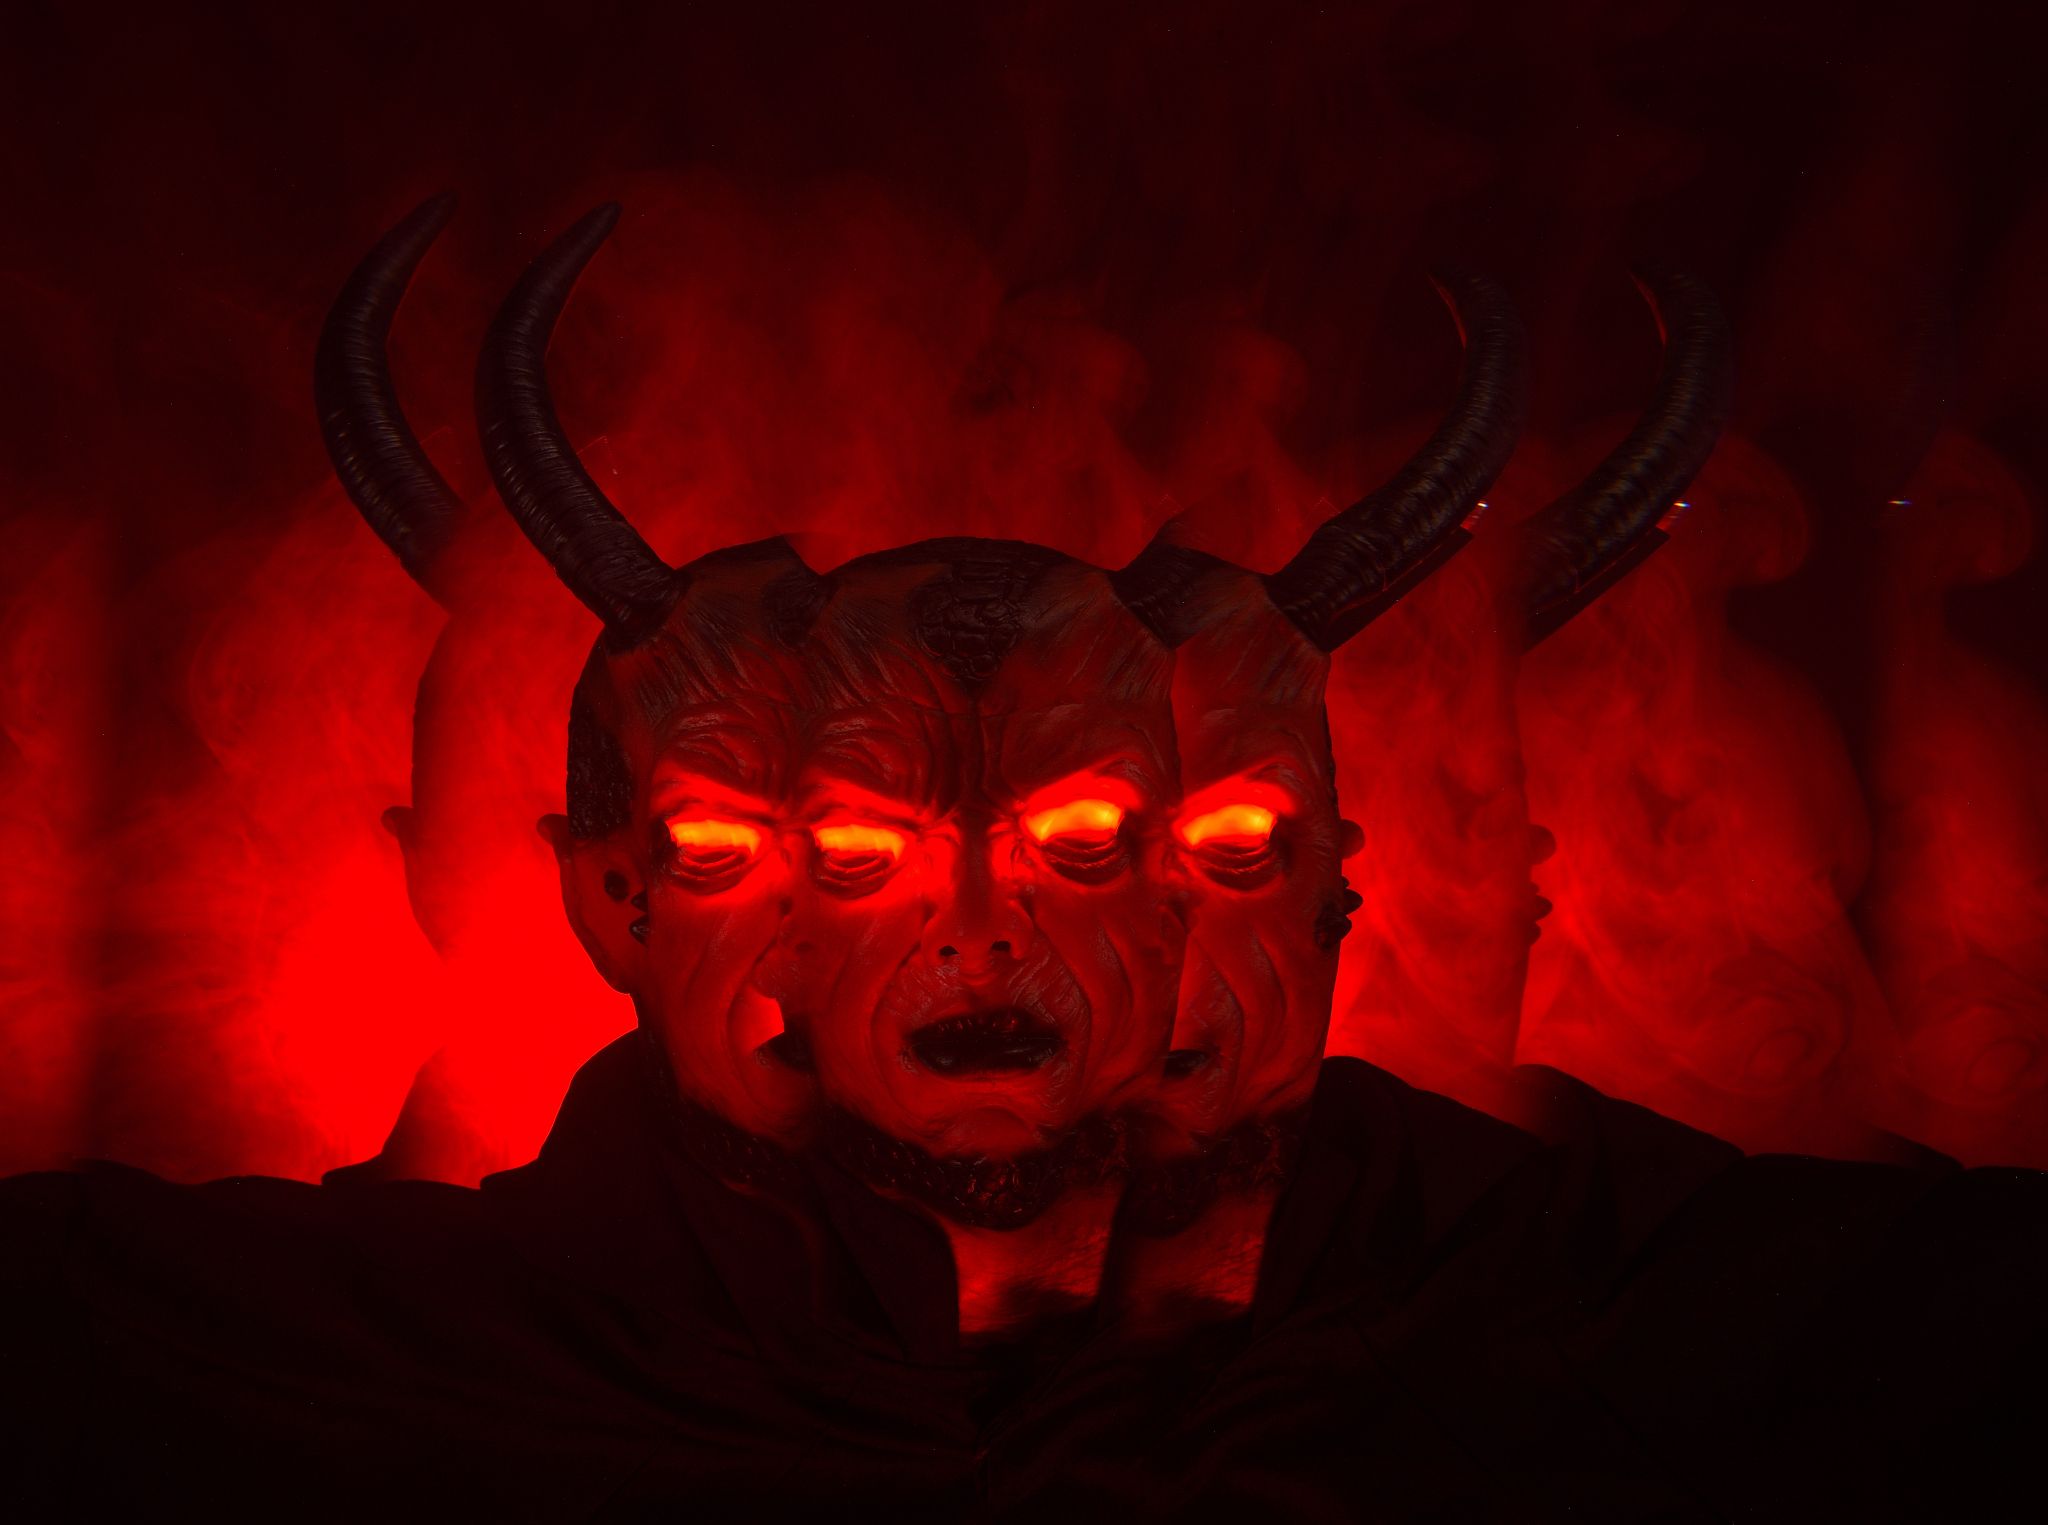
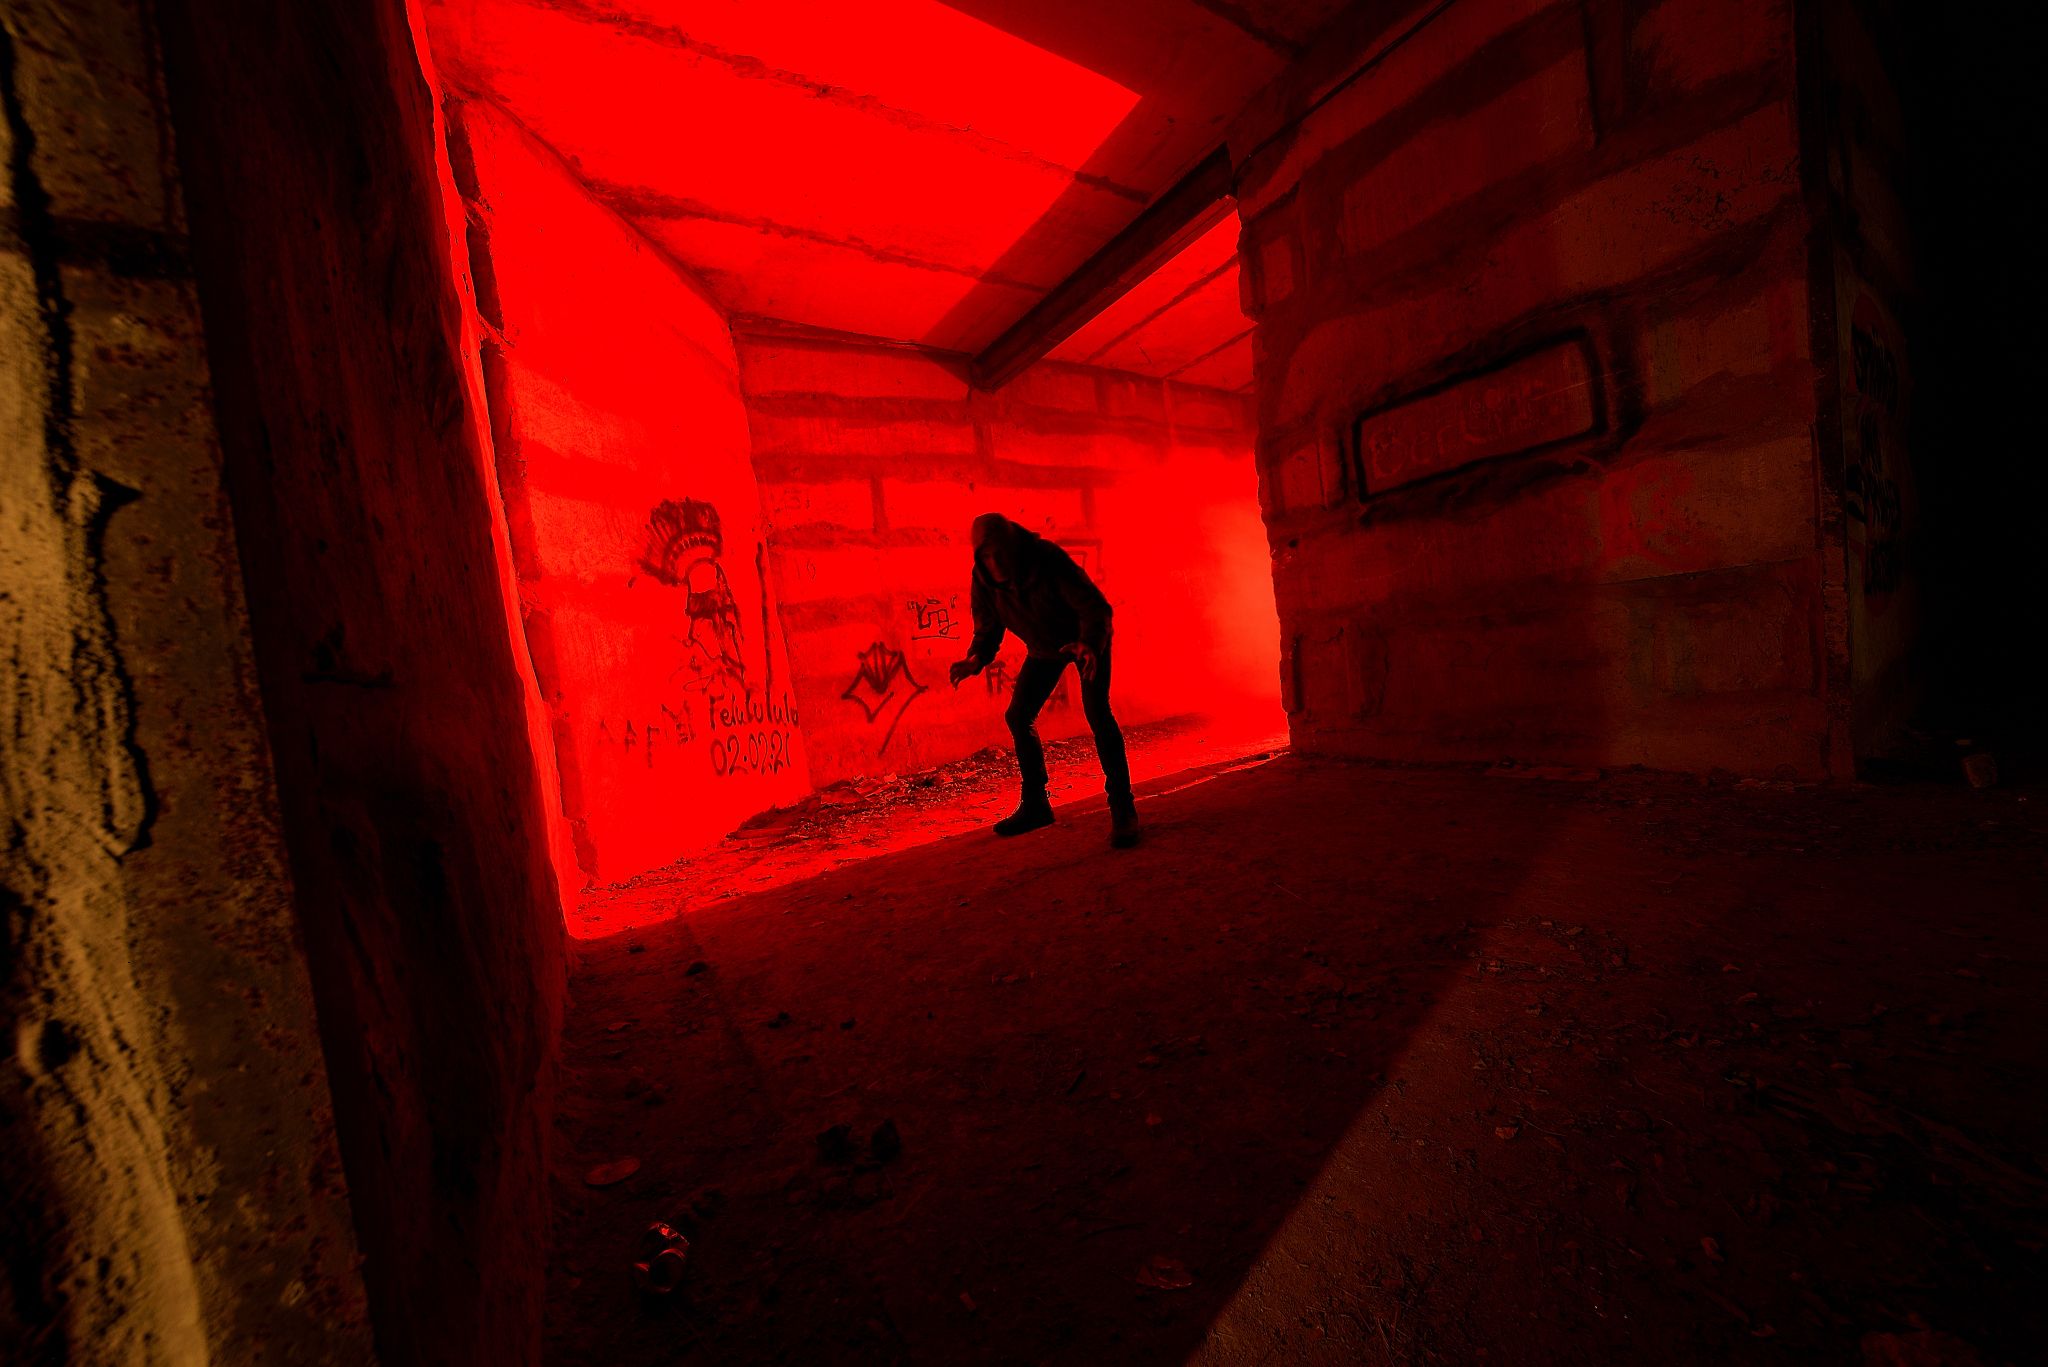
The cover image was taken in my studio. Once again, I used a cheap and willing model who not only keeps still during the exposure, but also doesn't talk. Very pleasant! I bought the devil with the horns from a trusted Asian overseas. When I started to set up the set for it, I noticed that the latex mask with the horns was not very stable. The face fell in and the horns were hanging somewhere. In between, the good devil looked more like a bull. So I had to use Udo, the dead skull. I stuffed the horns with cotton wool. I placed the dead skull with the mask on a tripod. To cover it up, I had to give the nice devil a black cape. I created the broad shoulders with styrofoam in the cape. Before, the fellow looked a bit starved.
Das Titelbild entstand in meinem Studio. Zum Einsatz kam wieder ein billiges und williges Model, was während der Belichtung nicht nur still hält, sondern auch nicht redet. Sehr angenehm! Den Teufel mit den Hörner habe ich käuflich bei einem Asiaten meines Vertrauens in Übersee erworben. Als ich angefangen habe das Set dafür einzurichten, bemerkte ich, dass die Latexmaske mit den Hörner nicht besonders stabil war. Das Gesicht viel ein und die Hörner hingen irgendwo. Zwischendurch sah der gute Teufel eher aus wie ein Stier. Also musste Udo, der tote Totenkopf ran. Die Hörner habe ich zusätzlich mit Watte ausgestopft. Den toten Todenkopf mit der Maske habe ich auf einem Stativ platziert. Um dieses zu verdecken, musste ich dem netten Teufel noch einen schwarzen Umhang verpassen. Die breiten Schultern habe ich mit Styropor im Umhang erzeugt. Vorher sah der Bursche etwas verhungert aus.
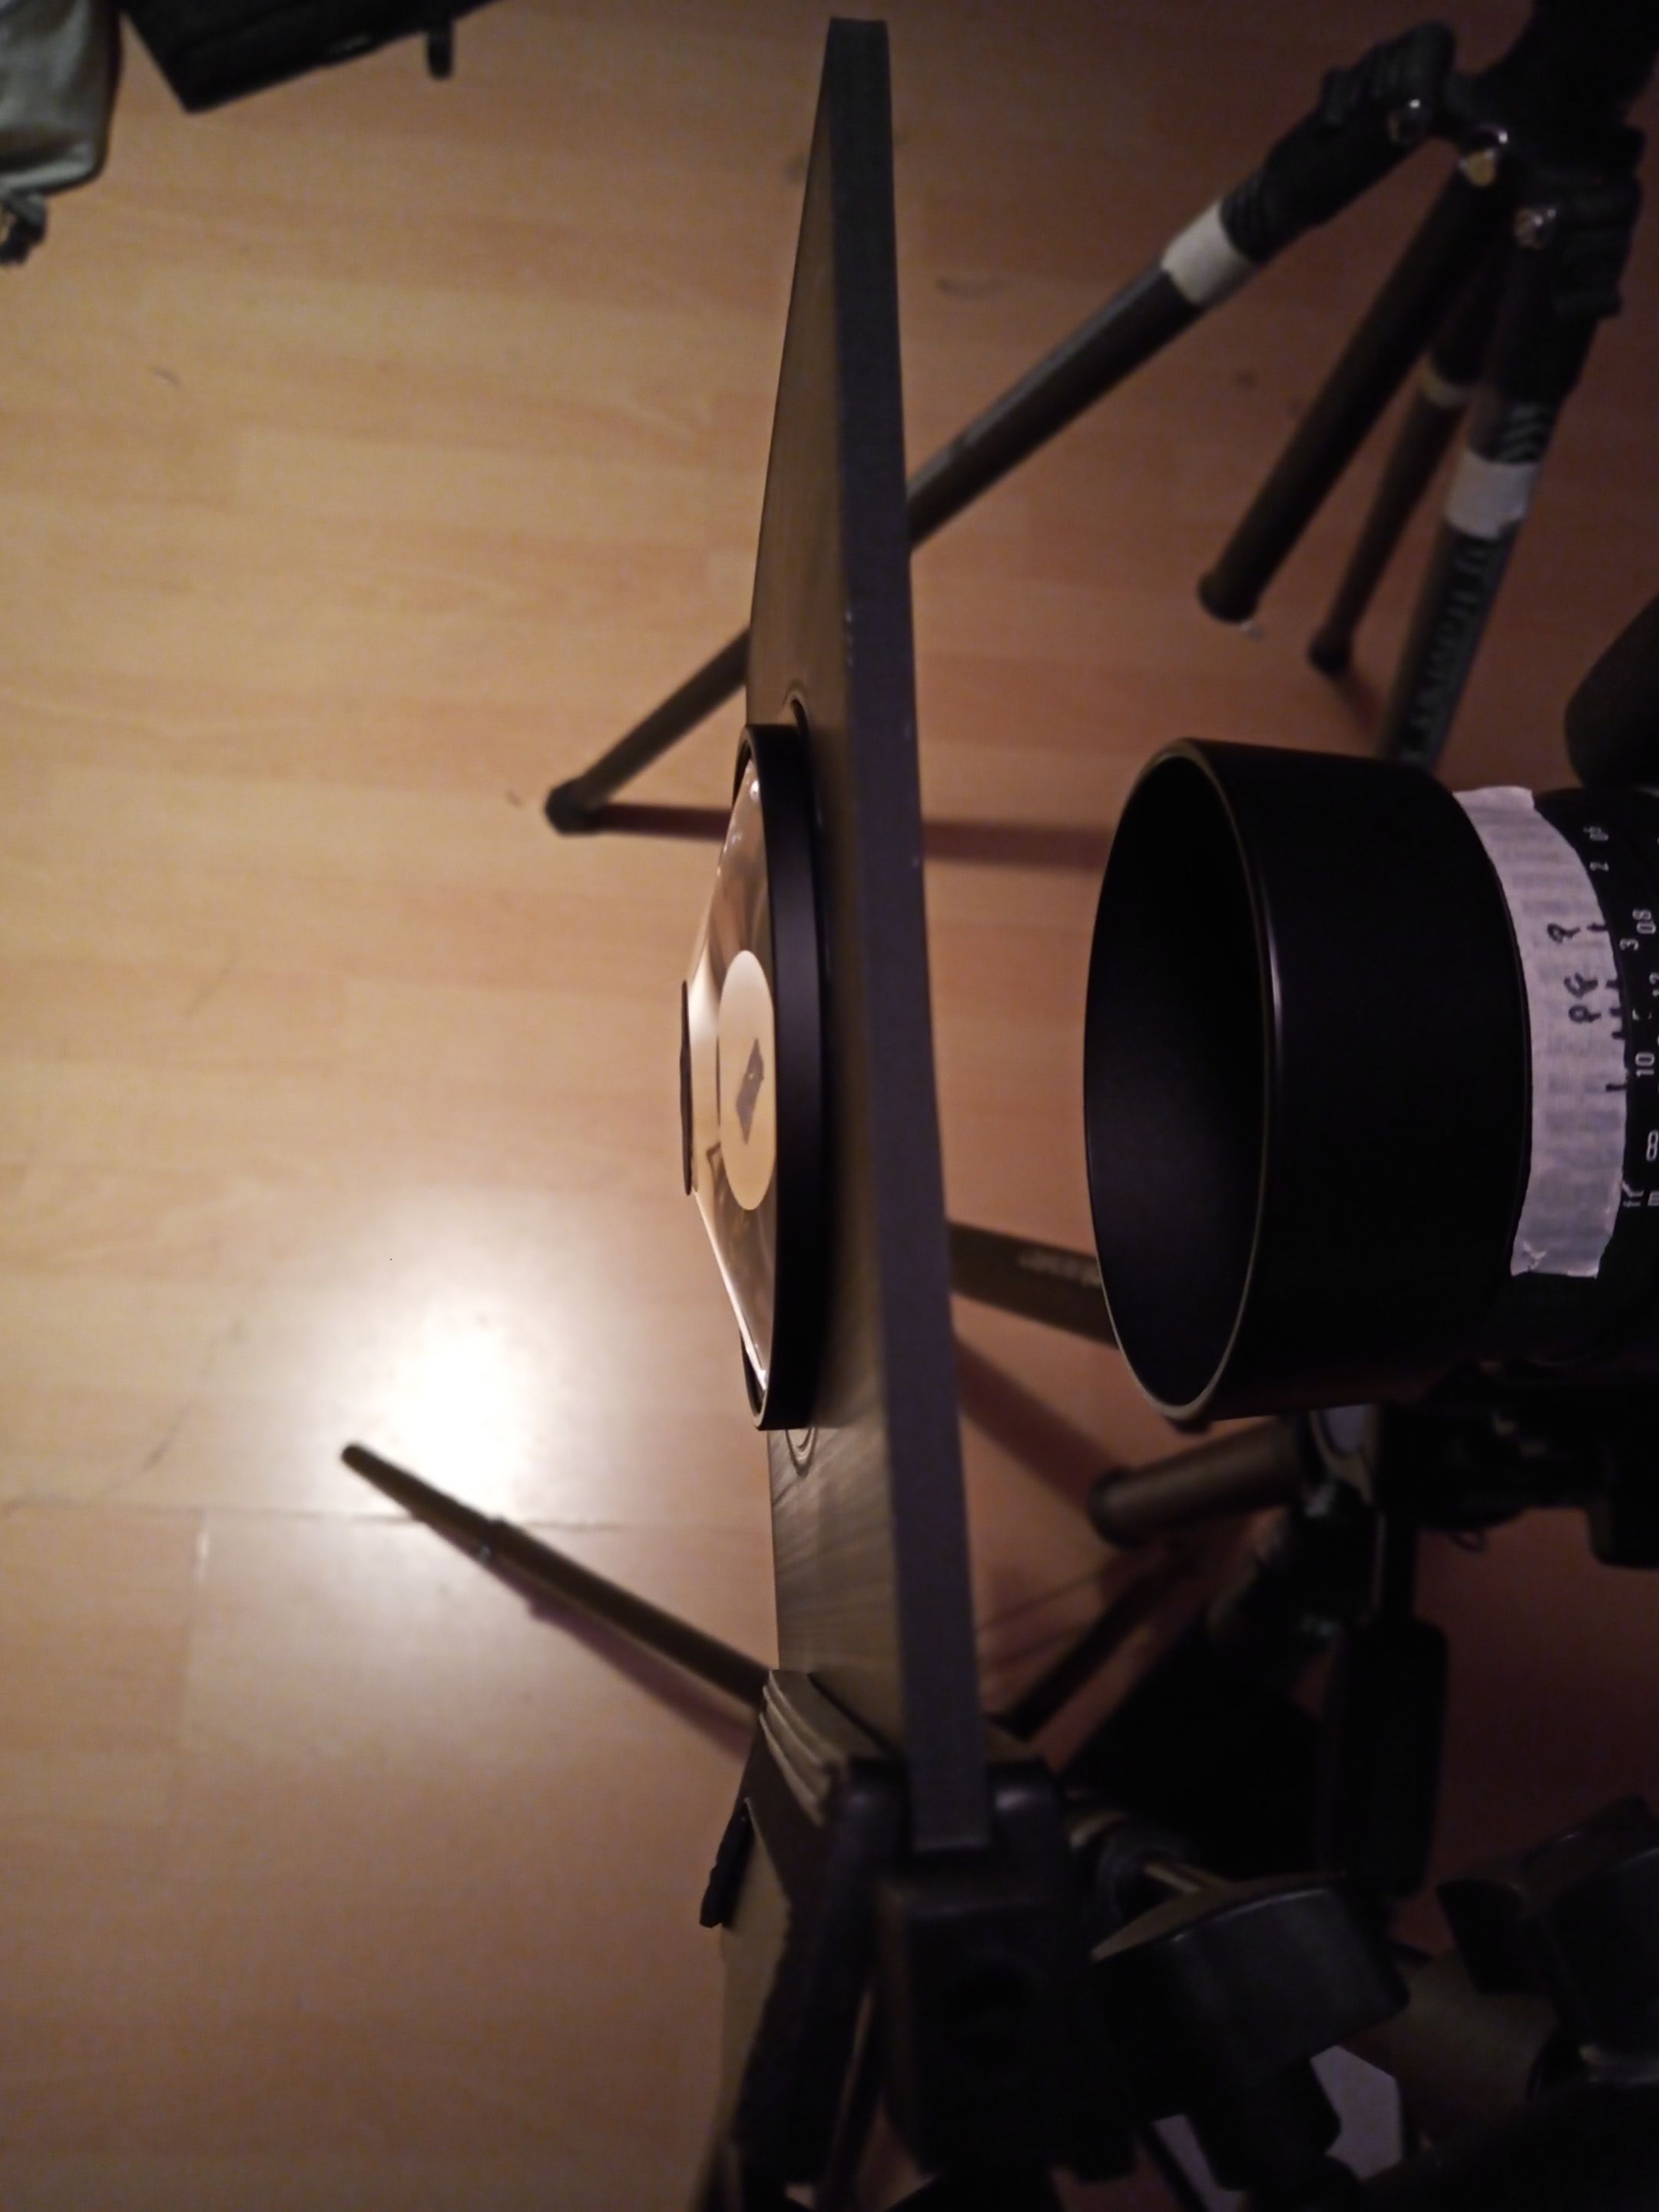 Behind the scenes
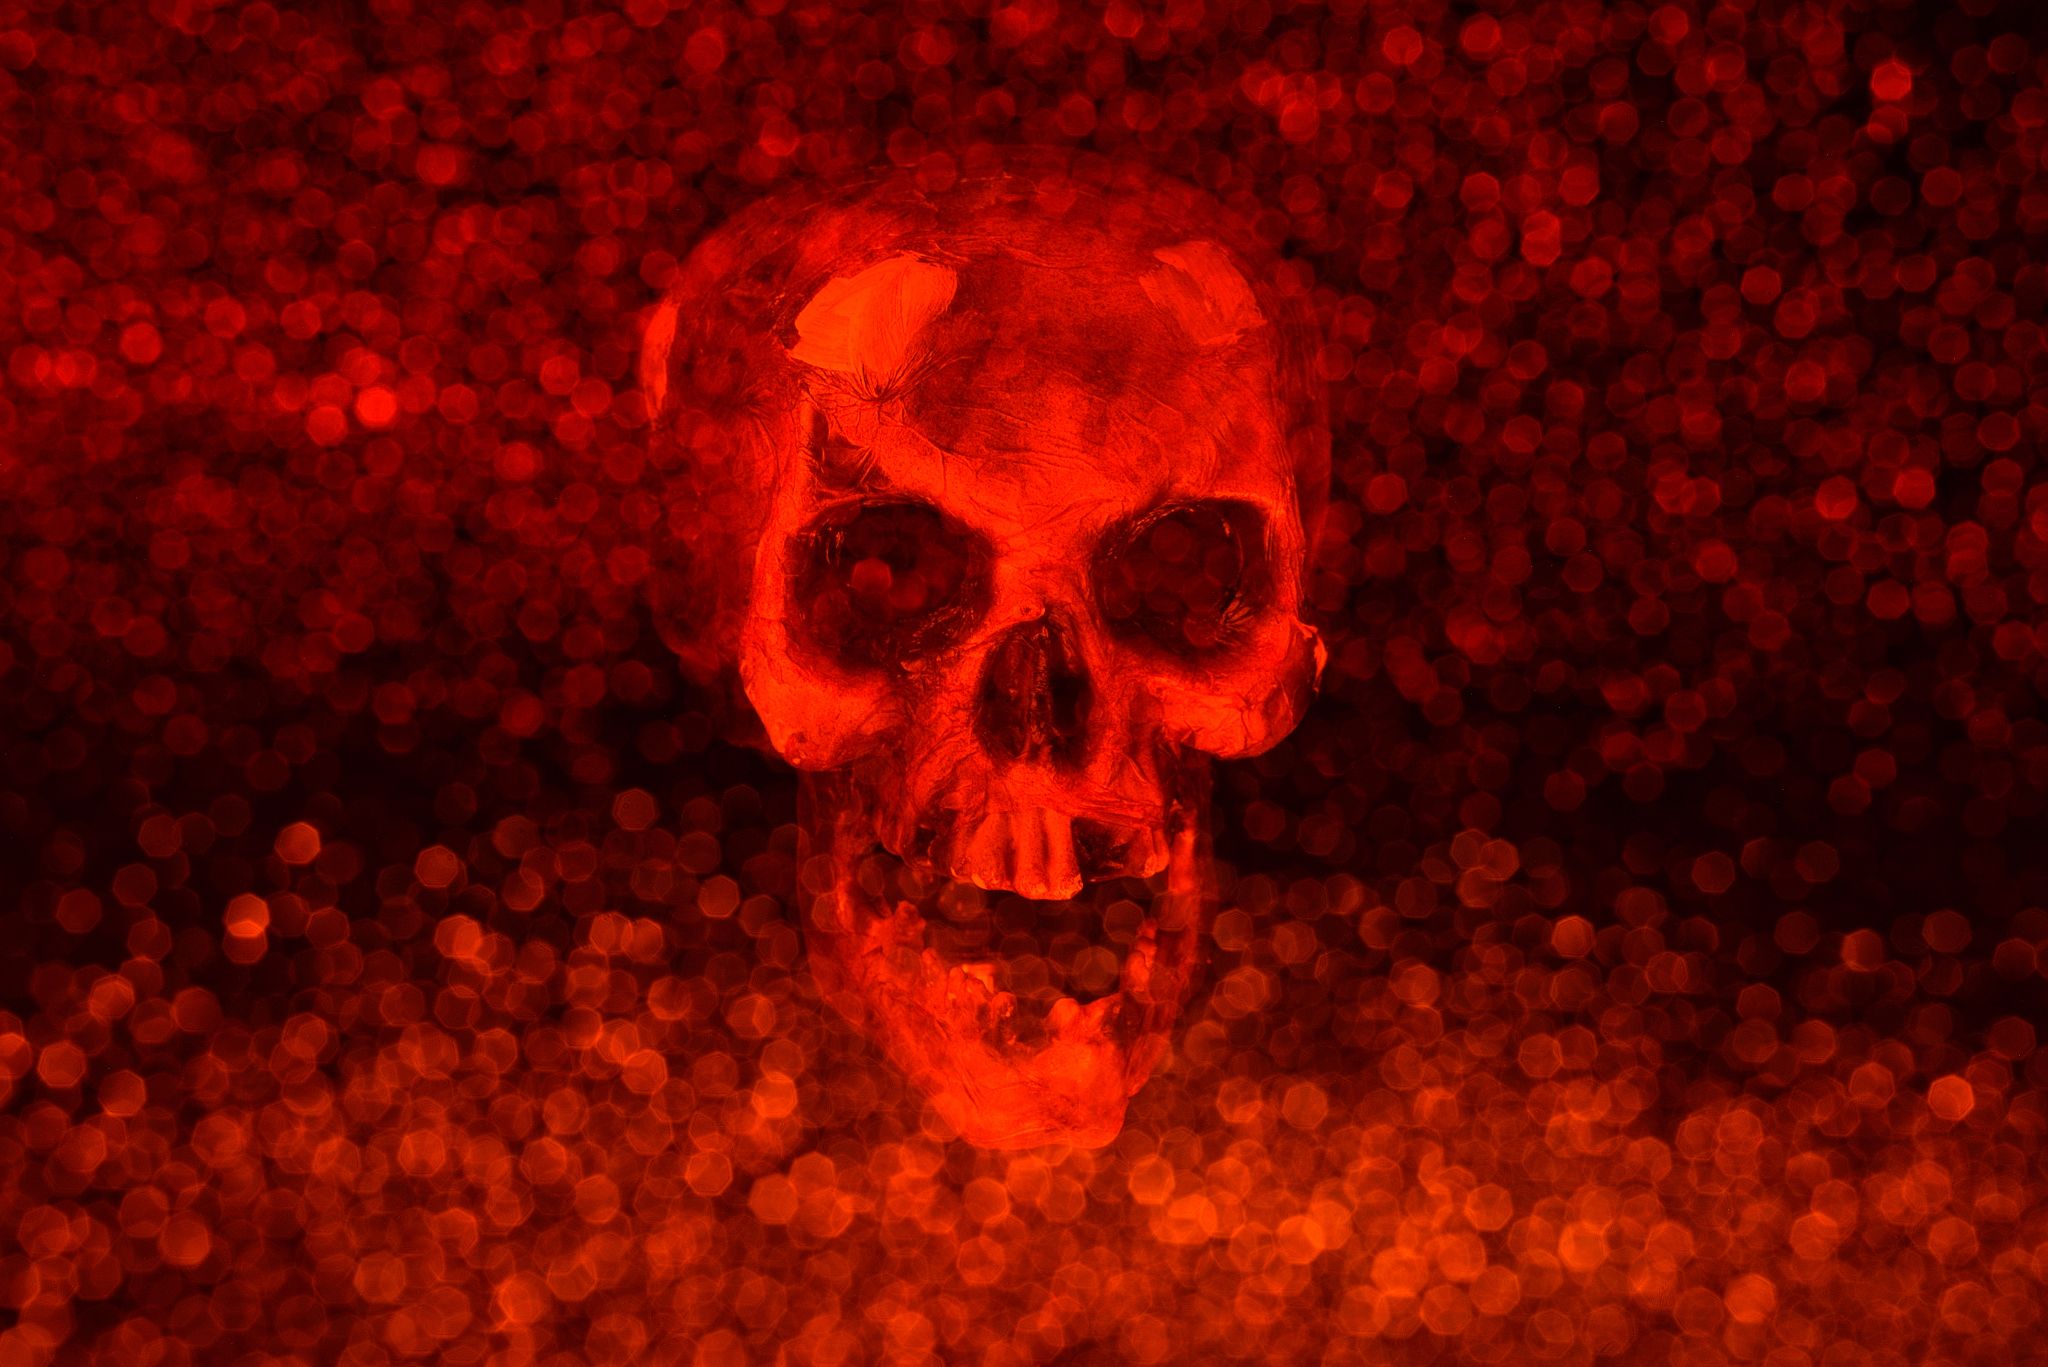
To get the devil into the frame several times, I used a prism with lines. In the example picture you can see how I placed the prism in front of the camera. Normally you just screw the prisms onto the lens, as long as the prism has the right diameter. @lichtkunstfoto kindly printed me a holder for the prism. This gives me more leeway and allows me to vary the distance to the lens. Likewise, I can place the prism more to the left and right, as well as up and down, depending on what effect I need for my image. What I have now touted as an advantage was the biggest challenge for the picture with the devil. I wanted to have a certain symmetry in the picture. In the middle the whole devil, on the left and right only one half of the face. What a fumble, but after what felt like an eternity and a few test pictures, everything was aligned.
Um den Teufel mehrfach ins Bild zu bekommen, habe ich ein Prisma mit Linien benutzt. In dem Beispielbild seht Ihr wie ich das Prisma vor der Kamera platziert habe. Normalerweise schraubt man die Prismen einfach auf das Objektiv, sofern das Prisma den richtigen Durchmesser hat. @lichtkunstfoto hat mir freundlicherweise eine Halterung für das Prisma gedruckt. Dadurch habe ich mehr Spielraum und kann den Abstand zum Objektiv variieren. Genauso kann ich das Prisma mehr nach links und recht, sowie nach oben und unten platzieren, je nach dem was ich für einen Effekt für mein Bild benötige. Was ich hier jetzt als Vorteil angepriesen habe, war für das Bild mit dem Teufel die größte Herausforderung. Ich wollte eine gewisse Symmetrie im Bild habe. In der Mitte den ganzen Teufel, links und rechts jeweils nur eine Gesichtshälfte. Was für einen Fummelei, aber nach einer gefühlten Ewigkeit und einigen Testbildern war alles ausgerichtet.
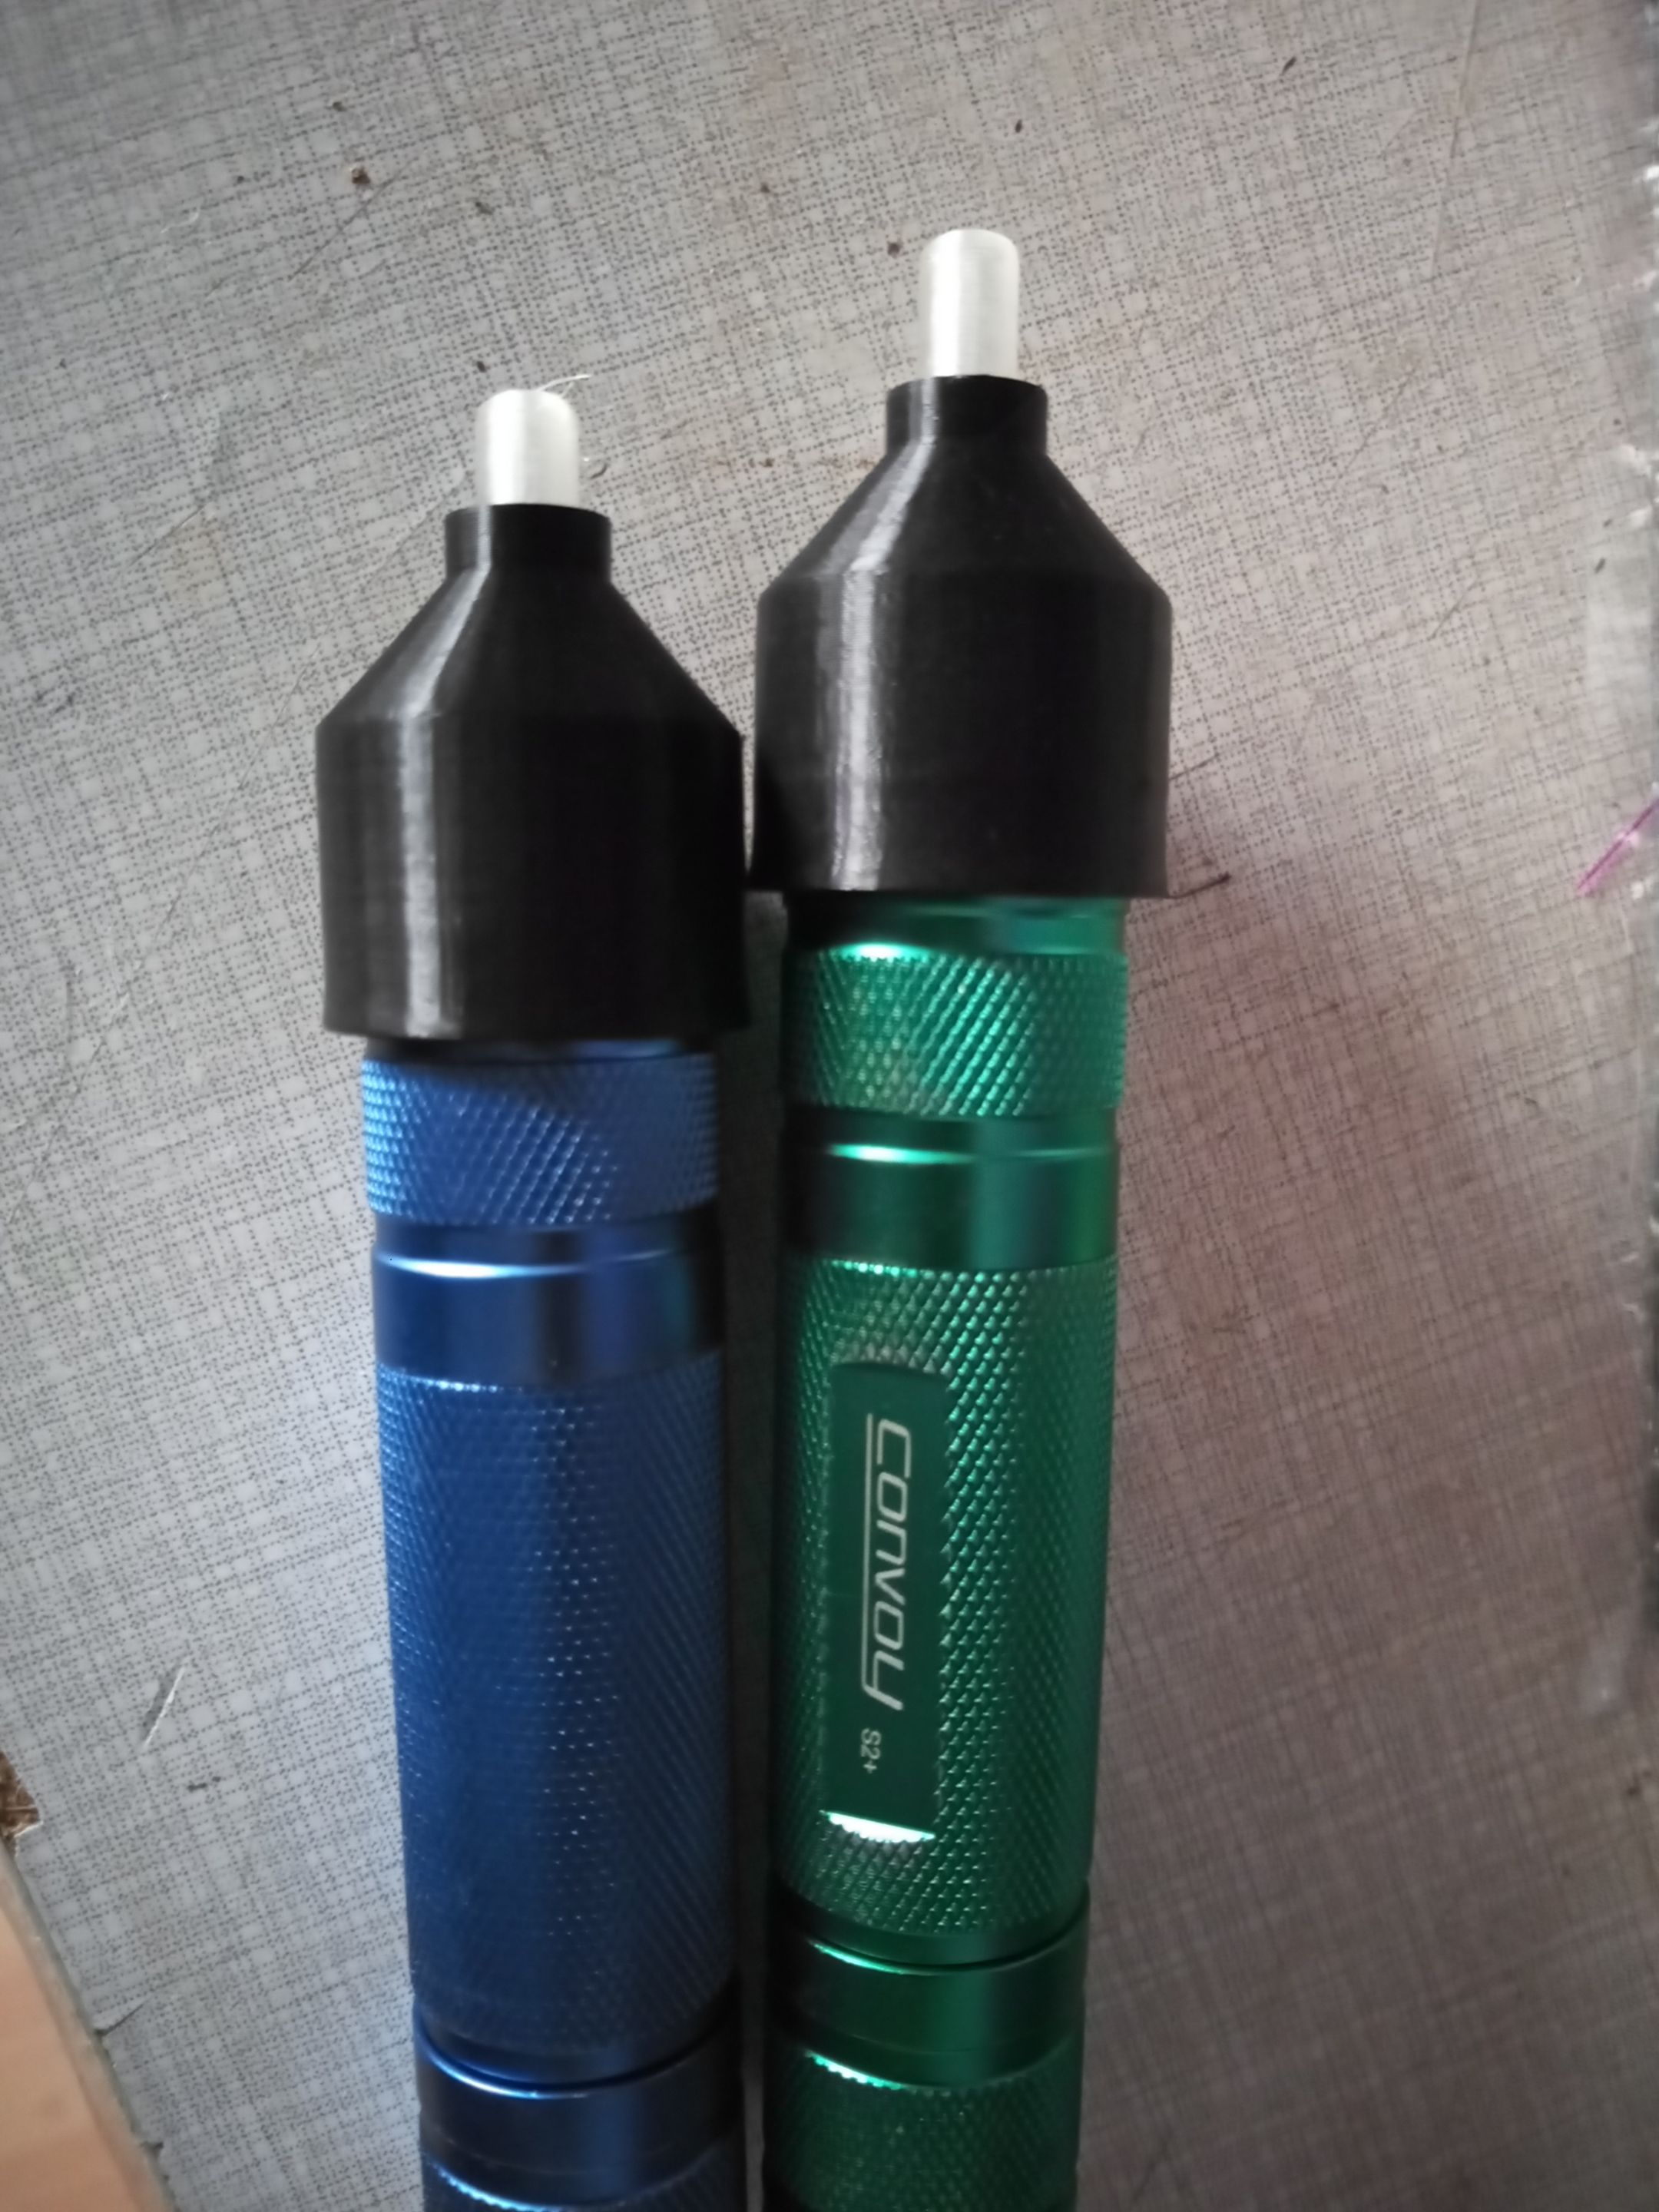
 Nikon D750 | ISO 100 | Sigma 28-70 mm | 211 sec. exposure time
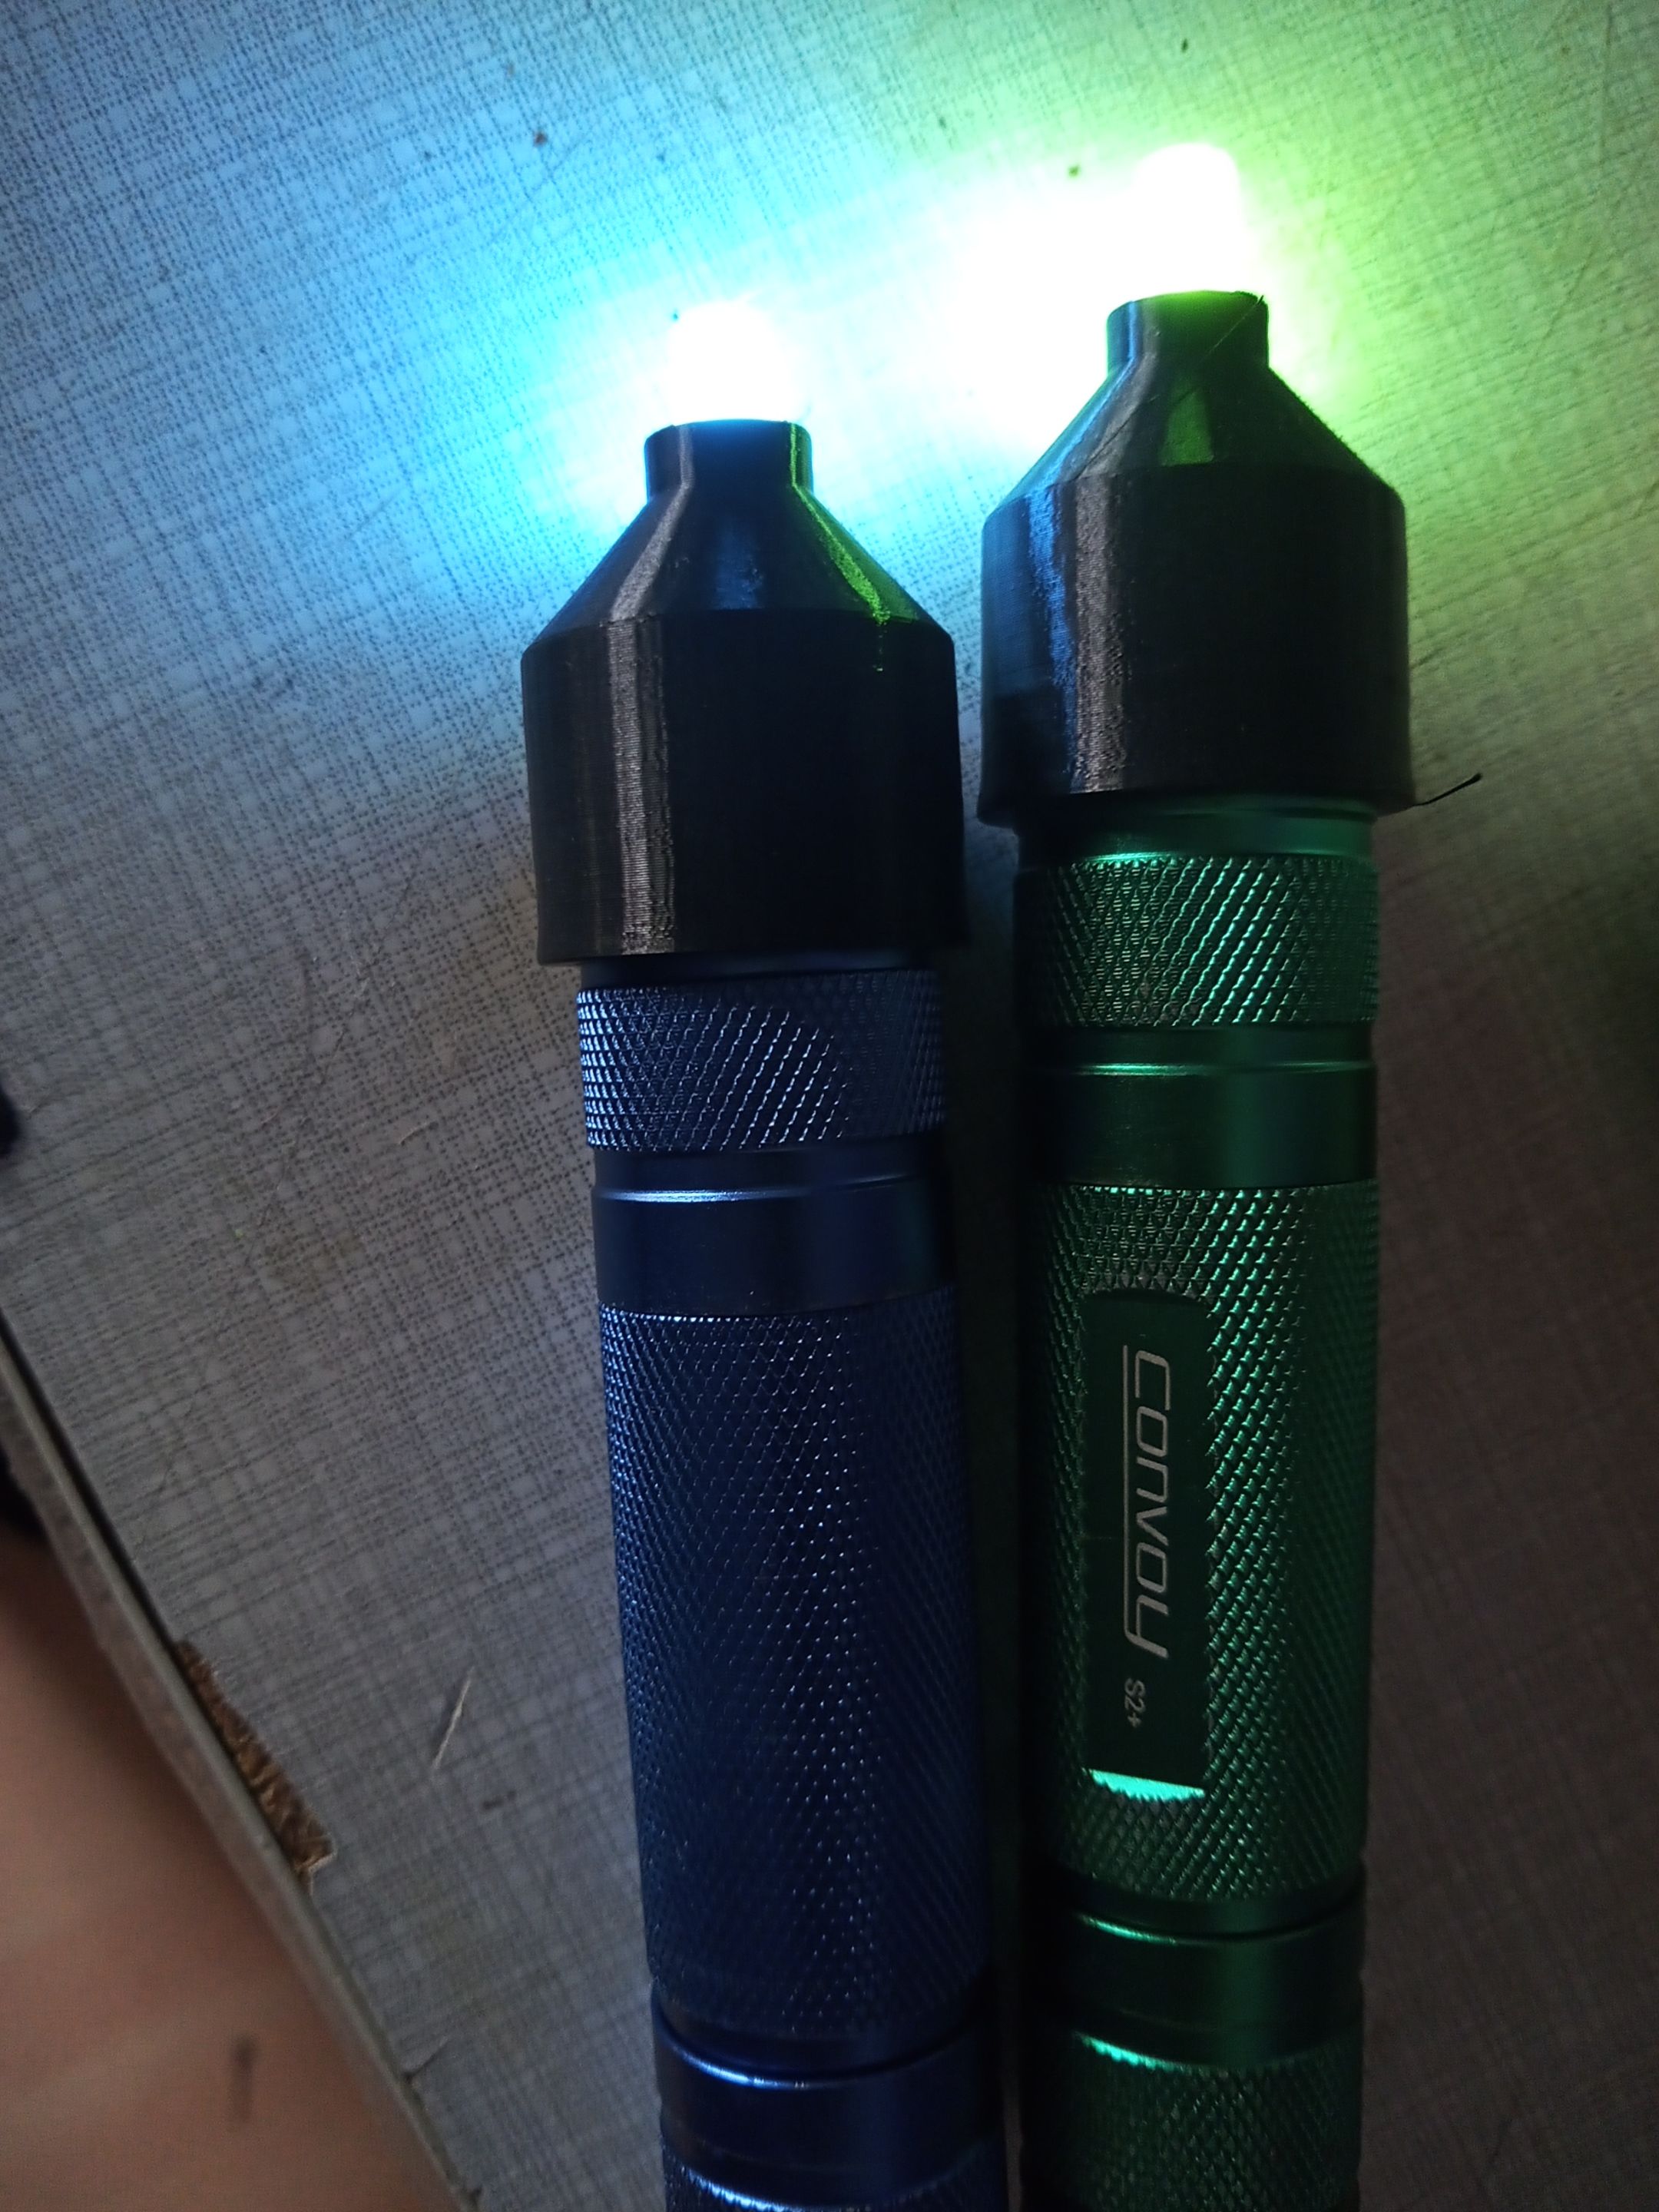
I had already introduced you to Udo the dead skull. For this shot, I only needed a blue Convoy S2+ and a black fibre-optic duster with a Ryu's torch, orange colour filters and a very fast stroboscope frequency. The slow movement of the fibre optic duster then creates these "dots" rather than strokes or light trails. After a few rounds of practice, I found out how fast/slow I could/must move the fibre-optic duster.
Udo den toten Totenkopf hatte ich euch ja bereits vorgestellt. Für dieses Bild benötigte ich lediglich eine blaue Convoy S2+ und einen schwarzen Glasfaserwedel mit einer Ryu´s Taschenlampe, orangenen Farbfilter und einer sehr schnellen Stroboskop-Frequenz. Durch die langsame Bewegung des Glasfaserwedels entstehen dann diese "Punkte" und keine Striche oder Lichtspuren. Nach ein paar Übungsrunden habe ich dann auch herausgefunden, wie schnell/langsam ich den Glasfaserwedel bewegen darf/muss.
 Nikon D750 | ISO 100 | Laowa 12 mm @f/8 | 103 sec. exposure time
 Behind the scenes
The last shot in today's post was also taken in my studio and with a prism in front of the camera. The rest of the picture was relatively easy to realise. Blue light from behind, from a Convoy S2+ and some fog to soften the light. And orange light from below from an Emisar D4 with colour filter. One of my fastest light painting shots with 6 seconds exposure time.
Das letztes Bild des heutigen Beitrags entstand ebenfalls in meinem Studio und mit einem Prisma vor der Kamera. Der Rest im Bild war relativ einfach umzusetzen. Blaues Licht von hinten, aus einer Convoy S2+ und etwas Nebel, um das Licht weicher zu machen. Und orangenes Licht von unten aus einer Emisar D4 mit Farbfilter. Eines meiner schnellsten Lightpainting-Bilder mit 6 Sekunden Belichtungszeit.
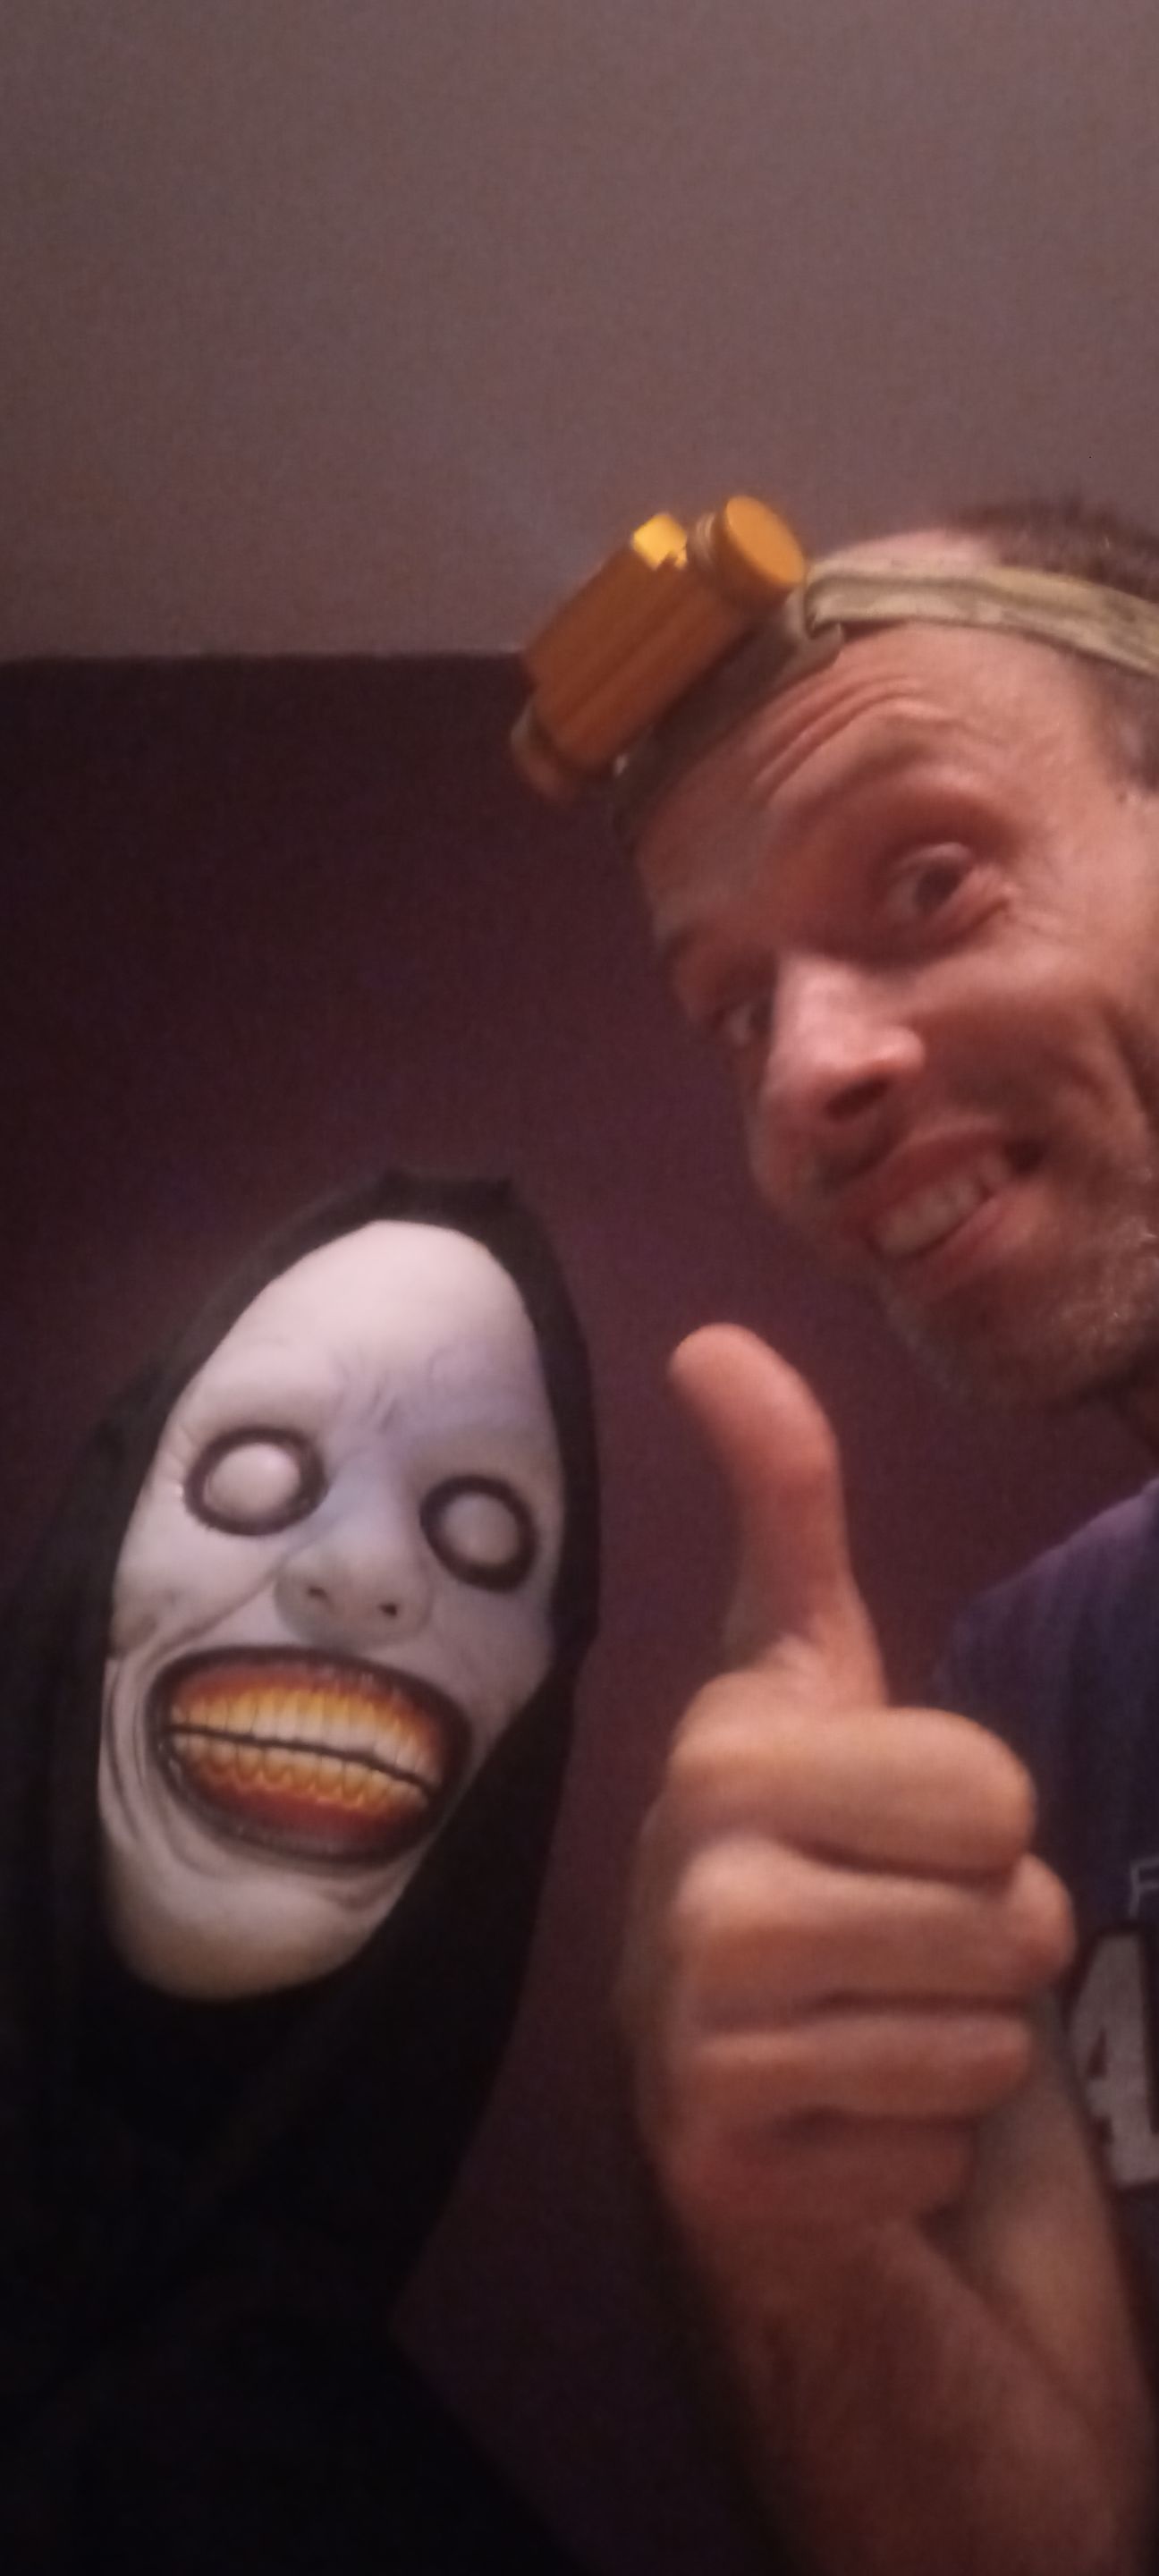
By the way, the creepy Grin Man and I have become friends. We decided to go out on 31 October and scare little kids in the neighbourhood.
Der gruselige Grinsemann und ich sind übrigens Freunde geworden. Wir haben beschlossen am 31.10. mal loszuziehen und kleine Kinder in der Nachbarschaft zu erschrecken.