Greetings, my #HiveDIY people. It gives me pleasure to share with you today, so I bring you something extra special. My week has been a bit stressful, and I've been busy with other things, so I've slowed down here at Hive, but I hope to get back on track next week. Anyway, I'm a bit of a romantic, and looking for a way to de-stress, I decided to do something different this time. Read on to see the process.
𝐒𝐭𝐞𝐩-𝐛𝐲-𝐒𝐭𝐞𝐩
Someone says that drawing serves as therapy, and since I've been practicing drawing more, my drawings I've proven it; it helps me to disconnect my mind and not think about anything but wanting to see the final result of my art.
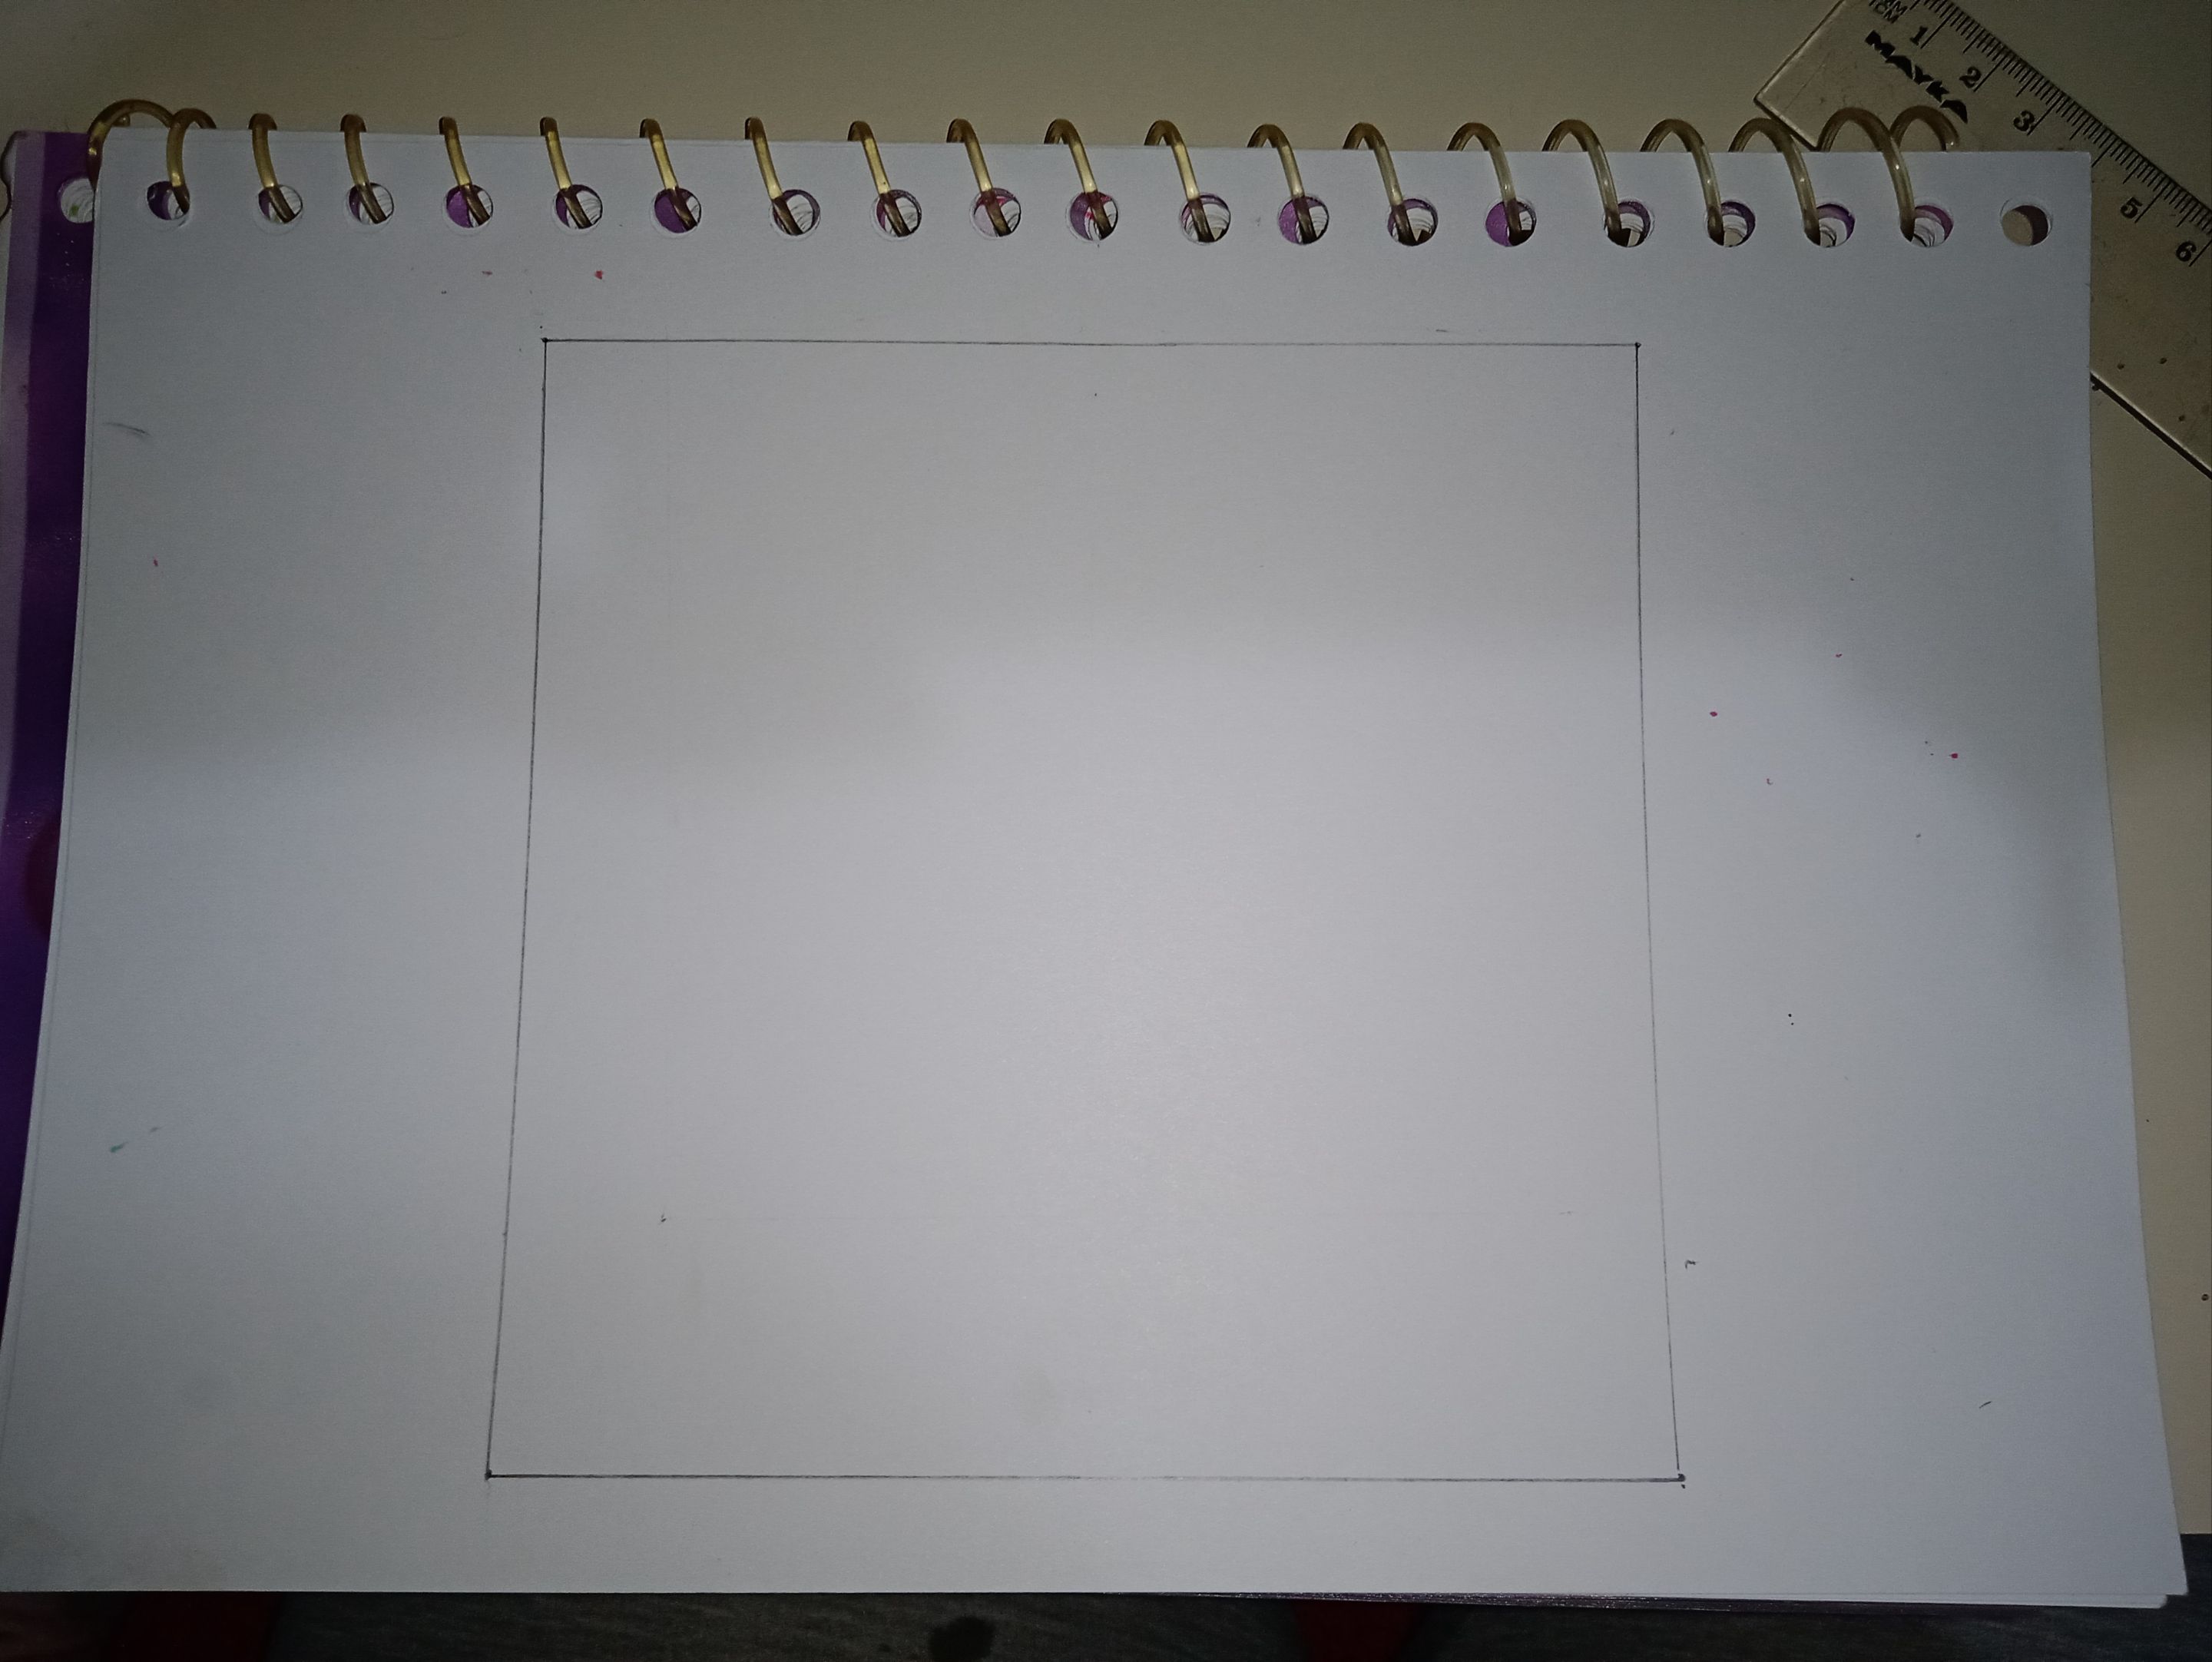
So today I thought, What about making a Heart with 3D Effect?. And so I started. I made a 15x15 CM square frame as shown in the first image.
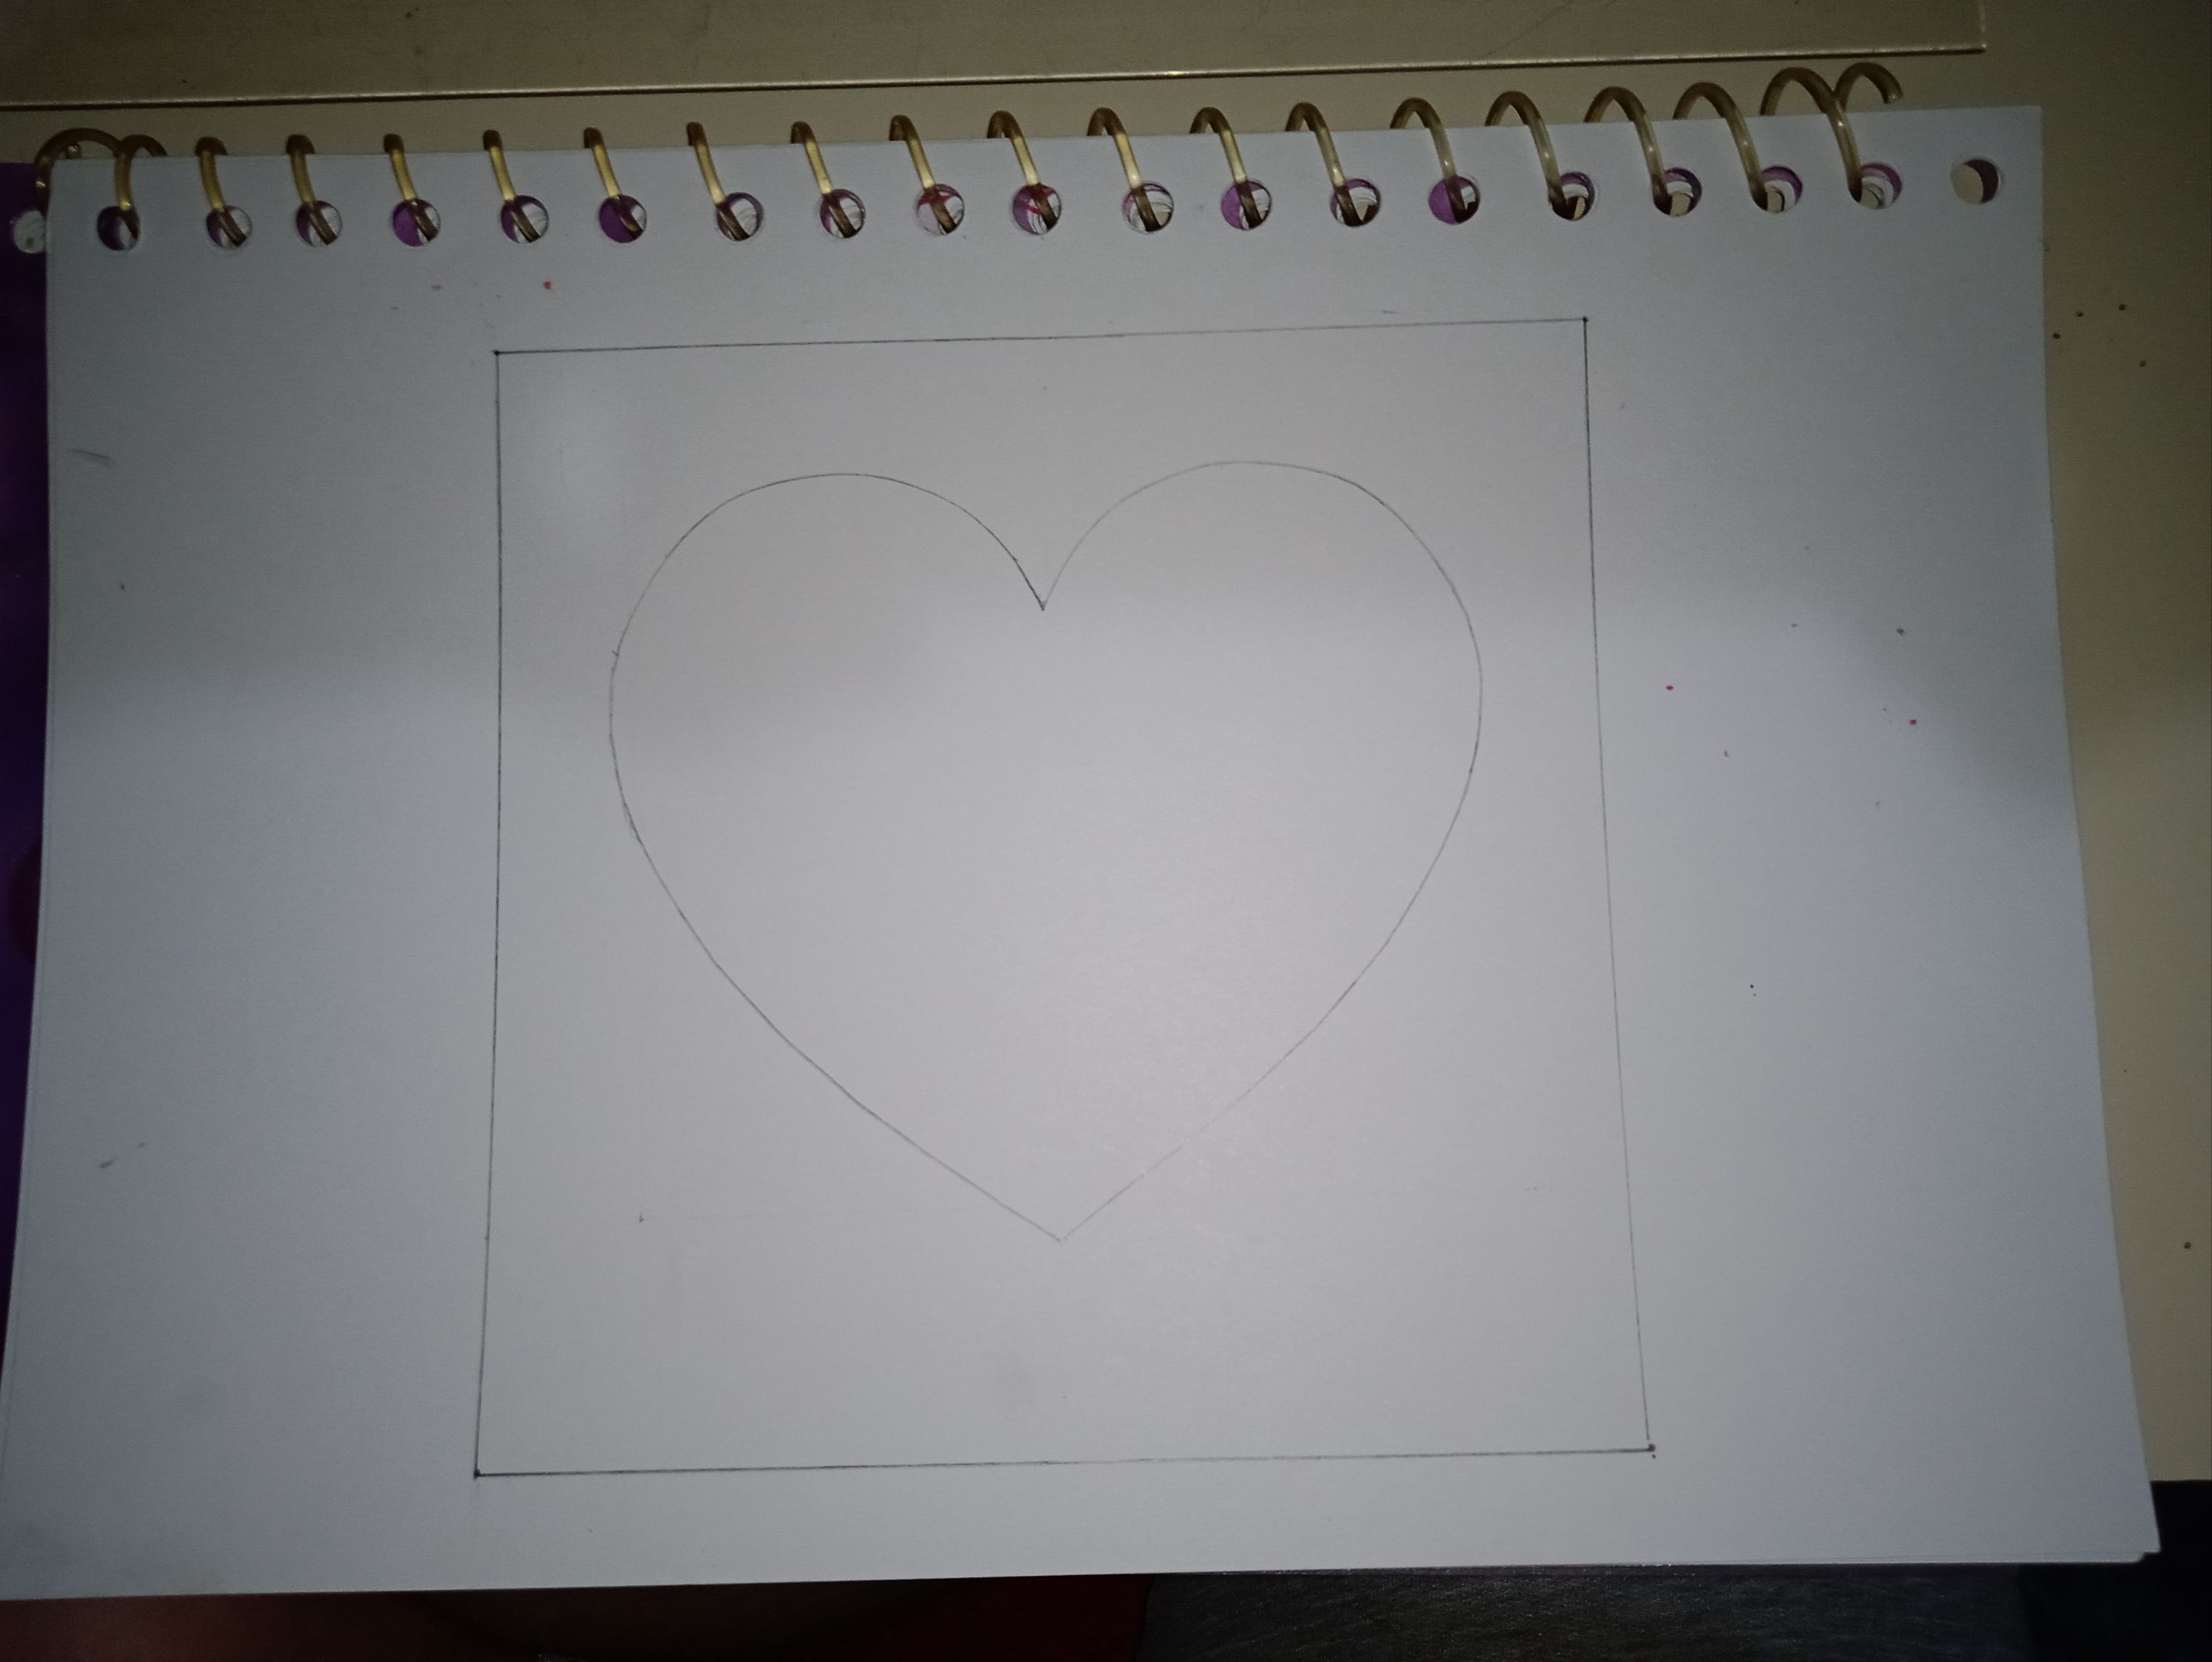
Then I drew a heart freehand, but you can also use a template to make it straighter and neater. The measurement of the heart was by eye percent, I just wanted it to be centered as much as possible and a little smaller than the square.

Then I started making vertical lines and marking the points to draw the horizontal lines. Each line has a spacing of 1 CM, making a total of 14 vertical lines.
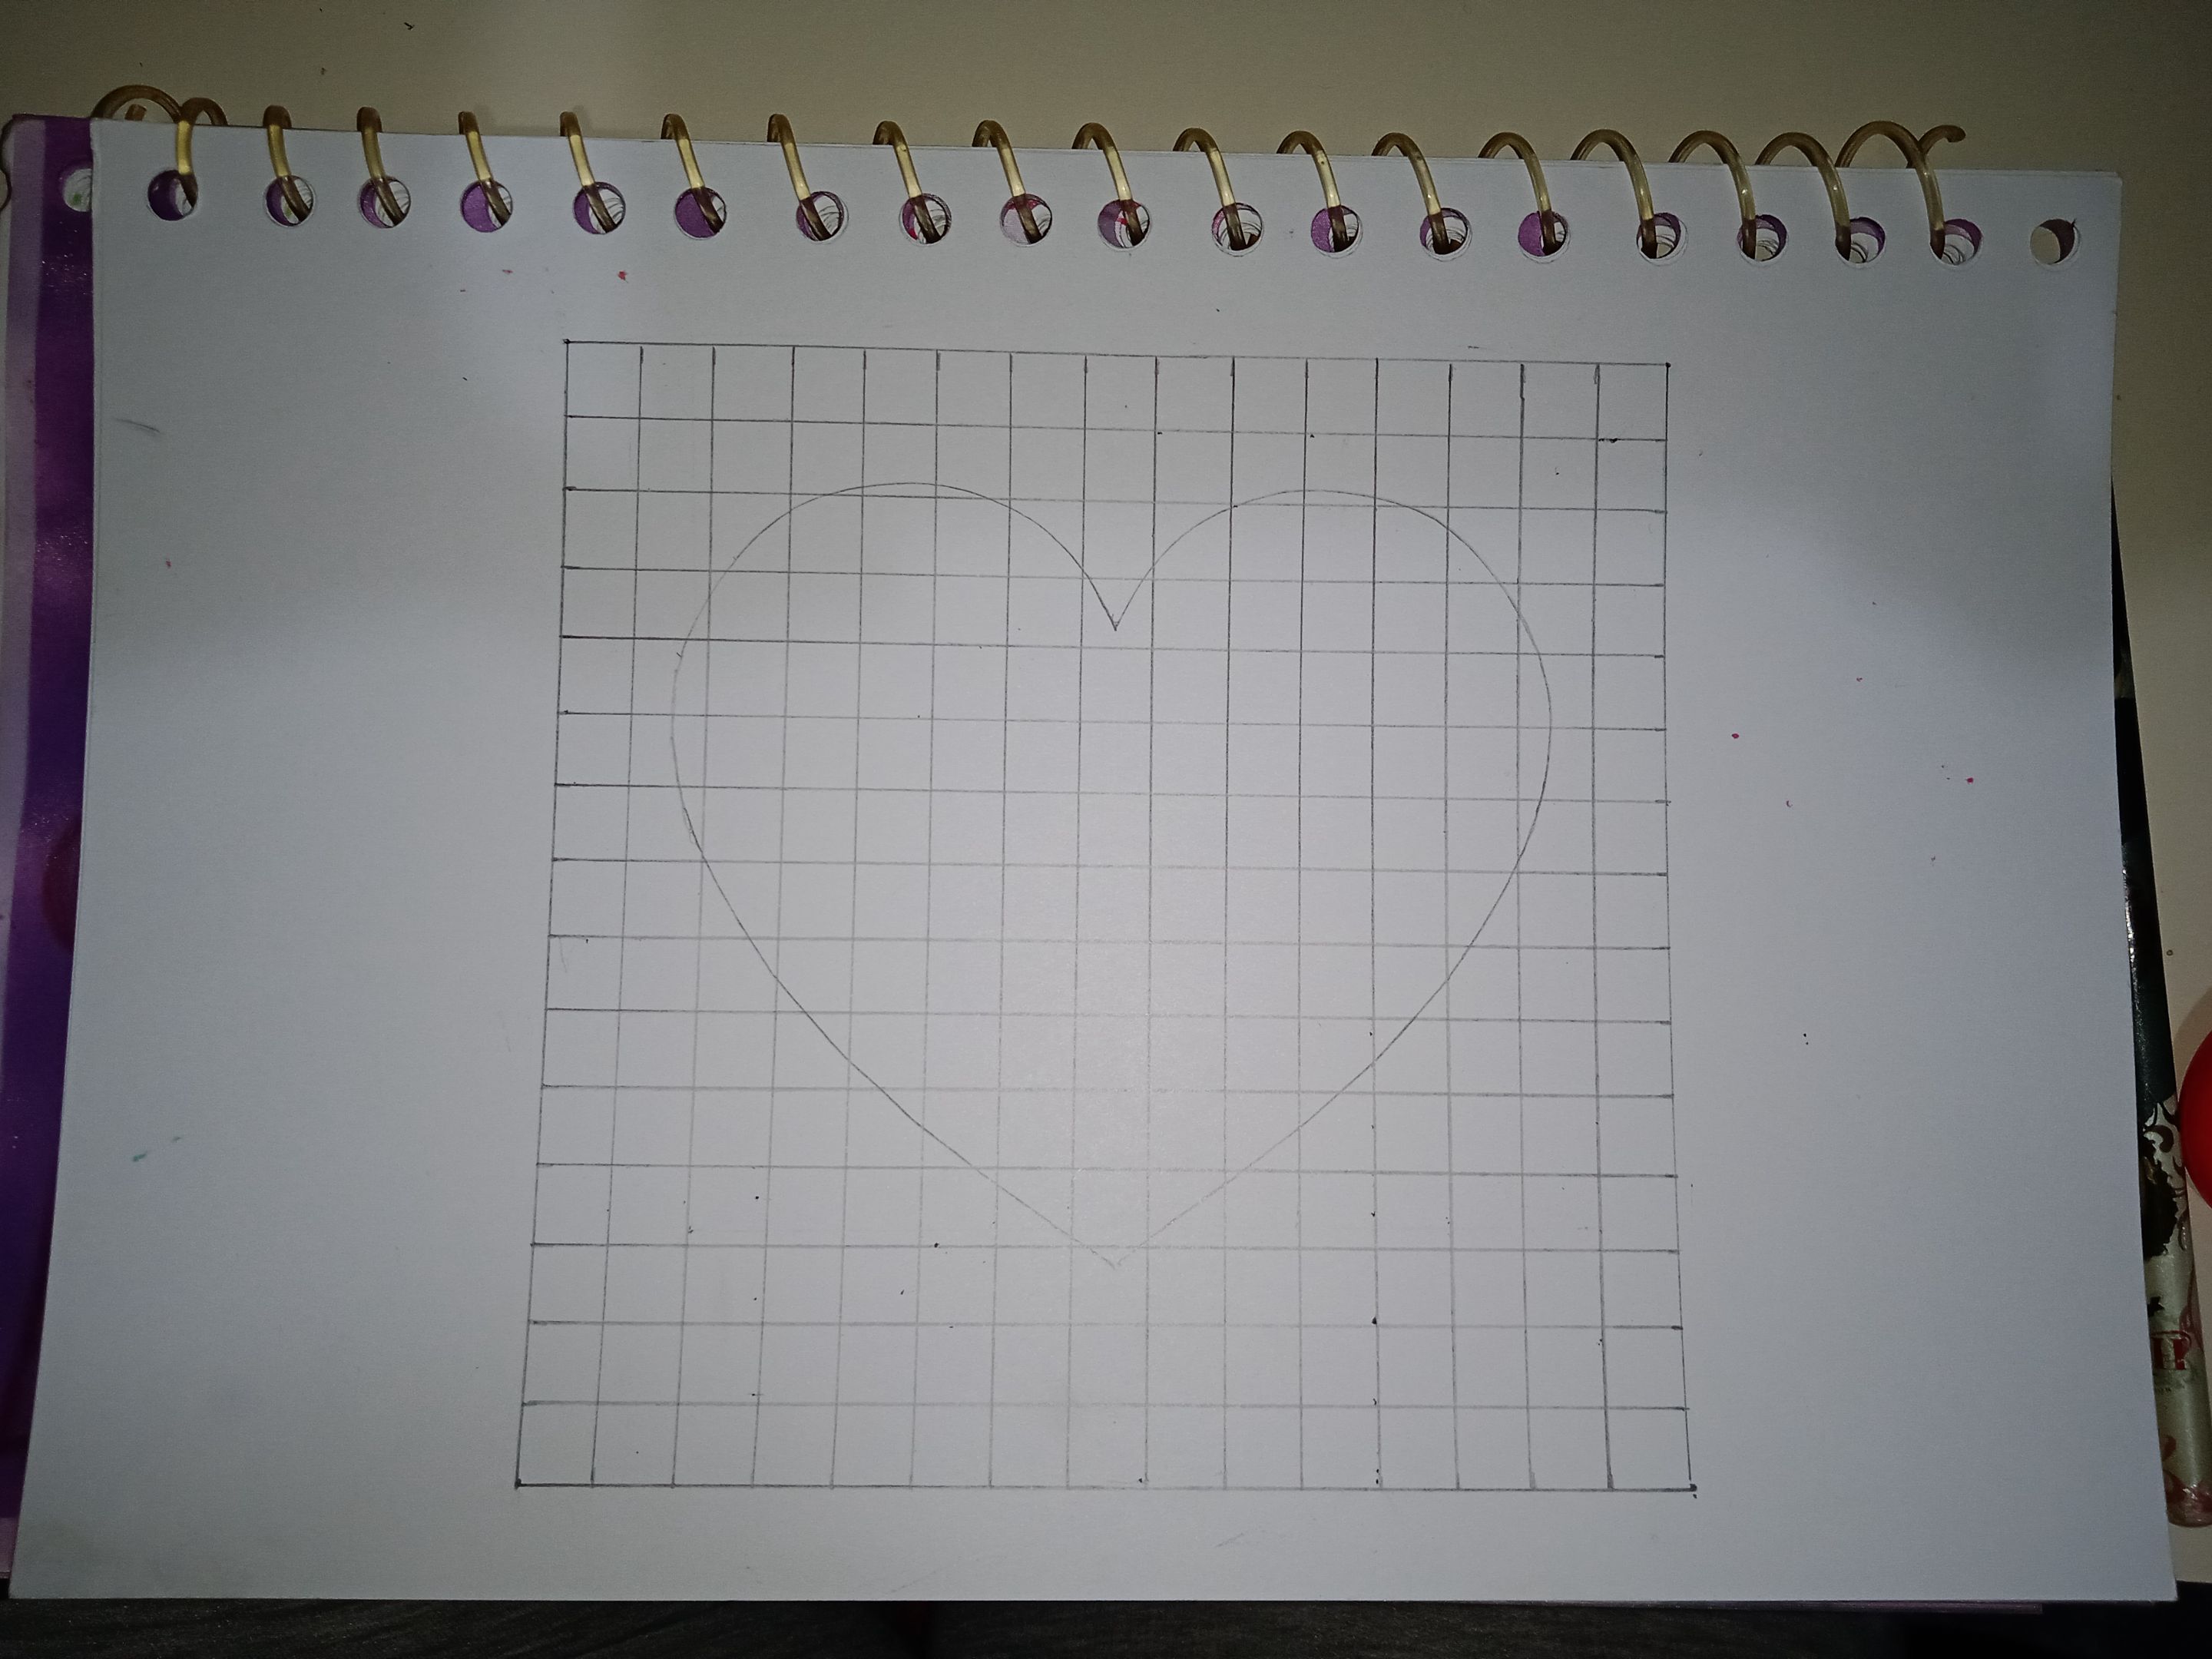
Already after that, I did the horizontal lines tracing, with the same separation measure, 1 CM between each one, making again a total of 14 horizontal lines. This part reminded me of the mathematics notebook 🤣

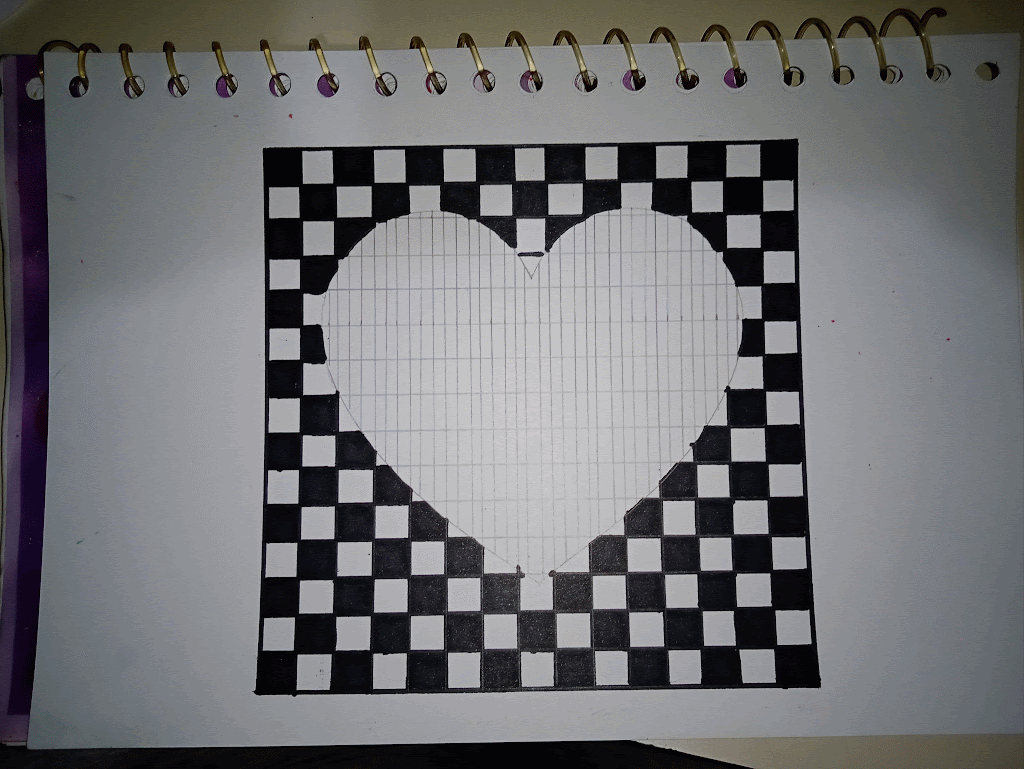
Now to make the heart stand out among the grid, I drew 0.3 mm separations in each square, i.e., each square inside the heart, I divided it into 3 with two lines that have a spacing of 0.3 mm.
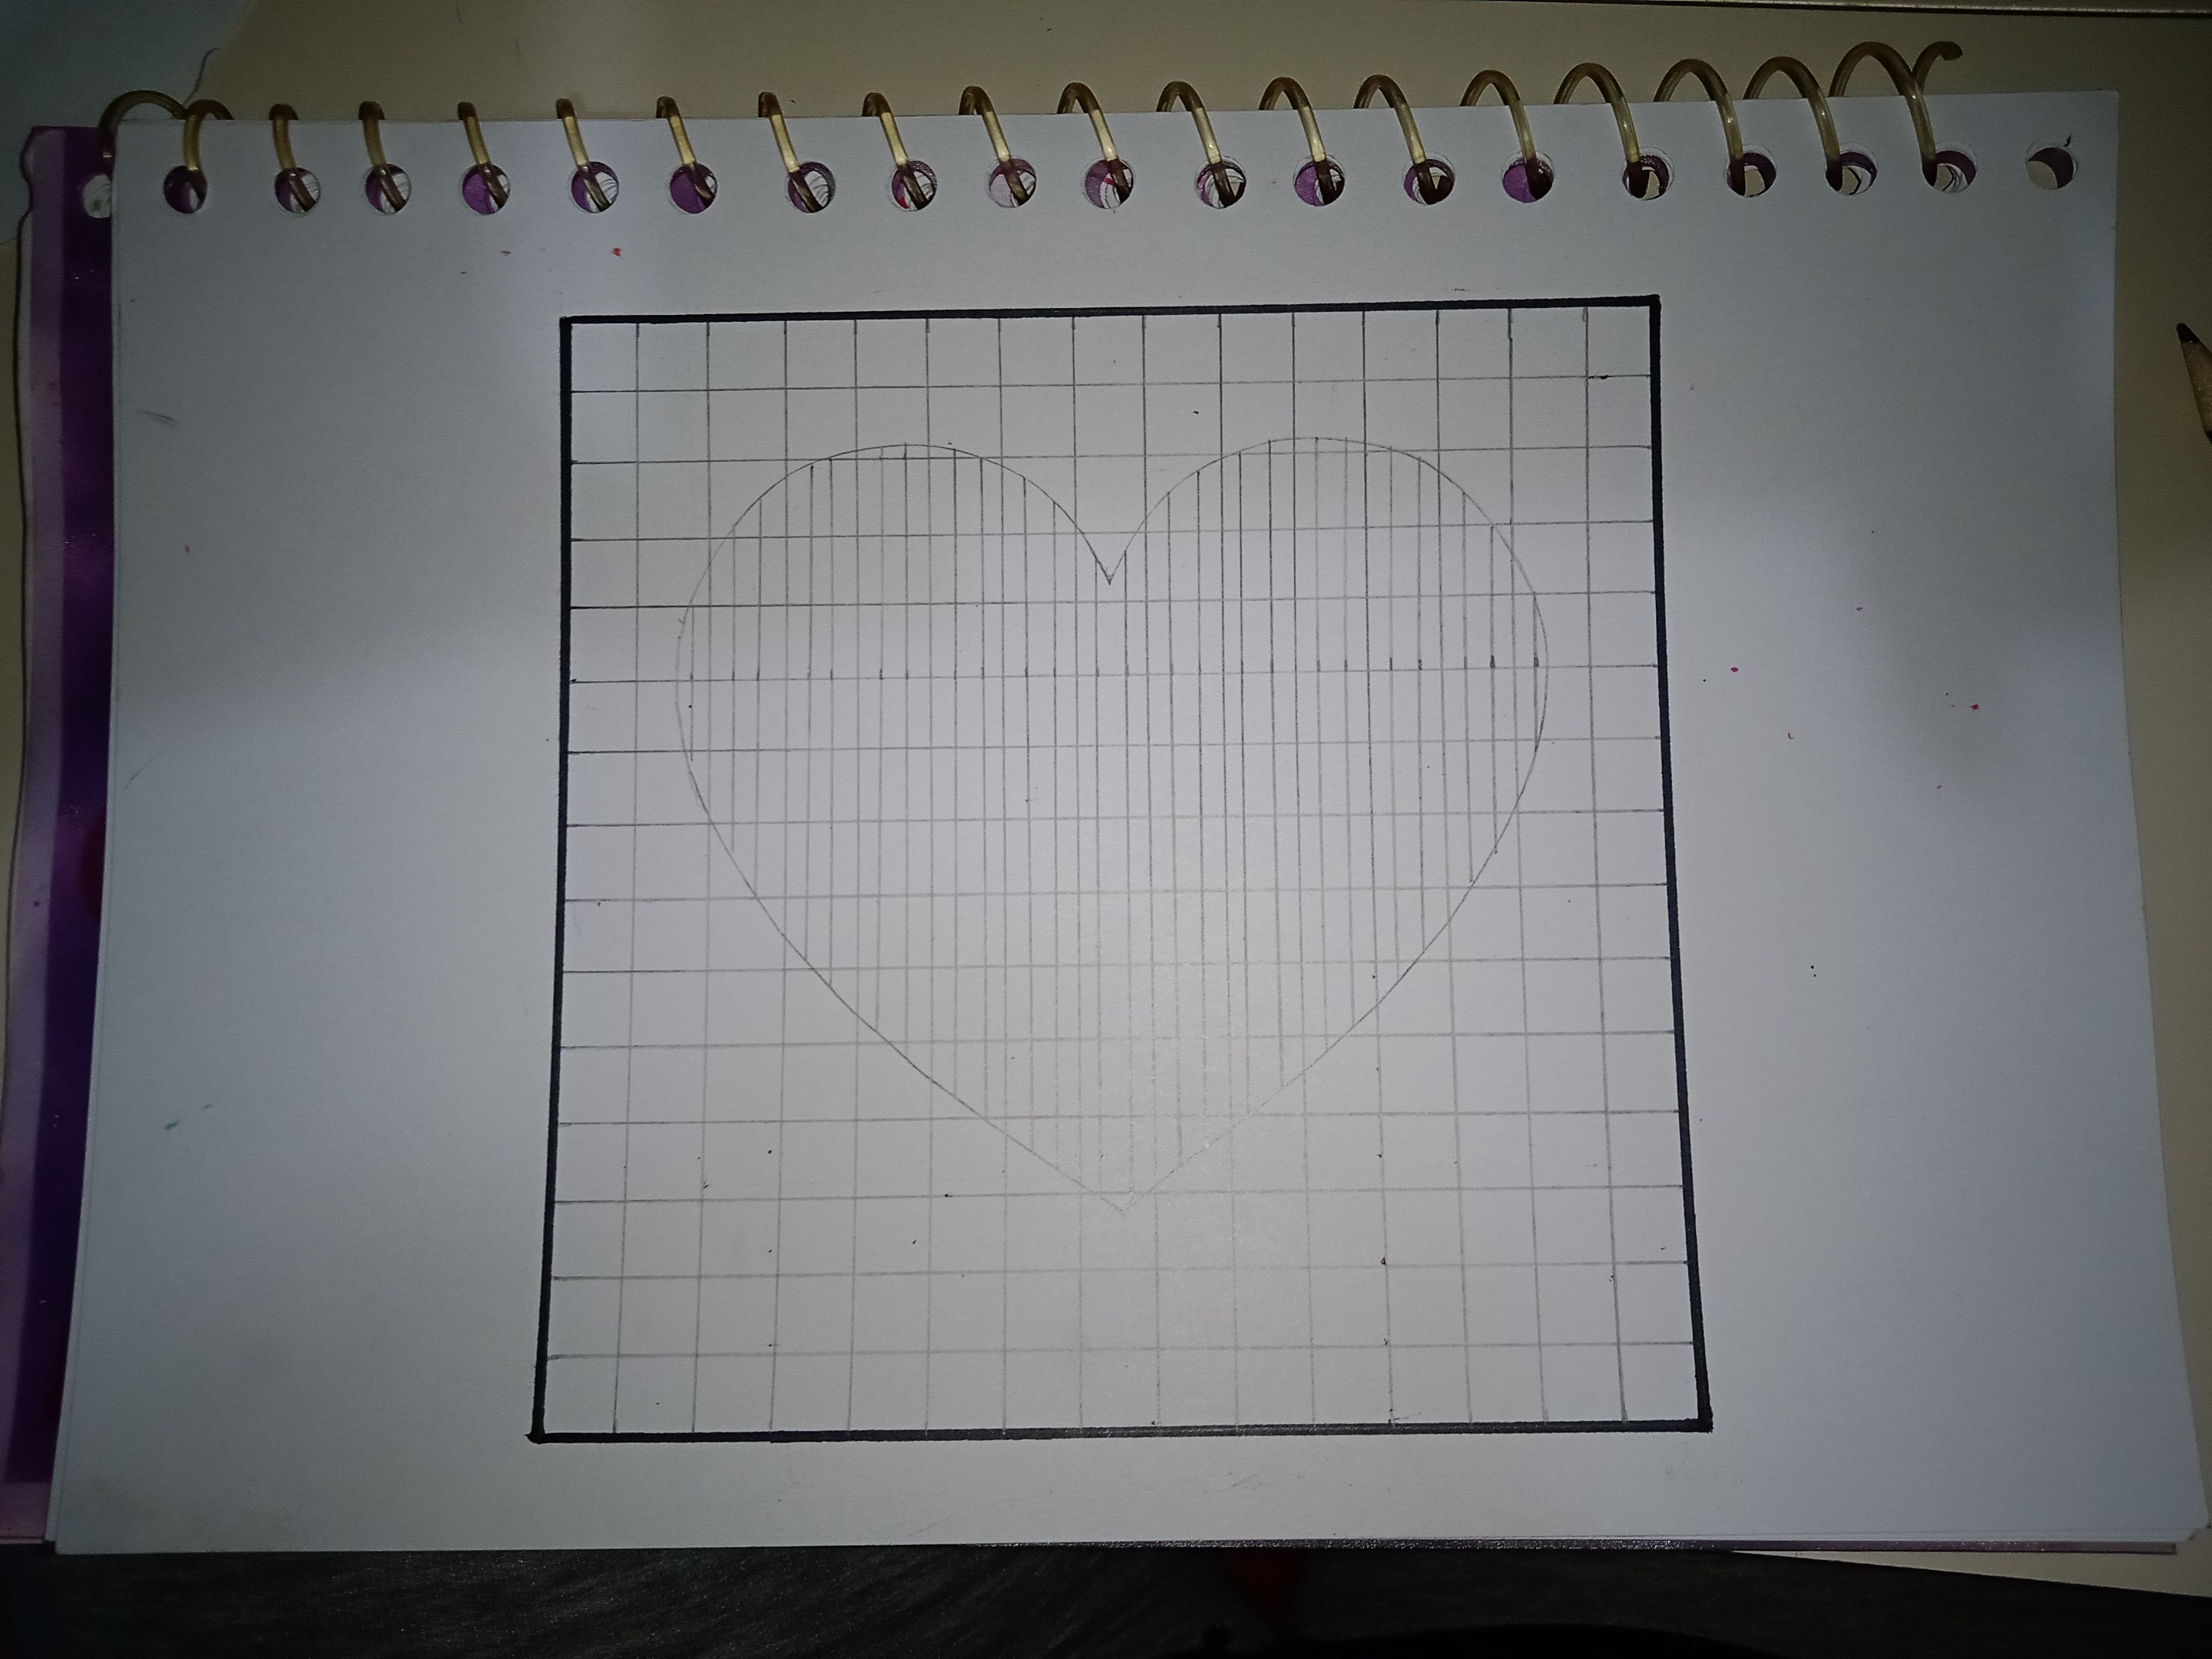
First, I started by outlining the square.

Then I carefully traced the grid lines without touching the heart. This part was a bit difficult for me, and you can see that the points near the heart were a little bit more marked 🤣.

Now it's time to paint the black squares, leaving a blank space as if it were a chessboard. I enjoyed this part, I had to concentrate a lot to paint the corresponding black square.
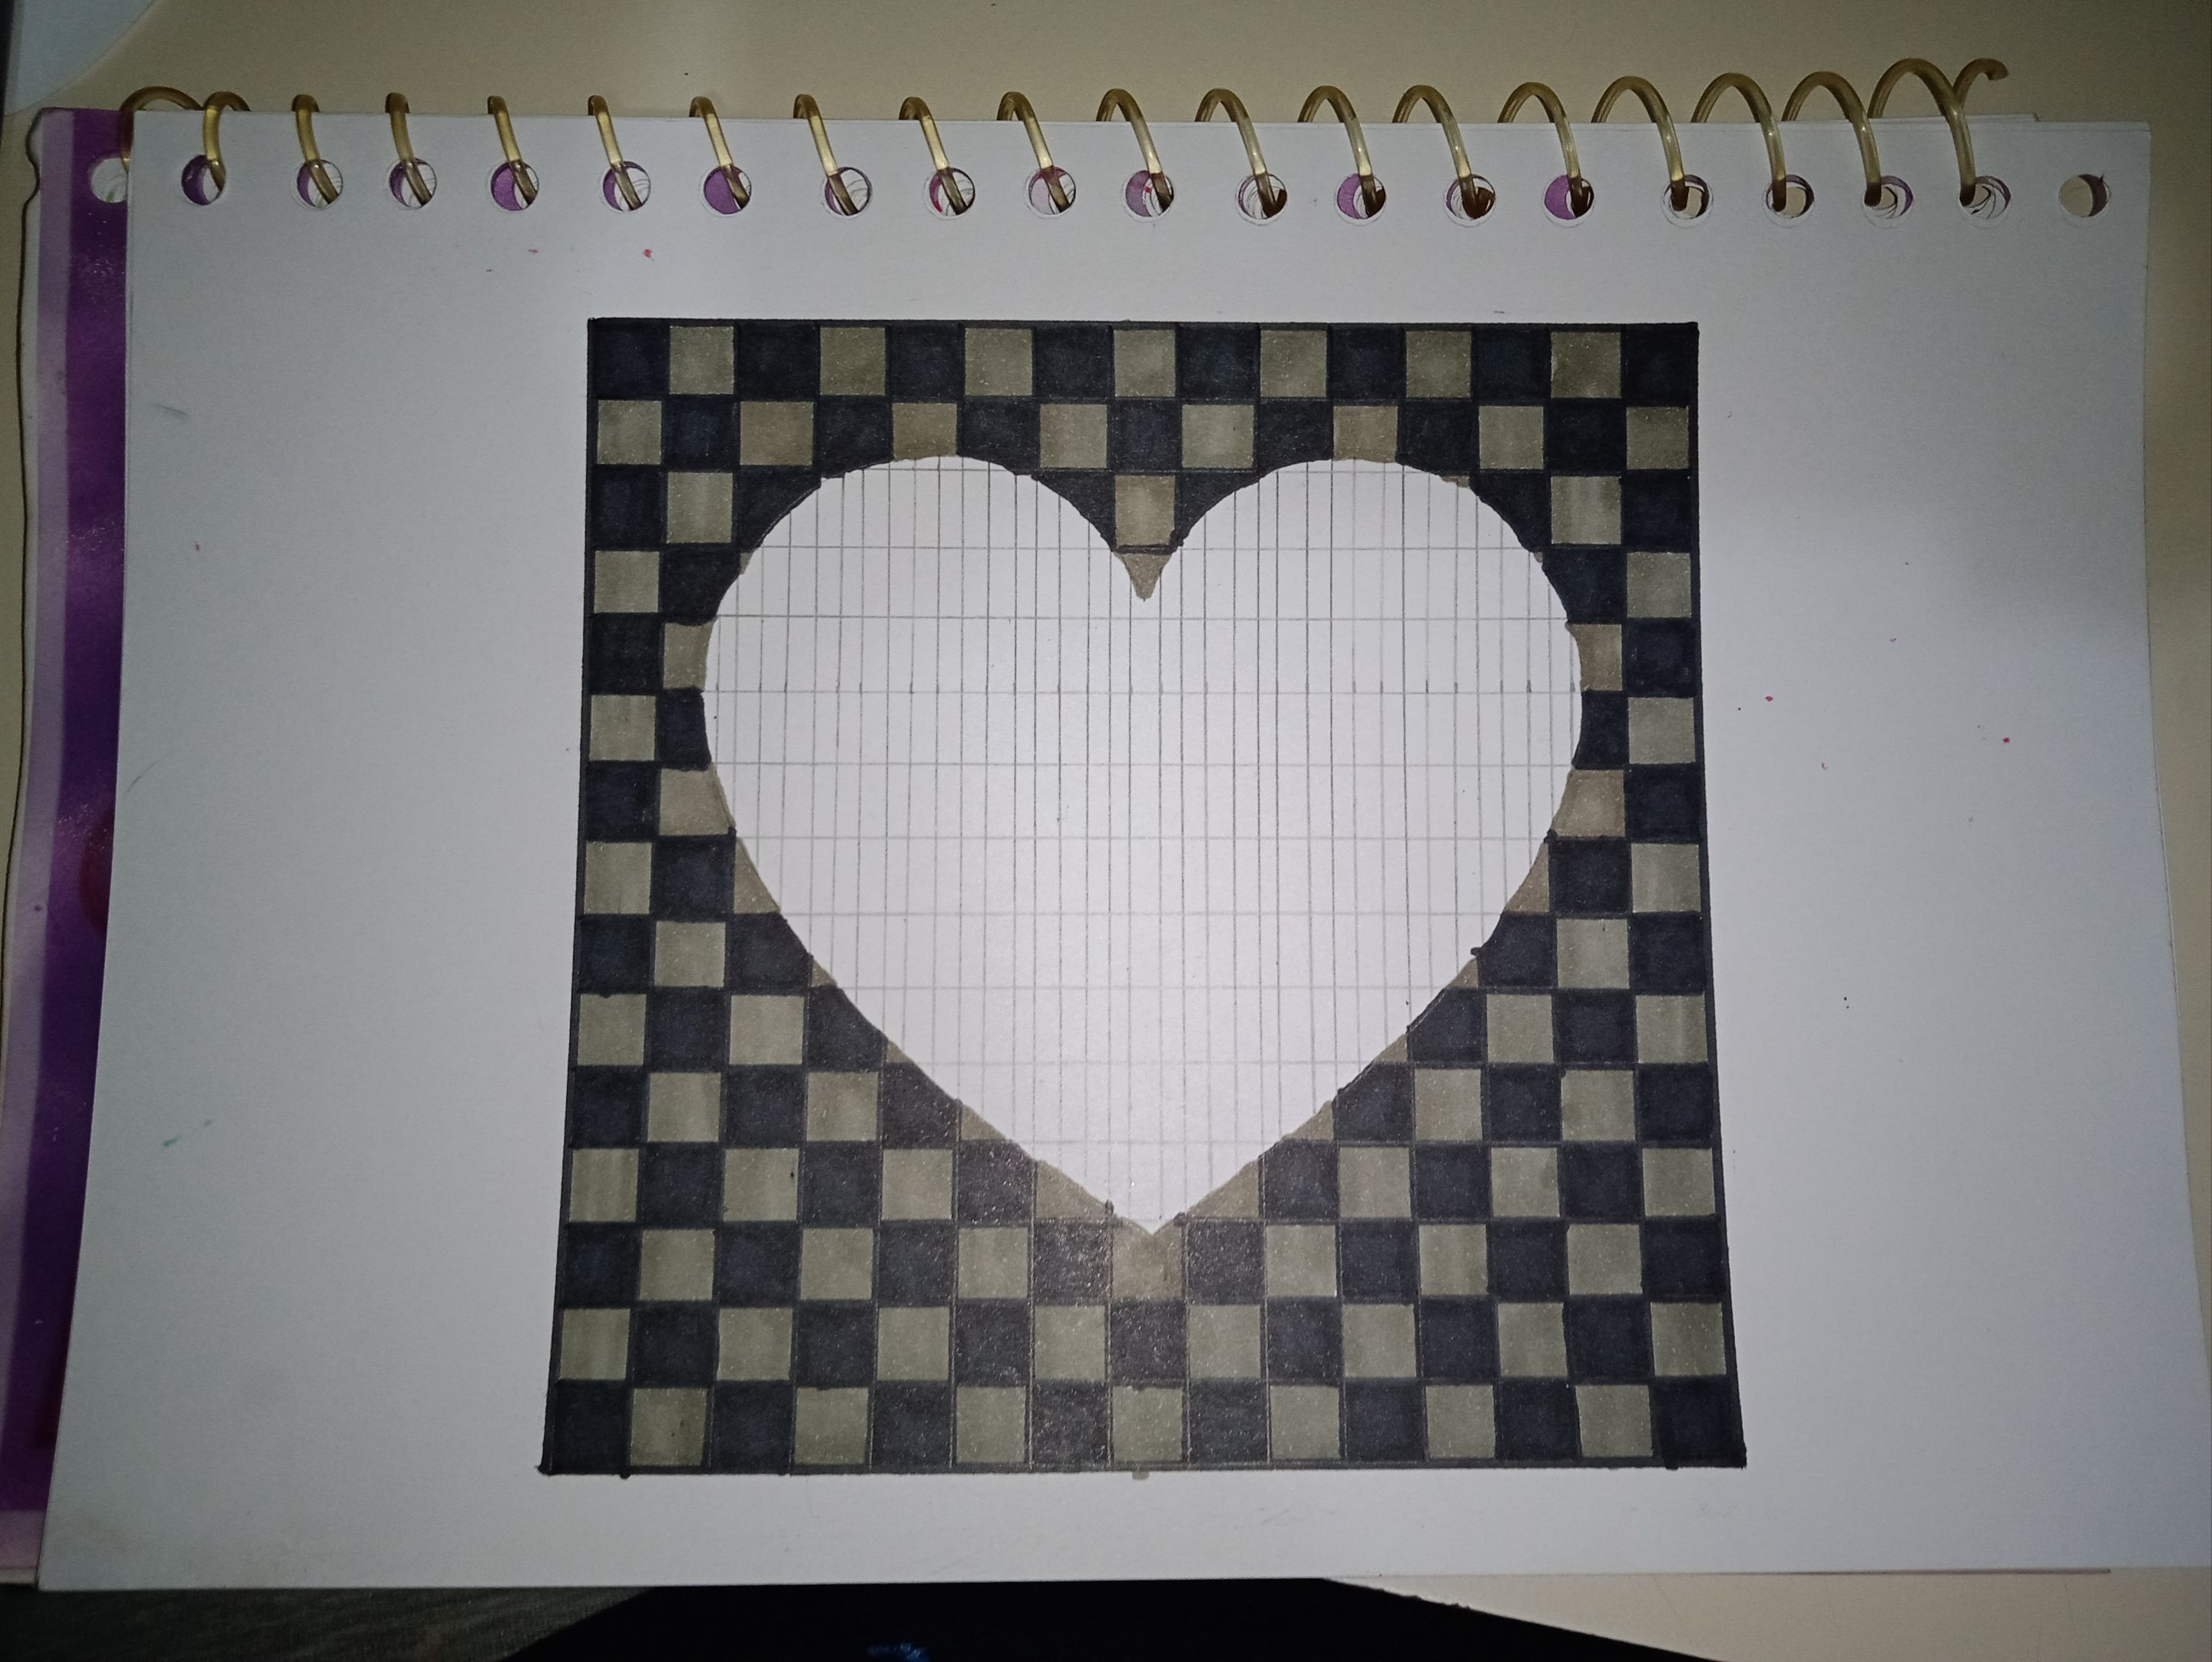
For the remaining white squares, I used a slightly dark gray, but if you have a lighter shade, it will look better (I think). Maybe this dark gray tone allows the 3D heart to stand out better without making the viewer dizzy 🤣
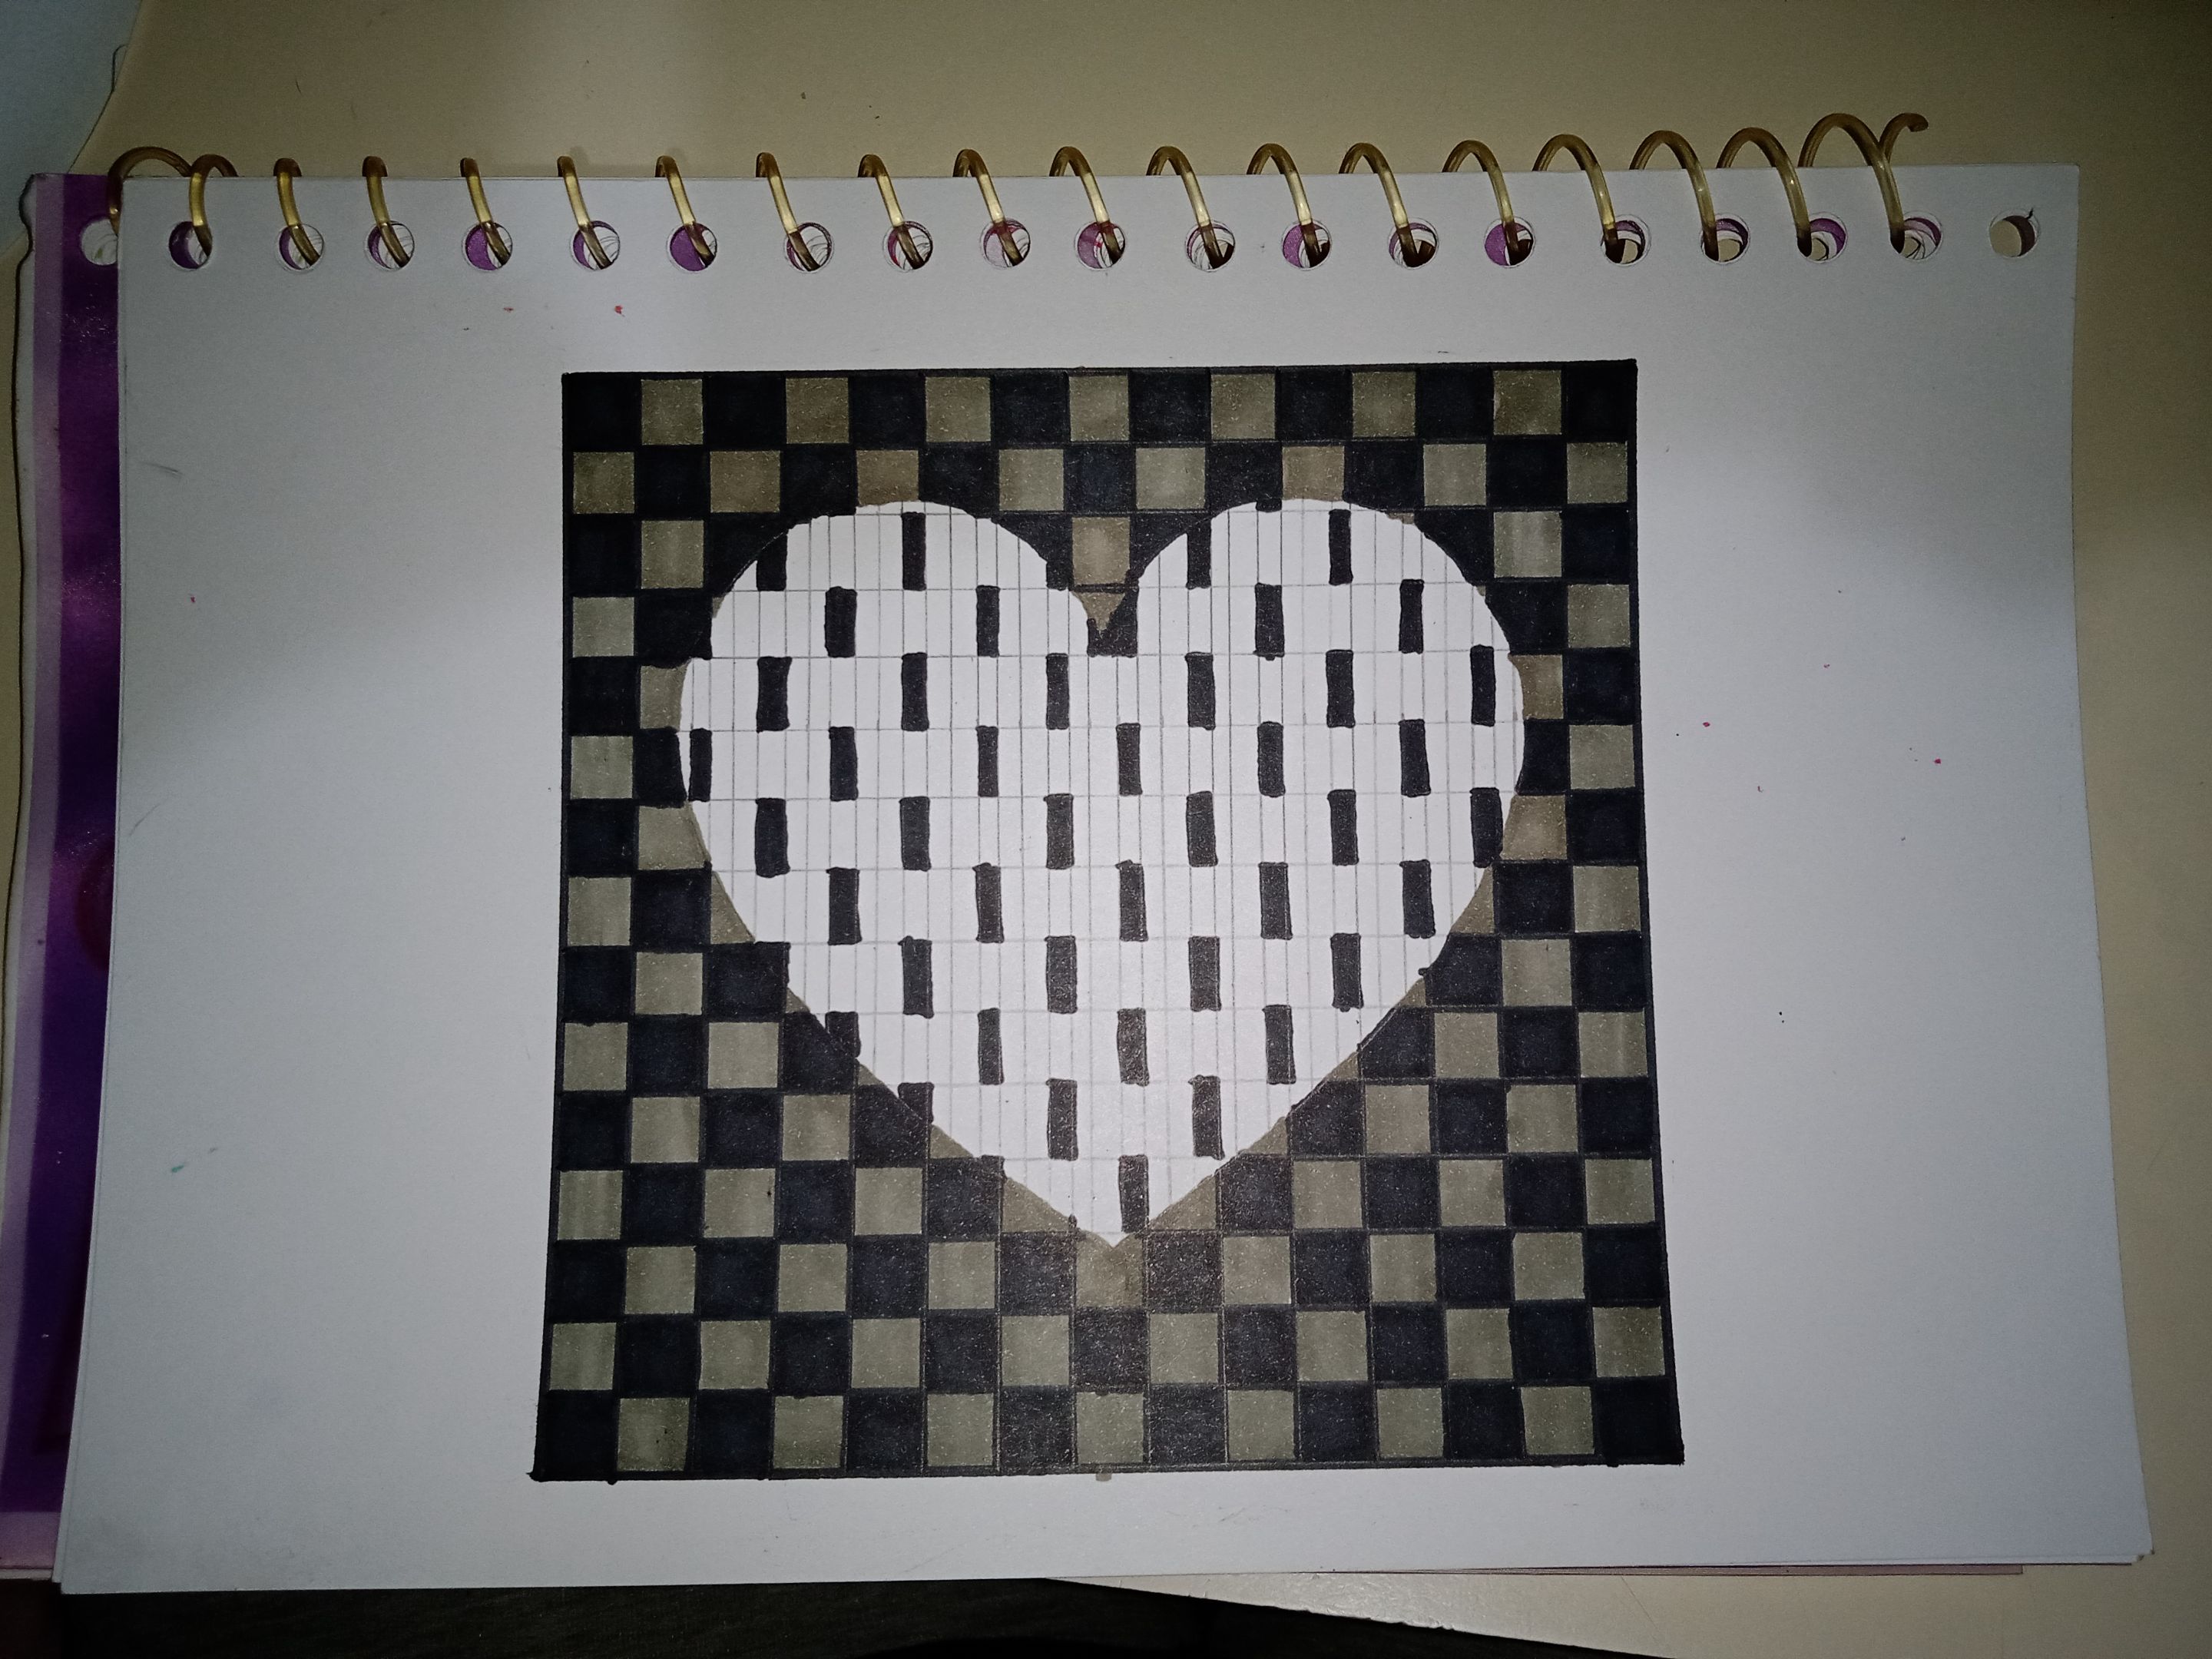
It is time to start filling in the heart. For this, I took into account a certain number of spaces. I started with black and took as a starting point the second line of the heart, leaving the first space blank, and starting with black. Then 5 white spaces and again black.
For the second line I took as a guide the first black square that I made in the heart and counted 2 spaces, thus coloring the third one, which if you start counting would be the middle one between the two upper squares.
I continued drawing between the lines, taking into account the separations and the previous position to place the black squares correctly.
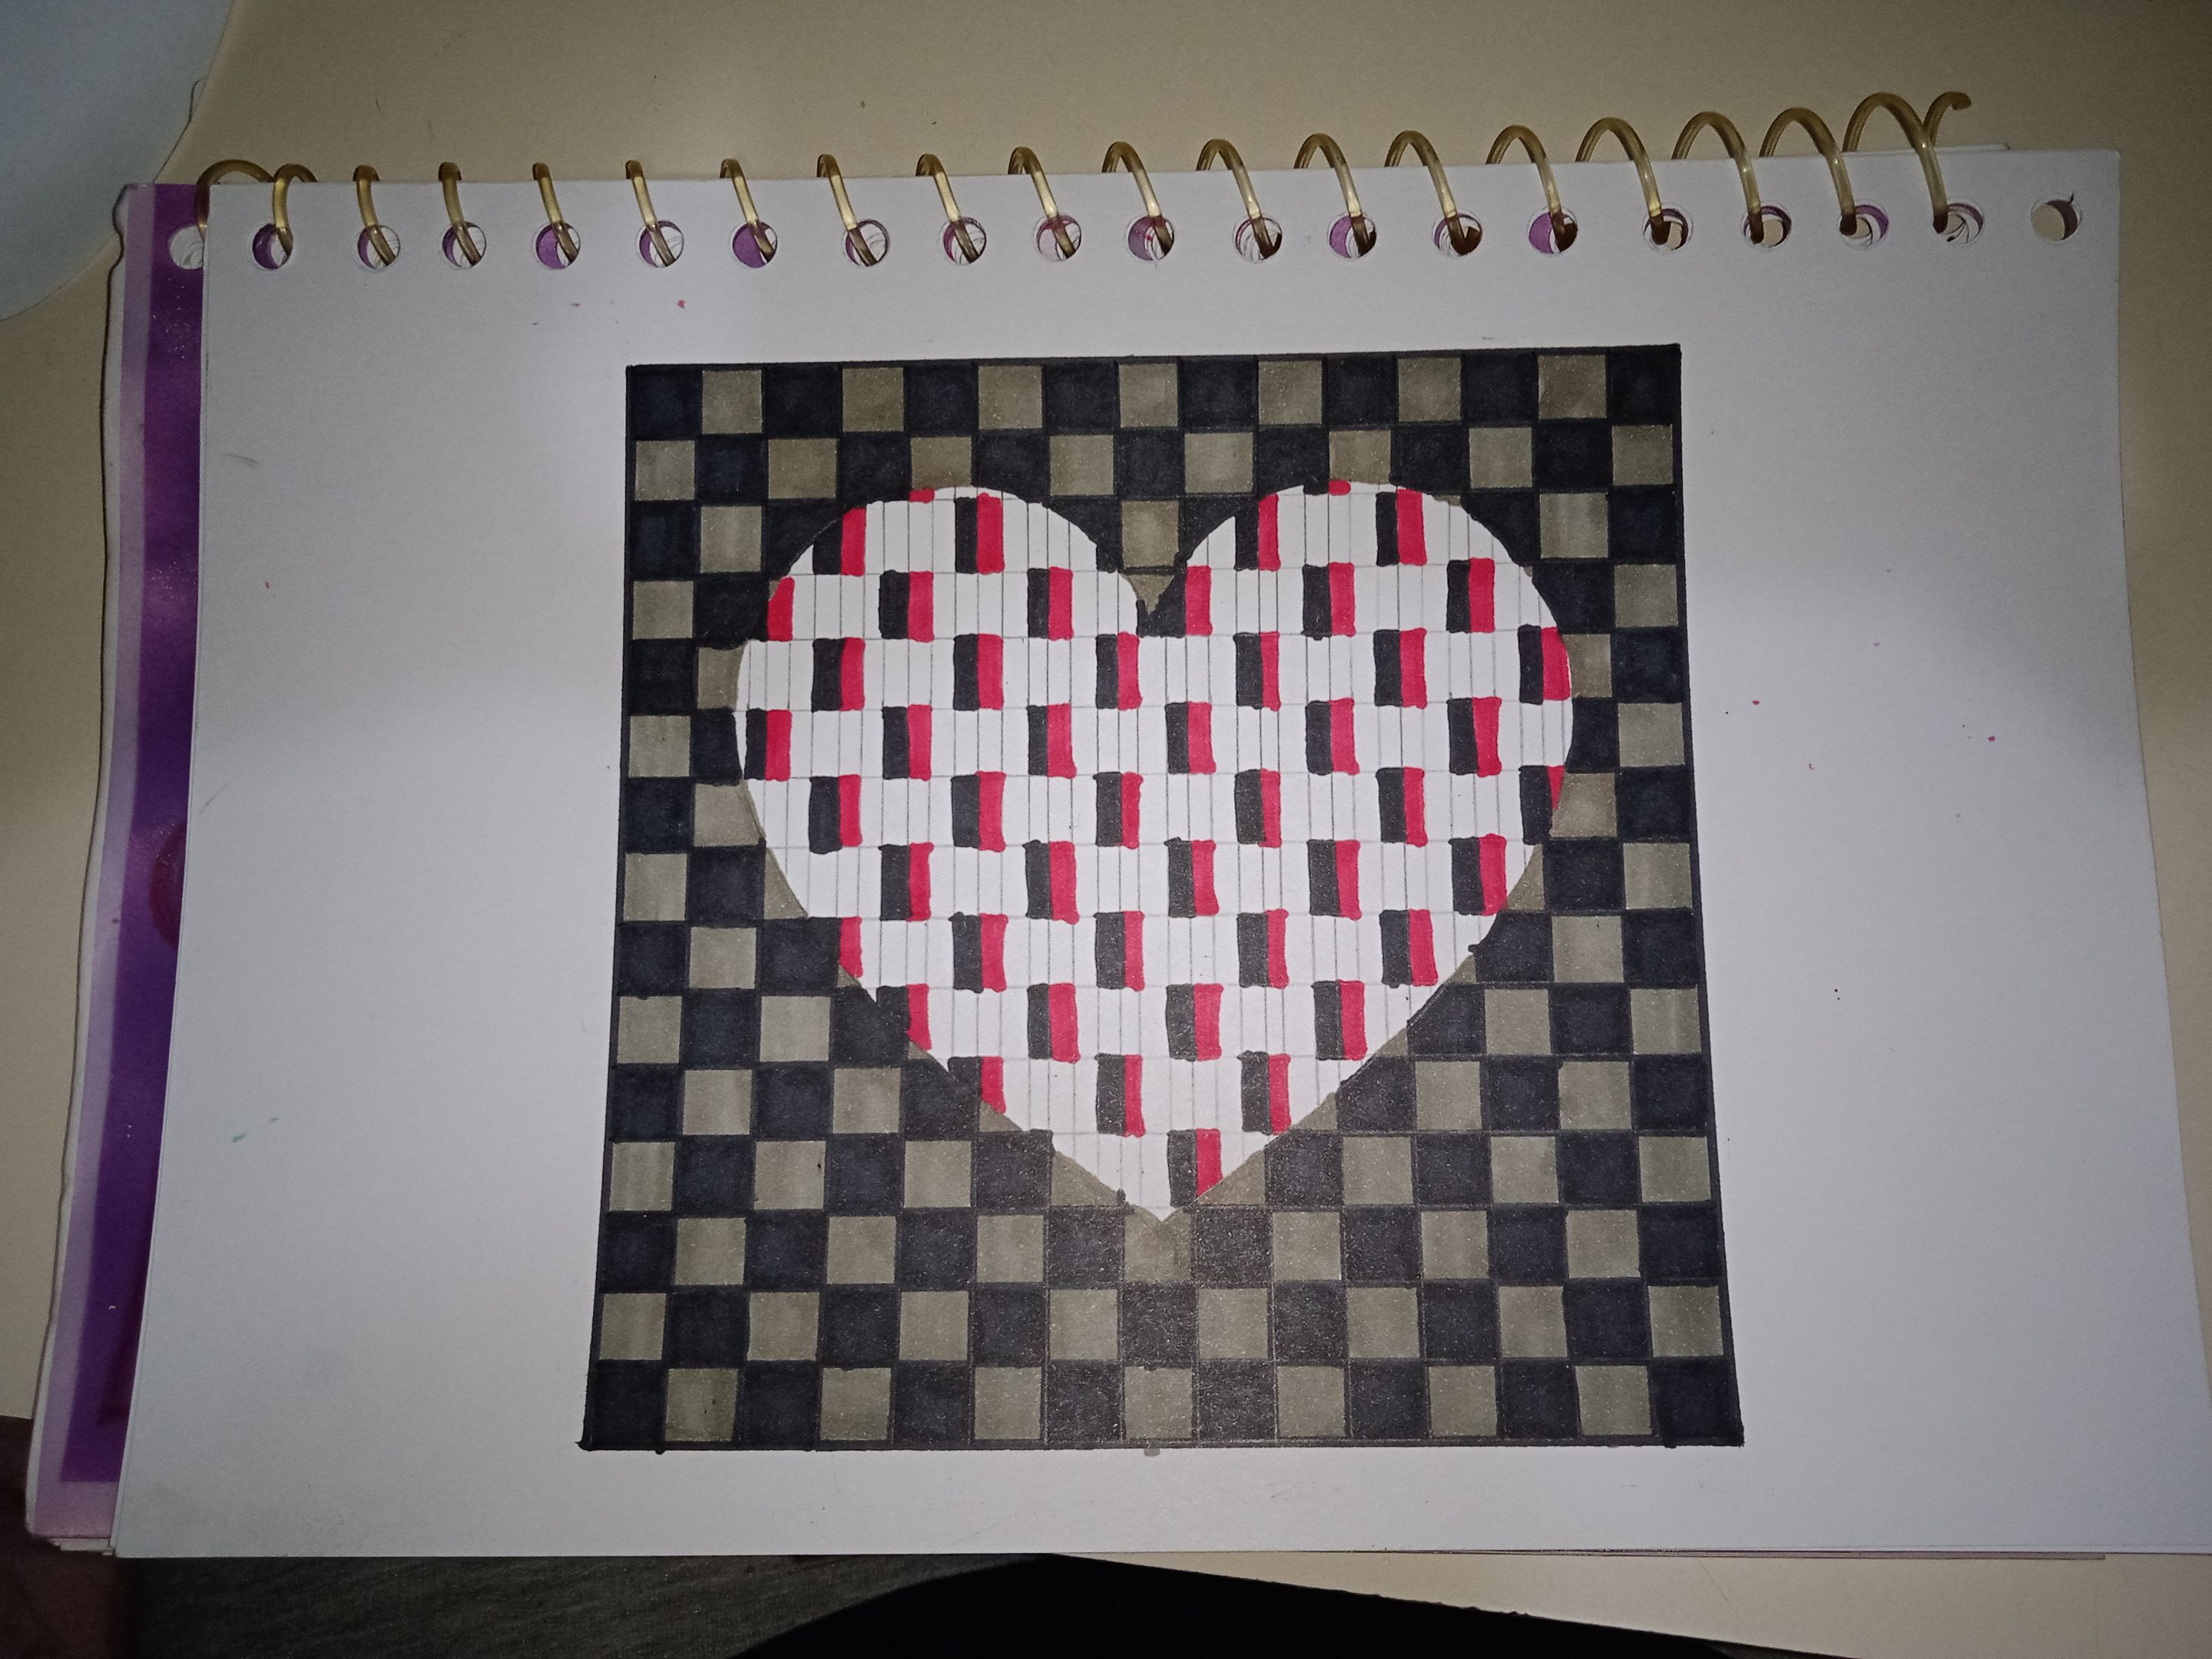
Then I started using the color red. I used it to paint all the squares that were on the right side of each black square.

Then I took the light blue color (but you can use a king blue color, which is darker). With this color, I drew the squares that were on the left side of each black block.
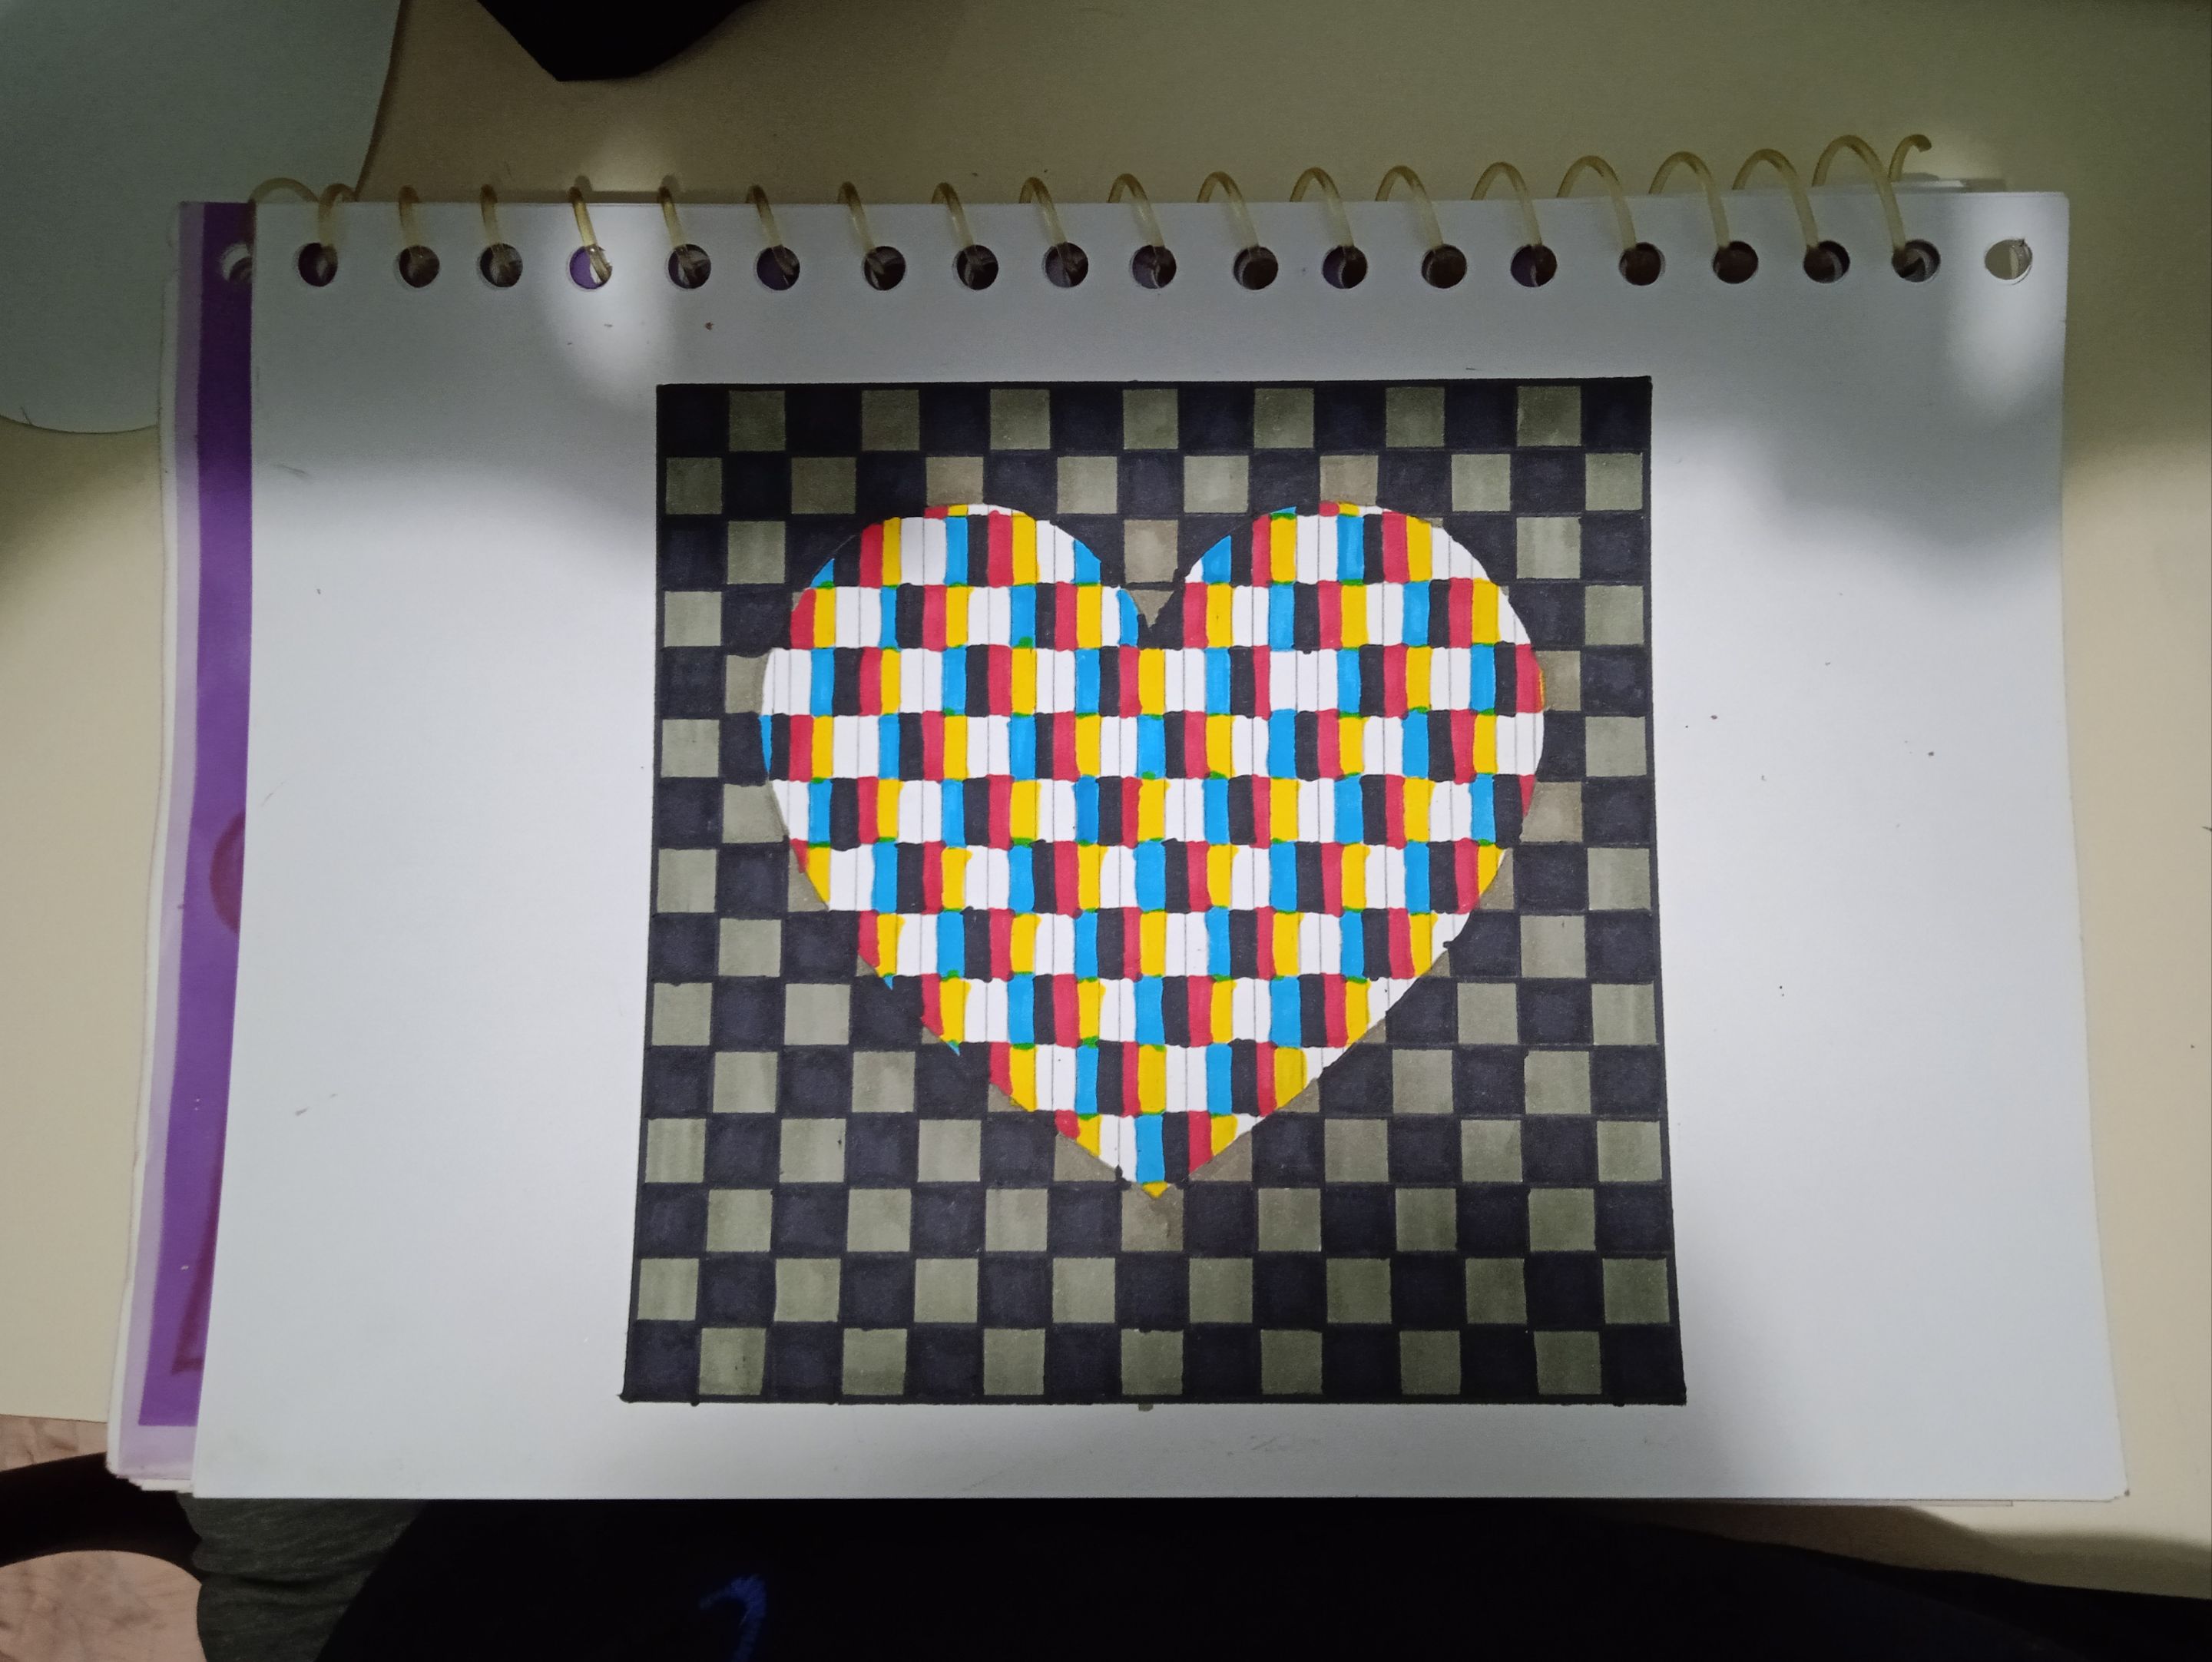
Then I used the yellow color. With it, I drew the squares next to each red square. And if you look closely, to guide you better, each square painted in yellow is exactly below the blue ones.
And now to finish, with a light green color, I set out to draw all the squares that were next to the blue squares. And coloring with green, you finish the drawing.
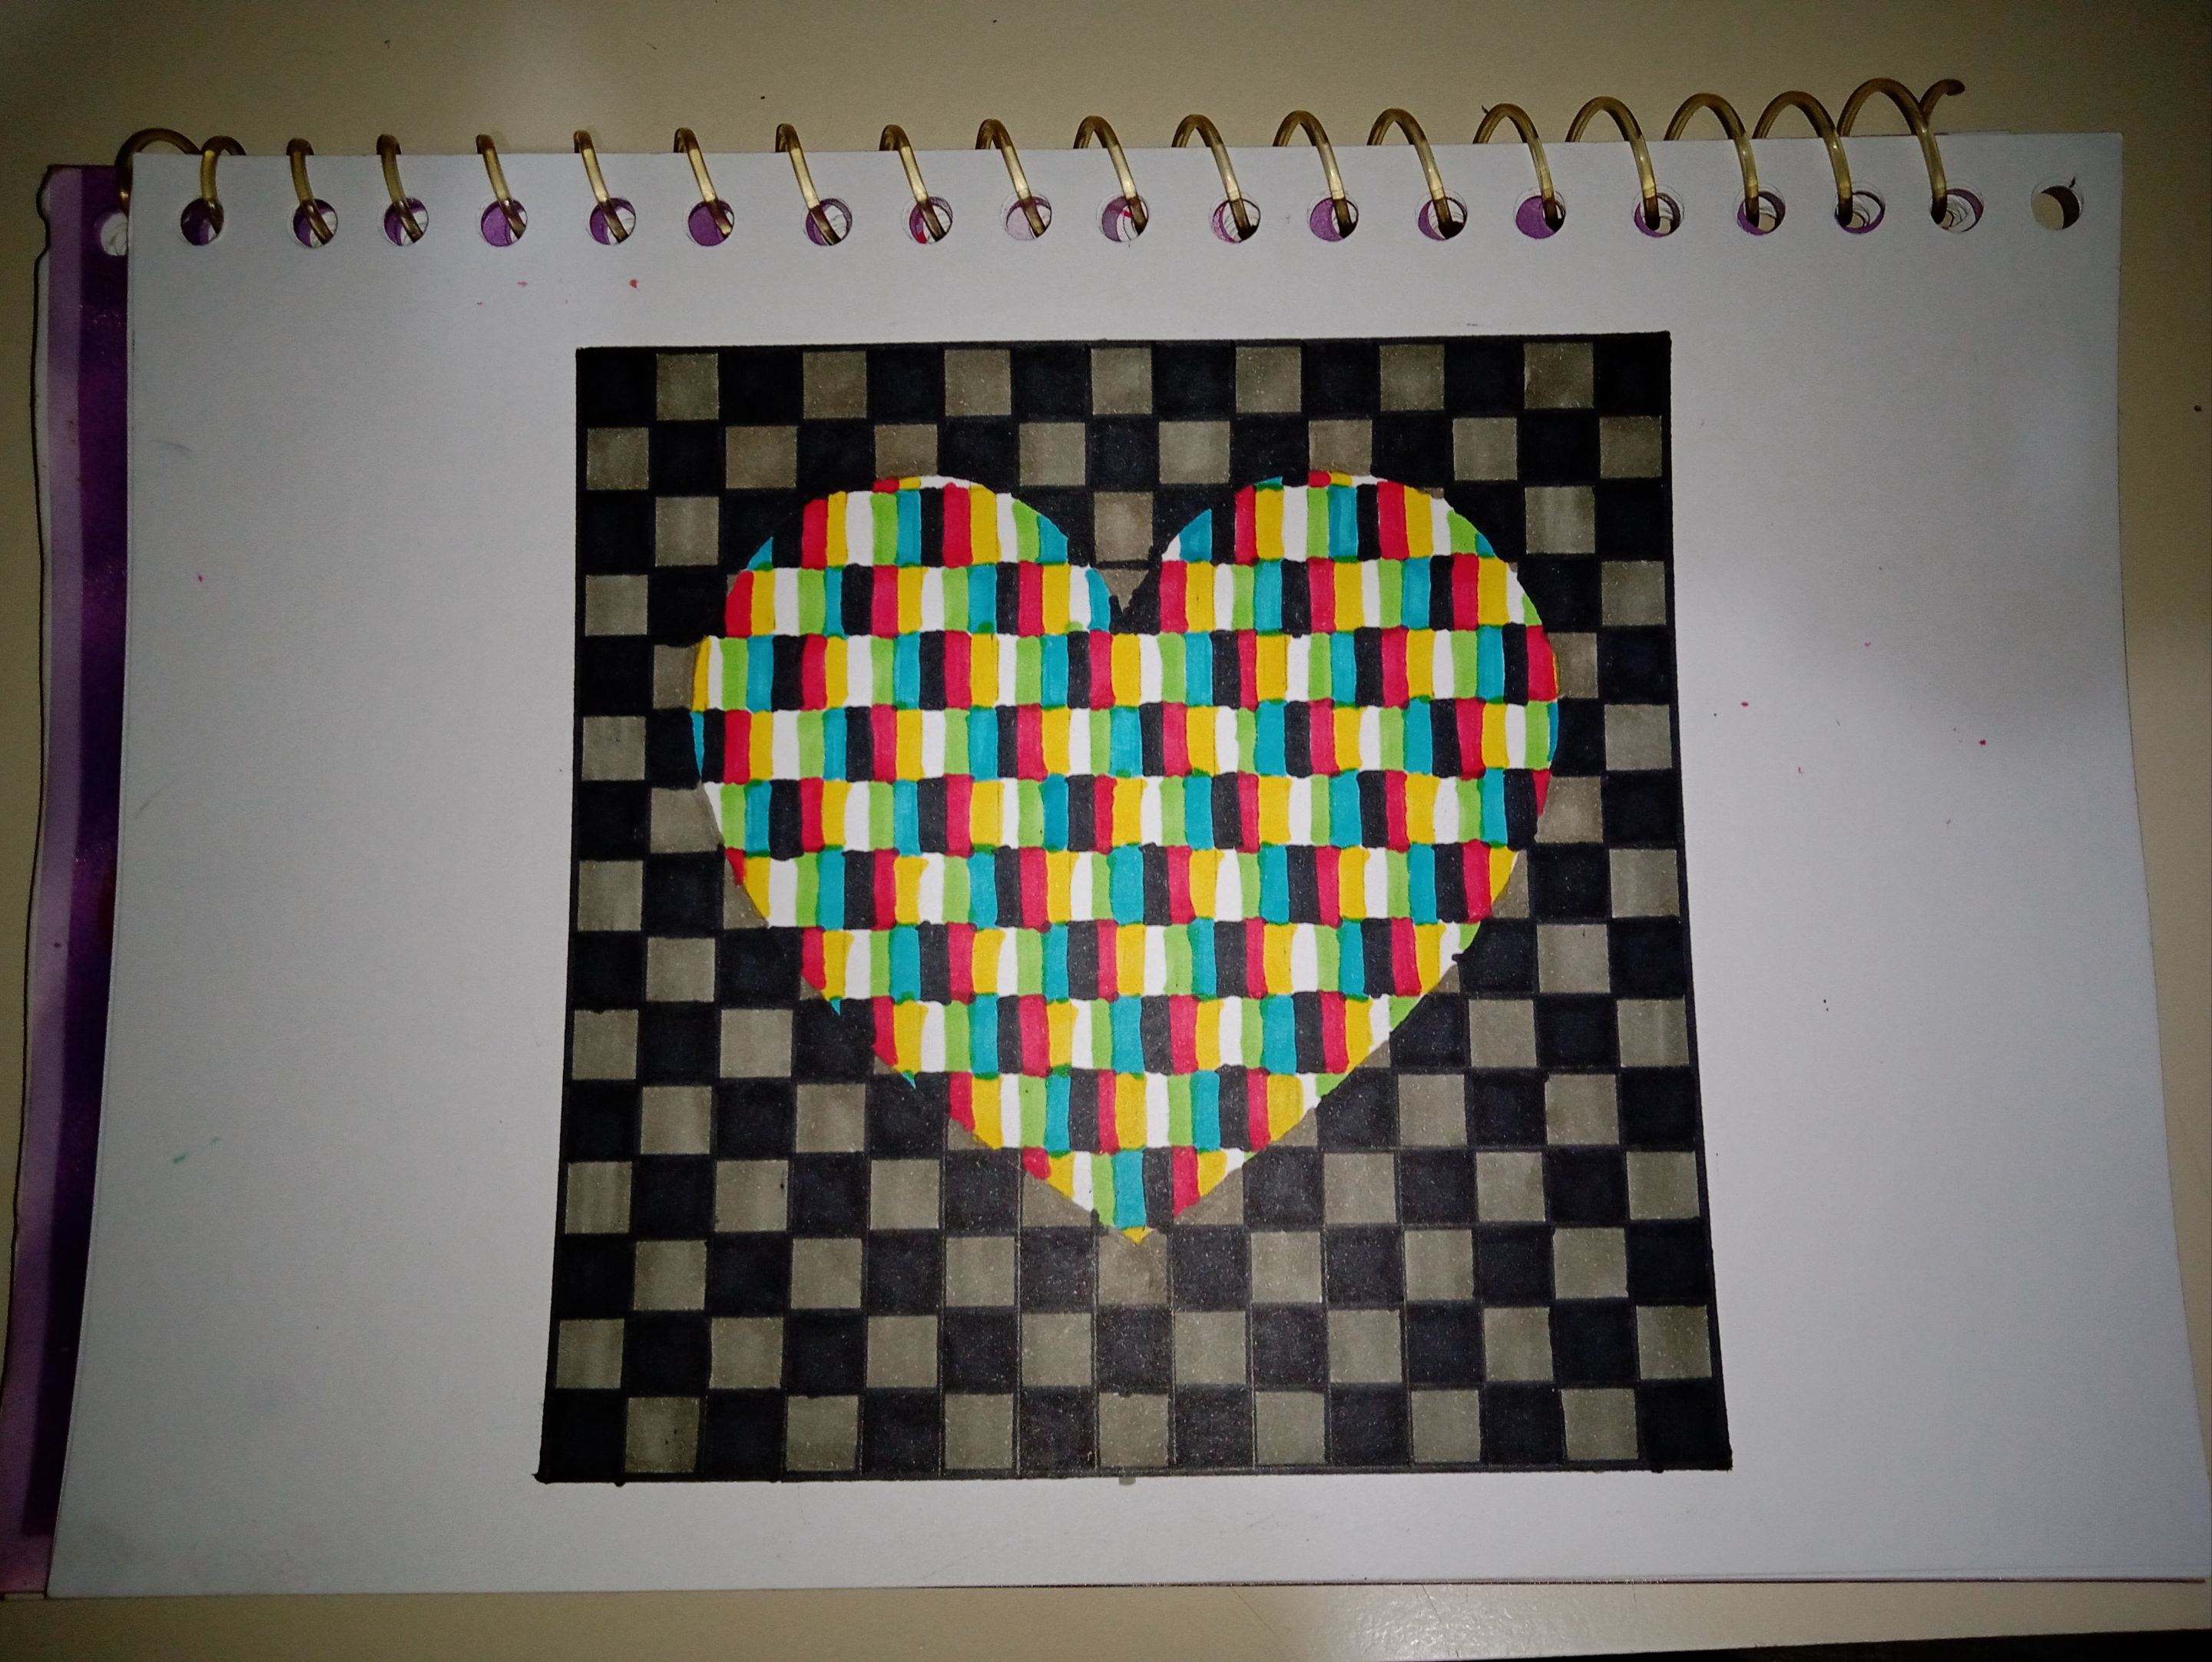
𝐅𝐢𝐧𝐚𝐥 𝐑𝐞𝐬𝐮𝐥𝐭

As an important note, I must add that once you have colored the respective boxes in the heart, you can erase the lines you made with the pencil to give it a better finish.
And well, to see the 3D effect you have to use the special glasses, those that they lend in the cinema or those that they sold before that came with a red lens and the other blue. Anyway, that's all for today. Let me know in the comments what you think. I read you! See you next time! 💚