Some time ago I received a favor request from my friend. He needed a burning iron and I decided to make one by using 3D printing in process. This time, I used our plastic printer to produce the pattern then I made a mould and casting. The concept and the workflow were pretty much the same compared to my latest job 3D printing: Steemit logo for casting. This is why I won’t go very deeply into different steps. I’ll just show the steps quickly so you can get another example of what kind of cool things you can do when you are utilizing 3D printing and castings.
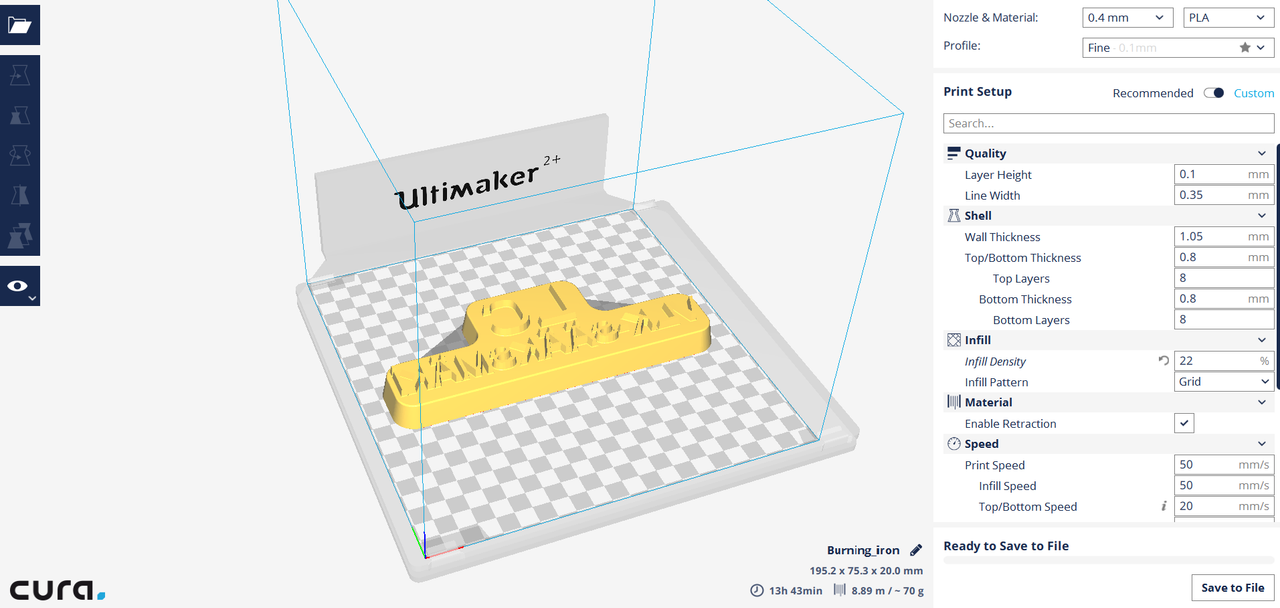
Step 1. Designing the geometry and sending it to Cura
When designing the pattern, it’s important to notice that the text must be a mirror image because it’s a burning iron. The device will be used to burn some marks on the wood.
After using ProE and designing the pattern, I downloaded it into the Cura. In Picture 1, the pattern is already downloaded to the Cura and you can see what are the main parameters.
Step 2. Making the cast inlets and channels
To save some printing time, I built inlets and channels using wood like last time. The pattern is also waxed and wooden parts are painted as you can see in the picture 2. This needed to be done just to make sure that the mould is removable from the pattern. Idea is to make three layers of moulds and cast them at the same time and naturally pick up the best one.

Step 3. Making and casting the moulds
I made the moulds using the cold resin sand. After a necessary amount of mouldings, I piled the moulds and squeezed them very tightly together. In picture 3. there is one mould ready to be coated.

After casting and cleaning the parts, I chose the best one for the further processing. In picture 4. are casted and cleaned parts ready to be grinded.

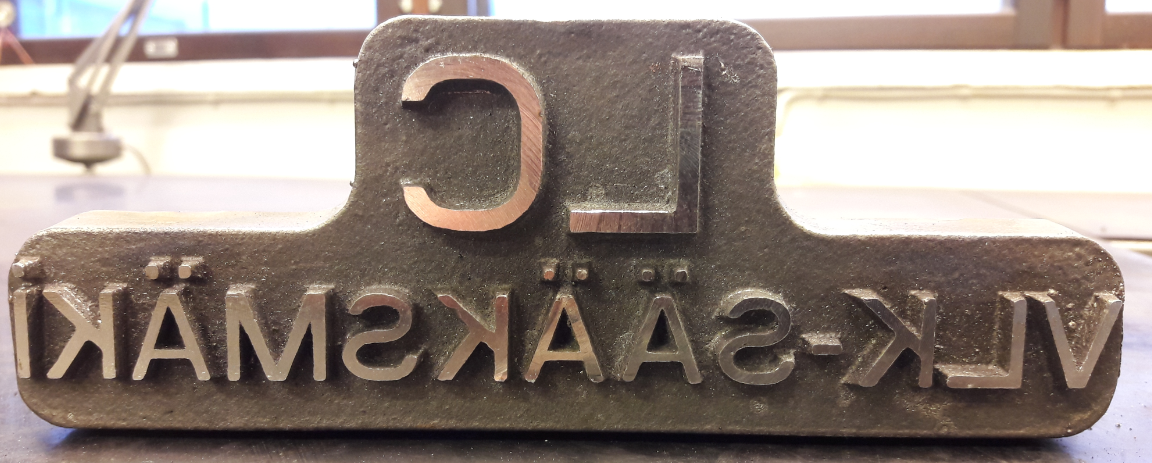
Step 4. Grinding the surface and building the handle.
After choosing the best part, the top surface of the text should be as flat as possible. The surface should be flat in order to achieve a smooth and nice burning. To avoid burning our hands, I also built the handle. In picture 5 is a grinded text and picture 6 presents the burning iron which is fully ready.

Step 5. Burning some marks
The burning iron is heated up using gas flame. I recognised that iron must be quite hot to make clear marks. At the beginning, it was very difficult to get the whole text visible. Picture 7 and 8 are representing practising and finding out the right technique.


I hope you liked this application. This tool and my last work were quite similar to manufacture and next time I will try to do something totally different.
-markos86