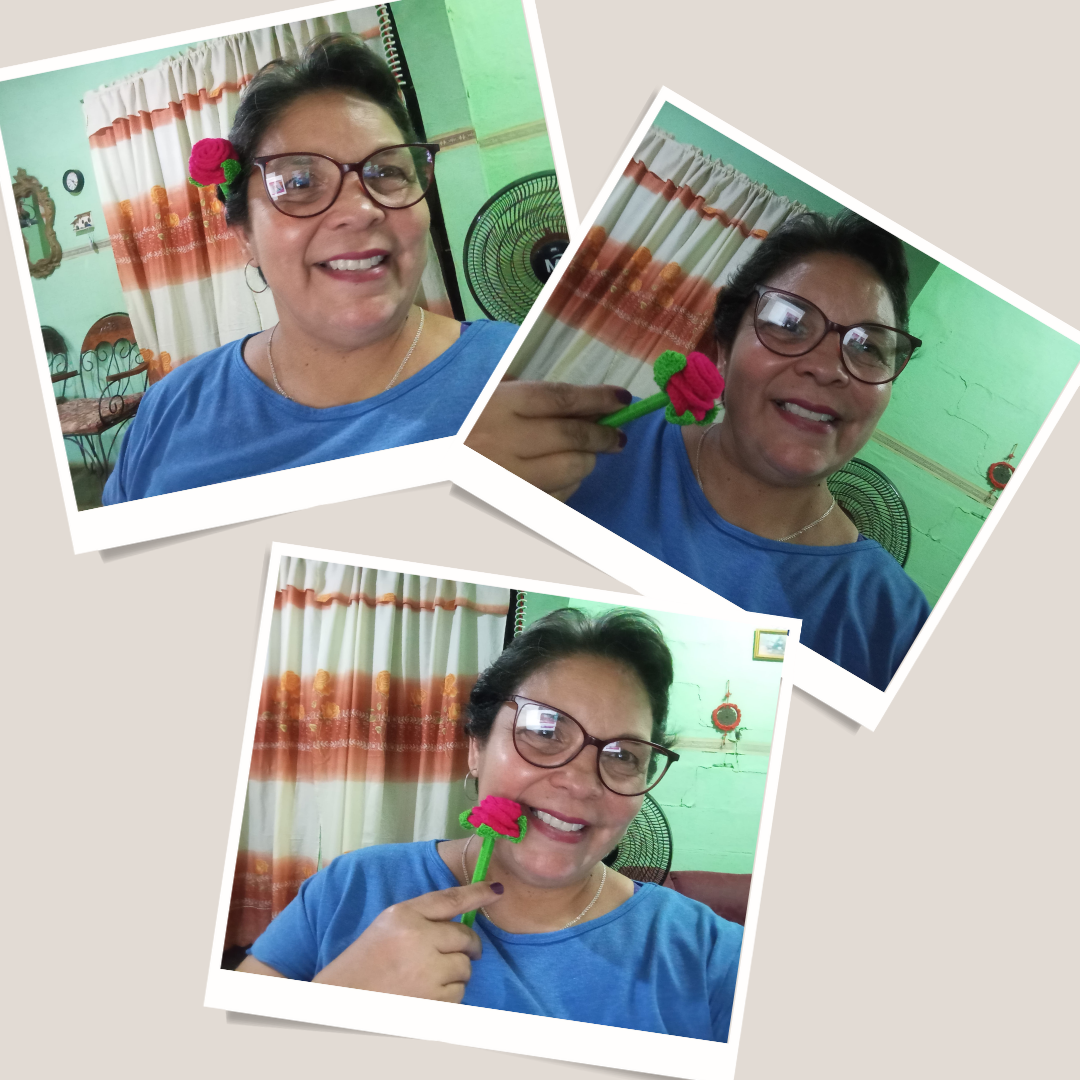
Hello hello, my beautiful people of the #hive community. If I could tell you how excited I am today, I am going to show you how to make a beautiful pencil that I decorated, to personalize my pencil, it is not the first time I do this and the truth is that I have loved it, to see that each time the knitting is more and more perfect and I feel motivated to do more crochet work.
For me it was extremely relaxing to do and very fast. At first I was a little busy I thought I did not have the complete material, and I checked my bag, and I got the perfect colors to combine, I hope your opinion, so without anything else to add I leave you with the step by step.
Hola hola, mi gente linda de la comunidad de #hive. Si les contará lo emocionada que estoy el día de hoy, voy a enseñarles a realizar un bello lapicero que decoré, para personalizar mi lapicero, no es la primera vez que hago esto y la verdad es que me ha encantado, ver que cada vez el tejido te queda más a la perfección y me siento motivada a hacer más trabajos en crochet.
Para mí fue sumamente relajante de hacer y rapidísimo. Al principio estaba un poco atareada pensé que no tenía el material completo, y revisé bien mi bolso, y conseguí los colores perfectos para combinar espero su opinión, así que sin nada más que agregar los dejo con el paso a paso.
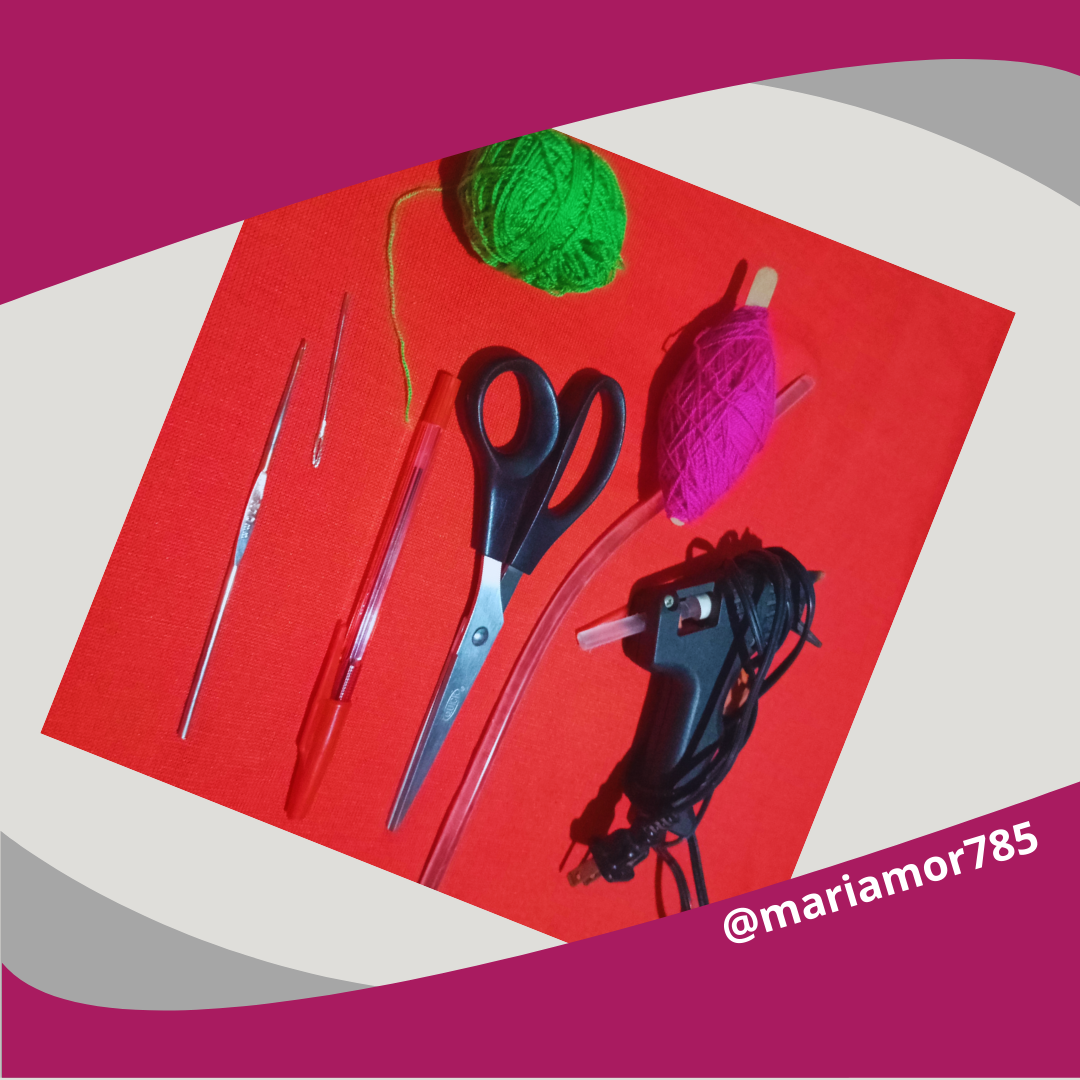
MATERIALS I USED://MATERIALES QUE UTILICÉ:
- Green crochet thread.
- Fuchsia crochet thread.
- Crochet needle of 00 mm.
- Silicone gun.
- Scissors.
- Wool needle.
- Pencil.
• Hilo crochet color verde.
• Hilo crochet color fucsia.
• Aguja de crochet de 00 mm.
• Pistola de silicón.
• Tijera.
• Aguja lanera.
• Lapicero.
STEP BY STEP//PASO A PASO
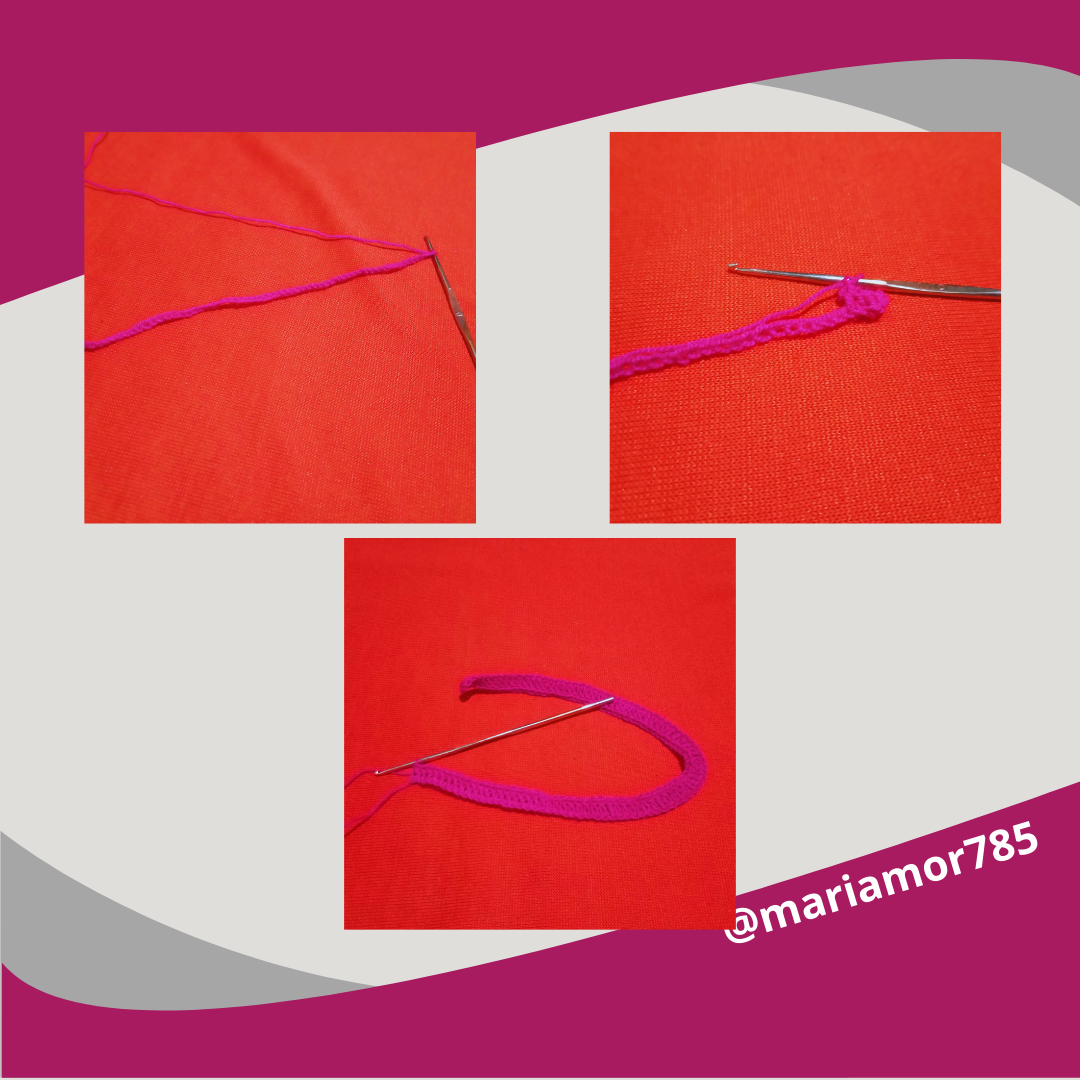
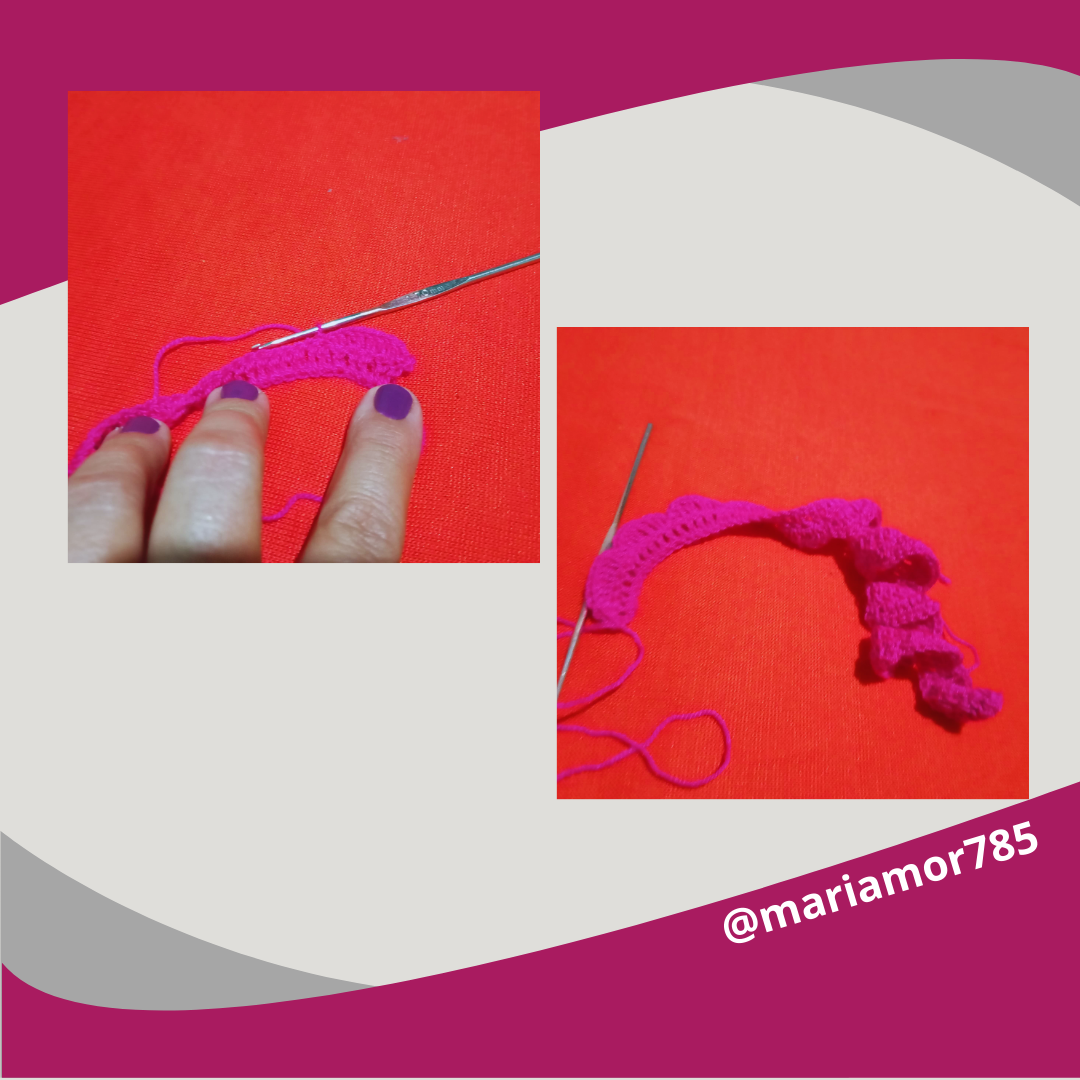
Steps to make the rose🌹.
Start working on a base of 88 chains.
We are going to fill the stitch base with 85 stitches with double crochet.
Pasos para realizar la rosa🌹.
Iniciar a trabajar en una base de 88 cadenetas.
Vamos a rellenar la base de candenetas con 85 puntos con puntos altos.
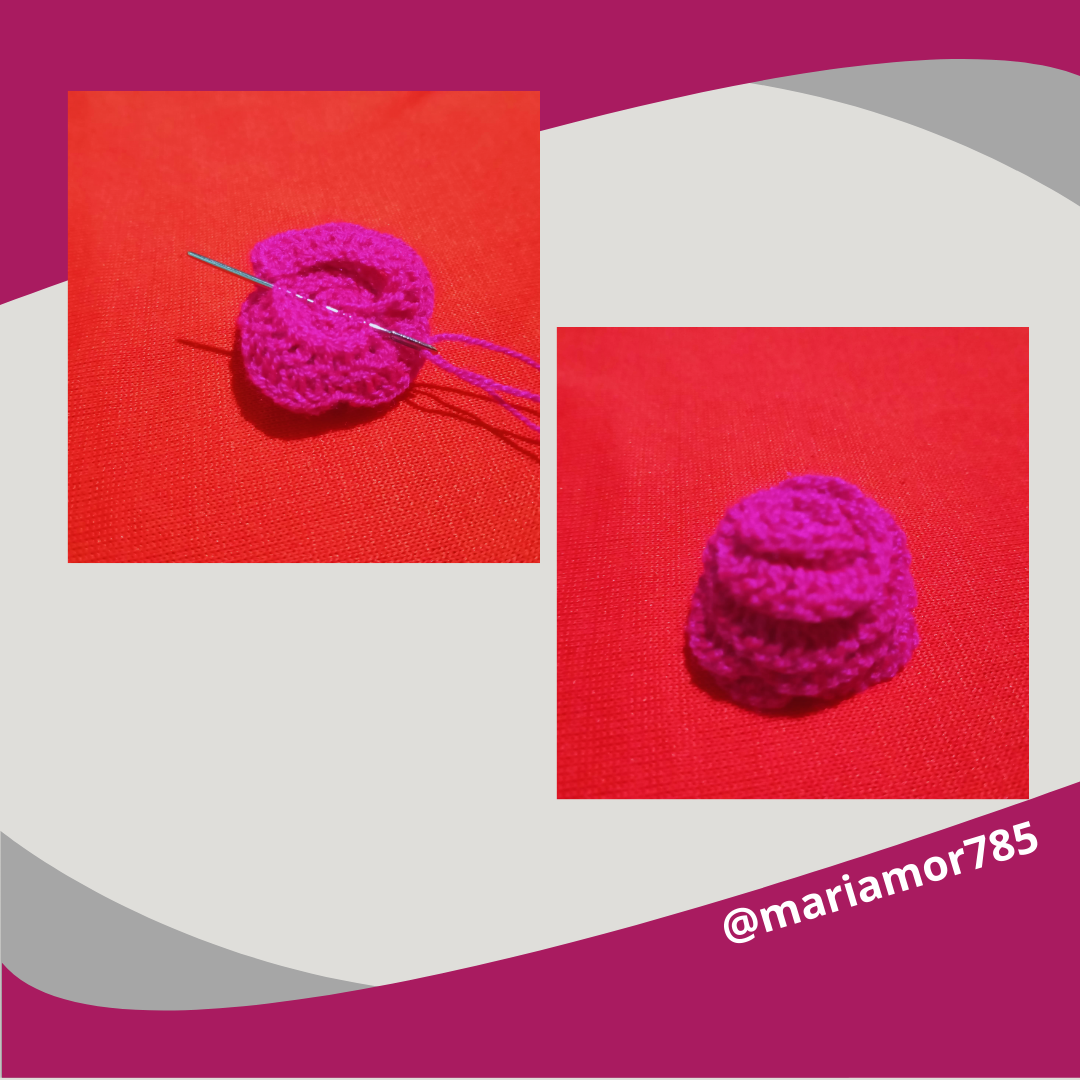
Then, count two spaces and on the fourth chain stitch, then knit two double crochets, knit four double crochets, plus single crochet (xVVVVVVx), repeat the procedure, it will give us the number of 17 groups, finish with a single crochet.
Luego, contaremos dos espacios y a la cuatra cadenetas, luego realizar dos puntos altos realizar cuatro puntos altos, más punto bajo (xVVVVx) repetir el procedimiento, nos dará la cantidad 17 grupos, finalizar con un punto bajo.
Begin to give it the shape of a rose and sew with the wool needle, taking a strand of thread very carefully and adjusting it so that it does not come apart.
Comenzar a darle la forma de rosa y con la aguja lanera coser, tomando una hebra de hilo con mucho cuidado y ajustando para que no se nos desarme.
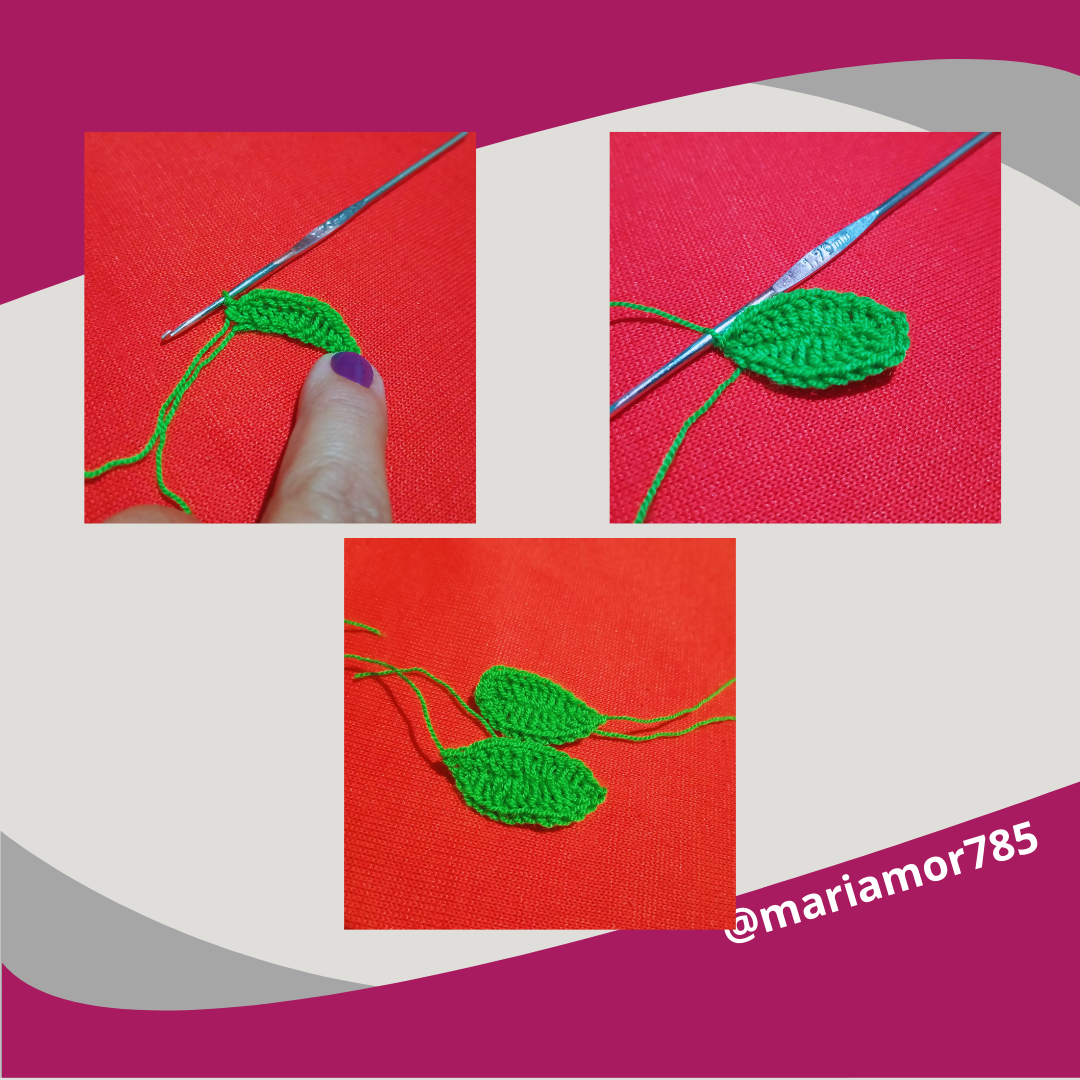
Step by step to make the leaves🍃.
Start with a base of 10 chain stitches, plus a single crochet, enter the second stitch, knit a single crochet, followed by a double crochet, two double crochets, two double crochets, (_xIIVVIIx) follow with two double crochets and repeat the steps until the leaf is finished.
Make 04 leaves repeating the same procedure🍃.
Paso a paso para hacer las hojas🍃.
Comenzar con una base de 10 cadenetas, más un punto al aire, introducir al segundo punto, hacer un punto bajo, seguido de punto medio alto, dos puntos altos, dos puntos dobles, (_xIIVVIIx) seguir con dos puntos medios y repetir los pasos hasta terminar la hoja.
Hacer 04 hojas repitiendo el mismo procedimiento🍃.
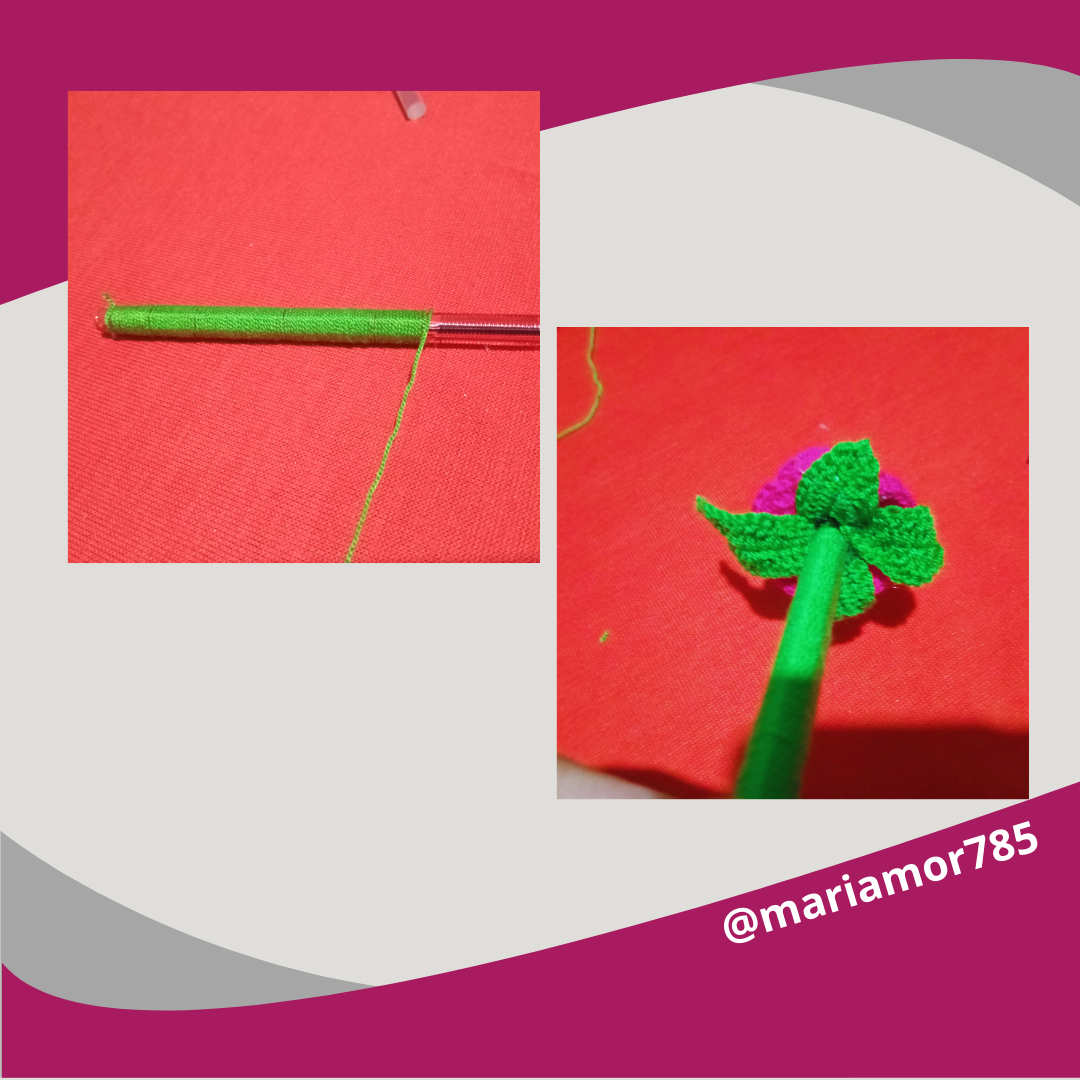
Time to assemble, and having the rose ready, we will place the glue on the bottom of the leaves and let it dry, we want the rose to have a magnificent finish.
Start decorating the body of the pencil, place hot silicone on the upper part of the pencil and give it a tight shape until you reach the end, cut the excess thread.
Hora de ensamblar, ya teniendo la rosa lista, colocaremos el pegamento en la parte inferior las hojas y dejar que se seque, queremos que la rosa tenga un magnífico acabado.
Iniciar a decorar el cuerpo del lapicero, colocaremos silicón caliente en la parte superior del mismo e ir dándole la forma bien ajustada hasta llegar al final, cortaremos el excedente de hilo.
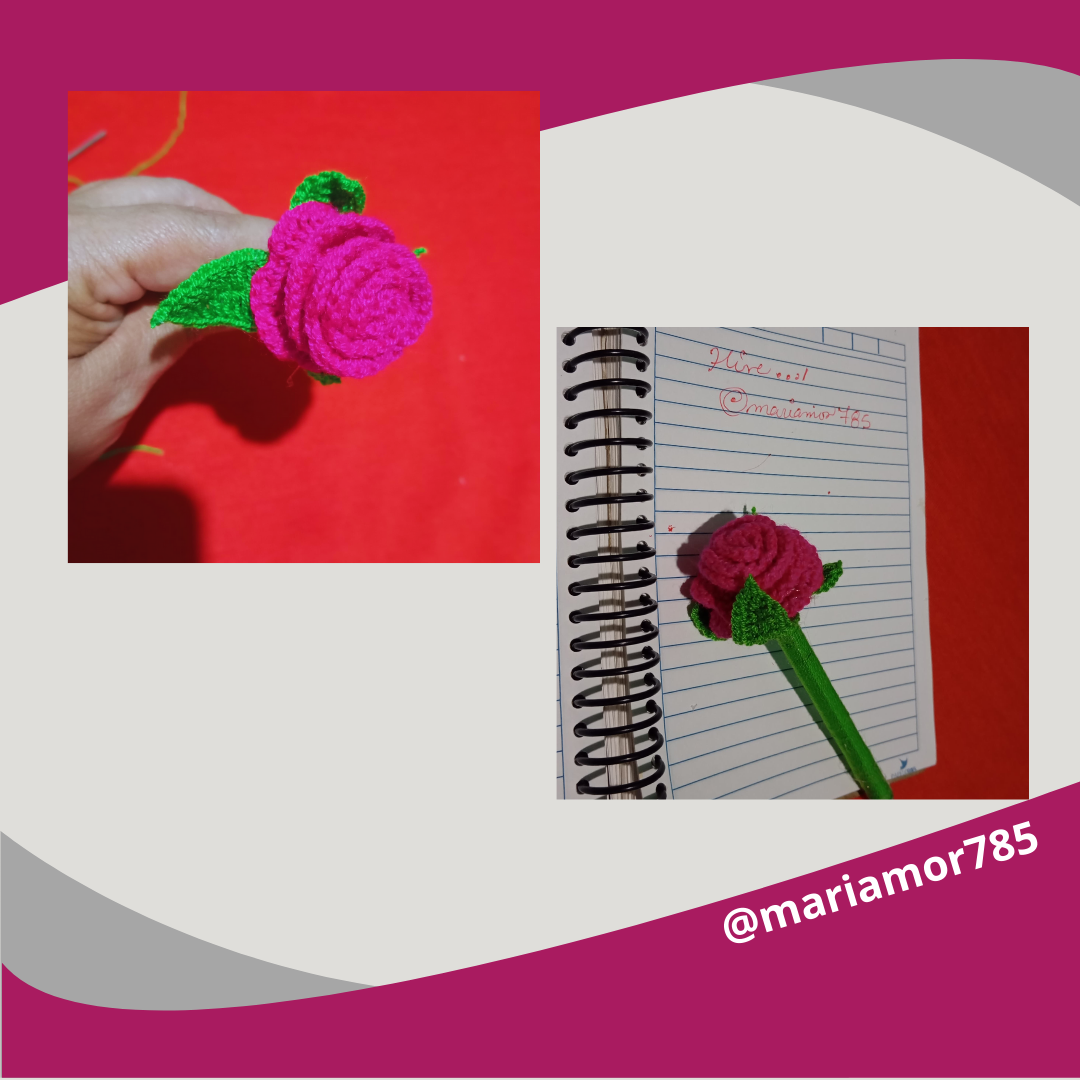
Done! The project of a pen with a beautiful and colorful rose.
In love 😊 to have made that project and share with my favorite community.
Listo! El proyecto de un lapicero con una hermosa y colorida rosa.
Enamorada 😊 de haber elaborado ese proyecto y compartir con mi comunidad favorita.