Hello my favorite beehive! Happy weekend to all of you. I have been thinking about making planters with your roses for a while now, I still have many, many more patterns to make. I am creating this work because I want to restore my ornaments and also as a way to generate more income. This is one of the reasons why today I have decided to do this project, if I see it feasible and beautiful.
I have already exhibited several works with flowers, or roses that I have woven, the flower pots is my first project, I will take the opportunity to share it, and I hope it will also be useful for everyone. These last few days have been hot, and it overwhelms me to feel hot and something that makes me forget is to be with my mind busy knitting, this project is very simple, in my work they vote the lids of the water bottles, and I collected several, and it occurred to me to take advantage of this recycling material to make my matero, This time I knitted an arrangement of mini roses. I will begin by explaining how I made the pot.
¡Hola mi colmena favorita! Feliz fin de semana para todos. Desde hace un tiempo he estado pensando en realizar maceteros con sus rosas, aún me quedan muchísimos modelos por realizar. Estoy creando este trabajo porque quiero restaurar mis adornos y también como manera de generar más ingresos. Esta es una de las razones por la que hoy he decidido este proyecto, si lo veo factible y lindo.
Ya les he exhibido varios trabajos con flores, o rosas que he tejido, las macetas es mi primer proyecto, aprovecharé de compartirlo, y espero sea también de provecho para todos. Estos últimos días han sido calurosos, y me agobia sentir calor y algo que me hace olvidar es estar con mi mente ocupada tejiendo, este proyecto es muy sencillo, en mi trabajo votan las tapas de los botellones de agua, y recogí varias, y se me ocurrió aprovechar este material de reciclaje para hacer mi matero, En esta ocasión tejí un arreglo de mini rosas. Empezaré explicando cómo hice la maceta.
MATERIALS//MATERIALES
01 Yellow wick thread.
01 Green wick thread.
01 Scissors
01 Needle N° 00.
01 Silicone gun.
02 Recycling caps.
01 Pink rag.
01 Sweet wire 15 cm.
01 Pickaxe to cut the wire.
01 Small stones of fishbowl.
01 Copper wire.
01 Hilo pabilo color amarillo.
01Hilo pabilo color verde.
01 Tijera
01 Aguja N° 00.
01 Pistola de silicon.
02 Tapas de reciclaje.
01 Trapillo color rosado.
01 Alambre dulce 15 cm
01 Piqueta para cortar el alambre.
01 Piedritas de pecera.
01 Alambre de cobre.

STEP BY STEP//PASO A PASO.
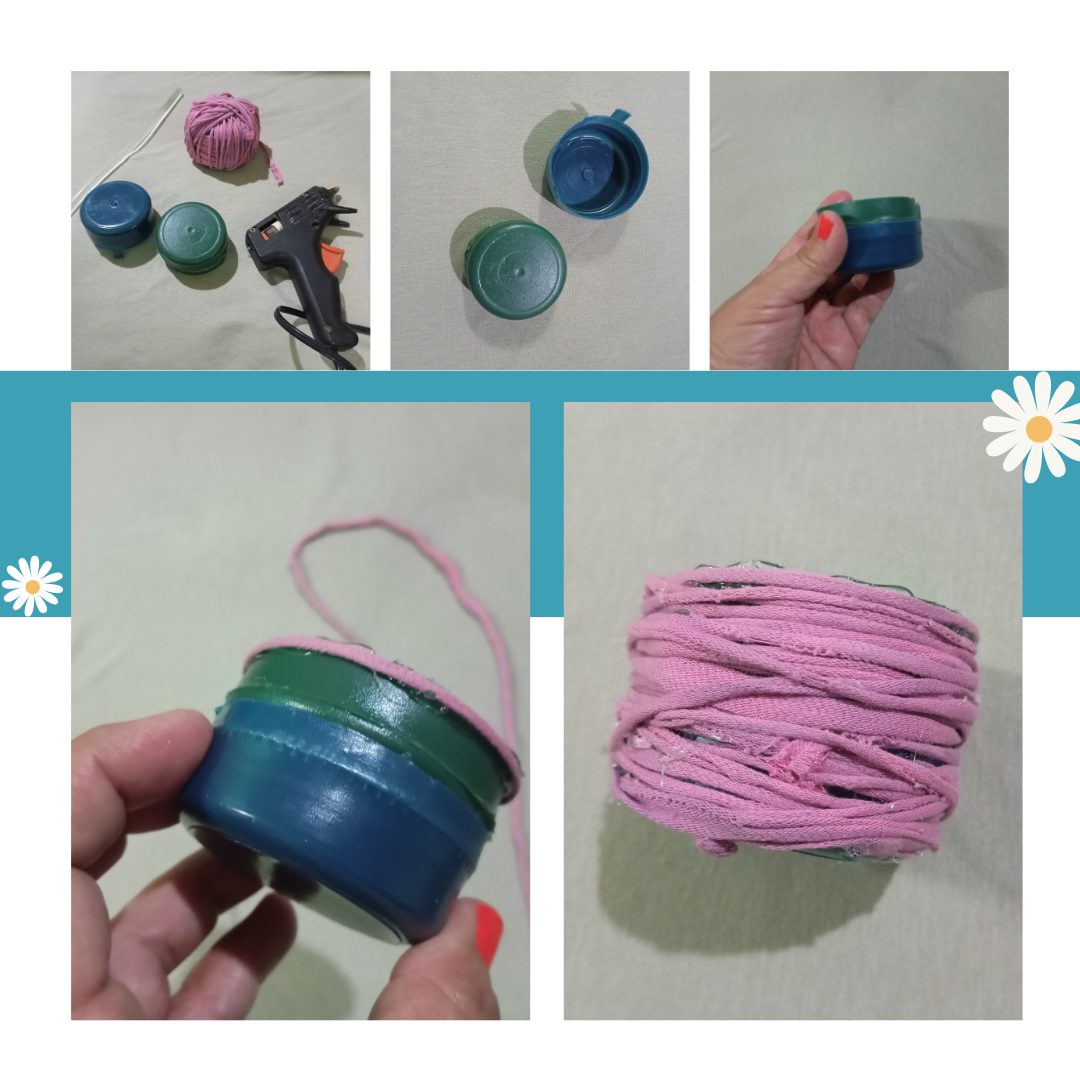
1.- Pot.
We are going to take the plastic lids, press them tightly, with the silicone we will start with the cloth to fill the lids, turn and fill the lid with the cloth, cut the excess, let it dry well.
1.- Maceta.
Vamos a tomar las tapas plásticas, presionar que queden bien ajustadas, con el silicón comenzaremos con el trapillo aforrar la tapas, ir girando y rellenando bien la tapa con el trapillo, cortar le sobrante, dejarlo secar bien.
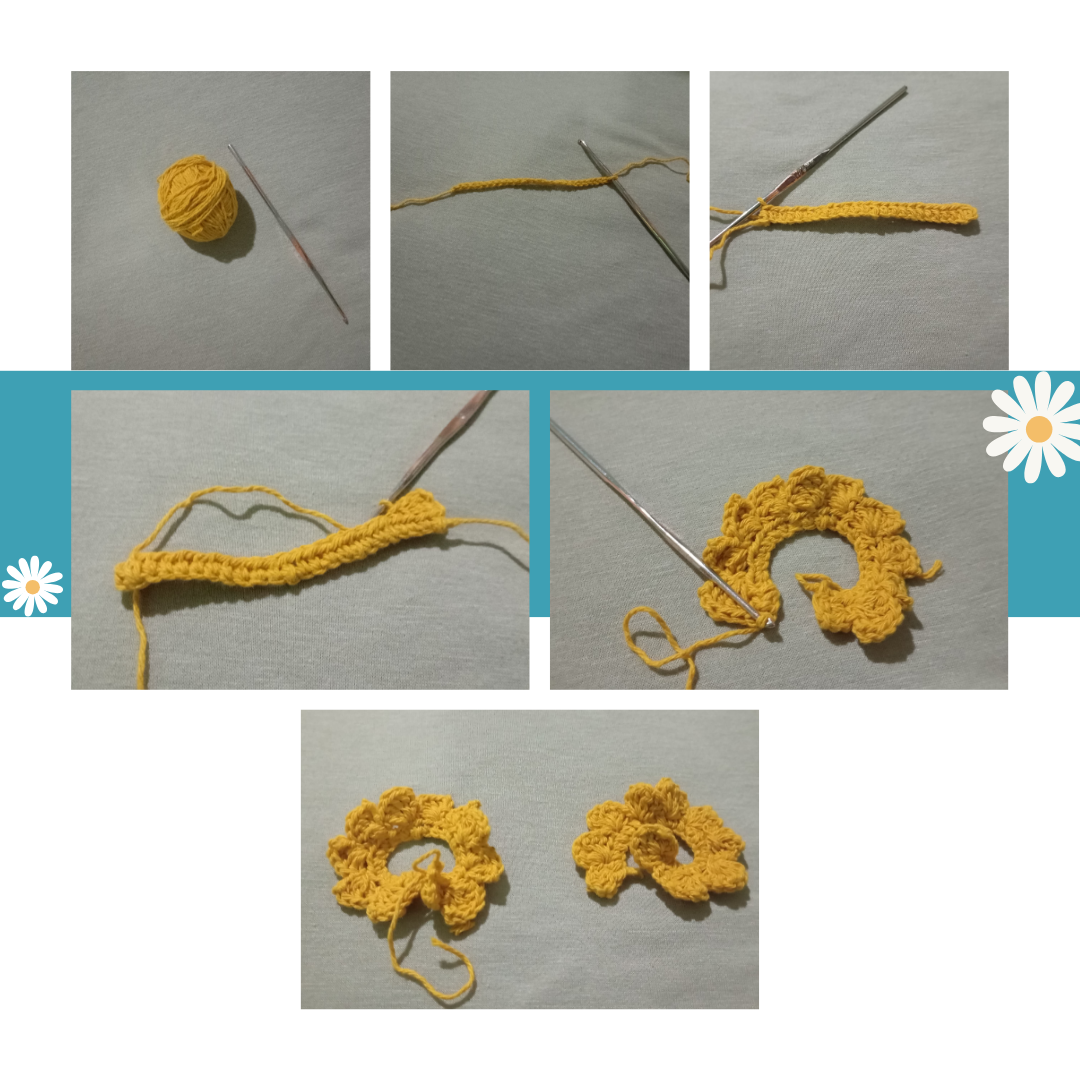
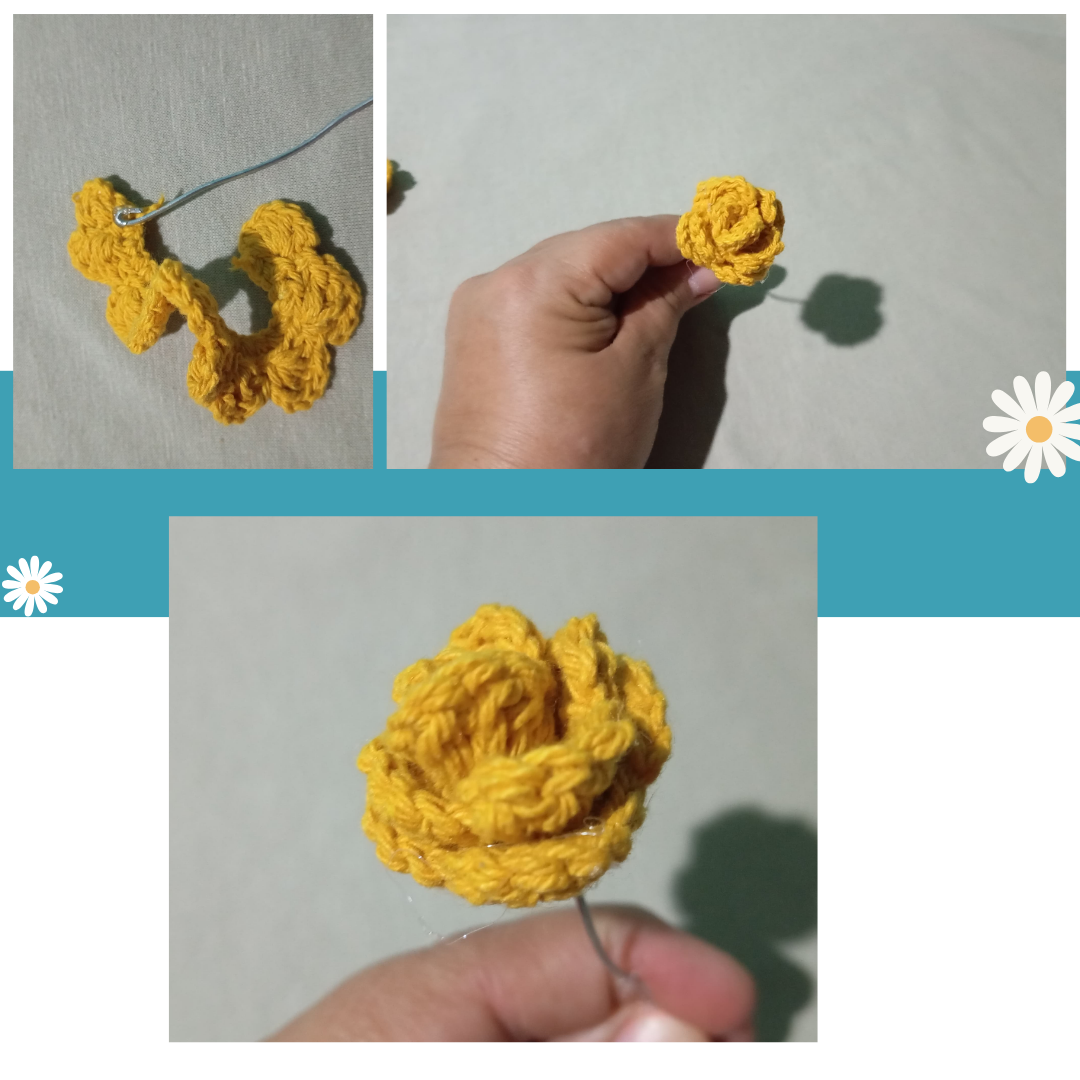
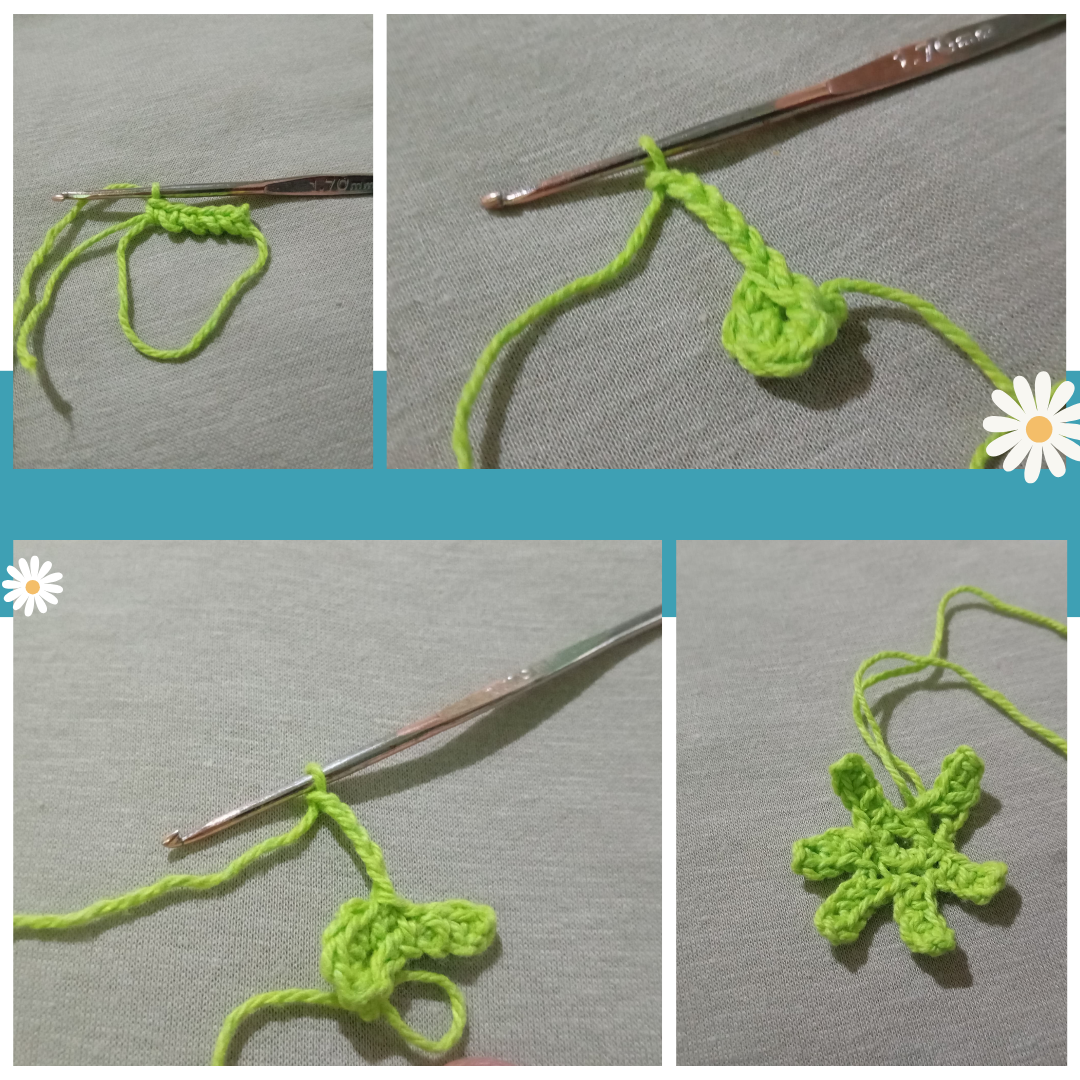
2.- Mini Rose
We will make a base of 23 chains, in the third stitch we will introduce the needle and we will make a medium high stitch in each chain and finish the base. When we reach the last stitch of the base we will make a turn and we will make two chains, we will make two high stitches, we will skip a stitch and the next stitch we will make a low stitch, then two stitches in the air and in that same stitch we will make 5 high stitches, skip the next stitch, and repeat the same procedure to make the petals of the mini rose, we finish with a slipped stitch and cut the yarn.
2.- Mini Rosa
Realizaremos una base de 23 cadenetas, en el tercer punto vamos a introducir la aguja y haremos un punto medio alto en cada cadena y terminar la base. Al llegar a ultimo punto de la base haremos un giro y vamos hacer dos cadenas, realizar dos puntos altos, vamos a saltar un punto y al siguiente punto hacer un punto bajo, seguidamente dos puntos al aire y en ese mismo punto haremos 5 puntos altos, saltamos el siguiente punto, y repetir el mismo procedimiento para realizar los pétalos de la mini rosa, finalizamos con un punto deslizado y cortamos el hilo.
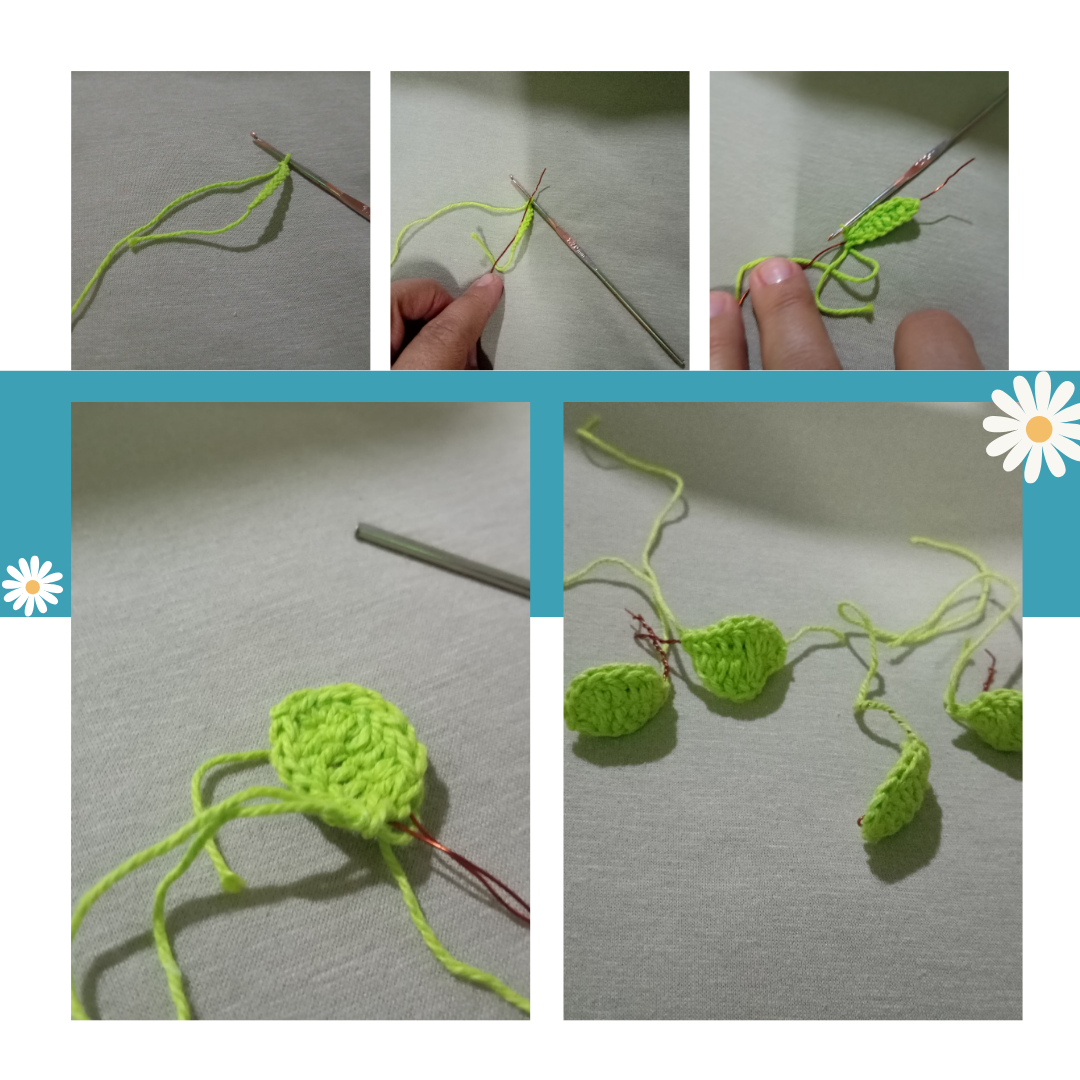
3.- Leaves.
We will make a base of 8 chains, with a fine copper wire, I used that one because I didn't have florist wire, in the second chain make a low stitch, so that the wire remains next to the thread, make a half stitch, then three high stitches, continue with a half high stitch and a low stitch, then a half double crochet, three double crochet, half double crochet and a single crochet, close with a slip stitch, cut the yarn, and we are going to adjust the wire so that it will not fall apart, with a plier we will cut the wire leaving a desired length.
With this same procedure make 4 small leaves.
3.- Hojas.
Haremos una base de 8 cadenas, con un alambre fino de cobre, utilice ese porque no tenía alambre de floristería, en la segunda cadena hacer un punto bajo, que vaya quedando el alambre junto al hilo, hacer un medio punto, seguidamente de tres puntos altos, continuamos con medio punto alto y un punto bajo, luego un medio punto alto, tres puntos altos, medio punto alto y un punto bajo, cerramos con un punto deslizado, cortar el hilo, y vamos a hacer el ajuste al alambre para que no se nos vaya a desarmar, con una pinza cortaremos el alambre dejando un largo deseado.
Con Este mismo procedimiento realizar 4 hojitas.
4.- Mini rose chalice
Make a magic ring, with five single crochet stitches and close with slip stitch and adjust, make five chains, in the second chain make a single crochet, plus a single crochet, in the base of the ring make a single crochet, five chains and repeat until the chalice is completed.
4.- Cáliz de la mini rosa
Hacer un anillo mágico, con cinco puntos bajos y cerrar con punto deslizado y ajustamos, hacer cinco cadenas en la segunda hacer un punto bajo, más un punto bajo, en la base el anillo hacer un punto bajo, cinco cadenas y repetir hasta conseguir completar el cáliz.
Assemble all the pieces to finish making the flowerpot, the first thing to do is to have the hot gun to start working, we will put a touch of glue to the wire with the mini rose, and we will go around giving it the shape. We cover the wire with the silicone and the green thread, we will place the calyx and finally the leaves. In the flowerpot we are going to open a hole to fix the flowers, we will put silicone and place the stones.
5.- Ensamblar todas las piezas para finalizar de hacer el macetero, lo primero es tener la pistola caliente para comenzar a trabajar, colocaremos un toque de pegamento al alambre con la mini rosa, y vamos a ir girando dándole la forma. Forramos el alambre con el silicón y el hilo verde, colocaremos el cáliz y por último las hojas. En el macetero vamos a abrir un huecos para fijar las flores, le colocaremos silicón y colocar las piedras.
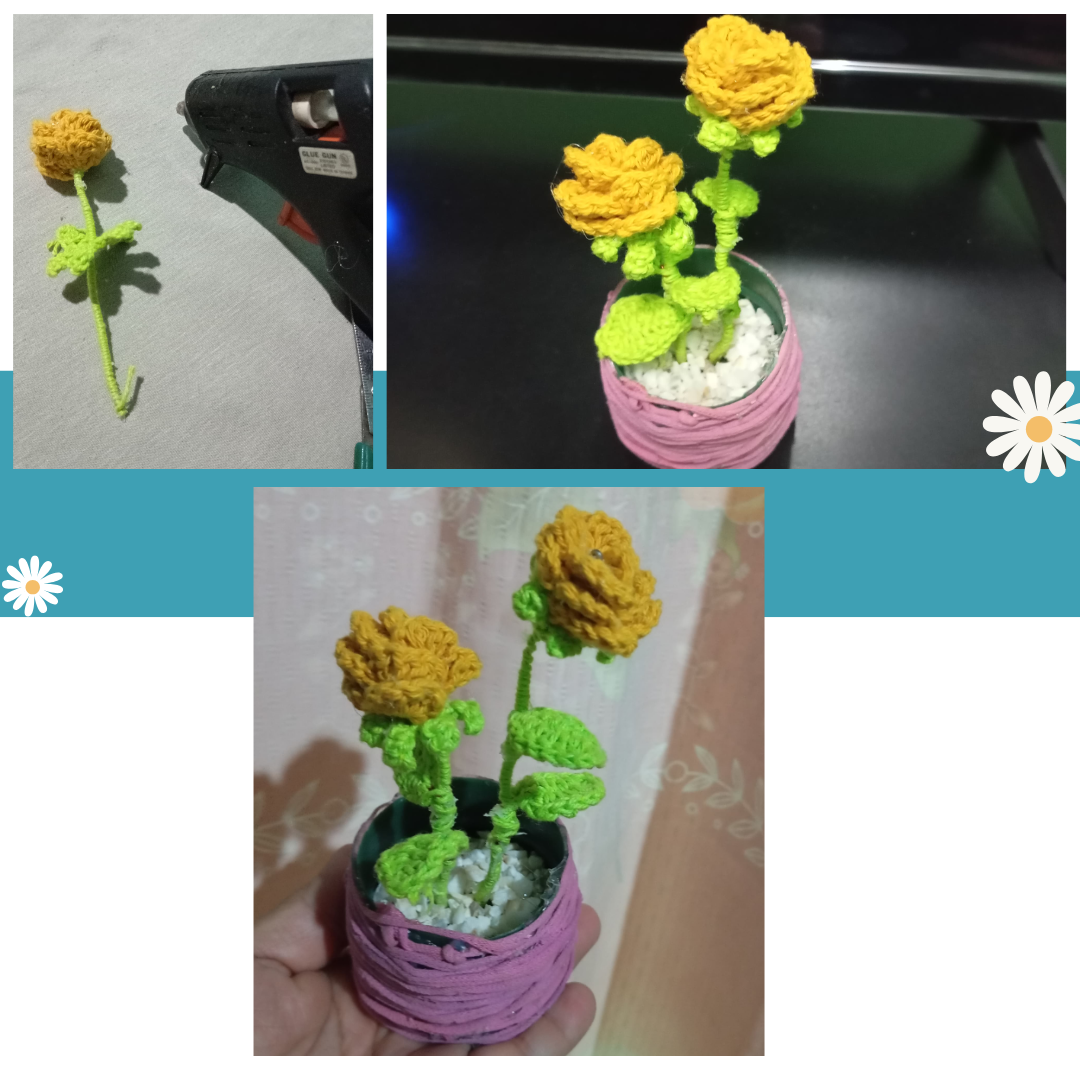
Beautiful flower pot with mini rose🌹//Macetero hermoso con mini rosa🌹
 Canva application cover//Portada de la aplicación Canva
Traducido con/DeepL Traductor
The texts and photos are of my authorship.//Los textos y las fotos son de mi autoría
Pictures taken with my Xiaomi Redmi 13C cell phone//Fotos tomadas con mi celular Xiaomi Redmi 13C
Canva application cover//Portada de la aplicación Canva
Traducido con/DeepL Traductor
The texts and photos are of my authorship.//Los textos y las fotos son de mi autoría
Pictures taken with my Xiaomi Redmi 13C cell phone//Fotos tomadas con mi celular Xiaomi Redmi 13C