Spn/Eng / intento de bolsa de regalo / gift bag attempt

2025-05-01T16:00:15

ESPAÑOL
¡¡Buenas a todos!! Hoy, quiero compartir con ustedes mi creación. La verdad fue algo de ultima hora y lo hice por primera vez, pero bueno, echando a perder se aprende ¿no?
Les cuento, mi primo pequeño estaba de cumpleaños, su primer añito y bueno, le compramos sus regalos pero no compramos la bolsa. Al final del día recordé eso y decidí descargar un tutorial de cómo hacer una bolsa de regalo con hojas de maquina. En fin, aquí les muestro como lo hice, espero que me comprendan que fue la primera vez que lo hice y fue apurada 😅😅😅
Los materiales son:
3 hojas de maquina
Pega
ENGLISH
Hello everyone!! Today, I want to share my creation with you. It was a last-minute creation, and I made it for the first time, but hey, you learn by messing around, right?
Let me tell you, my little cousin had a birthday, his first birthday, and well, we bought him his presents, but we didn't buy the bag. At the end of the day, I remembered that and decided to download a tutorial on how to make a gift bag with press-on sheets. Anyway, here's how I did it. I hope you understand that it was the first time I made it, and I was rushed 😅😅😅
The materials are:
3 press-on sheets
Glue

Para empezar, solo vamos a pegar las 3 hojas una al lado de la otra, de lado, no a lo largo.
Después de hacer eso vamos a seguir y doblamos desde el lado derecho al lado izquierdo, pero, no completo vamos a dejar alrededor de 3 dedos como ven en la foto y doblamos.
Luego de eso volvemos a doblar con la misma cantidad de espacio y hacemos lo mismo del otro lado.
To start, we're just going to glue the three sheets side by side, sideways, not lengthwise.
After doing that, we'll continue and fold from the right side to the left side, but not completely. We'll leave about three fingers' width, as you can see in the photo, and then fold.
After that, we fold again with the same amount of space and do the same thing on the other side.

Esas 3 líneas que ven a los costados las vamos a doblar asi: la línea del centro que quede hacia adentro y las de afuera que queden hacia afuera
We are going to fold those 3 lines that you see on the sides like this: the center line should be inward and the outside ones should be outside

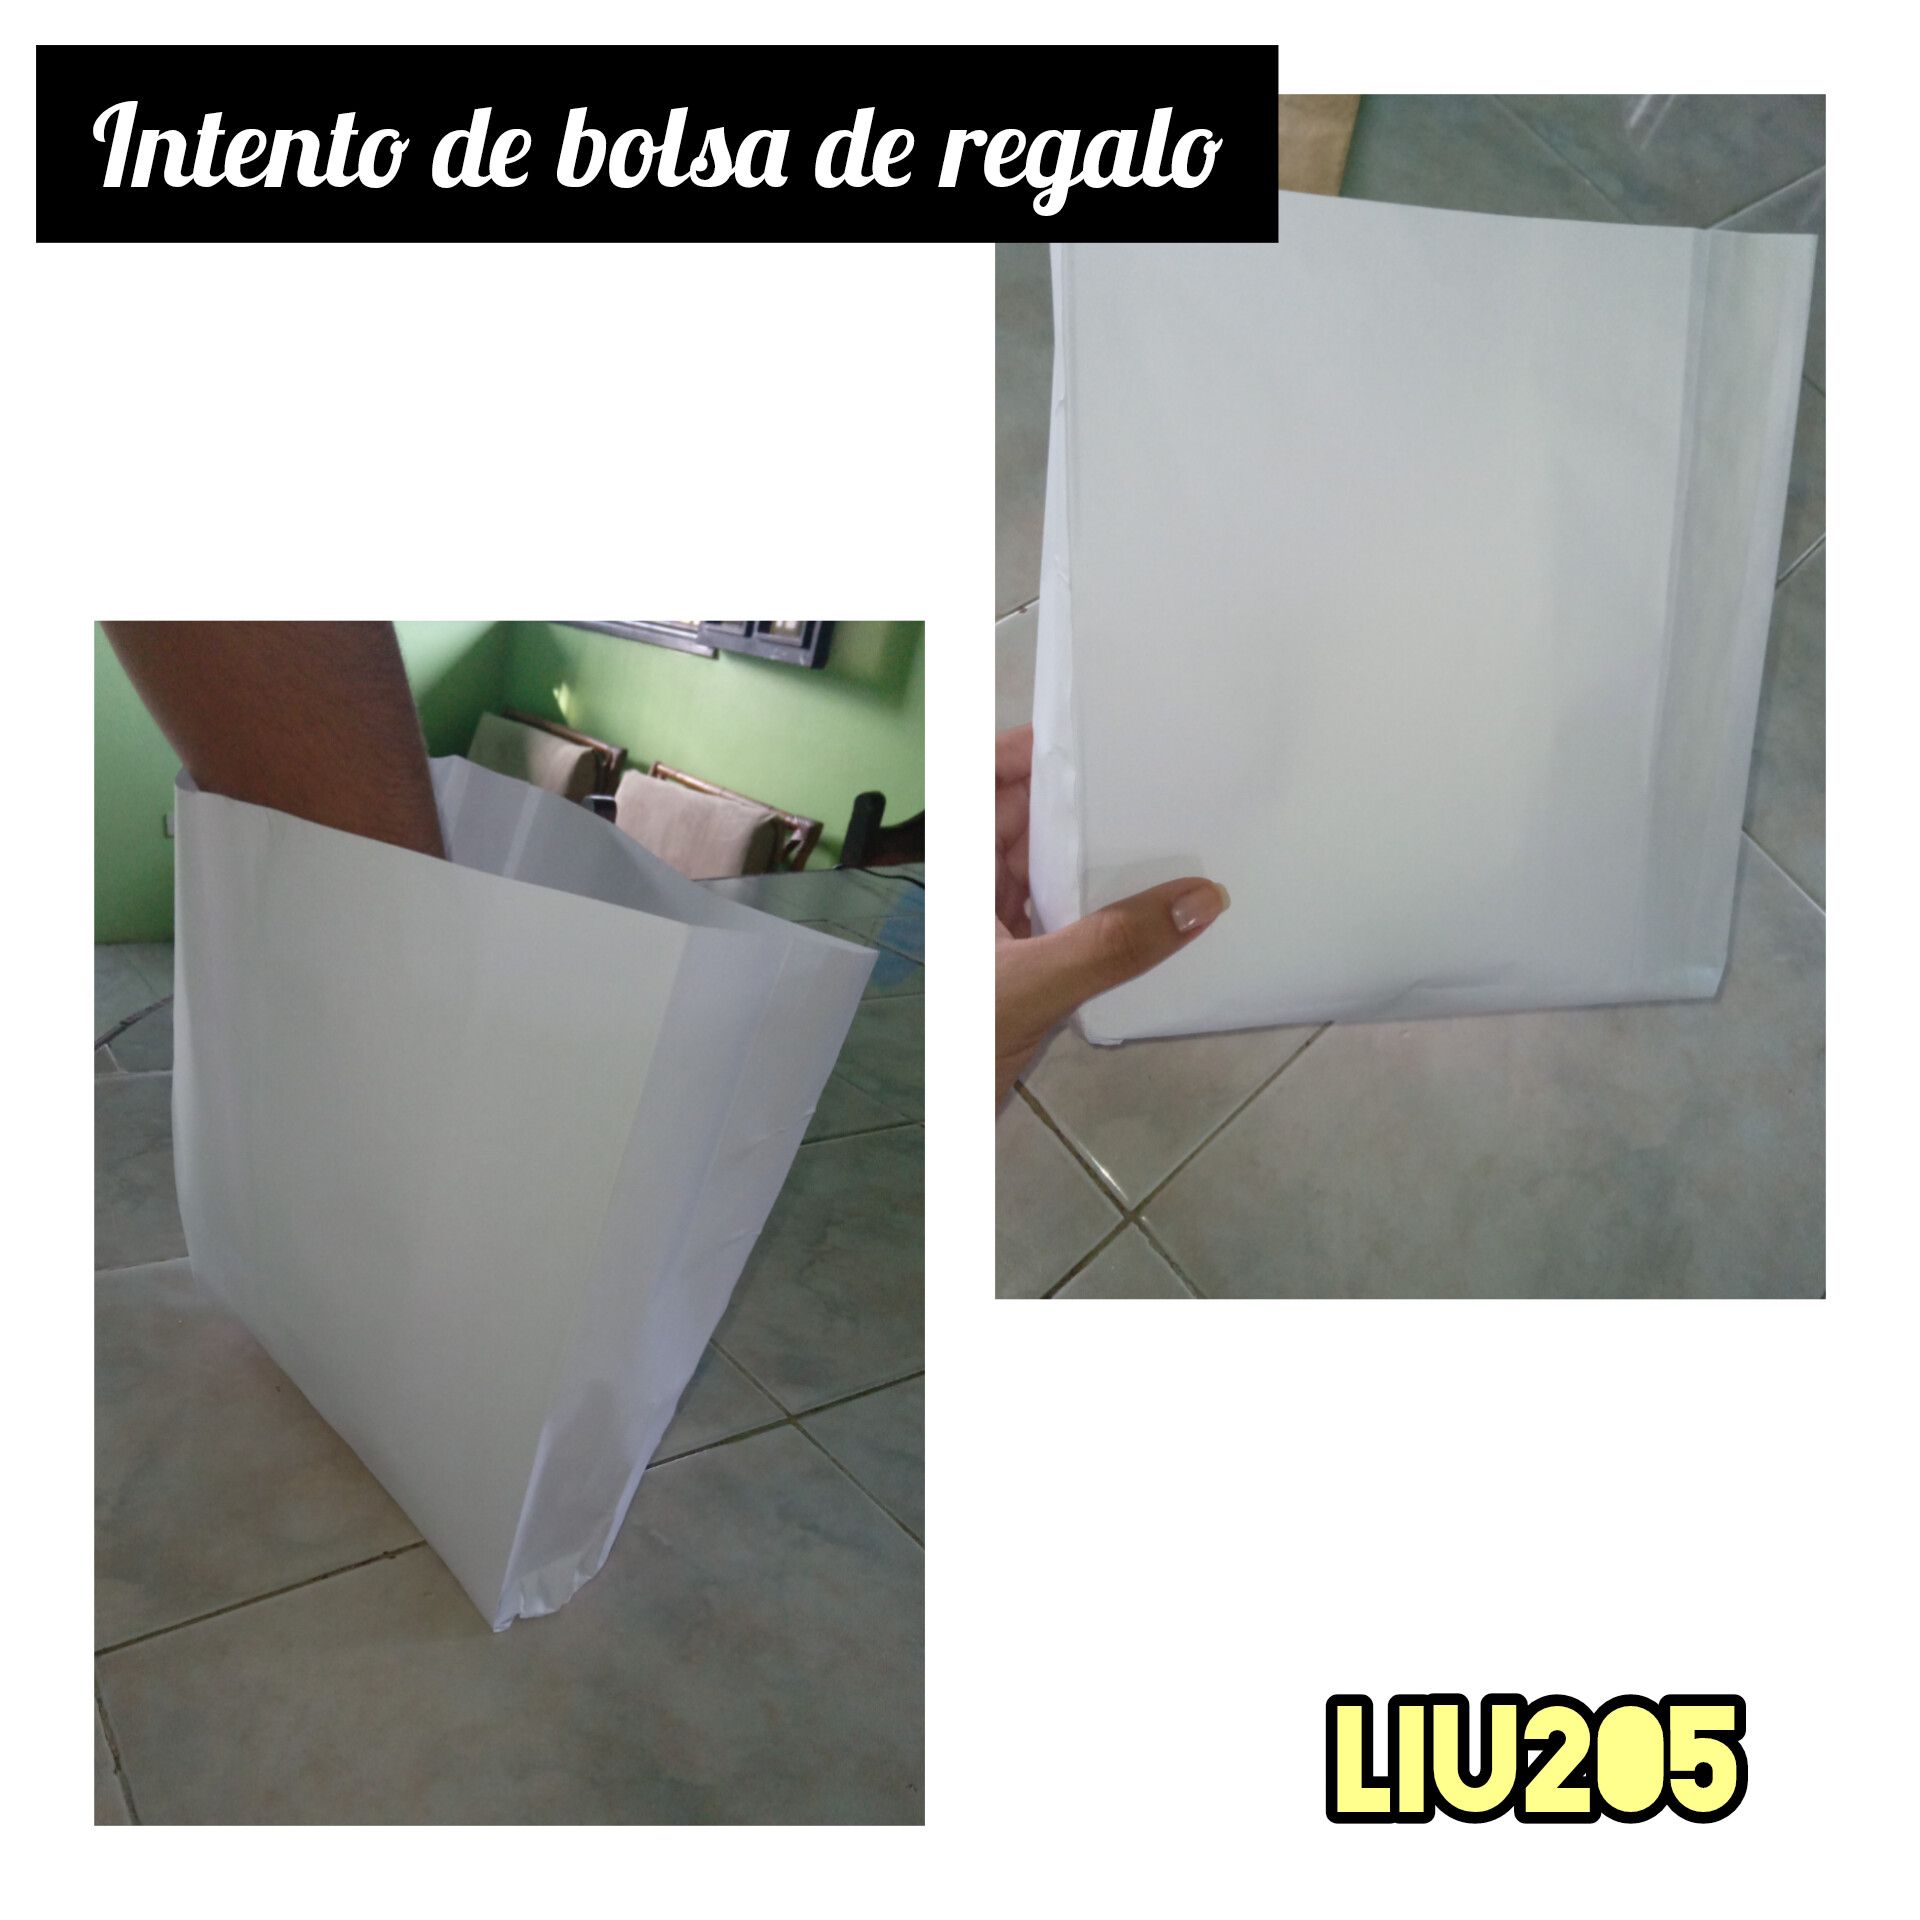
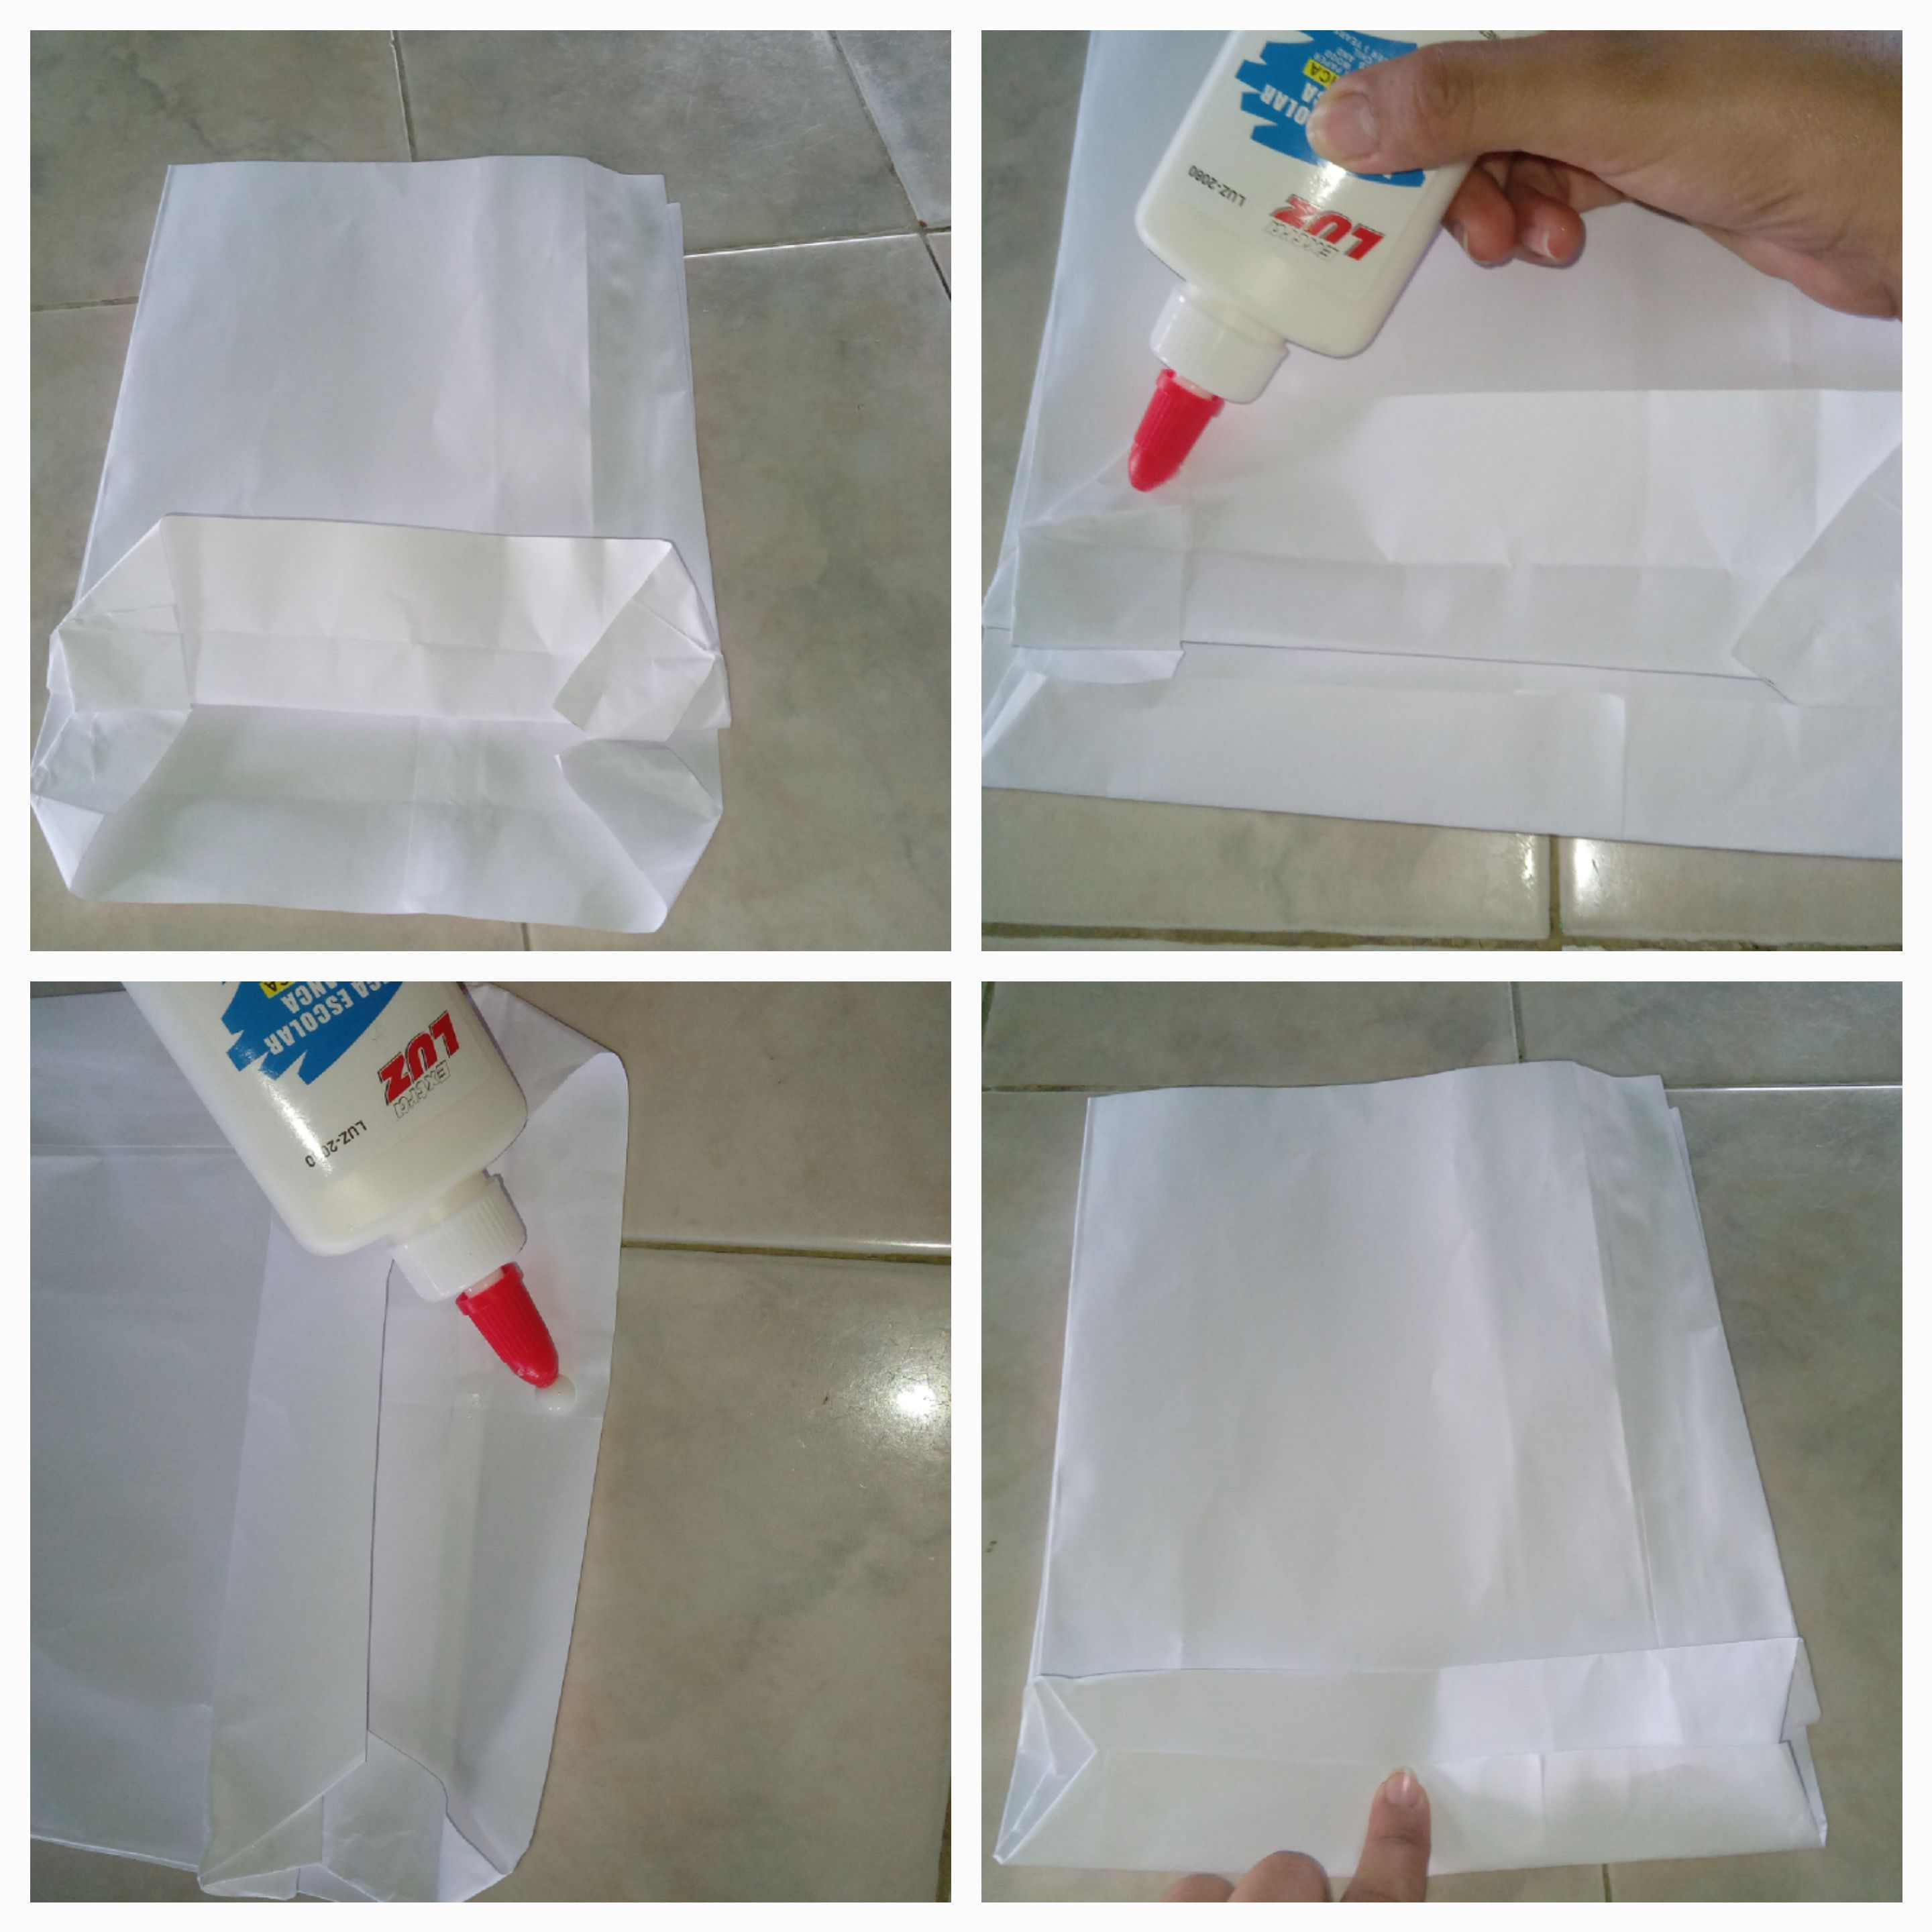
Mantenemos la casi bolsa cerrada y aquí viene la parte difícil...
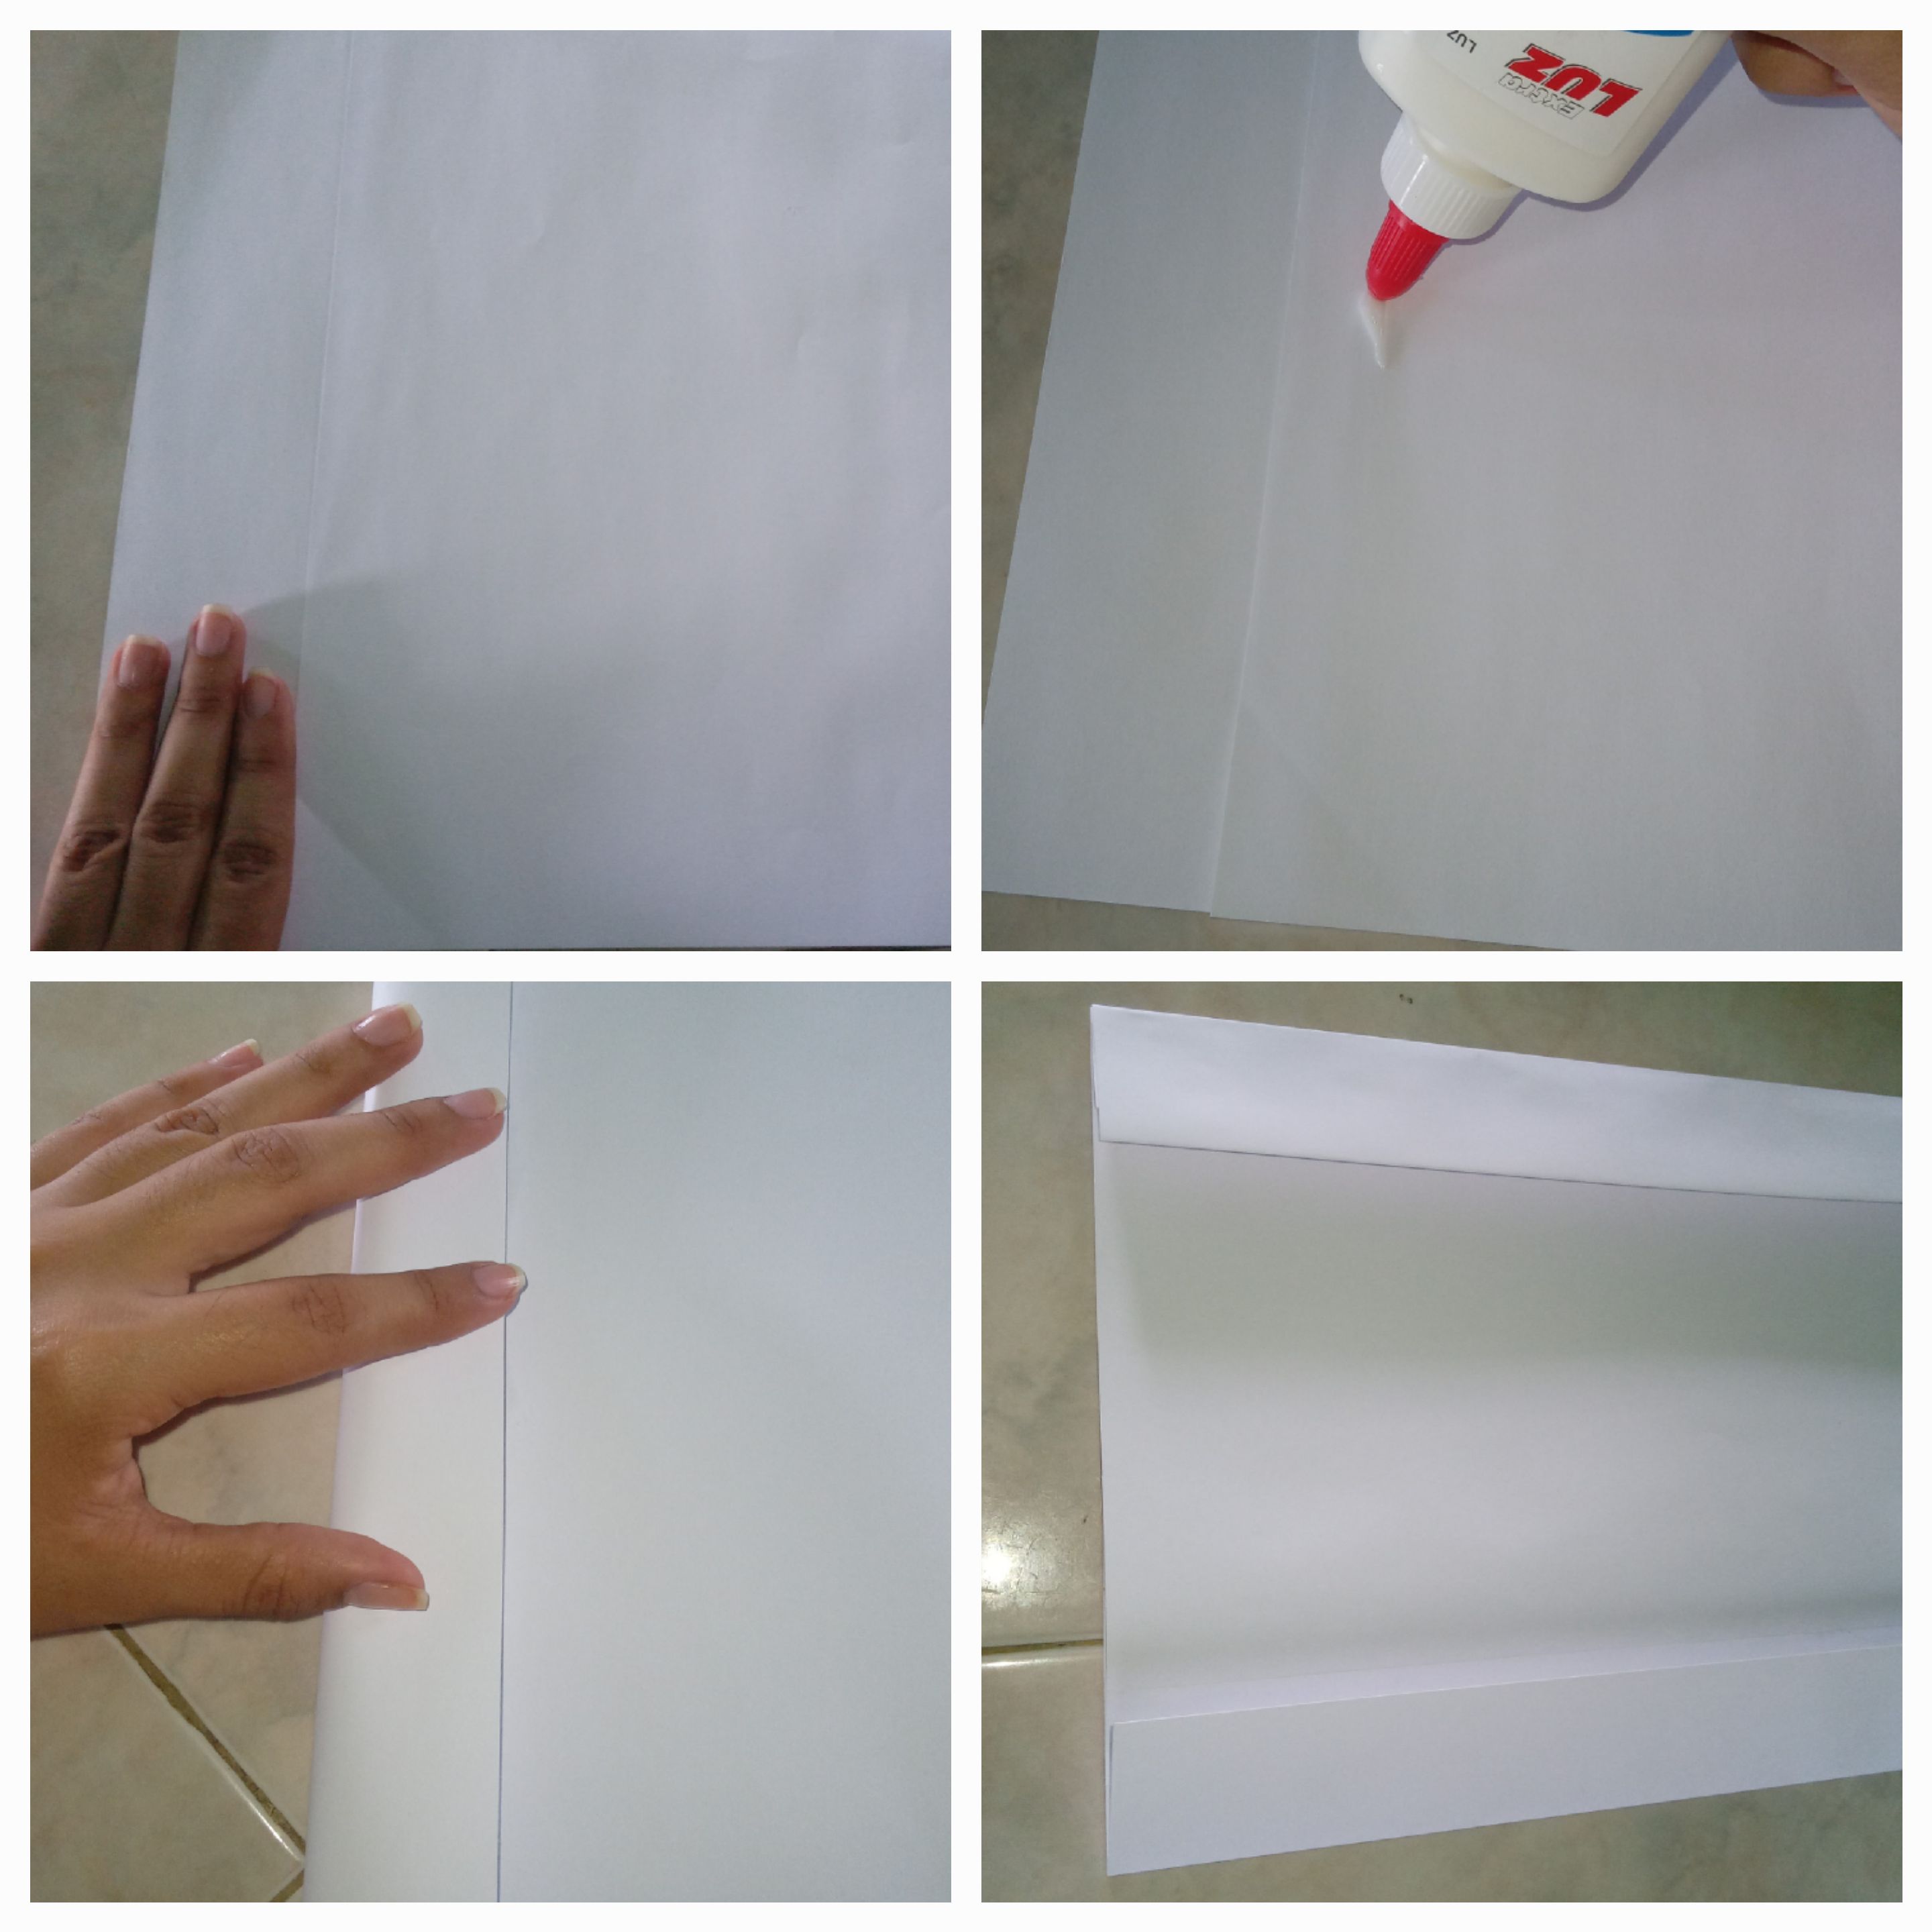
Estos costados de abajo, o mejor dicho, las esquinas de abajo, vamos a doblarlas hacia adentro, la idea es que quede como se ve en la foto (algo así) debe quedar mejor pero es mi primera vez 🫣
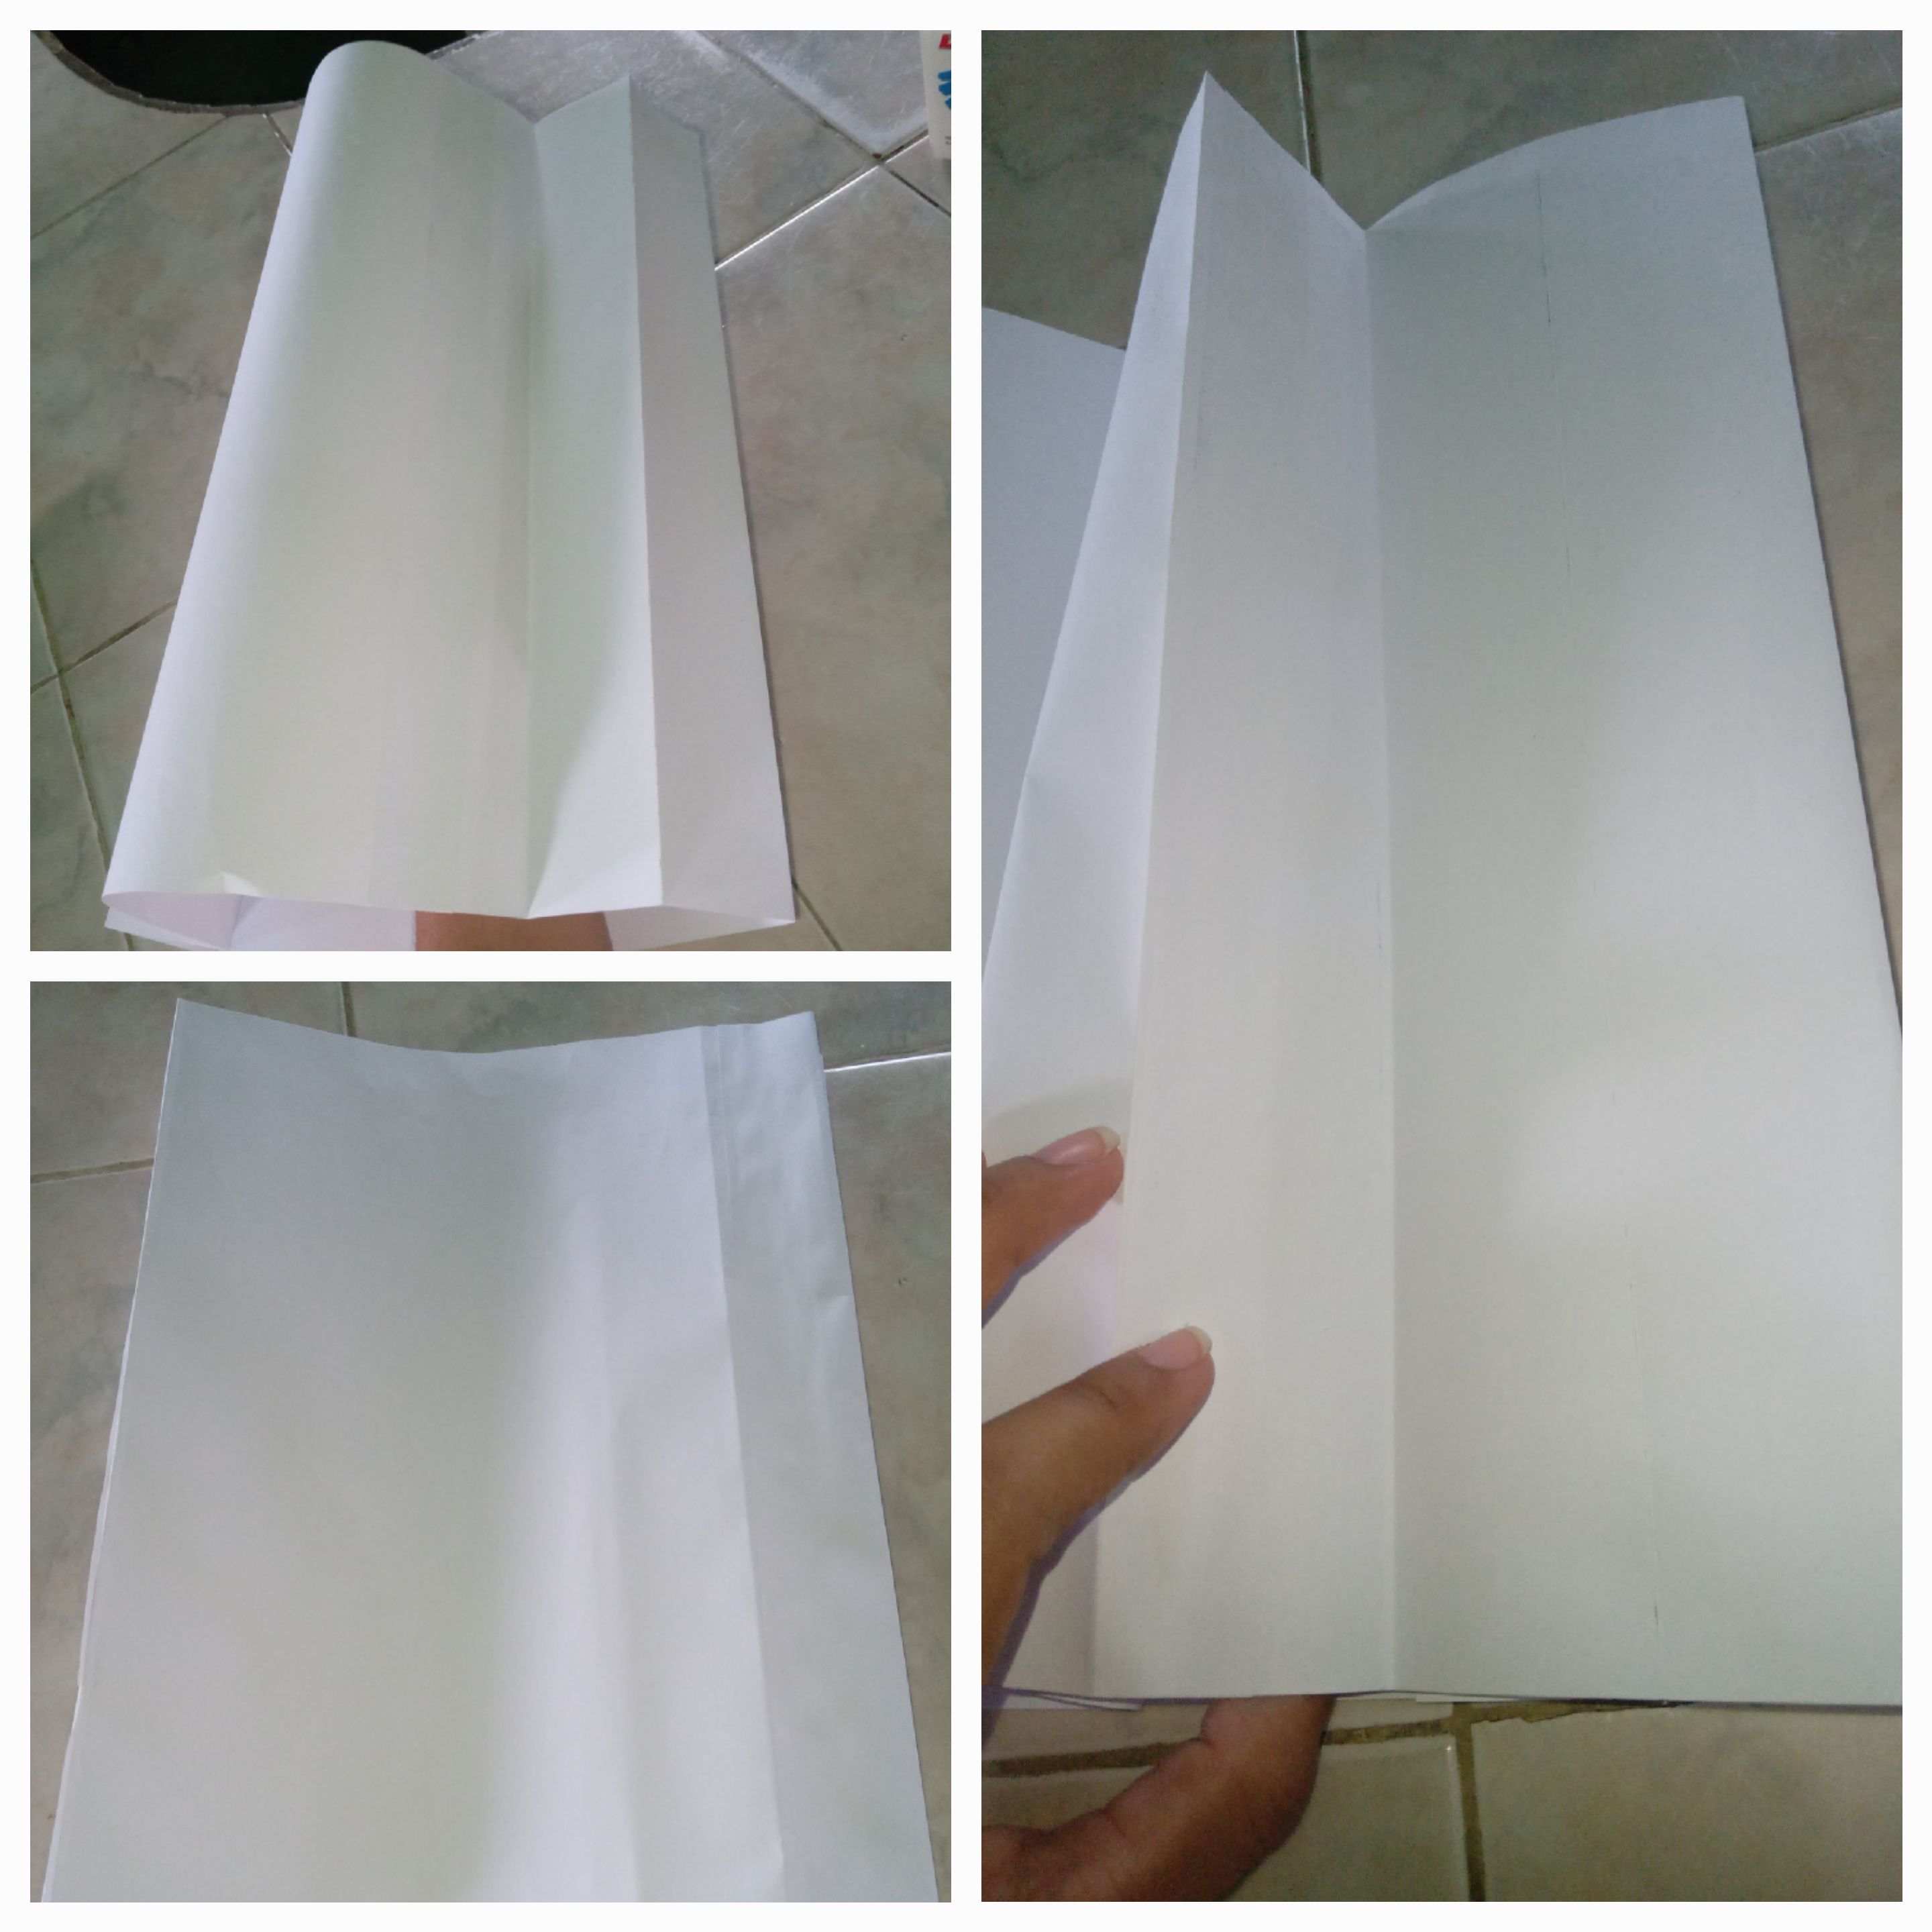
Hacemos lo mismo por los dos lados hasta que quede (espero que mejor) como mi intento 😁
Doblamos hacia arriba y solo le vamos a echar pega a una parte no a toda, en cambio, de la parte de abajo sí, le echamos pega a todo después solo esperamos que se seque y listo... abrimos y ya está.!!
We keep the bag almost closed, and here comes the tricky part...
We're going to fold these bottom sides, or rather, the bottom corners, inwards. The idea is to make it look like the photo (something like that). It should look better, but it's my first time 🫣
We do the same on both sides until it looks (hopefully better) like my attempt 😁
We fold it upwards and we're only going to apply glue to one part, not the whole thing. On the other hand, we're going to apply glue to the whole bottom part. Then, just wait for it to dry, and that's it... we open it and that's it!


Translated with https://www.deepl.com/translator
162
8
3.79
8 Replies