Happy day, dear community of DiyHub artists, I hope you are having a splendid week, in abundant health.
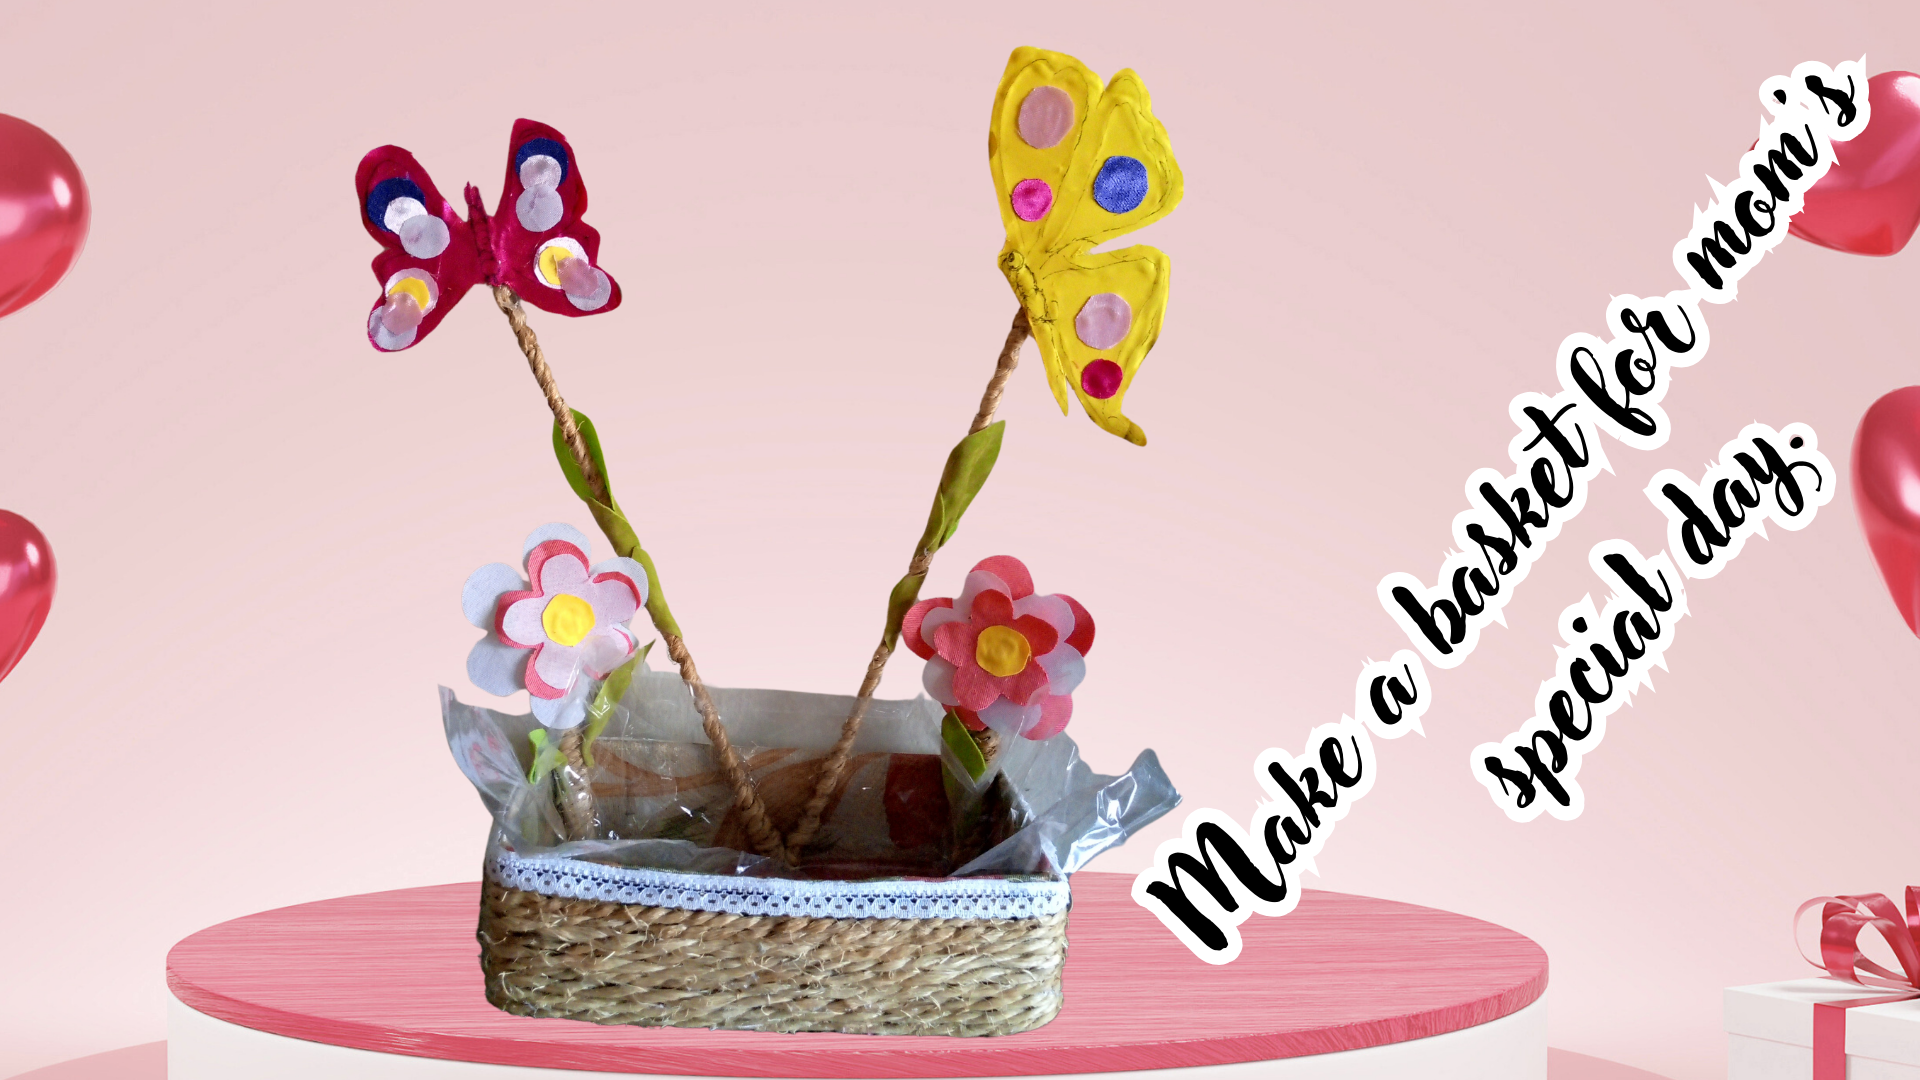
Today I visit you again with one more initiative, for Mother's Day, I share with you the making of a cardboard basket decorated with butterflies and flowers, so that mom can receive her sweets and any other details, well presented, with happy and radiant colors.
In other publications I made a craft with a Mother's Day theme, it was a cup of tea with flowers, and a badge for the door, now with this one, there are 3 creative ideas that I have made, so that you have new ideas, fusing different materials, easy to obtain and economical, we know that the high cost of an arrangement often does not suit our pocket; However, we have the option of creating something beautiful, with our hands at home, without much investment, something that makes us feel satisfied and proud to give as a gift, well made, with a lot of love and dedication, that detail is an act that is worth a lot.
We invite you to see what the process of making this beautiful candy basket was like, and something else.
The photographs you will see below were taken with my TECNO SPARK GO 2024 model phone.
Feliz día, querida comunidad de artistas DiyHub, espero que estén pasando una semana espléndida, con abundante salud.
Hoy vuelvo a visitarlos con una iniciativa más, para el día de las madres, les comparto la elaboración de una cesta de cartón decorada con mariposas y flores, para que mamá reciba sus dulces y cualquier otro detalle, bien presentados, con colores alegres y radiantes.
En otras publicaciones realicé una manualidad con la temática día de las madres, fue una taza de té con flores, y un distintivo para la puerta, ya con esta, son 3 ideas creativas que he realizado, para que tengan nuevas ideas, fusionando diferentes materiales, fáciles de conseguir y económicos, sabemos que el alto costo de un arreglo, muchas veces no se adapta a nuestro bolsillo; Sin embargo, tenemos la opción de crear algo lindo, con nuestras manos en casa, sin mucha inversión, algo que nos haga sentir satisfechos y orgullosos de regalar, bien elaborado, con mucho amor y dedicación, ese detalle, es un acto que vale mucho.
Los invitamos a que vean como fue el proceso de elaboración de esta linda cesta para dulces, y algo más.
Las fotografías que verán a continuación, fueron tomadas con mi teléfono modelo TECNO SPARK GO 2024.
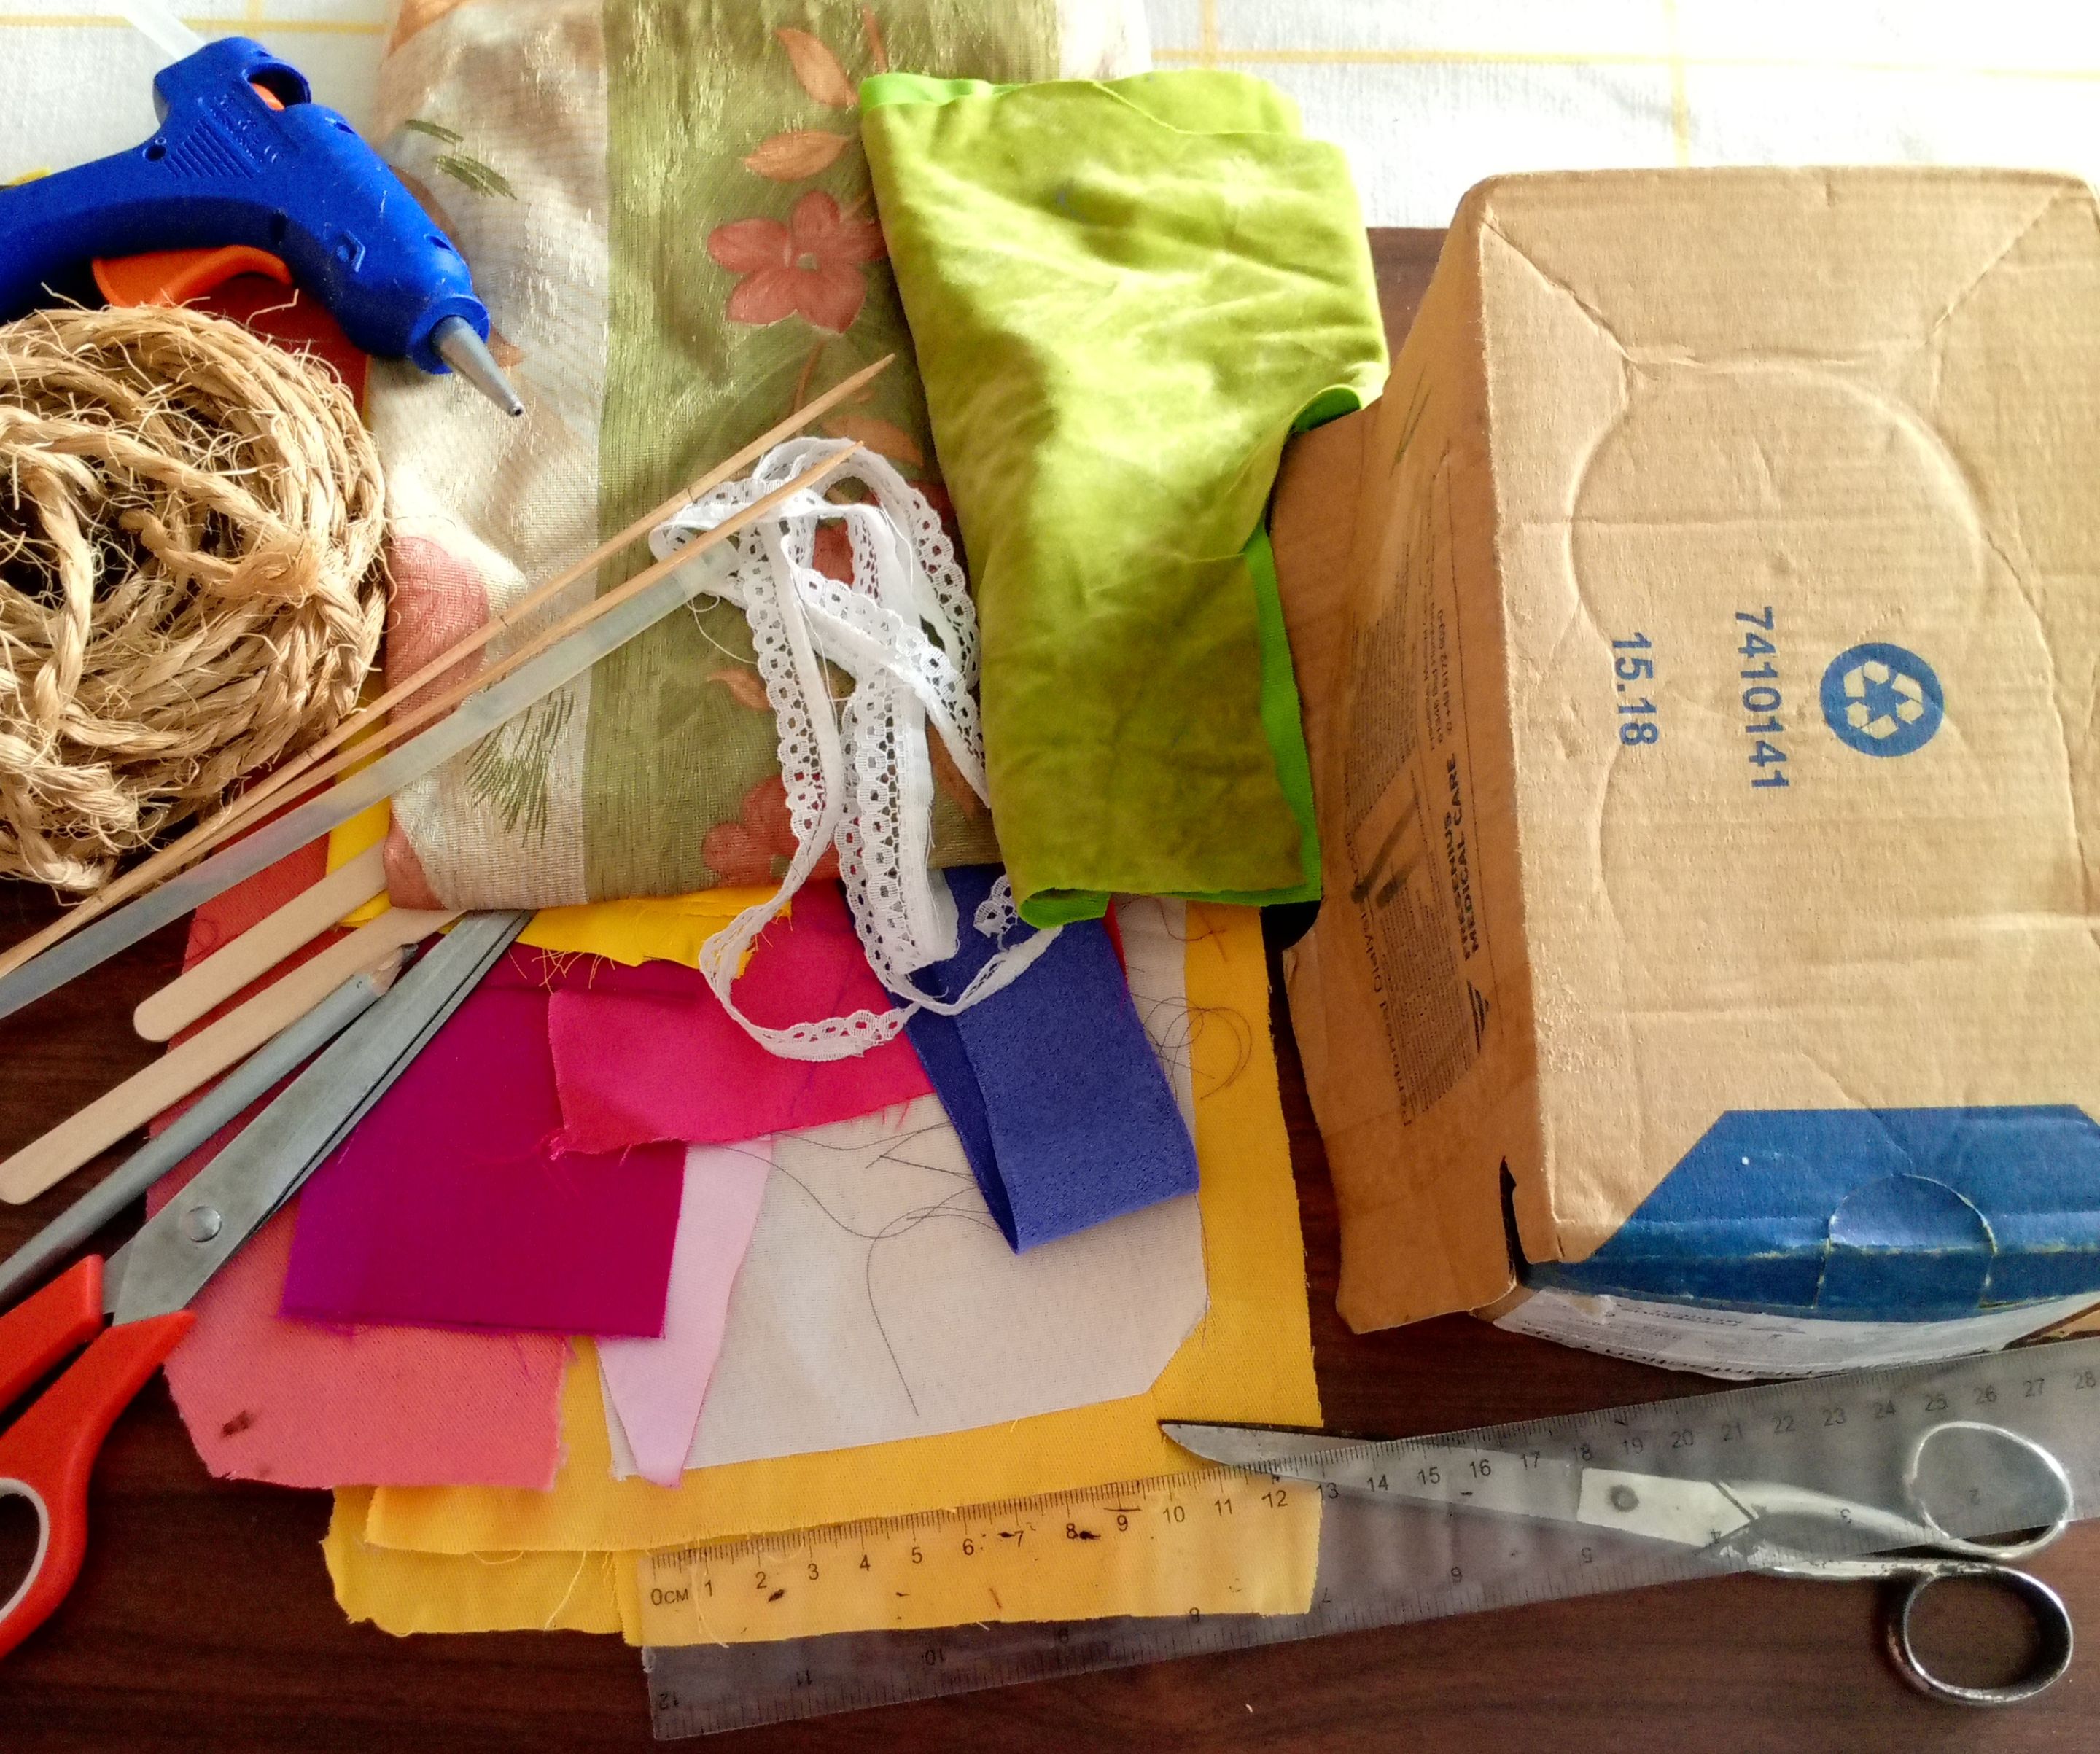
I show you and mentioned the materials I used.
- Cardboard box
- Colored fabrics
- Lace
- Mecatillo
- Silicone stick
- Pencils
- Scissors
- Skewer stick
- Wooden pallets
- Cardboard
- Cellophane paper
- Hot silicone gun
- Ruler
Les muestro y menciono los materiales que utilicé.
- Caja de cartón
- Telas de colores
- Encaje
-Mecatillo
- Barra de silicona
- Lápices
- Tijeras
- Palo de brocheta
- Paletas de madera
- Cartón
- papel celofán
- Pistola de silicona caliente
- Regla
I started with the transformation of the cardboard box, to achieve this I made some adjustments, the first thing was to measure the height that the box would leave, which was 5 cm, with the marking pencil and cutting off the excess.
Comencé con la transformación de la caja de cartón, para lograrlo hice algunos ajustes, lo primero fue medir el alto que dejaría la caja, que era de 5 cm, con el lápiz marca y cortando el excedente.
Once the size of the box was ready, I measured the sides and bottom to make the pieces of fabric to cover the box, and with a little hot silicone I glued the fabrics to the box, completely covering its internal part, then took the twine and hot silicone to cover the outside of the box.
Una vez listo el tamaño de la caja, medí los lados y el fondo para hacer los trozos de tela para cubrir la caja, y con un poco de silicona caliente pegué las telas a la caja cubriendo completamente su parte interna, luego tomé el mecatillo y la silicona caliente, para cubrir el exterior de la caja.
To make the box look that delicate, glue a white lace ribbon around the edge, and move on to the next step.
Para que la caja luzca mas delicada, pegue una cinta de encaje blanco alrededor del borde, y continue con el siguiente paso.
In this step I began to make the decorative details, first I drew some butterflies on paper, I cut them out and I already had a mold of butterflies, and then I placed them on cardboard, marked and cut them out.
En este paso comencé a hacer los detalles decorativos, primero dibujé unas mariposas en papel, las recorté y ya tenía un molde de mariposas, luego las coloqué en cartulina, las marqué y las recorté.
Continue with the decoration of the butterflies, the first thing I did was outline the butterflies with hot silicone, I placed the fabrics, yellow and fuchsia, I applied a little pressure, until the silicone was hardened, to trim the excess fabric from the edges, that layer of fabric goes on both sides of the butterflies.
Then, with a pencil, I drew some lines on the wings, and defined the body, cutting out colored circles in fabric, to make the butterflies more decorative. I also cut some leaves to continue with the decoration, from the skewer sticks that I covered with twine.
This technique that we use to cover the butterflies is very nice for many projects, I hope you like it.
Continúe con la decoración de las mariposas, lo primero que hice fue delinear las mariposas con silicona caliente, colocó las telas, amarilla y fucsia, hice un poco de presión, hasta que la silicona fuera endurecida, para recortar la tela sobrante de las orillas, esa capa de telas va por ambos lados de las mariposas.
Después, con un lápiz, dibujé algunas líneas en las alas, y definí el cuerpo, recortando círculos de colores en tela, para hacer más decorativas las mariposas, también corta algunas hojas para seguir con la decoración, de los palos de brocheta que cubrí con mecatillo.
Esta técnica que utilice para cubrir las mariposas, es bien linda para muchos proyectos, espero les guste.
I made some simple fabric flowers, covered the pallets with twine, glued the flowers and leaves on the pallets, and then finished placing these butterflies and flowers in the box, then placed the paper and cellophane on it and so this beautiful box was ready for that beautiful day, which could always be.
At that moment I finished this beautiful initiative of the day.
I hope you like it, and you are encouraged to make a basket like this for your dear mommies to pamper them more.
Thanks for visiting my post.
Realice unas flores sencillas de tela, cubrí las paletas con mecatillo, pegue las flores y hojas en las paletas, para luego terminar posicionando estas mariposas y flores, a la caja, luego le coloque el papel, celofán y así esta linda caja quedo lista para ese día tan hermoso, que puede ser siempre.
En ese momento finalicé esta linda iniciativa del día.
Espero les guste, y se animen a hacerle una cesta así sus queridas mamitas para consentirlas más.
Gracias por visitar mi post.