Materiales / Materials
Pantaloneta floreada
Tijeras
Hilo y aguja
Elastico
Cinta de medir
Alfileres
Maquina de coser
✨✨✨✨✨✨✨✨✨✨✨✨✨✨✨✨
Flowered trousers
Scissors
Thread and needle
Elastic
Measuring tape
Pins
Sewing machine
Procedure:
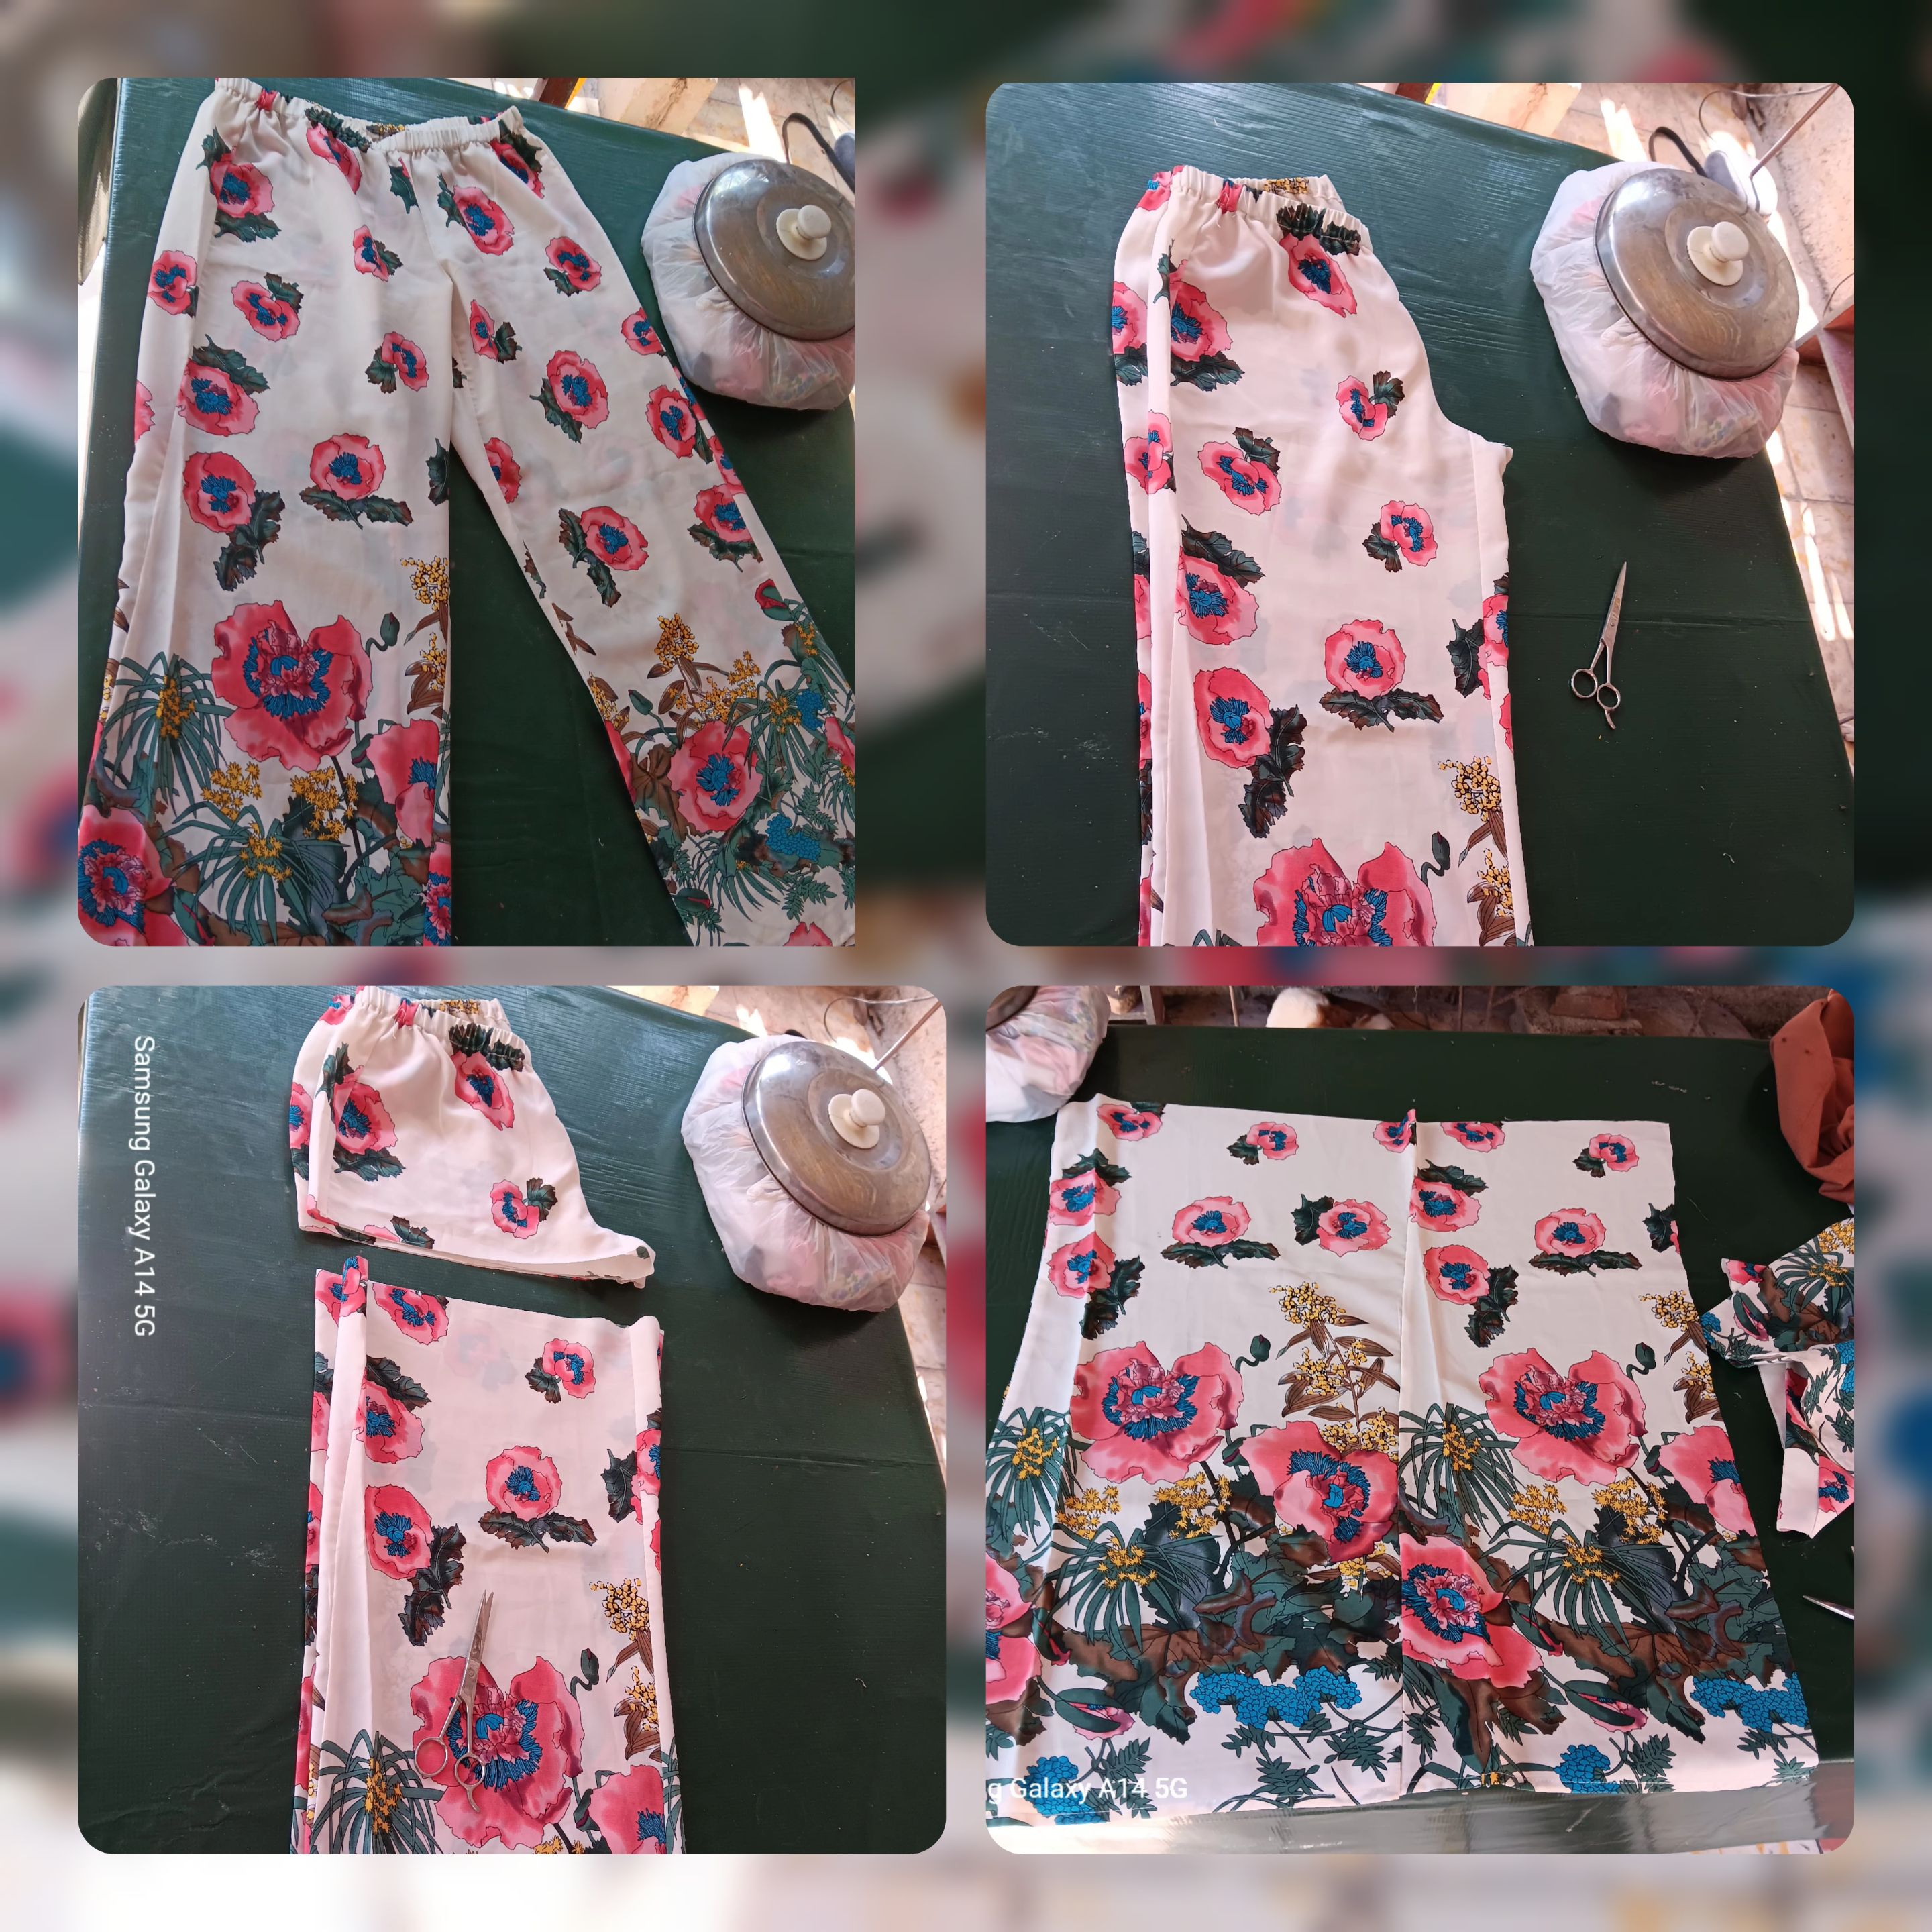
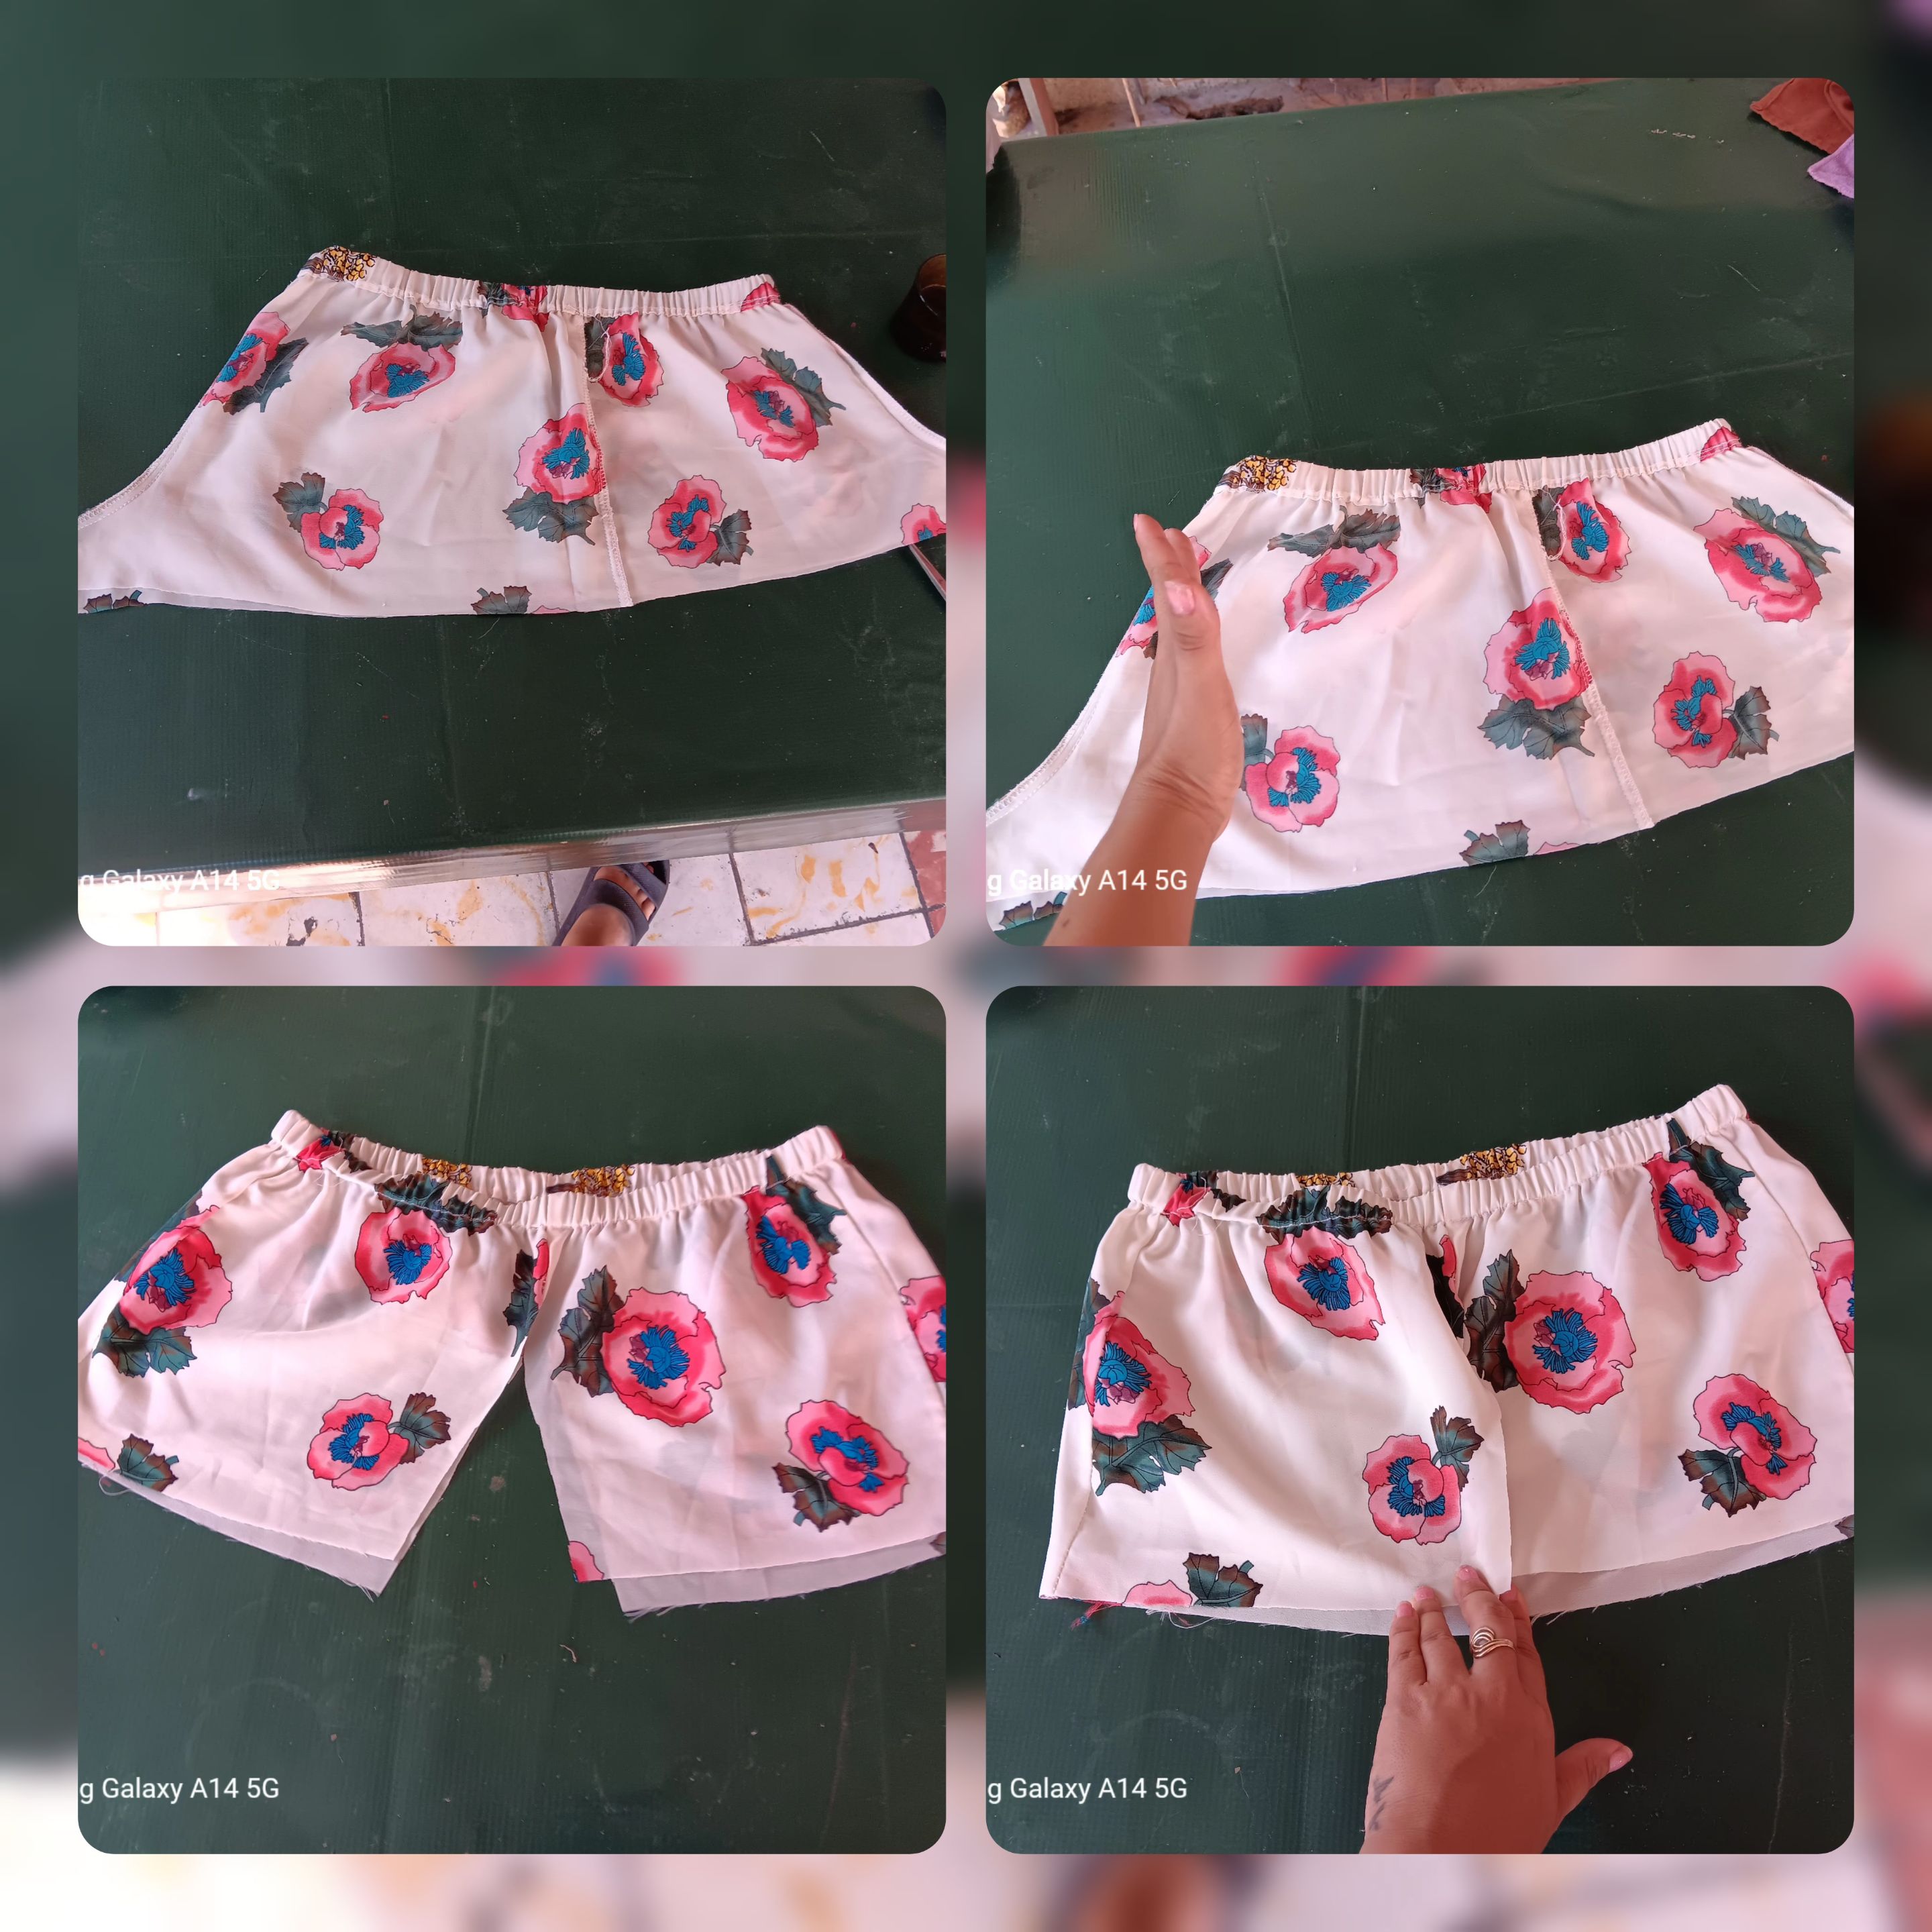
#1
✨ For the realization of this nice outfit, I started by cutting from the shot down the middle, obtaining two parts which correspond to the blouse and the skirt of the same. Once cut out, I matched the fabric cuts with the scissors, and cut the excess fabric from the hem, achieving a straighter and more even structure.
Procedimiento:
#1
✨ Para la realización de este lindo conjunto, comence recortando del tiro hacia abajo por la mitad, obteniendo dos partes las cuales corresponden a la blusa y la falda del mismo. Una vez recortados, empareje con la tijera los cortes de tela, y pique el exceso de tela del tiro, logrando una estructura mas recta y pareja.
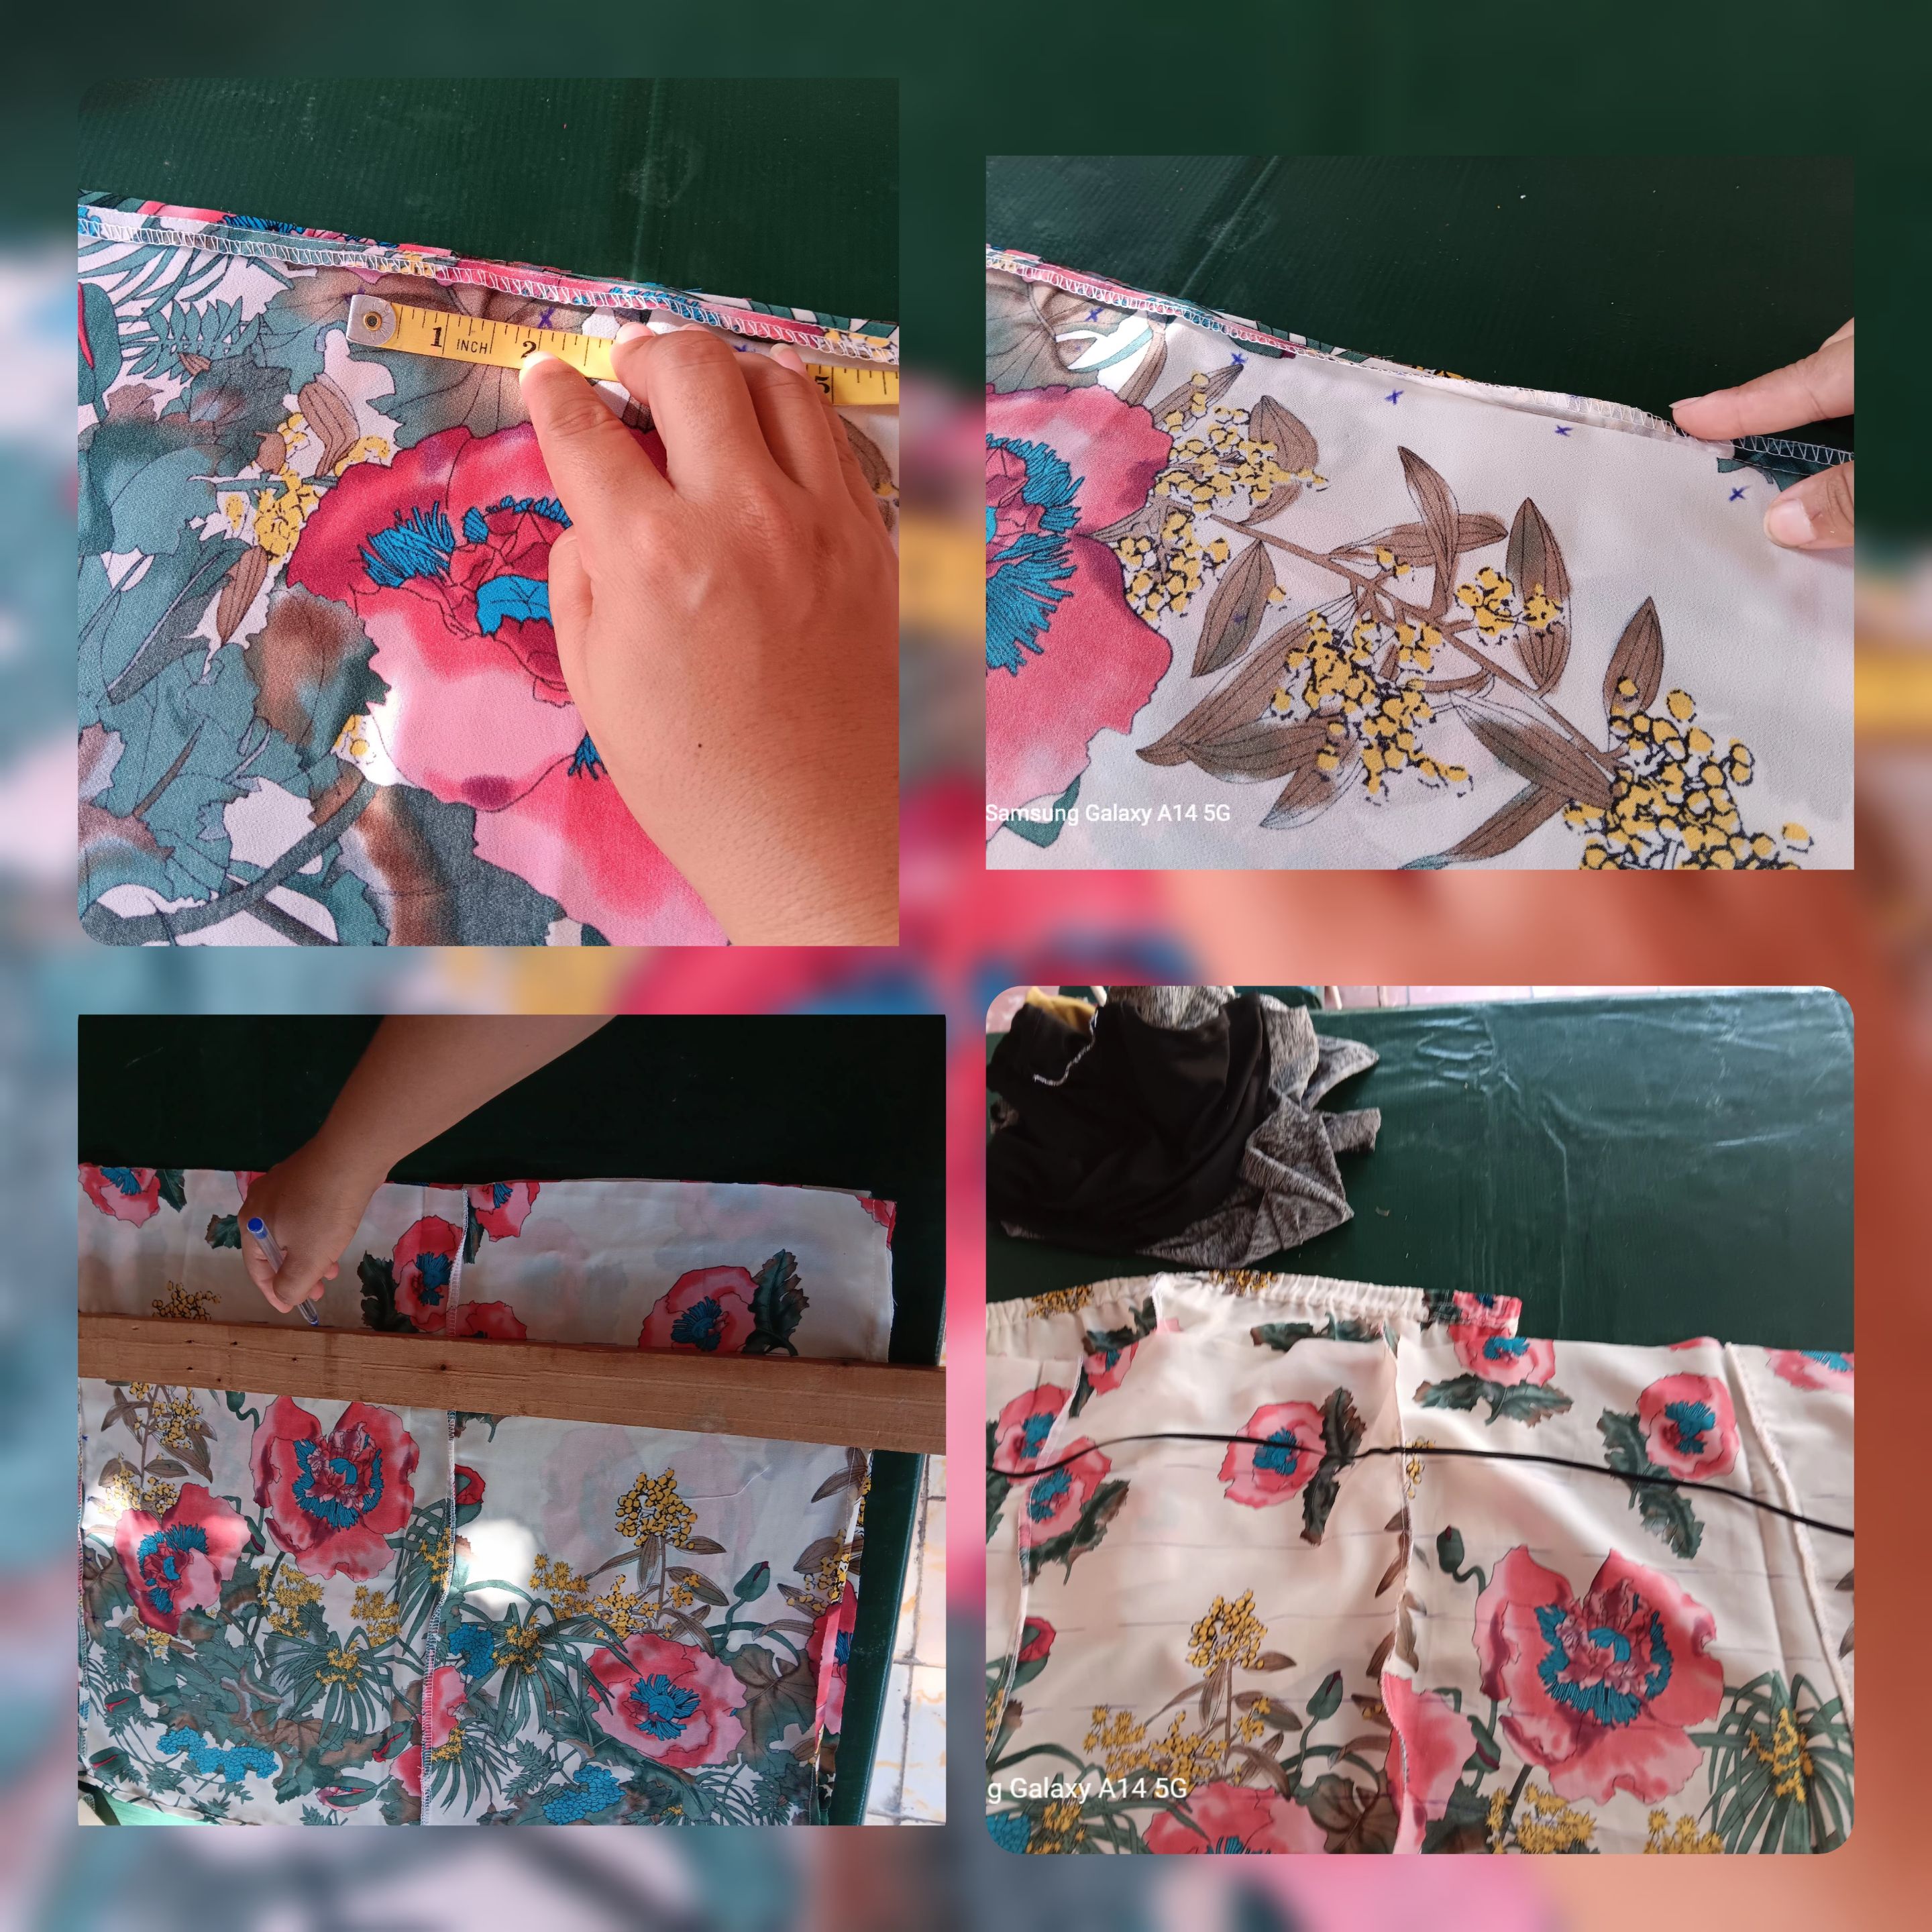
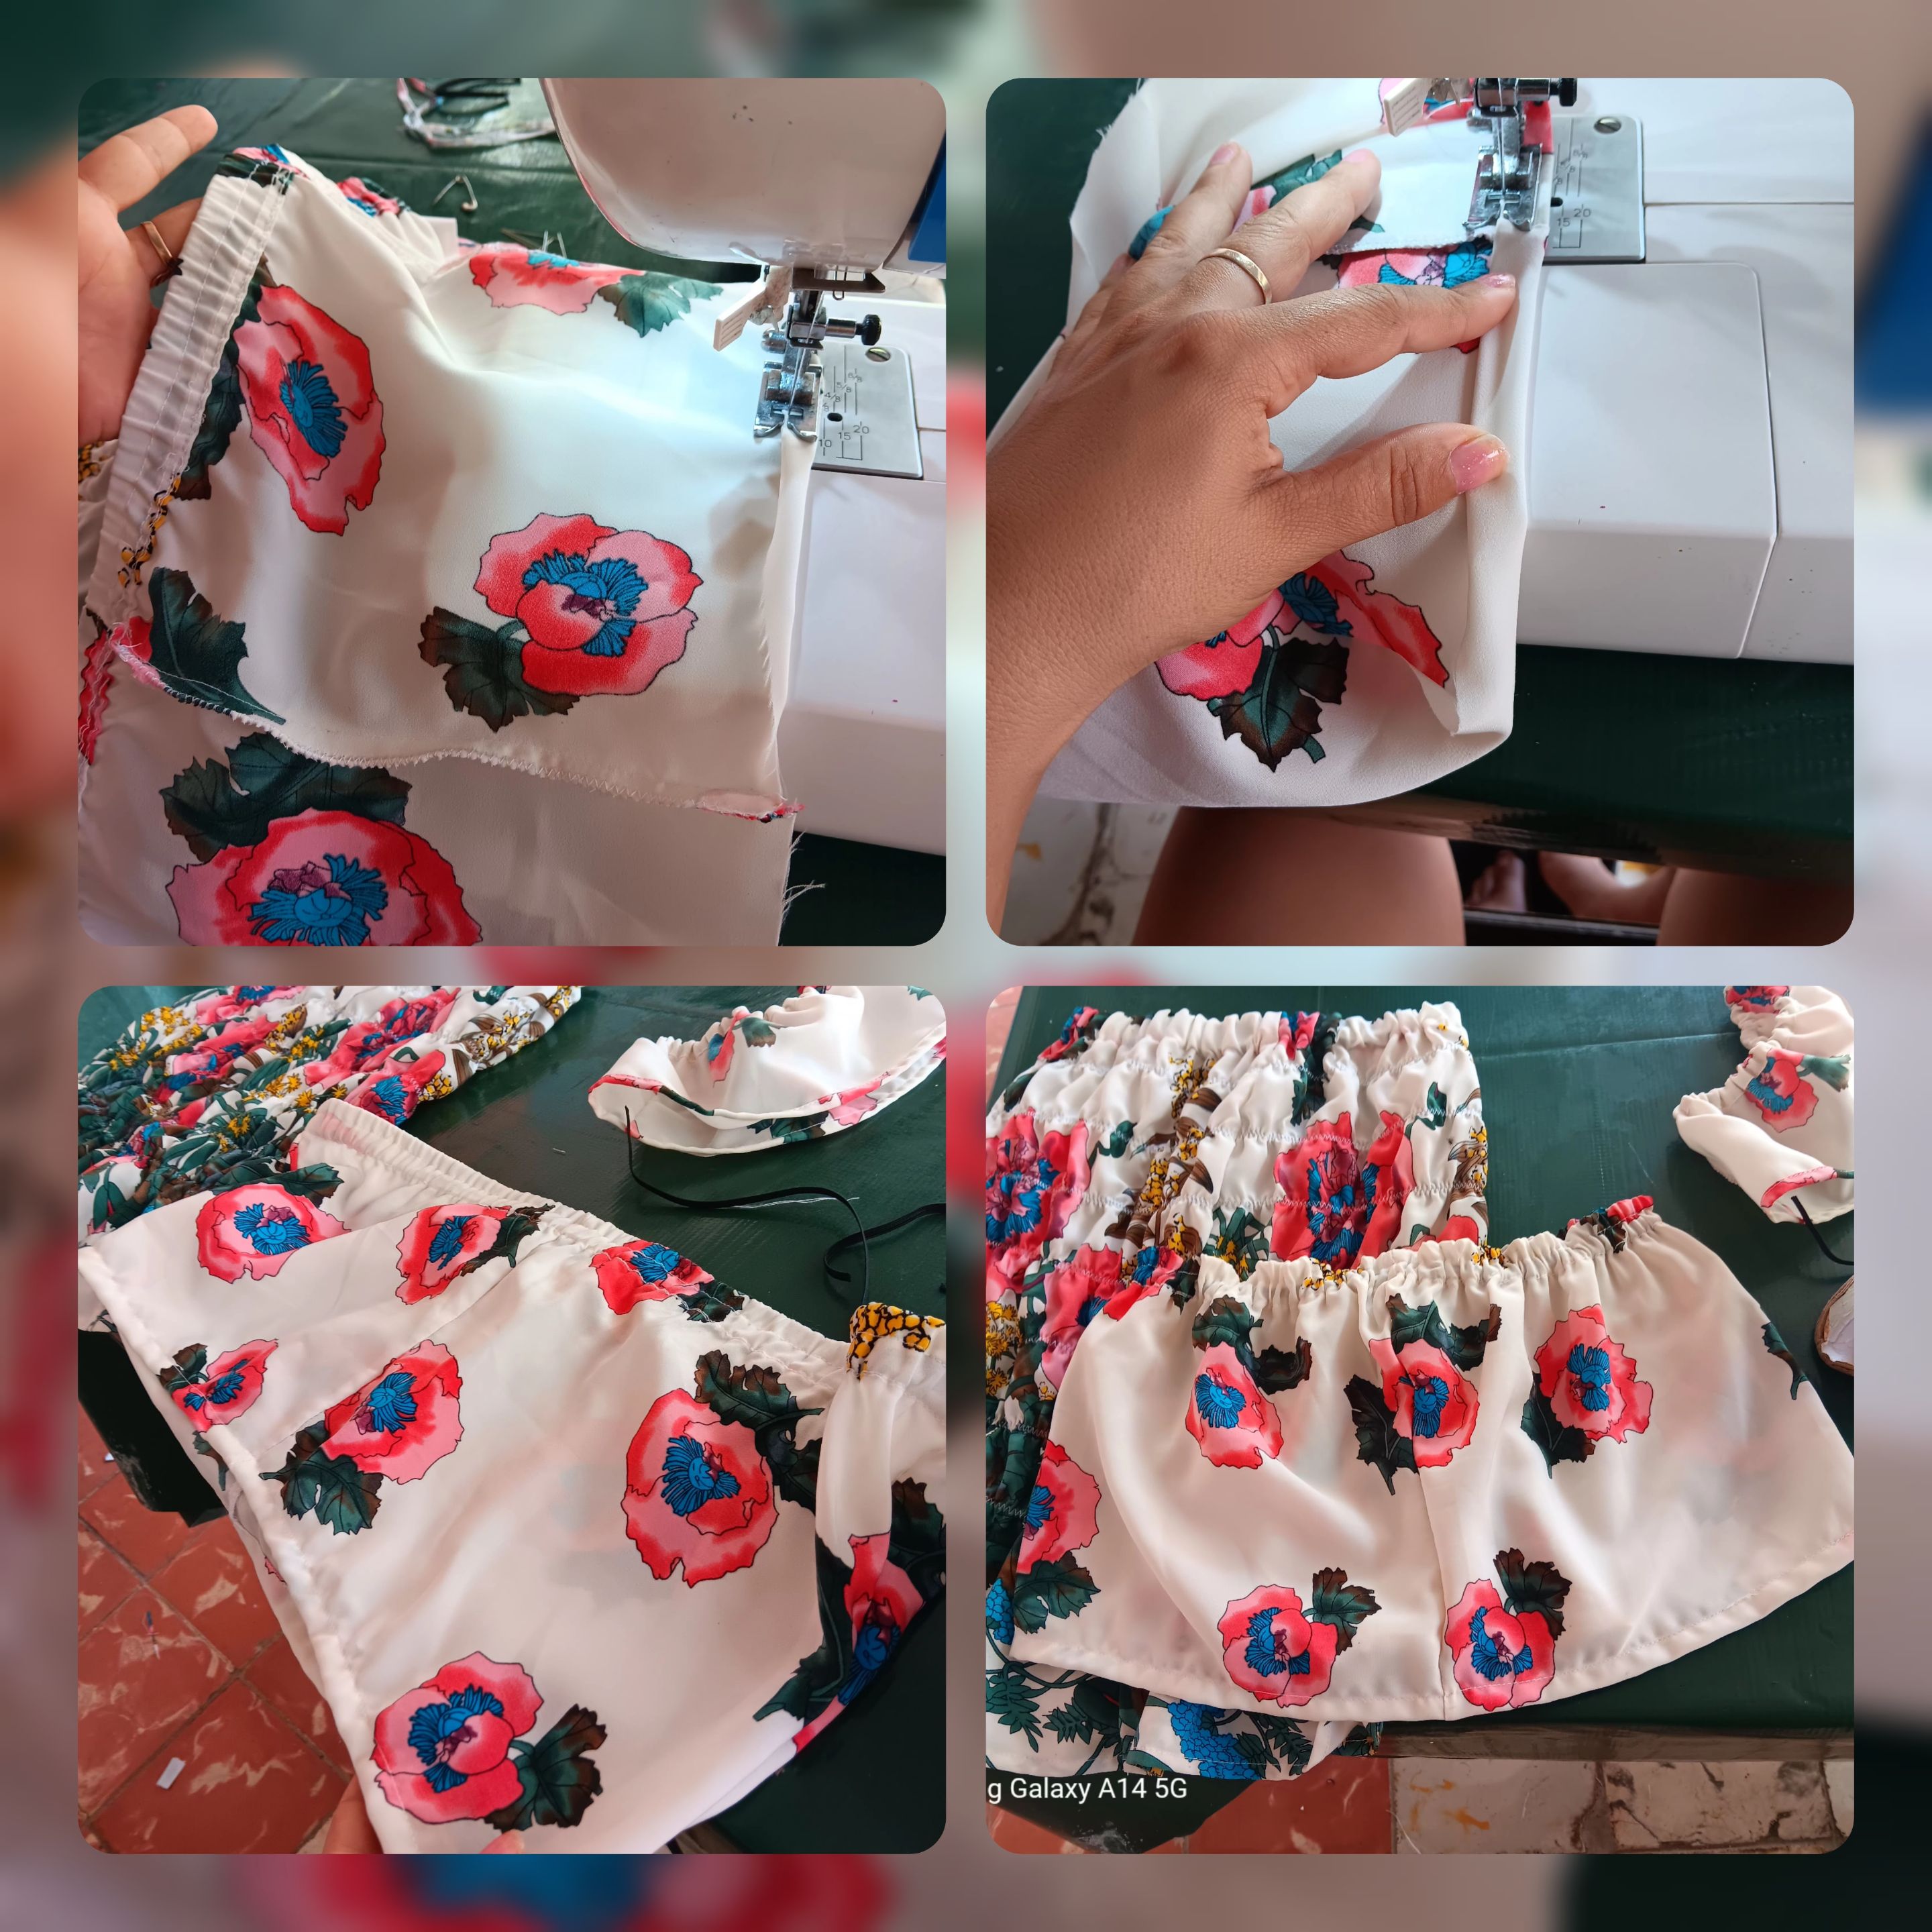
#2
✨ Take the top part and sew a seam in the center where the sash was, thus closing the openings and leaving the body of the blouse ready.
Then take out the elastic through a small unpicked space and with a long stitch, make a straight seam through the center of the sash, leaving a small margin, so that when it is time to place the sash, it will have a nice gathered effect.
#2
✨ Tome la parte de arriba y realice una costura en el centro donde estaba el tiro, cerrando de esta forma los abiertos y quedando listo el cuerpo de la blusa.
Luego saque el elástico por un pequeño espacio descosido y con una puntada larga, realice una costura recta por el mismo centro del fajin, quedando un pequeño margen, para a la hora de colocar el, quede un efecto fruncido bien bonito.

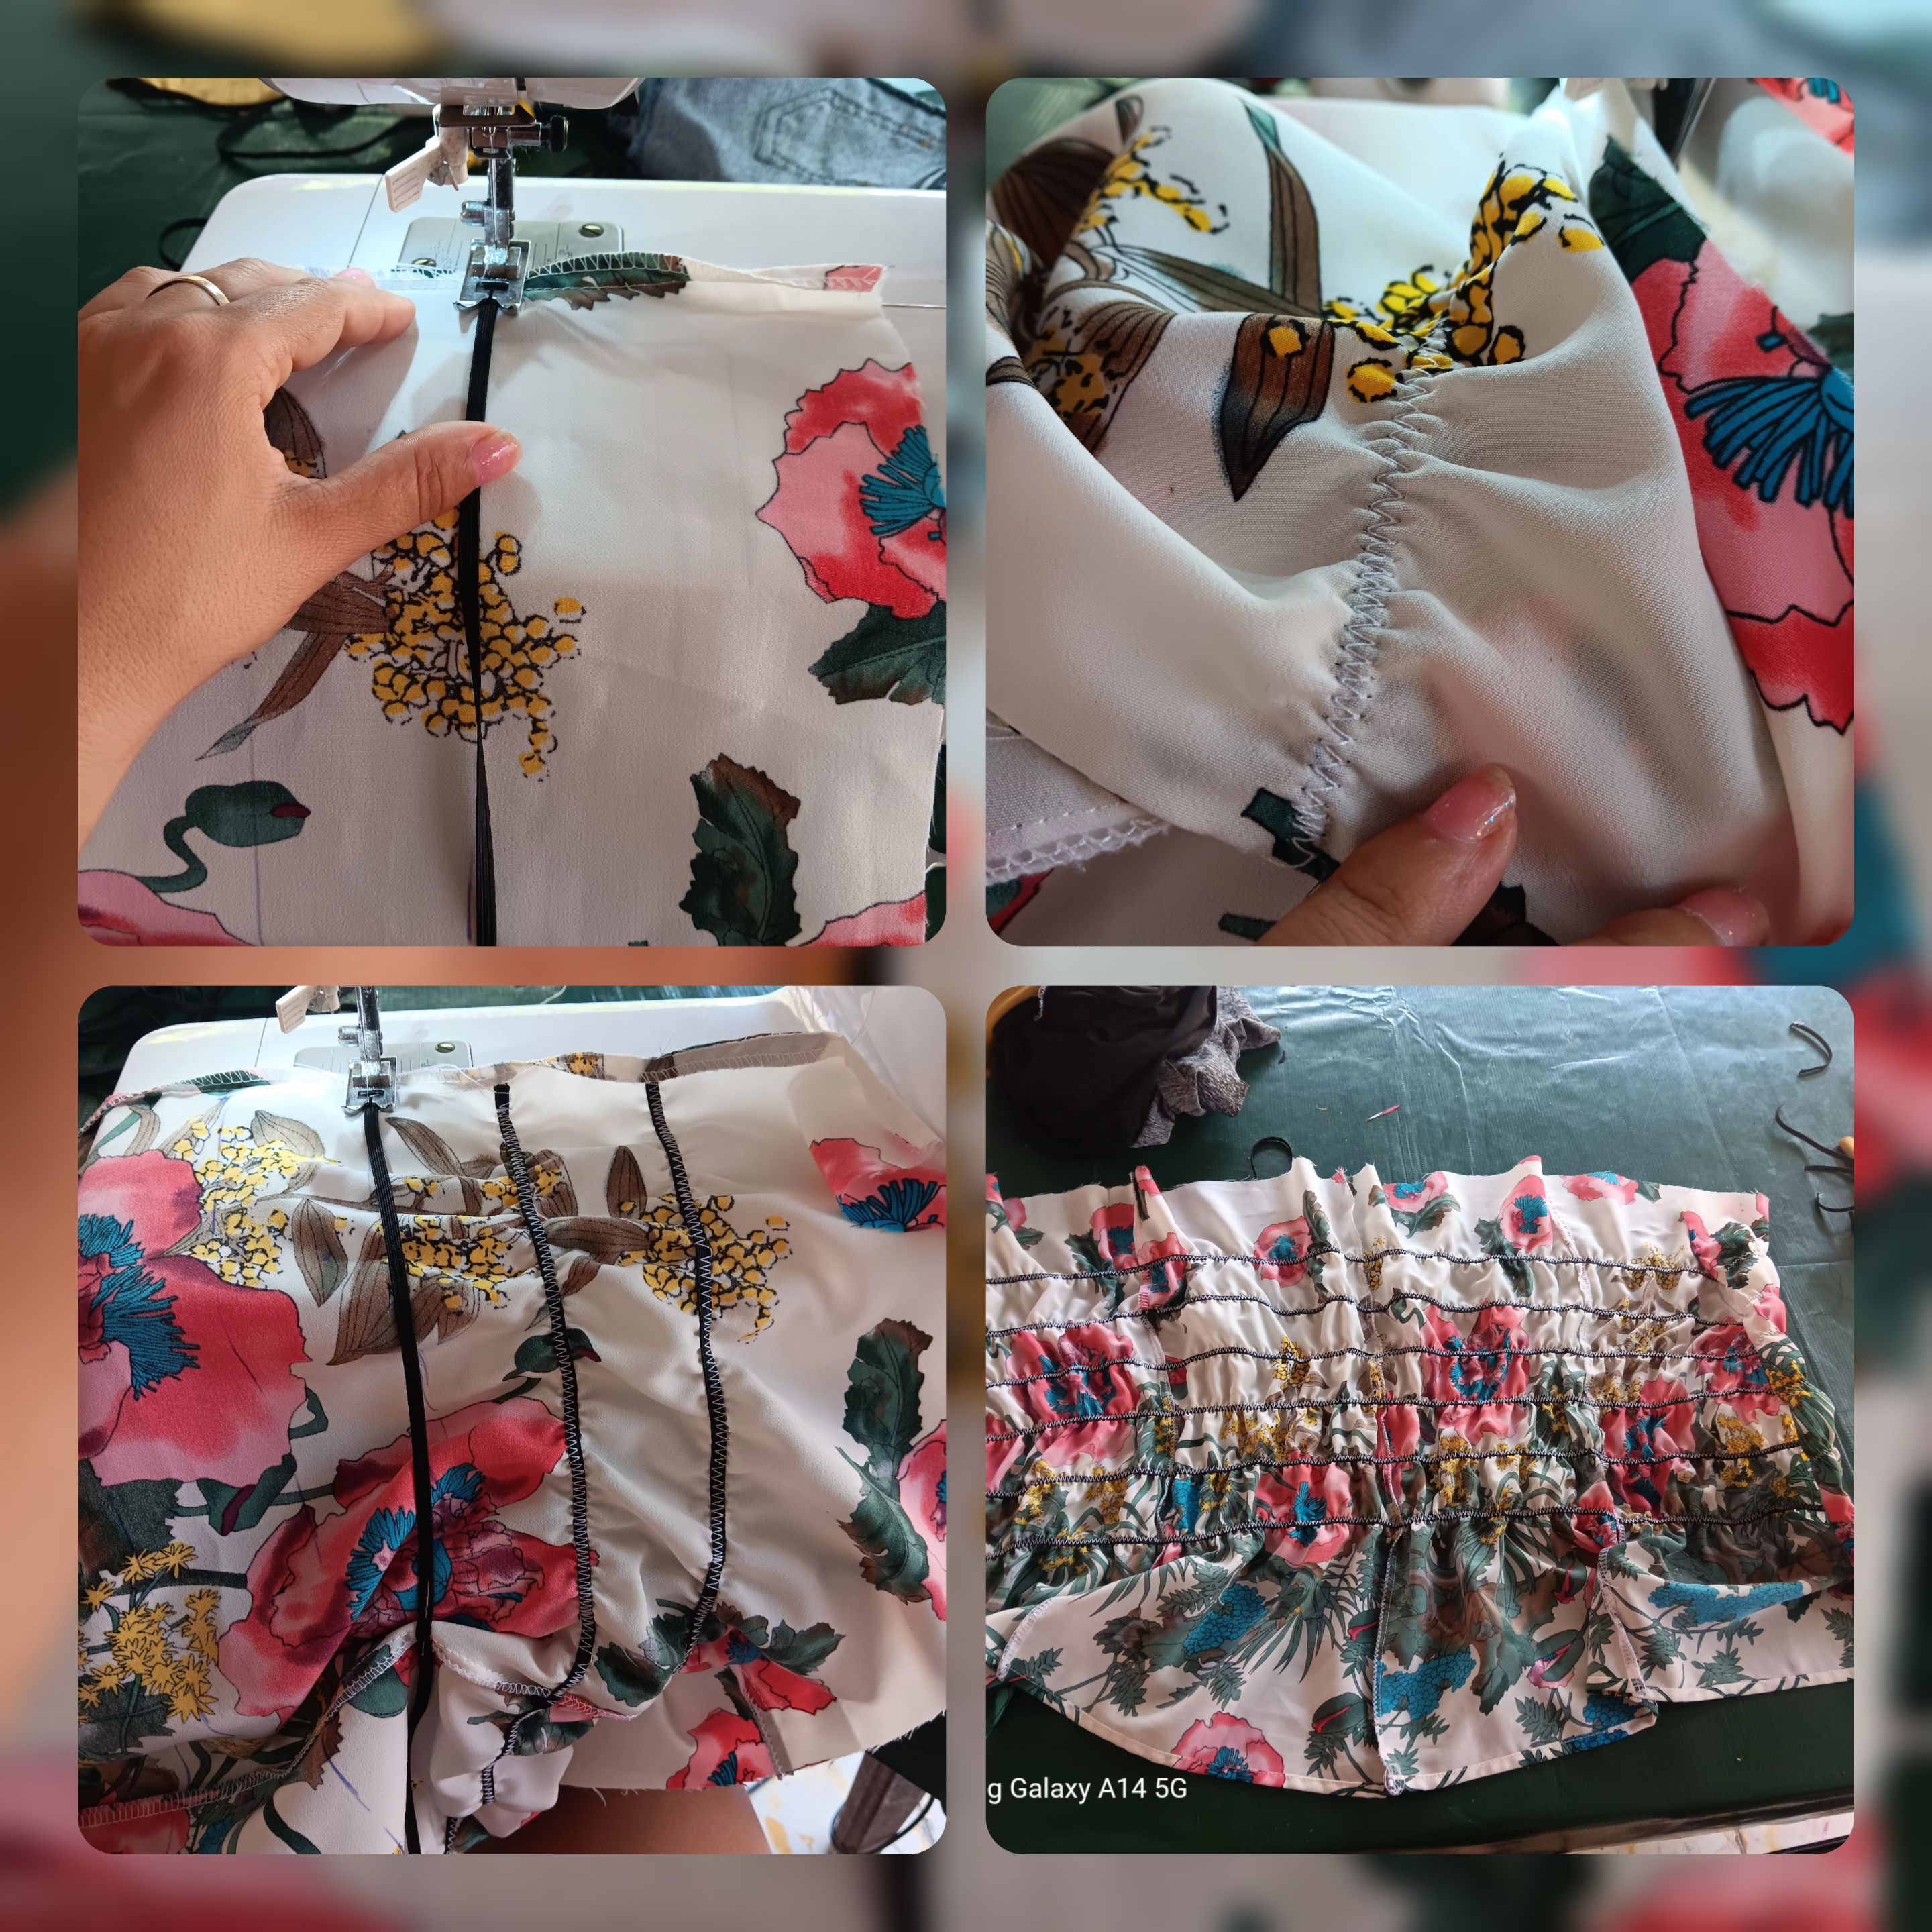
#3
✨ For the gathered effect of the skirt, I first joined the two pieces on one side, leaving only one piece. Then I took a measuring tape and marked a distance of approximately 6cm between each one. With a ruler, well it had to be, since I didn't have that tool, I took a board and made lines over the points already marked, making them as even and parallel as possible for each elastic placed afterwards.
With a tik tak stitch, I proceeded to place each elastic, always guided by the marks made.
#3
✨ Para el efecto fruncido de la falda, primero uni por uno de los laterales las dos piezas, quedando una sola pieza. Luego tome una cinta de medir y fui marcando con una distancia de 6cm aproximadamente entre cada uno. Con una regla, bueno debia de ser, al no disponer de esa herramienta tome una tabla y realice rayas por encima de los puntos ya marcados, logrando asi que quedaran lo mas parejos y paralelos posibles cada elástico colocado luego.
Con una puntada en tik tak procedi a colocar cada elástico, siempre guiandome por las marcas realizadas.
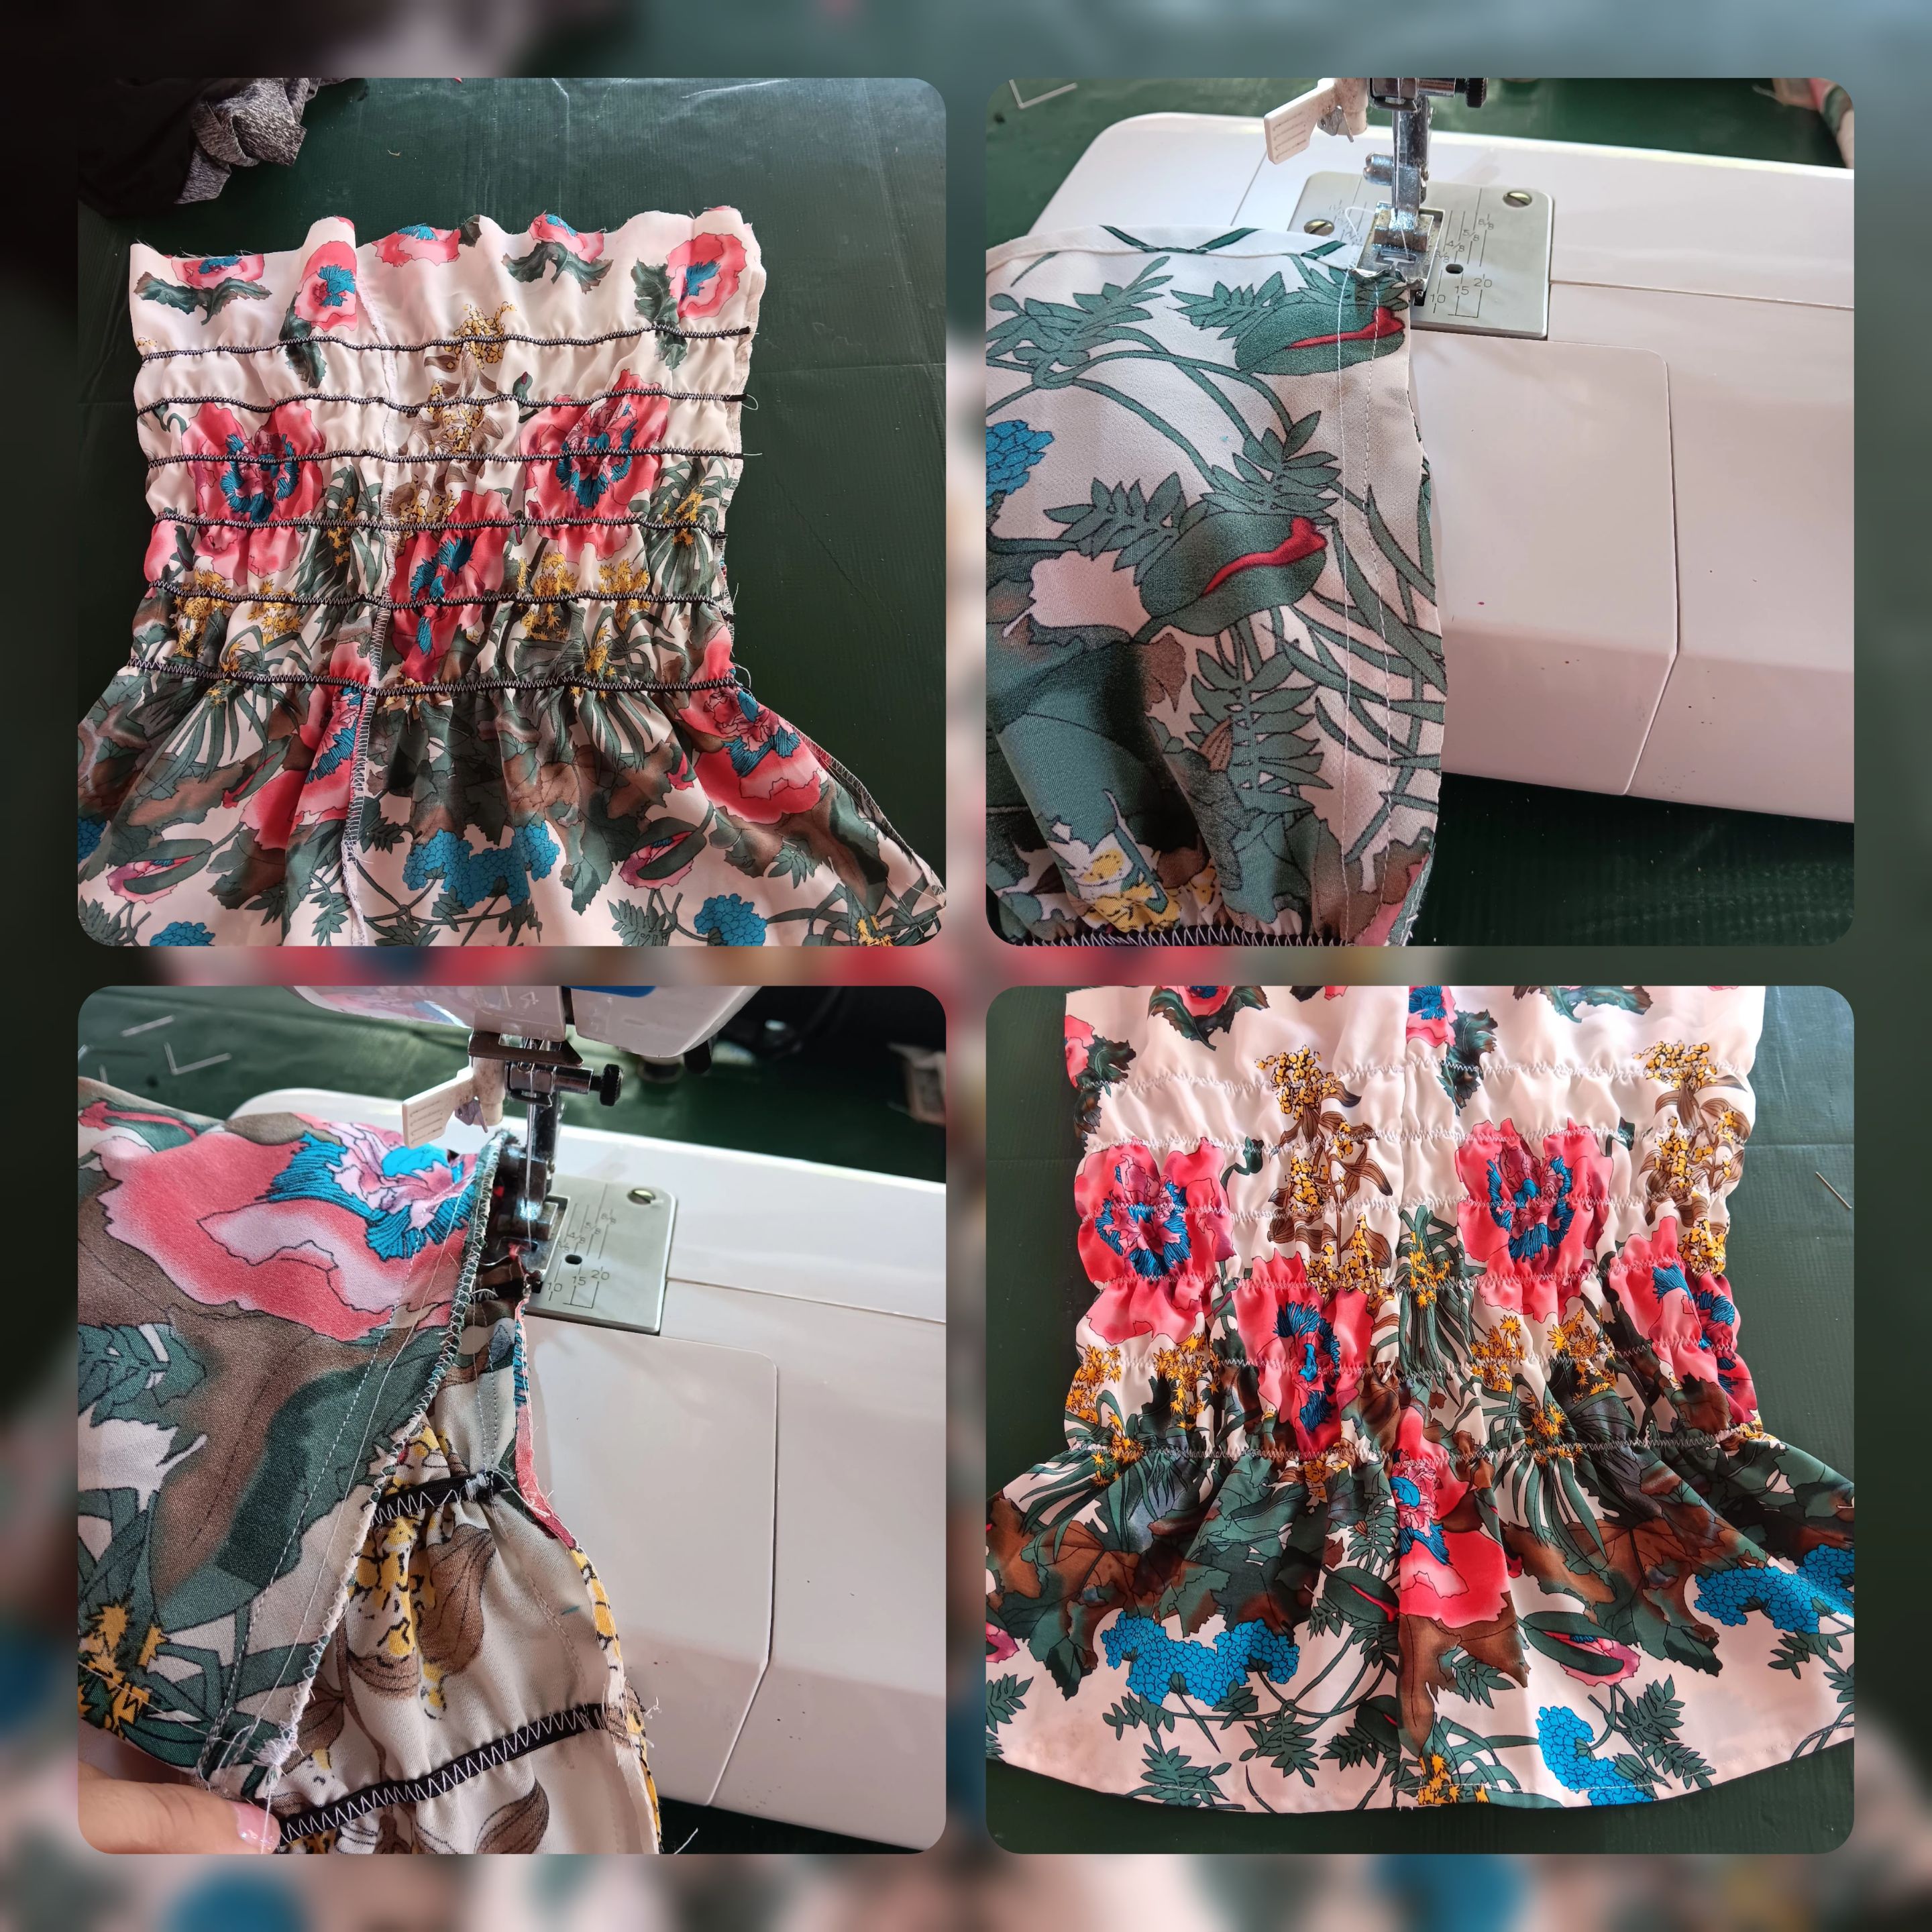
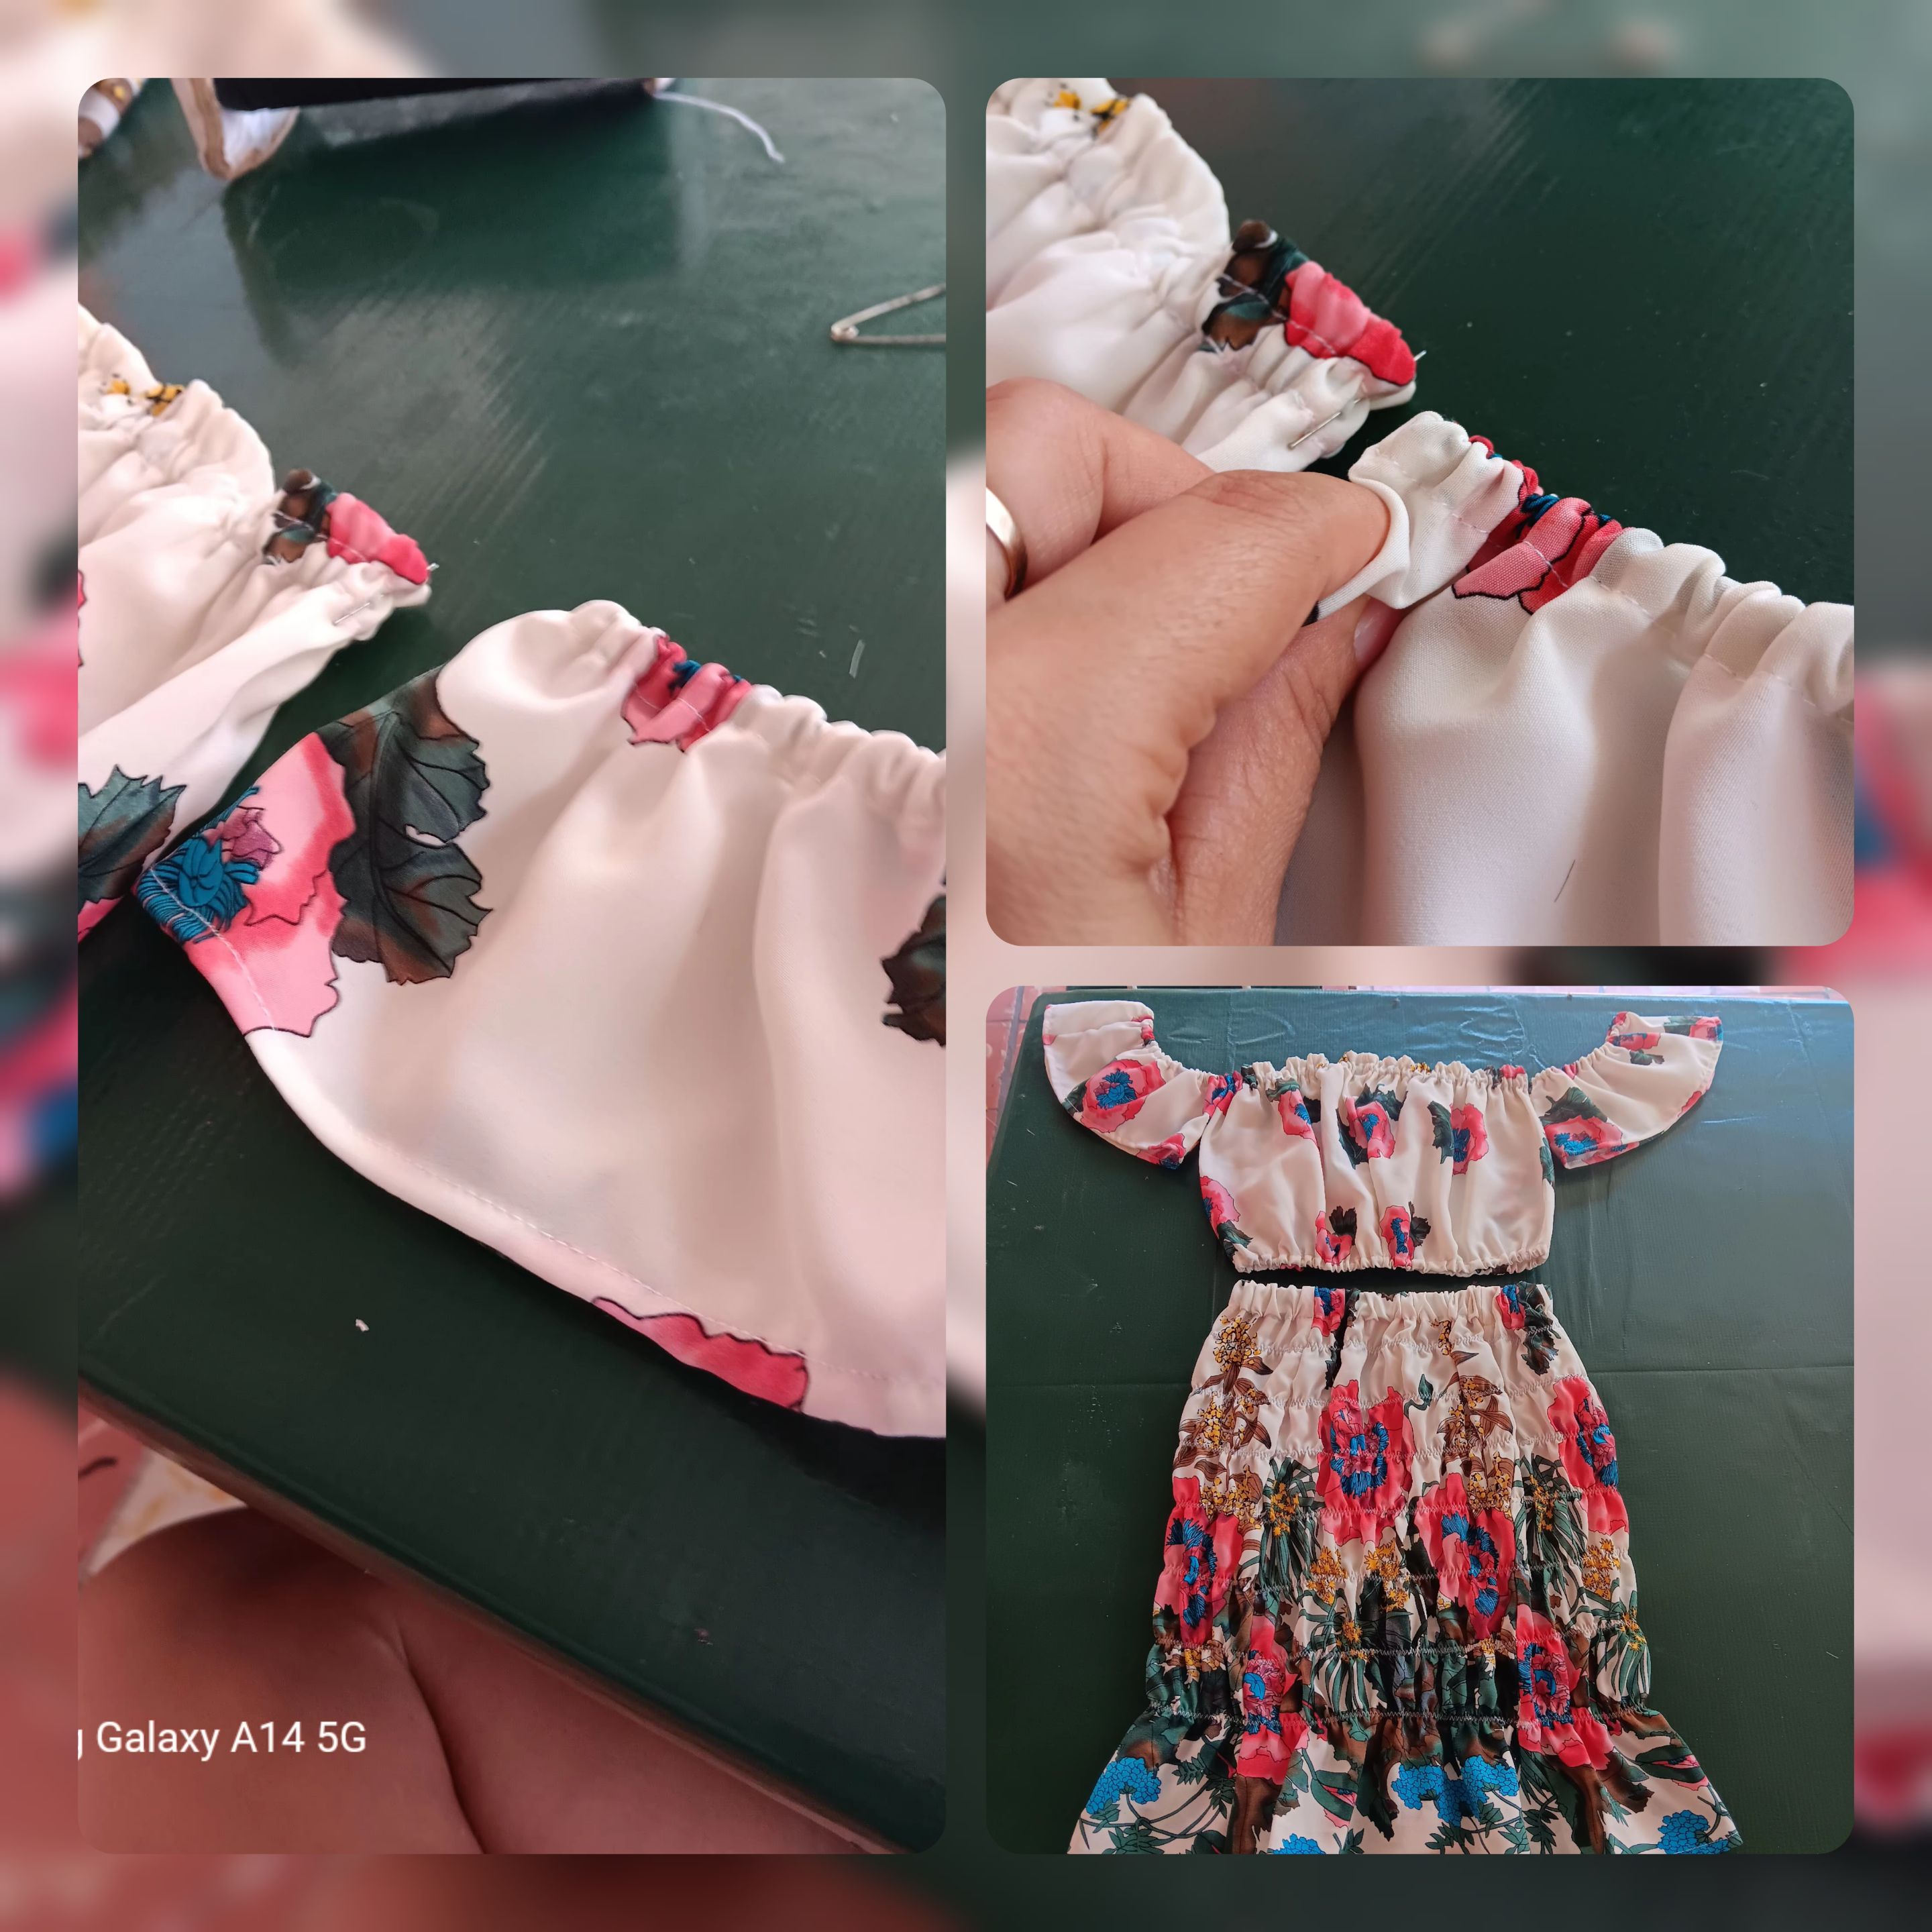
#4
✨ I joined the other side of the skirt that had been left open, and finished it off with a tik tak seam.
Then I made a wide hem, corresponding to the sash of the skirt, leaving a small opening to pass the elastic.
#4
✨ Uni el otro lateral que habia quedado abierto de la falda, y lo remate con una costura en tik tak.
Luego se le realizo un dobladillo bien ancho, correspondiente al fajin de la falda, dejando una pequeña abertura para pasar el elástico.

#5
✨ Finally I hemmed the sleeves and the missing hems of the blouse, placed the elastic on the top of the blouse, above and below, so that it would be well attached to the body and in the case of the sleeves, only at the top.
Finally I attached the sleeves to the crop top and tried on the design.
#5
✨ Por último le realice los dobladillos a las mangas y los que faltaban de la blusa, coloque los elástico en top de la blusa, encima y abajo, para que quedara bien sujeta al cuerpo y en el caso de las mangas, solo en la parte de arriba.
Finalmente uni las mangas al crop top y me probe el diseño.
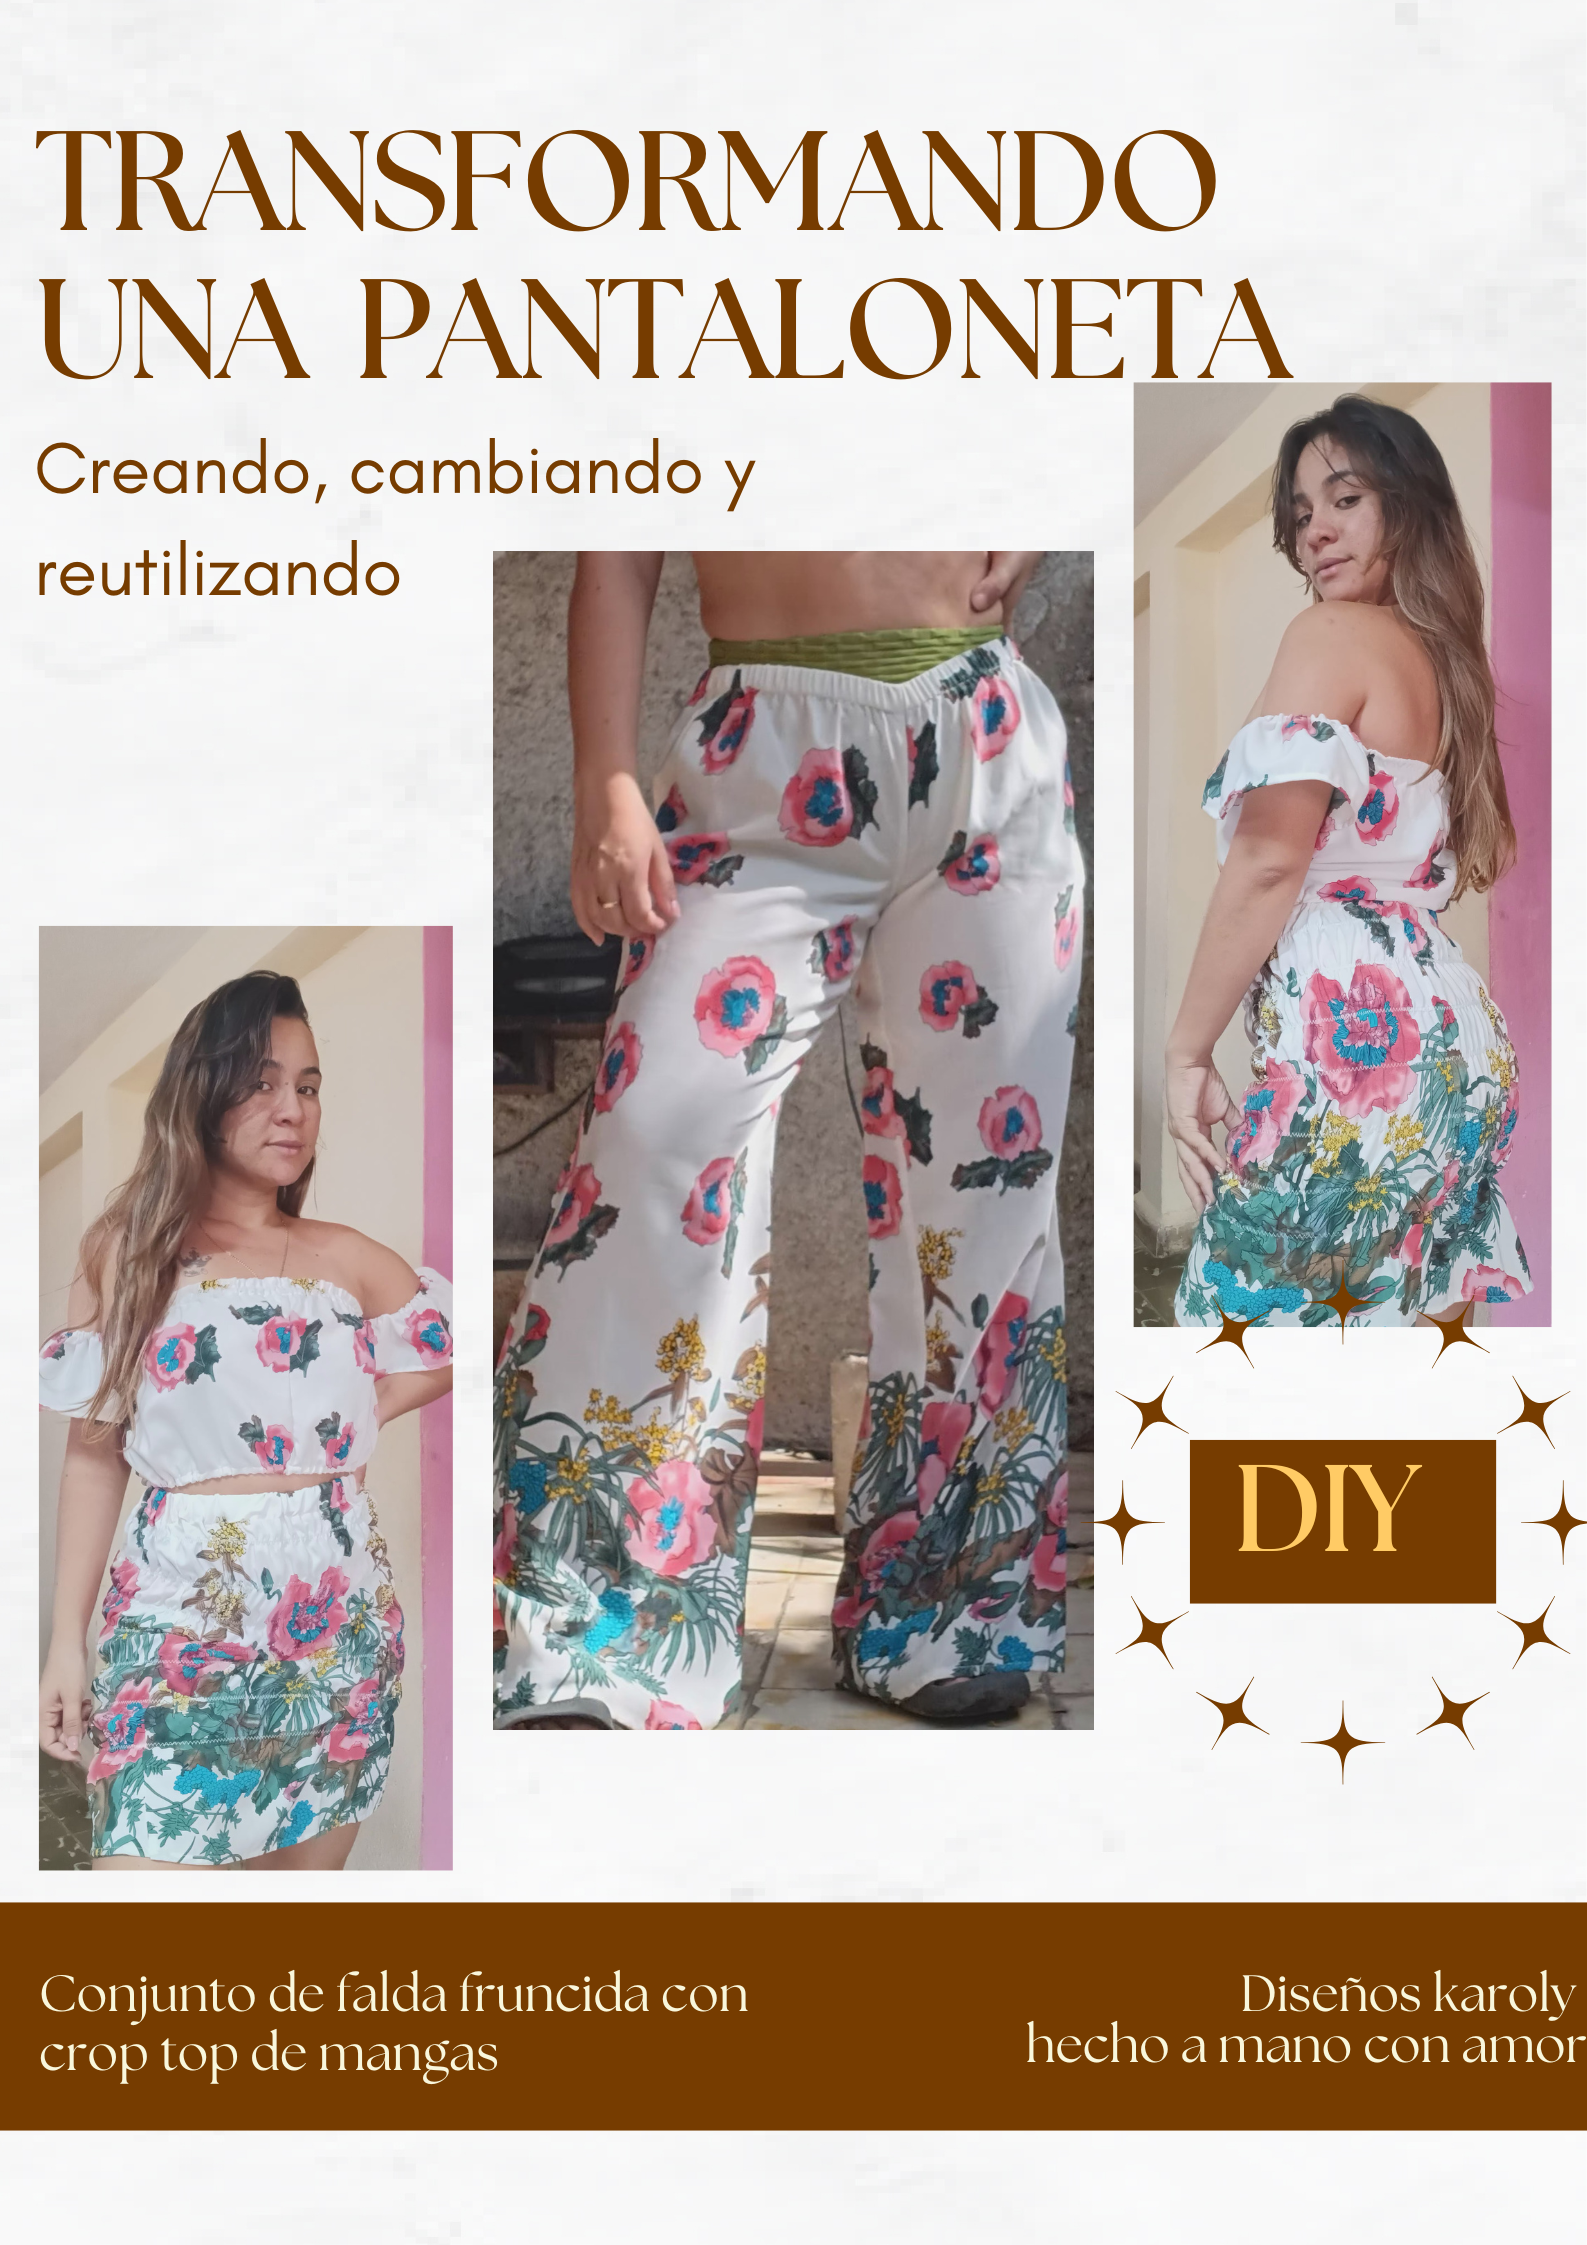
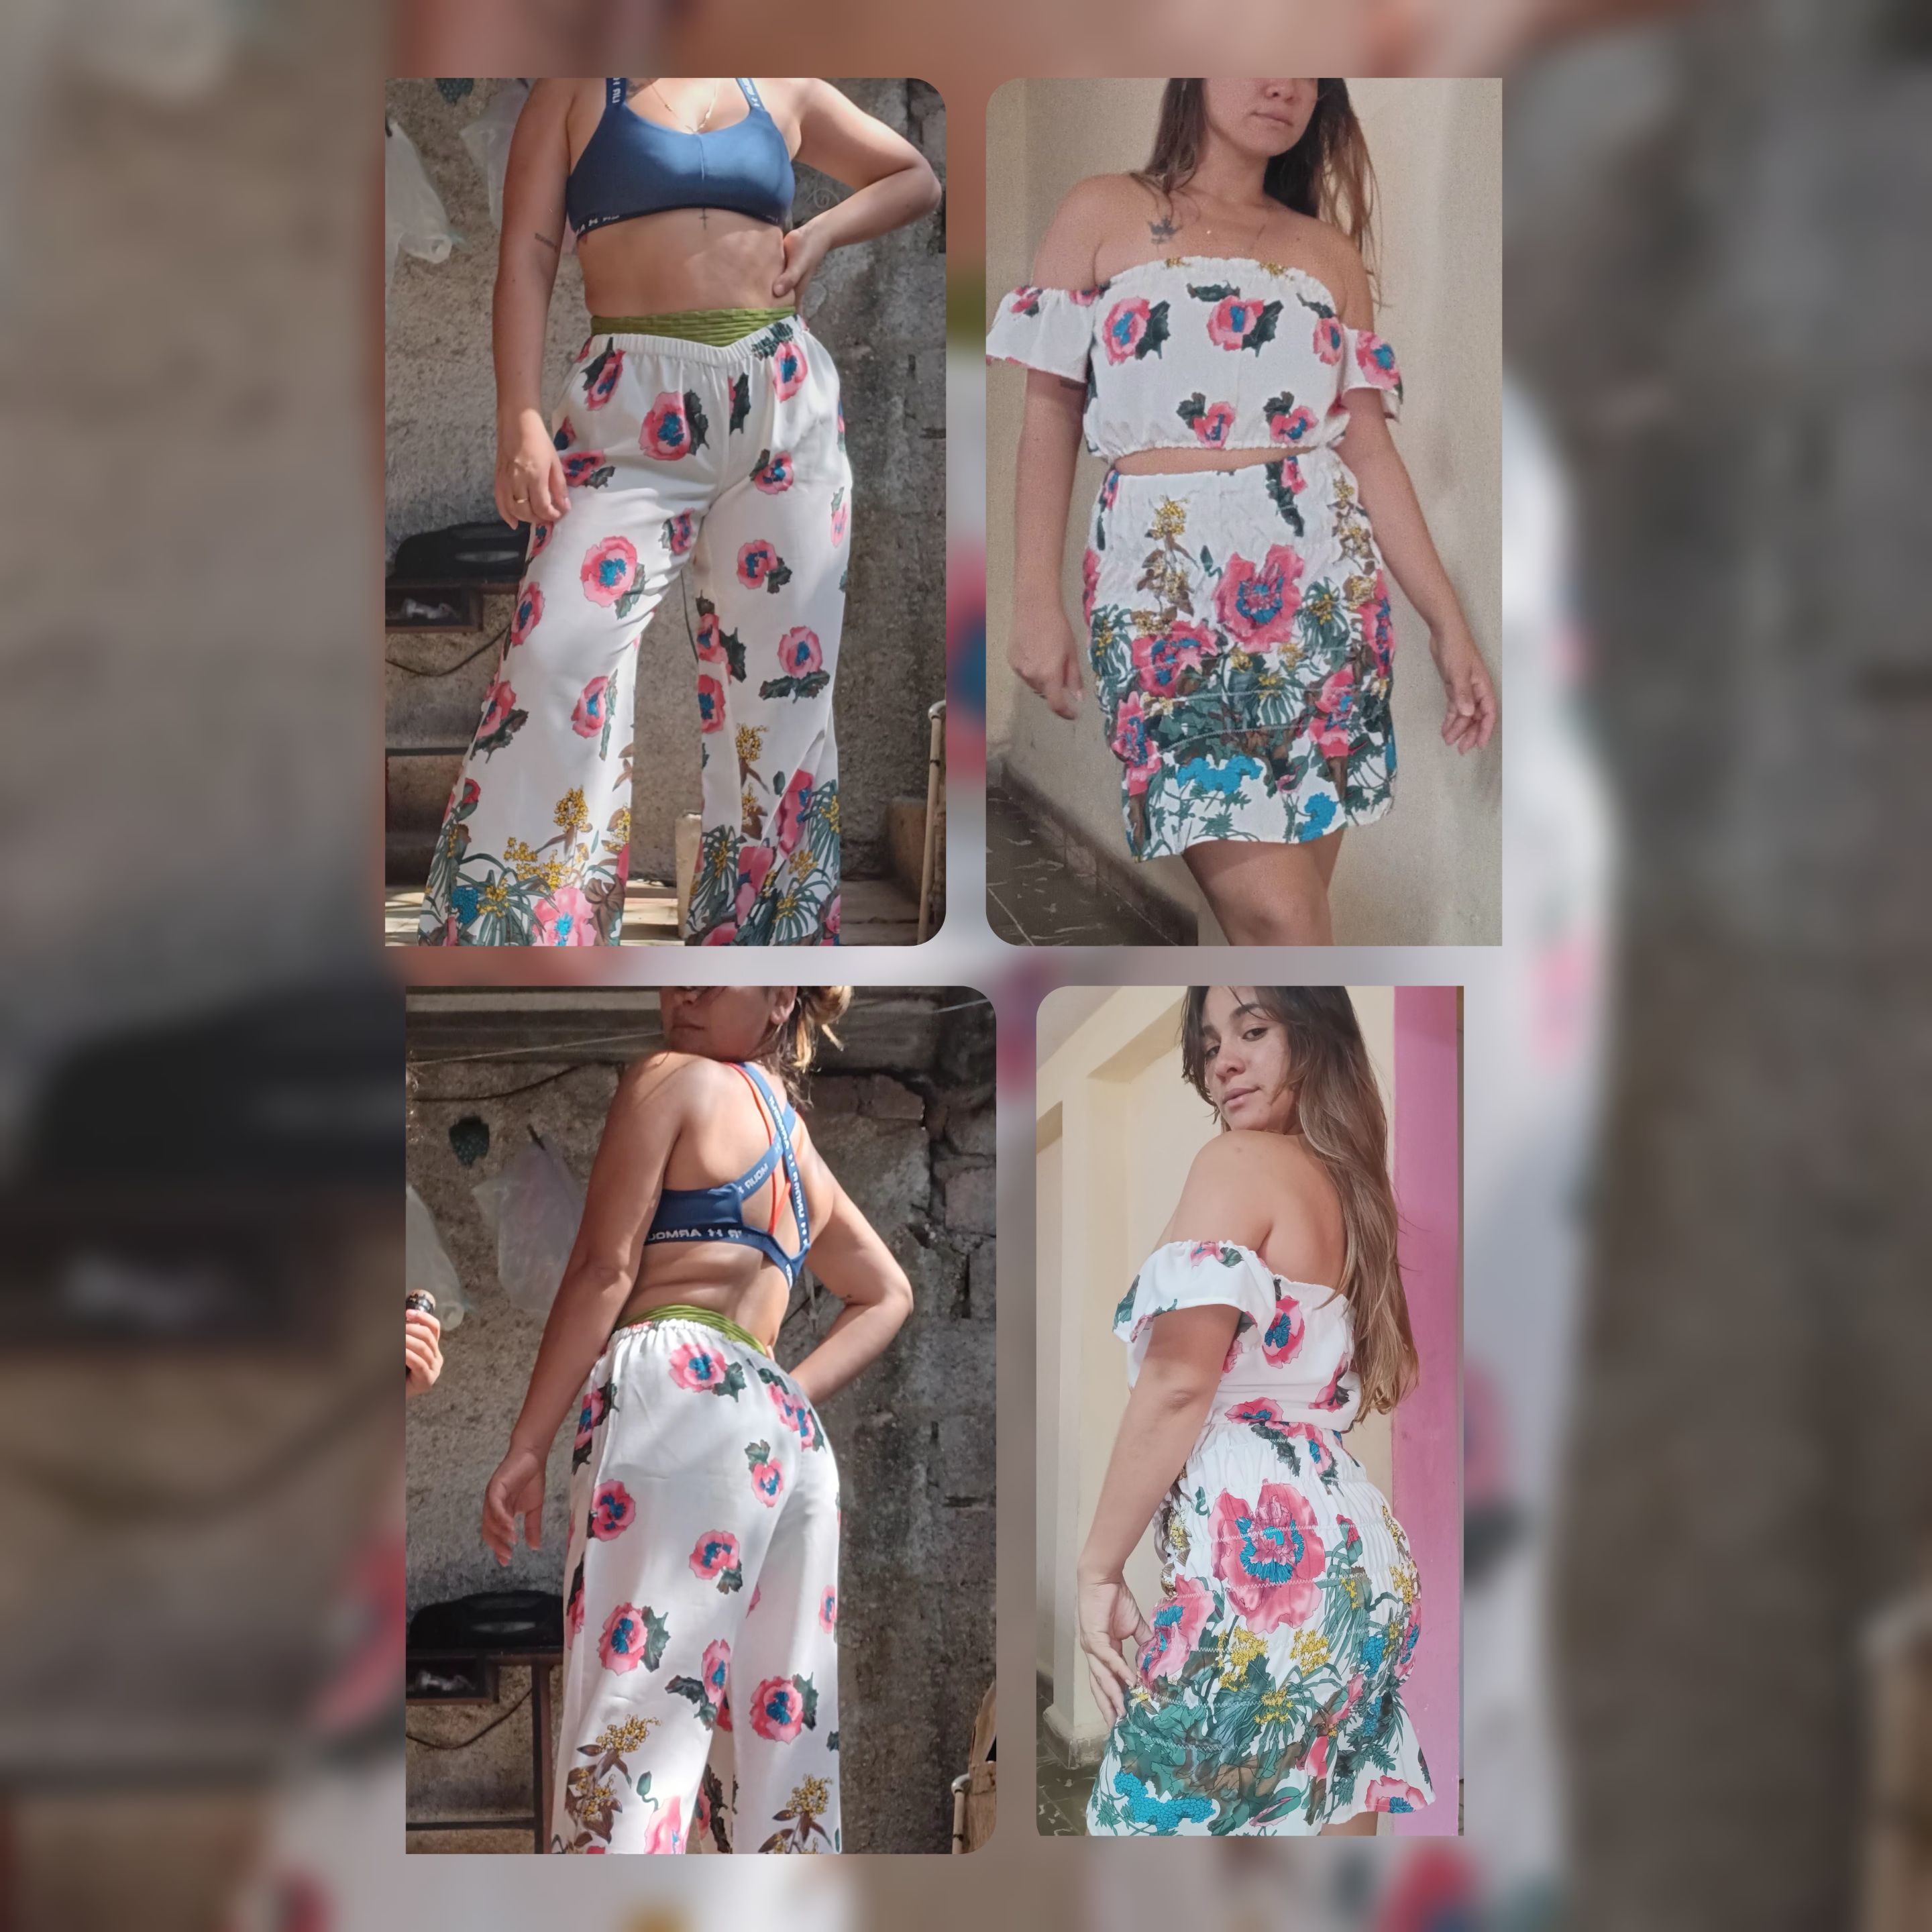
✨✨✨Resultado/Result✨✨✨


✨ This is a new garment, very youthful, sensual, fashionable and with a very flirtatious style. A cute and unique outfit that will make you feel empowered, sexy and very feminine.
I hope you liked this recycling project with clothes that I no longer used. I would appreciate if you could support me with your votes and leave me your nice comments on the result of this beautiful dress. Thank you in advance and have a nice day everyone.
✨ De esta forma quedo una nueva prenda de vestir, muy juvenil, sensual, a la moda y con un estilo bien coqueto. Un conjunto lindo y unico que te hara sentirte empoderada, sexy y muy femenina.
Espero q os haya gustado este proyecto de reciclaje con ropas que ya no usaba. Agradeceria que me apoyaran con sus votos y me dejaran sus lindos comentarios del resultado de este bello vestido. Gracias de antemano y tengan todos un bello dia.
Todas las fotografias son de mi autoria, capturadas desde mi celular y editadas por GridArt, usé www.DeepL.com/Translator.
El texto o resumen es totalmente de mi autoria.
All photographs are my own, captured from my cell phone and edited by GridArt, I used www.DeepL.com/Translator.
The text or summary is entirely my own.