Greetings friends. It's been a long time since I last shared with you something about one of my current projects, one of the ones I'm most passionate about. It is a first generation Power Rangers Dinozord, completely handmade by myself, from scratch.
Actually I have shared with you a couple of posts of this project, you can see them in the link below:
Part 1https://peakd.com/hive-130560/@gaboamc2393/diy-dinozord-tyrannosaurus-part-i-engspa-a16
Part 2https://peakd.com/hive-130560/@gaboamc2393/diy-dinozord-tyrannosaurus-part-ii-engspa-ebc
Well, since last time I made some improvements to the initial design, the main thing being to cover the head with flexible dough to start shaping the mechanical parts of the Dinozord, instead of just a bunch of cardboard pieces glued together.
Español
Saludos amigos. Mucho tiempo ha pasado desde la última vez que les compartí algo sobre uno de los proyectos que llevo actualmente, uno de los que mas me apasiona. Se trata de un Dinozord de los Power Rangers de primera generación, hecho completamente a mano por mi mismo, desde cero.
Actualmente he compartido con ustedes un par de post de este proyecto, pueden verlos en el enlace a continuación:
Parte 1https://peakd.com/hive-130560/@gaboamc2393/diy-dinozord-tyrannosaurus-part-i-engspa-a16
Parte 2https://peakd.com/hive-130560/@gaboamc2393/diy-dinozord-tyrannosaurus-part-ii-engspa-ebc
Pues bien, desde la última vez hice algunas mejoras en el diseño inicial, siendo lo principal cubrir la cabeza con masa flexible para comenzar a dar forma a las piezas mecánicas del Dinozord, en lugar de solo un montón de piezas de cartón pegadas entre si.
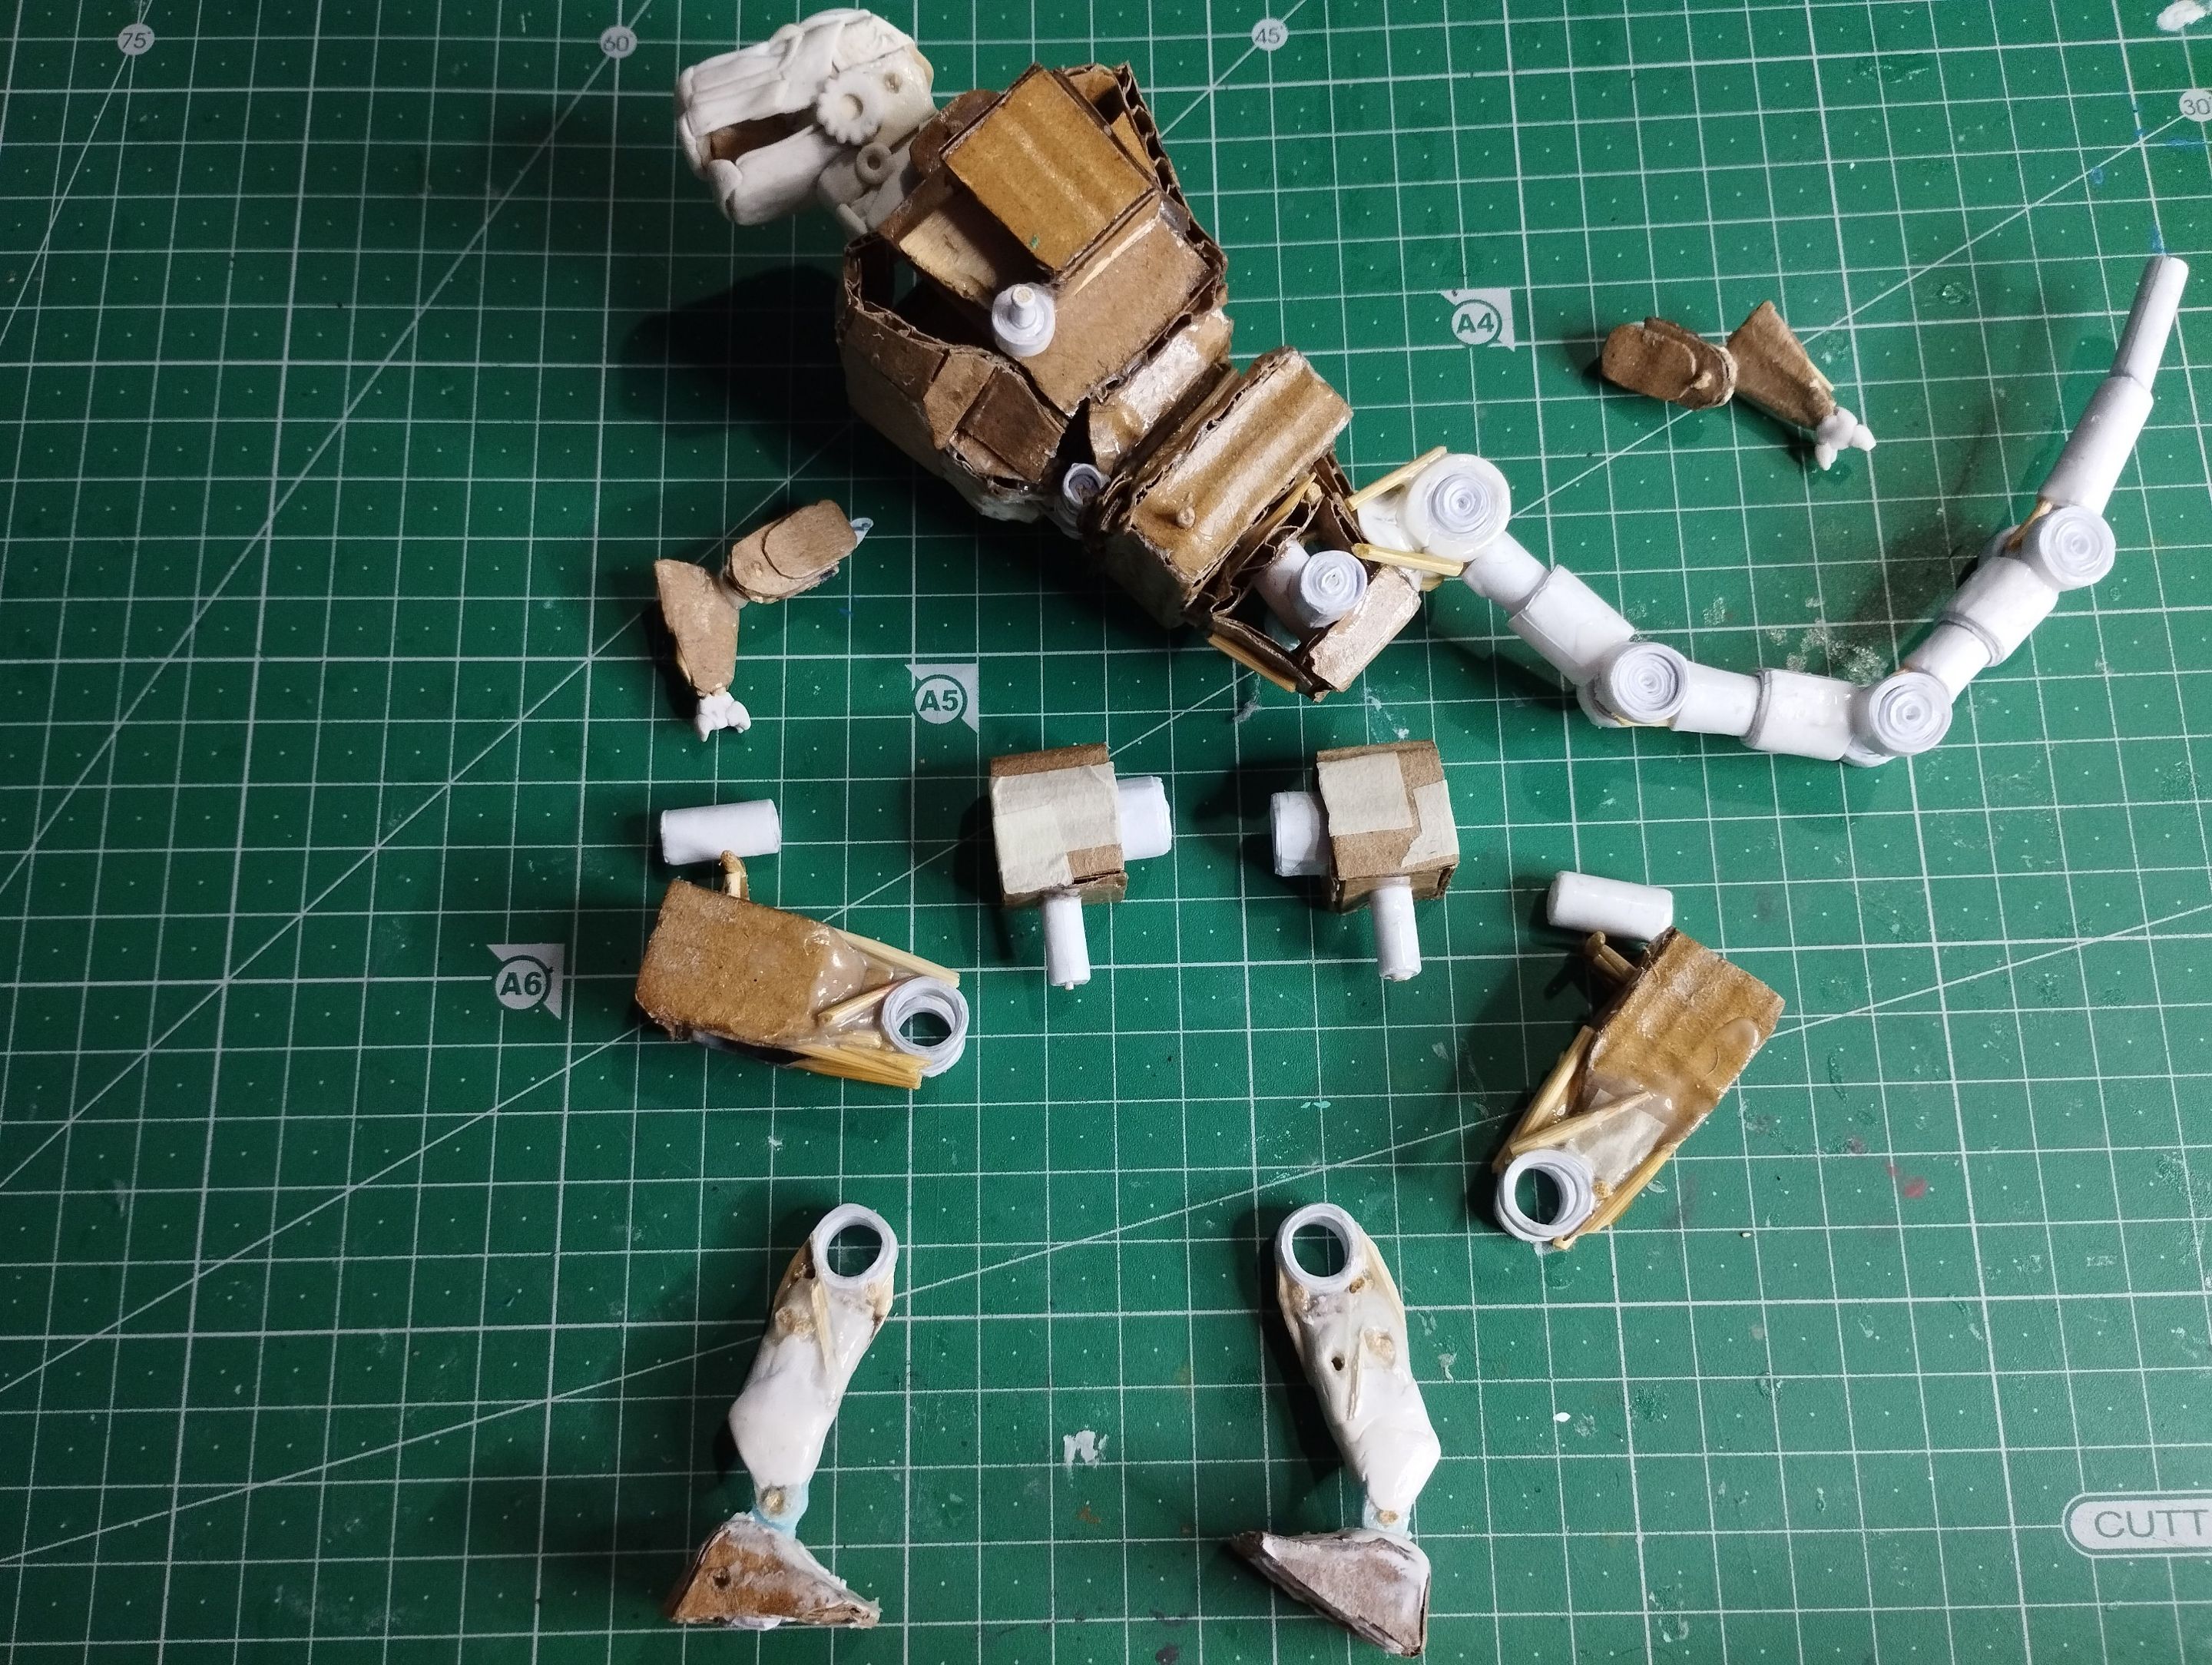
Basically I had to restructure the whole lower part of the legs, because when thinking about the design that the other parts, or better said, the other Dinozord, would have, I realized that some pieces would not be functional so I had to disassemble all the pieces to see what I could do to improve the structure of the “robot”.
In the image below, besides all the restructured pieces, you can see that I made a new tail for the character, using the quilling technique to roll cylinder-shaped pieces, which will be used to connect the different moving parts of both the legs and the tail.
Básicamente tuve que reestructurar toda la parte inferior de las piernas, porque al pensar en el diseño que tendrían las otras partes, o mejor dicho, los otros Dinozord, me di cuenta que no serían funcionales algunas piezas así que tuve que desarmar todas las piezas para ver qué podría hacer para mejorar la estructura del "robot".
En la imagen de abajo, además de todas las piezas reestructuradas, pueden ver que hice una nueva cola para el personaje, usando la técnica de quilling para enrollar piezas en forma de cilindro, que servirán para conectar las distintas partes móviles tanto de las piernas como de la cola.
At this point, I started to cover some pieces with flexible dough, as I did with the head before.
The idea of using flexible dough is to cover the cardboard skeleton and make all the pieces that give the appearance of mechanical parts. As you can see in the image on the right, there I started to place some washers, pipes, gears and others.
Ya en este punto, comencé a cubrir algunas piezas con masa flexible, tal como hice con la cabeza anteriormente.
La idea de usar masa flexible es cubrir el esqueleto de cartón e ir fabricando todas las piezas que dan la apariencia de partes mecánicas. Como pueden ver en la imagen de la derecha, ahí comencé a colocar algunas arandelas, tuberías, engranajes y demás.
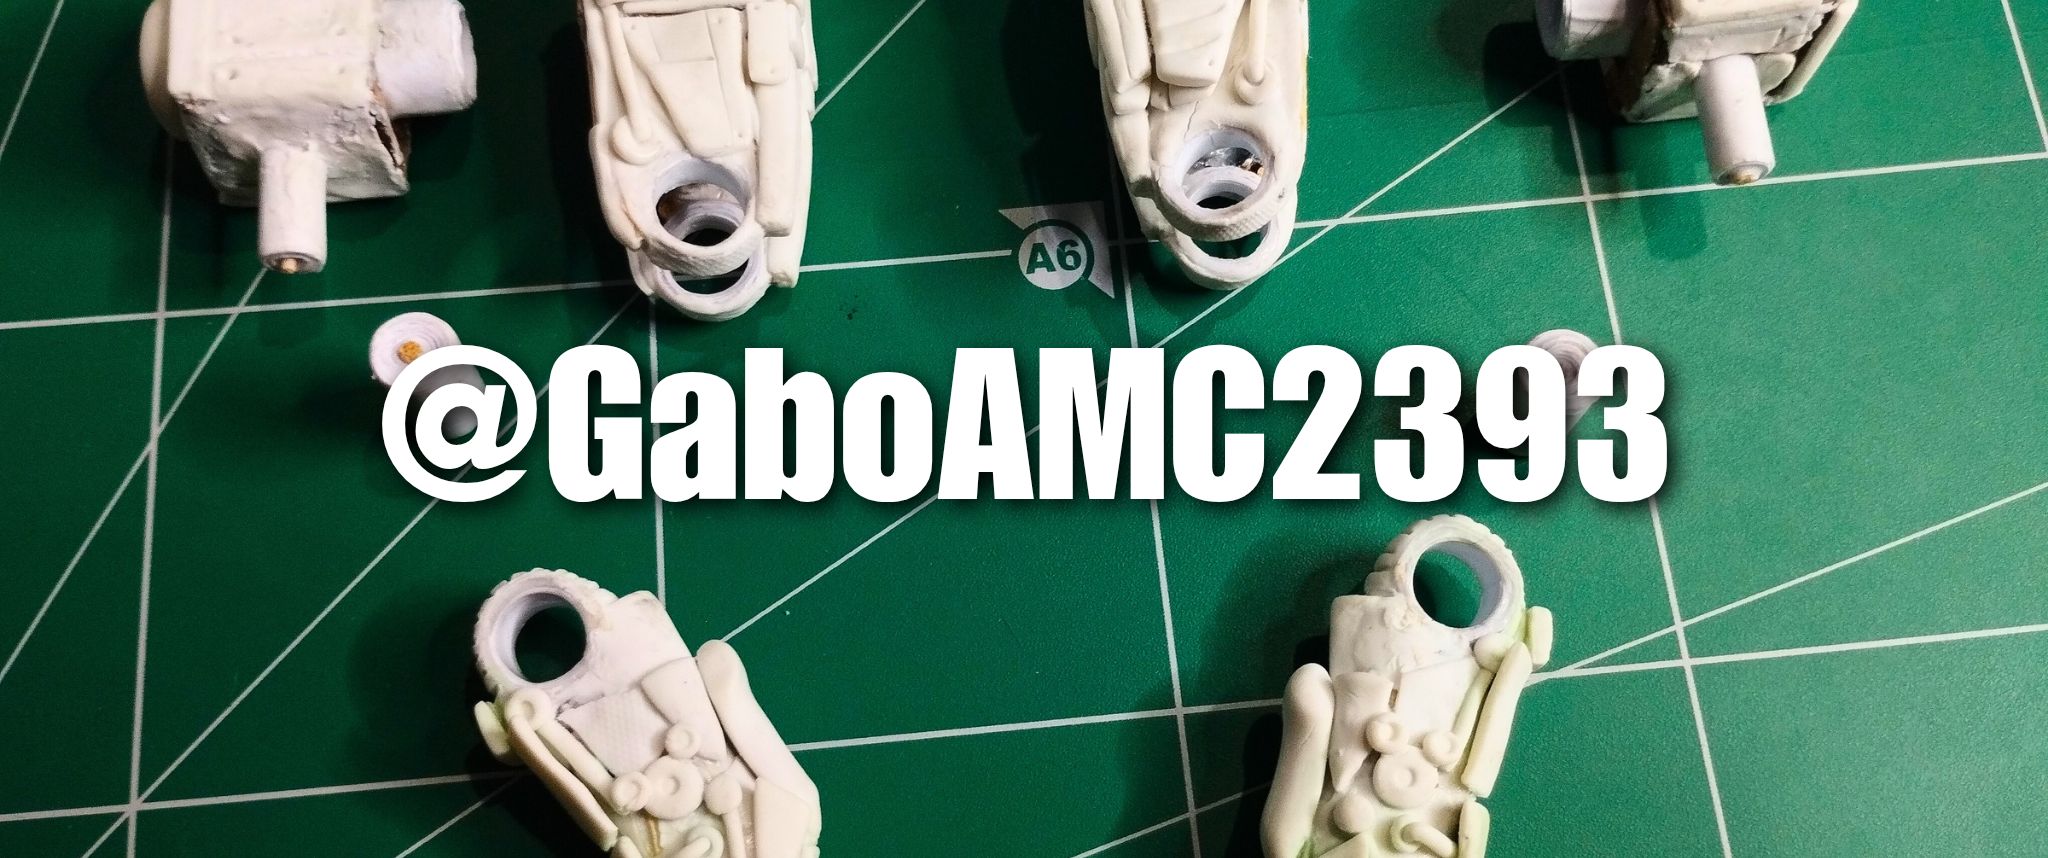
In the image below you can clearly see all the small parts I created for what would be the calves, with all the mechanical parts, new plates, tracks at the joints and pipes.
En la imagen de abajo se puede visualizar claramente todas las pequeñas piezas que creé para lo que serían las pantorrillas, con todas las piezas mecánicas, placas nuevas, orugas en las uniones y tuberías.
I continued to cover the thigh part, placing more plates, slots, gears and other screw holes. At this point it was all trial and error, as sometimes the parts in place did not allow the leg to move, so I had to restructure the parts so that it could move.
Continué cubriendo la parte de los muslos , colocando más placas, ranuras, engranajes y agujeros de tornillos demás. En este punto todo era ensayo y error, ya que a veces las piezas colocadas no permitían la movilidad de la pierna, así que tuve que reestructurar las piezas de manera que pudiera moverse.
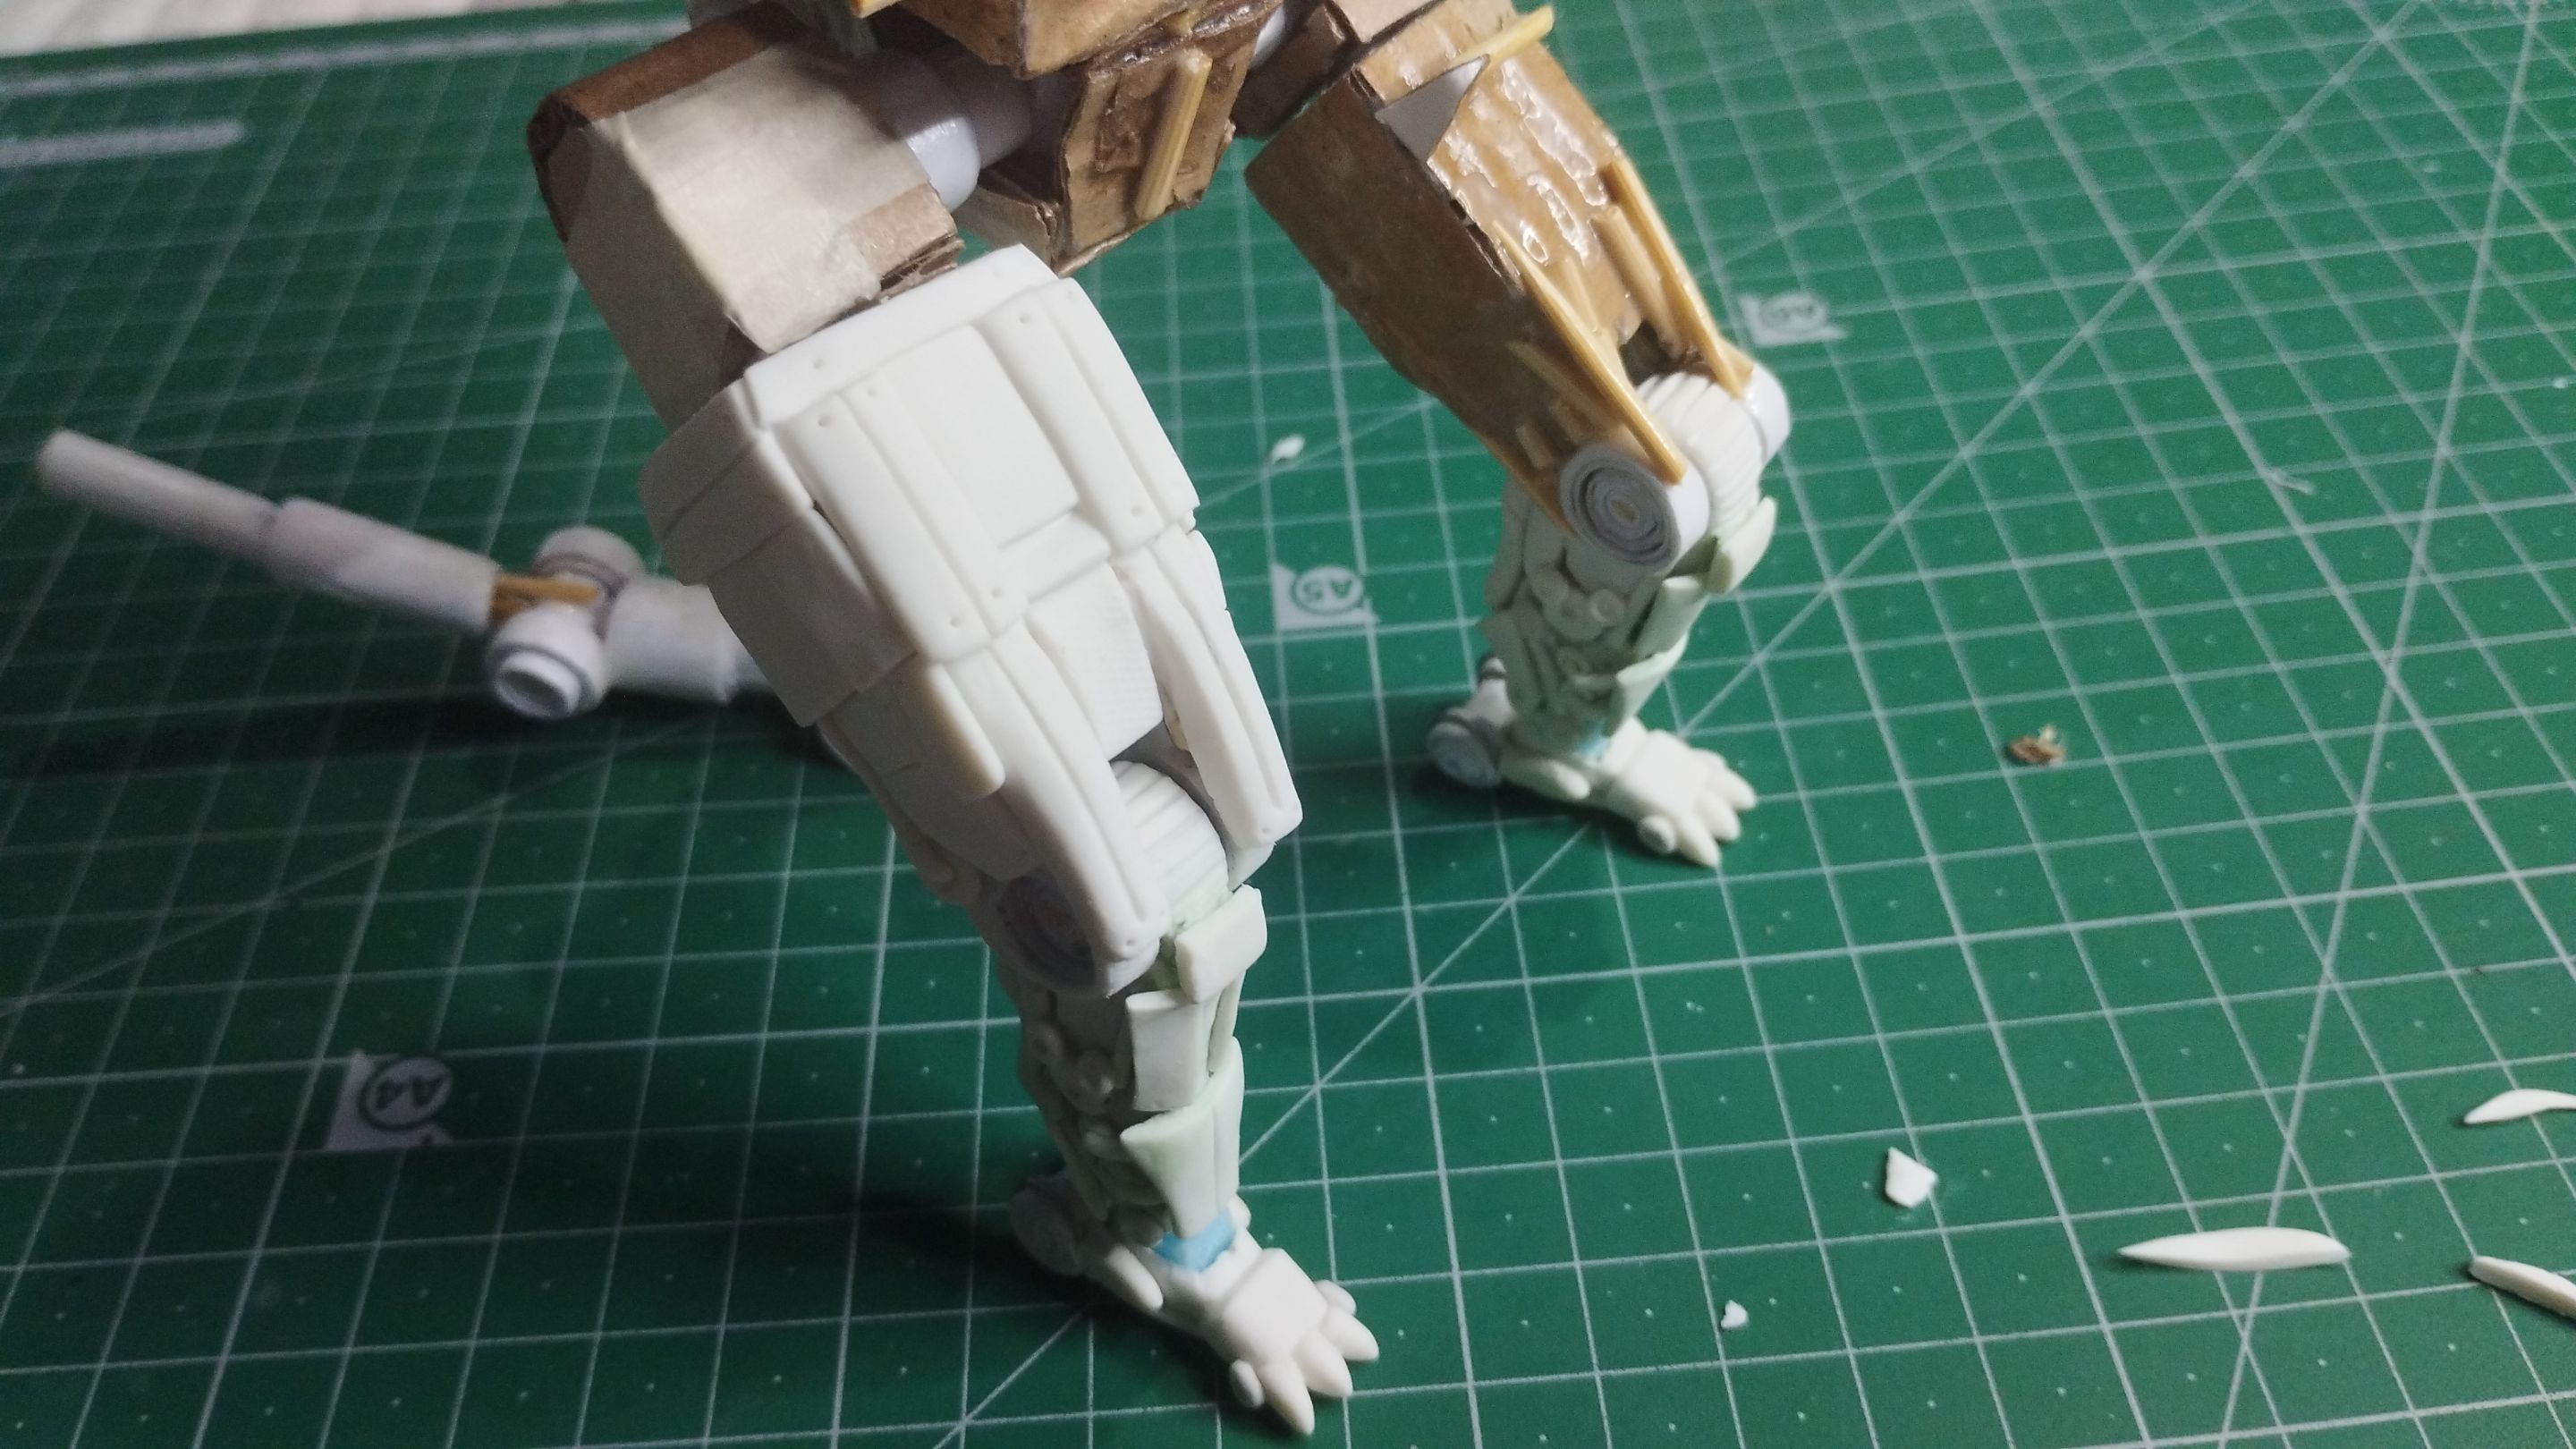
In fact, in the image below you can visualize the great mobility that the leg has, it can bend completely.
On the other hand, I also had to remake the feet, because they were too big and would not fit on the other Dinozords that I will make later and that would serve as the legs of a great future Megazord.
De hecho, en la imagen de abajo pueden visualizar la gran movilidad que tiene la pierna, puede doblarse completamente.
Por otra parte, también tuve que rehacer los pies, porque eran demasiado grandes y no servirían para encajarlos en los otros Dinozord que haré más adelante y que servirían como las patas de un gran futuro Megazord.
After having the legs well structured, continue working on the junction between the thigh and the waist.
This joint not only allows to move the leg forward and backward, but also to turn the thigh sideways, which allows a quite wide mobility, not quite full, but quite wide.
Next you can see how I started to cover the cardboard piece with flexible dough, to create this cover to simulate mechanical and metallic pieces.
Después de tener las piernas bien estructuradas, continúe trabajando en la unión entre el muslo y la cintura.
Esta unión no solo permite mover la pierna hacia adelante y hacia atrás, sino girar el muslo hacia los lados, lo que permite una movilidad bastante amplia, no del todo plena pero sí bastante amplia.
A continuación pueden observar como comencé a cubrir la pieza de cartón con masa flexible, para crear esta cubierta para simular piezas mecánicas y metálicas.
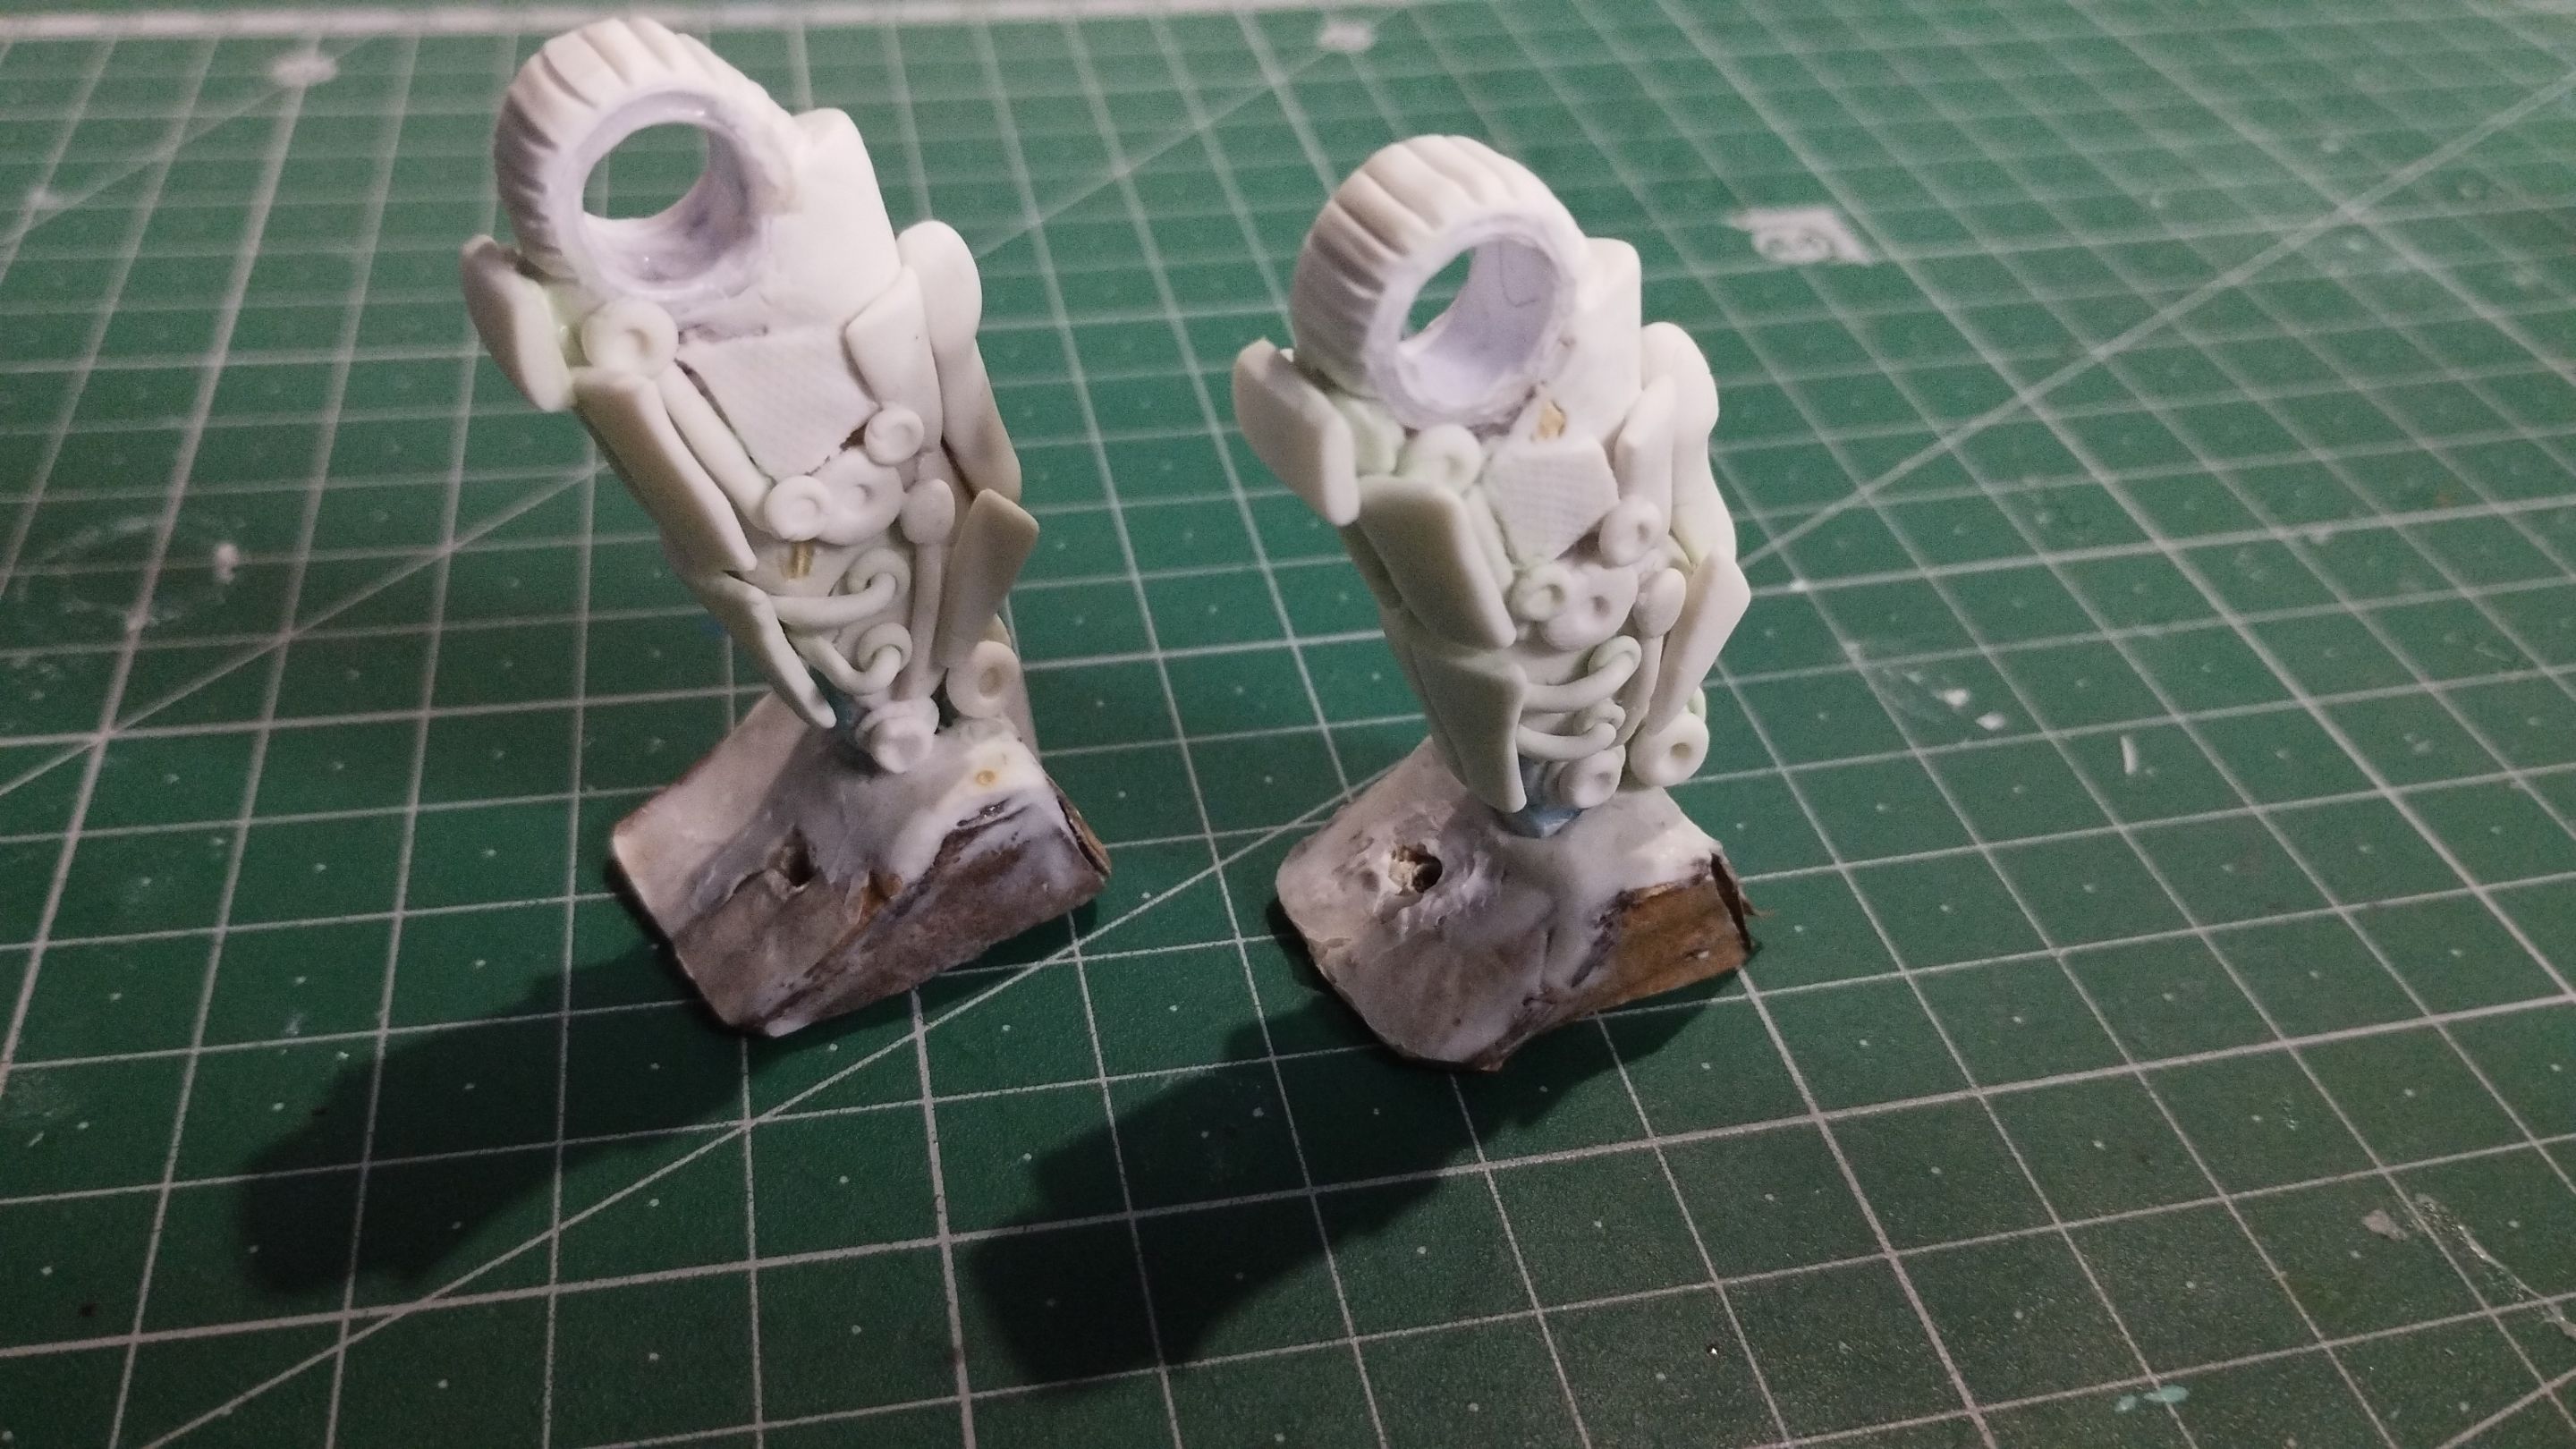
This is how the two thigh pieces turned out. I should tell you that I made different parts on one leg and the other. Although they were the same, I put some details on the left leg to make the distinction.
An important detail because the left and right leg are made to fit in place only in the right way, so that if they are not in place, the figure will lose stability. That is why I made the additional details on the leg, so that it would be easy for me to differentiate them.
Así quedaron las dos piezas del muslo. Debo comentarles que hice diferentes partes en una pierna y la otra. Aunque eran iguales, le coloqué algunos detalles en la pierna izquierda para hacer la distinción.
Un detalle importante pues la pierna izquierda y la derecha están hechas para encajar en su lugar solo de la manera correcta, de manera tal que si no se colocan en su sitio, la figura perderá estabilidad. Por eso hice los detalles adicionales en la pierna, para que me fuese fácil diferenciarlas.
Below you can see all the separate pieces, once the flexible dough has dried. Below is a summary with animated GIFs of all the progress I've made so far.
A continuación pueden ver todas las piezas separadas, una vez que la masa flexible secó. Más abajo les dejaré un resumen con GIF animados de todo el progreso que llevo hasta ahora.
Arming the left leg
Armando la pierna izquierda
Arming the right leg
Armando la pierna derecha
Joining the legs at the waist
Uniendo las piernas a la cintura
Joining the tail to the back of the waist.
Uniendo la cola a la parte trasera de la cintura
Creating a joint in the neck to store the head in the chest compartment
Creando una articulación en el cuello para guardar la cabeza en el compartimiento del pecho
Ending arms with mobility, so they can be stored in the chest compartment.
Terminando los brazos con movilidad, para que puedan guardarse en el compartimiento del pecho
Dinozord jaw mobility
Movilidad de la mandíbula del Dinozord
Well friends, this has been all so far. For me it has been a real pleasure to have shared this preview of this figure I'm making, one of the most difficult and beautiful projects I've done in hive. I hope you are enjoying this process as much as I am and that in a shorter time you will be able to see the final result.
I have learned a lot while I have been doing it, everything is trial and error because it is the first one, so the ones I will do in the future will be easier to do....
I'd love to know what you think of this project. You can leave your opinions below in the comments and as always I will be happy to read them. With nothing more to add, I'll say goodbye then...
See you next time!
Bien amigos, esto ha sido todo hasta ahora. Para mí ha sido un verdadero placer haber compartido este avance de esta figura que estoy haciendo, uno de los proyectos más difícil y bonitos que he hecho en hive. Espero que estén disfrutando como yo este proceso y que en un tiempo más corto puedan ver el resultado final.
He aprendido mucho mientras lo he estado haciendo, todo es ensayo y error porque es el primero, así que los que haré a futuro serán más fáciles de hacer...
Me gustaría saber qué piensan de este proyecto. Pueden dejar sus opiniones abajo en los comentarios y como siempre estaré encantado de leerlos. Sin más que agregar, me despido entonces...
¡Hasta la próxima!