Greetings friends of the community.
What a joy to be back here sharing another of my creations made with fomi and recycled materials! Today I bring you a very special decoration dedicated to my friend
@ibarra95, who was not only my college classmate, but he is also an amazing person and has a succulent and cactus business.
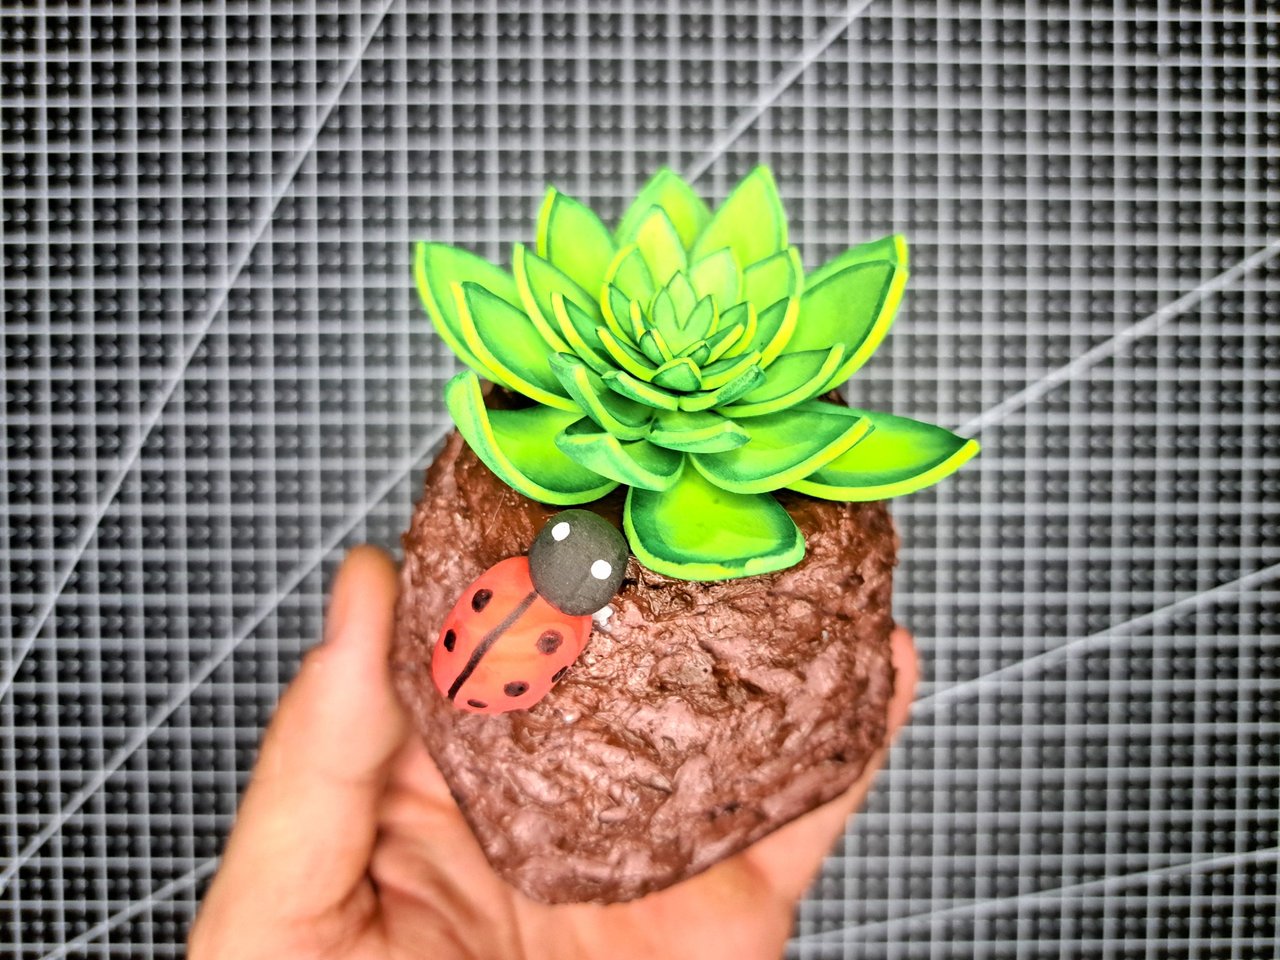
And yes, this time I will show you how to create an artificial succulent with few materials and simple steps. This little beauty is perfect to decorate any workspace, as well as it can be used as a centerpiece. To make it, I have used light green fomi sheets and a polystyrene base, which I have modified to take the appearance of a rock. I hope you like it. Let's start with the tutorial.
Saludos amigos de la comunidad.
¡Qué alegría de poder estar nuevamente por aquí compartiendo otras de mis creaciones elaboradas con fomi y materiales reciclados! Hoy les traigo una decoración muy especial dedicada a mi amigo
@ibarra95, el cual no solo fue mi compañero de la universidad, sino que también es una persona increíble y tiene un emprendimiento de suculentas y cactus.
Y sí, en esta ocasión les mostraré cómo crear una suculenta artificial con pocos materiales y pasos sencillos. Esta pequeña hermosura es perfecta para decorar cualquier espacio de trabajo, al igual que puede ser utilizada como centro de mesa. Para su elaboración, he empleado láminas de fomi verde claro y una base de poliestireno, la cual he modificado para que tomara la apariencia de una roca. Espero que les guste. Comencemos con el tutorial.
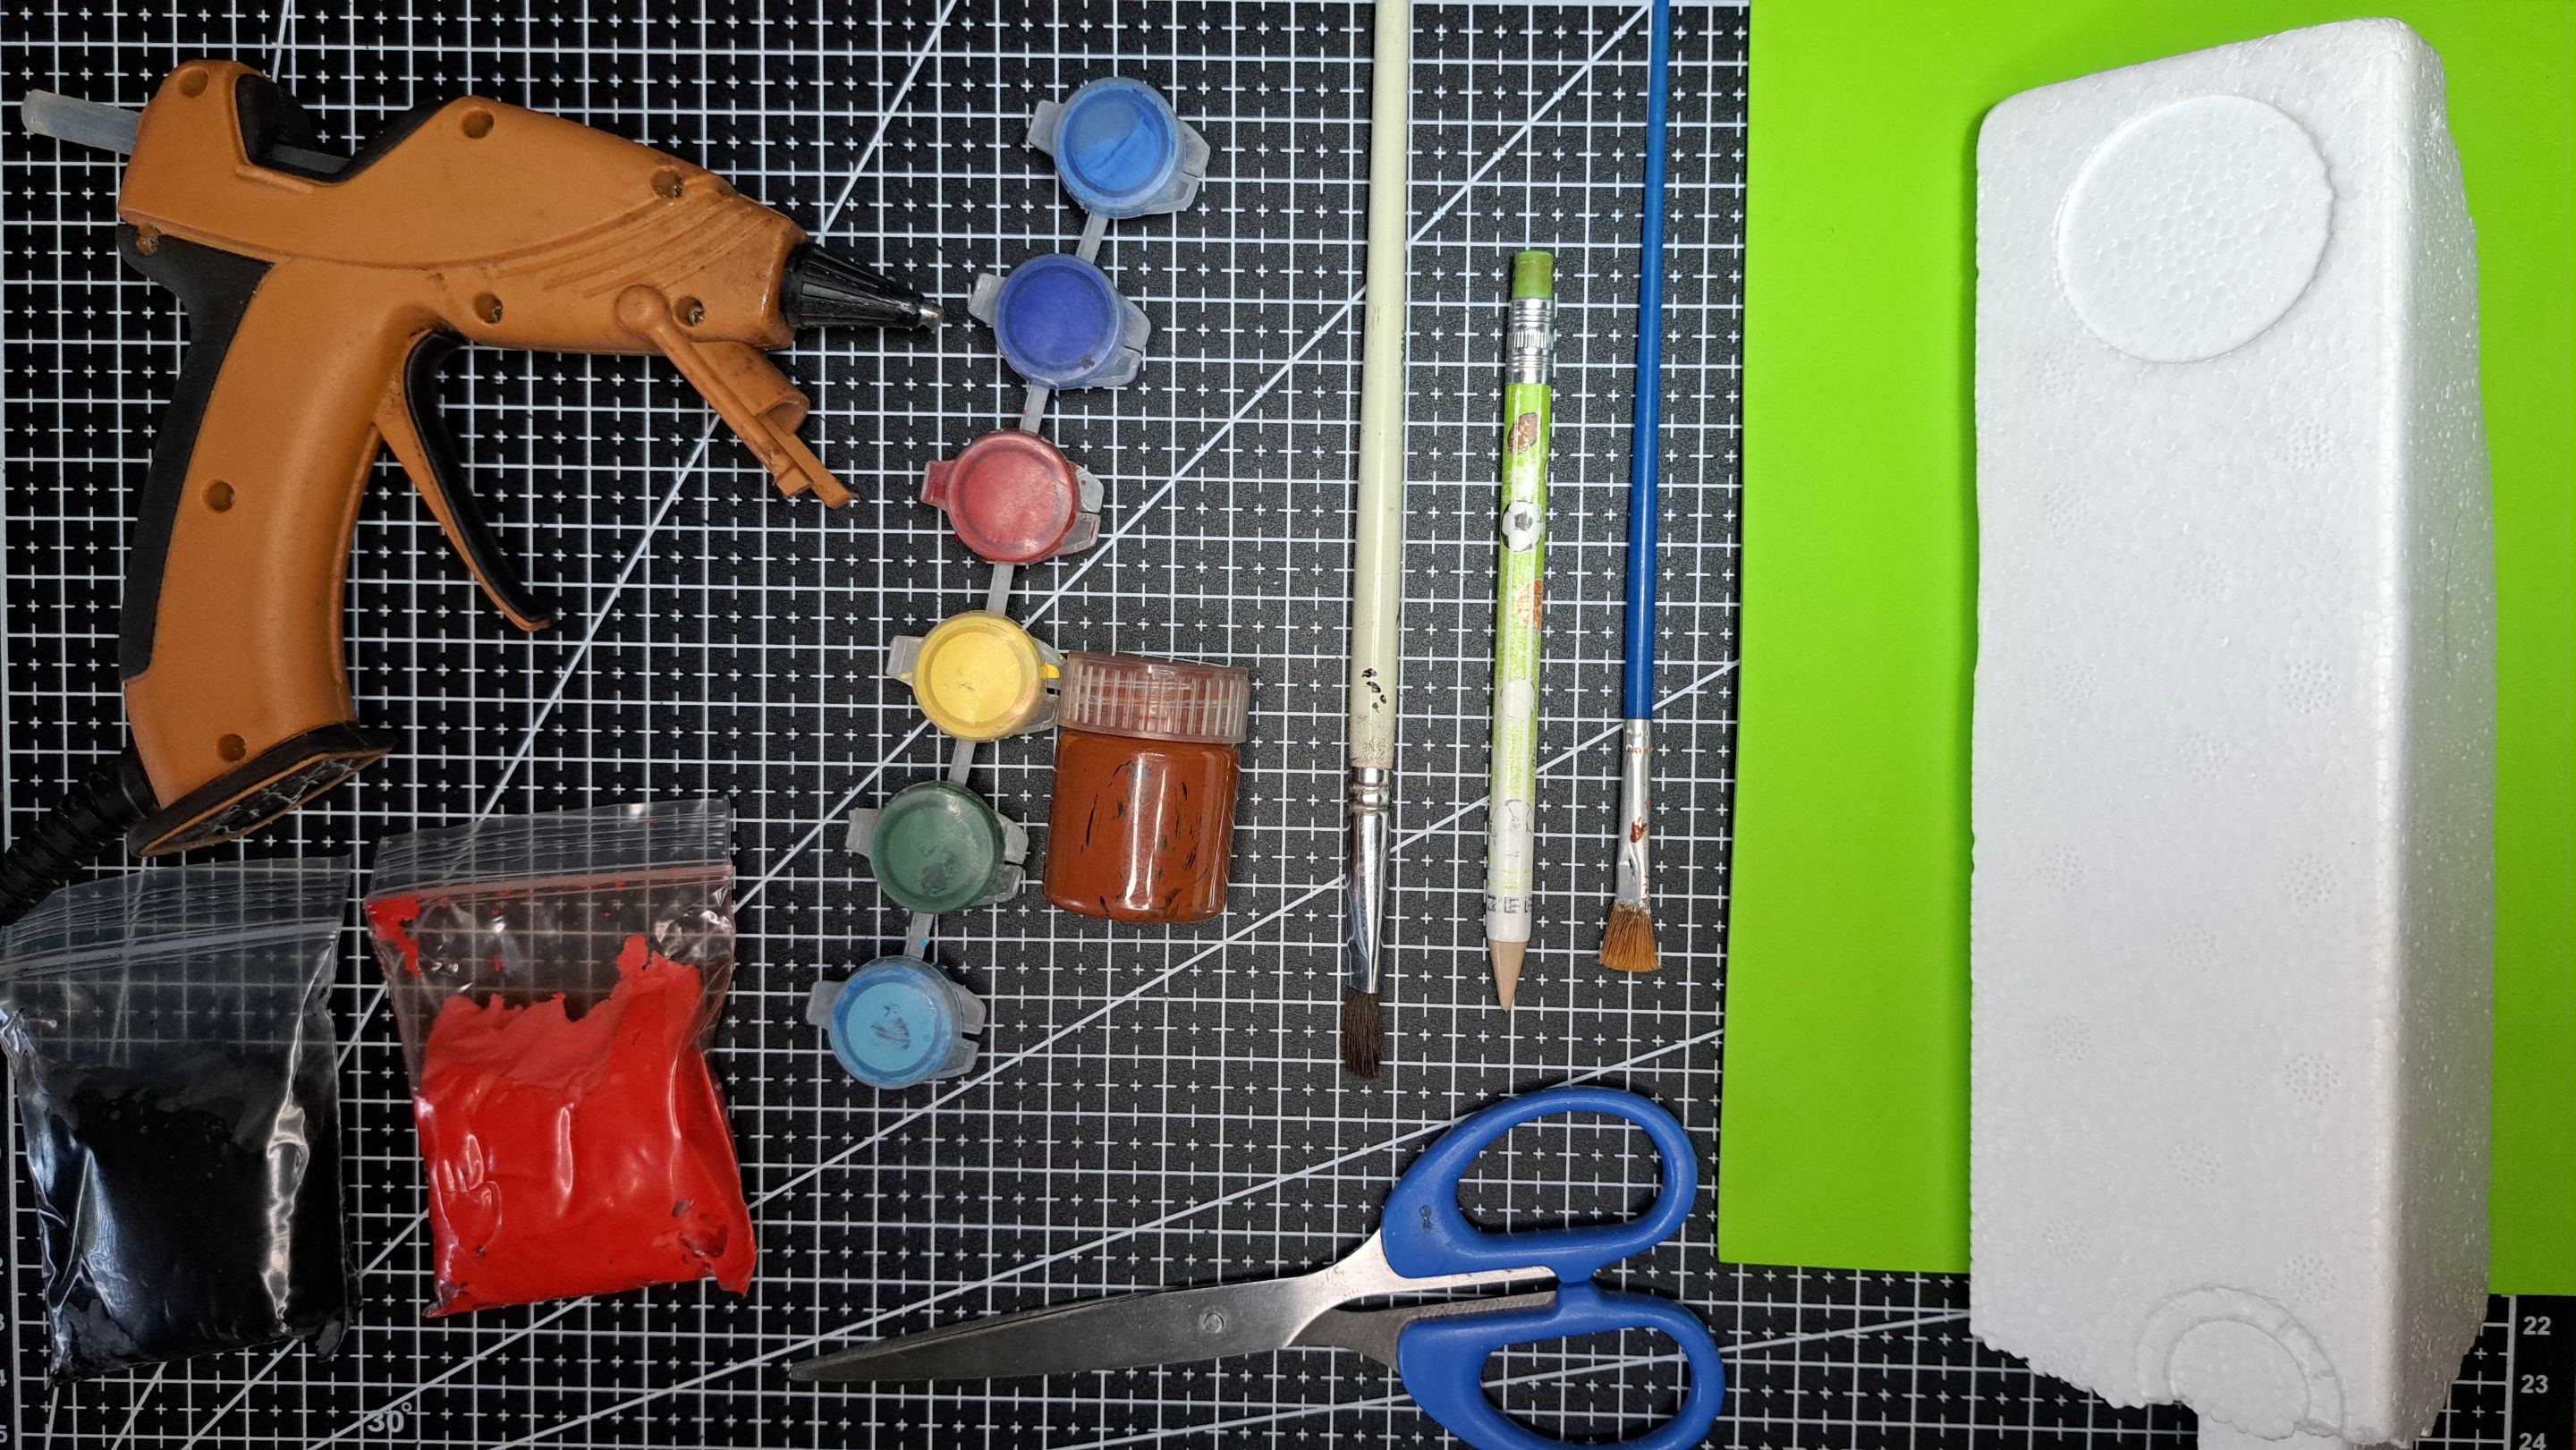
Materials // Materiales
| English |
Español |
| ✔️ Light green fomi |
✔️ Fomi verde claro |
| ✔️ Polystyrene |
✔️ Poliestireno |
| ✔️ Carmelite and green paint |
✔️ Pintura carmelita y verde |
| ✔️ Brushes |
✔️ Pinceles |
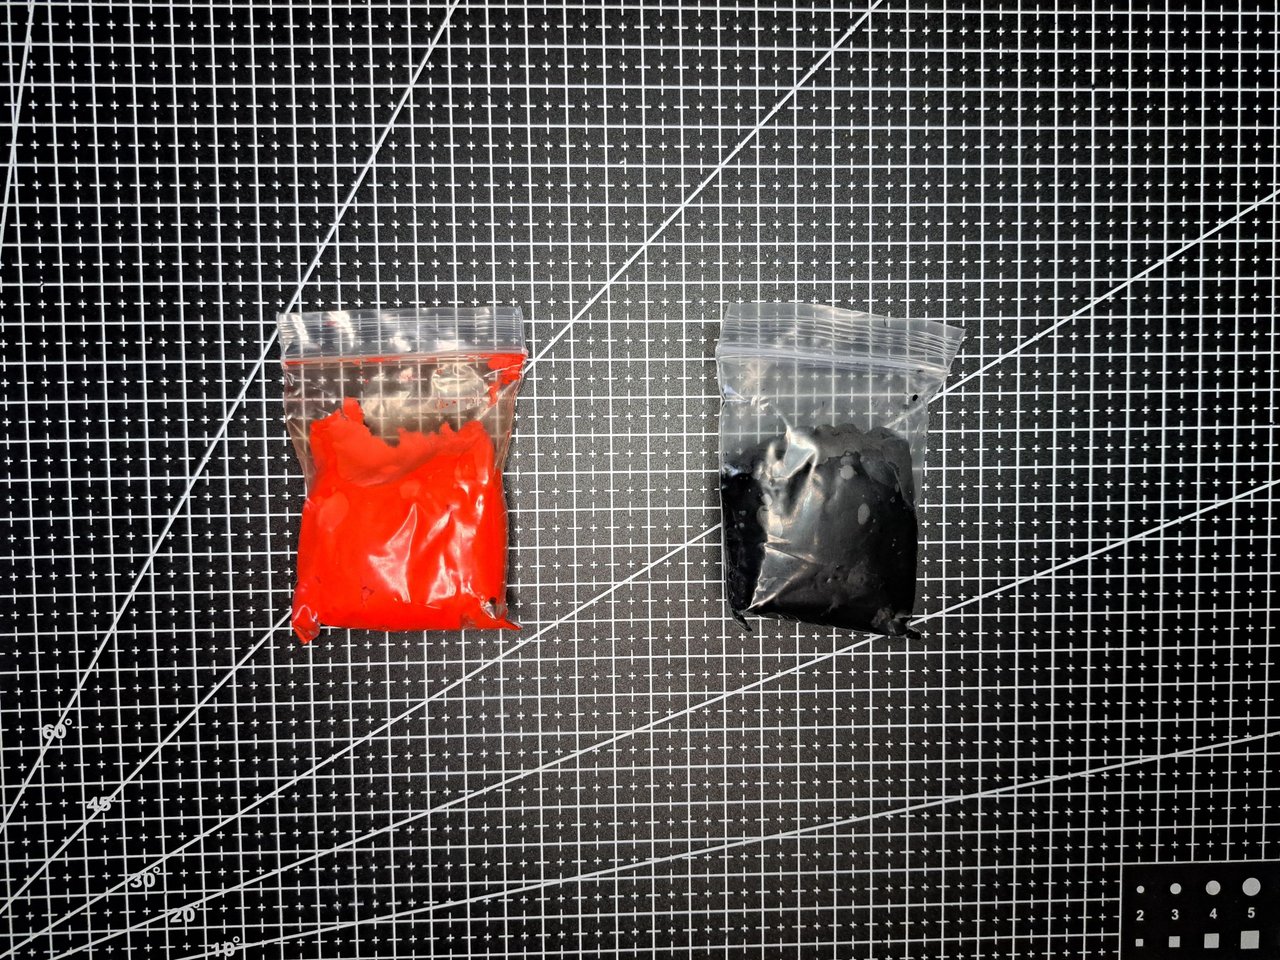
| ✔️ Red and black moldable fomi |
✔️ Fomi moldeable rojo y negro |
| ✔️ Scissors |
✔️ Tijeras |
| ✔️ Pencil |
✔️ Lápiz |
| ✔️ Hot silicone |
✔️ Silicona caliente |
Step by step // Paso a paso
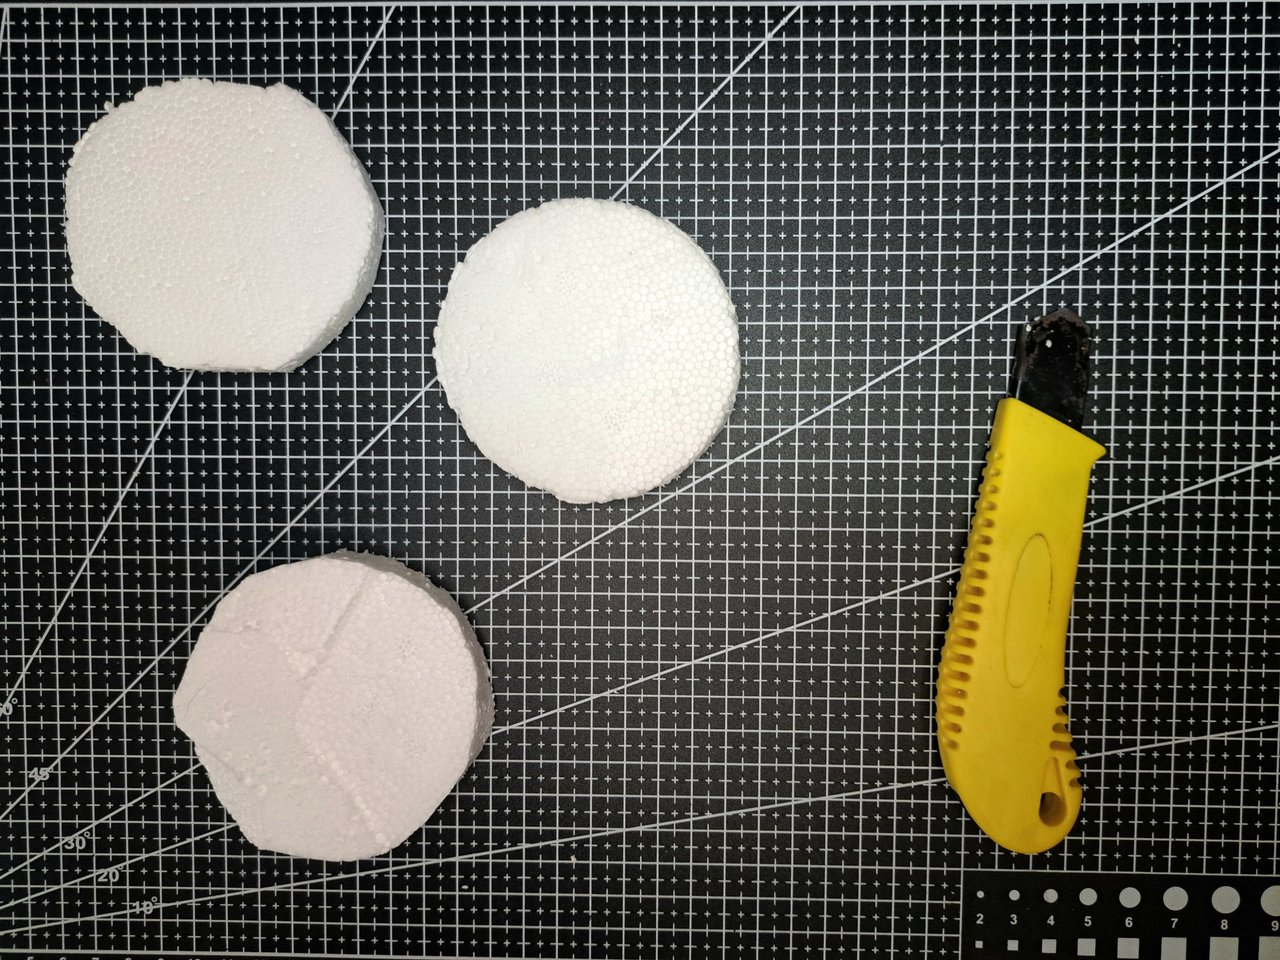
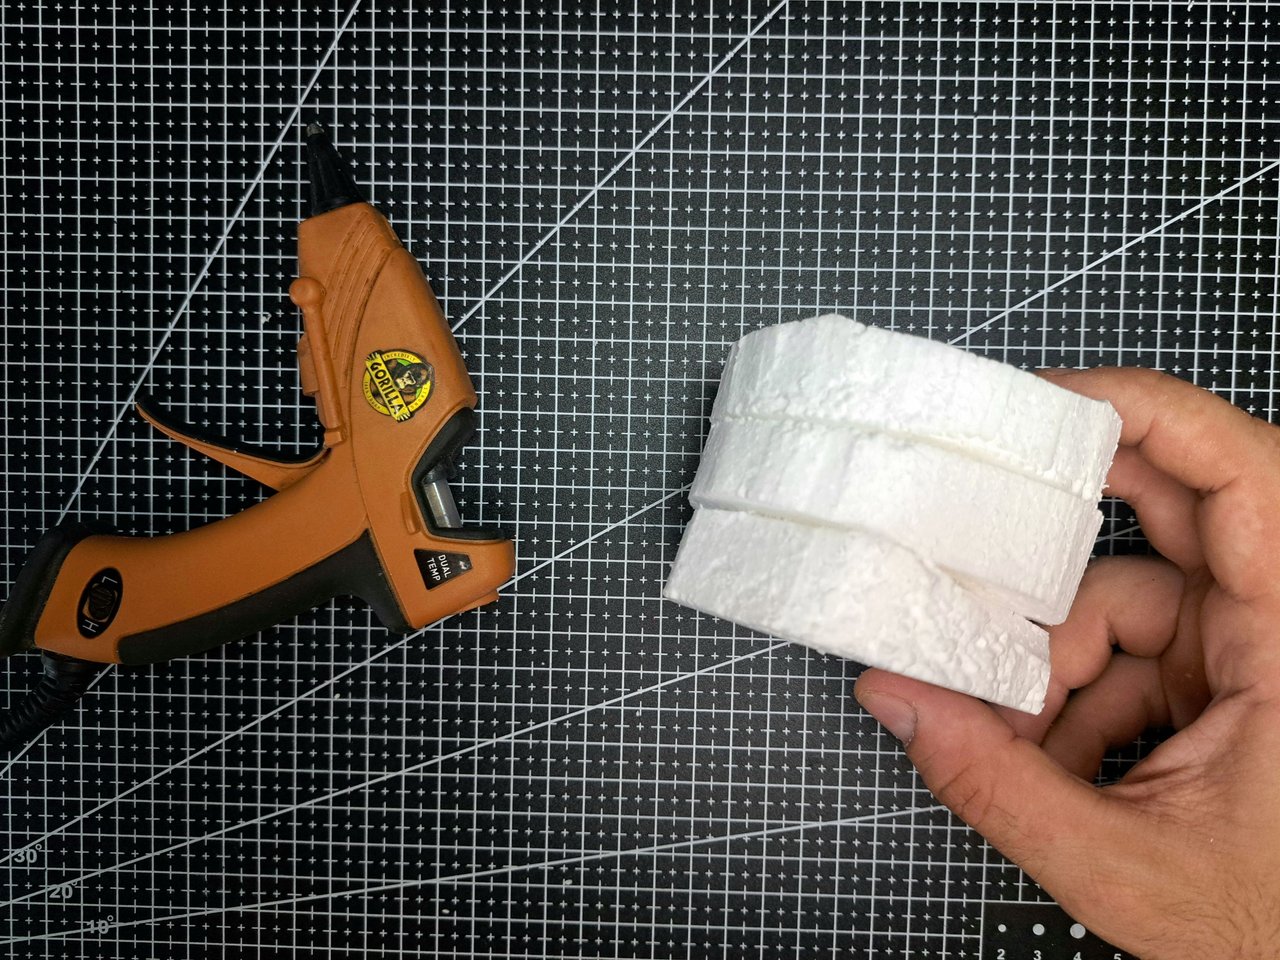
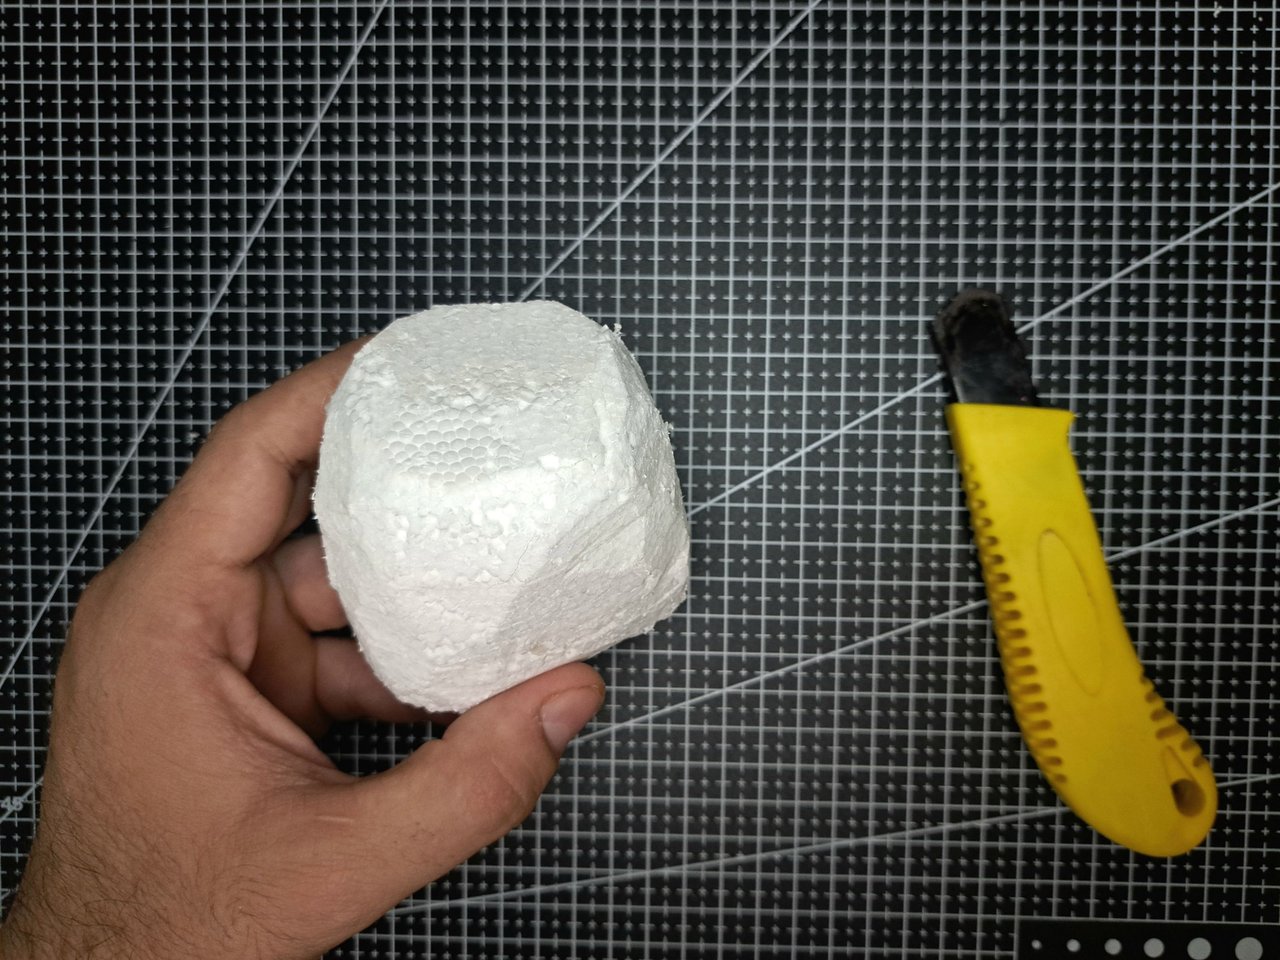
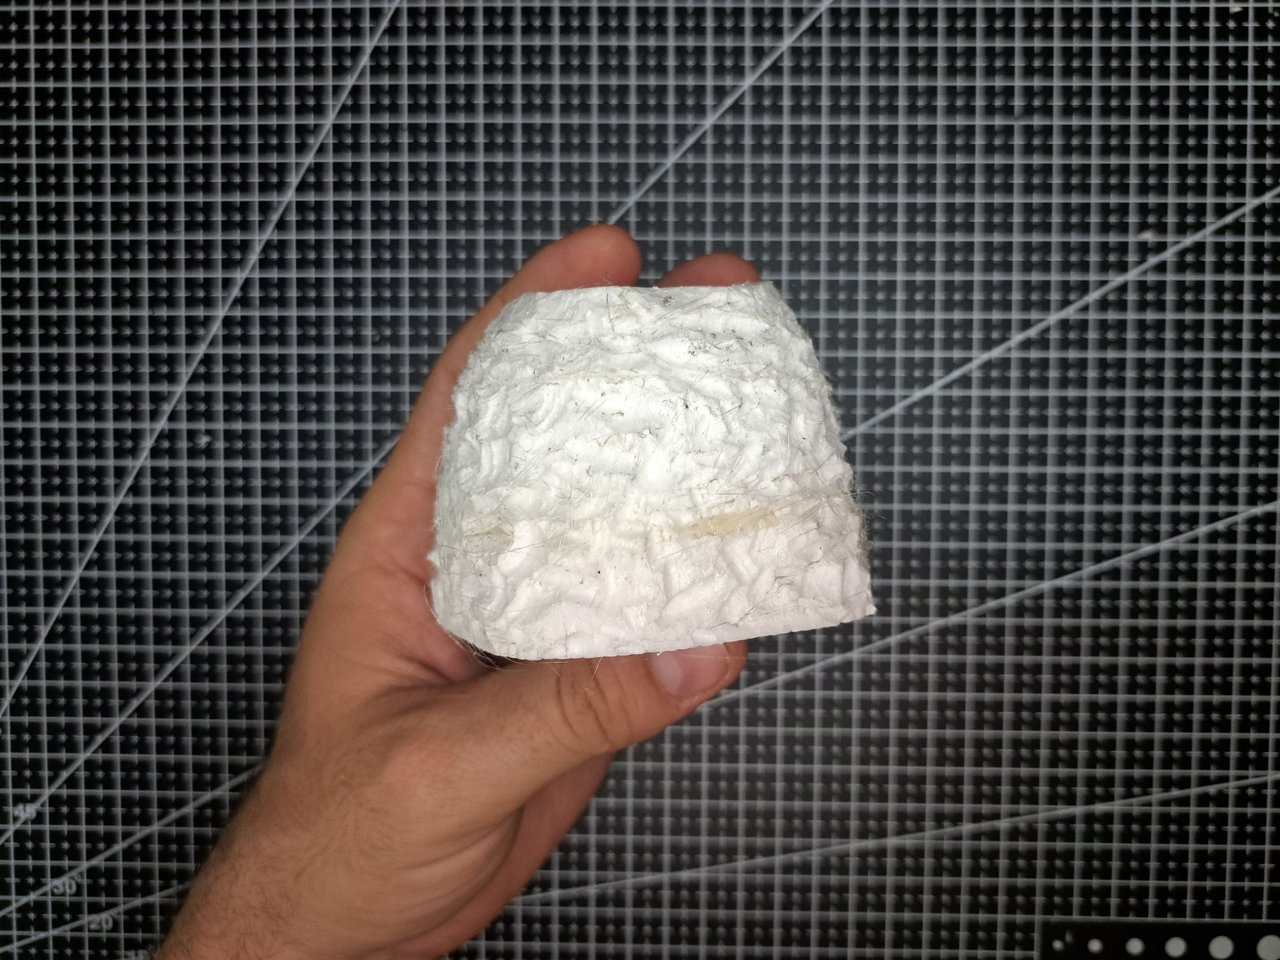
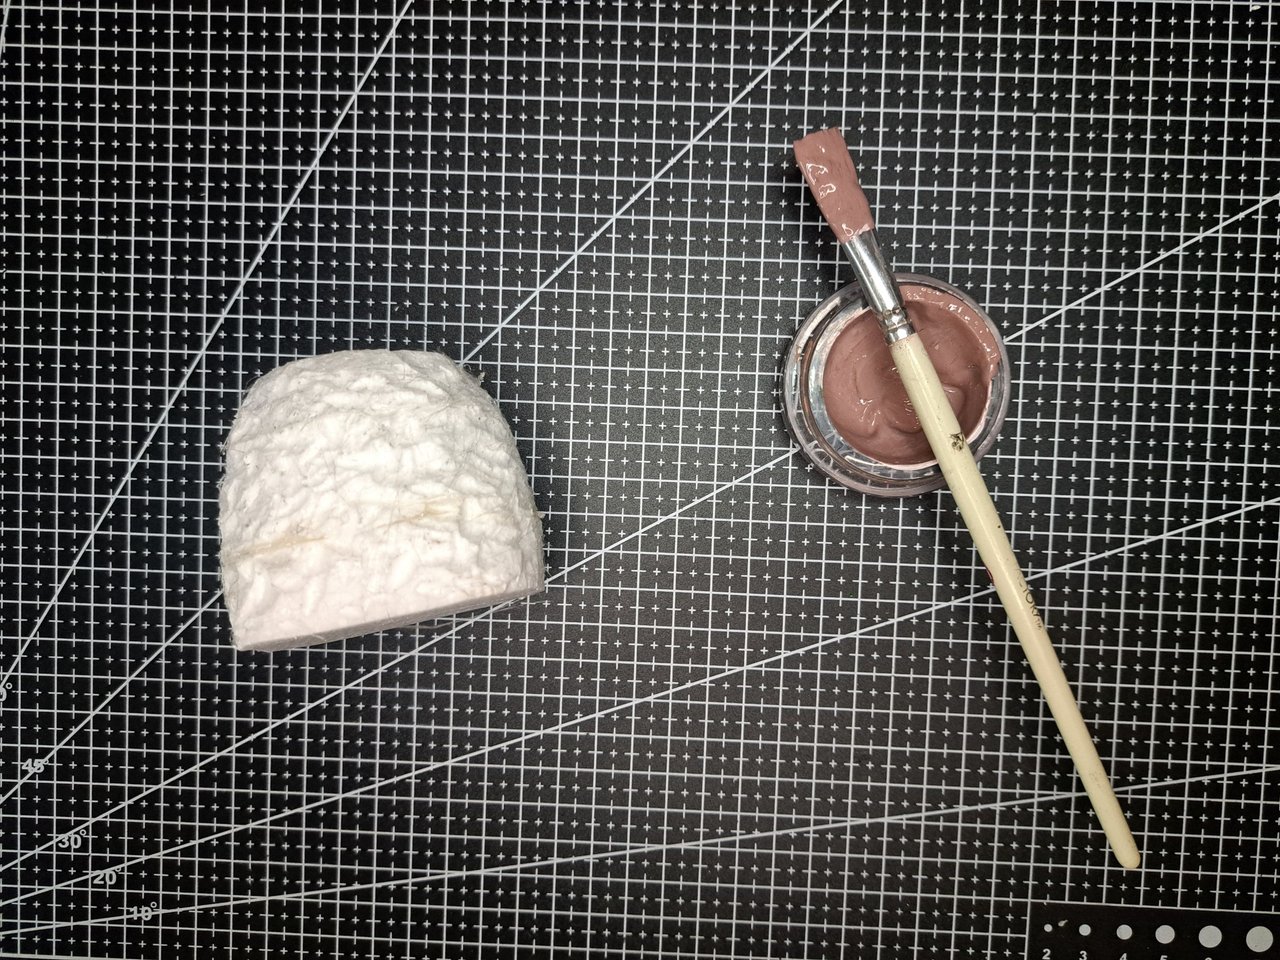
1️⃣ I will start by cutting out three polystyrene circles with a diameter of 8 cm. After gluing them one on top of the other, I use the cutter to sharpen one of its sides with an almost conical shape, but without leaving the narrowest part too thin. With a tin soldering iron I mark the entire side of the polystyrene to create a rough and irregular surface.
Comenzaré recortando tres circunferencias de poliestireno con un diámetro de 8 cm. Tras pegarlas una encima de otras, utilizo el cúter para afinar uno de sus lados con una forma casi cónica, pero sin dejar muy fina la parte más estrecha. Con un soldador de estaño voy marcando todo el lateral del poliestireno para crear una superficie rugosa e irregular.
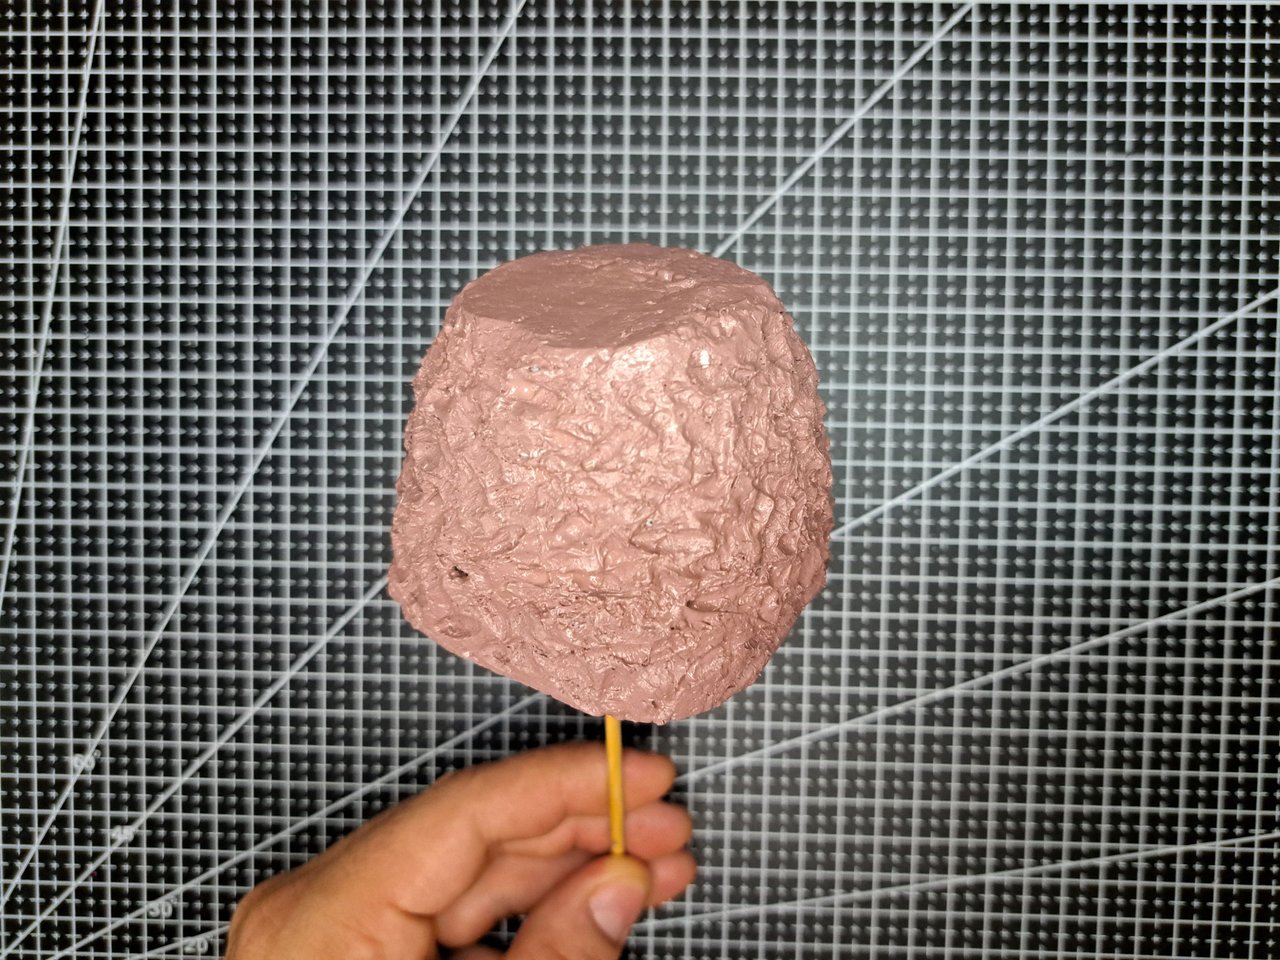
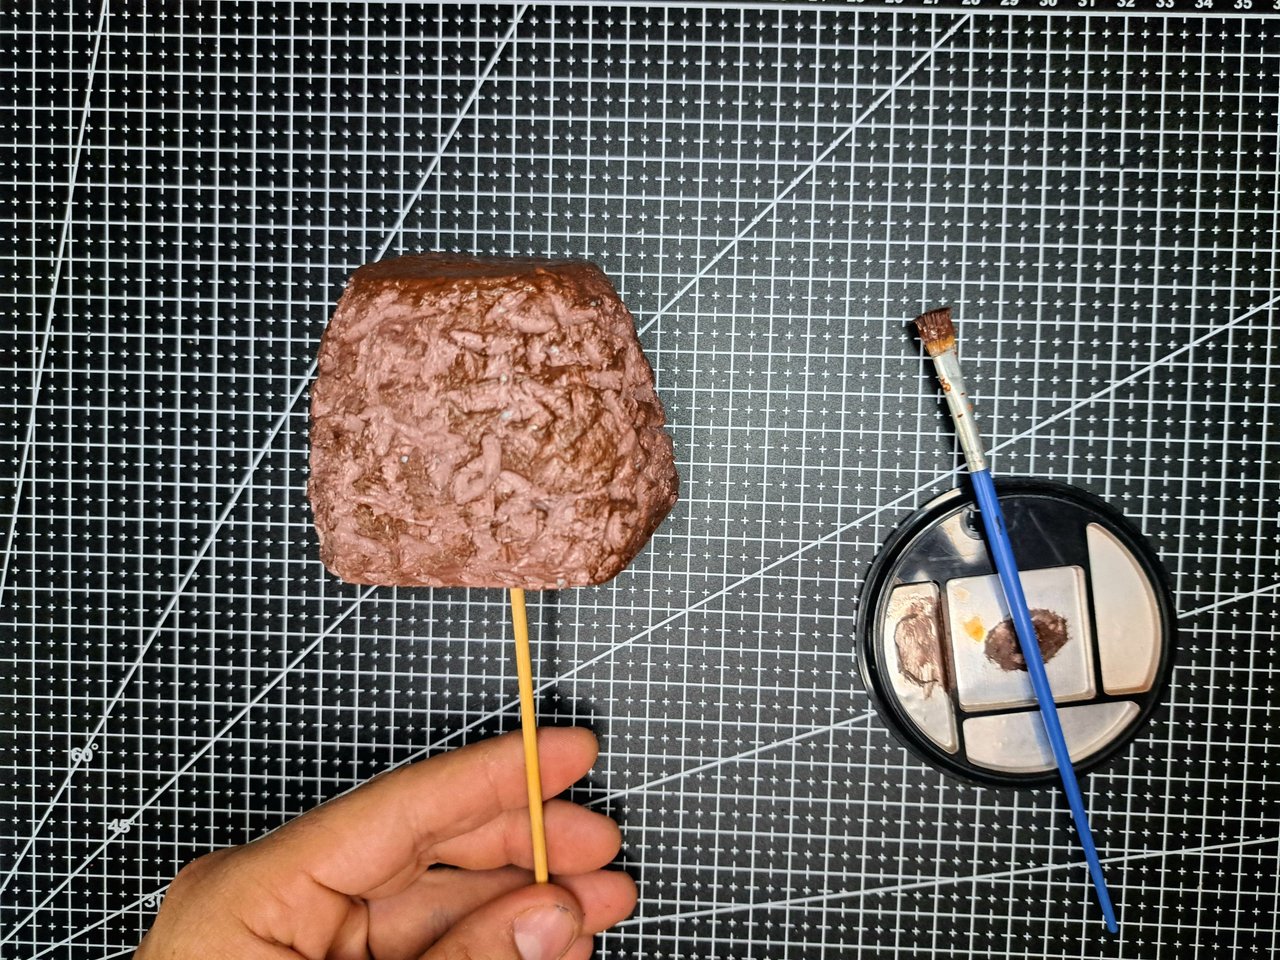
2️⃣ With two different shades of carmelite paint, I covered the entire surface of the polystyrene. The first layer of light carmelite should not be too thick so that it can spread well inside the holes. The darker layer of carmelite will be applied with a stiff brush or dry brush and will be done with random, shallow strokes.
Con dos tonos distintos de pintura carmelita, cubrí toda la superficie del poliestireno. La primera capa de carmelita claro no debe ser muy espesa para que pueda esparcirse bien dentro de los agujeros. La capa más oscura de carmelita se aplicará con un pincel rígido o pincel seco y se hará con pinceladas aleatorias y superficiales.
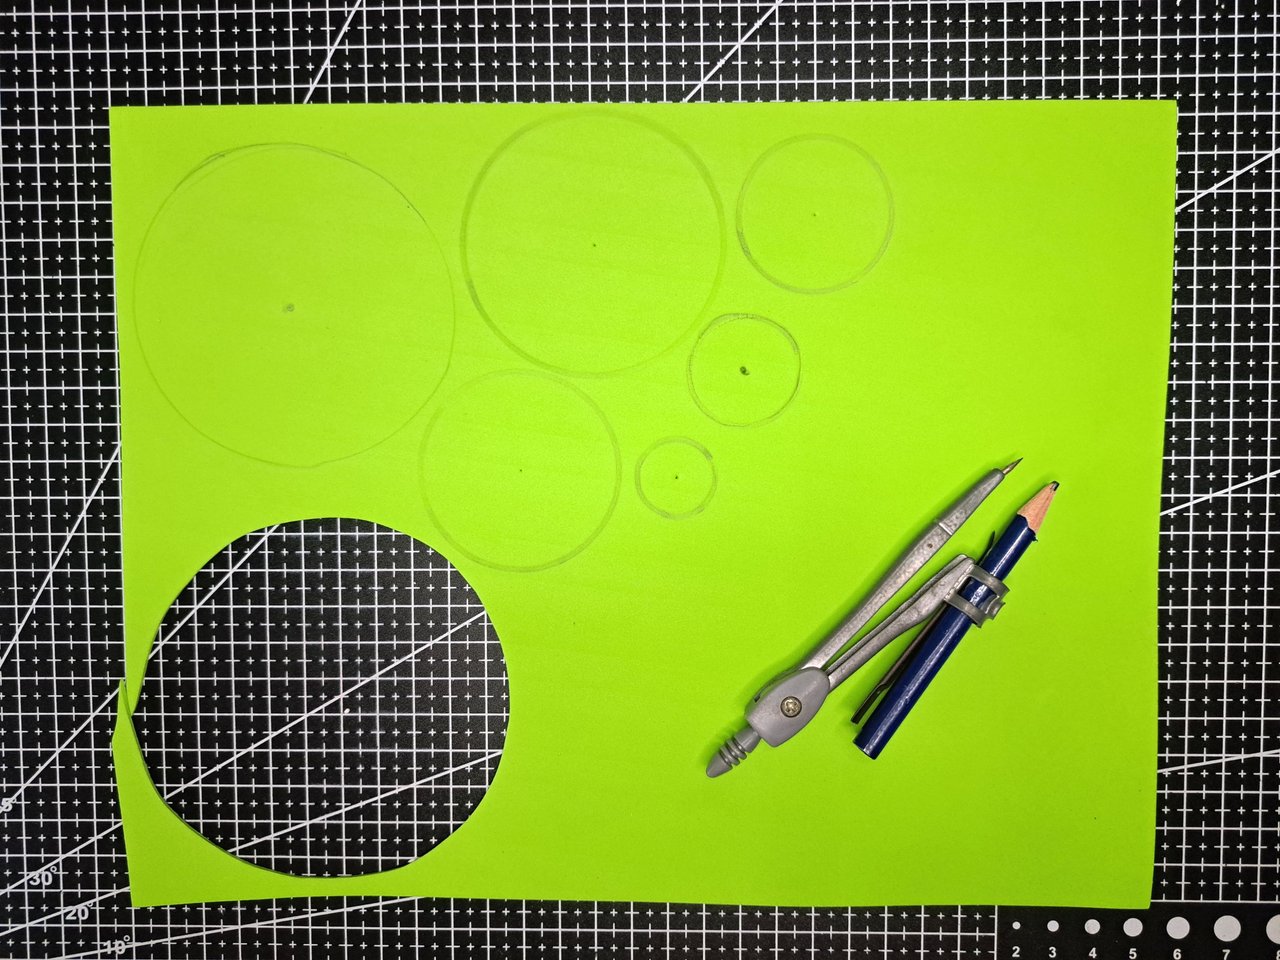
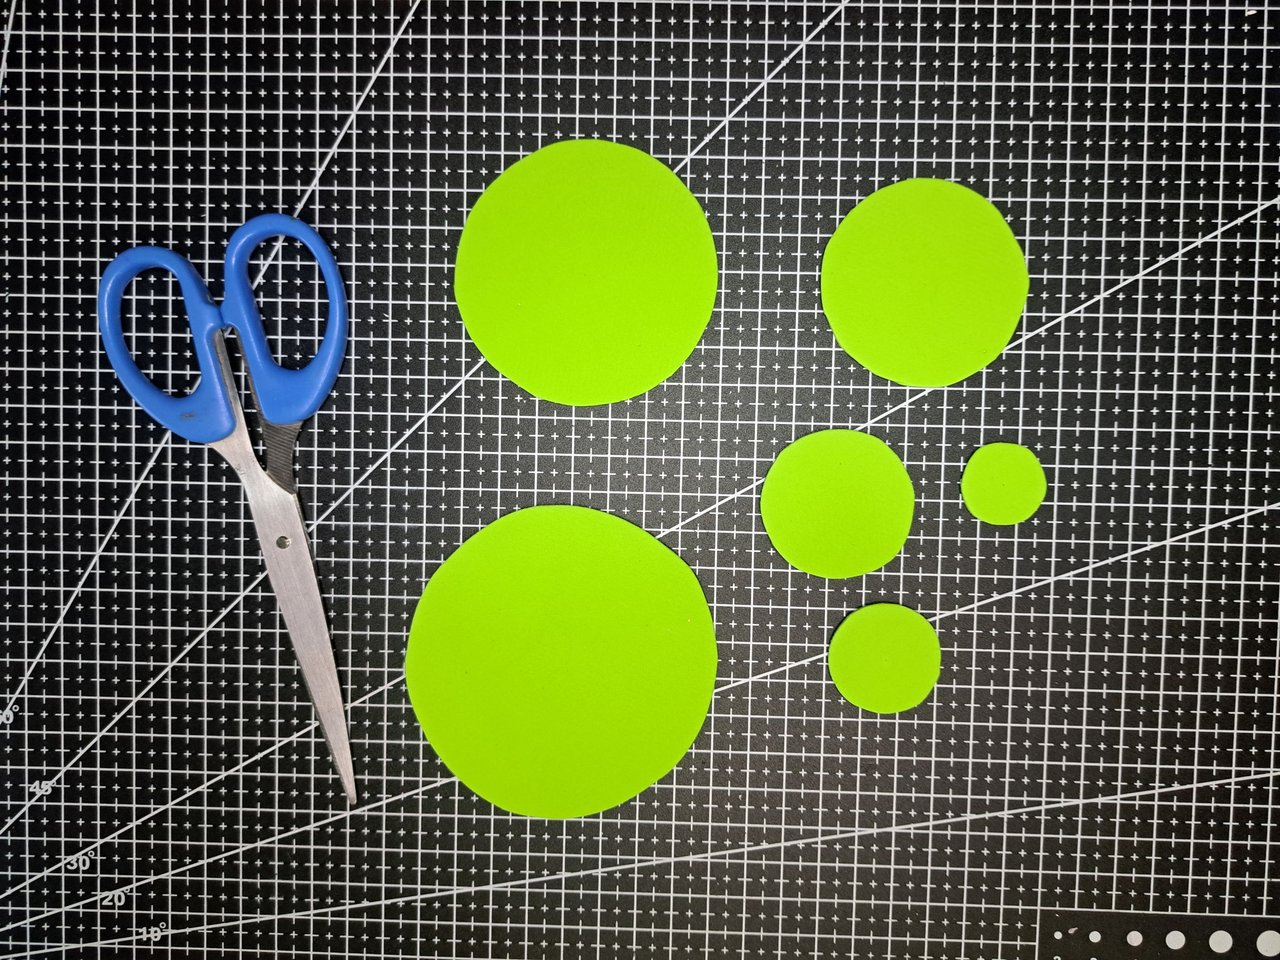
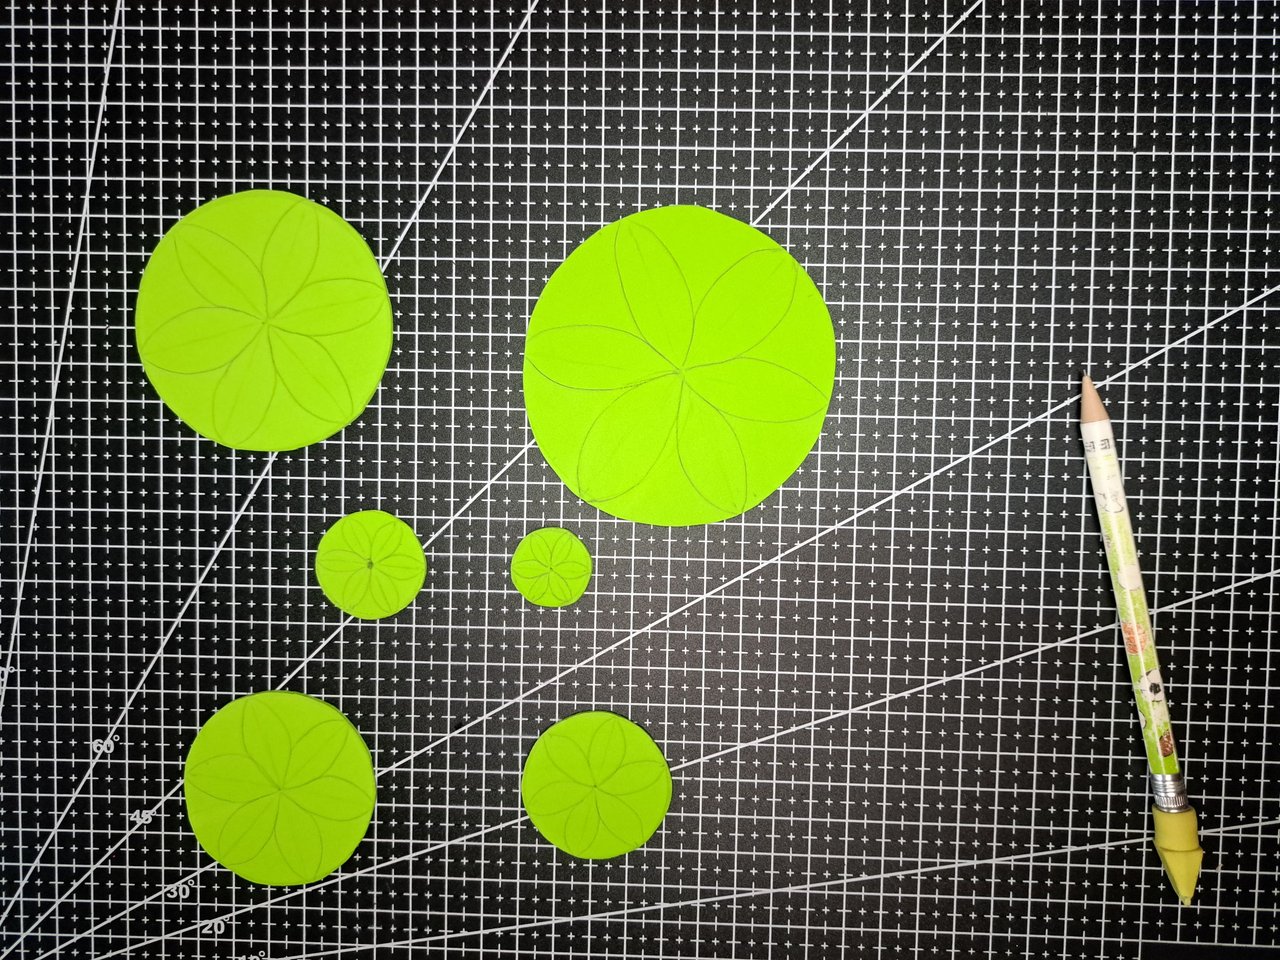
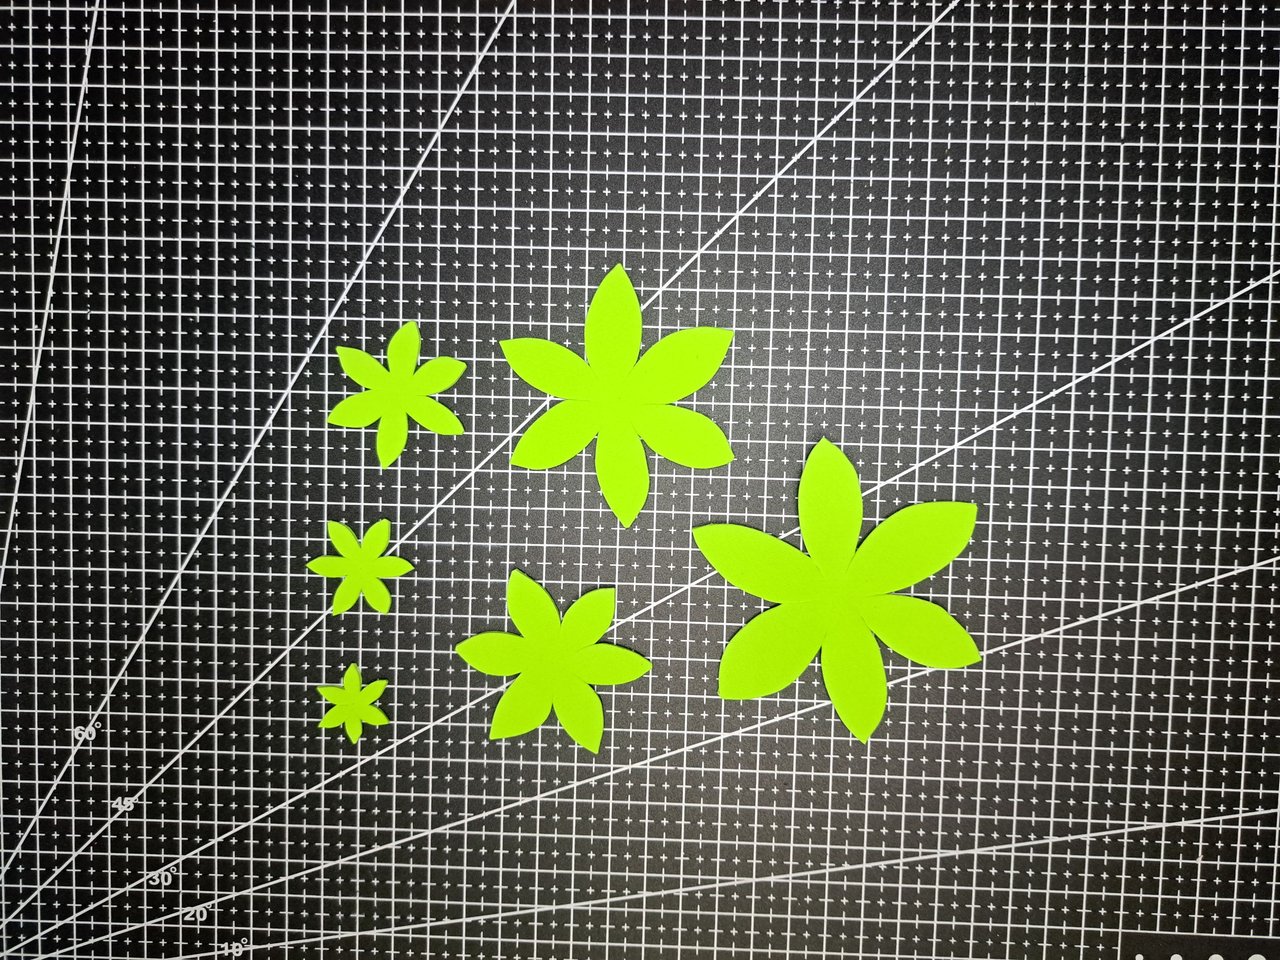
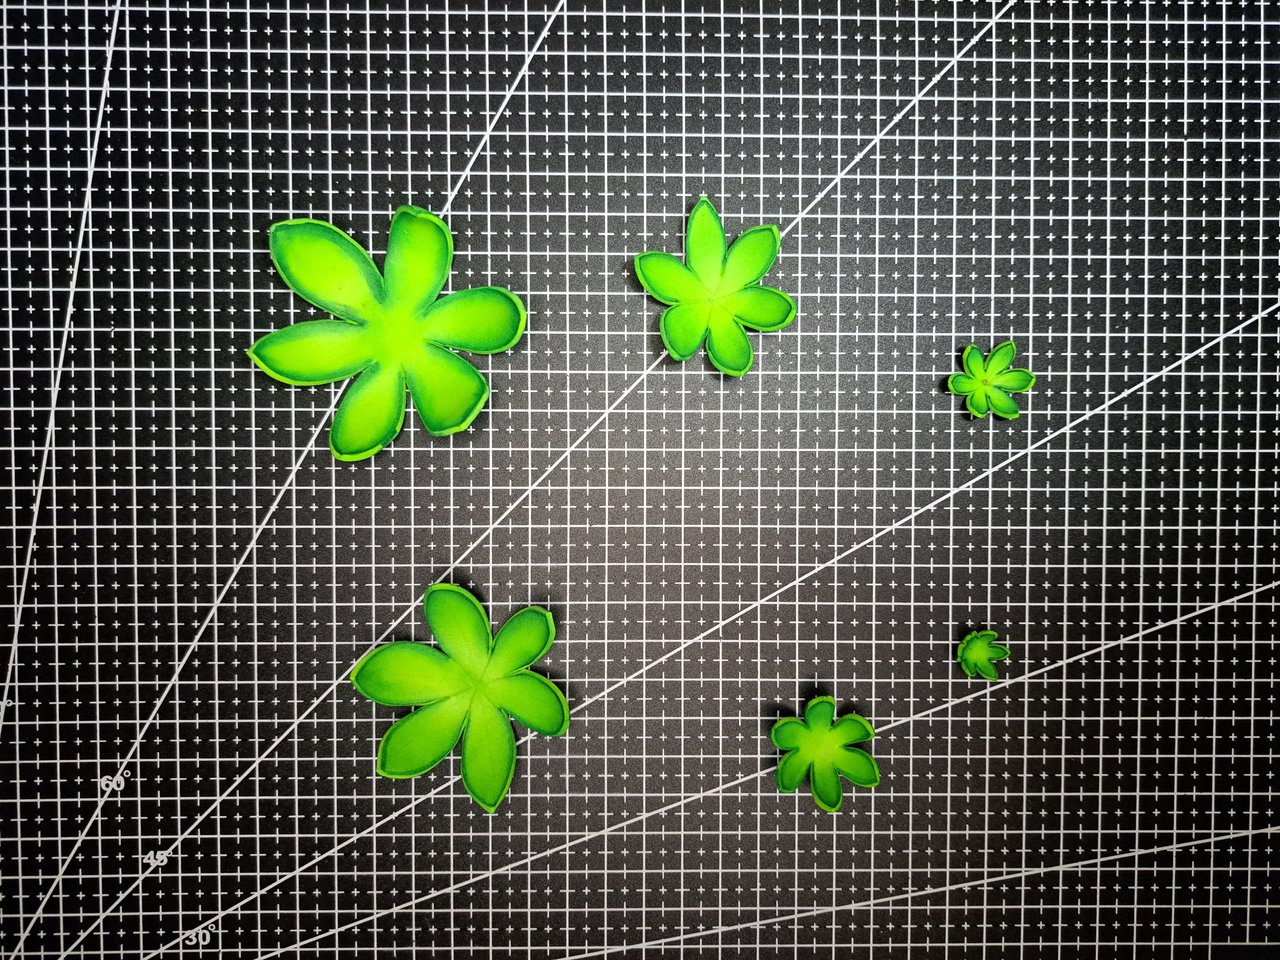
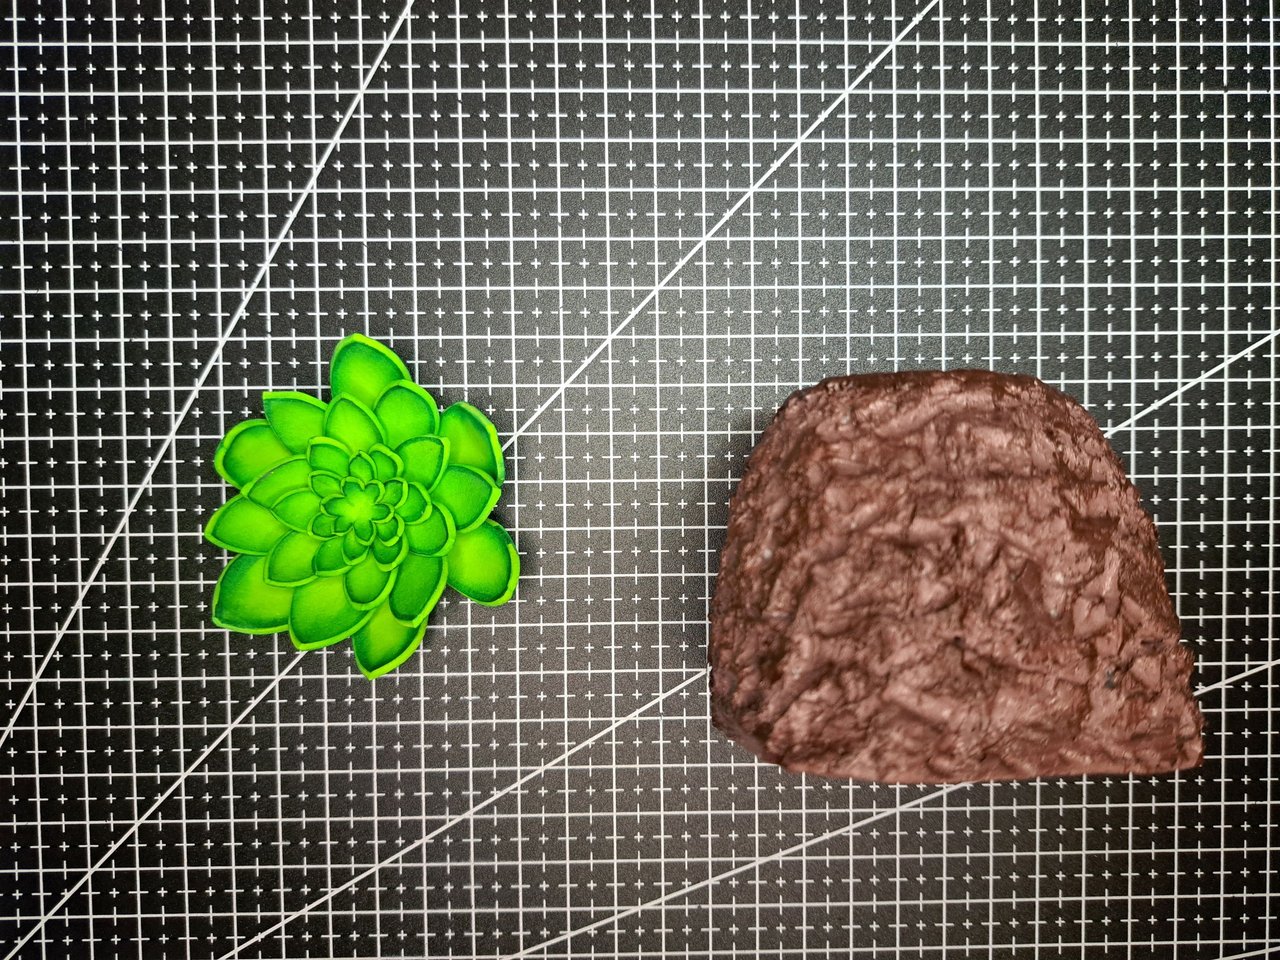
3️⃣ On a light green fomi sheet with yellow tones, I drew 6 circles of different diameters using a compass. The smaller circles can be of different sizes, but the largest should be 8 cm in diameter. After cutting out the circles, I drew inside the patterns of the succulent plant leaves and cut out again.
En una lámina de fomi color verde claro con tonos amarillos dibujé 6 círculos de diferentes diámetros utilizando un compás. Los círculos más pequeños pueden ser de distintos tamaños, pero el más grande debe ser de 8 cm de diámetro. Luego de recortar las circunferencias, dibujé en el interior los patrones de las hojas de la planta suculenta y volví a recortar.
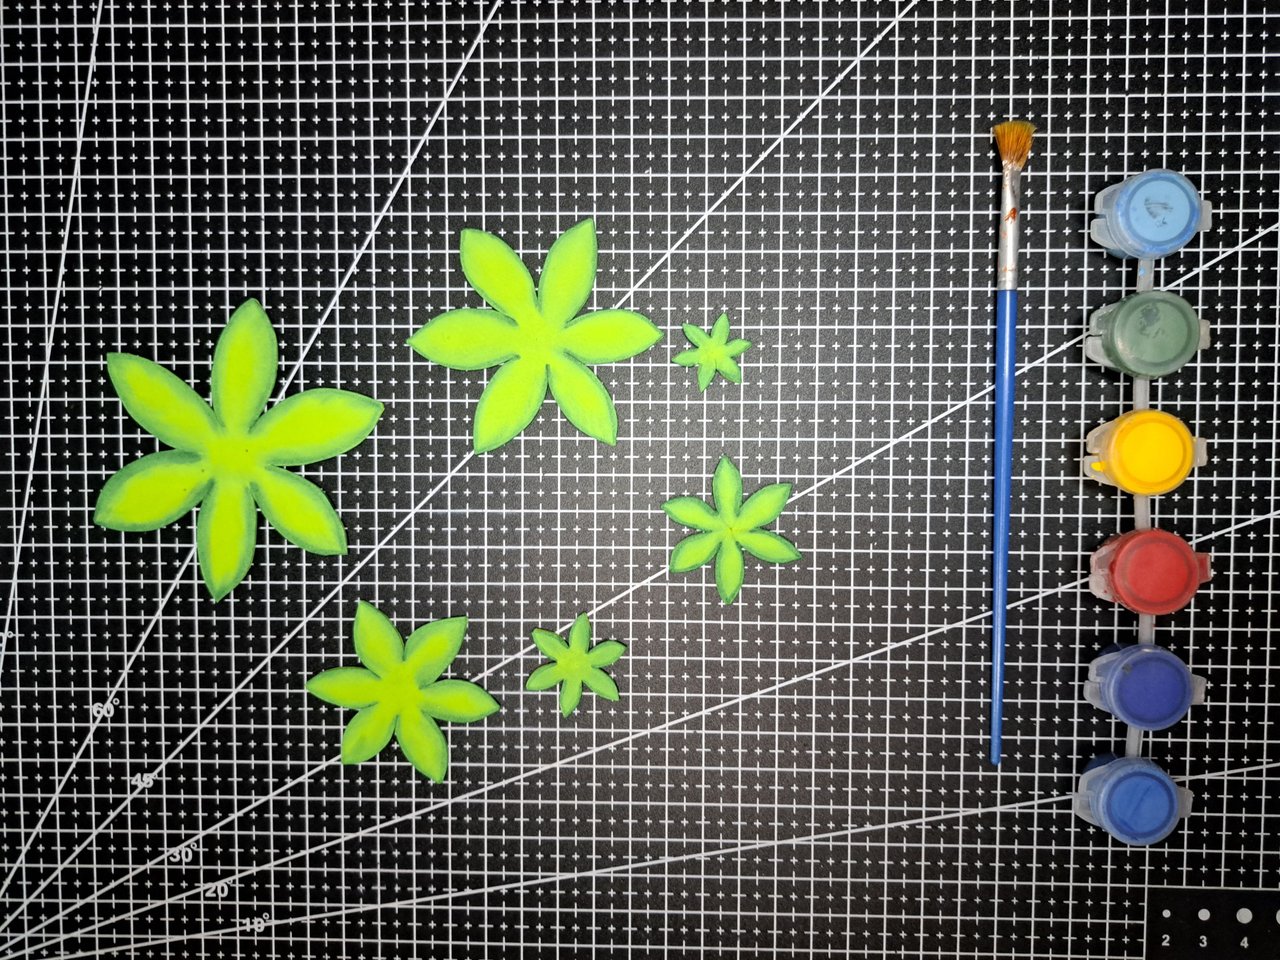
4️⃣ With green paint I will blur the entire edge of each of the layers of leaves on both sides. You can use a brush, short brush or even absorbent cotton. After the paint dries, I will heat the fomi to arch it and glue them one on top of the other in staggered order.
Con pintura verde difuminaré todo el borde de cada una de las capas de hojas por ambos lados. Se puede utilizar un pincel, brocha corta o incluso algodón. Luego de que seque la pintura, calentaré el fomi para arquearlo y así pegarlo uno encima de otro en orden escalonado.
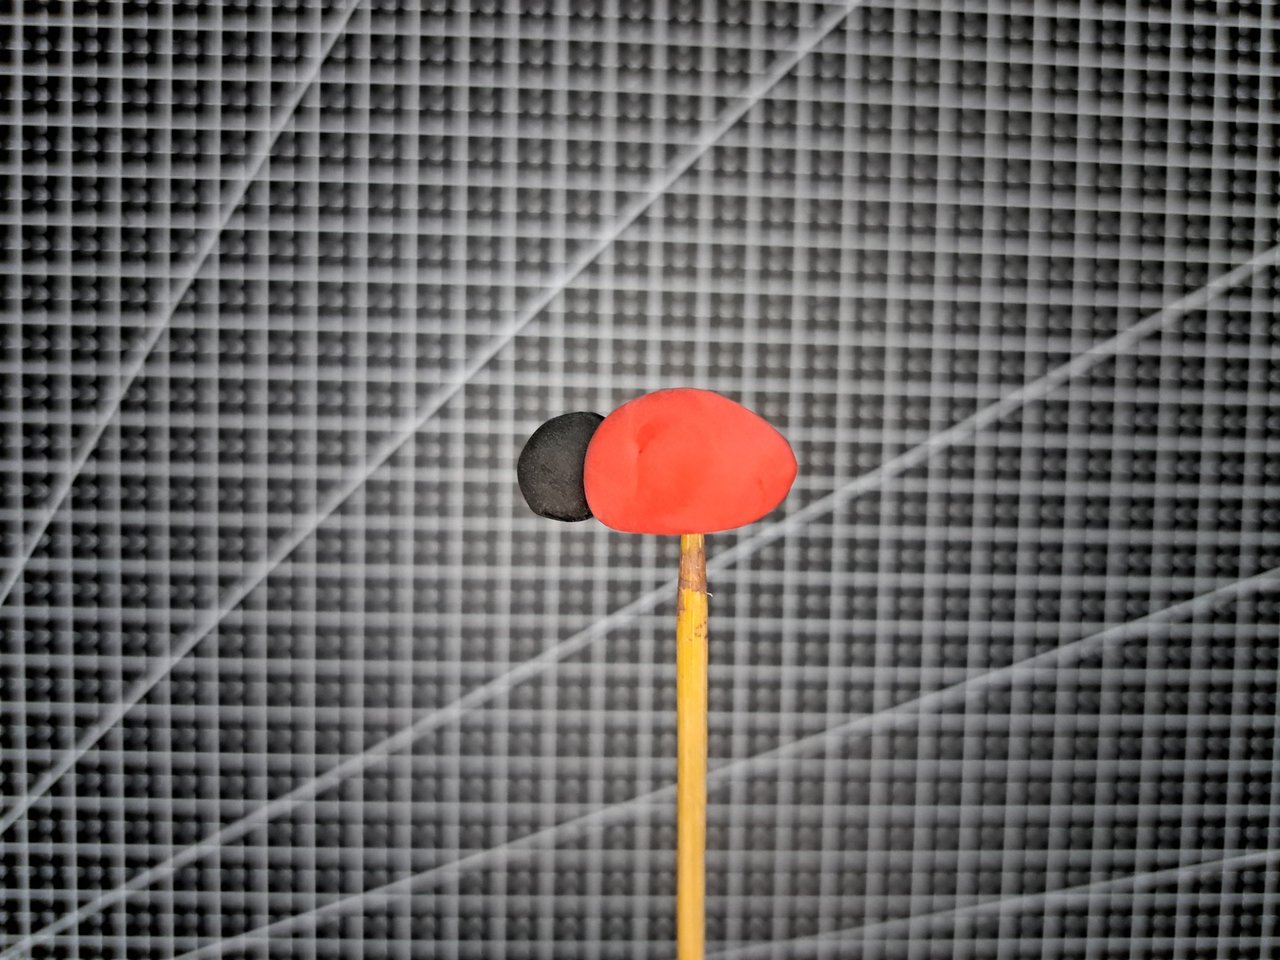
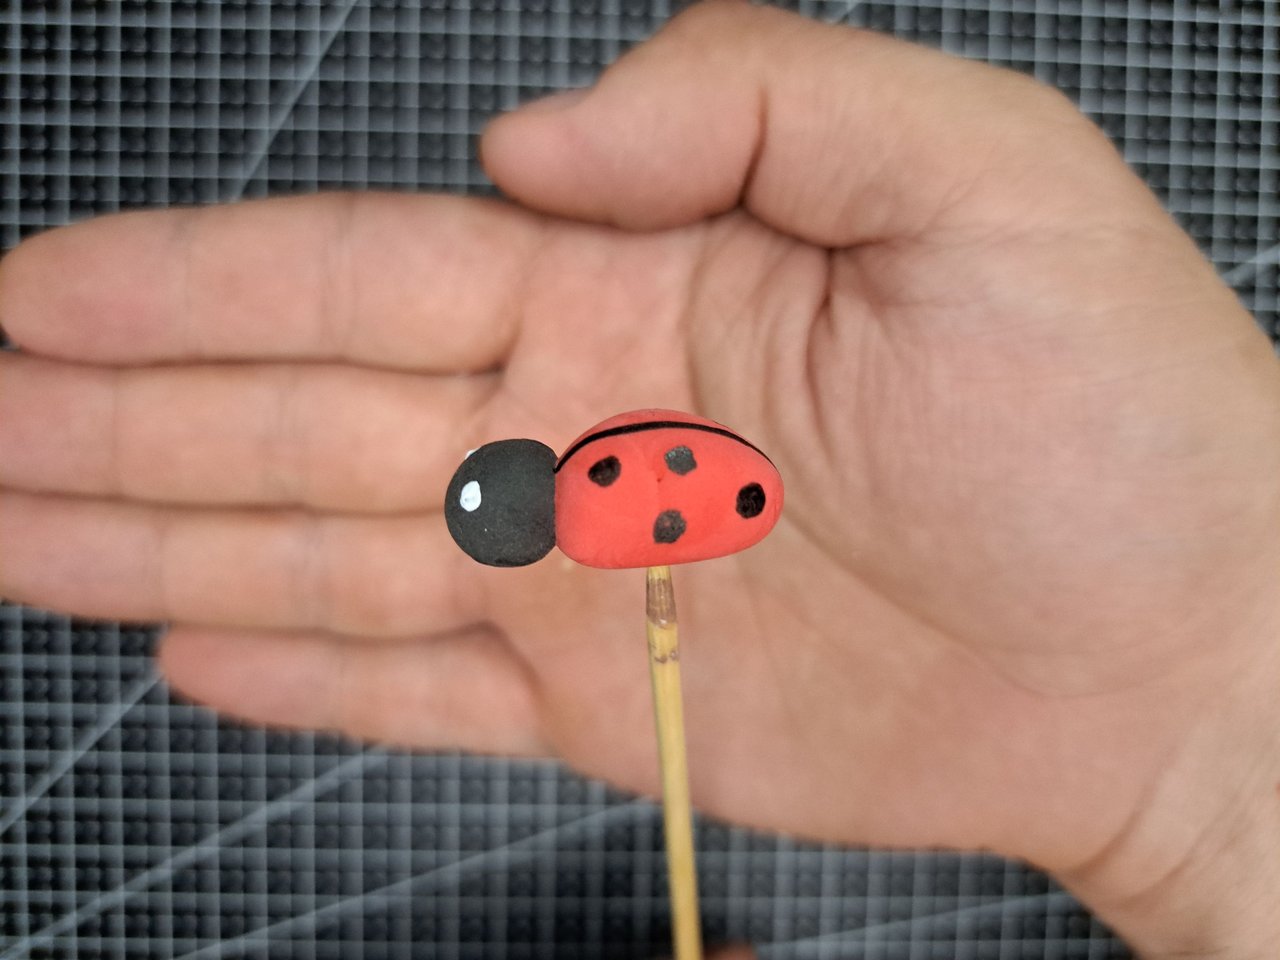
5️⃣ With the red and black moldable fomi bags, I created a ladybug. I used a thin toothpick to help me manipulate it so as not to deform it. In the last image, I had to use my own hand as a background, because for some reason my camera was not focusing on the insect. Will it be afraid of ladybugs?
Con las bolsitas de fomi moldeables, rojo y negro, creé una mariquita. Me ayudé con un palillo fino para manipularla y así no deformarla. En la última imagen, tuve que emplear mi propia mano de fondo, ya que por algún motivo mi cámara no enfocaba al insecto. ¿Le tendrá miedo a las mariquitas?
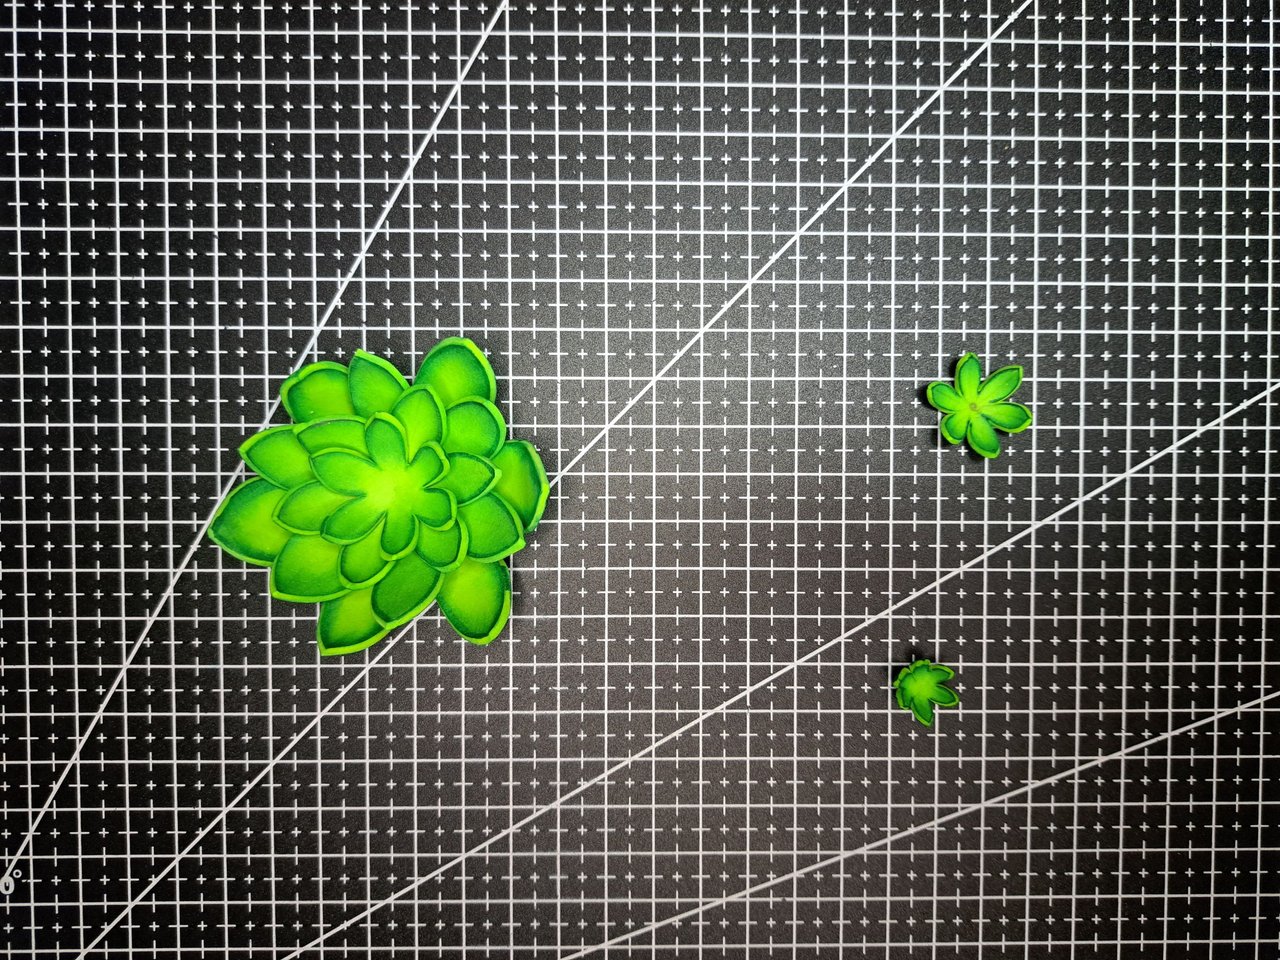
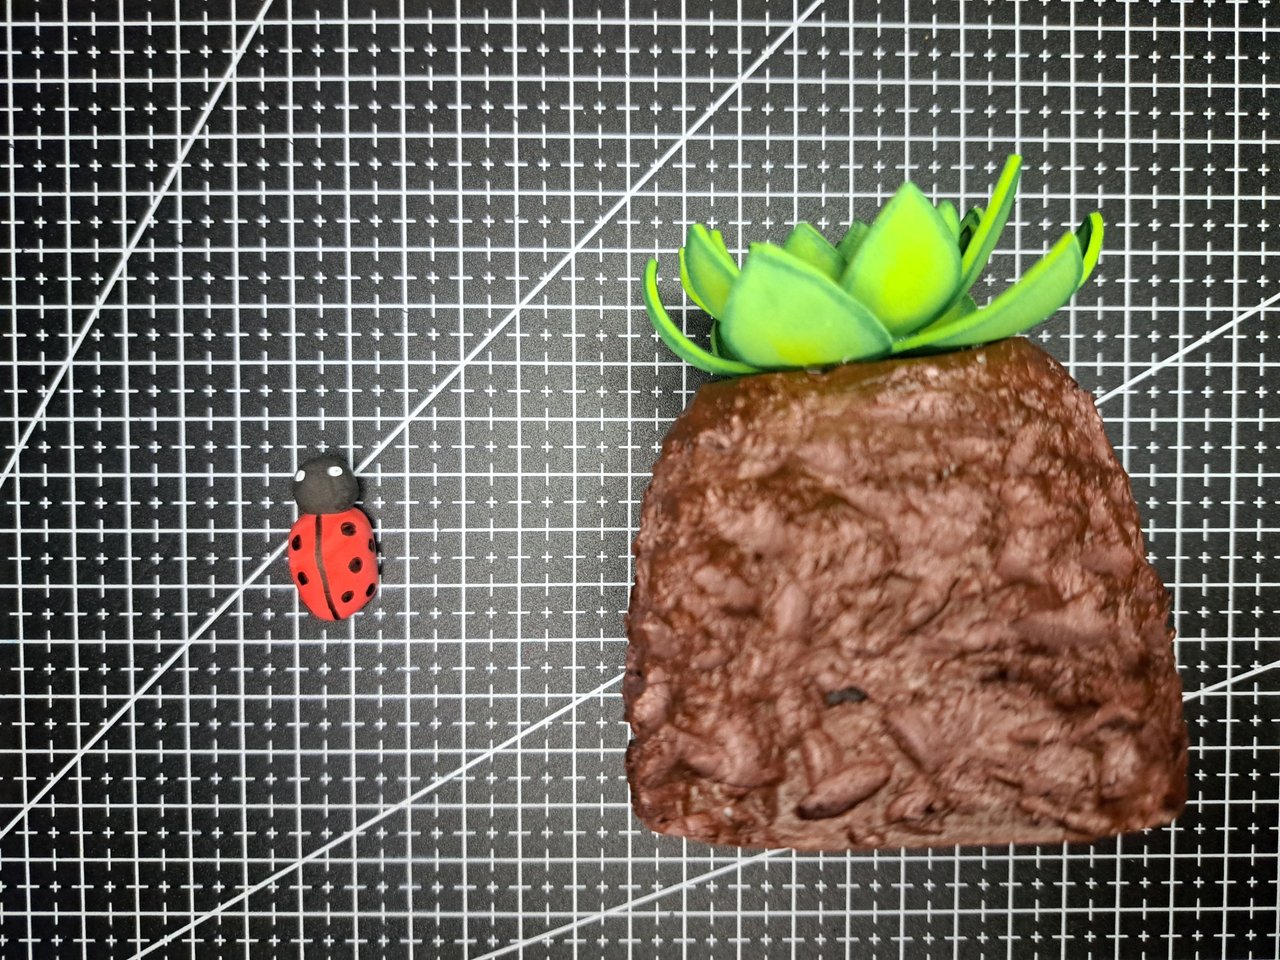
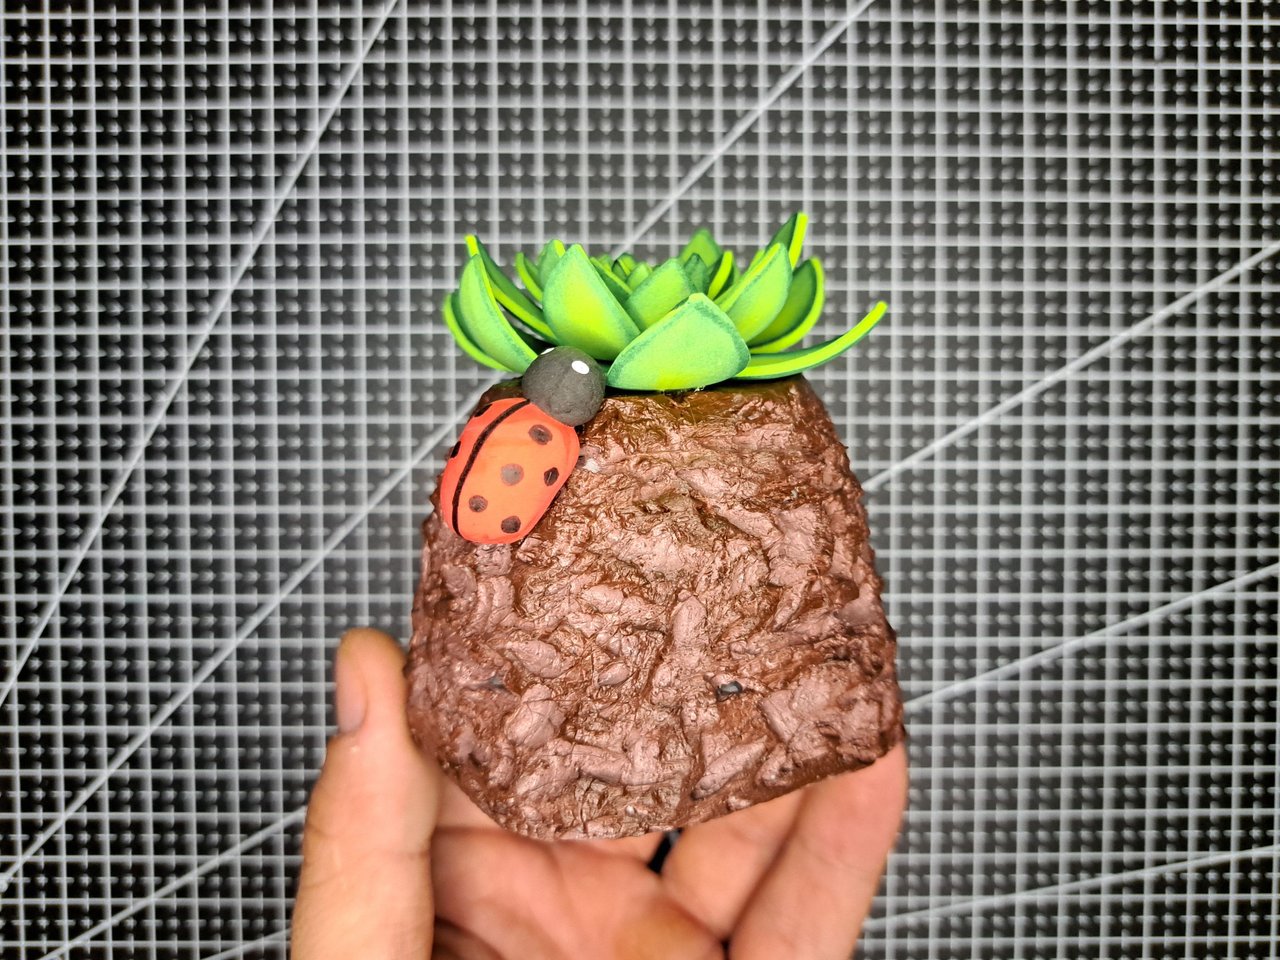
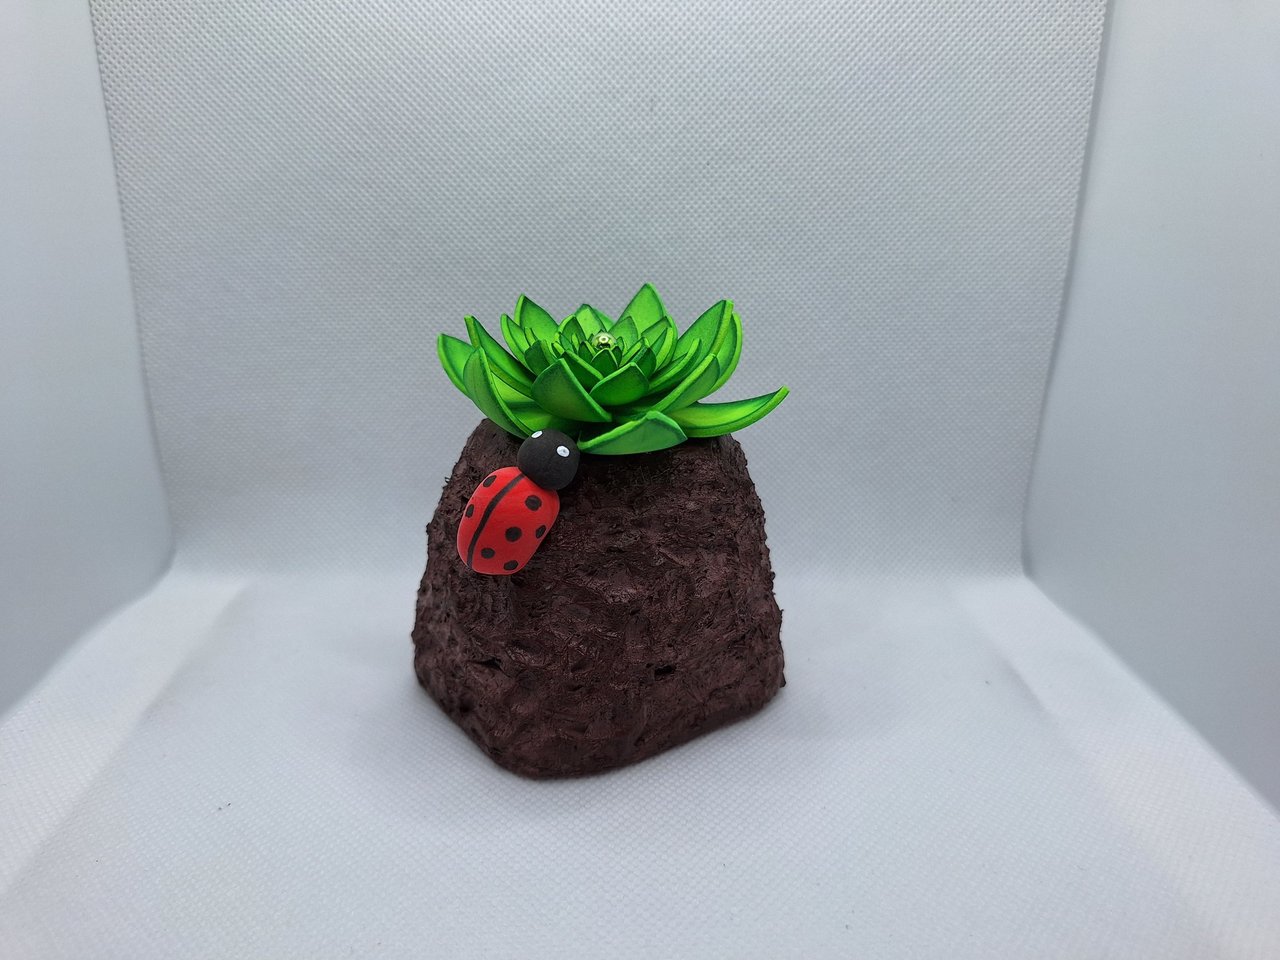
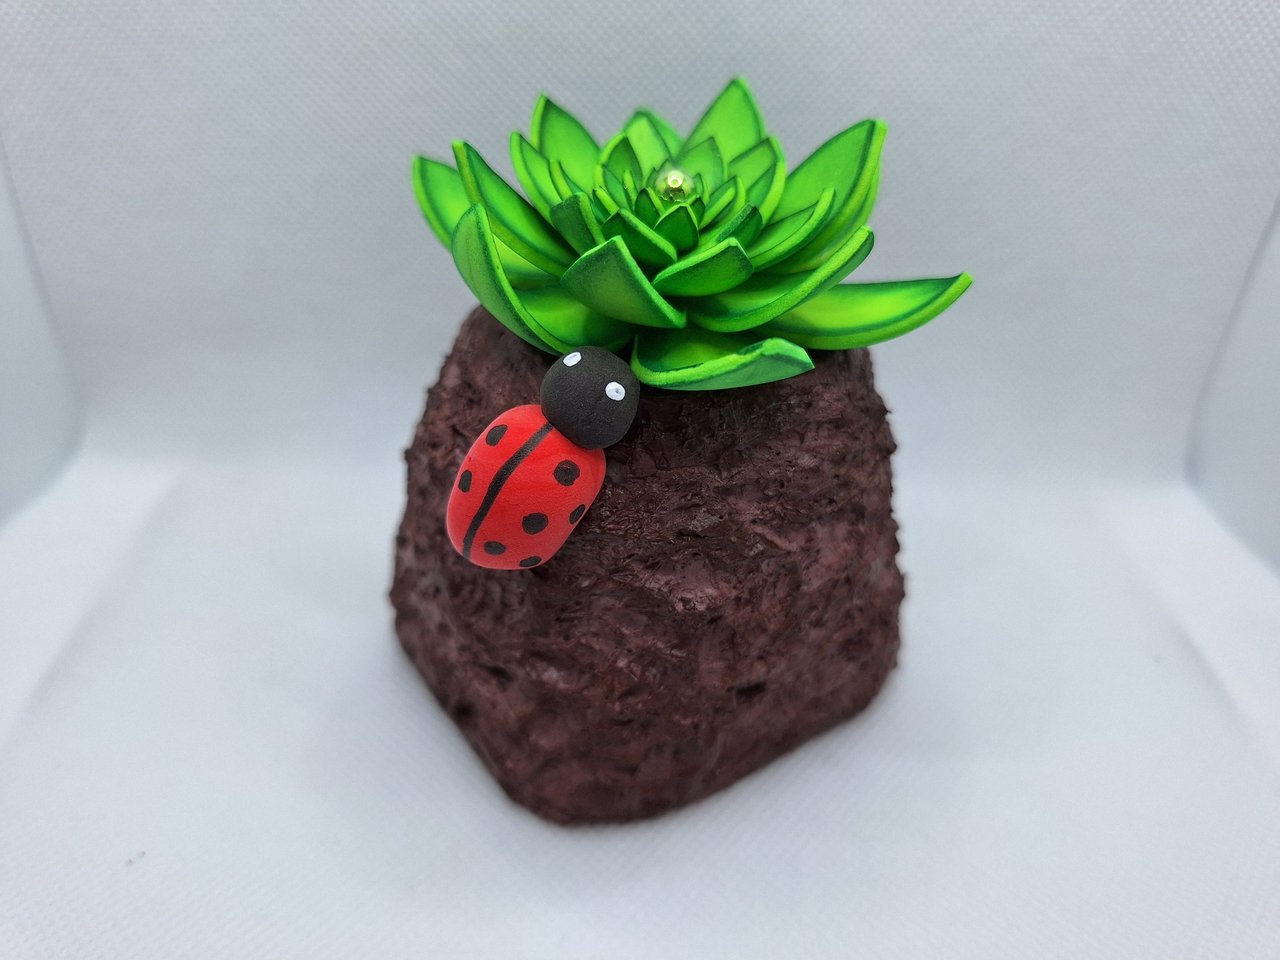
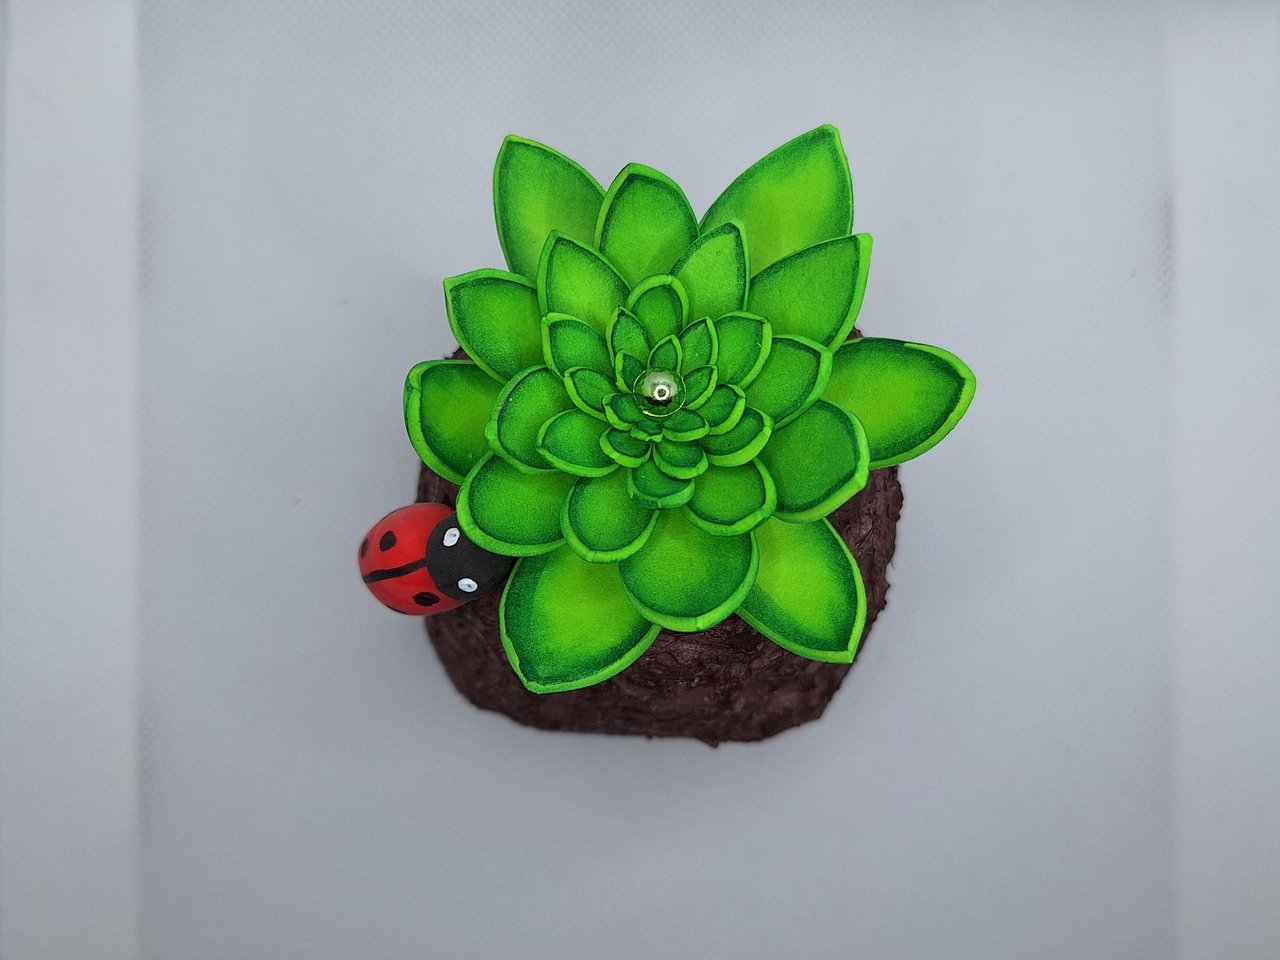
6️⃣ The three parts that make up the ornament were ready, so I put them together. First I glued the foam succulent on top of the carmel base, facing it toward the front end. Next, I glued the ladybug in the upper left corner, so that it looks like it's facing the plant.
Las tres partes que conforman el adorno ya estaban listas, así que las uní. Primero pegué la suculenta de foam encima de la base carmelita, orientándola hacia el extremo frontal. Seguidamente, pegué la mariquita en la esquina superior izquierda, de modo que parezca que se dirige hacia la planta.
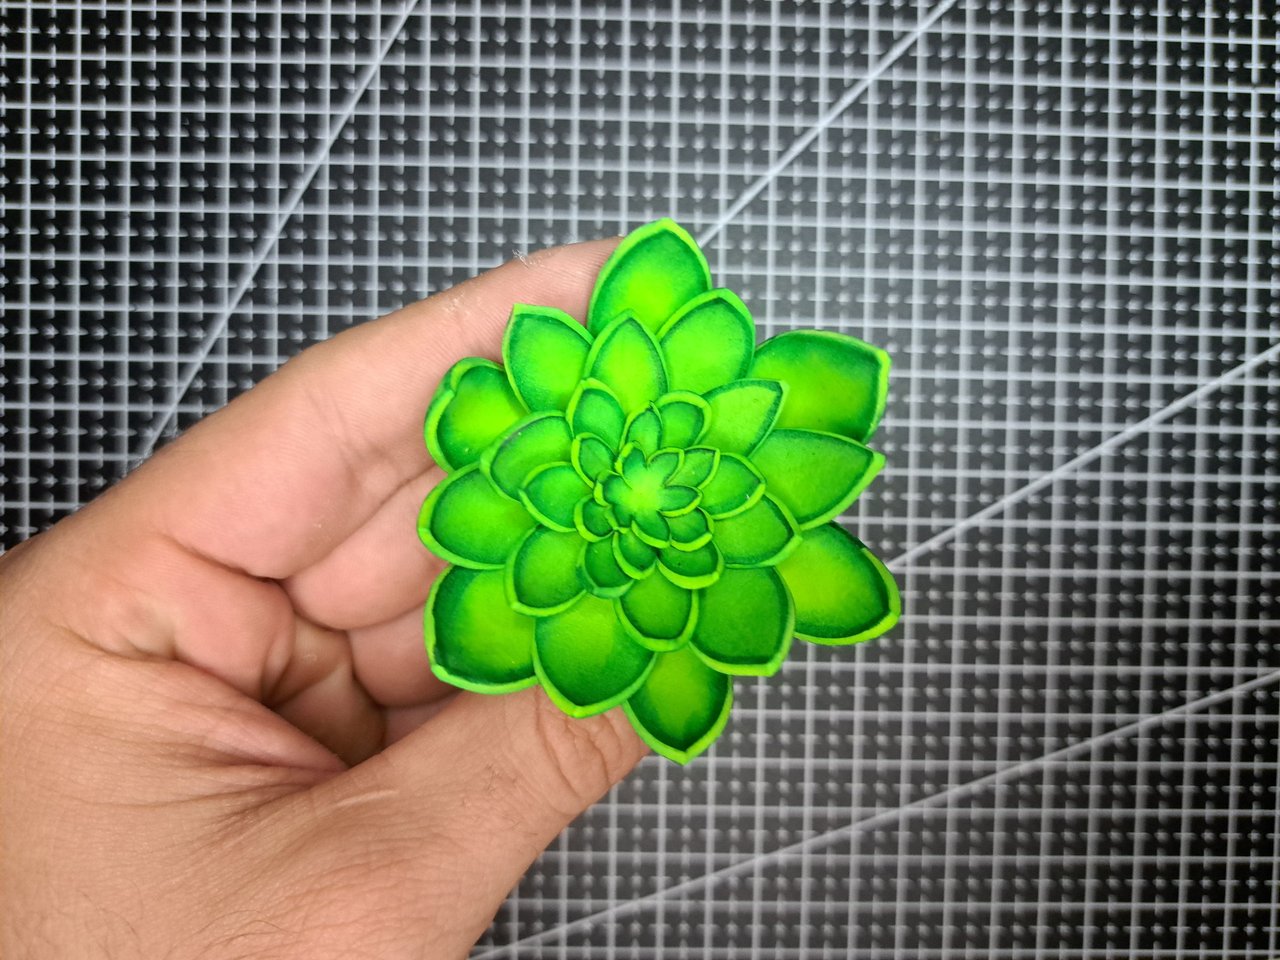
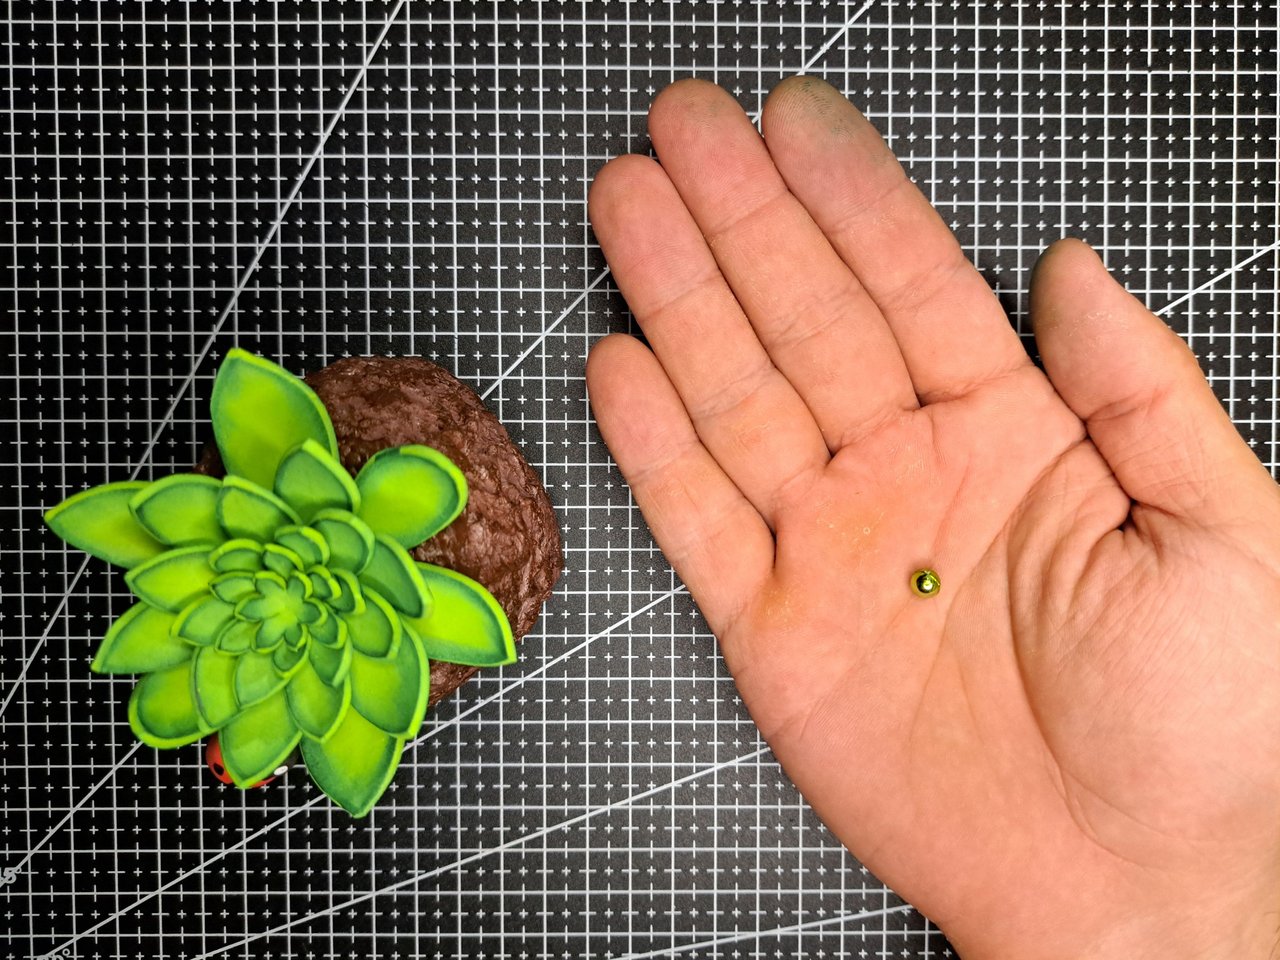
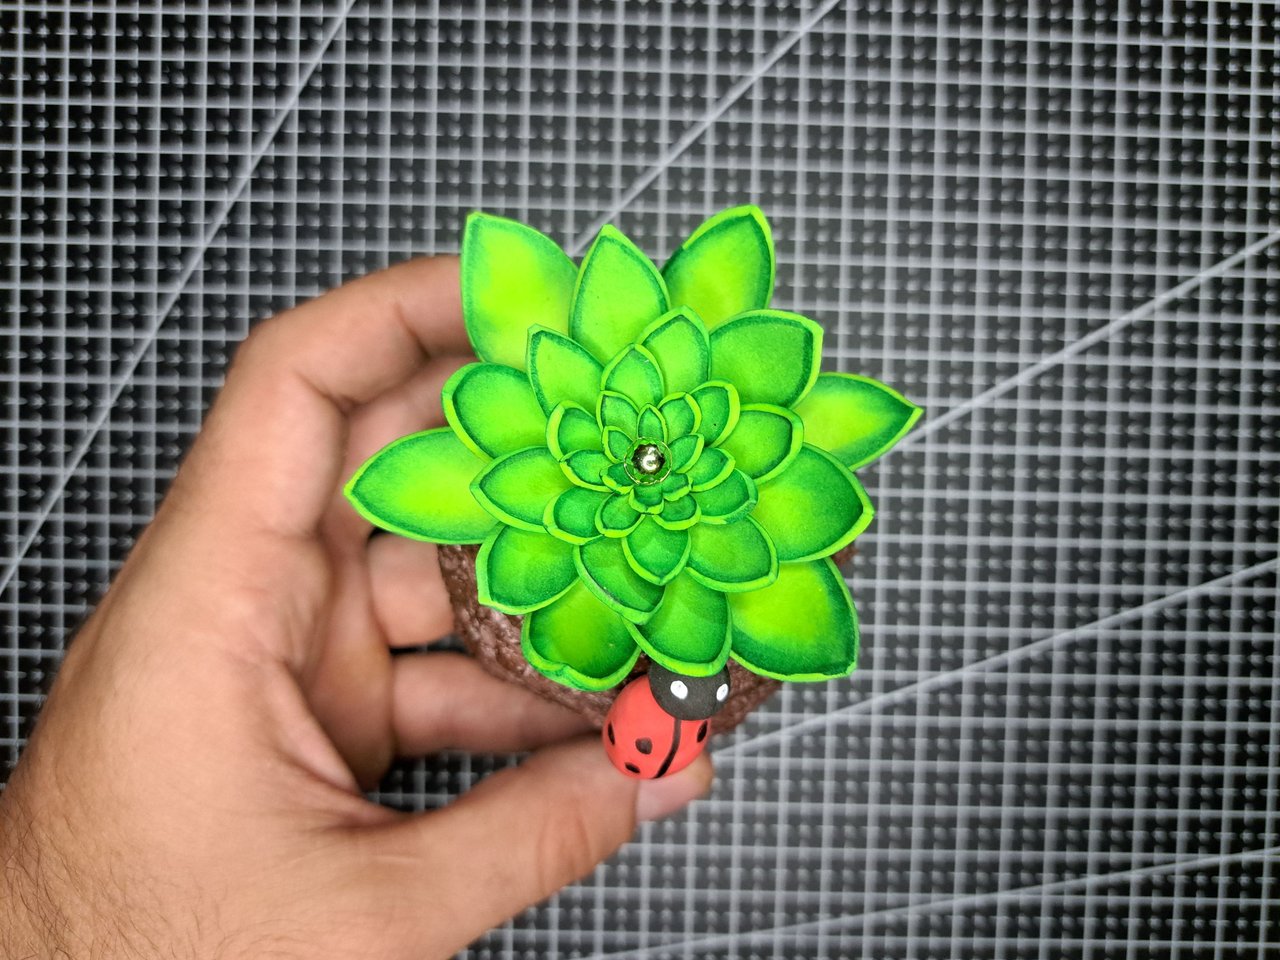
7️⃣ Finally, I will show you a totally optional step. In the center of the plants or flowers that are not completely closed I usually place some pearl or shiny stone. I know this takes away a bit from the natural look, but I particularly love it.
Para finalizar, les mostraré un paso totalmente opcional. En el centro de las plantas o flores que no están completamente cerradas suelo colocar alguna perla o piedra brillante. Sé que esto le quita un poco el aspecto natural, pero a mí en lo particular me encanta.
Finished Work // Trabajo Terminado
And well, dear reader, once again we come to the end of another tutorial. I hope that each of the steps explained above will guide you in creating your own artificial succulent. Leave me a comment with your opinion on whether the plant looked better with or without the green pearl in the center.
Y bueno, querido lector, una vez más llegamos al final de otro tutorial. Espero que cada uno de los pasos explicados anteriormente te sirvan de guía para crear tu propia suculenta artificial. Déjame un comentario con tu opinión respecto a si la planta se veía mejor con o sin la perla verde en el centro.

Credits and Resources // Créditos y Recursos
Cover page created in
CanvaTranslated by
DeepLImages captured with my
Samsung Galaxy A53