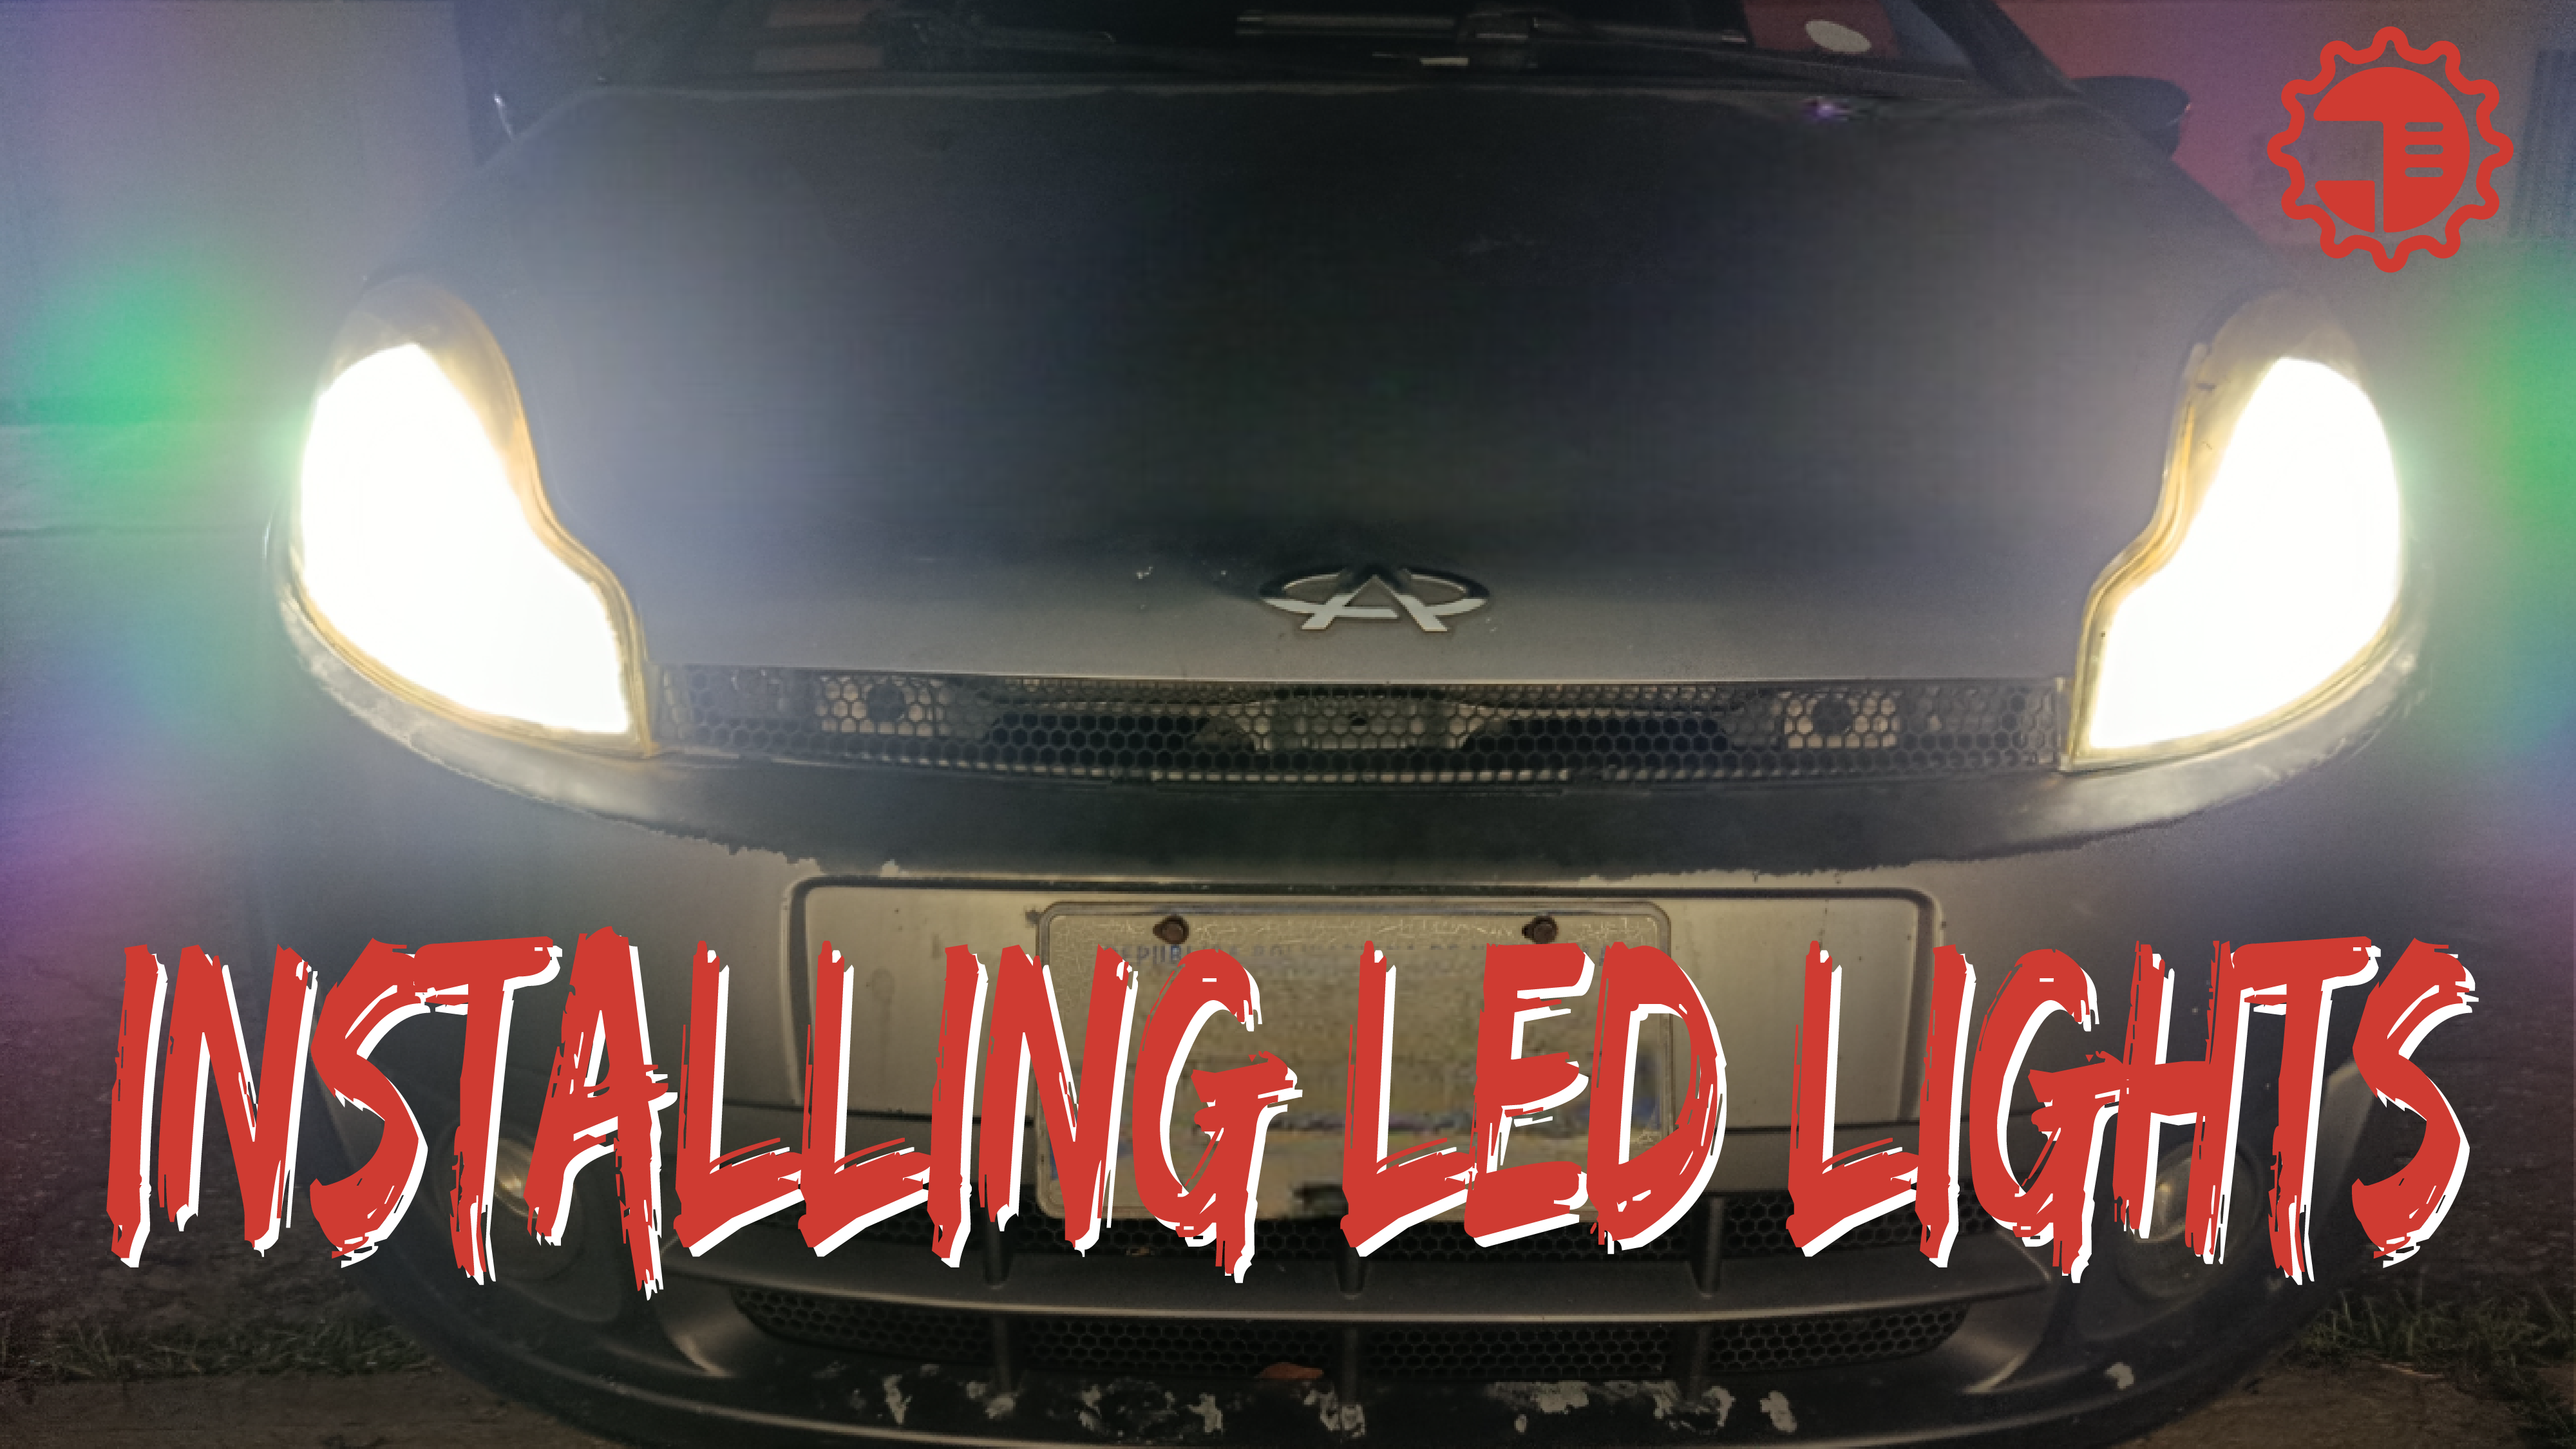
Due to a family medical situation that required our attention for several days, I found myself obligated to use the car at night, something I avoid because I don't have good headlights. Driving like that was very difficult, so I made it my goal to finally replace them with better ones. Before, I saw them as a luxury, now they are a necessity.
Instalando luces LED en mi carro - Guía y consejos prácticos
Debido a diligencia médica que tuvimos que atender en mi familia durante varios días, me ví en la obligación de usar el carro de noche, algo que evito porque no tengo buenas luces. Fue muy difícil andar así, por lo tanto me puse la meta de finalmente cambiarlas por unas mejores, antes las veía como un lujo, ahora son una necesidad.
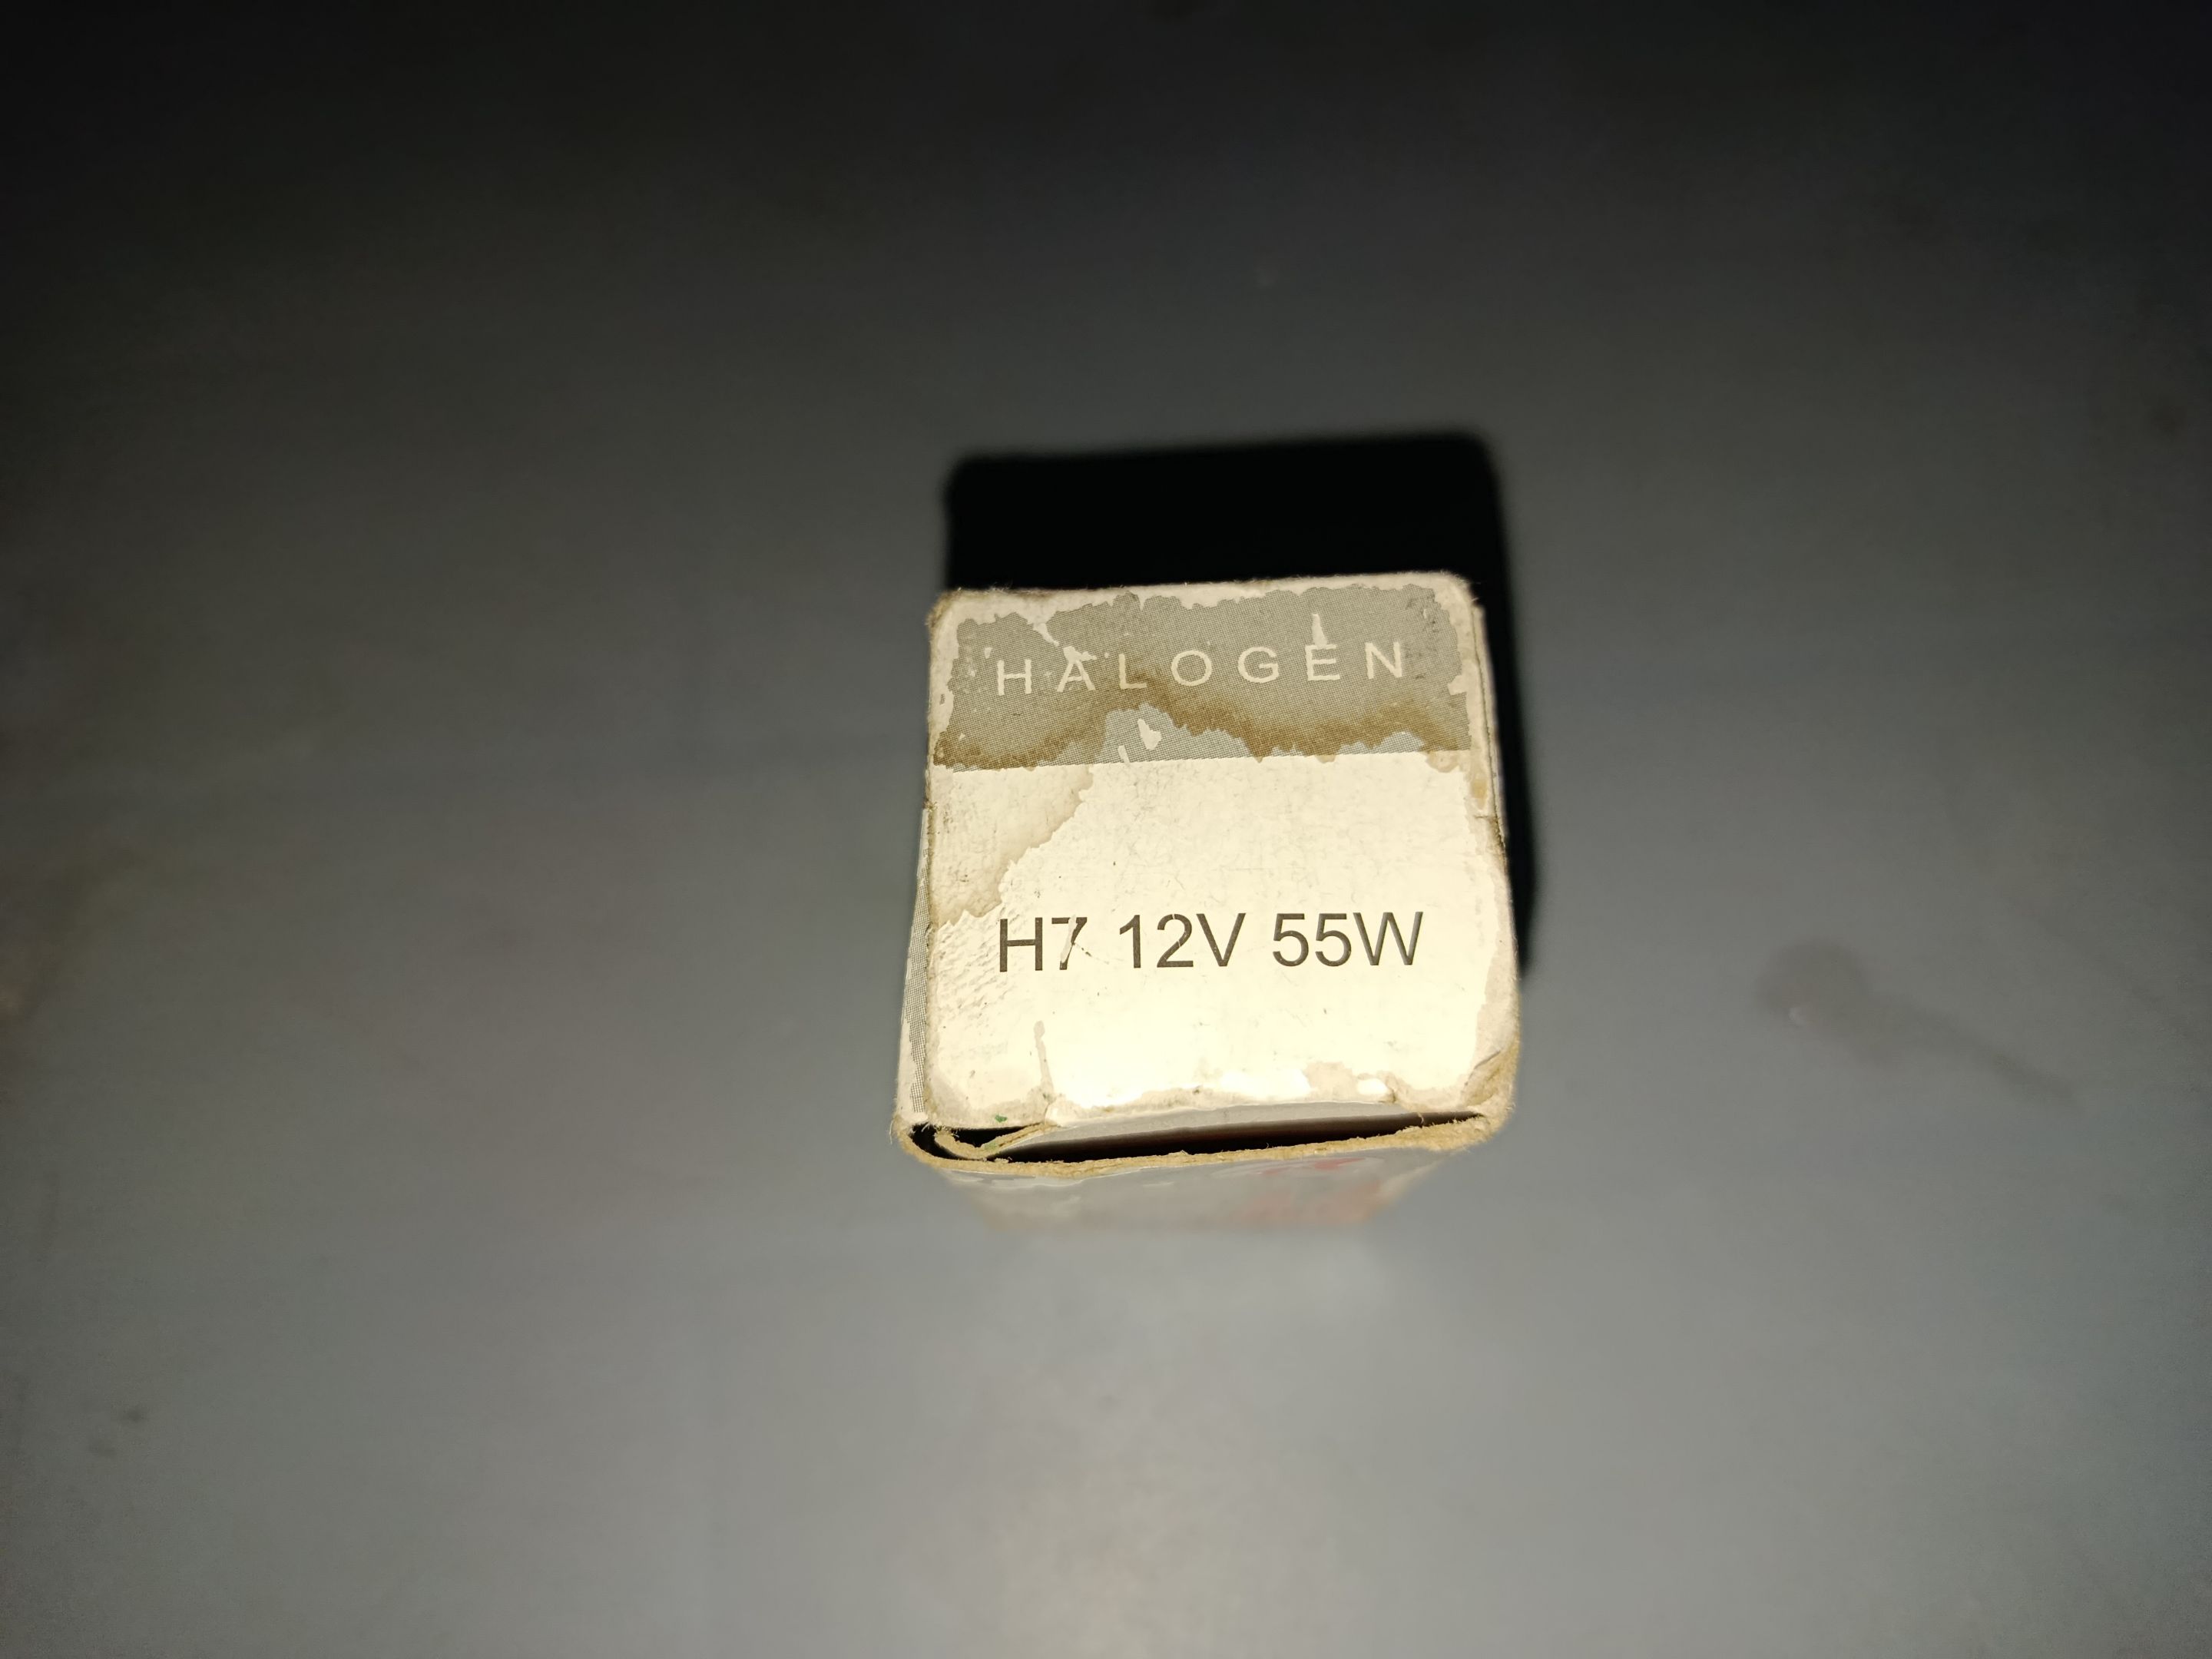
I had been using 55-watt halogen bulbs, which is within the range recommended by the vehicle manufacturer; however, their quality isn't very good, and the illumination is poor. I also had a problem with the connector that melted, and my low beams weren't working because this car has them separate – an H7 bulb for the high beams and another H7 for the low beams.
Estuve usando halógenos de 55 watts que está dentro del rango que el fabricante del vehículo recomienda, sin embargo, la calidad de estos no es muy buena y la iluminación es deficiente. También tenía un problema con el conector que se fundió y no tenía disponible las luces bajas, porque este carro las tiene por separado, un bombillo h7 para las altas y otro h7 para las bajas.
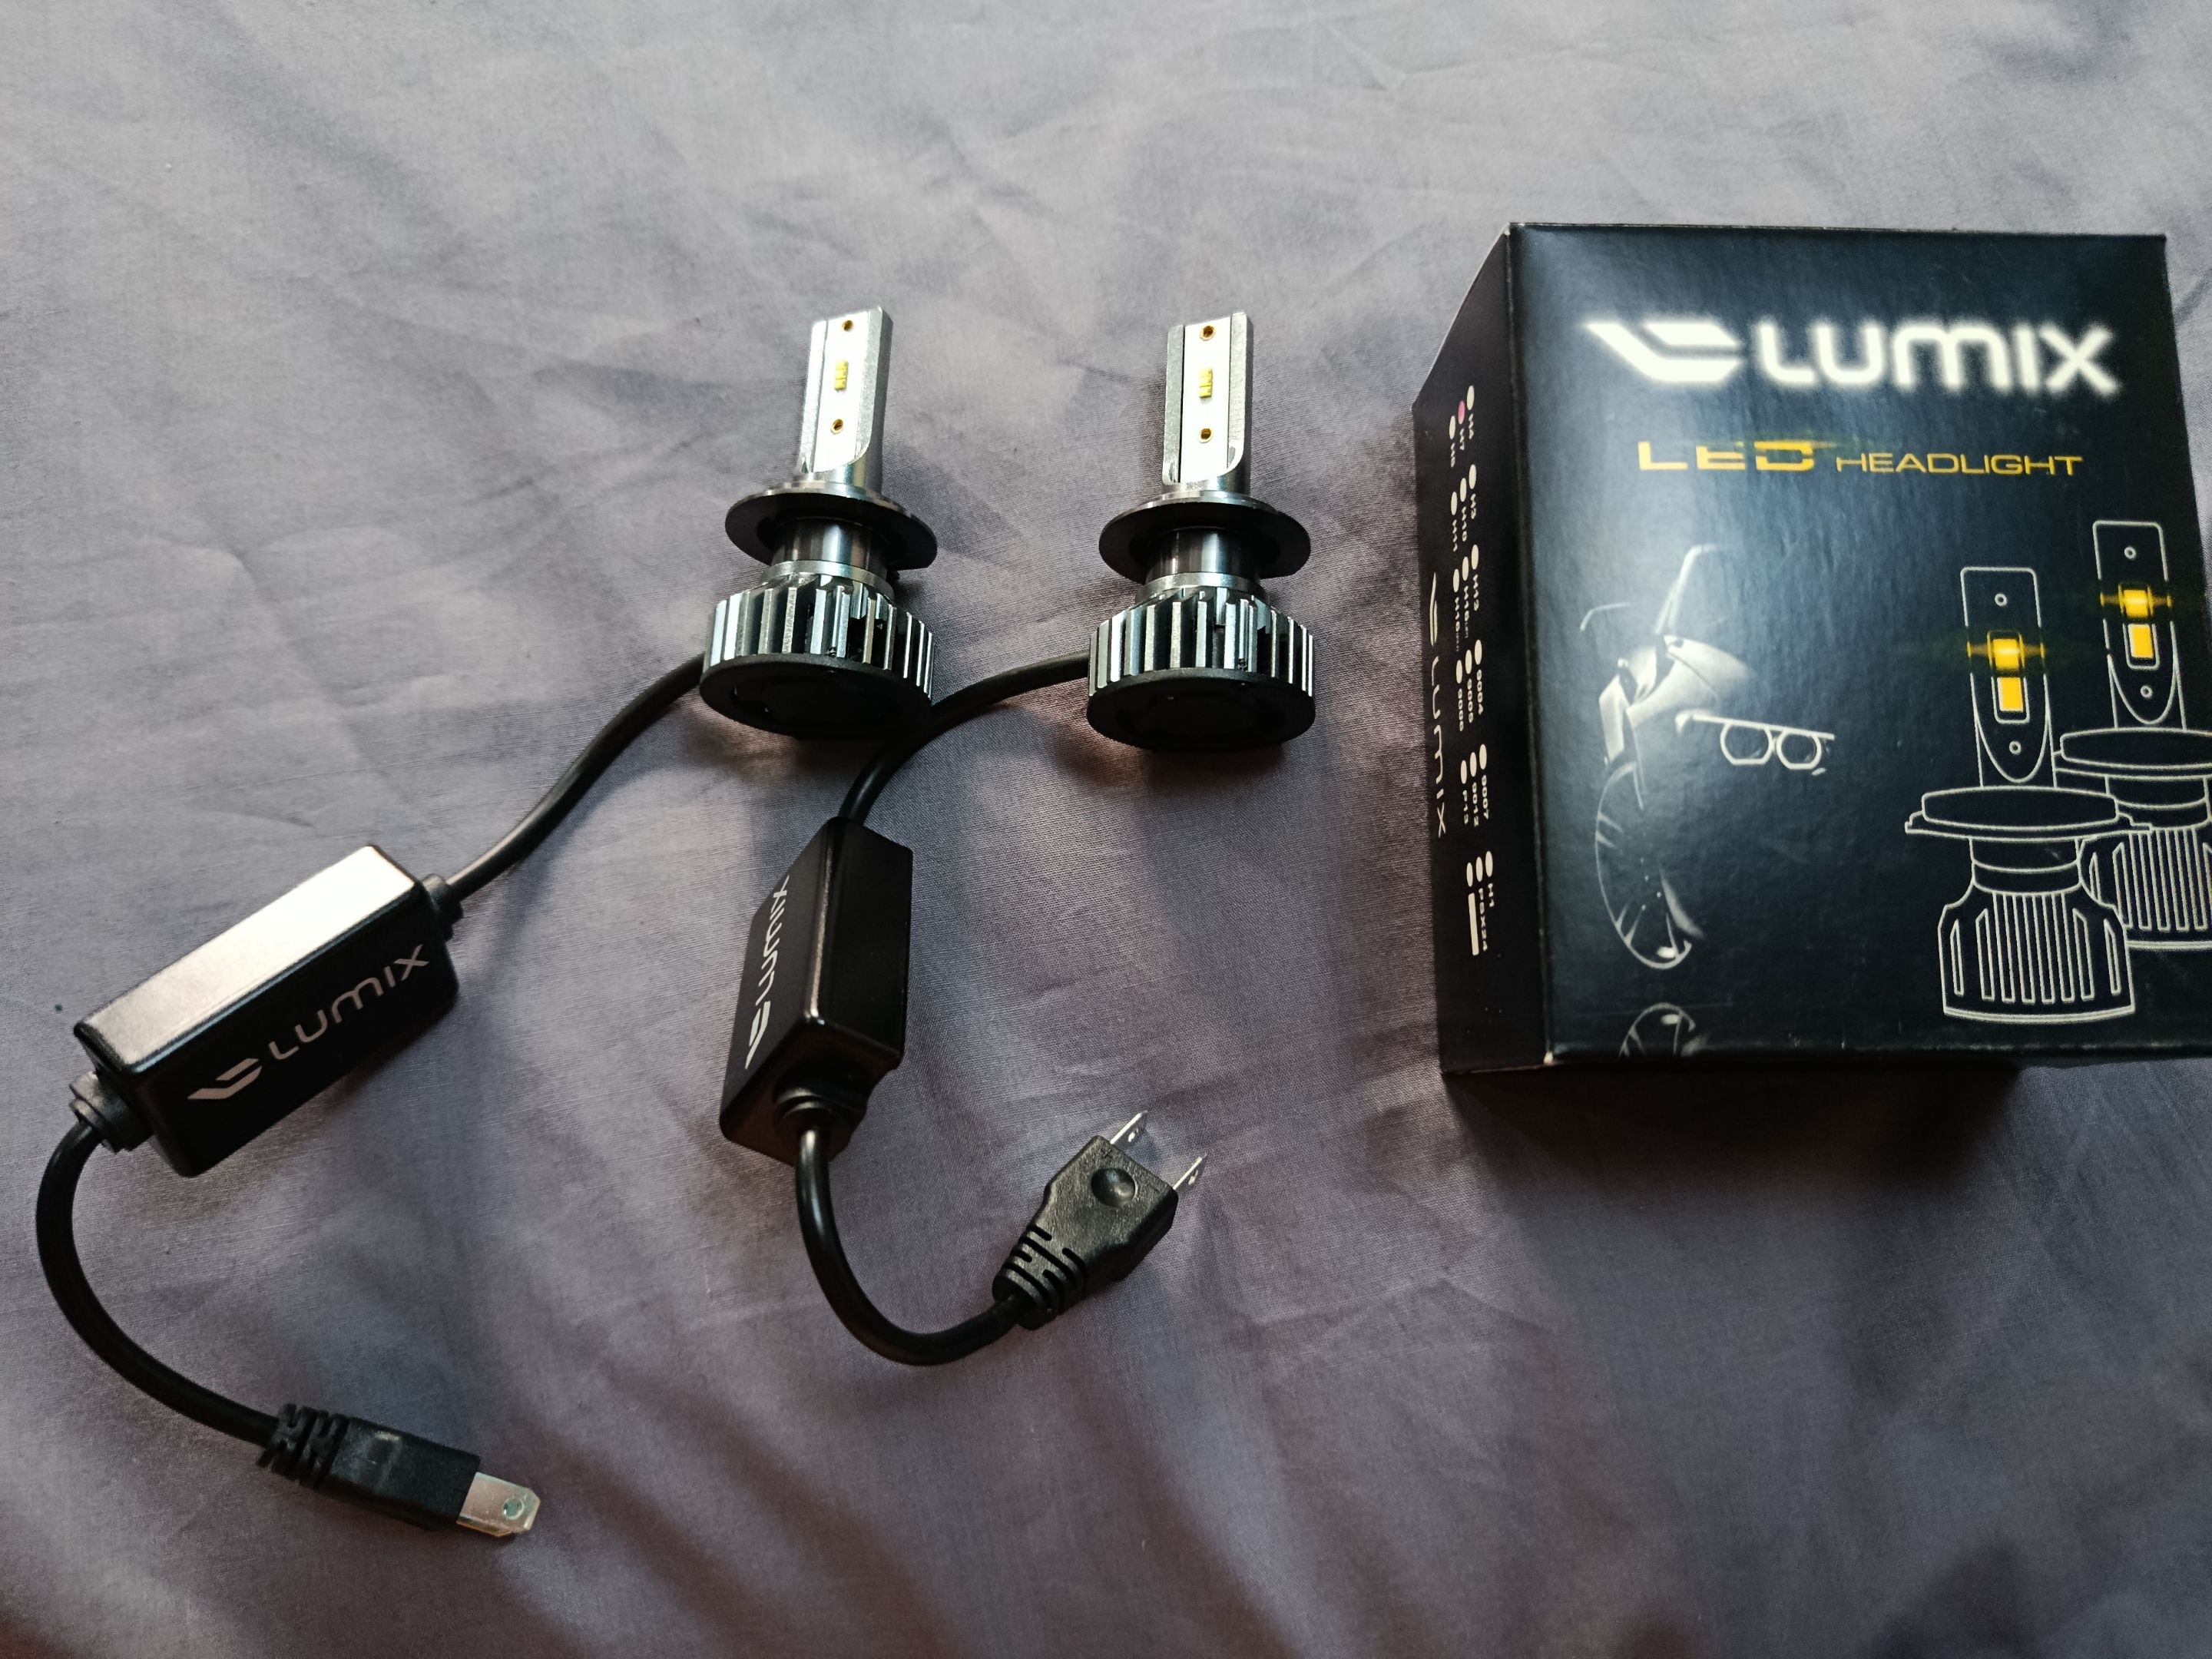
Therefore, I decided to purchase some LED lights, which have become very popular in the country. This has led to the existence of many brands, with different qualities and price ranges for all budgets. After researching quite a bit, I found a distributor near my city that sells a national brand, offering a 6-month warranty, with a 20,000-lumen, 60-watt option for a price of $35 USD.
Decidí por lo tanto adquirir unos tipo led que se han vuelto muy populares en el país, esto a provocado que existan muchas marcas, de distintas calidades y con rangos de precios para todos los presupuestos. Tras investigar bastante, en encontré un distribuidor cerca de mi ciudad que comercializa una marca nacional, que ofrece 6 meses de garantía, con una opción de 20.000 lúmenes de 60 watts por un precio de $35 USD.
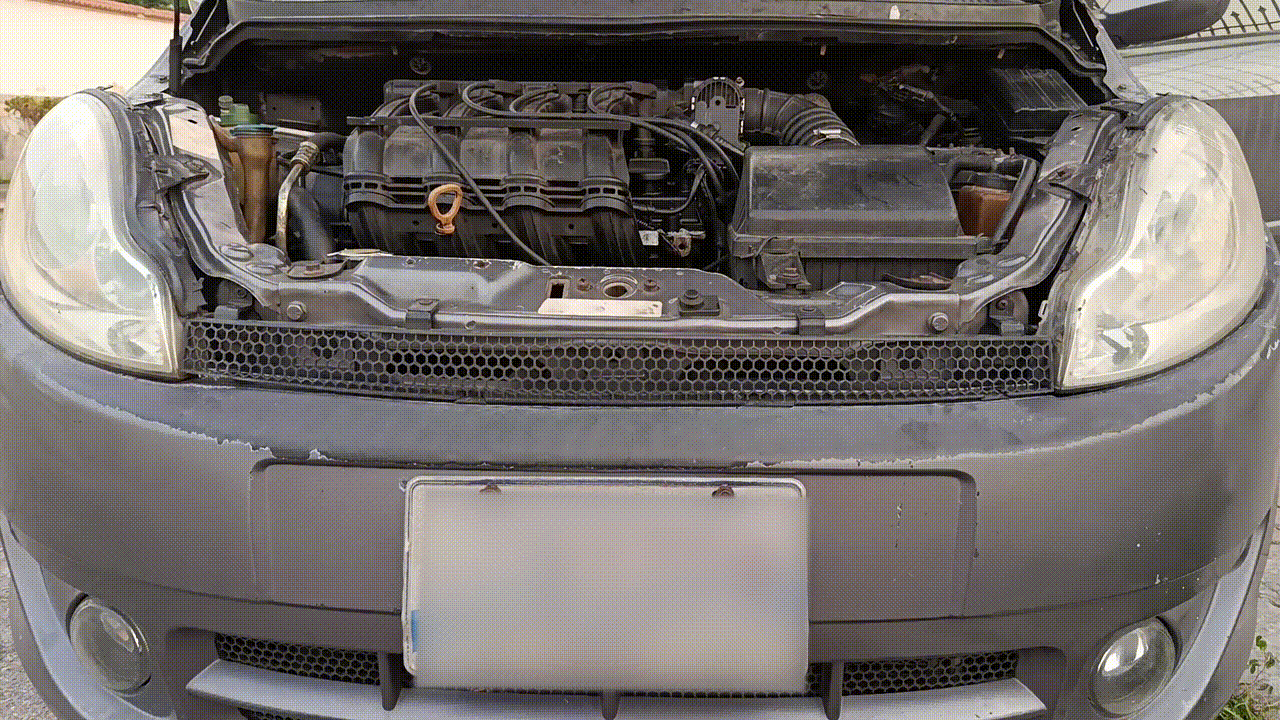
Installation is straightforward as long as several aspects are taken into account, and if you're careful with them, the result will be very good. The first thing I did was remove the headlight assembly to work more comfortably. This allowed me to change the connector that had melted due to heat, one of the drawbacks of using halogens.
La instalación es sencilla siempre y cuando se tengan en cuanta varios aspectos, que si los cuidas quedarán muy bien. Lo primero que hice fue bajar el faro para trabajar más cómodo, así cambien el conector que estaba derretido por el calor, uno de los males de usar halógenos.
The next step was to place the base that holds the bulb in the headlight. It's important to keep in mind that LEDs have a small fan cooler that prevents a normal installation like with a halogen bulb. Therefore, it has a separate base that attaches to the headlight, which we place first, and then we insert the bulb by pressing it in. A nice touch from where I bought the bulbs was that they gave me two LED bulbs for the parking lights, so I took the opportunity to change those as well.
Lo siguiente fue colocar la base que sujeta el bombillo al faro. Hay que tener presente que los led tiene un pequeño fan cooler que impide una instalación normal como sería para un halógeno, por lo tanto, tiene por separado la base que los sujeta al faro para que la coloquemos primero y luego a presión introducir el bombillo. Un detalles que tuvieron donde compre los bombillos fue obsequiarme dos bombillos LED para las luces de posición, así que aproveché a cambiarlas también.
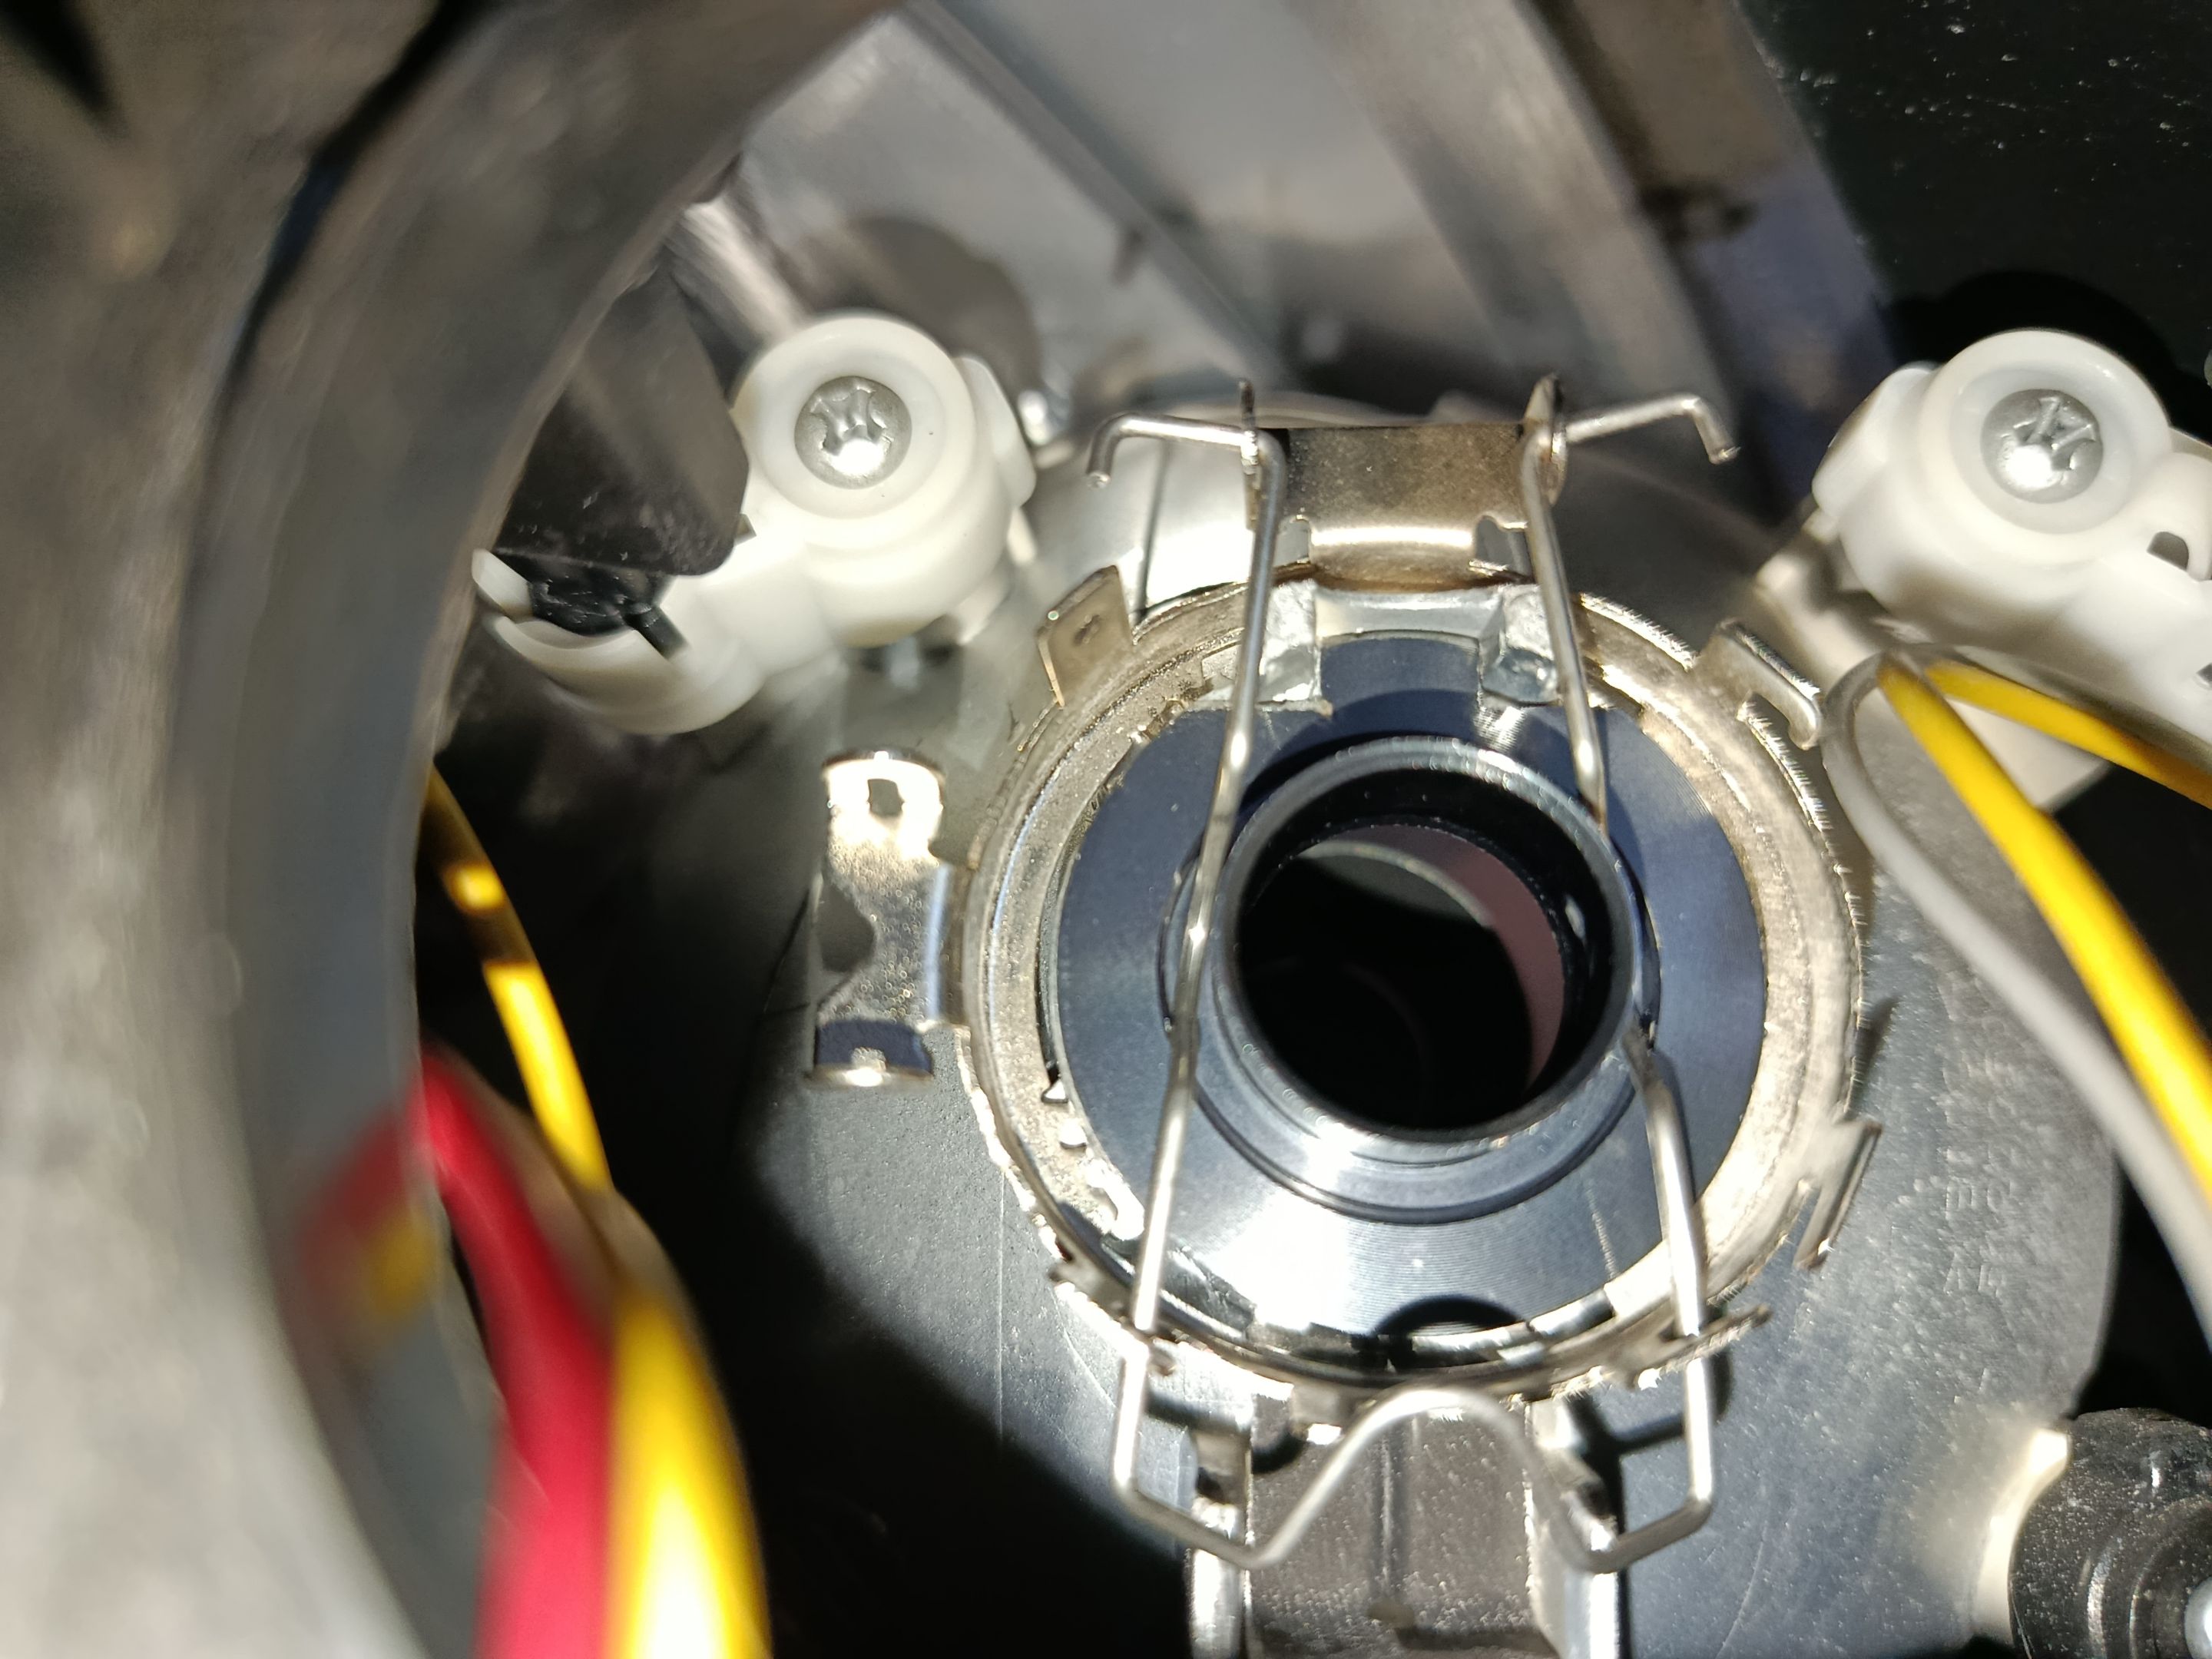
The position of the bulb inside the headlight is also very important. In my case, it has two flat sides, and both must be positioned facing sideways. This way, I maximize the reflection of the light beam, because if I place it facing up and down, the bases inside the headlight housing cast a shadow. It's important to research well how to position it depending on the model. For those with low and high beams combined in one bulb, the low beam part usually goes on top, and the high beam part goes on the bottom.
La posición del bombillo dentro del faro también es muy importante, en mi caso este tiene dos caras y ambas deben estar posicionadas mirando hacia los lados, así aprovecho al máximo la reflexión del haz de luz, una que si lo coloco hacia arriba y abajo, las bases del faro le hacen sombra. Es importante investigar bien como colocarlo dependiendo del modelo, para los que tiene las luces bajas y altas incluidas, normalmente las bajas van hacia arriba y las altas hacia abajo.
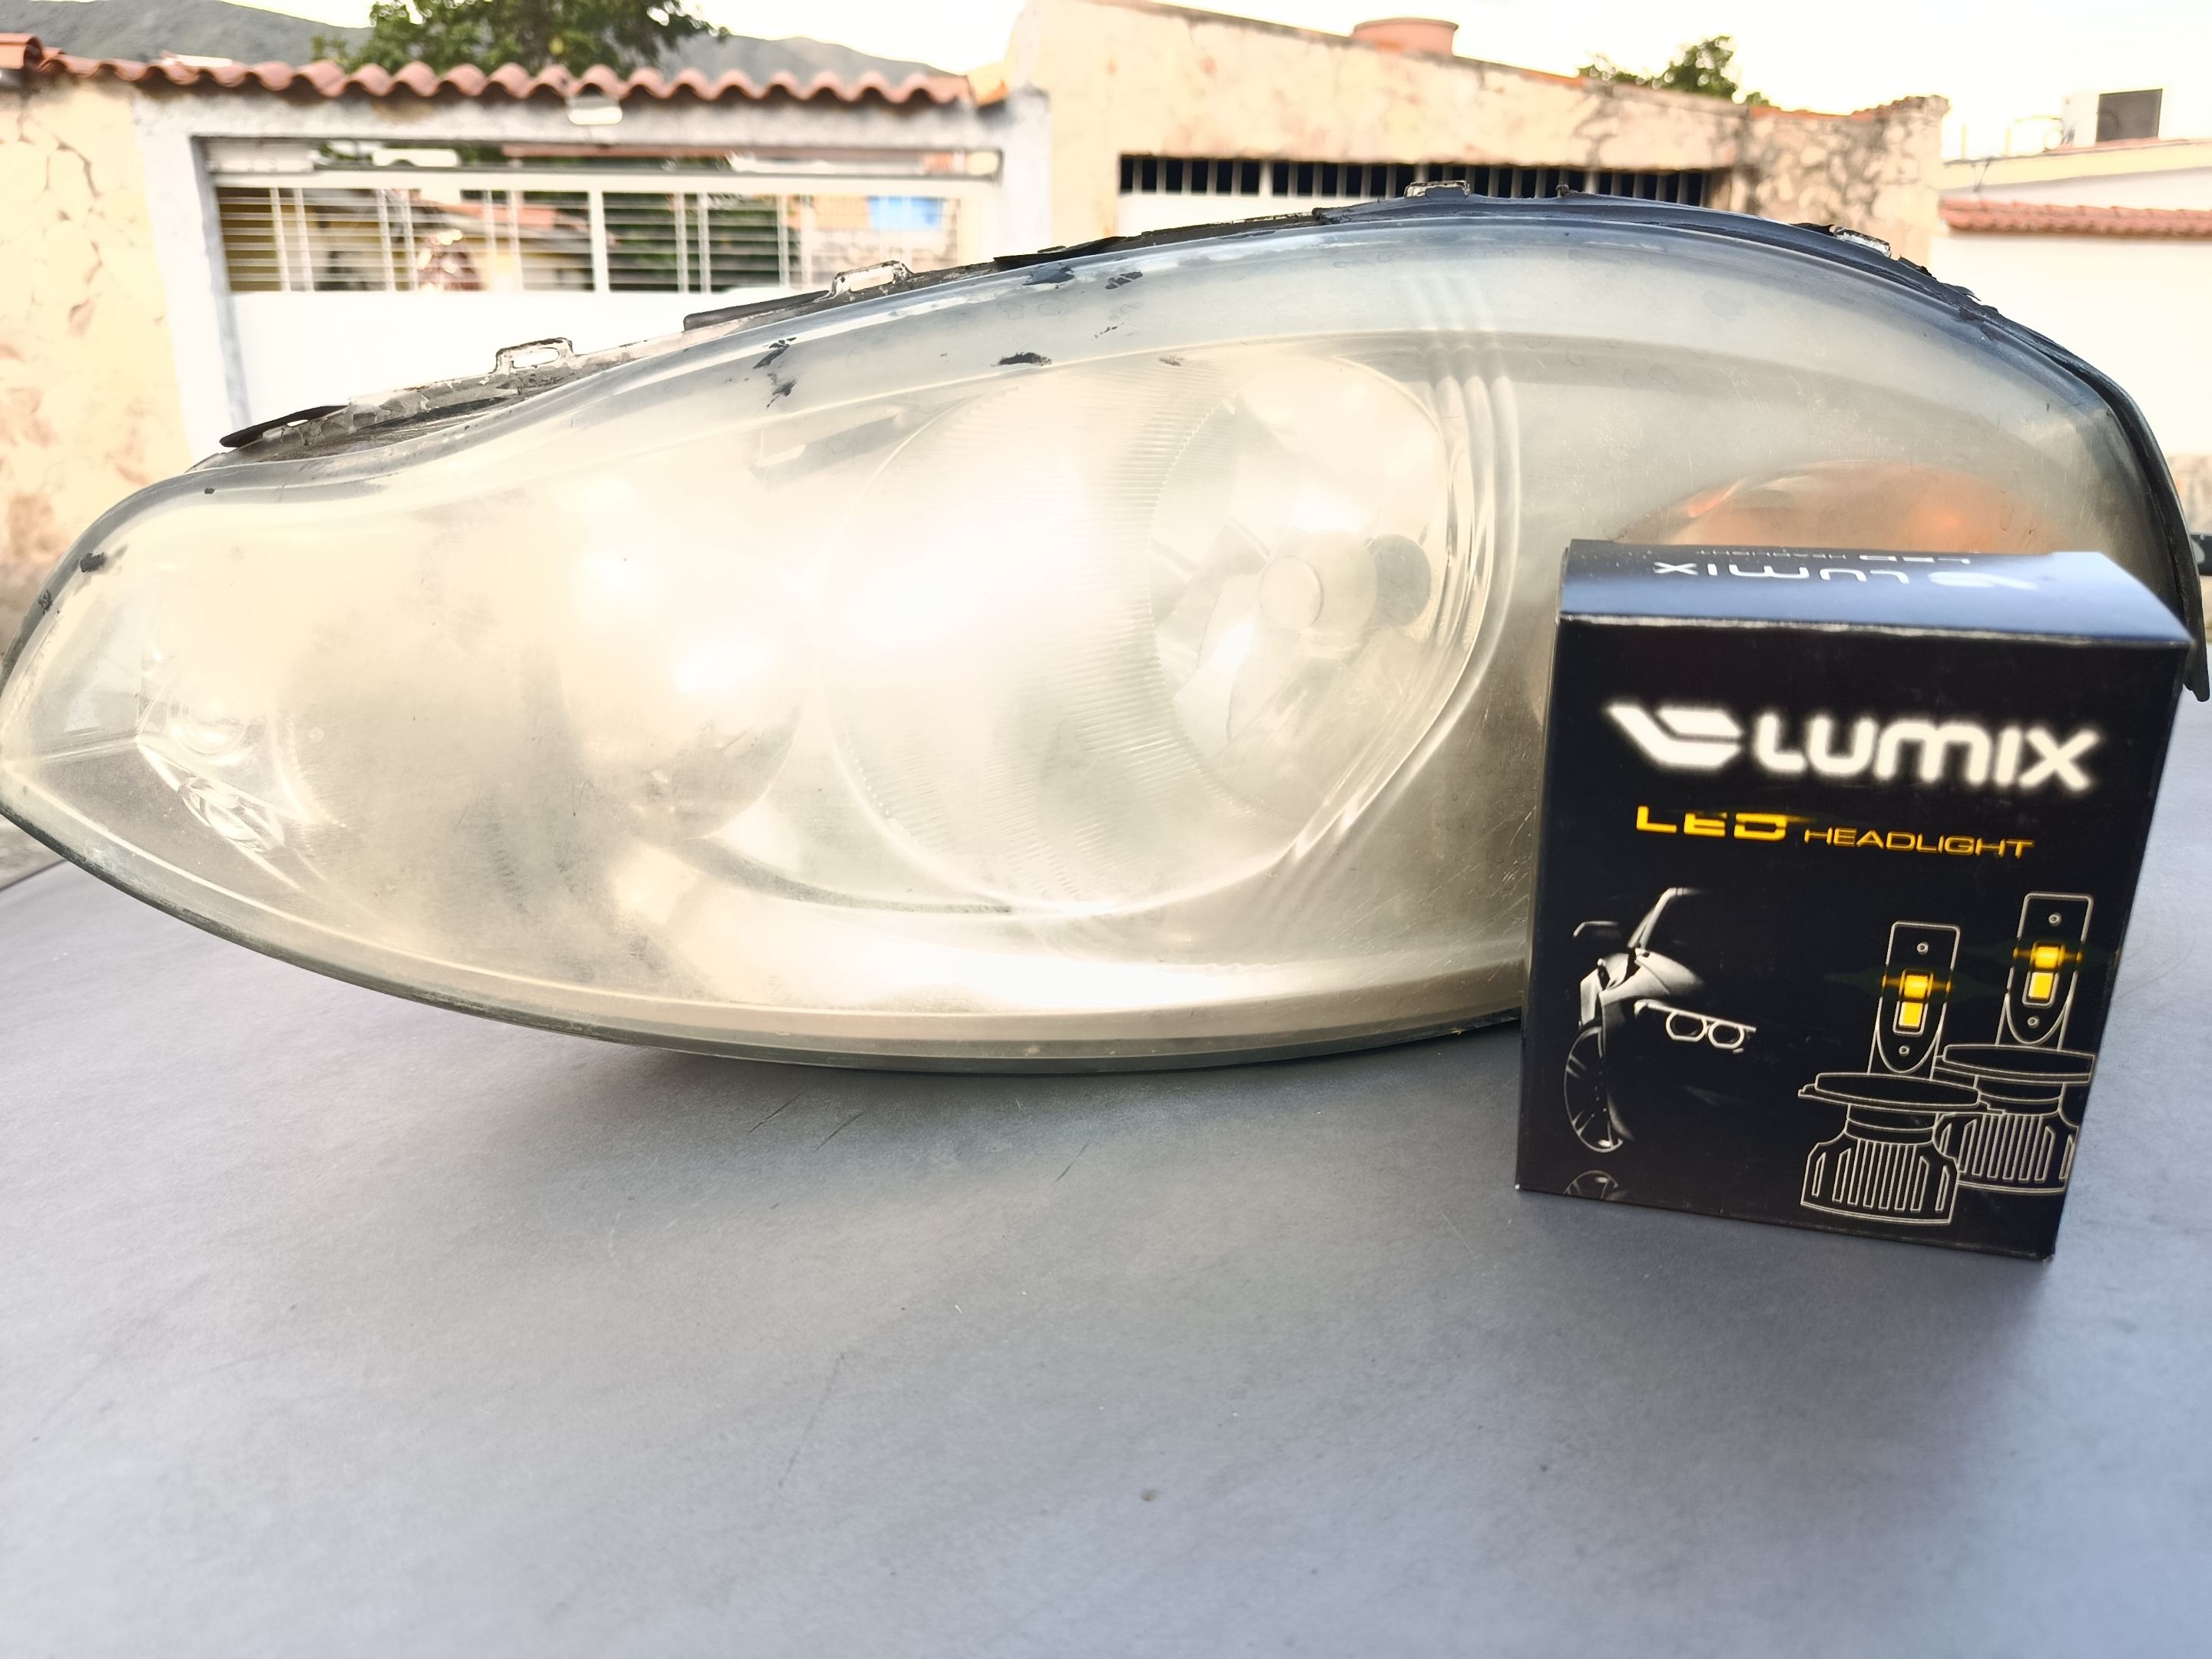
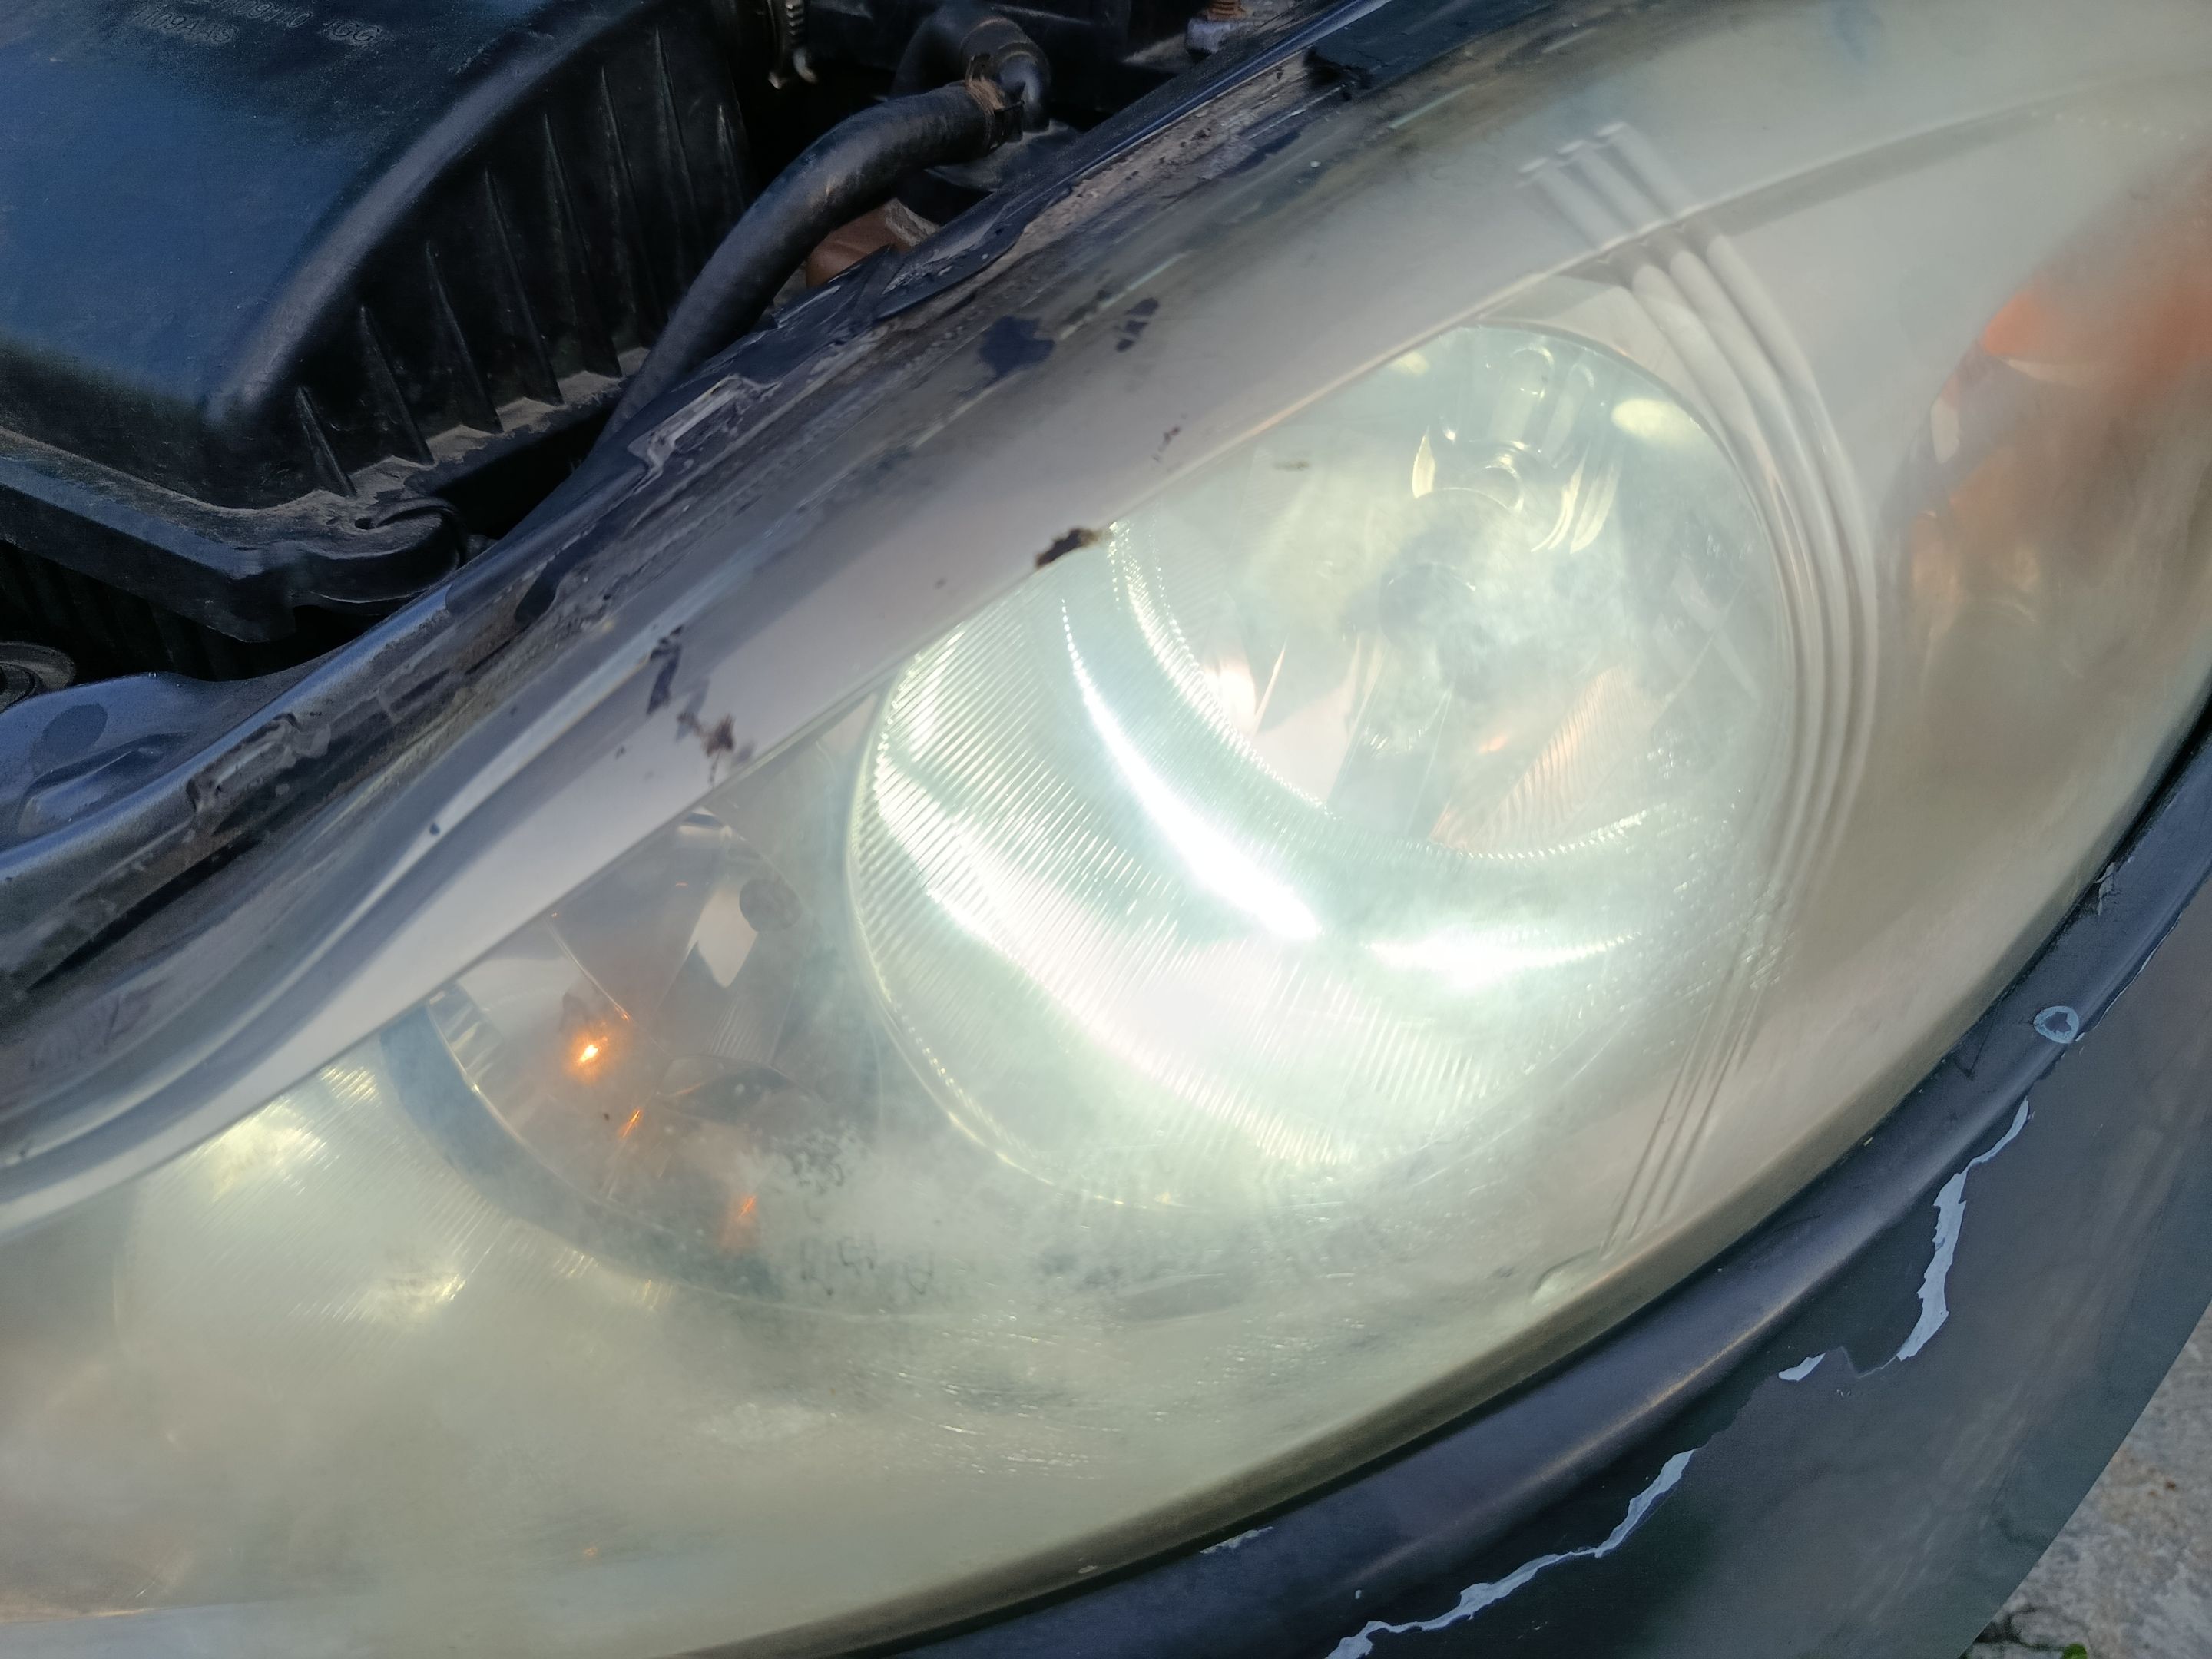
The other big detail to take care of is the condition of the lens (glass or plastic). If they are very cloudy or yellowed, installing new lights won't make much difference. For now, I need to polish mine again with 3M polishing compound, which makes them look great, but it's something I have to repeat every month. It's very easy to do; you apply it with your hands, let it dry for 5 minutes, and then remove it with your hands, repeating the process a couple more times until they are well polished. Of course, if you have a polishing wheel, they will look even better, but look how well they turn out just by hand.
El otro gran detalle a cuidar es la condición del cristal o plástico, si están muy quemados nada haces con poner luces nuevas. Por ahora mi toca pulirlos nuevamente con la pulitura 3M que los deja muy bien, pero es algo de que debo repetir cada mes. Es muy sencillo de hacer, lo aplicas con la manos, lo dejas secar 5 minutos y con la misma manos lo retiras, para repetir el proceso un par de veces más hasta quedar bien pulidos, claro si tienes disco de pulitura quedan mejor, pero fíjense como quedan solo con la mano.
The next thing, which almost no one does, is the height adjustment, even in the stores where they sell them, they don't do it properly because every car is different. In my case, I positioned the car facing a wall at a distance of 3 meters (about 10 feet), where you could see that the right headlight illuminated higher than the left one. The adjustment is done through the holes on the top of the headlight assembly, which in my case, you can find on the car's body.
Lo siguiente y que casi nadie hace es la calibración de la altura, incluso en las tiendas donde los venden no lo hacen debidamente porque cada carro es diferente. En mi caso posicione el carro frente a una pared a una distancia de 3 metros, donde se puede notar que el faro derecho ilumina más arriba que el izquierdo. La calibración se hace a través de los orificios en la parte superior del faro, que en mi caso puedes encontrarlo en la carrocería.
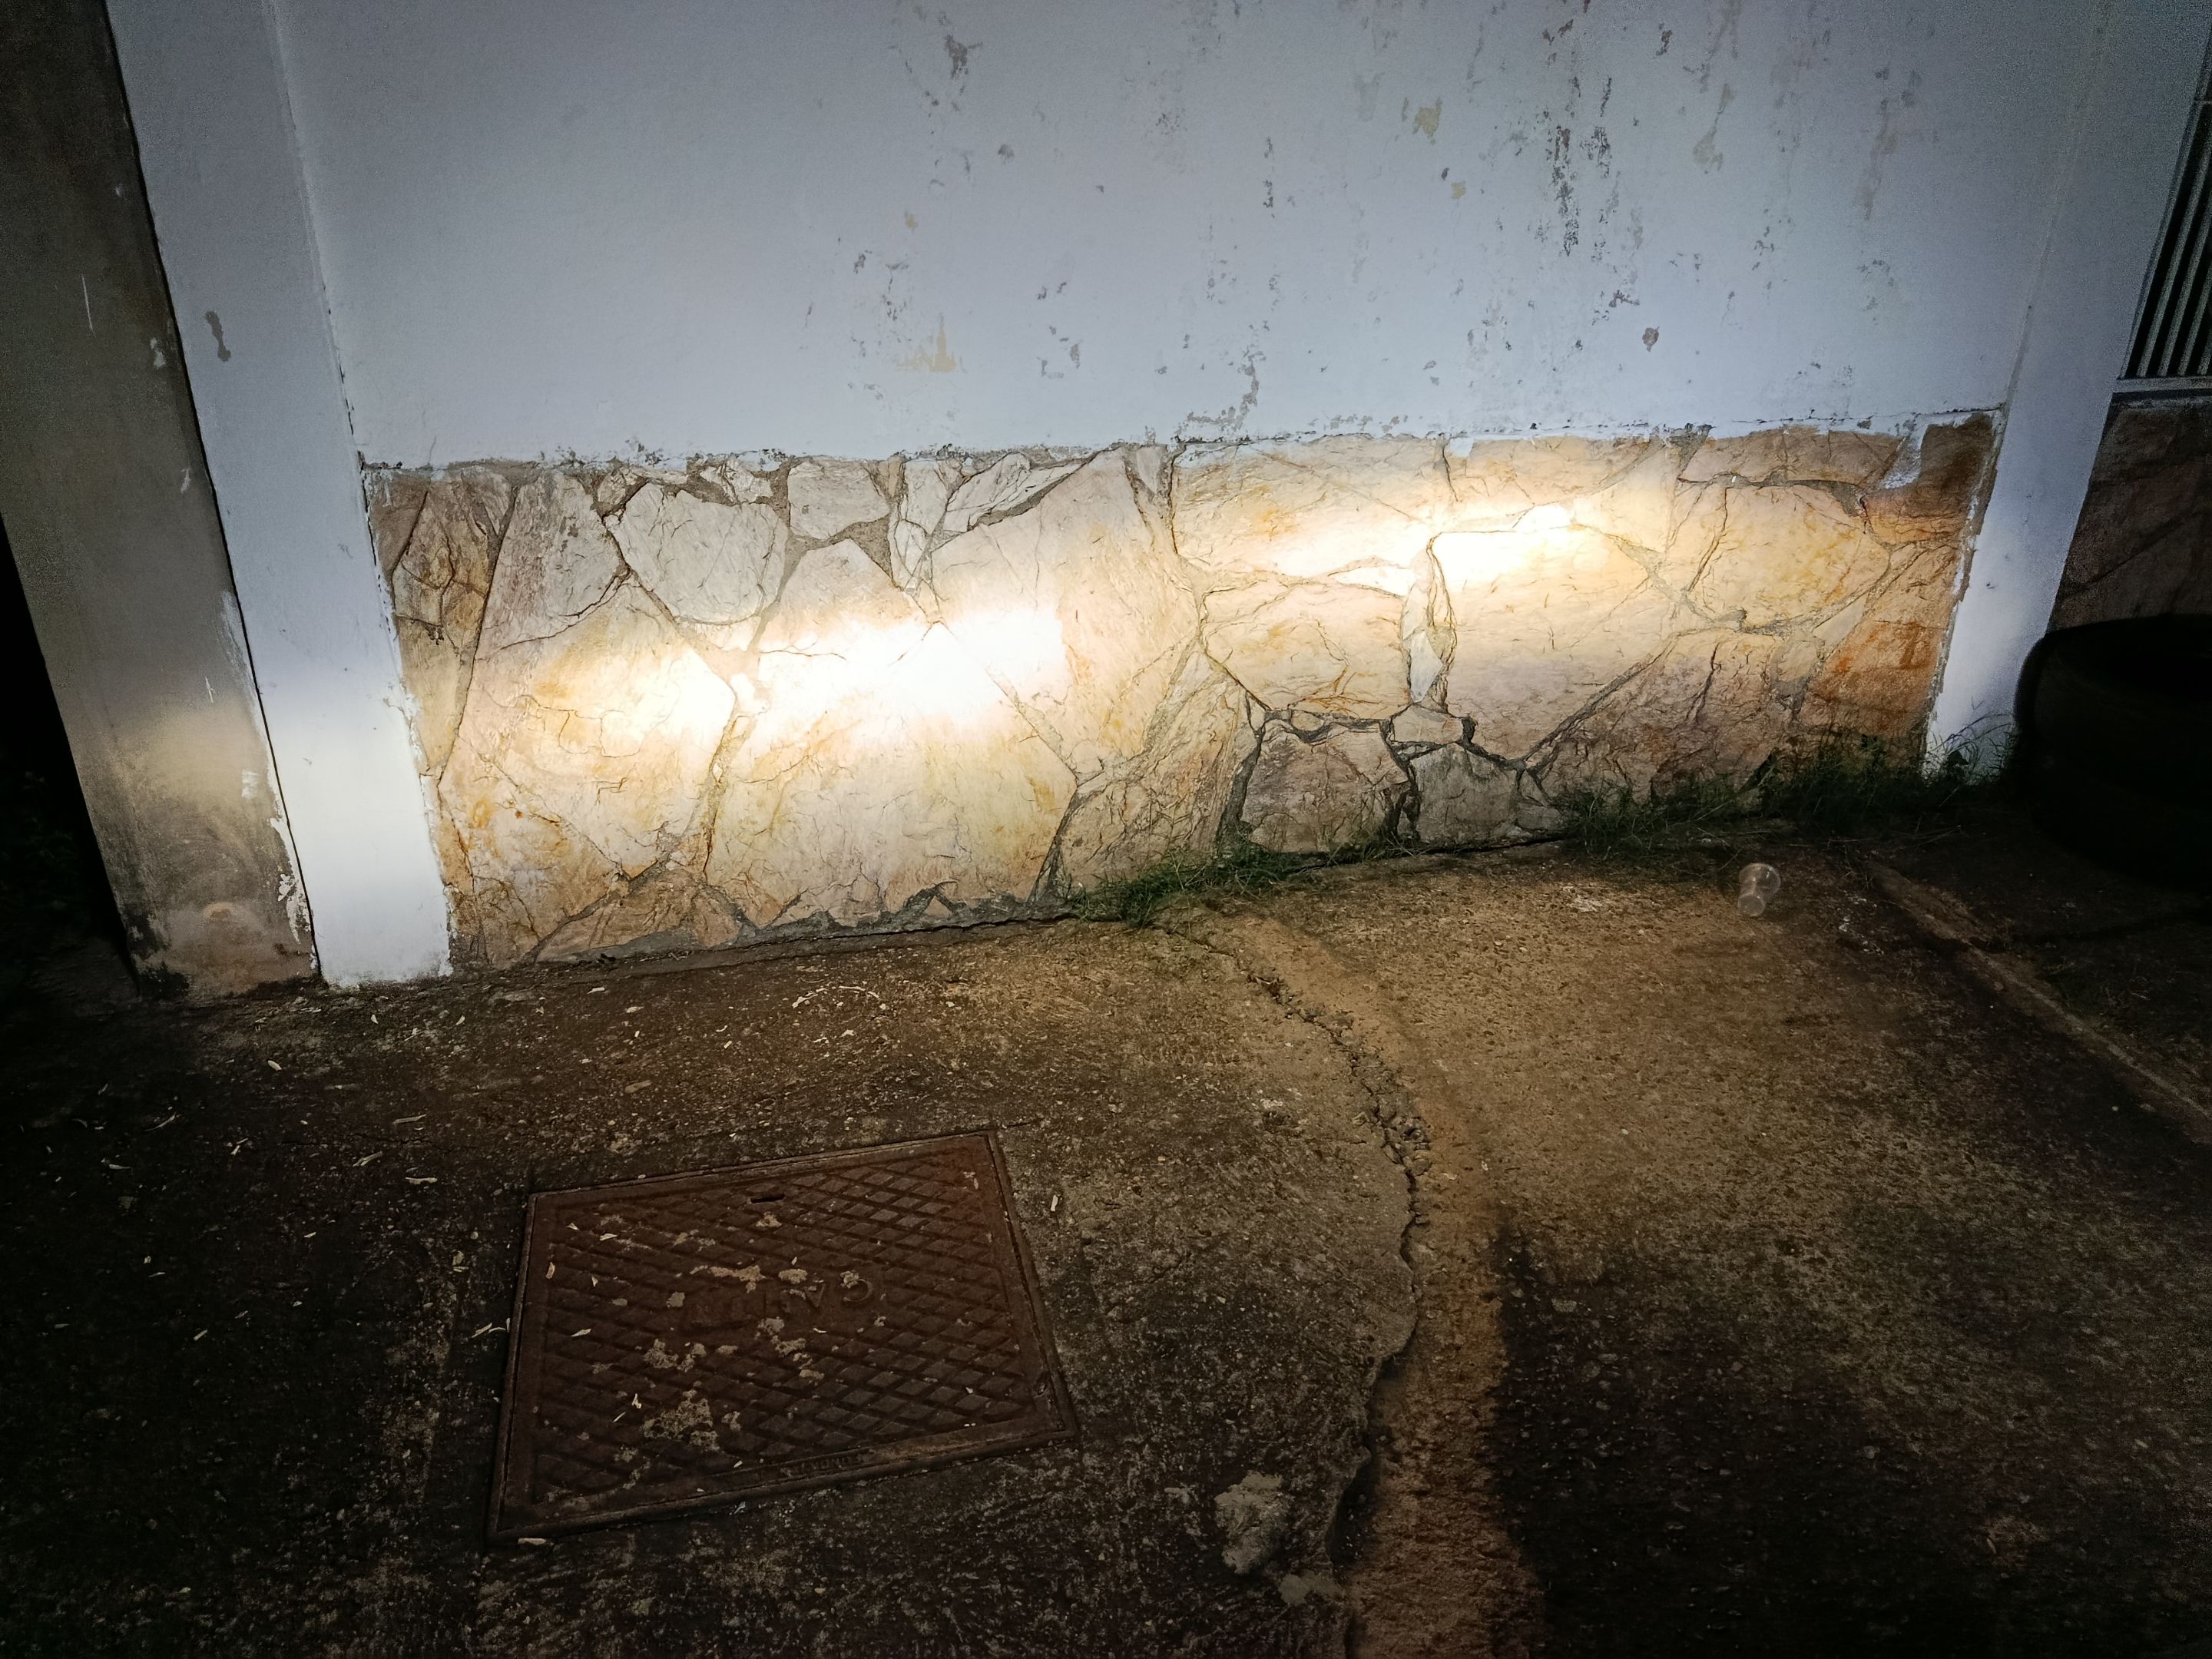
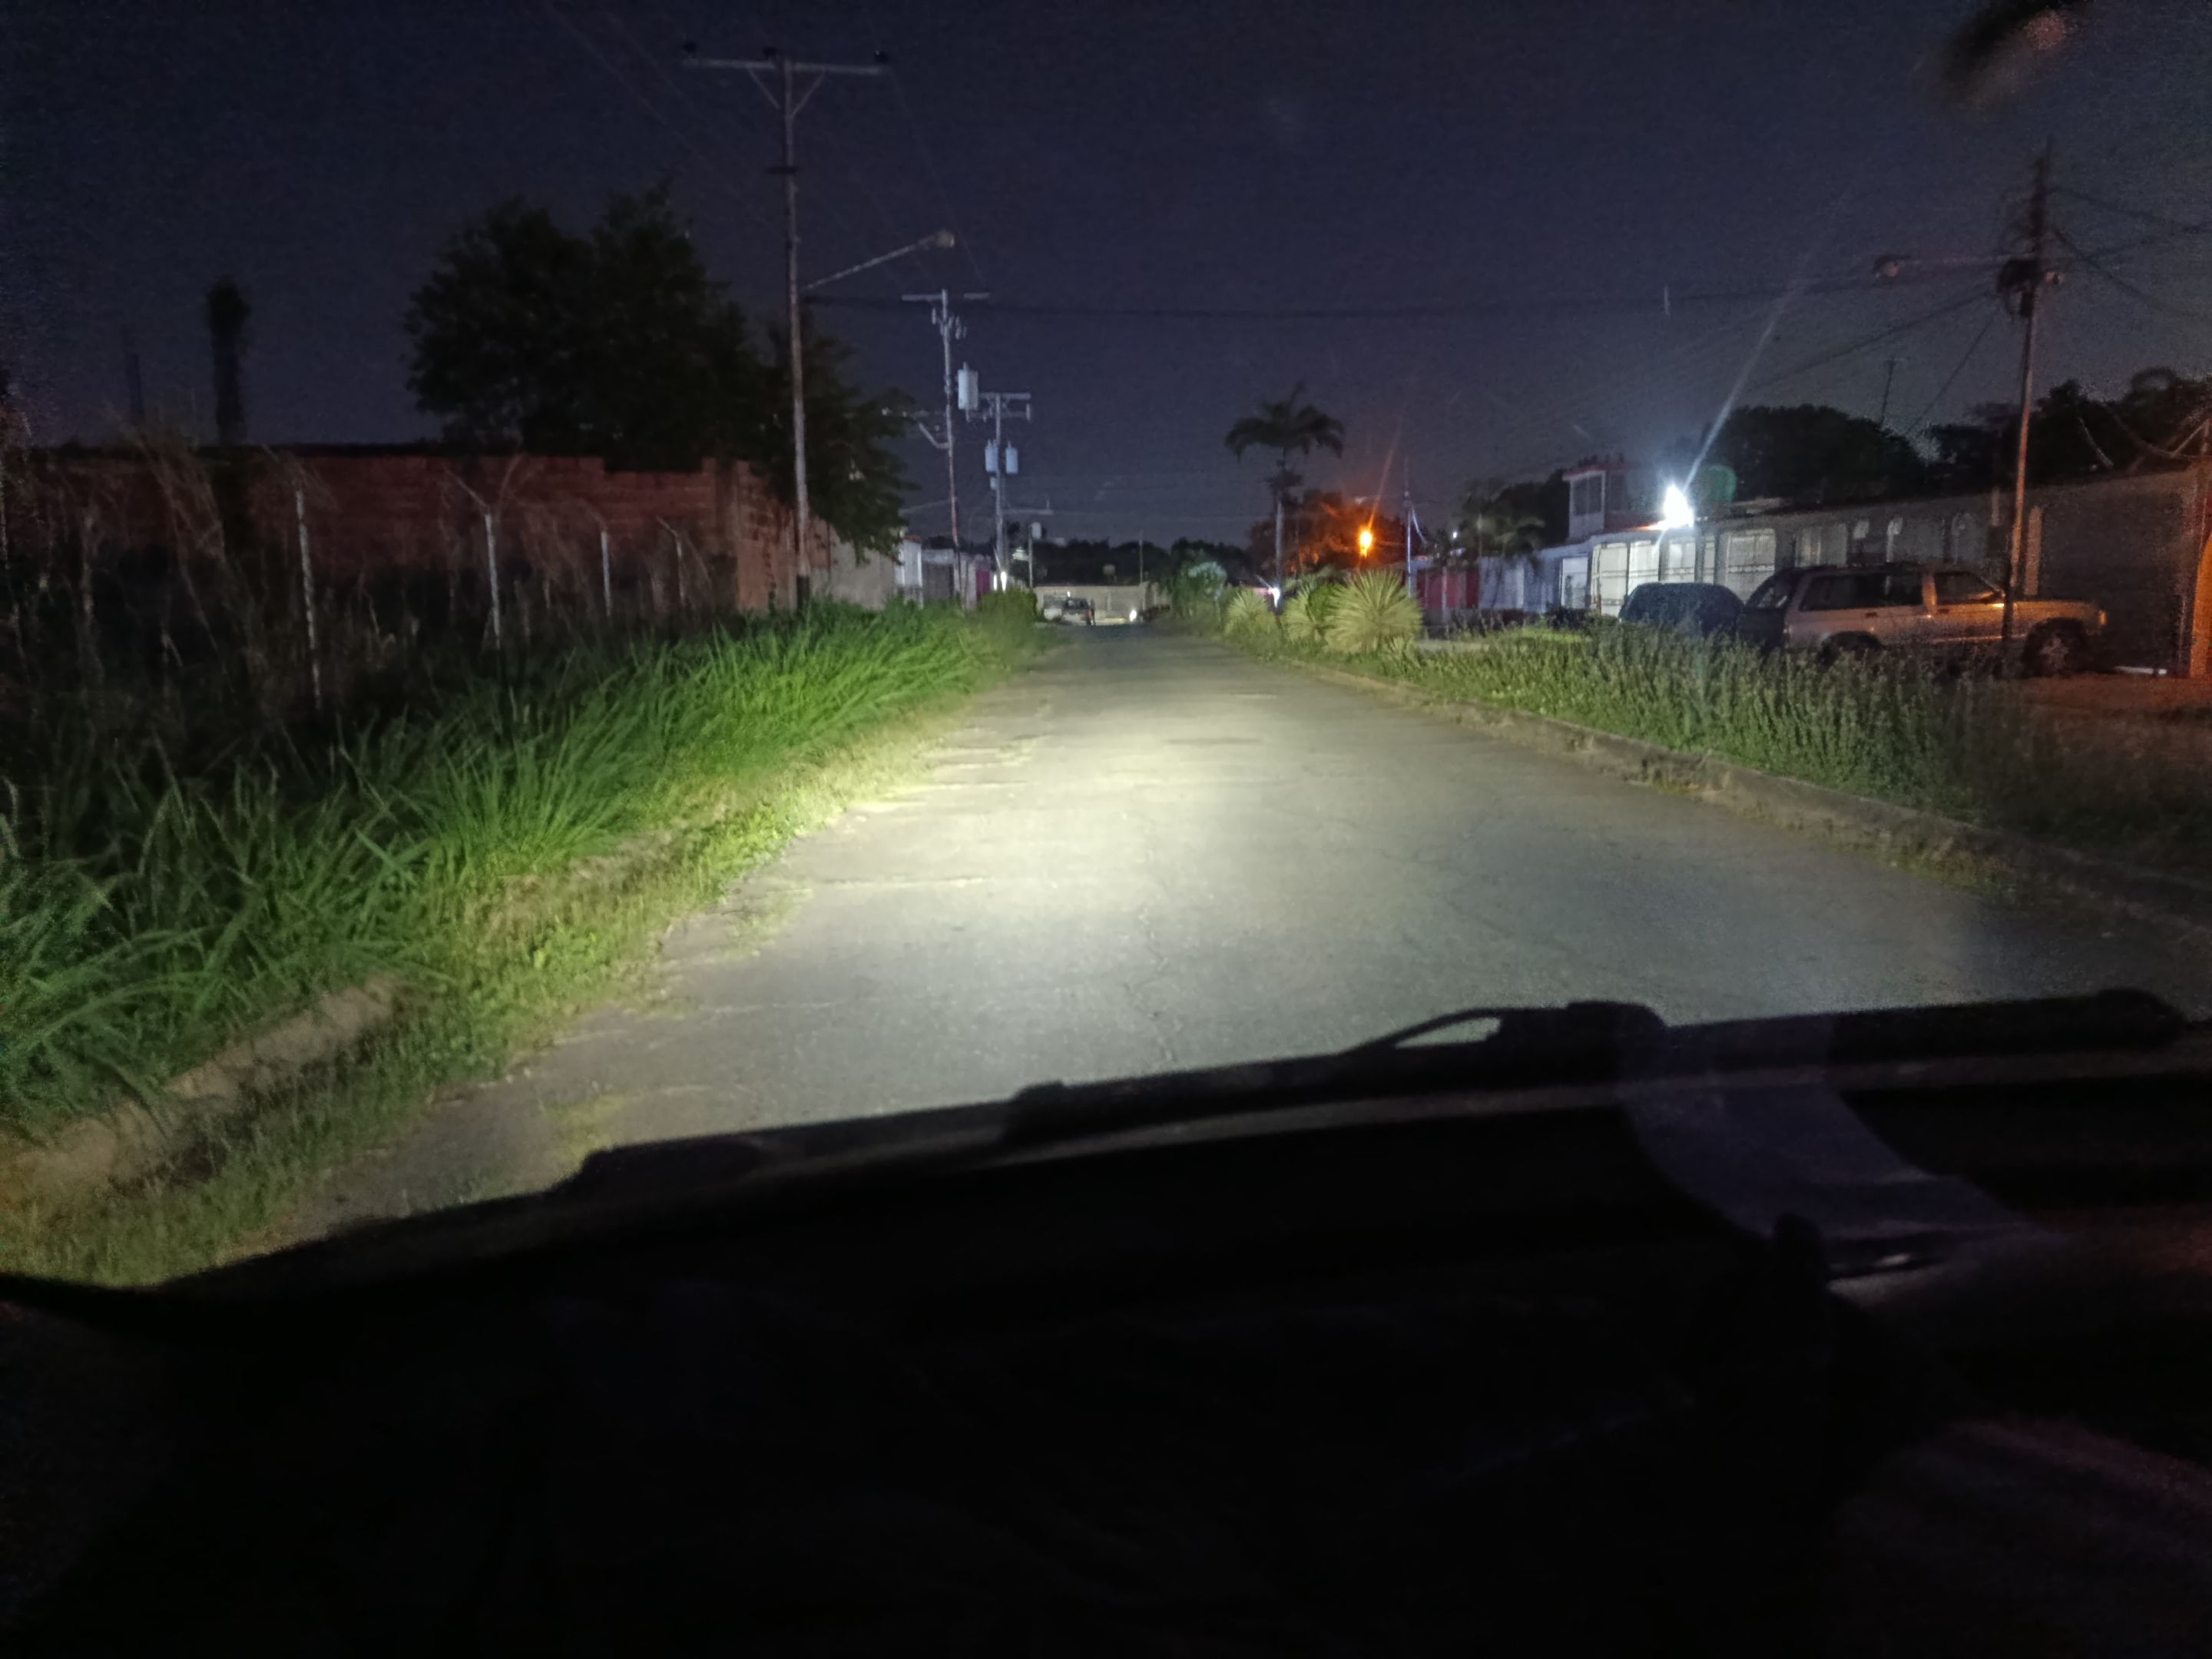
After the adjustment, this was the result. You can see the difference between the halogens and the LEDs since I left the former installed in the high beam location until I have the availability to buy others and install them as high beams.
Tras la calibración este fue el resultado, pueden ver la diferencia entre los halógenos y los led ya que los primeros los dejé instalados en el lugar de las luces altas, hasta que tenga disponibilidad nuevamente para comprar otros e instalarlos como luces altas.
Photos taken by ©danielcarrerag copyright reserved. These images may not be reproduced, distributed or used without the express permission of the author.