Hello everyone!!!
I hope you are well or are trying to be well. I'm a little better, but the stress is giving my stomach a lot of trouble. I will manage it, though. It will come to an end eventually. Today, I want to talk to you about Minecraft because I want to normalise a little bit more, because I really need to.
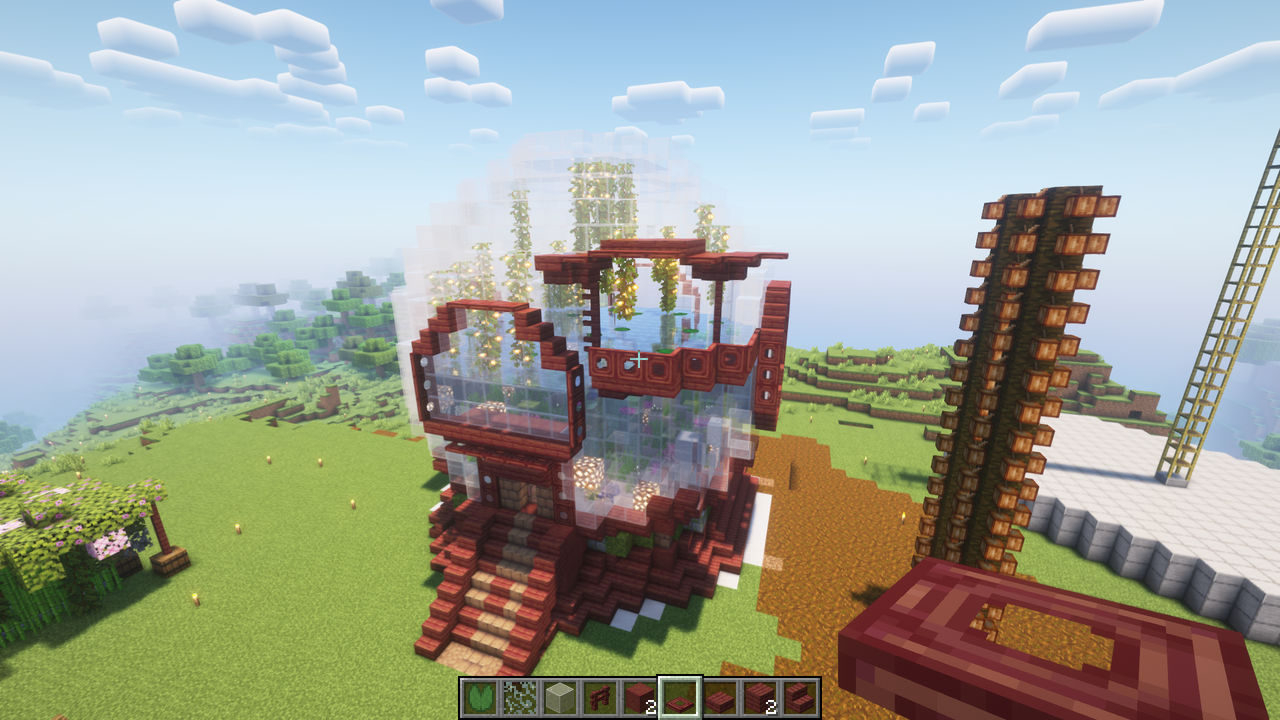
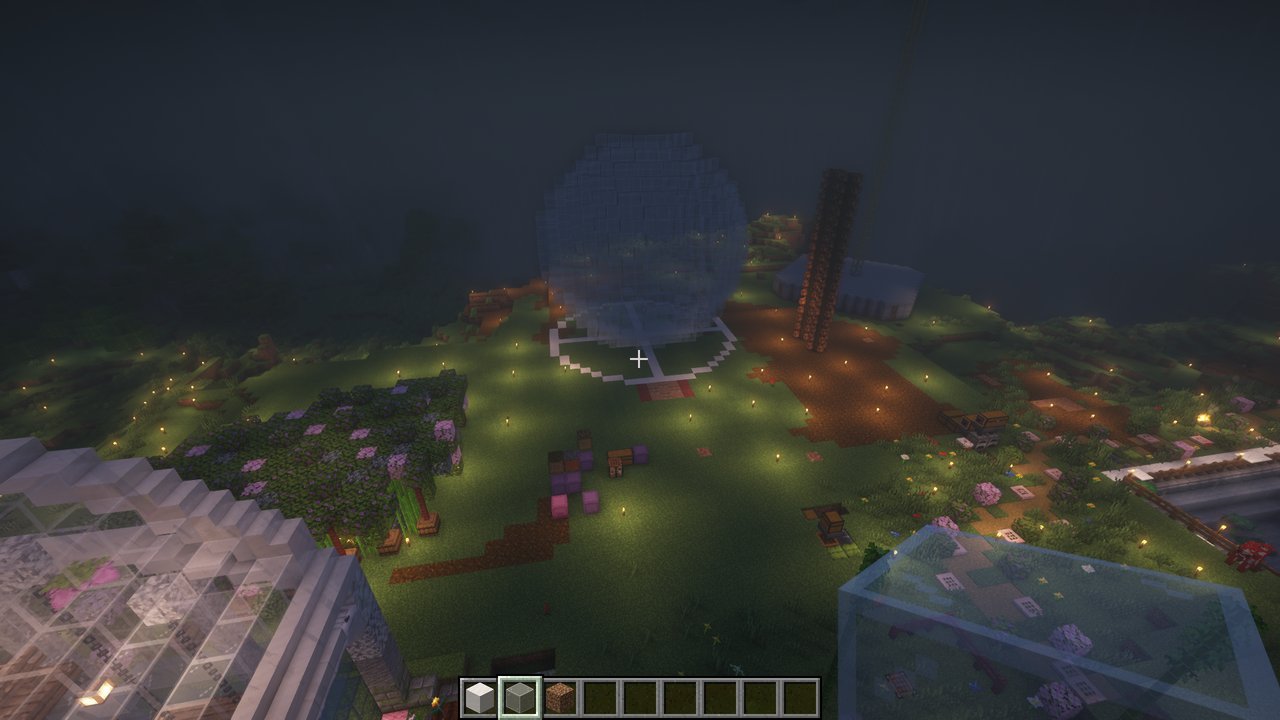
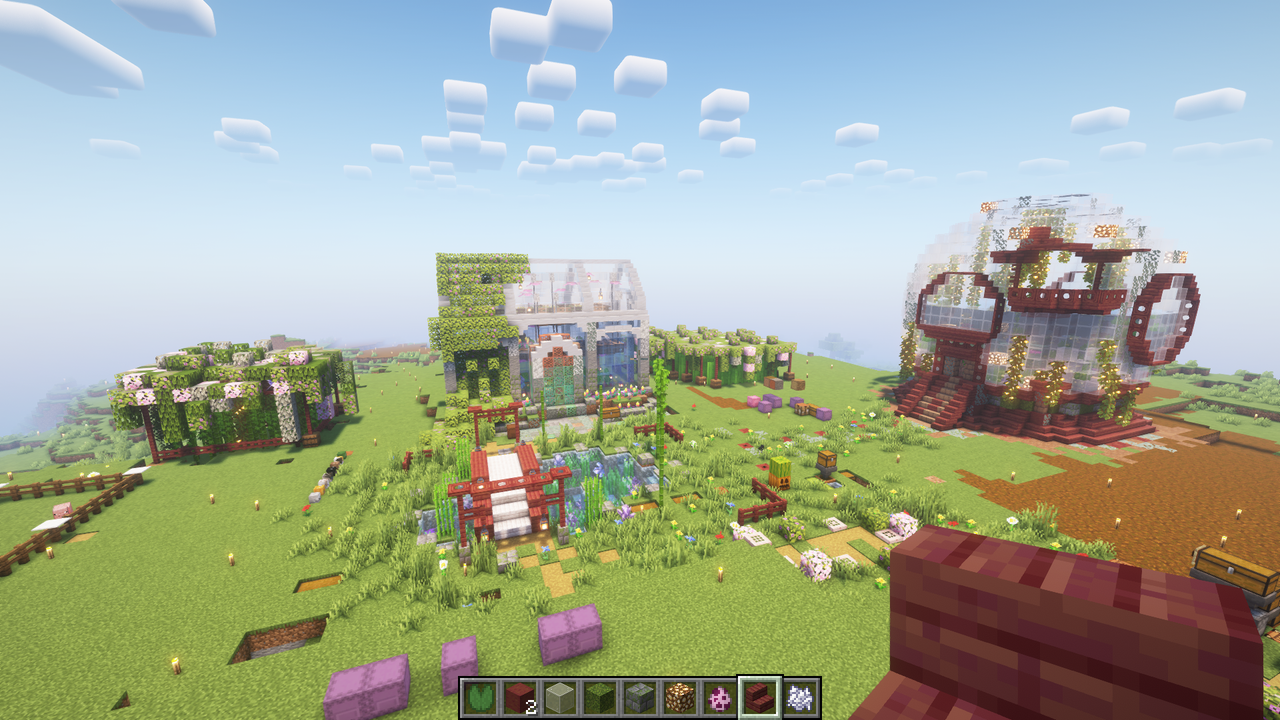
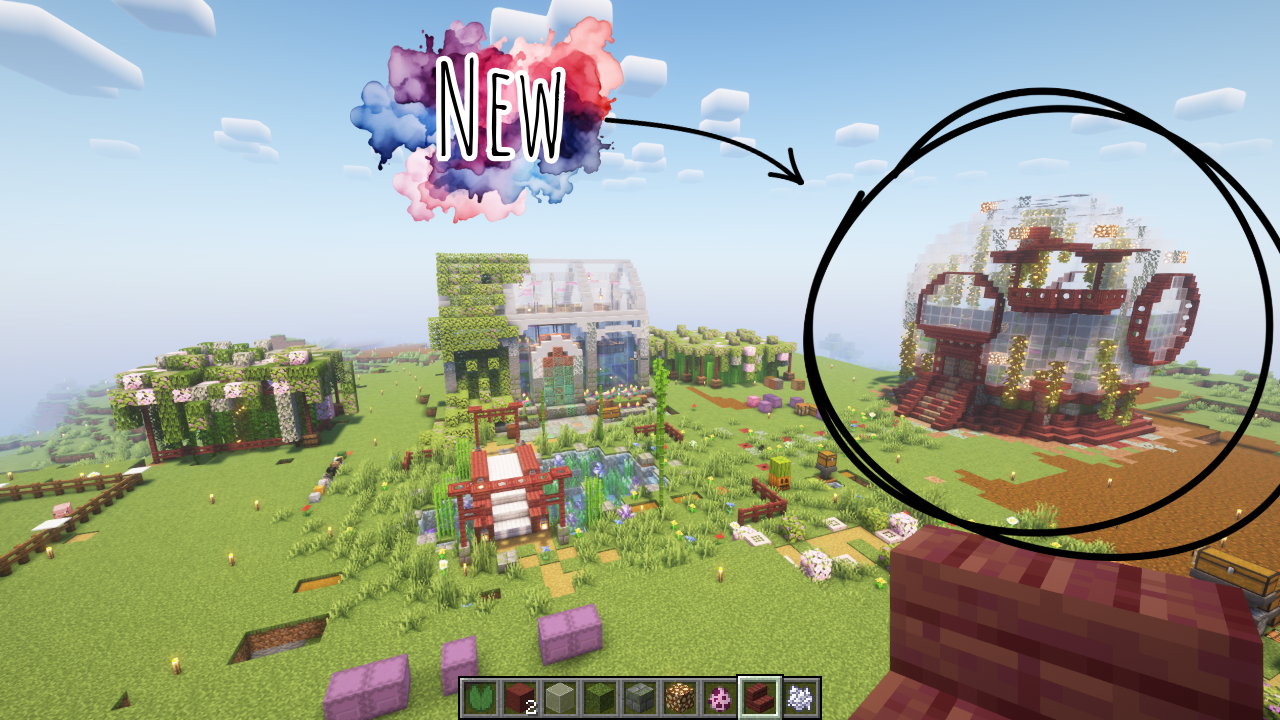
We have a new building. Of course, I have continued with the Beautification Project. Unfortunately, I have not been able to continue for the last few days, but it is written in the back of my mind.
Axolotl Sphere/Aquarium
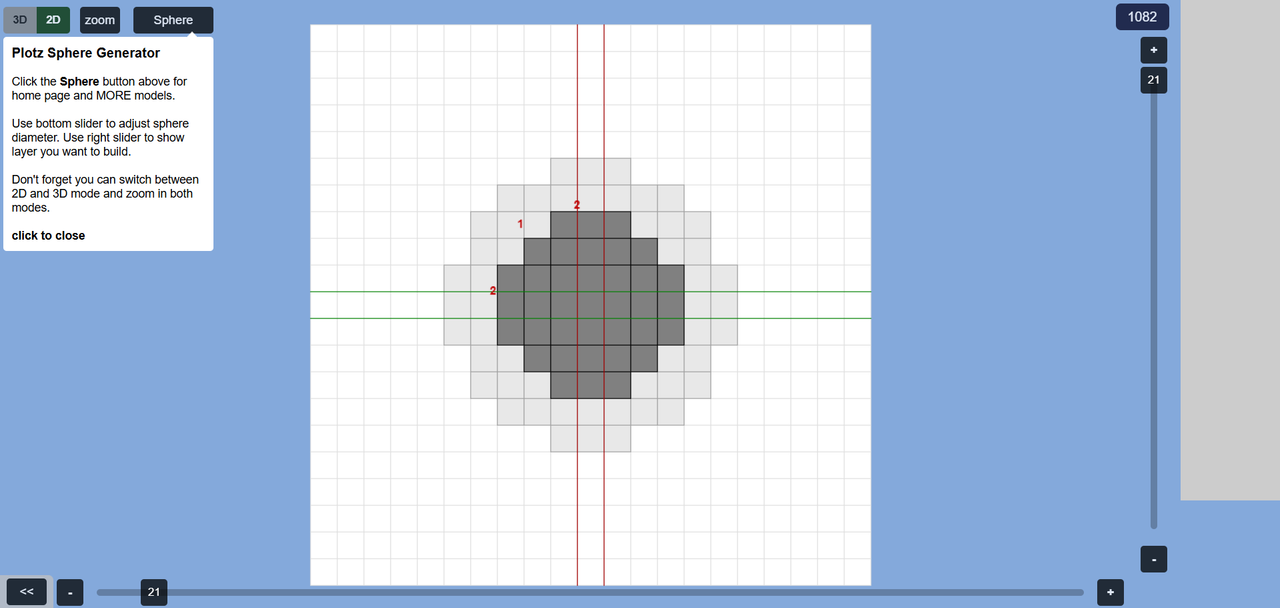
This time I'm here with something that challenged me. The challenging part was the sphere because I had no idea how to make it, but luckily
Plotz came to my aid. This website promises you a lot of things. When I say a lot, I mean in terms of modelling. It is very easy to use and offers you the modelling of a sphere, ellipse and more in 3D, 2D. You just need to know how big you want it.
I found this site thanks to a YouTube video and it was very useful. If you want, I suggest you take a look. It is very useful for this kind of work.
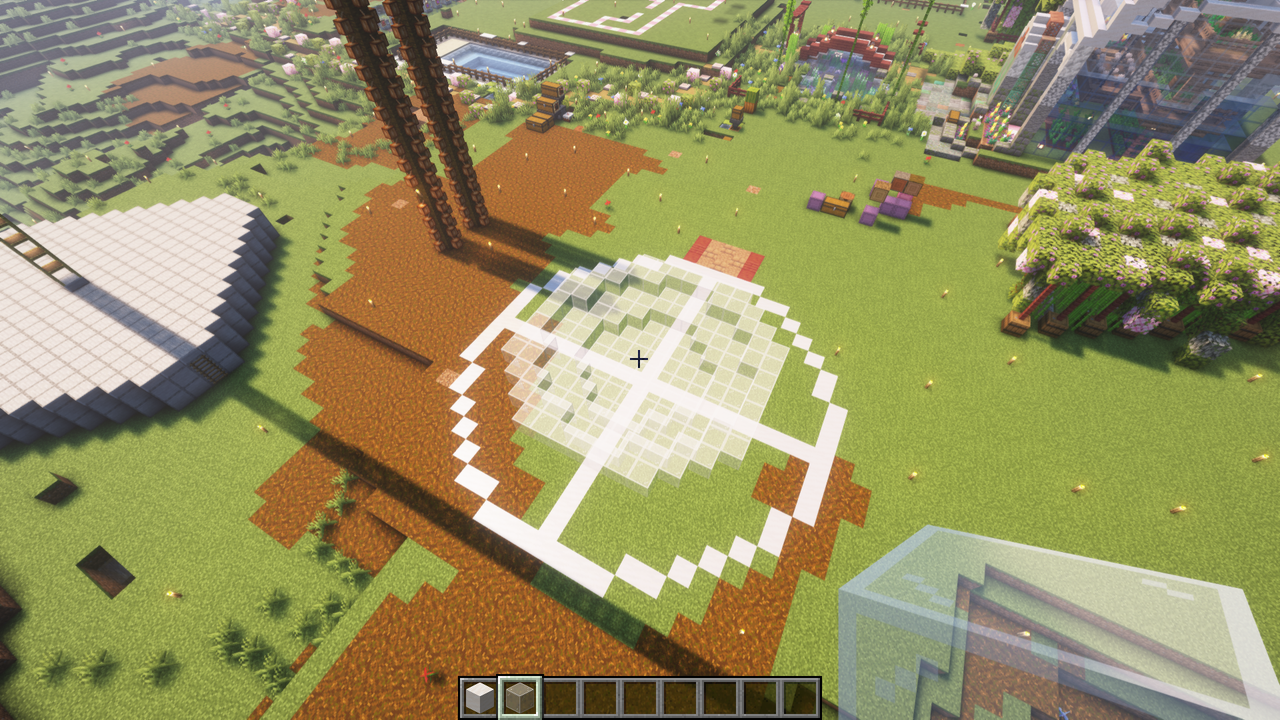
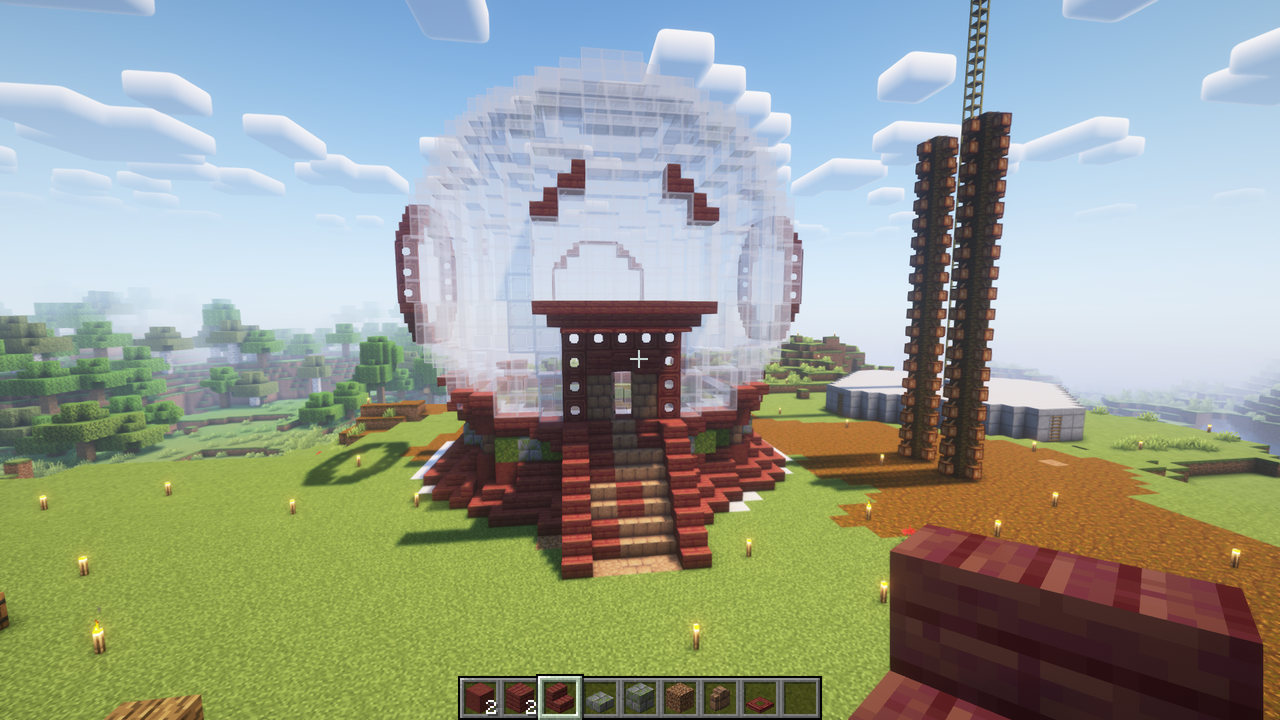
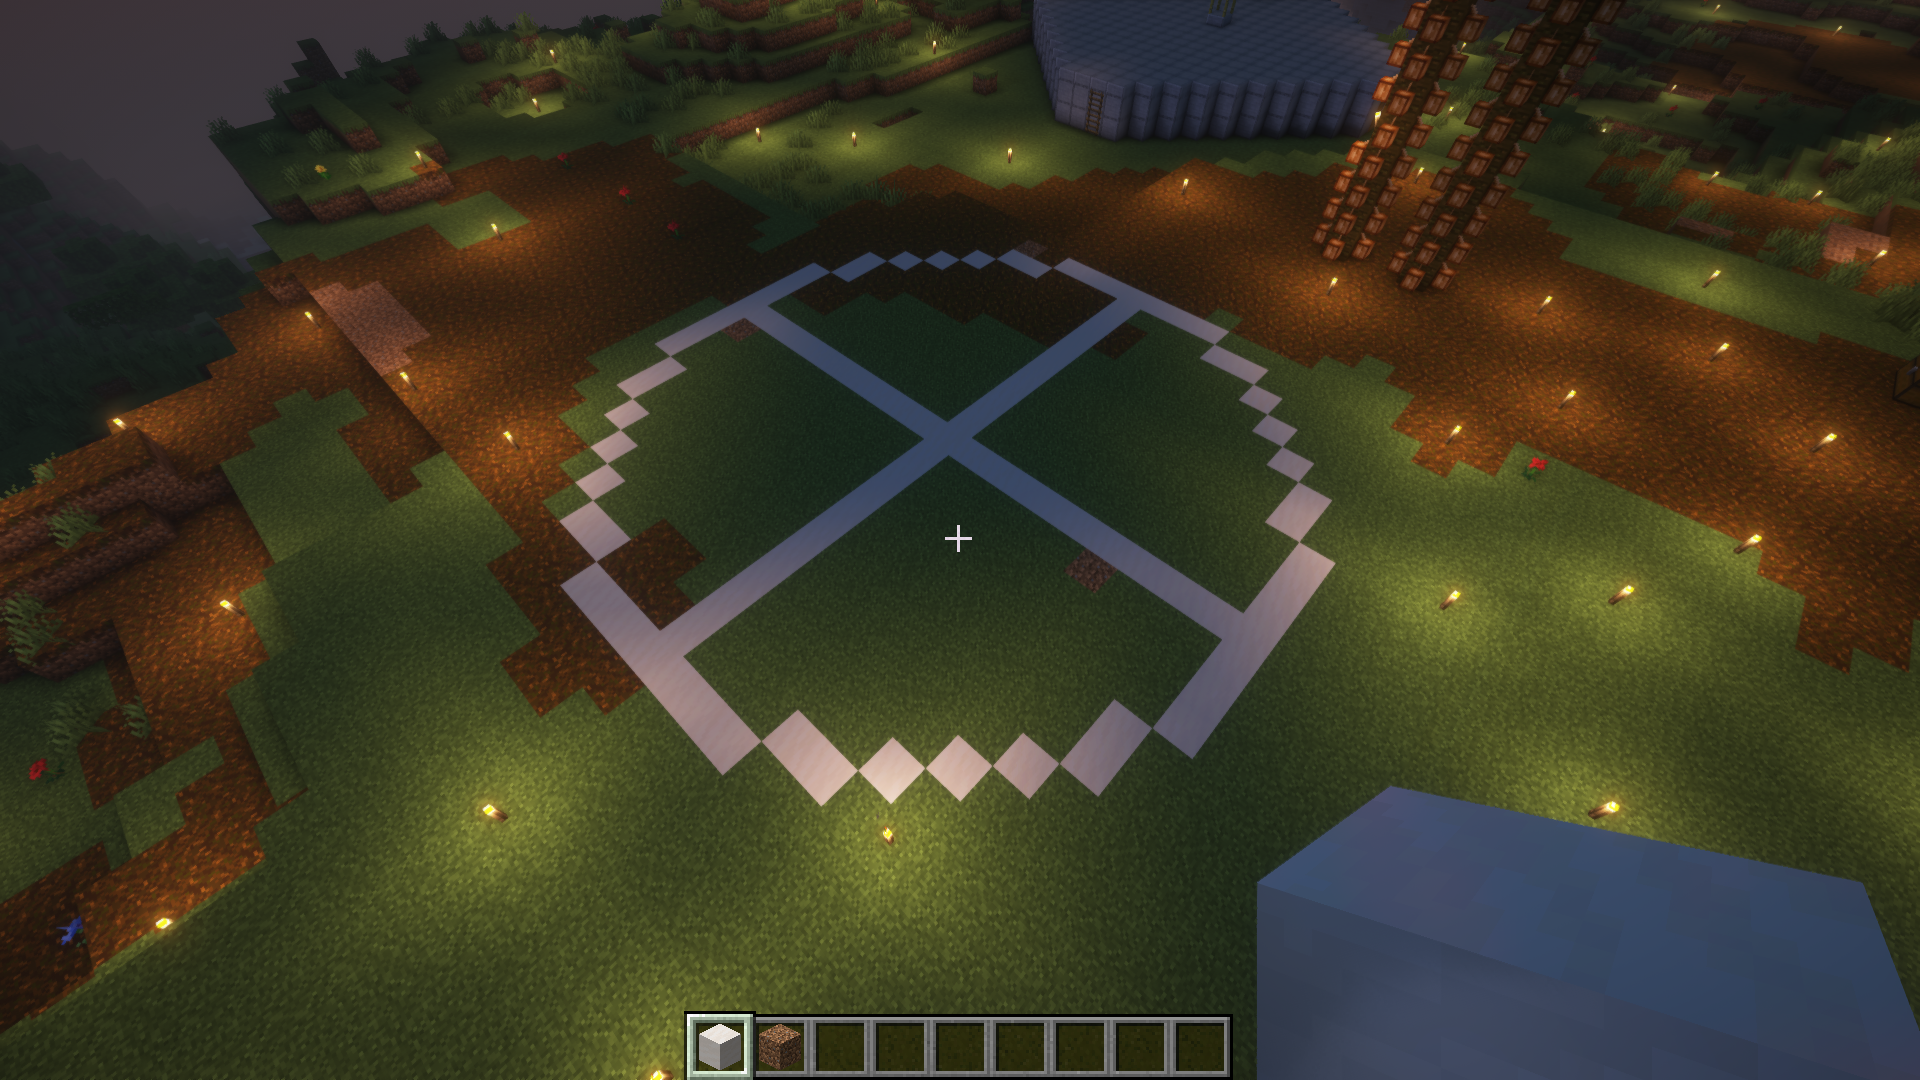
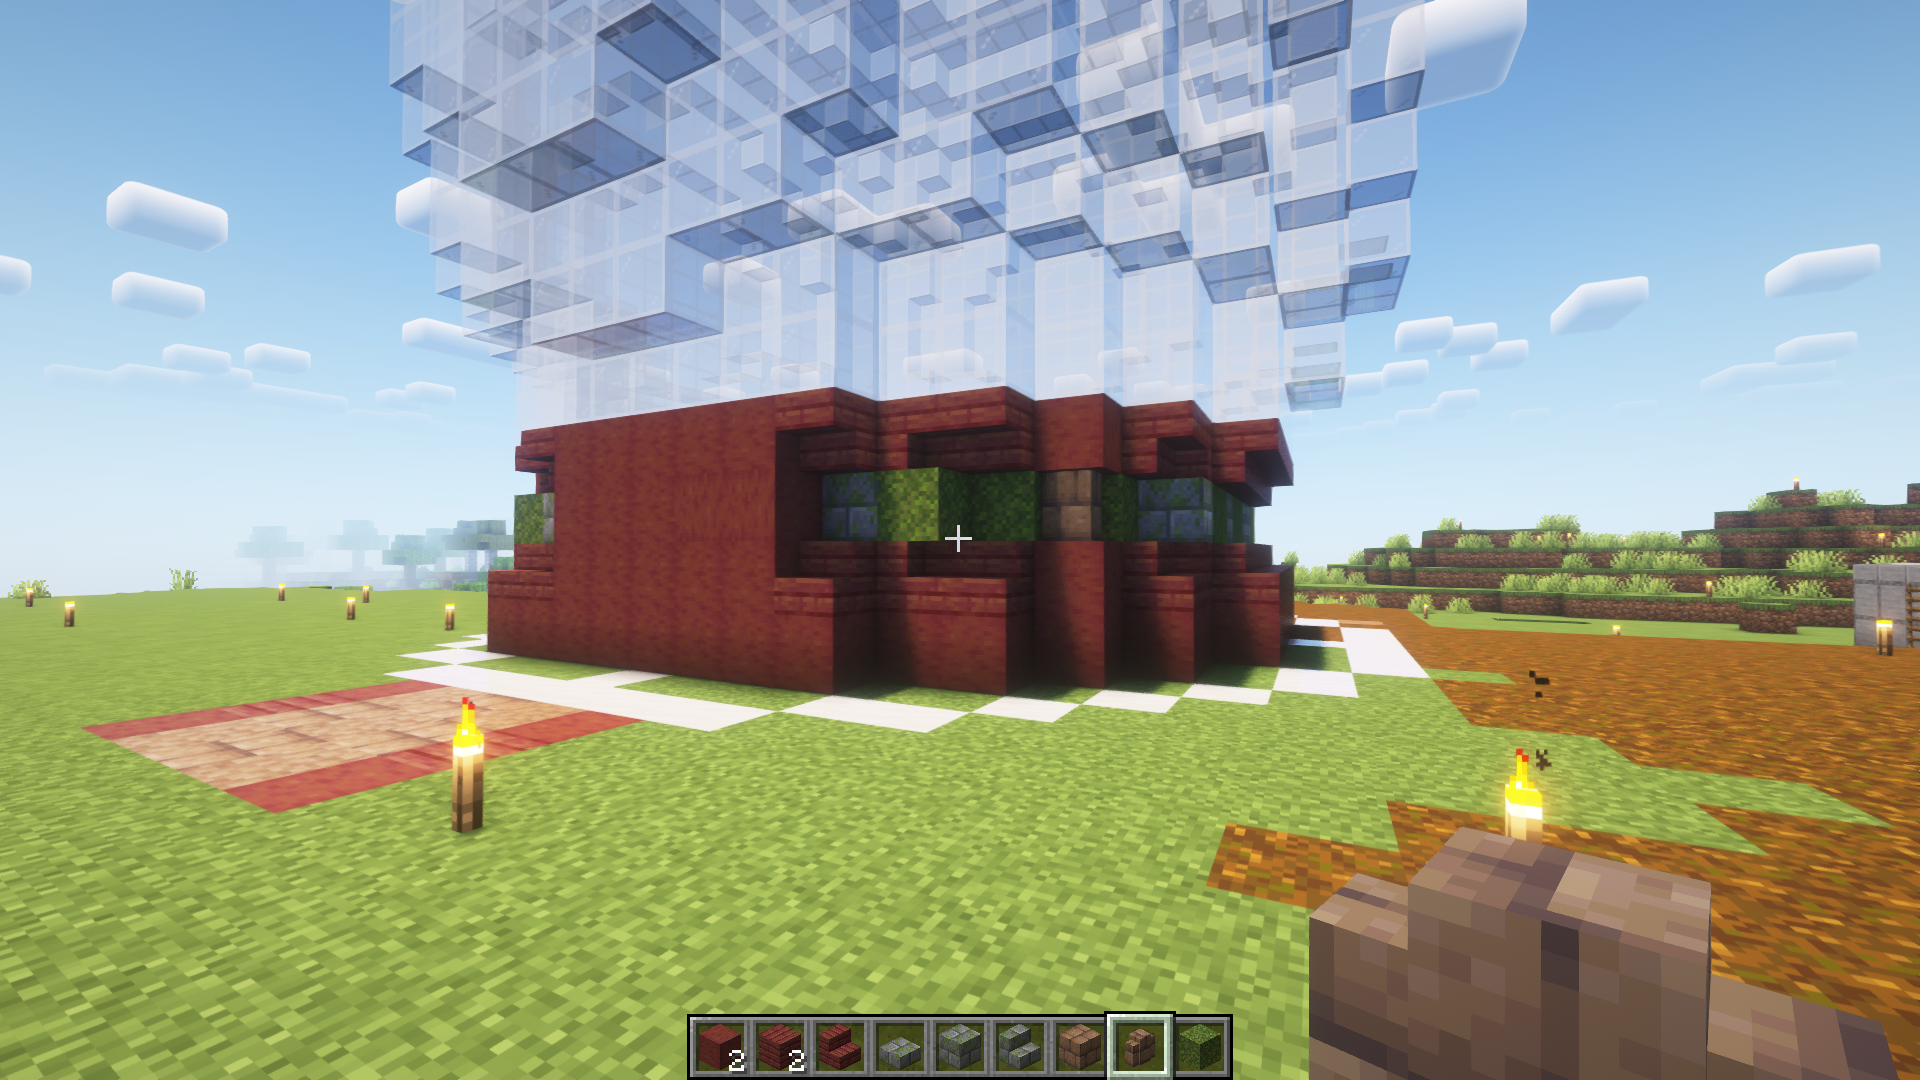
It was difficult for me to plan the size I wanted for my sphere because I didn't want it to stand out too much in the neighbourhood. I didn't want it to be overshadowed by the house I'm going to share with you in my next post. So I decided that the widest part would be 21 blocks. That would be almost as big as the
Green House. It seemed like a good plan, right?
I wish I'd made it smaller. But it's too late.
*[Screenshot Source](https://www.plotz.co.uk/plotz-model.php?model=Sphere)*
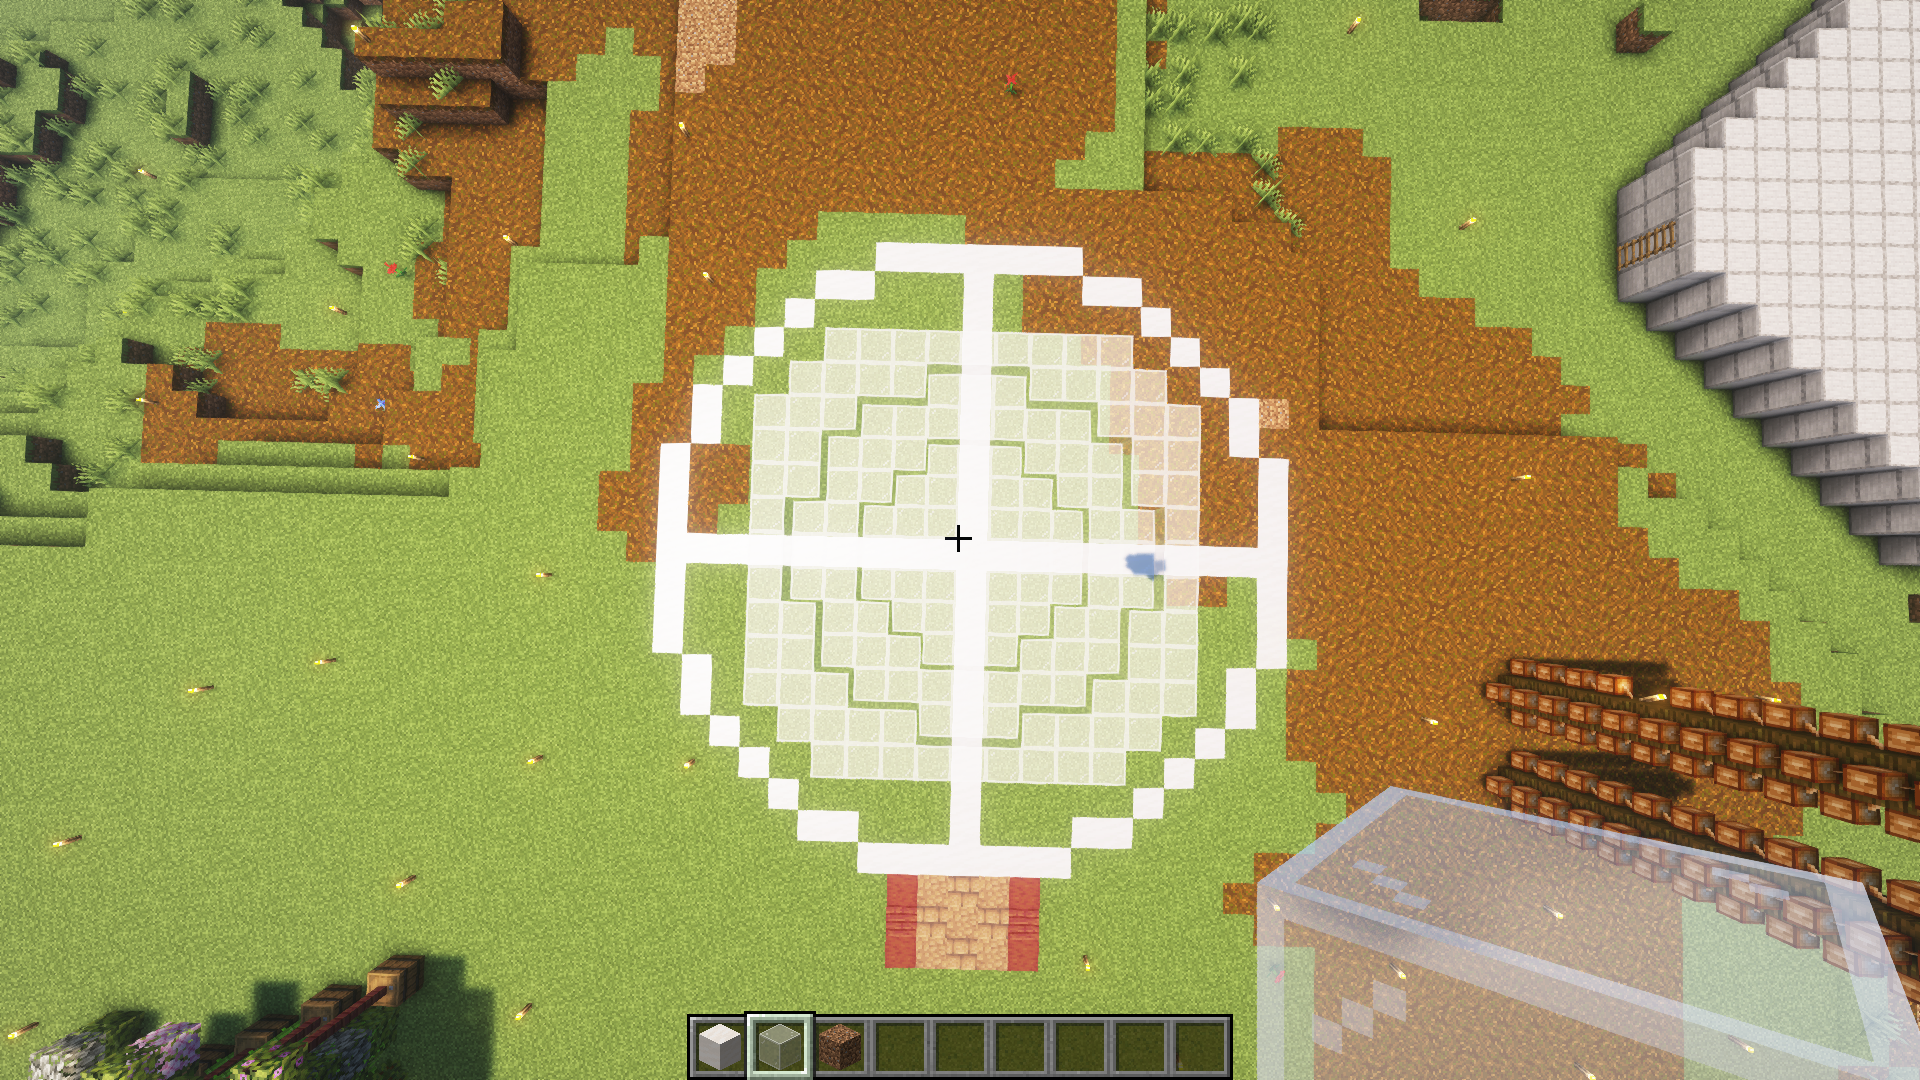
As you can see in the photo above, it easily shows the sphere step by step. With a little attention, it can be completed without any problems and accidents. I made a lot of mistakes as Beril again, but I learnt and had fun.
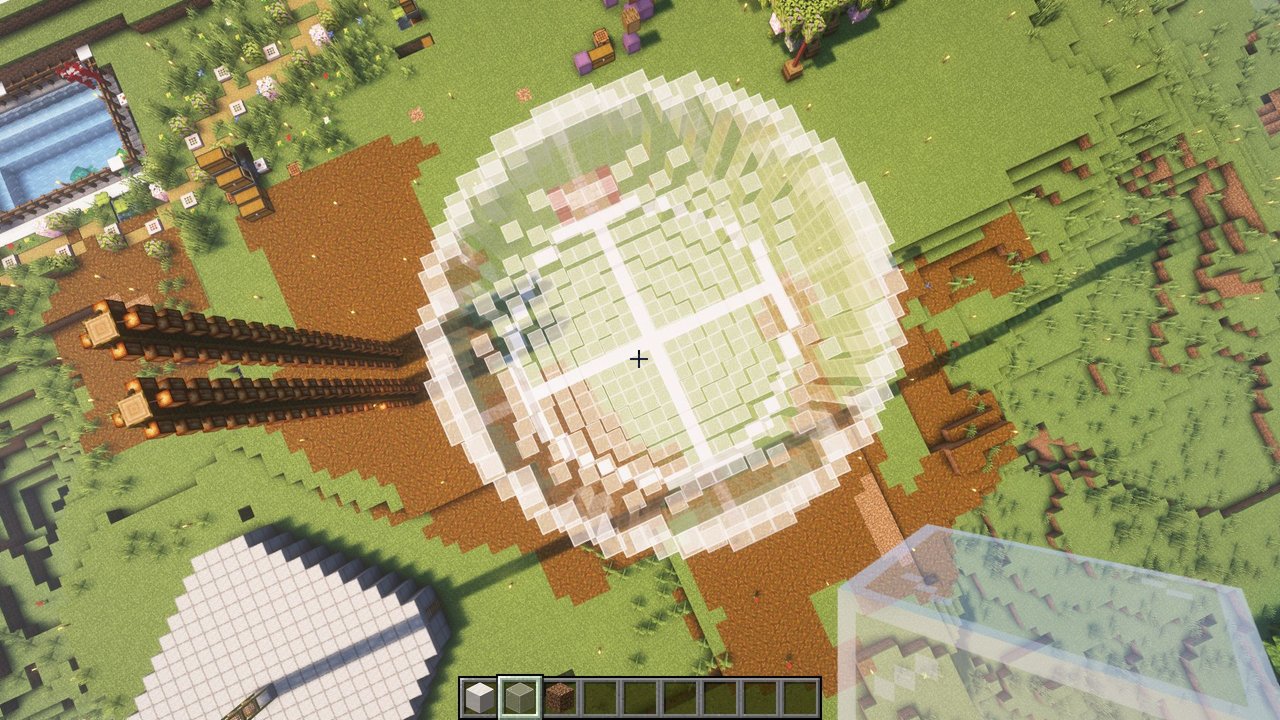
I didn't want to deal with the amount of resources it would take to do something like this in survival mode, even though I've done a lot of work in creative mode... I'm sure you can see what I'm trying to say with the finished version you see above. I tried to take as many photos as I could because I didn't want to miss the areas in between because even I had a hard time understanding it myself. Anyway, if you are curious, you can examine it in more detail on the website I mentioned.
It took about 1,5-2 hours just to make the sphere, including making the decision. You know, I don't like to decide on things. Especially in this kind of things. I also like to change my decisions. The important thing is beauty after all.
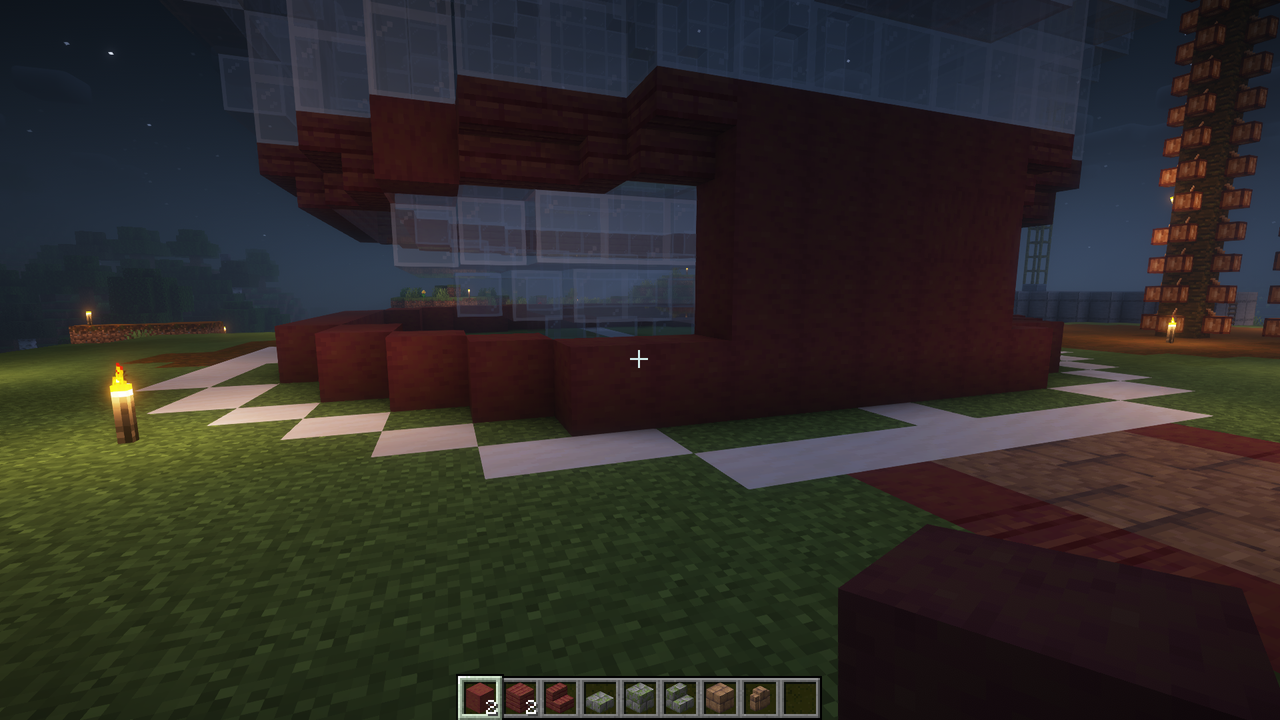
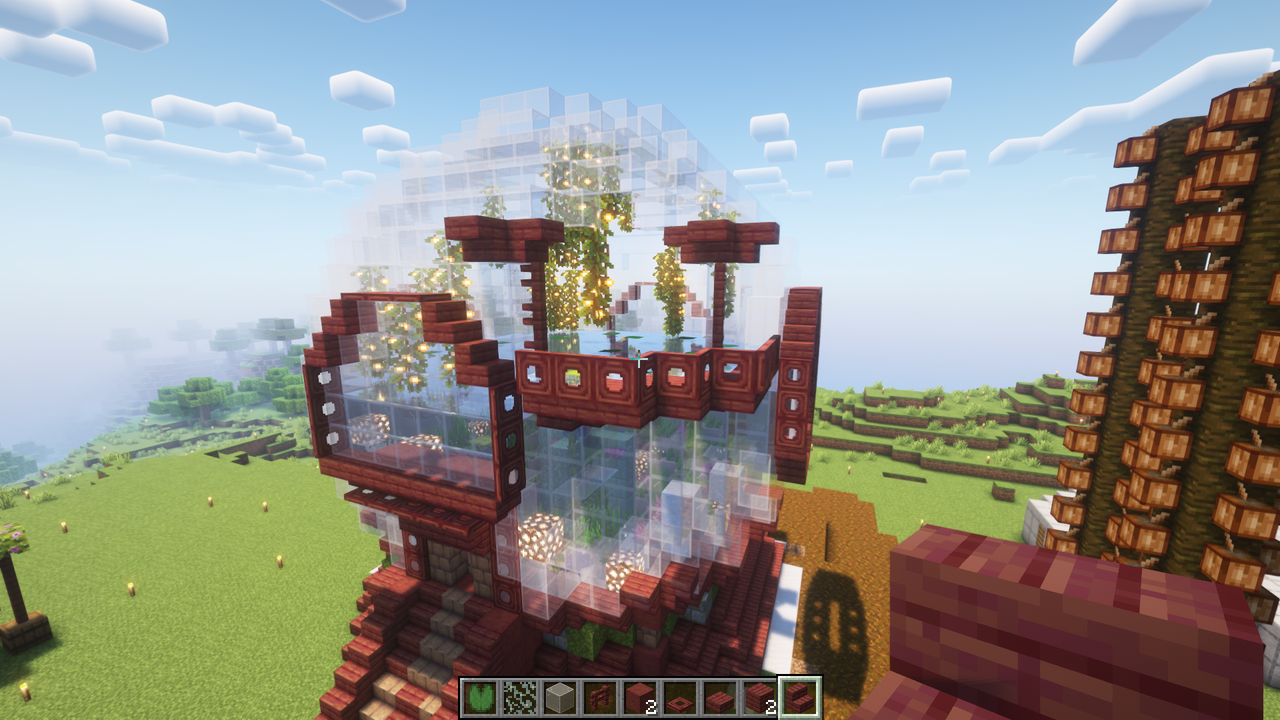
When it was finally finished, it was like I gave a ‘Finished’ pose 😂 After this part, I started to decorate the exterior. I used Mangrove again for this. What I had in mind was still sticking to the white and dark red theme. Actually, let's say not exactly white but close shades.
My aim was to make this sphere look as if it had already been here for as long as possible. I had to create a strong root for this, right? I tried to create a connection point from top to bottom with the stairs. Sometimes I used stripped wood where the stairs did not connect.
In the space in between, I used moss and mossed stone brick blocks to avoid making everything red and make it look a bit old. Of course, in the meantime, I placed the road I had in mind there. I used mud brick blocks, packed mud and planks again using mangrove. I also added mud brick walls where I thought there were foundation columns.
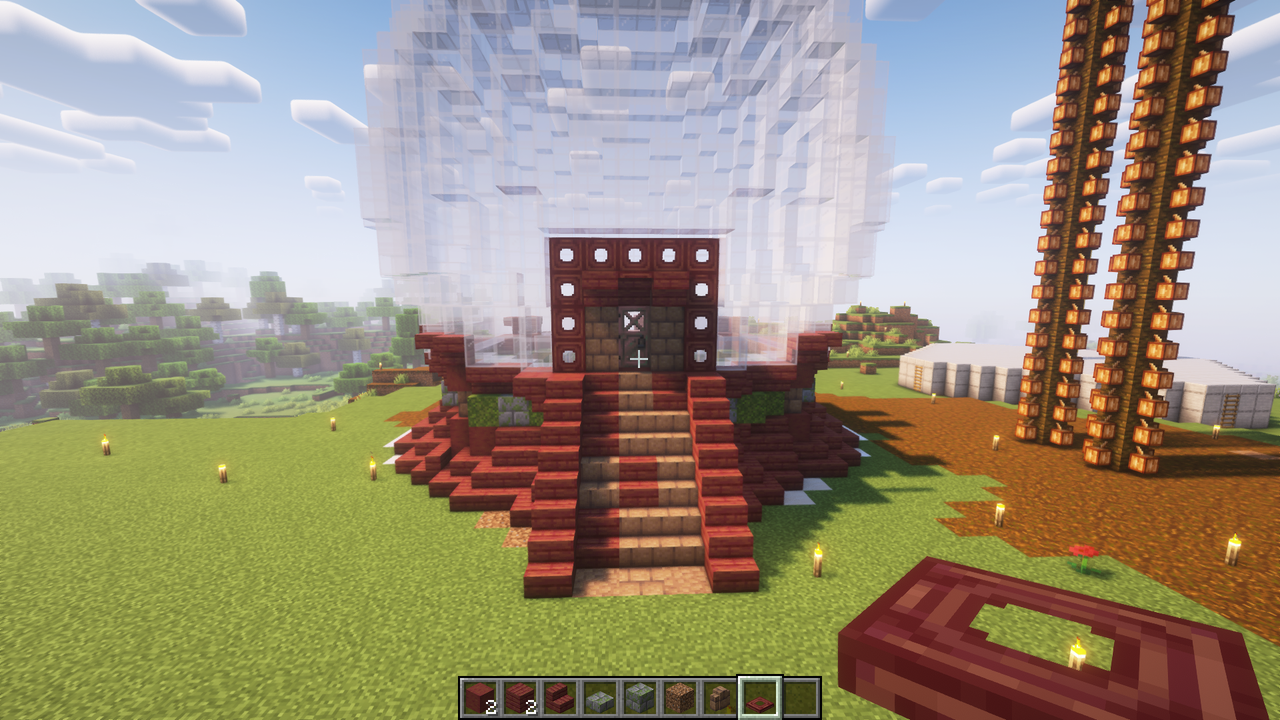
I want to cut this part a bit short because I also want to talk about interior decoration in this blog. Again with the help of Mud bricks and Mangrove, I created a staircase. I thought this height was enough for the entrance and anything lower would look ugly and disproportionate.
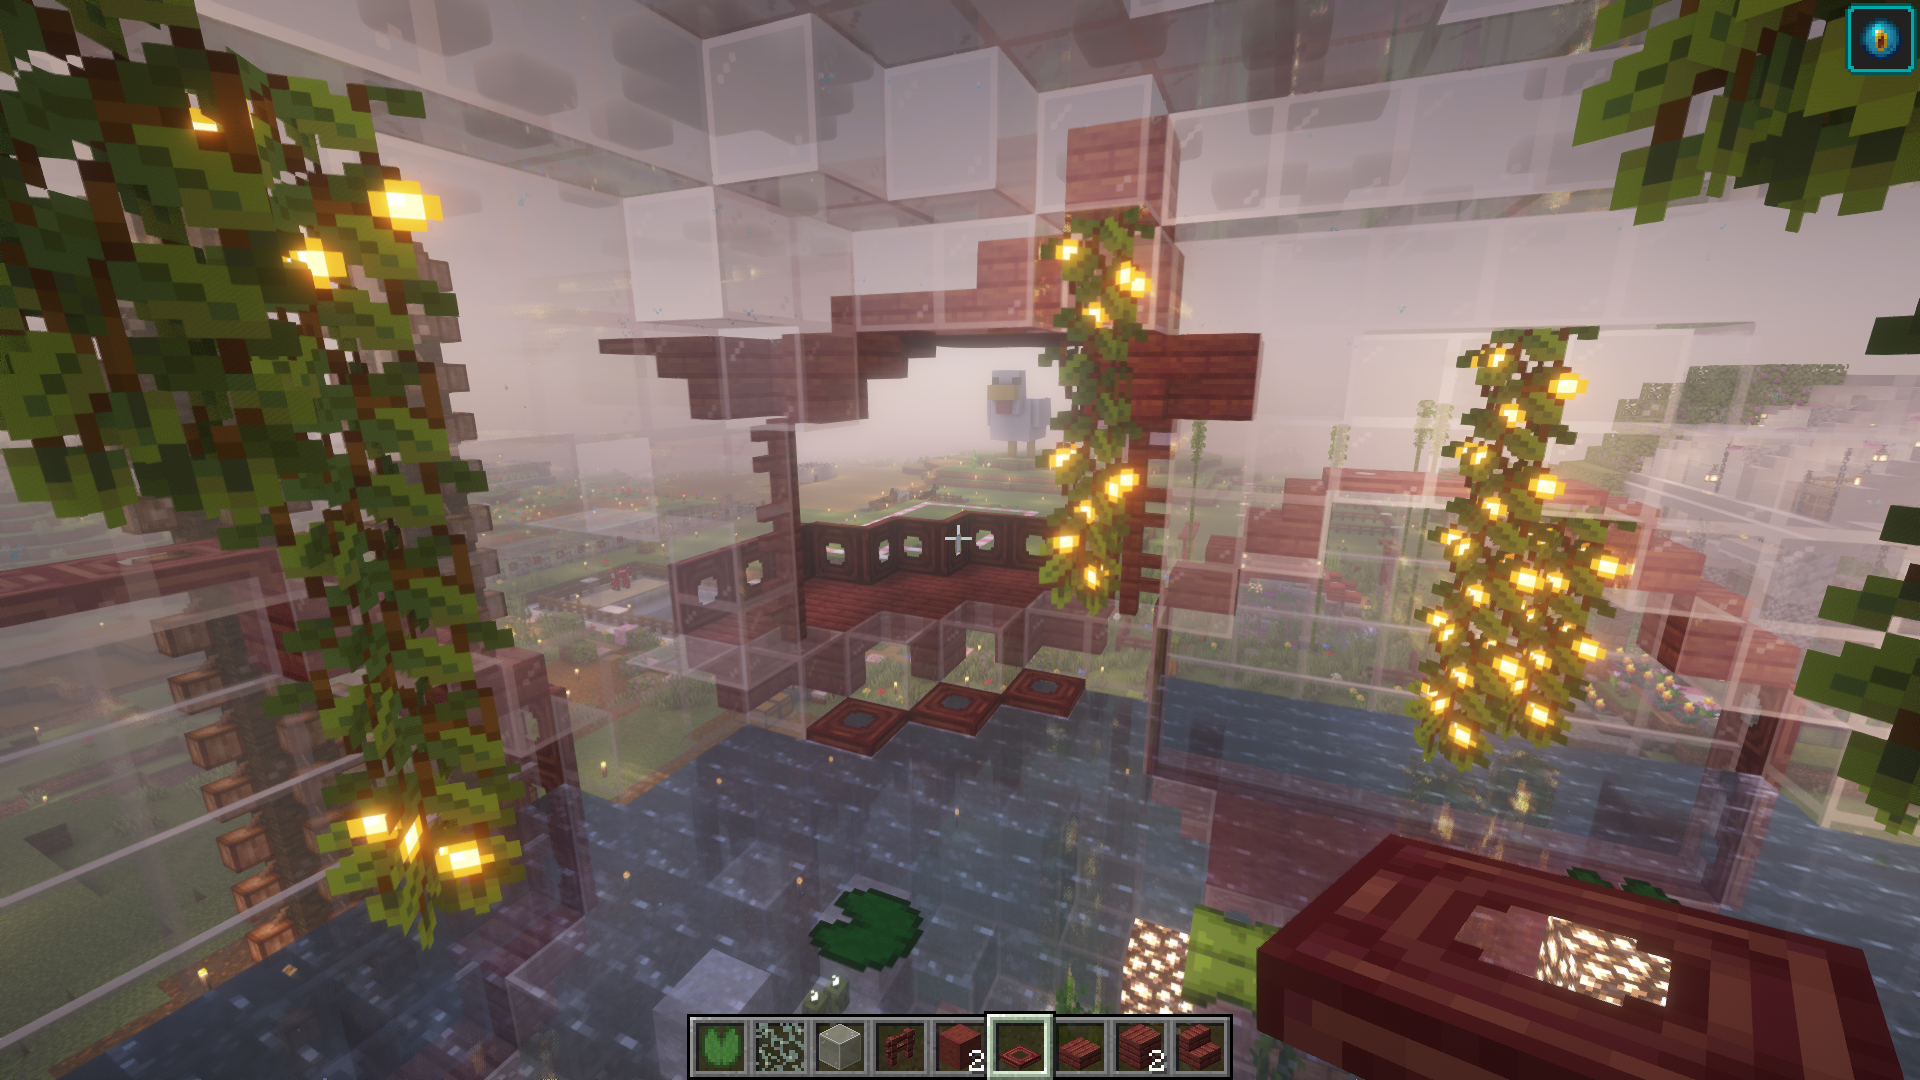
I surrounded the outermost parts of the sphere with stairs and trapdoors to give it a window-like appearance. Then I replaced the glass blocks on the inside of this frame with panes. I think this tiny detail helped to add some texture. I realised this better at the end when it was dark and the light came from inside to outside.
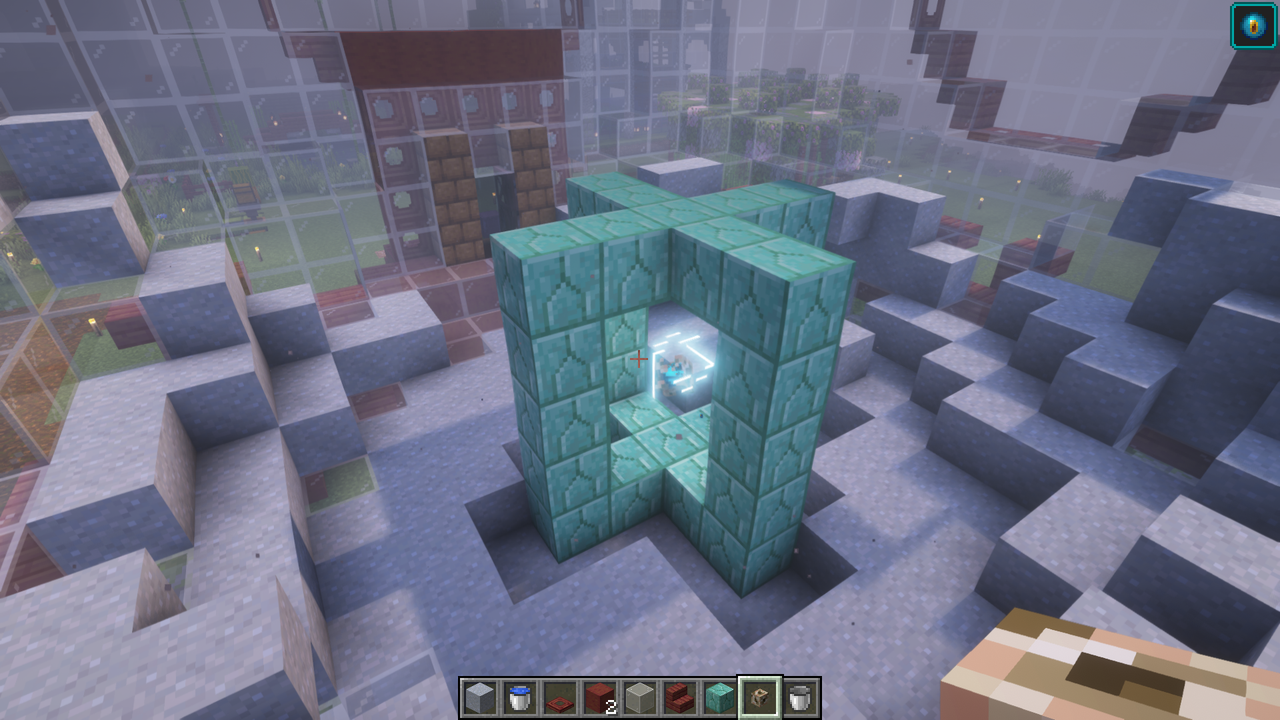
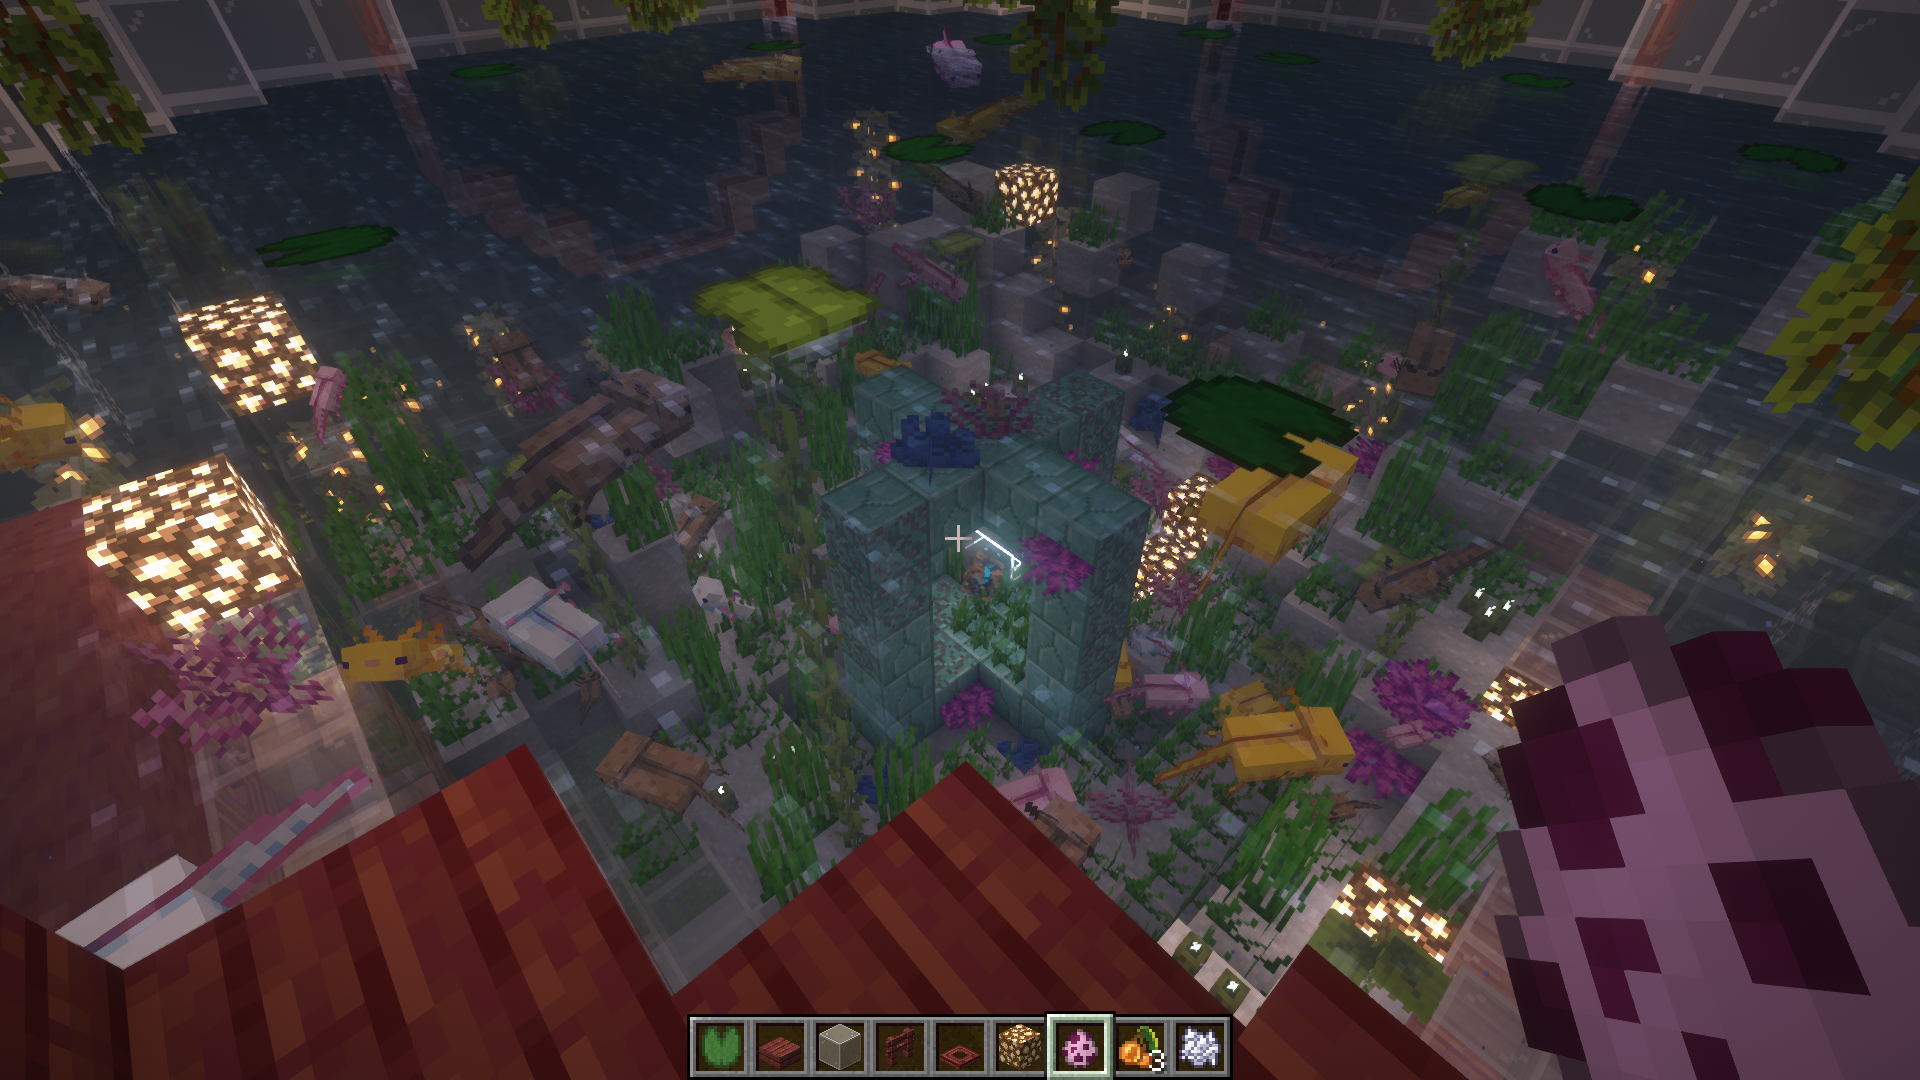
When it came to the interior, I admit that I overdid it a bit. Conduit was a bit too much for this area, but I don't know... It looks cute, too. I guess I'm really abusing my authority 👿 I also filled the inside with clay instead of dirt because I thought it would be more in harmony with the colours of both the sphere and the environment.
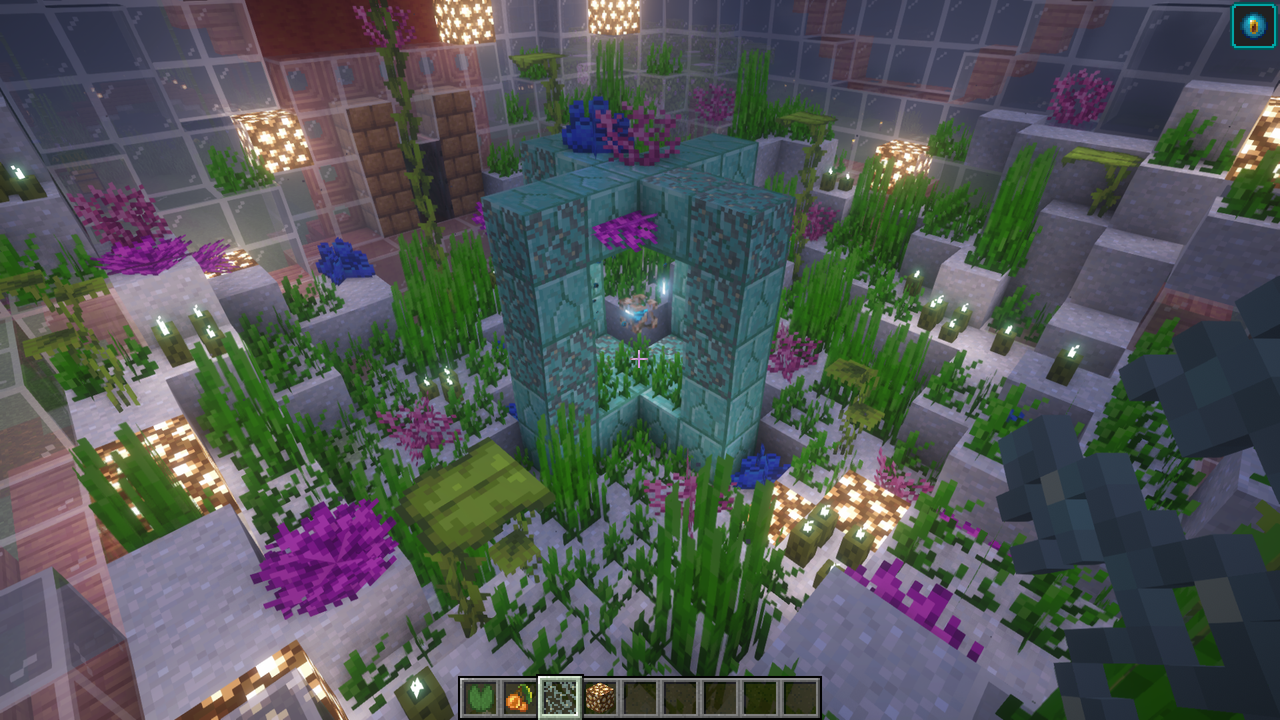
I decorated the inside and made it more livable for axolotls 🦋 😁 I used coloured corals, sea pickles, bonemeal (a lot), glow stone and 1-2 other things that you are too nervous to remember the name of right now.
I used some Glow Berries because I thought the inside needed more light. I think they don't emit too much light, but when they are enough, they are fine. They are also beautiful ... 😜
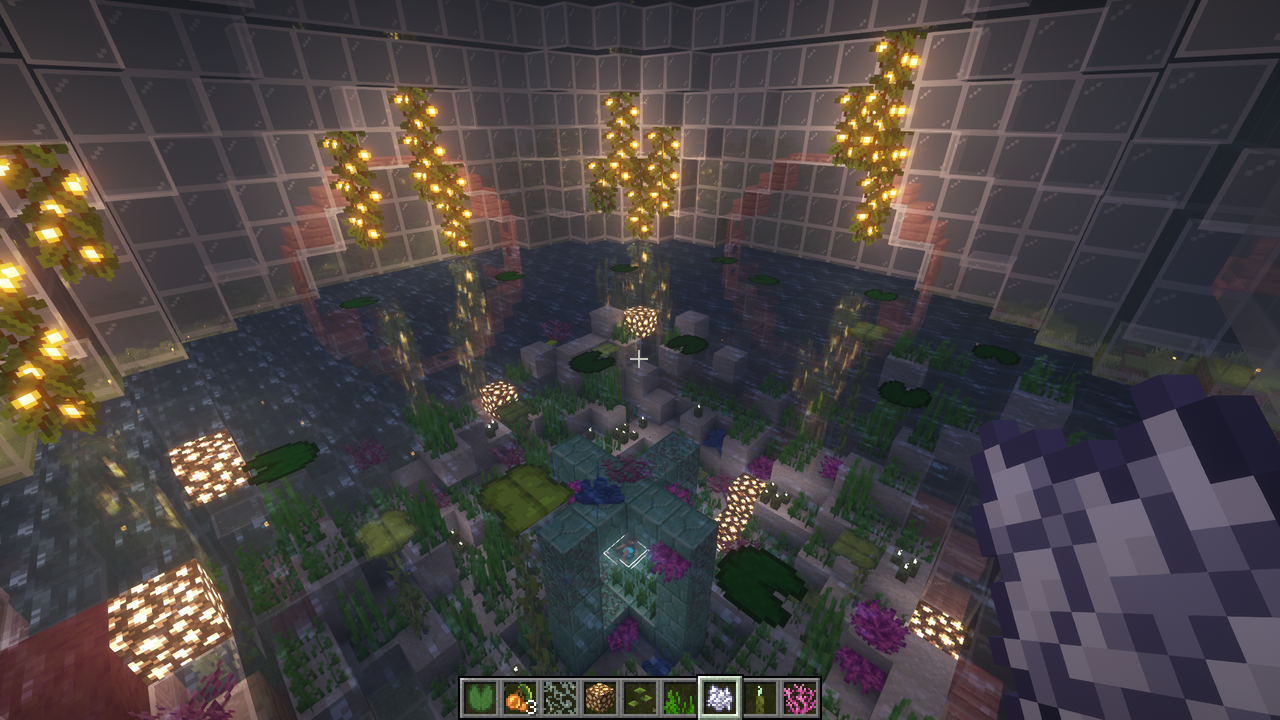
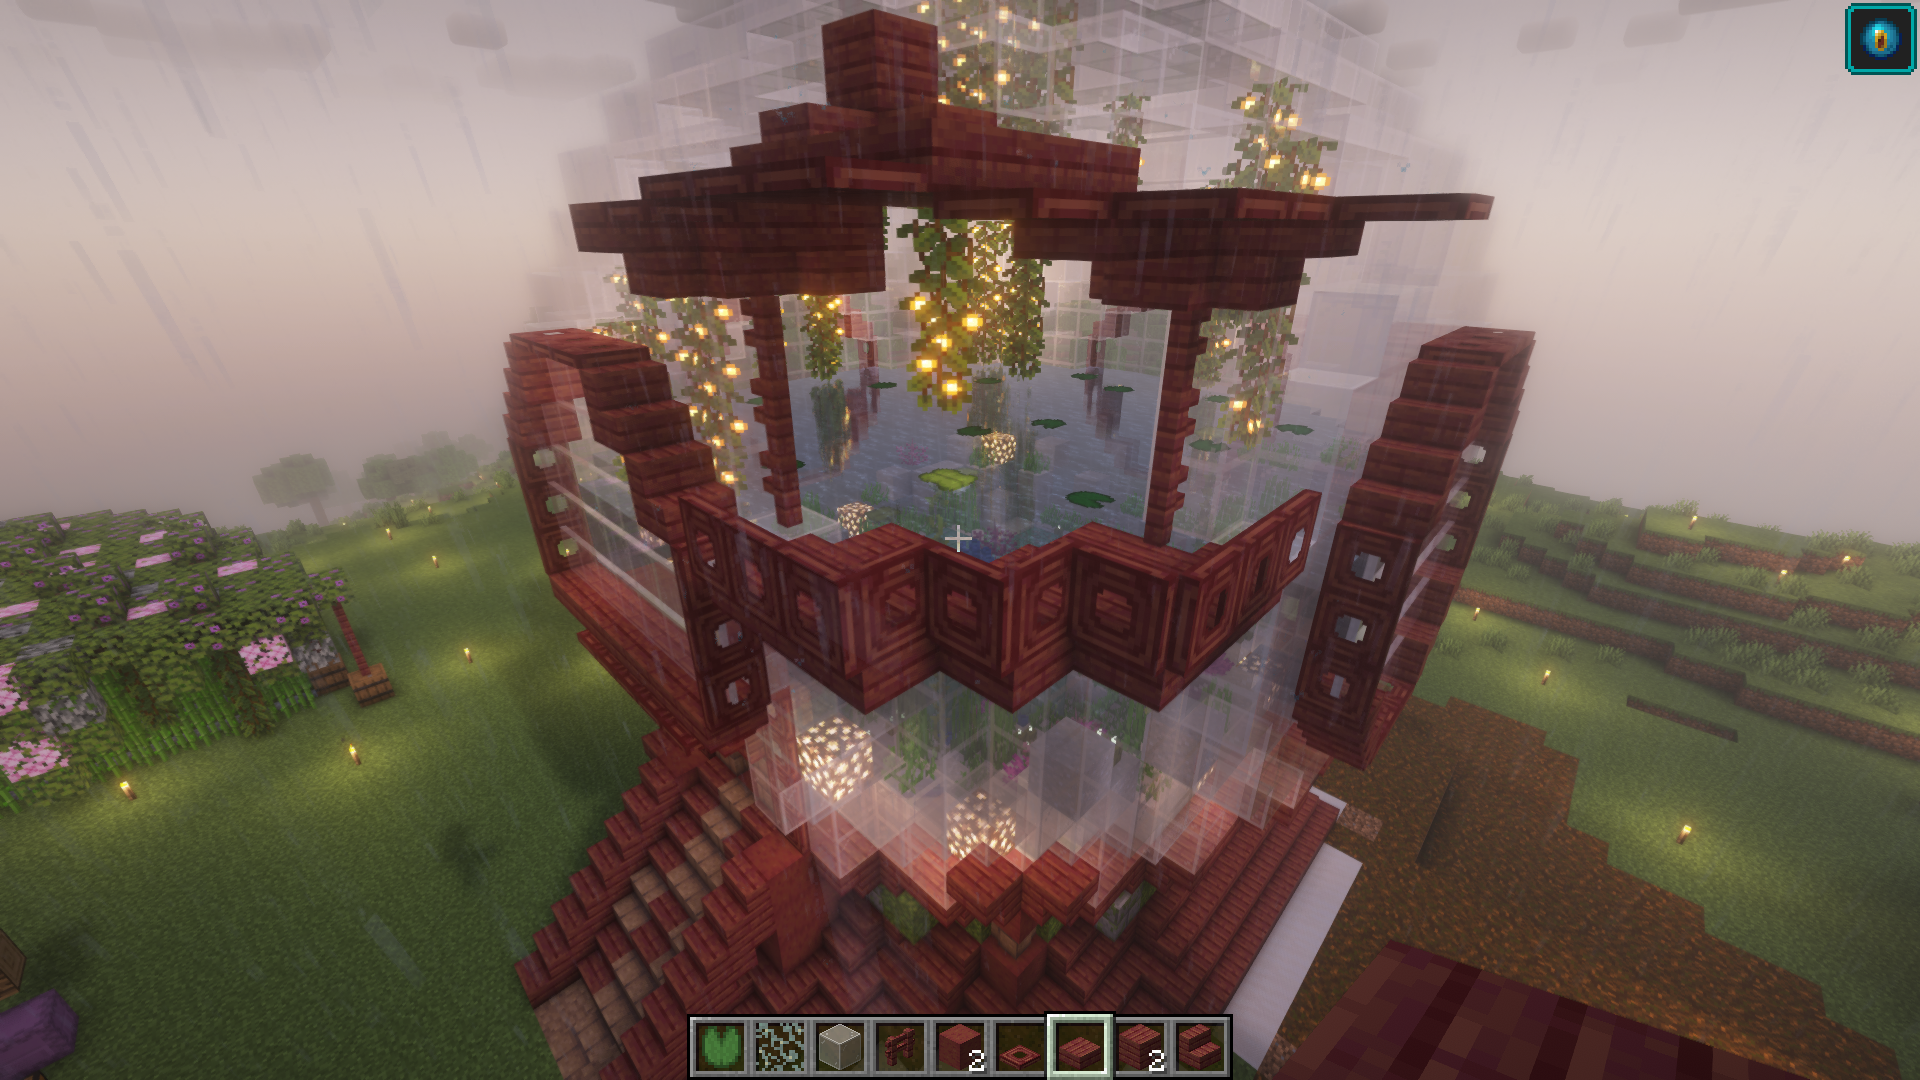
Finally, I thought something was missing. Another exit. After all, we might not want to swim down and use the door all the time, right? So I thought it might be nice to have something like a balcony. I did this again using trapdoors, fences and stairs.
When it was finished, it looked like this from both inside and outside. It seems to be a great entry-exit place, especially in the air. I found this part quite useful because I've been in creative mode a lot lately. Also, you may need to cut Glow Berries every once in a while because they get longer. It is useful to keep in mind.
Finally, I put a lot of Axolotls in it 😁 I think it was just enough for such a big sphere. Unfortunately, none of the rarities came out 🤡 Well... If I was lucky, anyway.
Yeah, that was the next step in the Beautification Project. An Axolotl Aquarium. I think it's cute. Although I didn't photograph it, I'd like to add. I also added different kinds of dirt around the sphere, trying to make it look like it belongs here as much as possible.
That's it. I was relieved to come to the end of another project, because I have more in mind. I'll also give you a little spoiler. After our house, I'm planning to build a village that is intertwined with our area. My goal is big, I have no resource constraints and I have time. I think when these 3 come together, they can do great things. I'll see you later. Take care of yourself, stay with health and love and please remember that;
You are the only one of you.
Herkese merhabaaa!!
Umarım iyisinizdir ya da iyi olmaya çalışıyorsunuzdur. Ben biraz daha iyiyim fakat stresten dolayı midem beni çok zorluyor. Halledeceğim ama. Eninde sonunda bir sonu gelecek. Bugün sizinle biraz daha normalleşmek istediğimden dolayı biraz Minecraft hakkında konuşmak istiyorum çünkü buna gerçekten de ihtiyacım var.
Yeni bir yapımız var. Tabii ki Güzelleştirme Projesi'ne devam ettim. Ne yazık ki son birkaç gündür devam edemiyorum fakat aklımın bir köşesine yazılı.
Axolotl Sphere/Aquarium
Bu sefer beni zorlayan bir şeyler karşınızdayım. Zorlayan kısmı küre oldu çünkü nasıl yapacağım hakkında en ufak bir fikrim dahi yoktu ama neyse ki yardımıma
Plotz yetişti. Bu website size bir sürü şey vaad ediyor. Bir sürü derken modelleme açısından. Kullanımı oldukça kolay ve 3D, 2D olarak sizlere bir kürenin, elipsin ve daha fazlasının modellemesini sunuyor. Sizin tek yaptığınız ise ne kadar büyüklükte istediğinizi bilmek.
Ben bu siteyi bir YouTube videosu sayesinde buldum. Çok da işime yaradı. Eğer isterseniz bir göz atın derim. Bu tarz işler için oldukça kullanışlı.
Küremin istediğim büyüklüğünü planlamak benim için zordu çünkü çevrede çok fazla dikkat çekmesini istemiyordum. Bir sonraki yazımda sizinle paylaşacağım evin, onun gölgesinde kalmasını istemiyordum. Bu yüzden de en geniş kısmının 21 blok olmasına karar verdim. Bu hemen hemen
Green House kadar olacaktı. Güzel bir plan gibi göründü değil mi?
Keşke daha küçük yapsaydım. Ama çok geç.
*[Ekran Görüntüsü Kaynağı](https://www.plotz.co.uk/plotz-model.php?model=Sphere)*
Yukarıdaki fotoğrafta da görebileceğiniz gibi küreyi adım adım rahatlıkla gösteriyor. Biraz dikkatle hiçbir sorun çıkmadan kazasız bir şekilde tamamlanabilir. Ben yine Beril olarak bir sürü yanlış yaptım. Olsun, öğrendim ve eğlendim.
Her ne kadar creative modaa işin suyunu çıkarsam da bu tarz bir şeyi survival modda yapmak için gereken kaynak miktarı ile uğraşmak istemedim... Eminim yukarıda gördüğünüz bitmiş hâli ile ne demeye çalıştığımı anlamışsınızdır. Elimden geldiğince fazla fotoğraf çekmeye çalıştım çünkü kendim bile anlamakta zorlandığım için aradaki alanları kaçırmak istemedim. Zaten merak ederseniz bahsettiğim websitesinden daha detaylı bir şekilde inceleyebilirsiniz.
Sadece kürenin yapımı, karar vermek ile birlikte, 1,5-2 saat kadar sürdü. Bilirsiniz, bir şeylere karar vermeyi pek sevmem. Özellikle de bu tarz şeylerde. Verdiğim kararları da değiştirmeyi severim. Önemli olan güzellik sonuçta.
Sonunda bittiğinde bir "Finished" pozu verdim gibi bir şey oldu 😂 Bu kısımdan sonra dış kısmı süsleme işine giriştim. Bunun içinde yine Mangrove kullandım. Aklımda olan hâlâ beyaz ve koyu kırmızı temaya bağlı kalmaktı. Aslında tam beyaz değil de yakın tonları diyelim.
Amacım bu küreyi olabildiğince zaten uzun süredir buradaymış gibi göstermekti. Bunun içinde güçlü bir kök oluşturmalıydım değil mi? Merdivenler ile yukarıdan aşağıya doğru bir bağlantı noktası oluşturmaya çalıştım. Bazen merdivenlerin bağlanmadığı yerde de stripped wood kullandım.
Aradaki boşluğu ise her şeyi kıpkırmızı yapamak ve biraz da eski görünmesini sağlamak için moss ve mossed stone brick blocks kullandım. Tabii bu sırada aklımdaki yolu da oraya yerleştirdim. Bunun içinde mud brick blocks, packed mud ve yine mangrove'dan yararlanıp planks kullandım. Ayrıca temel kolonlarının olduğunu düşündüğüm yerlere de mud brick walls ekledim.
Bu kısımları biraz kısa kesmek istiyorum çünkü bu yazıda iç dekorasyondan da bahsemek hedeflerimin arasında. Yine Mud bricks ve Mangrove'dan yardım alarak bir merdiven oluşturdum. Giriş için bence bu kadar yükseklik yeterliydi ve daha aşağısı da çirkin ve orantısız durur gibi gelmişti.
Pencere benzeri bir görüntü verebilmesi için küreyi oluşturan en dış kısımlarını stairs ve trapdoors ile çevreledim. Ardından ise bu çerçevenin iç kısmına kalan cam blokları pane'ler ile değiştirdim. Bence bu minik detay biraz doku katmaya yardımcı oldu. Bunu da en son hava karanlık olduğunda ve içeriden dışarıya ışık geldiğinde daha iyi anladım.
Sıra iç kısmına geldiğinde ise biraz aşırıya kaçtığımı kabul ediyorum. Conduit biraz fazla oldu bu alan için fakat ne bileyim... Hem şirin de durdu. Ben sanırım gerçekten yetkimi kötüye kullanıyorum 👿 Ayrıca iç kısmını dirt yerine clay ile doldurdum çünkü hem kürenin hem de çevrenin renklerine daha çok uyum sağlayacağını düşündüm.
İçeriyi süslemek ve de axolotl'lar için daha yaşanabilir bir hâle getirebilmek için bir süsledim 🦋 😁 Bunun içinde göz kararı renkli coral'lar, sea pickle'lar, bonemeal (bir sürü), glow stone ve şu anda adını hatırlamak için bile çok gergin olduğun 1-2 şey daha kullandım.
İç kısmına daha fazla ışık gerektiğini düşündüğümden biraz Glow Berries kullandım. Bence çok fazla ışık yaymasalar da yeterince olduklarında gayet iyiler. Ayrıca güzeller de... 😜
En sonunda ise bir şeylerin eksik olduğunu düşündüm. Bir çıkış daha. Sonuçta sürekli aşağıya yüzüp kapıyı kullanmak istemeyebiliriz, değil mi? Bu yüzden de balkon benzeri bir şeyin varlığı iyi olabilir diye düşündüm. Bunu da yine trapdoors, fences ve stairs kullanarak yaptım.
Bittiğinde ise hem içeriden hem de dışarıdan bu şekilde görünüyordu. Özellikle havada iken harika bir giriş-çıkış yeri oldu gibi görünüyor. Ben bu kısmı oldukça kullanışlı buldum çünkü son zamanlarda sürekli creative modundayım. Bir de arada bir Glow Berries'i kesmek gerekebiliyor çünkü uzuyorlar. Akılda bulundurmakta fayda var.
Son olarak içerisine bolca Axolotl koydum 😁 Bence bu kadar büyük bir küreye ancak yeterdi. Ne yazık ki nadirlerin hiçbirisi çıkmadı 🤡 Olsun... Bende şans olsa zaten, neyse.
Evet, Güzelleştirme Projesi'nin bir sonraki adımı buydu. Bir Axolotl Aquarium. Bence şirin oldu. Tabii fotoğrafını çekmesem de eklemek isterim. Kürenin çevresine değişik dirt çeşitleri de ekledim, olabildiğince buraya aitmiş gibi göstermeye çalışıyordum.
İşte bu kadar. Bir projenin daha sonuna gelmek beni rahatlatmıştı açıkçası çünkü aklımda daha fazlası var. Ayrıca minik bir spoiler da vereyim. Bizim evimizden sonra bizim alanımızla iç içe olan bir köy de inşa etmeyi planlıyorum. Hedefim büyük, kaynak kısıtlamam yok ve zamanım var. Bence bu 3'lü birleştiğinde harika işler çıkarabilirler. Sonra görüşmek üzere. Kendinize dikkat edin, sağlık ve sevgiyle kalın ve lütfen unutmayın ki;
Bu dünyada sizden başka bir tane daha yok.