Hello my dear friends who love art and crafts, I hope you have a great weekend. Today I bring you a tutorial on how to make a gift basket using a nasobuco, accessory that we all use in the pandemic and have forgotten at home.
Hola mis queridos amigos amantes del arte y las manualidades, espero que pasen un excelente fin de semana. En el día de hoy les traigo un tutorial de como realizar una cesta para regalo utilizando un nasobuco, accesorio que todos utilizamos en la pandemia y tenemos olvidados en casa.
As you know tomorrow is a special day and we all want to honor and reward our mothers that being who gave us life and have guided us in every step we take and nothing better to do it with a unique detail that comes from our hands and with love. For my mother who I consider a tireless warrior, someone who does not give up before the difficulties, who has always been by my side in every good and bad moment and for all the mothers of this wonderful platform I wish you a Happy Mother's Day. I will show you how you can make this beautiful gift.
Como saben mañana es un día especial y todos queremos honrar y premiar a nuestras madres ese ser que nos dio la vida y nos han guiado en cada paso que damos y nada mejor para hacerlo que con un detalle único que venga hecho de nuestras manos y con mucho amor. Para mi madre que considero una guerrera incansable, alguien que no se rinde antes las dificultades, que siempre ha estado a mi lado en cada momento bueno y malo y para todas las madres de esta maravillosa plataforma les deseo un Feliz día de las madres. Enseguida les muestro como pueden realizar este hermoso regalo.
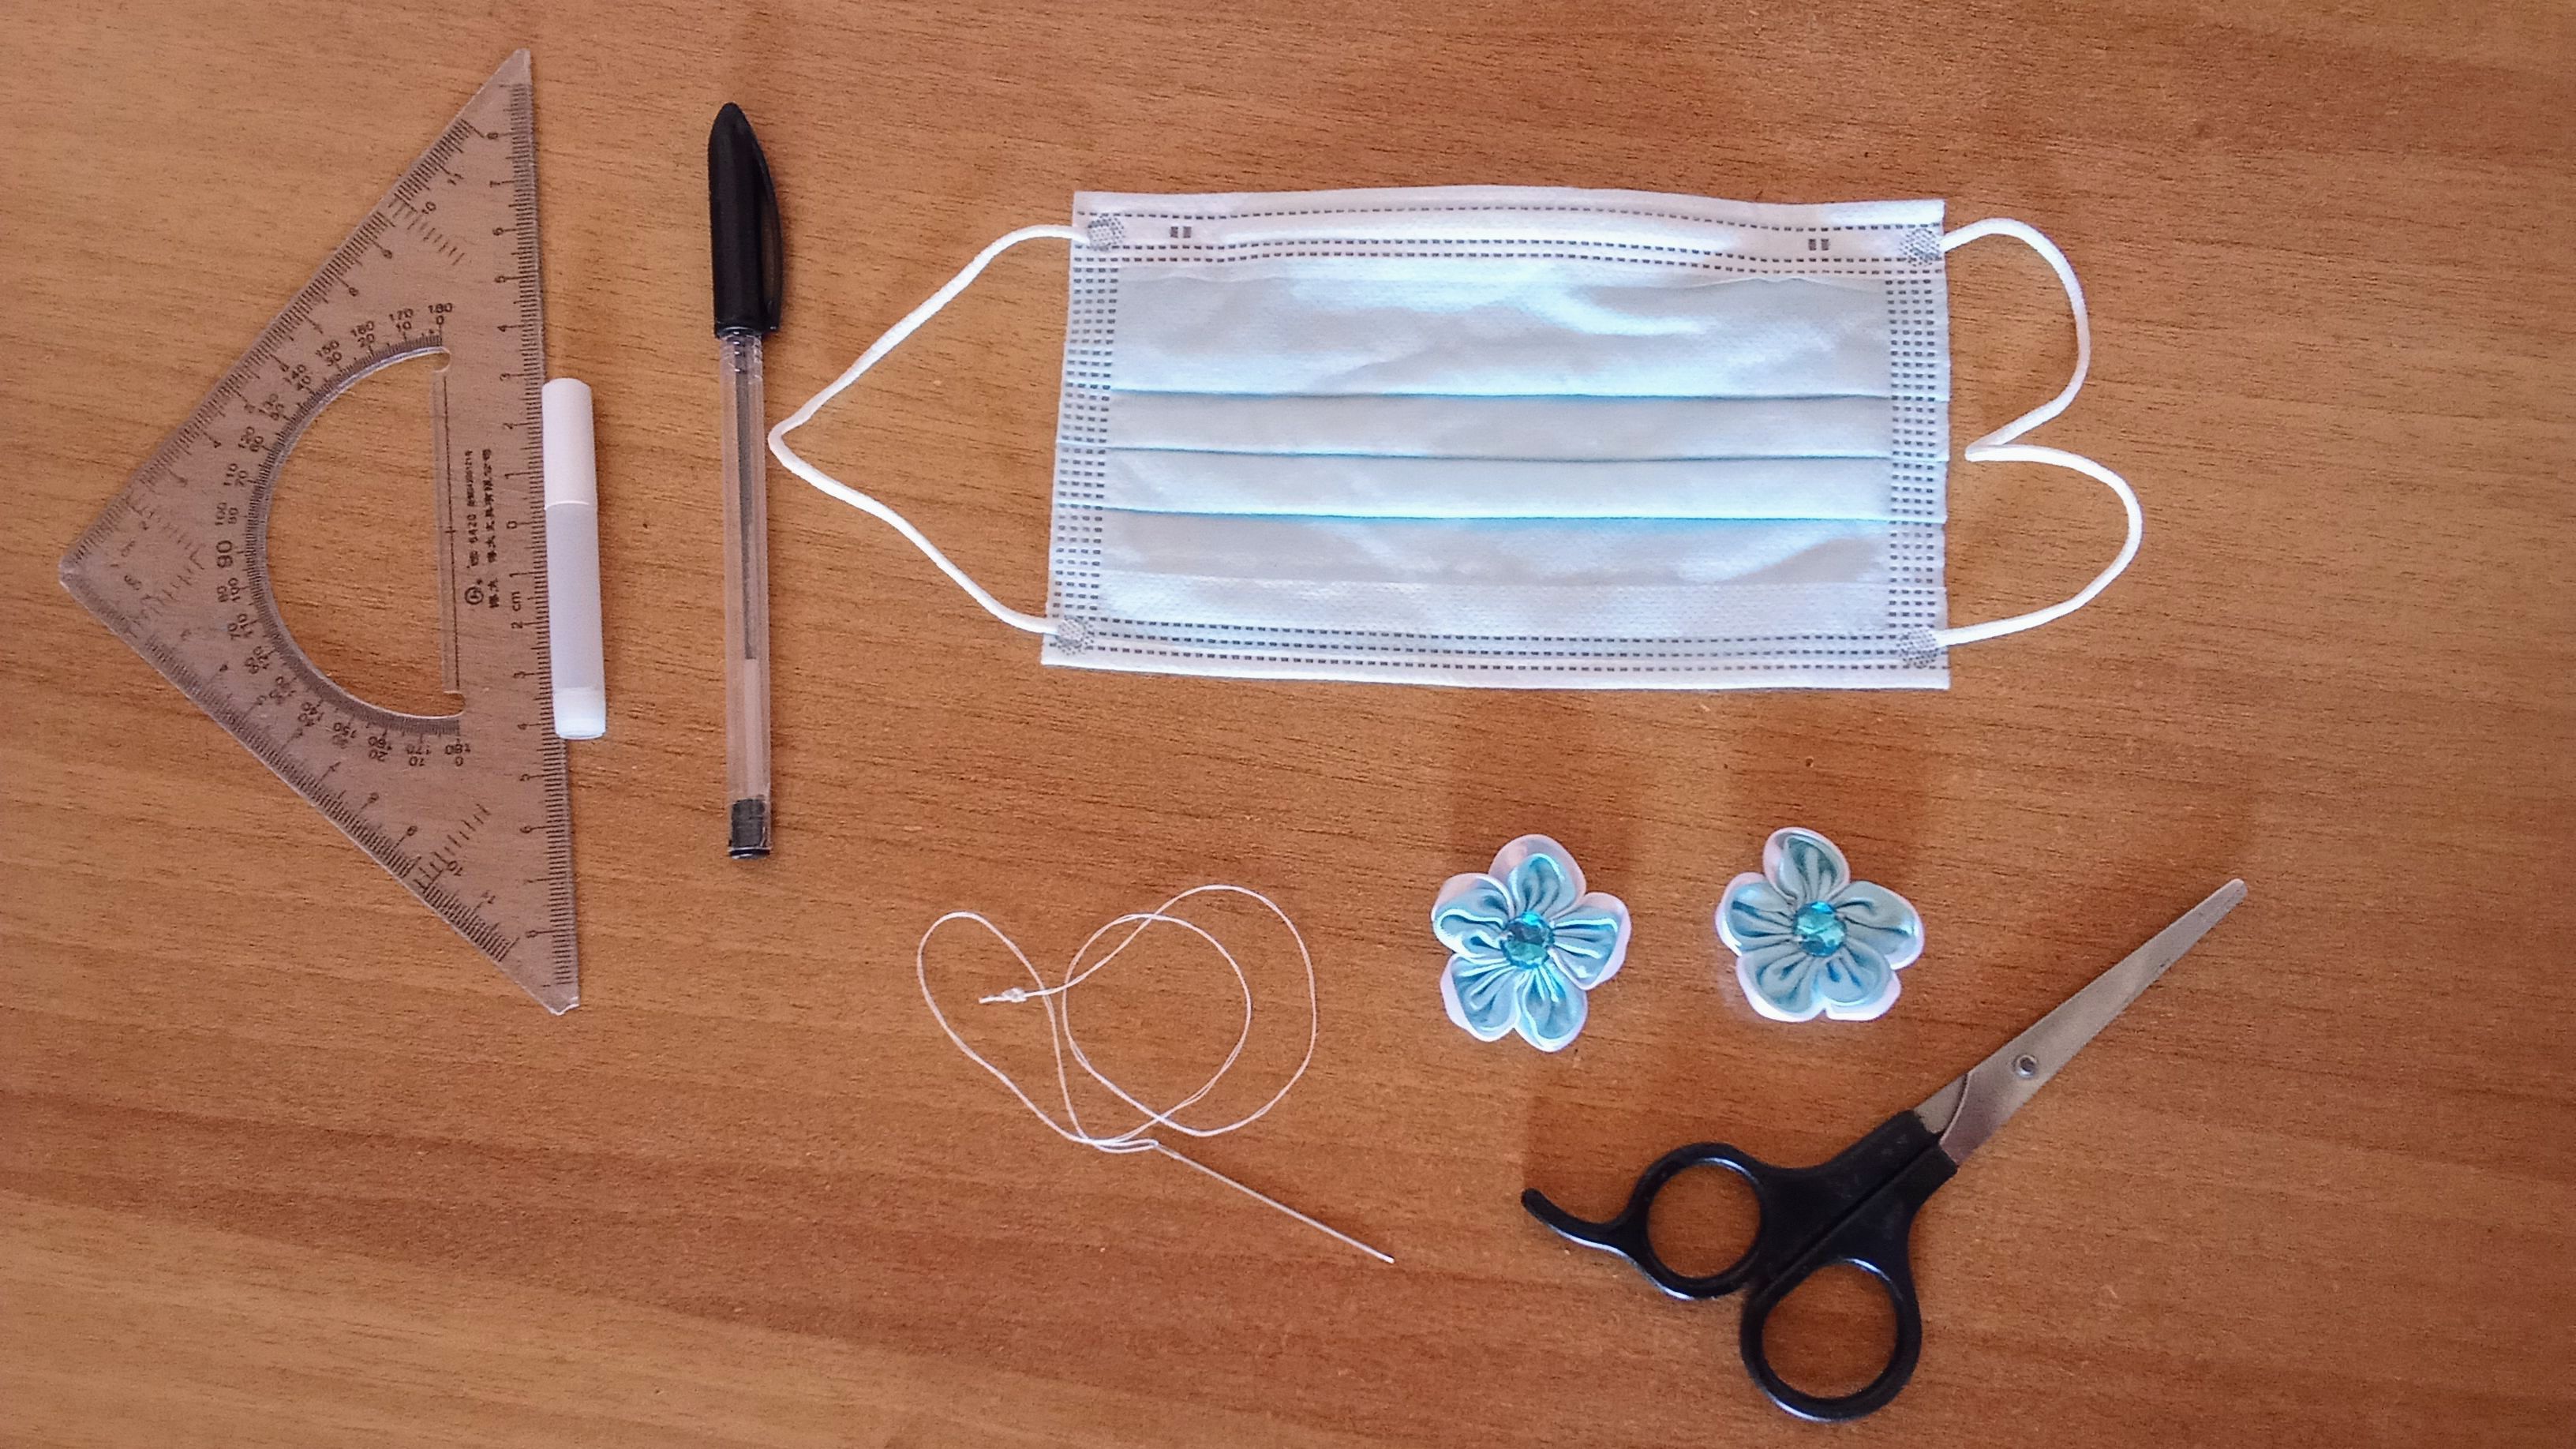
Materials//Materiales
1 nasobuco//1 nasobuco
Scissors//Tijeras
Thread and needle//Hilo y aguja
Glue//Pegamento
Decorative flowers//Flores decorativas
Ballpoint pen//Bolígrafo
Ruler//Regla
Step by step// Paso a paso
Step 1
The first thing to do is to cut the ends of the nasobuco, only the part that has the strips to hold it (approximately 1.5 cm) as shown in the pictures. It is important to make a cut as even as possible so that it is more aesthetically pleasing and much easier to sew.
Paso 1
Lo primero será cortar los extremos del nasobuco, solo la parte que tiene las tiritas de sostenerlo (aproximadamente 1.5 cm) como les nuestro en las imágenes. Es importante hacer un corte lo más parejo posible para que quede con más estética y sea mucho más fácil a la hora de coser.
Step 2
Then we carefully remove this portion of the nasobuco material that appears at the top so that it remains firm with great care as shown at one end, stretch it as best as possible and fold it in half, leaving the lower part visible.
Paso 2
Luego sacamos con mucho cuidado esta porción del material del nasobuco que aparece en la parte superior para que se mantenga firme con mucho cuidado como se muestra por uno de los extremos, se estira lo mejor posible y se dobla por la mitad dejando a vista la parte inferior.
Step 3
The next step is to mark a 1.5 x 1.5 cm square on the bottom corners with a pen and then cut them out with scissors. They should be clean cuts with very sharp scissors to make them as even as possible.
Paso 3
Lo siguiente será marcar con un bolígrafo en las esquinas inferiores un cuadrado de 1.5 x 1.5 cm para después recortarlos con las tijeras. Deben ser cortes limpios con una tijera muy filosa para que quede lo más parejo posible.
Step 4
Next, sew with a needle and resistant thread the ends marked in the photo, securing the edges with a firm and uniform seam. Then take the nasobuco by the squares that we had cut and place the ends so that they are perfectly overlapped to sew them and thus reinforce the ends of the basket, this will make it easier to hold. Turn it over so that it is on the right side and continue with the rest of the steps.
Paso 4
Seguidamente, se cose con una aguja e hilo resistentes los extremos marcados en la foto asegurando los bordes con una costura firme y uniforme. Para después tomar el nasobuco por los cuadrados que habíamos cortado y colocar los extremos de manera que queden perfectamente solapados para coserlos y así reforzar los extremos de la cesta, esto hará que sea más fácil de sostenerse. Dar la vuelta para que quede por la parte derecha y poder continuar con los demás pasos.
Step 5
Spread glue on the decorative flowers and glue them the way you want. You can also decorate them with fomi or any other material you have at home, it is up to the choice and taste of each one of you.
Paso 5
Untar pegamento en las flores decorativas y pegarlas de la forma que deseen. También pueden decorar con fomi u otro material que tengan en casa, eso es a la elección y el gusto de cada cual.
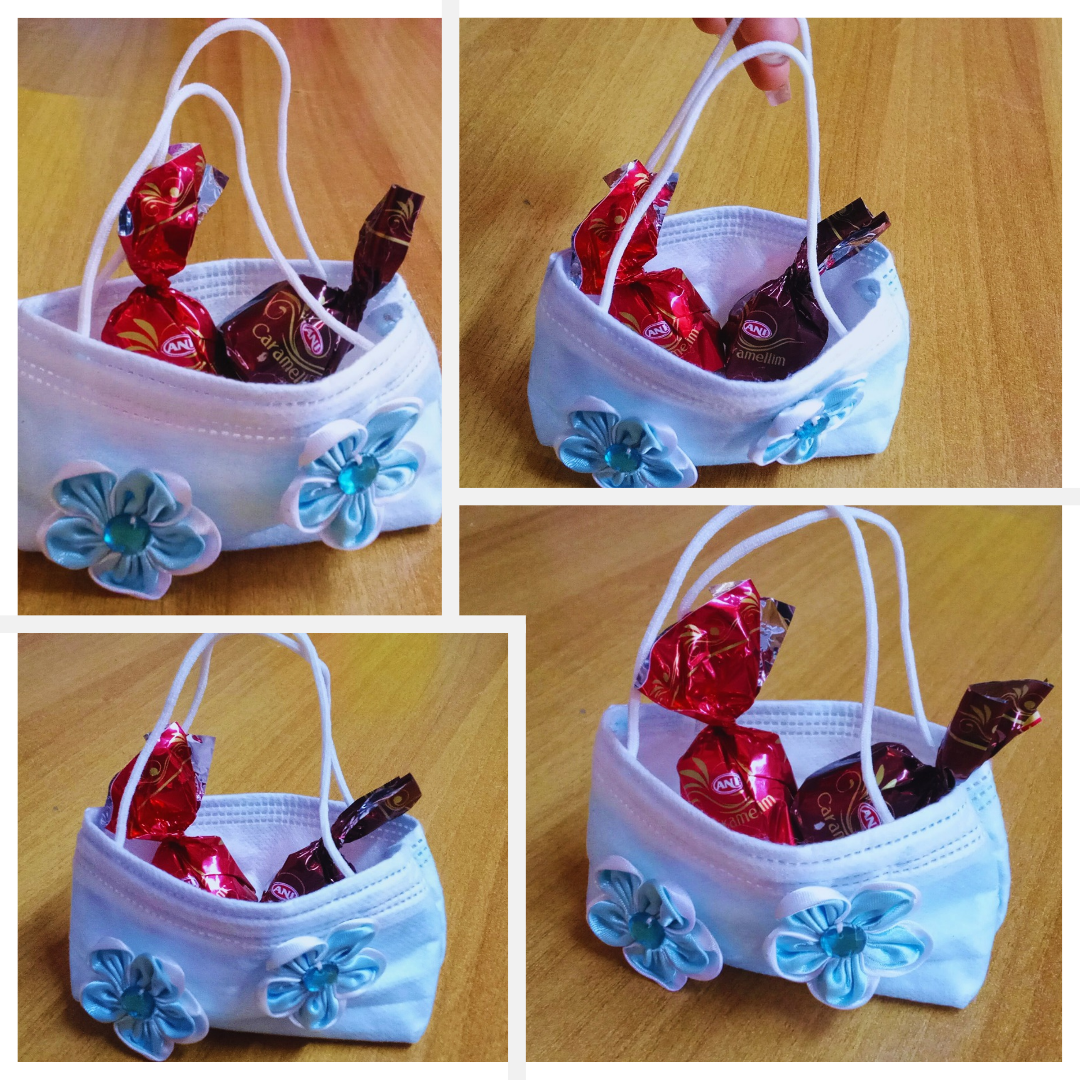
Step 6
Place the strips that we had removed inside the basket to form the handles, the height is up to each one's choice I took the same ones that we removed previously with the same length, but if you want to cut them and make them smaller.
Paso 6
Colocar las tiras que habíamos retirado en el interior de la cesta para formar las asas, el alto es a elección de cada uno yo tome las mismas que quitamos anteriormente con el mismo largo, pero si desean las recortan y las hacen más pequeñas.
This way our basket is ready to put the gift to mom, it is valid to note that it is for a small detail I chose several chocolates, but you can put whatever you want. So far my craft today and my gift for the queen of my life I hope you liked it, tell me what you thought, I will be attentive to your comments.
De esta manera queda lista nuestra cesta para ponerle el regalo a mamá, es válido señalar que es para un detalle pequeño yo escogí varios bombones, pero pueden ponerle lo que deseen. Hasta aquí mi manualidad de hoy y mi regalo para la reina de mi vida espero que les haya gustado, díganme que les pareció, estaré atenta a sus comentarios.
Créditos y Recursos//Credits and Resources
Translated by
DeepLCover page created in
Canva ProImages captured with my
Samsung Galaxy F13
Thanks for Visiting my Blog