Having our accessories organized is very important to ensure their care, having a better arrangement of them, in sight that allows us to be inspired when combining outfits, and this is not only a need for women, but also for men who today take great care of aspects of their personal image.
Today's Hive DIY project is an Accessory Organizer for Men, which has the following characteristics:
- Easy to use.
- In sight.
- That harmonizes with the decoration.
- That does not distort.
- Easy to place in different spaces.
Tener organizados nuestros accesorios es muy importante para garantizar su cuidado, tener una mejor disposición de ellos, a la vista que nos permita inspirarnos a la hora de combinar los outfits, y esto no es solo una necesidad de las mujeres, sino también de los hombres que hoy en día cuidan mucho los aspectos de su imagen personal.
El proyecto Hive Diy de hoy, es un Organizador de Accesorios para Hombres, que tiene las siguientes características:
- Fácil de utilizar.
- A la vista.
- Que se armonice con la decoración.
- Que no distorsione.
- Fácil de colocar en diferentes espacios.

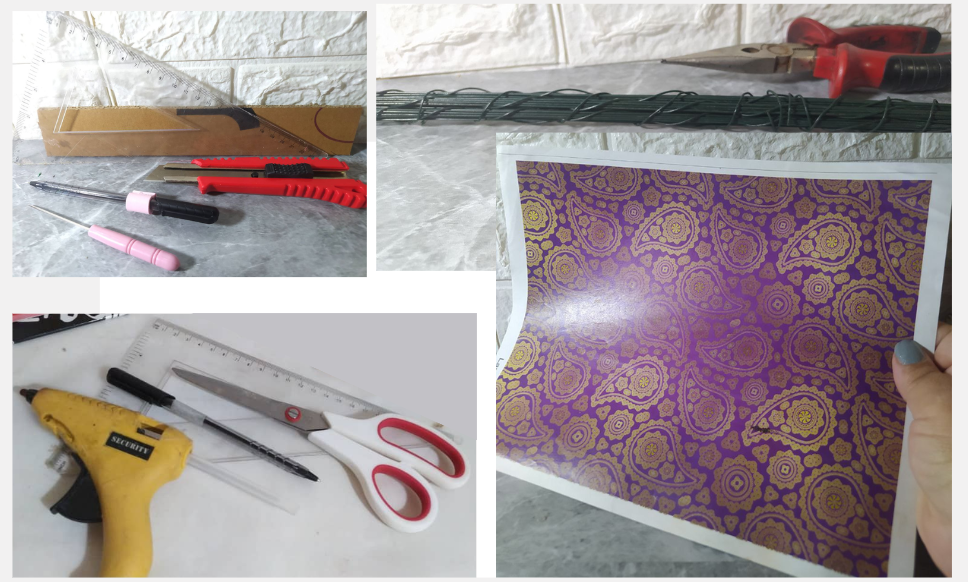
- Recycled cardboard.
- Punch, ruler and pen.
- Florist wire.
- Cutting pliers.
- Hot glue gun.
- Illustrated paper.
- Scissors and/or cutter.
- Cartón reciclado.
- Punzón, regla y bolígrafo.
- Alambre de floristería.
- Pinza de corte.
- Pistola de Silicón caliente.
- Papel ilustrado.
- Tijera y/o cuter.

This project is a request from my son, who has accessories and wanted to have them organized, visible, and that could be placed or glued to the side of a bookcase he has in his room, since he didn't want something that had to be placed on top of a table, or take up space, but rather he wanted to take advantage of the free spaces left by the side of his bookcase, for example.
This is the first time I've done a project like this, and what motivated me the most to do this design was that I came up with the idea of making the HOOKS OR SUPPORTS, with florist wire, which after some tests turned out to be ideal for me because of how easy it was to manipulate and the stability or resistance it provided to the hook.
Este proyecto es una petición de mi hijo, quien tiene accesorios y quería tenerlos organizados, a la vista y que pudiera colocarse o pegarse en el extremo lateral de una biblioteca que tiene en su habitación, ya que no quería algo que tuviese que colocar arriba de una mesa, ni ocupar espacio, sino que quería aprovechar esos espacios libres que deja el lateral de su biblioteca, por ejemplo.
Es la primera vez que realizo un proyecto como este, y lo que más me motivó a realizar este diseño fue que se me ocurrió realizar los GANCHOS O SOPORTES, con alambre de floristería, el cual después de algunas pruebas me resultó ideal por lo fácil de manipular y la estabilidad o resistencia que aportó al gancho.
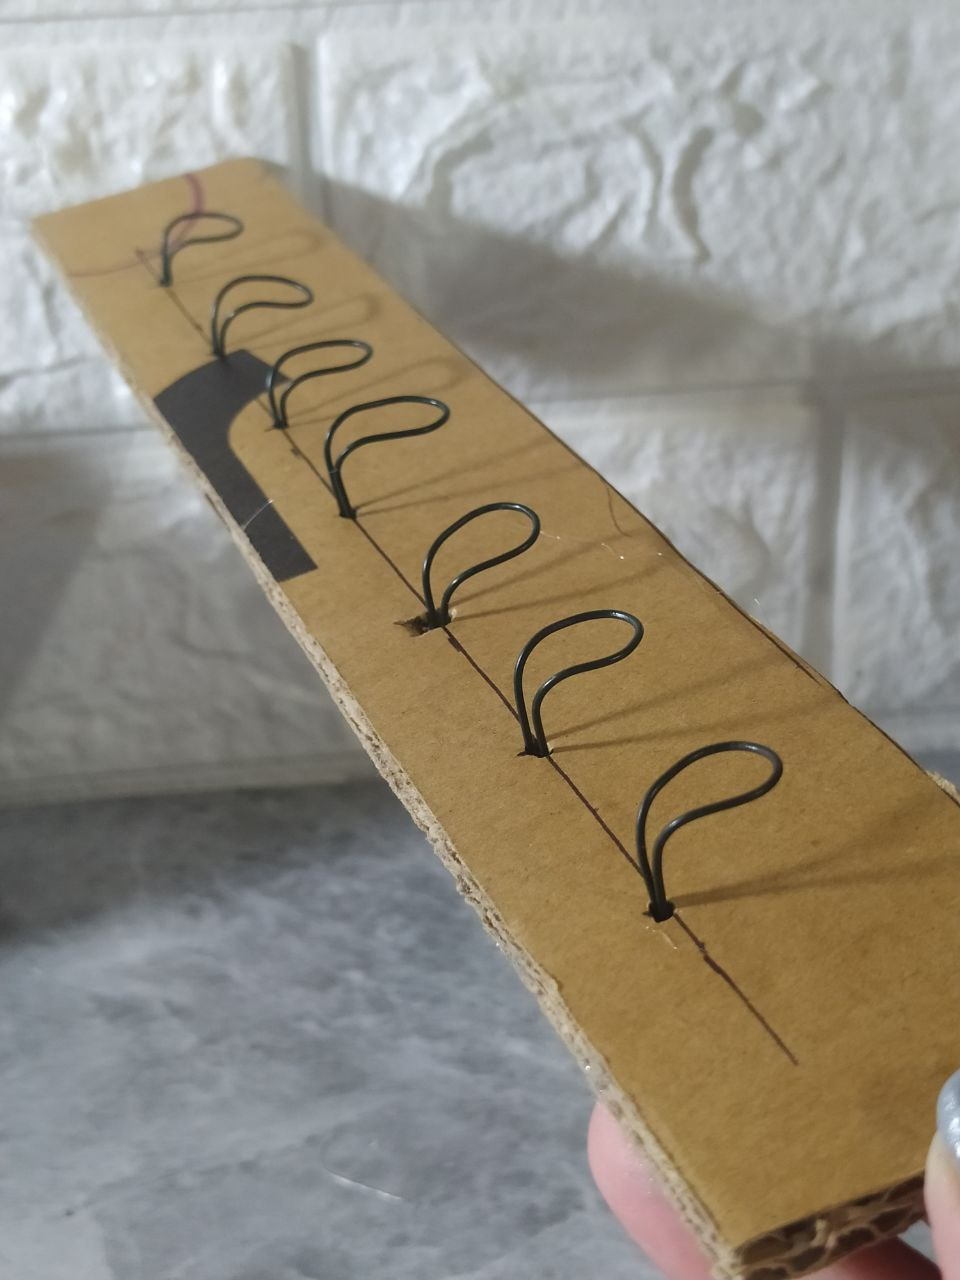
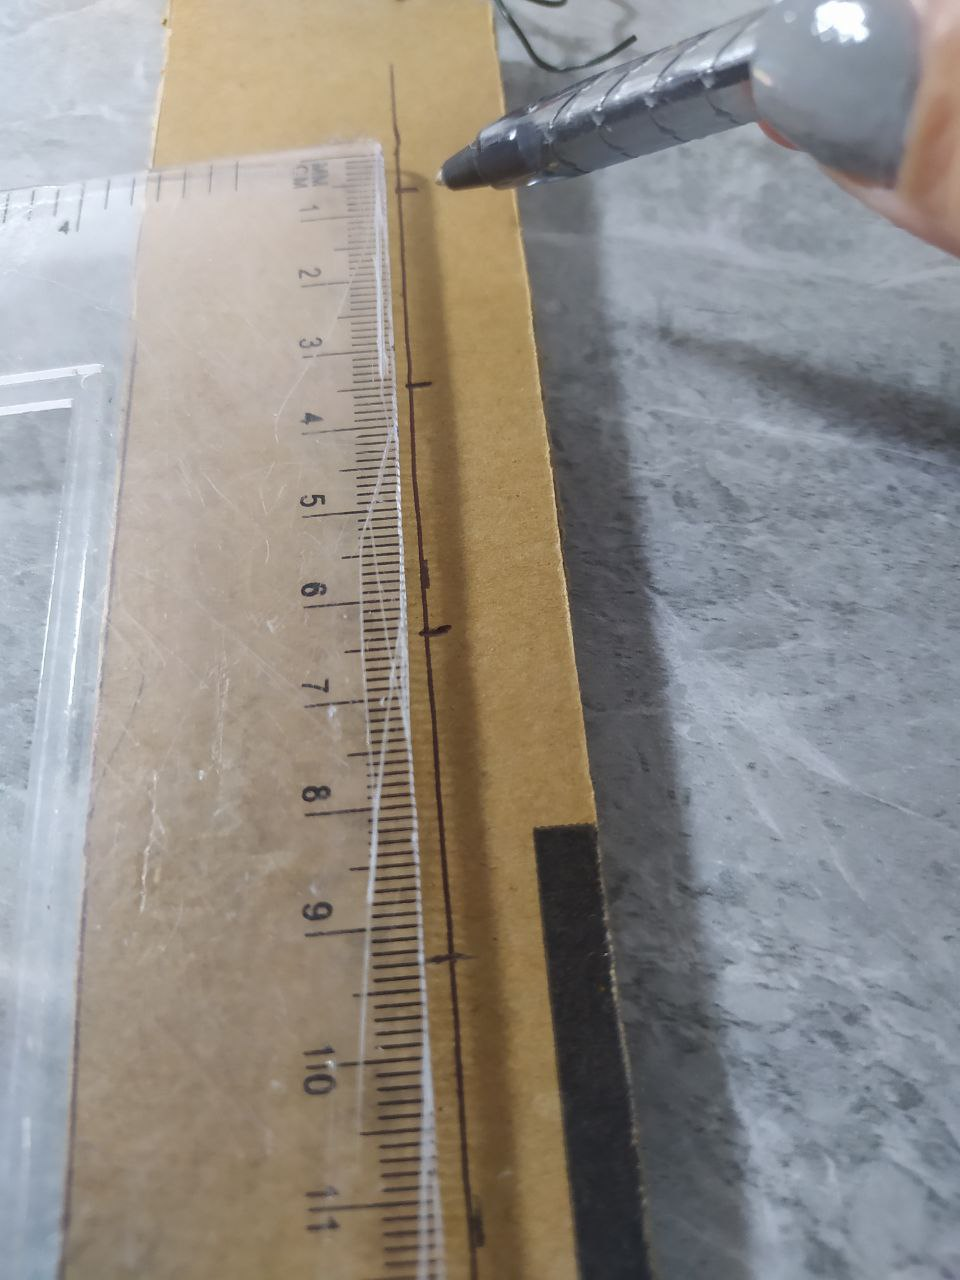
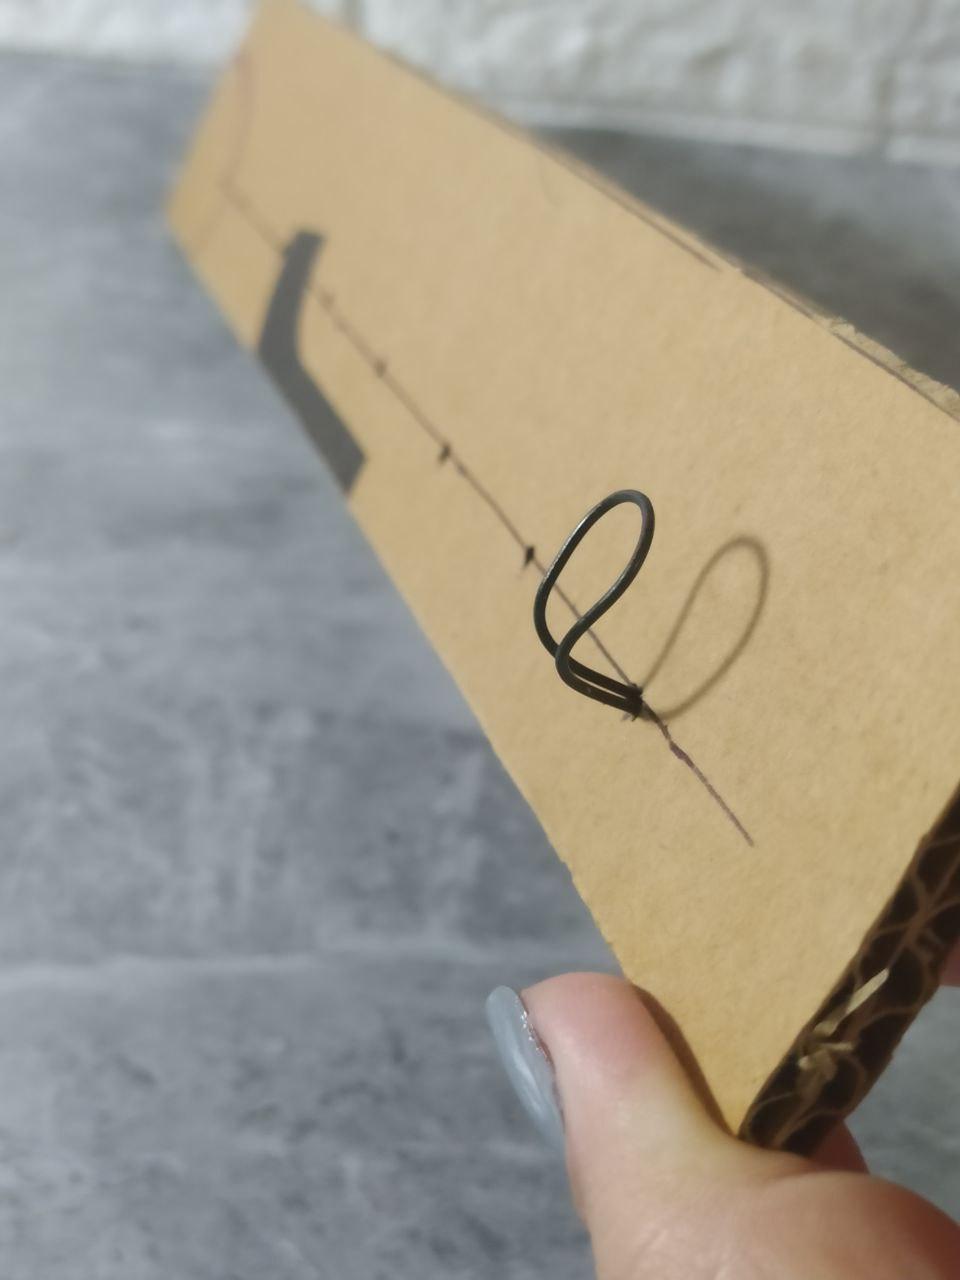
I was motivated to make a video with step-by-step photos and a video on how I made the support ring for the accessories. This way I think it is much easier to explain. For me it was a natural thing to make these supports with wire, since I know a little about the Wire Craft Technique in Jewelry, and I managed to create or recreate this type of supports with florist wire. What I had to think about was how to place them on a strip of strong cardboard and how to secure them well on the back to ensure that they do not move from their place or rotate their position.
Me motivé a realizar un video con las fotografías del paso a paso, y video sobre la forma cómo realicé el aro soporte para los accesorios. De esta forma creo que es mucho más fácil de explicar. Para mí fue algo natural llegar a hacer estos soportes con alambre, ya que manejo un poco la Técnica de Alambrismo en Bisutería, y logré idear o recrear este tipo de soportes con alambre de floristería, lo que tuve que pensar es cómo colocarlos en una tira de cartón resistente y como fijarlos bien por el reverso para garantizar que no se muevan de su lugar o giren su posición.
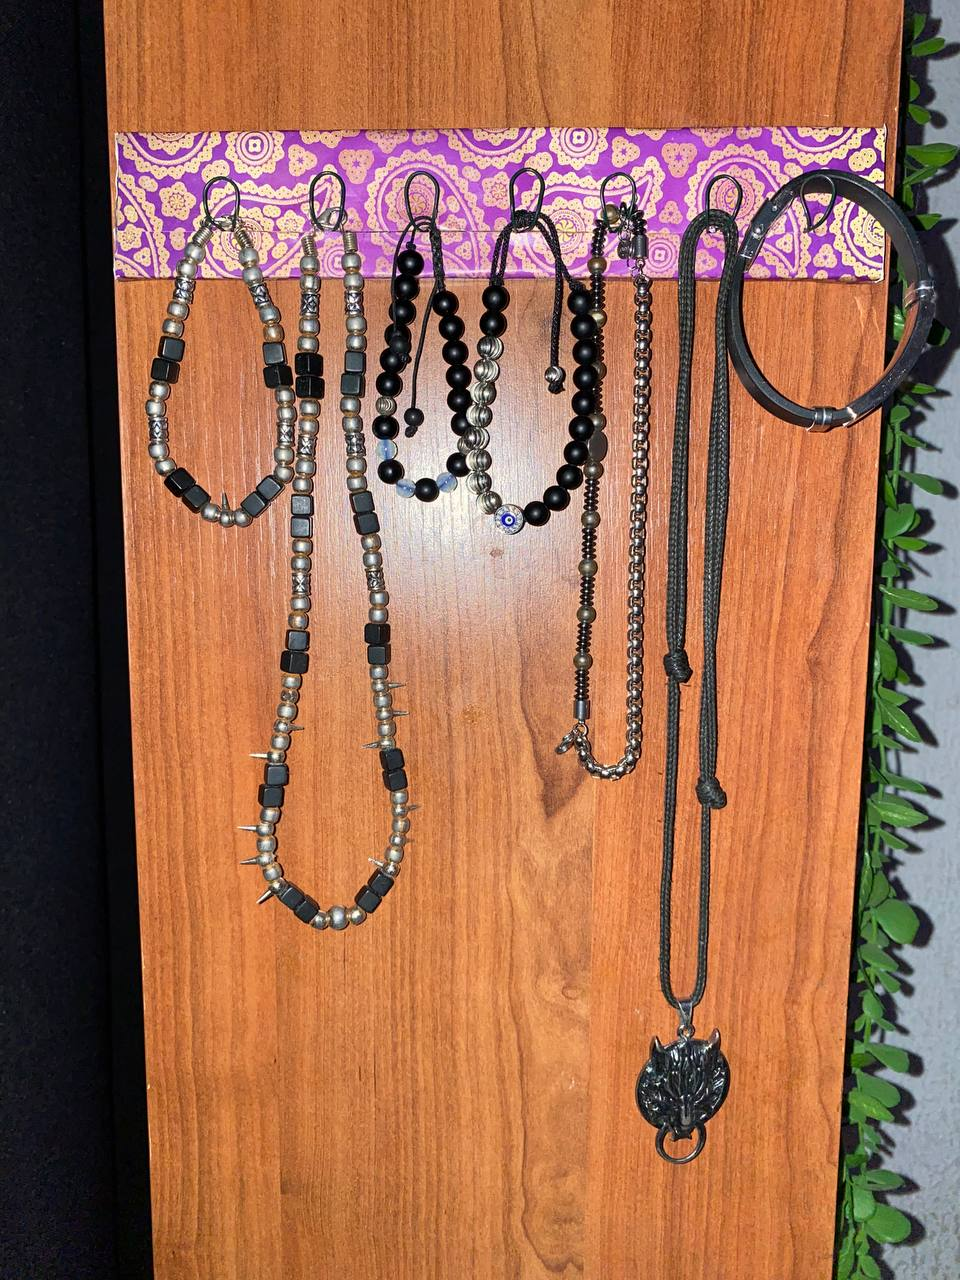
This is the result we are going to achieve with the step-by-step instructions I show you in the video. With the width of the cardboard strip I used, I got 7 supports. This measurement was considering the width of the library where I would fix it, as I told you before; but this measurement is totally customized to the needs or measurements of the space where you want to place the organizer later.
Este es el resultado al que vamos a llegar con el paso a paso que les muestro en el video. Con el ancho de la tira de cartón que utilicé, logré 7 soportes. Esta medida fue considerando el ancho de la biblioteca donde lo fijaría, como les dije anteriormente; pero esta medida es totalmente personalizada a las necesidades o medidas del espacio donde se quiera ubicar posteriormente el organizador.

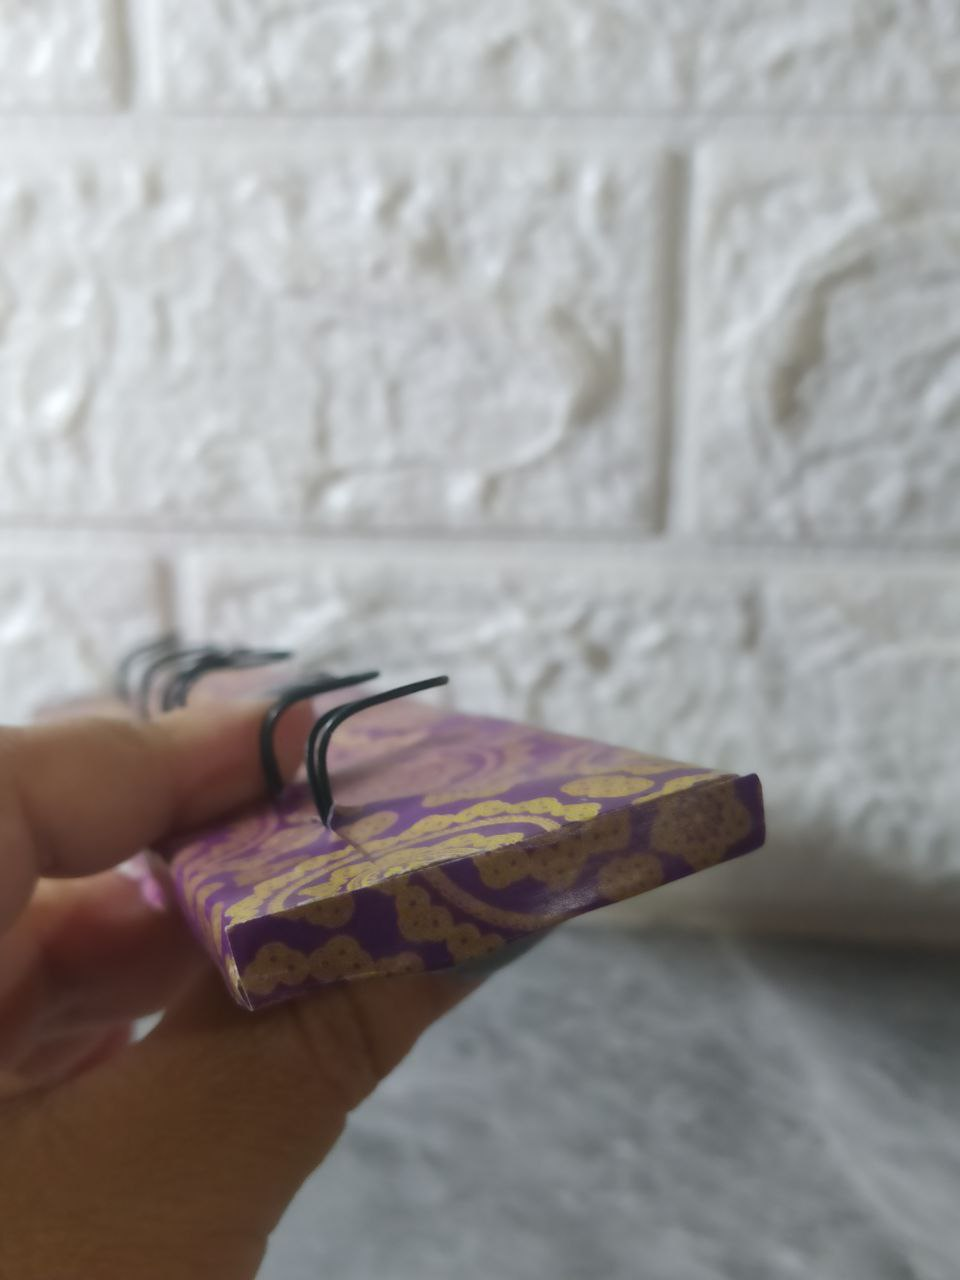
As I always say, projects should be visible from all angles, here is an example of this. The Accessory Organizer can be seen from the front and from all its edges with the same decorative details, there should be no ugly or messy edges.
Como siempre digo, los proyecto deben poder verse bien desde todos los ángulos, aquí tienen un ejemplo de esto. El Organizador de Accesorios se puede apreciar de frente y por todos sus bordes con los mismos detalles de decoración, no debe haber bordes feos o desprolijos.
My client, who is my son, was totally pleased. He didn't want something that would take up space on tables, desks or shelves. He wanted to take advantage of these side spaces and at the same time give interest to the closet area, which is the continuous zone. It turned out very functional. Now that this "prototype" has been approved and is ready at once, I must make others so that I can continue placing the remaining accessories.
Mi cliente que es mi hijo, quedó totalmente complacido, no quería algo que ocupase espacios sobre mesas, escritorios o repisas, quería aprovechar estos espacios laterales y al mismo tiempo darle interés a área del closet que es la zona continua, quedó muy funcional. Ahora que quedó aprobado este "prototipo" que quedó listo de una vez, pues debo realizar otros para que pueda seguir colocando los accesorios restantes.
I hope you enjoyed this HIVE DIY project, and I invite you again to watch the video and tell me if you liked this idea.
Deseo que les haya gustado este proyecto HIVE DIY, y los invito nuevamente a pasar por el video, y que me comenten si les gustó esta idea.

I took the photos with my phone Redmi Note 8
Apps I used:
Canva Pro for Cover, Collage and Banners Video Editor:
Capcut Pro
Music: Pixabay
I used Deepl Translator
My social networks:
Discord: YennysYaneth#0189
Twitter: @yennysferm Instagram: @yennysyaneth
Las fotos las tomé con mi teléfono Redmi Note 8
Apps que utilicé:
Canva Pro para la Portada, Collage y Banners
Editor de video: Capcut Pro
Música: Pixabay
Utilicé el Traductor Deepl
Mi redes sociales:
Discord: YennysYaneth#0189
Twitter: @yennysferm Instagram: @yennysyaneth