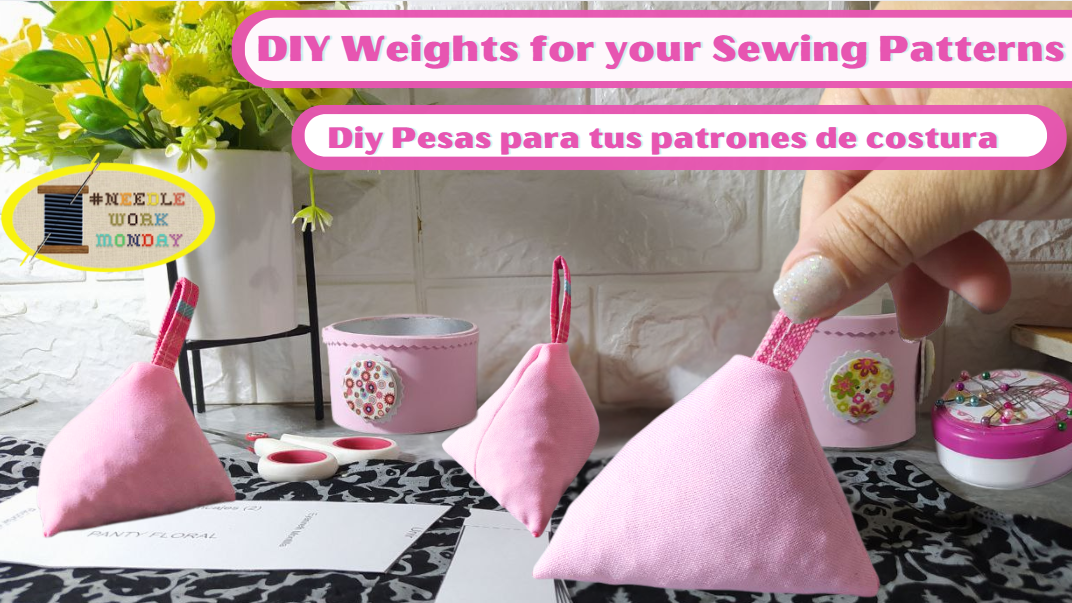
This year I decided to make certain sewing tools to support my projects, and as a common characteristic, I want them to be in pink or shades of pink. Today I want to share these weights with you so you can place sewing patterns on fabrics. This is something I wanted to do for some projects where the fabrics are very soft or delicate and I don't want to poke them with pins to avoid damaging them, or also to speed up projects so I don't have to spend time inserting and removing pins.
This makes it ideal to have these weights available to use whenever we want. Of course, there are many models on the market, in different shapes, sizes, and prices, but I wanted to make my own weights and I want to show you this simple tutorial... Welcome.
Este año me decidí a realizar ciertas herramientas de costura, para apoyar mis proyectos, y como característica en común quiero que sean en color o tonos rosados. Hoy quiero compartir con uds. estas pesas para poder ubicar los patrones de costura sobre las telas, y esto es algo que quería hacer para algunos proyectos en los que las telas son muy suaves o delicadas y no quiero pinchar con alfileres para no afectarlas, o también para agilizar proyectos y así no tengo que dedicar tiempo colocando y retirando los alfileres.
Así es ideal disponer de estas pesas para utilizarlas cuando deseemos. Por supuesto que en el mercado hay mucho modelos, de diferentes formas, tamaños y variados precios, pero yo quise realizar mis propias pesas y les quiero mostrar este sencillo tutorial... Bienvenidos.

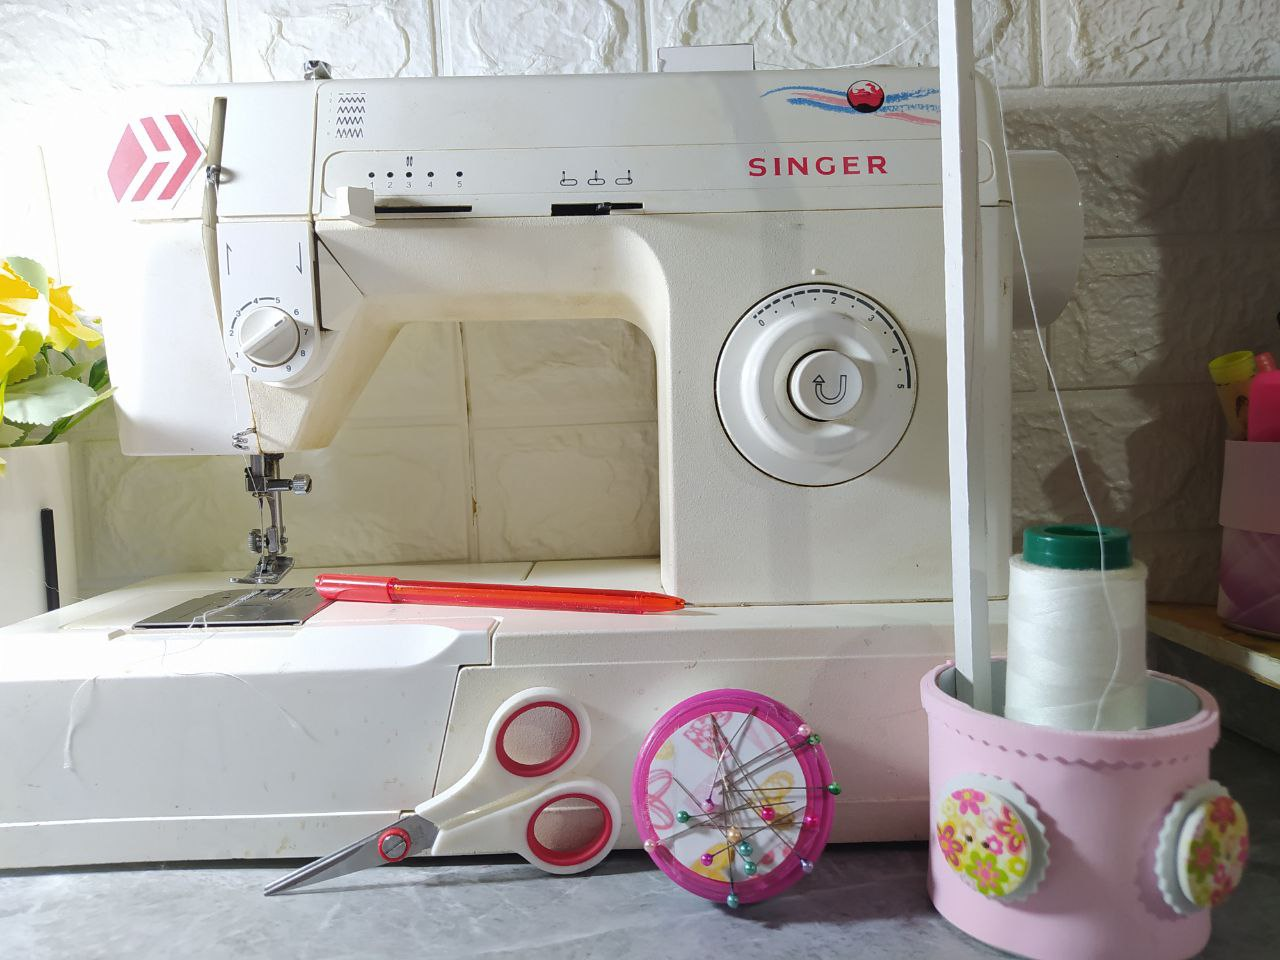
- Sewing machine and thread.
- Hand sewing needle and pins.
- Ruler, pen, and scissors.
- Solid-color fabric.
- Printed sky blue canvas.
- Peas, rice, or other grain.
- Piece of paper.
- Máquina de coser e hilo.
- Aguja de coser a mano y alfileres.
- Regla, bolígrafo y tijera.
- Tela unicolor.
- Loneta sky estampada.
- Arvejas, arroz u otro grano.
- Trozo de papel.
 |  |  |  |
|---|

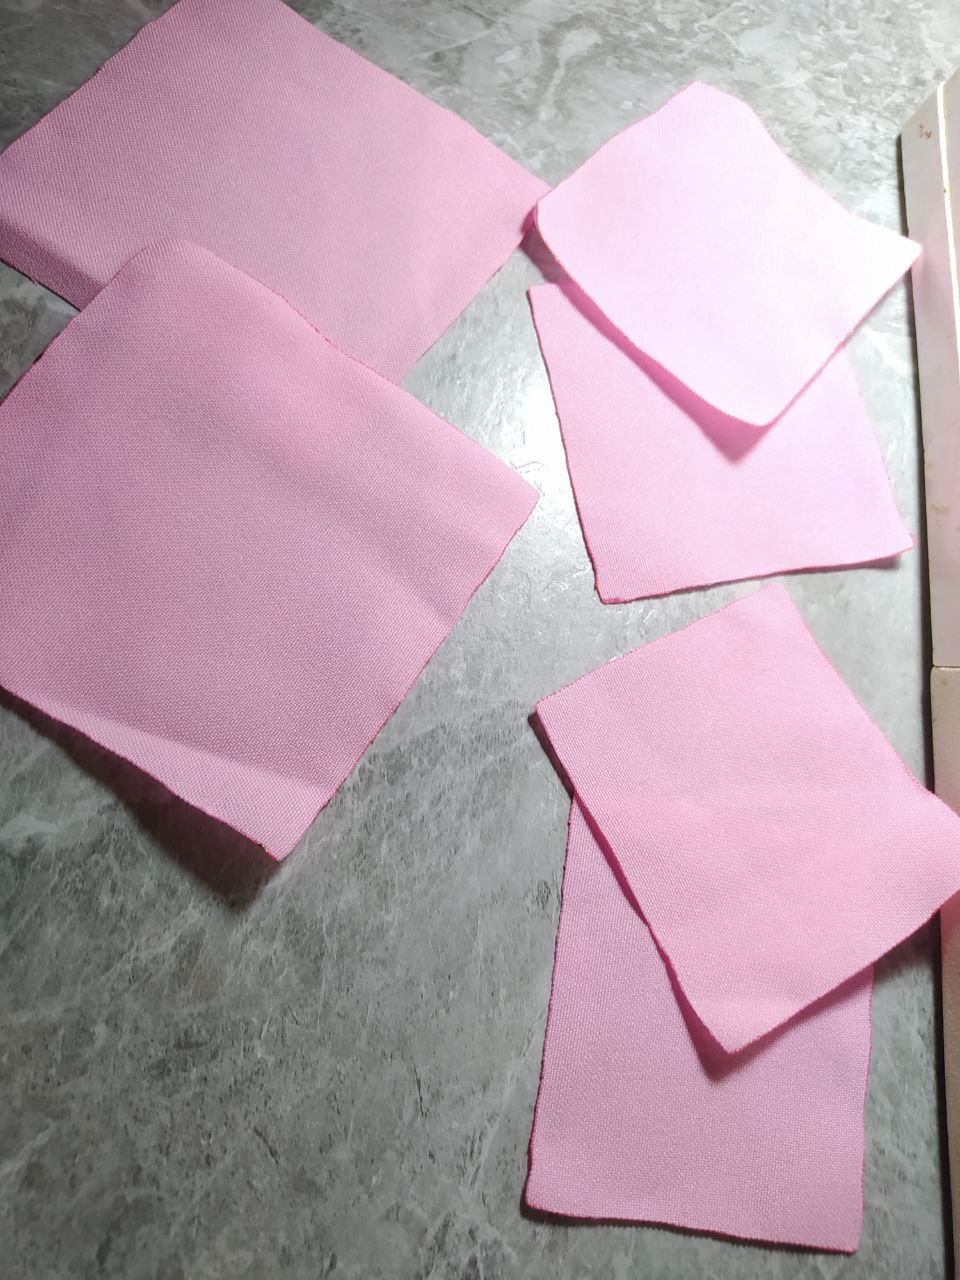
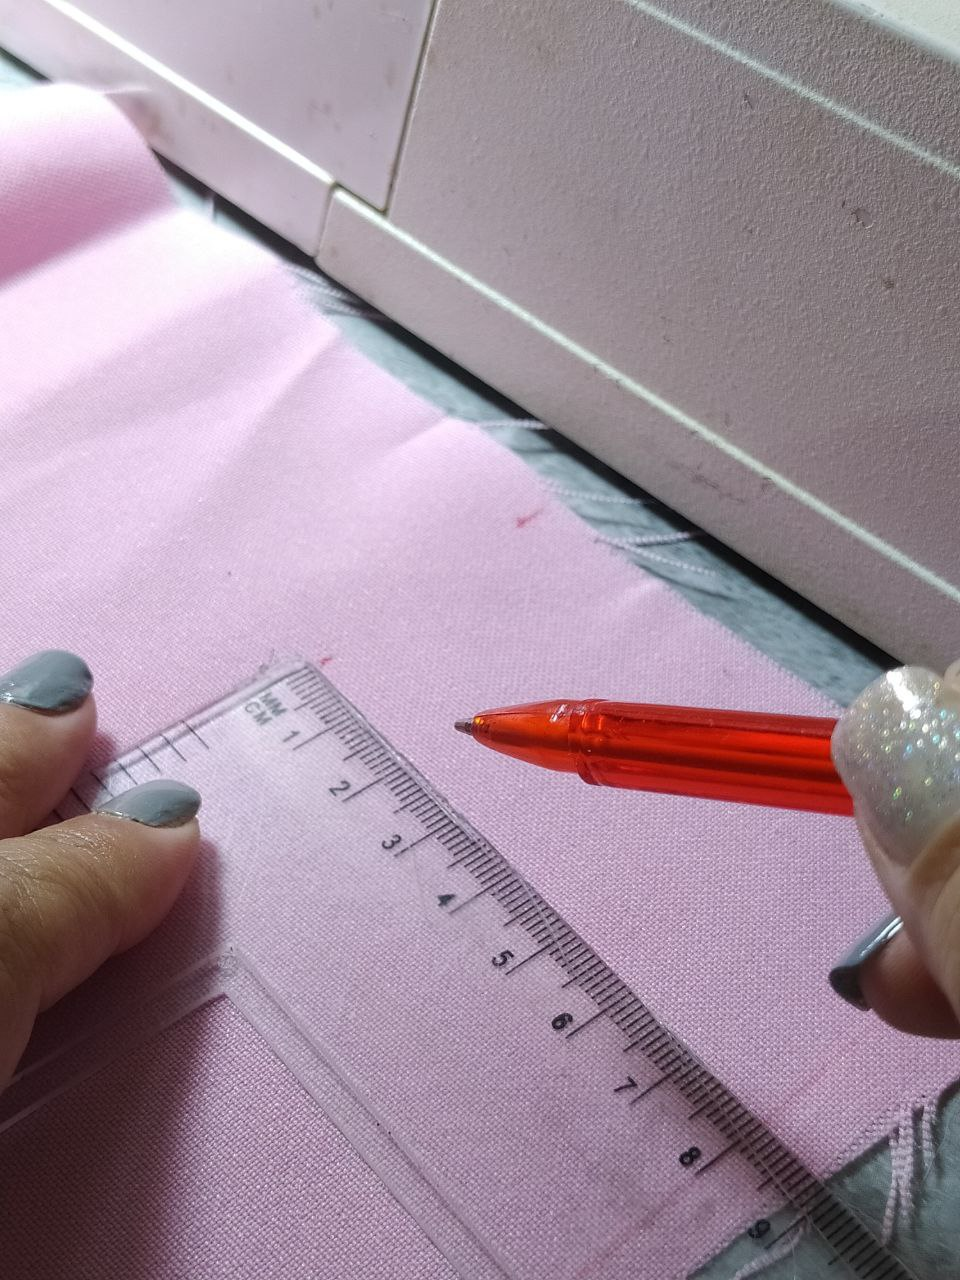
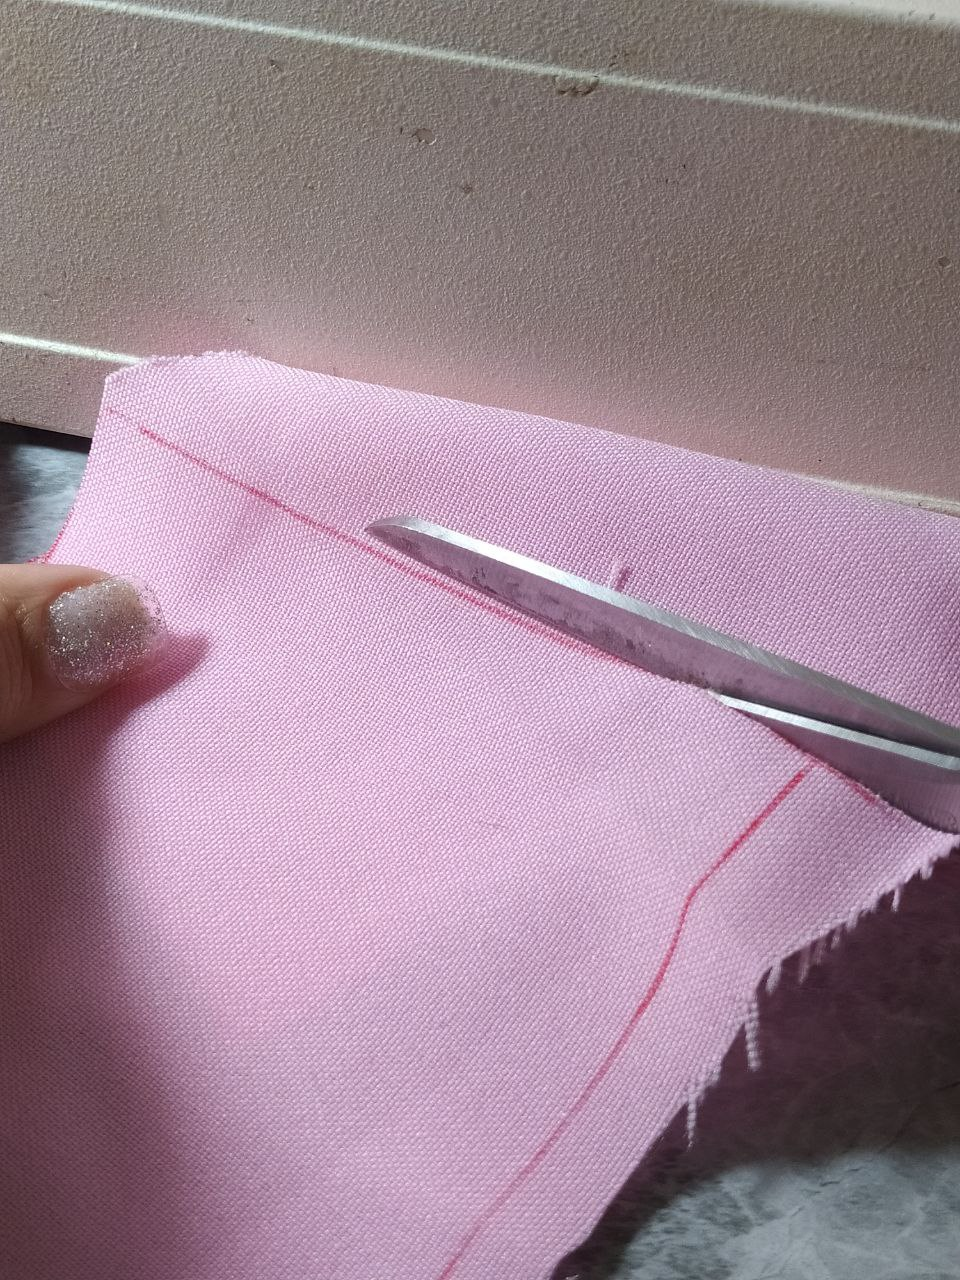
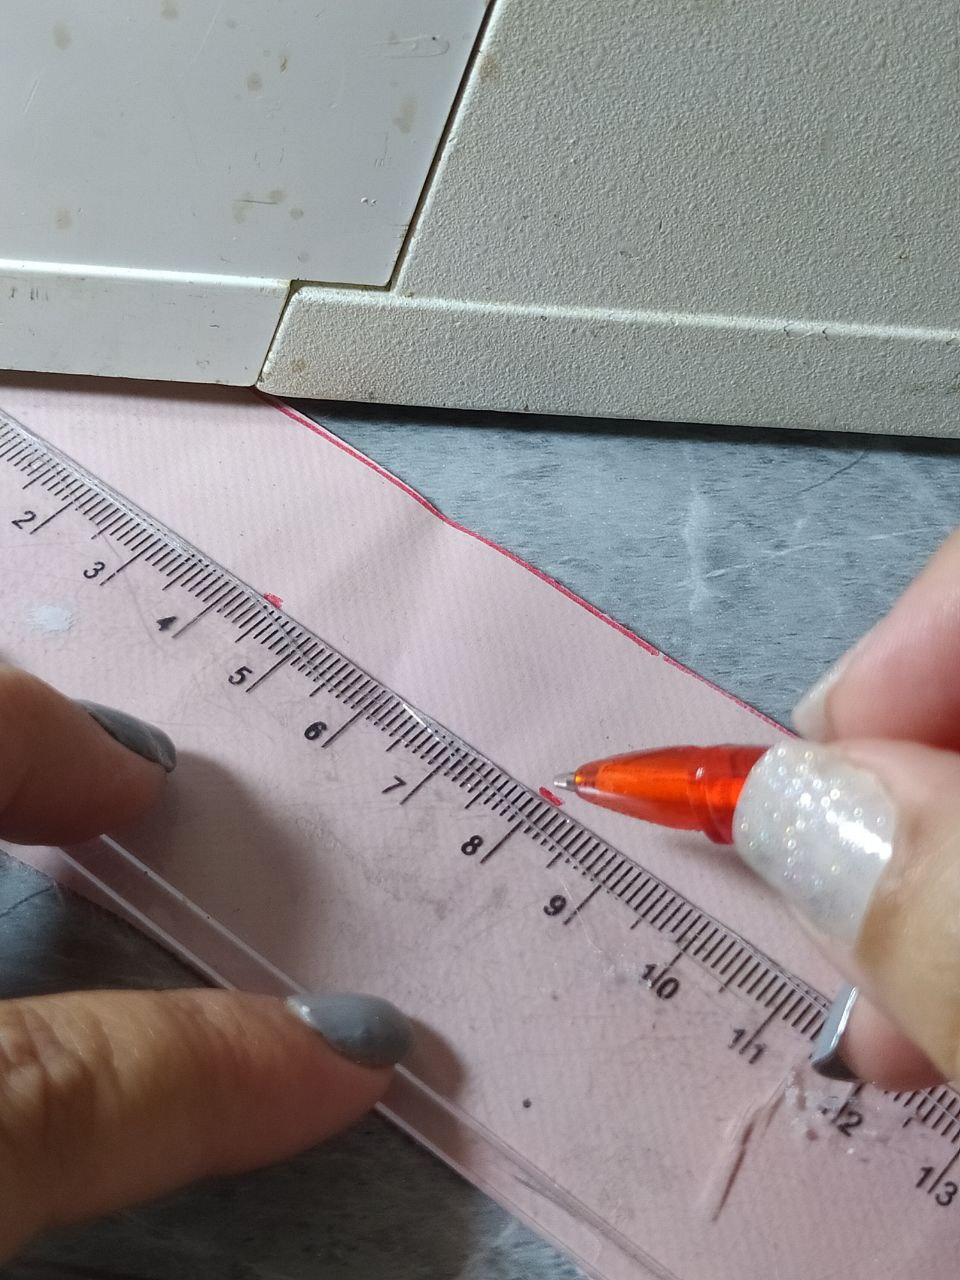
First, I'll prepare the body of the weights, which will be made up of two identical squares of any sturdy fabric. For each weight, you'll need two squares. In this case, I cut squares measuring 8 cm on each side and another measuring 10 cm on each side, but this measurement can really be any you like.
I marked it with a ruler, preferably a set square, and a pen. I cut these squares out and set aside a moment while I prepare the handle.
Primero voy a prepara el cuerpo de las pesas, que estará formado de dos cuadrados idénticos de tela de cualquier género que sea estable. Para cada pesa se necesitan dos cuadrados, en este caso corté cuadrados de 8cms de cada lado, y otro de 10cms de cada lado, pero esta medida realmente puede ser cualquiera que sea de tu gusto.
La marqué con la ayuda de una regla escuadra preferiblemente, y bolígrafo. Estos cuadrados los recorté y tenía reservados un momento, mientras preparo el asa.
 |  | |
|---|
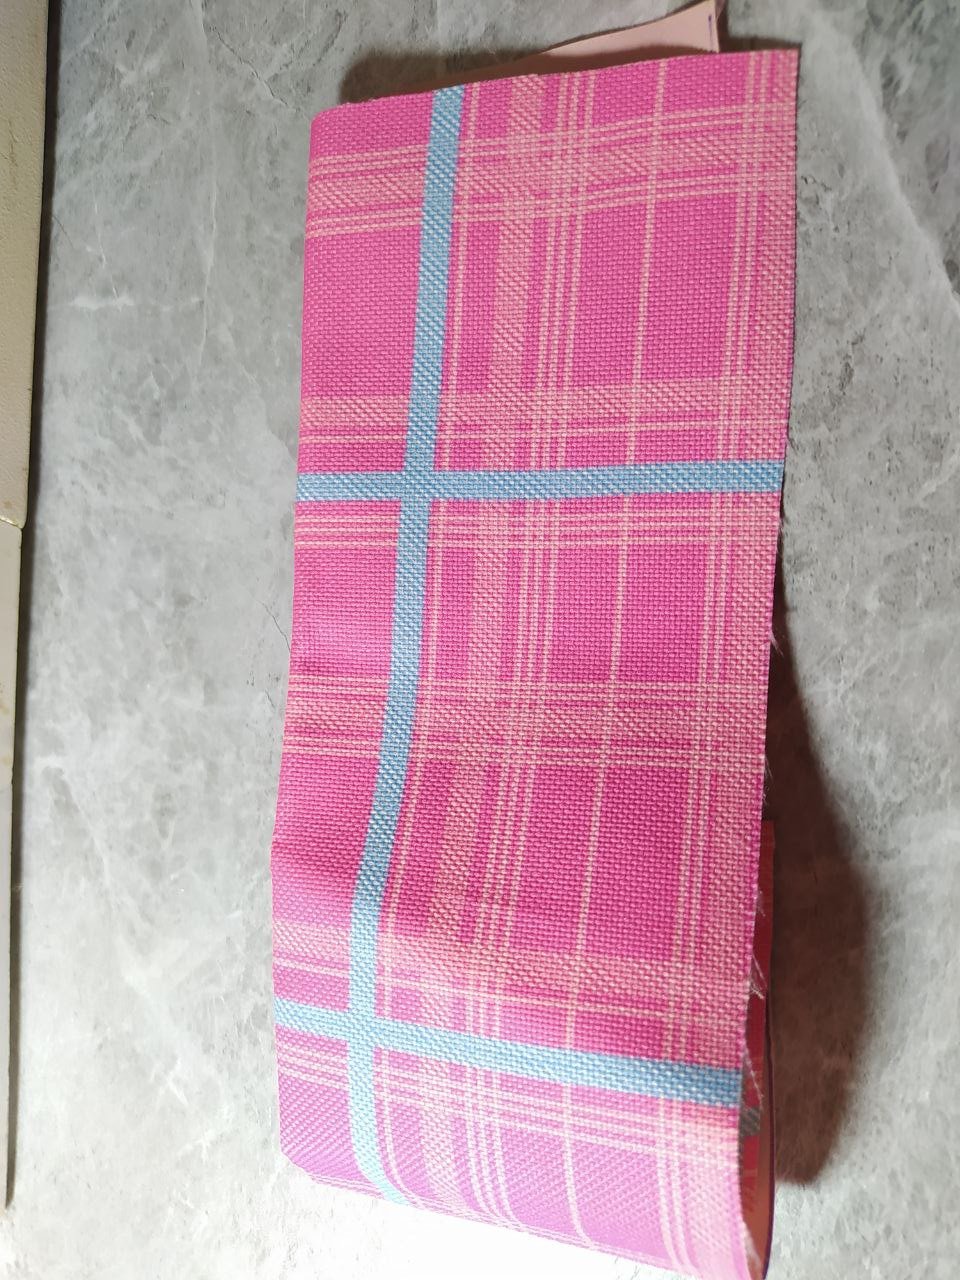
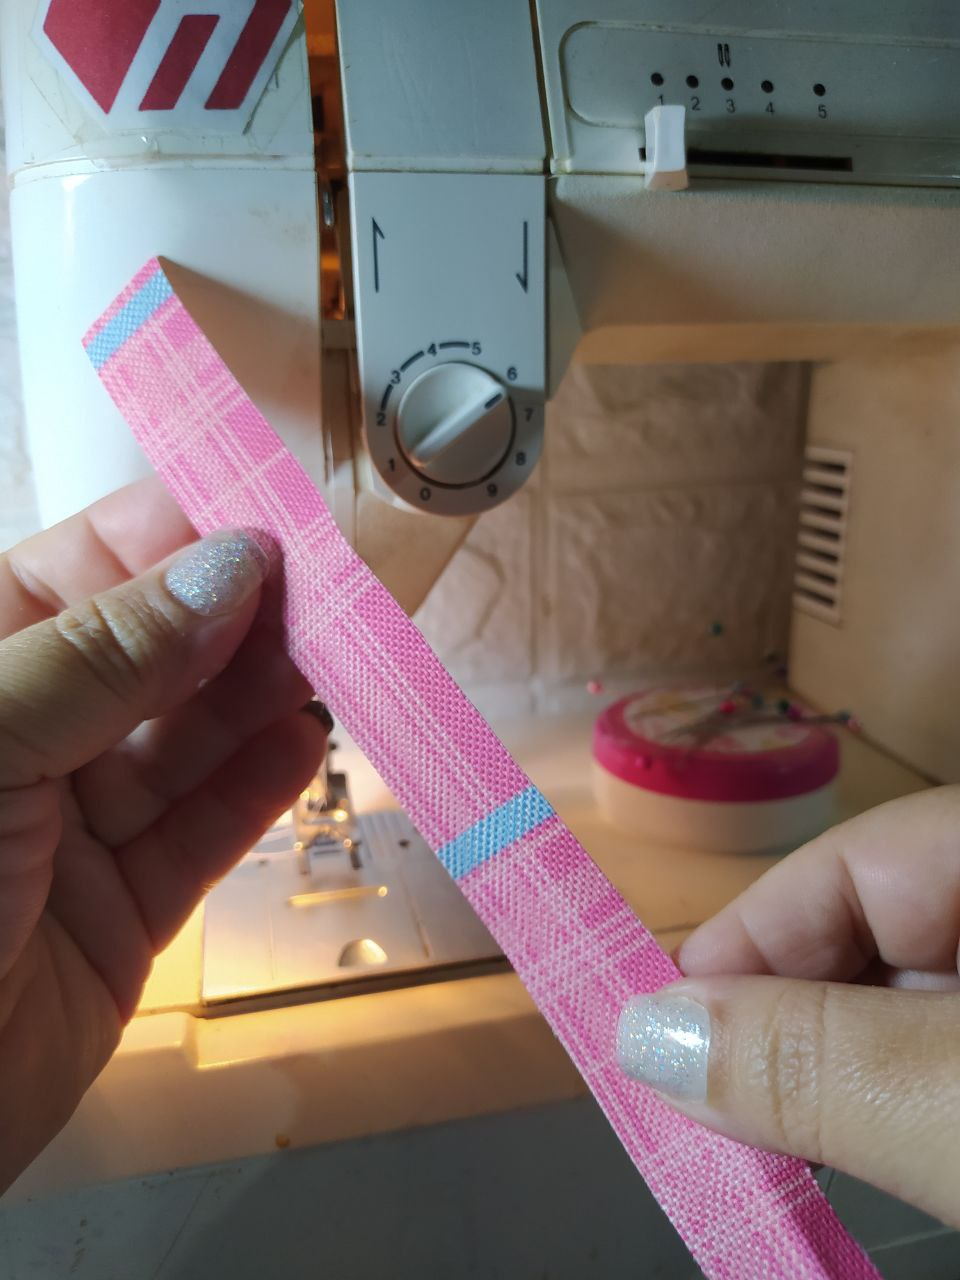
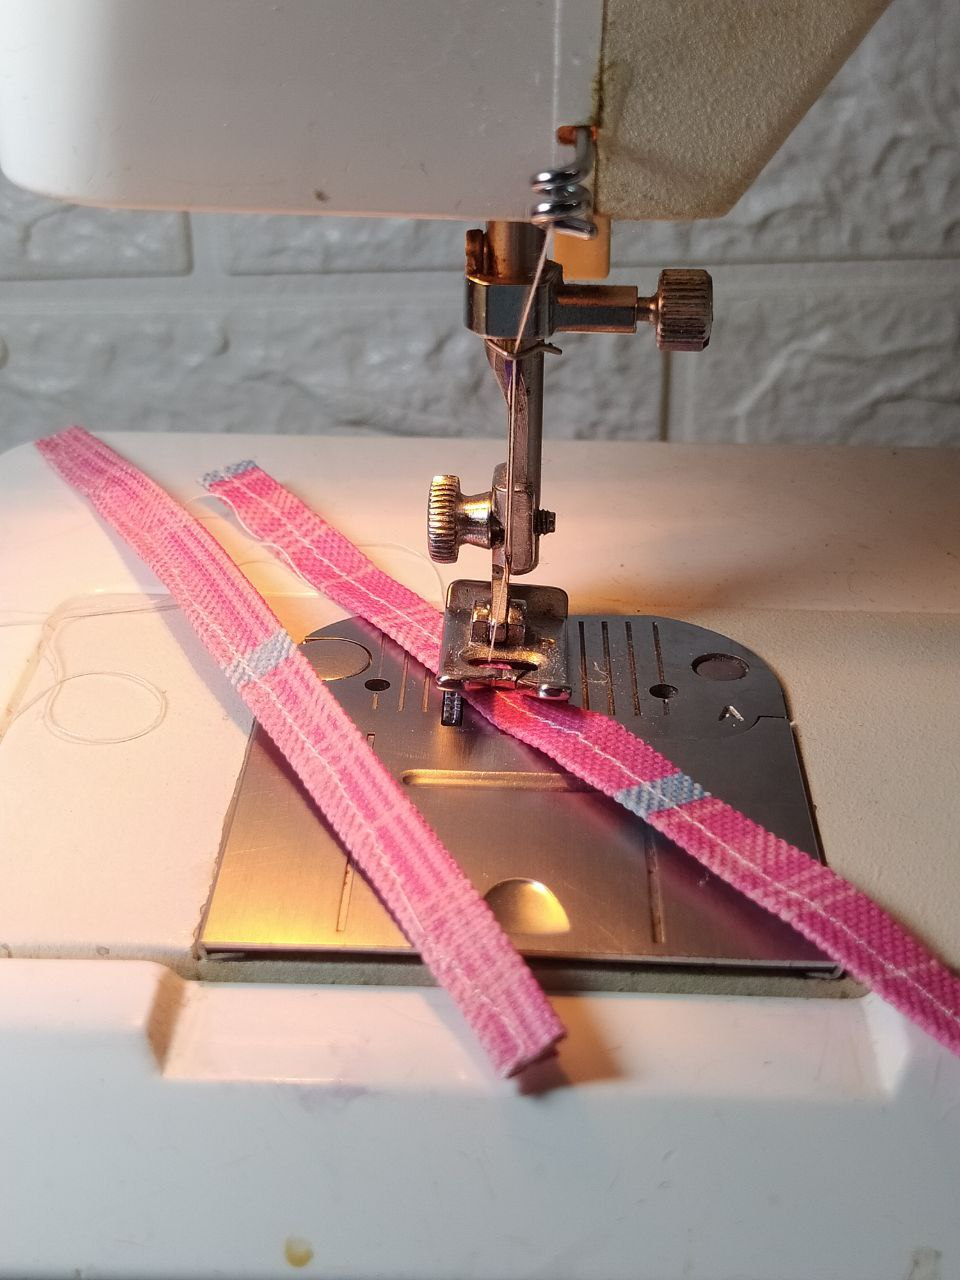
For the handle, I used a piece of patterned sky canvas, marked it, and cut strips 2.5 cm wide by 14 cm long. This measurement is also completely up to you.
Para el asa, utilicé un trozo de loneta sky estampada, marqué y corté tiras de 2,5cms de ancho por 14cms de largo. Esta medida también totalmente a tu gusto.
|  |  |
|---|
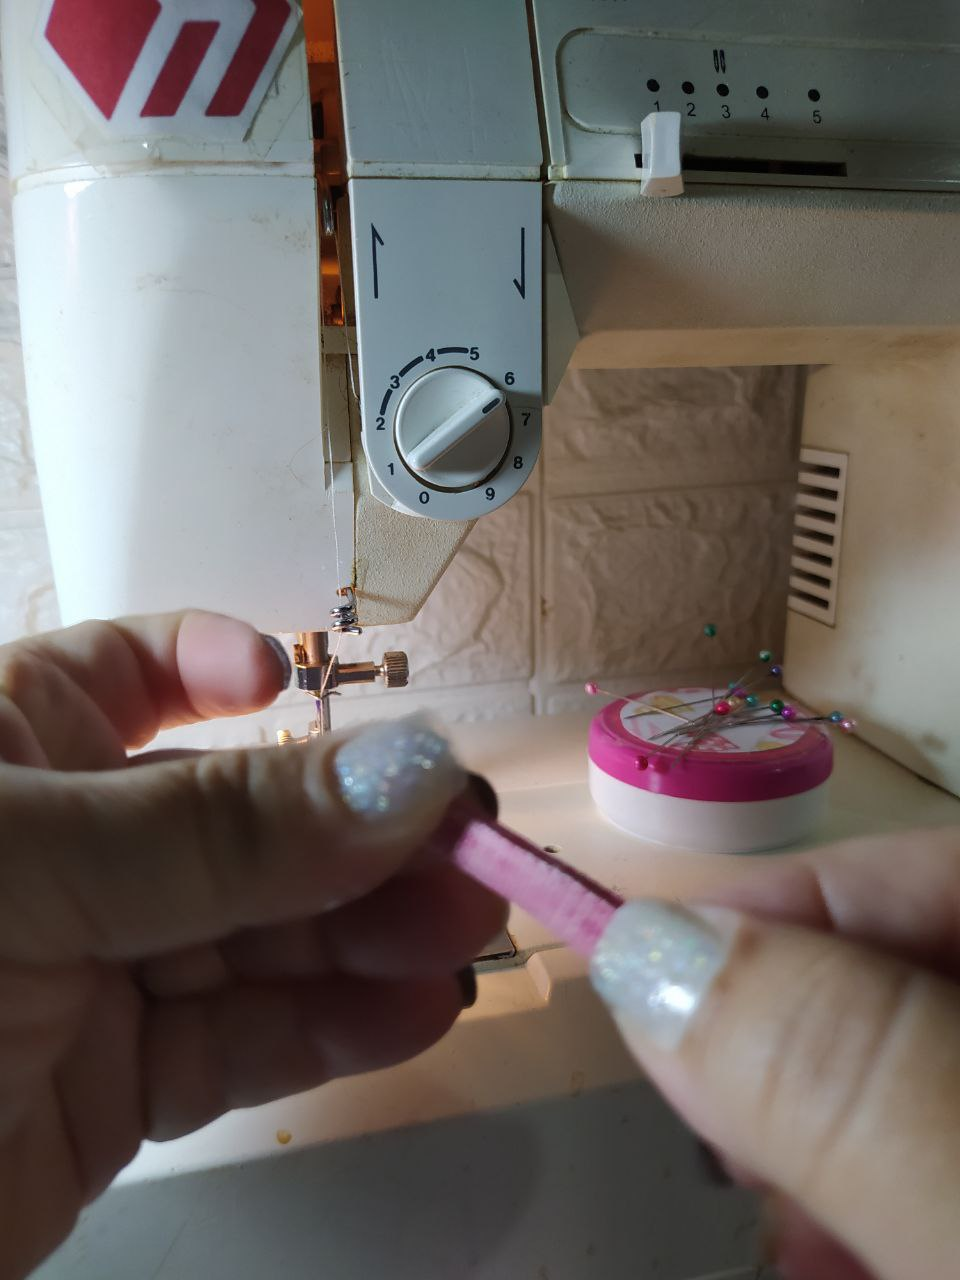
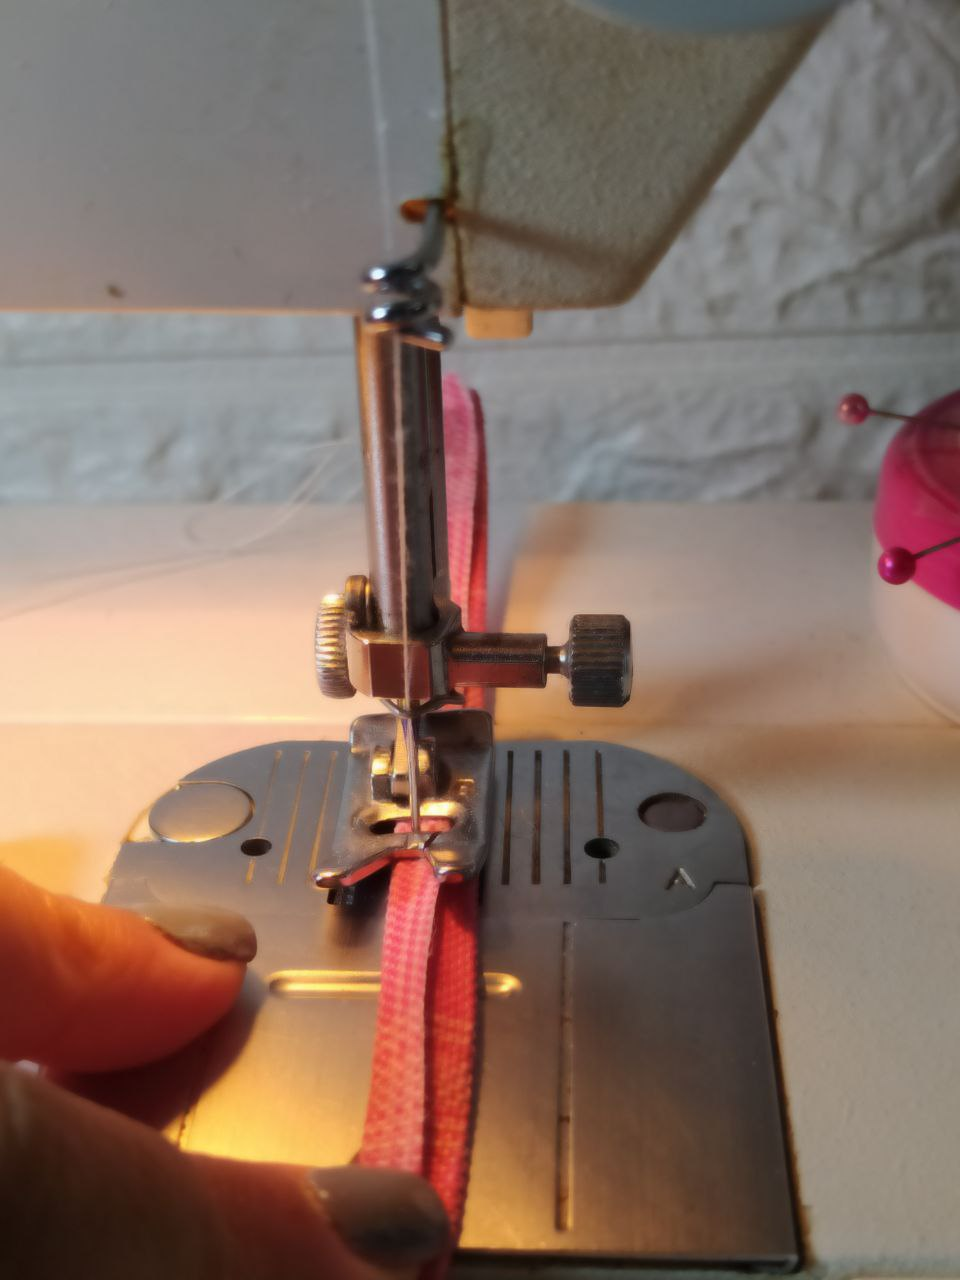
I folded each strip twice to make a thicker strip, and sewed it with a straight stitch on the sewing machine.
Cada tira las doblé dos veces para obtener una tira más gruesa, y la cosí con costura recta en la máquina de coser.
|  |  |  |
|---|
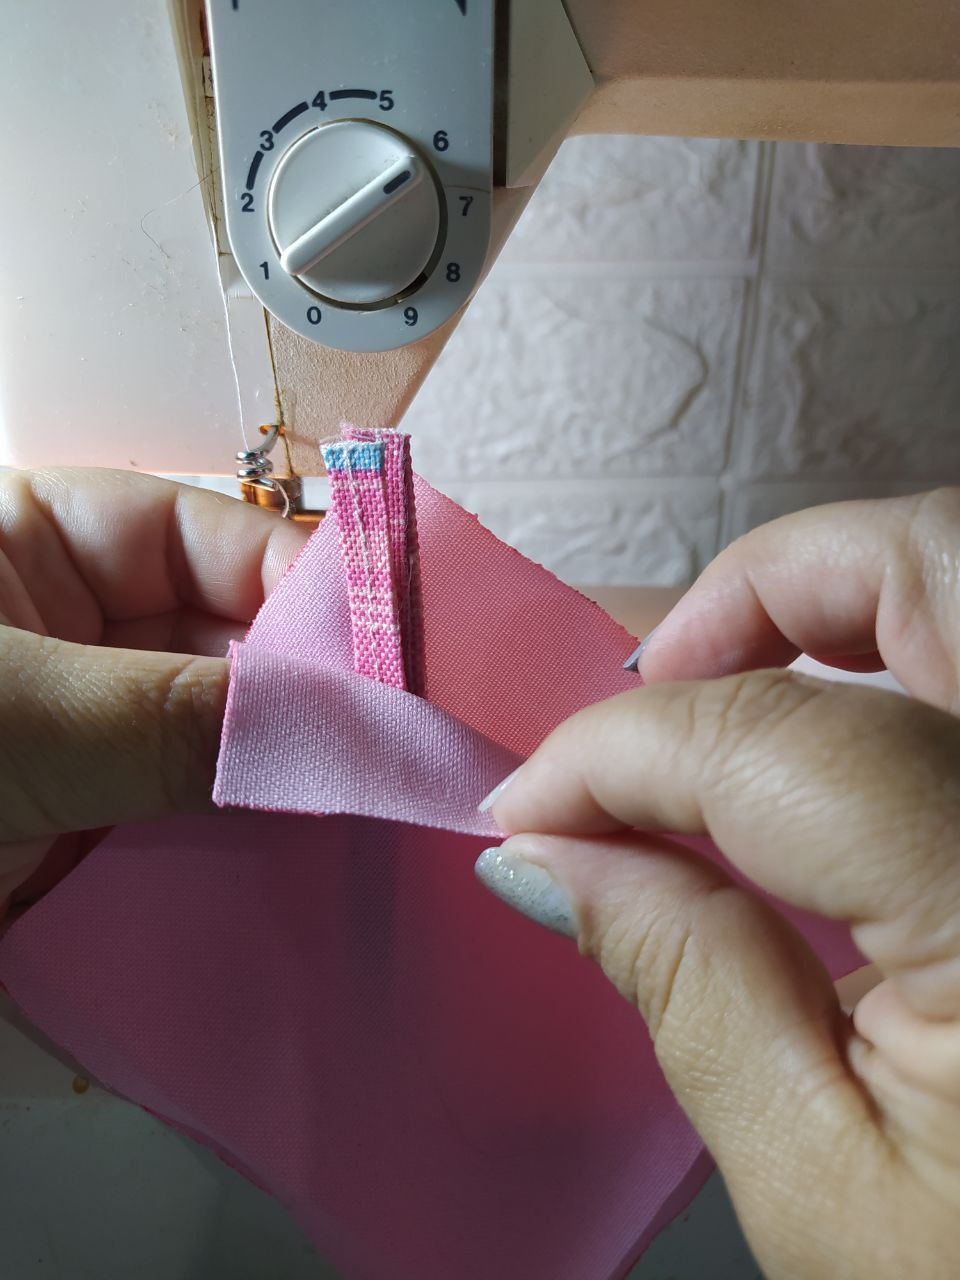
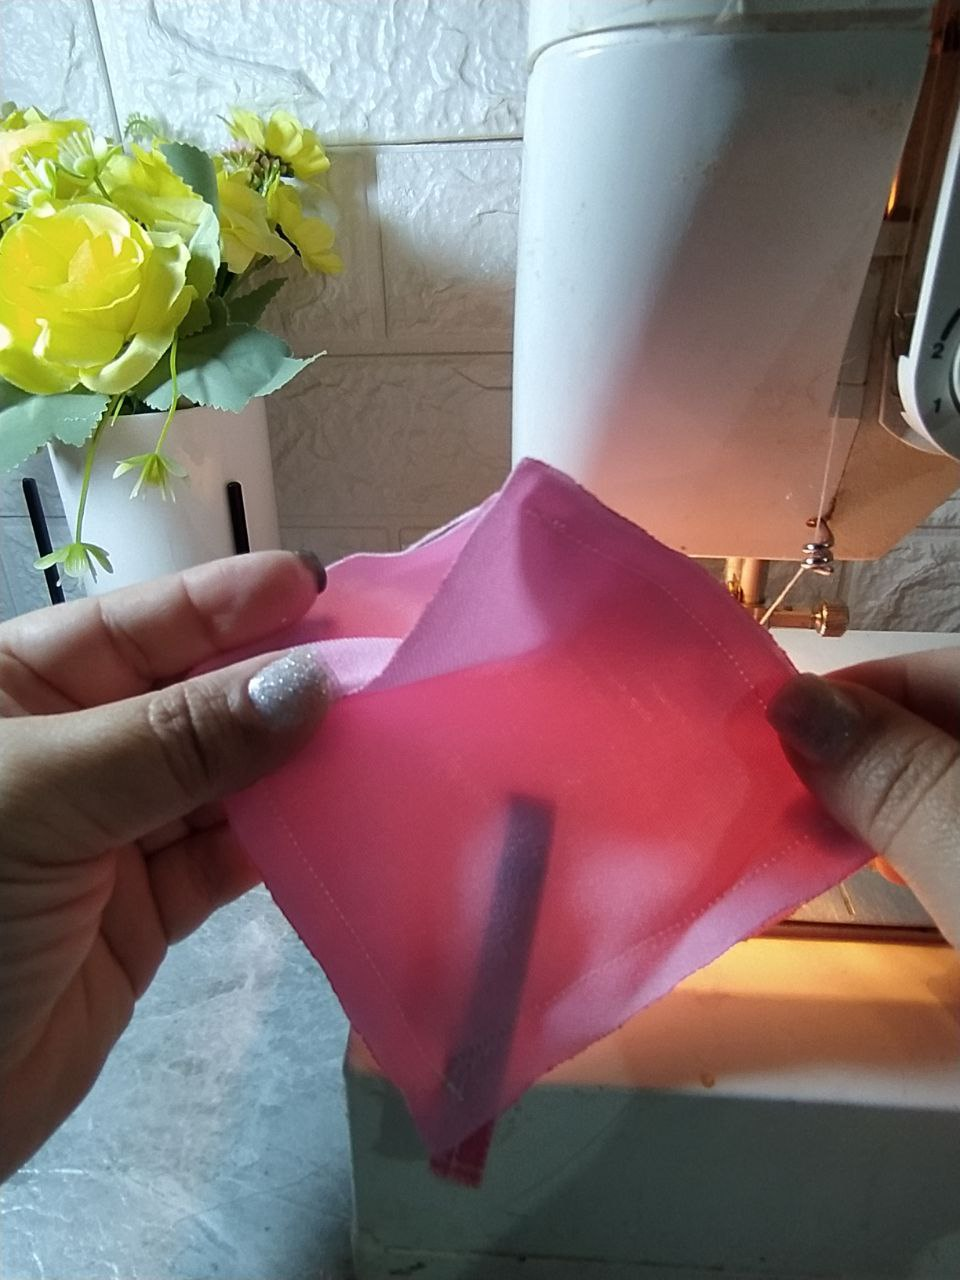
Now, I'm going to assemble each weight as follows. I took two identical squares from the ones I initially prepared, and placed the folded strip between the two fabrics at one corner, leaving the points at that corner.
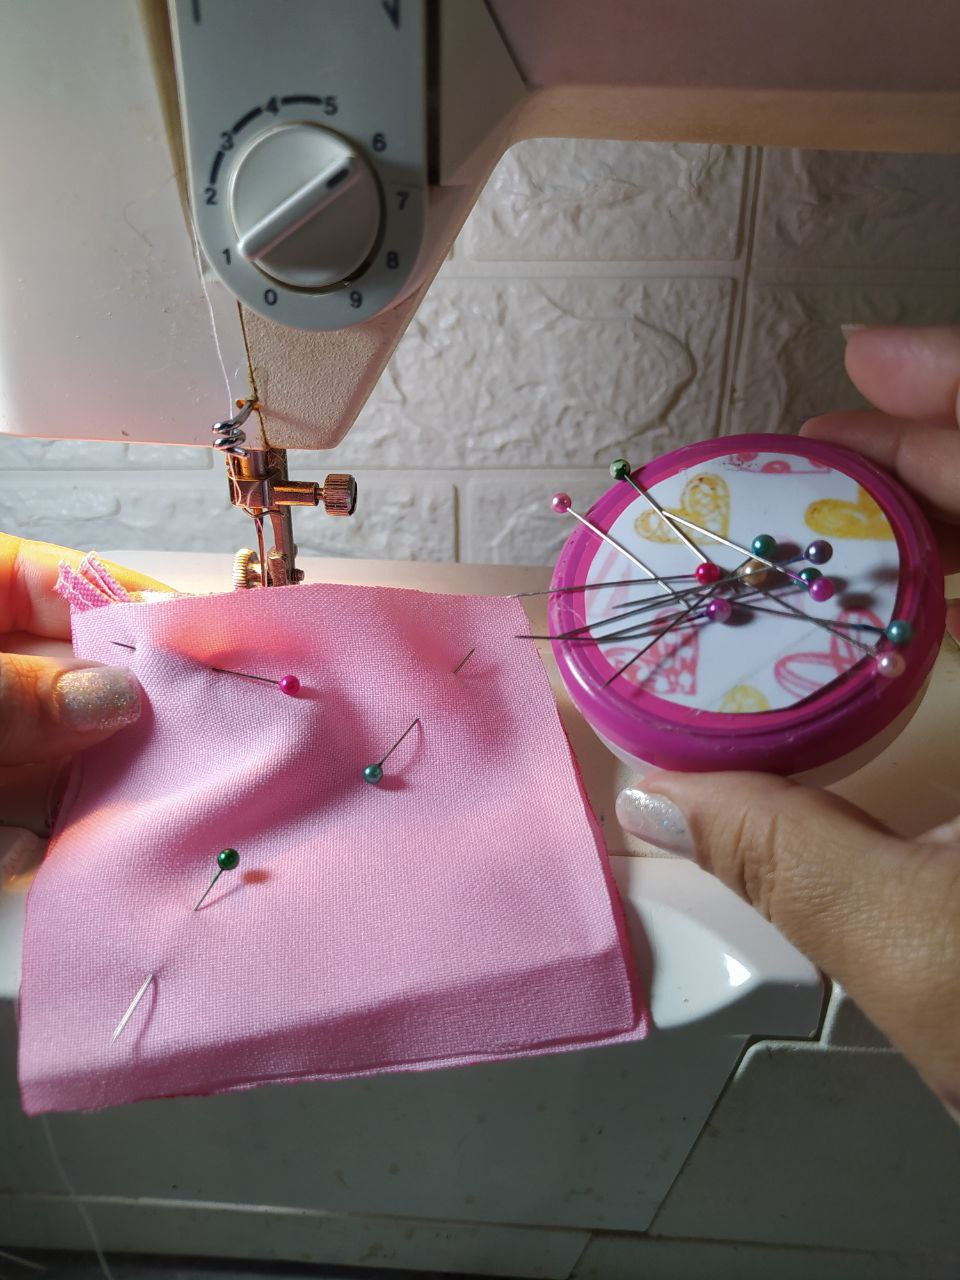
I secured them with pins to keep everything stable and make sewing much easier. I sewed three of the sides, including the corner containing the strip in this seam.
Ahora si, voy a armar cada pesa de la siguiente forma. Tomé dos cuadrados idénticos de los que preparé inicialmente, y entre las dos telas en una de sus esquinas coloqué la tira doblada, dejando las puntas en esa esquina.
Fijé con alfileres para que todo esté estable y poder coser con mucha más facilidad. Cosí tres de sus lados, incluyendo en esta costura la esquina que contiene la tira.
 |  |  |  |
|---|
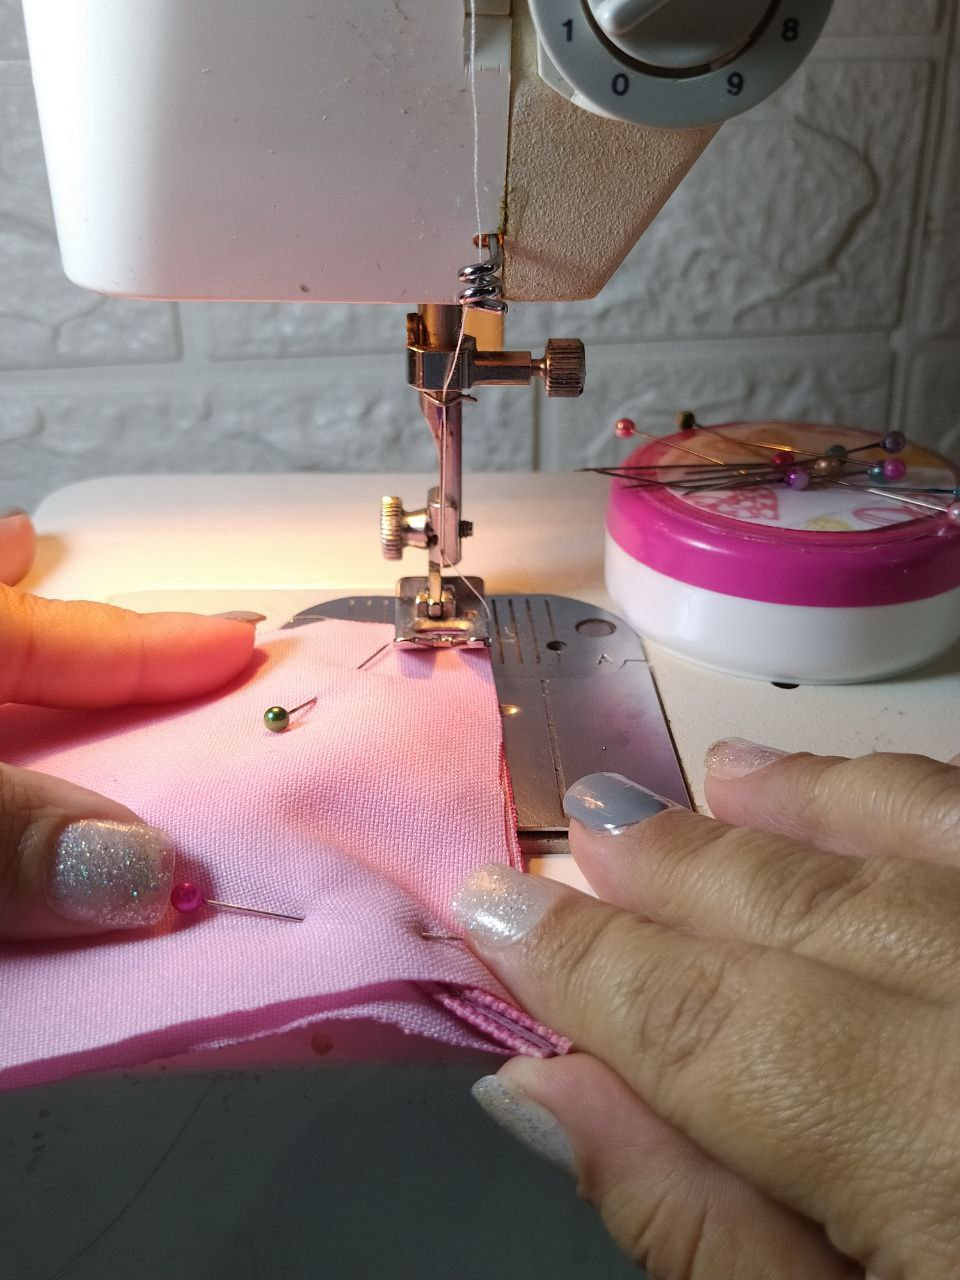
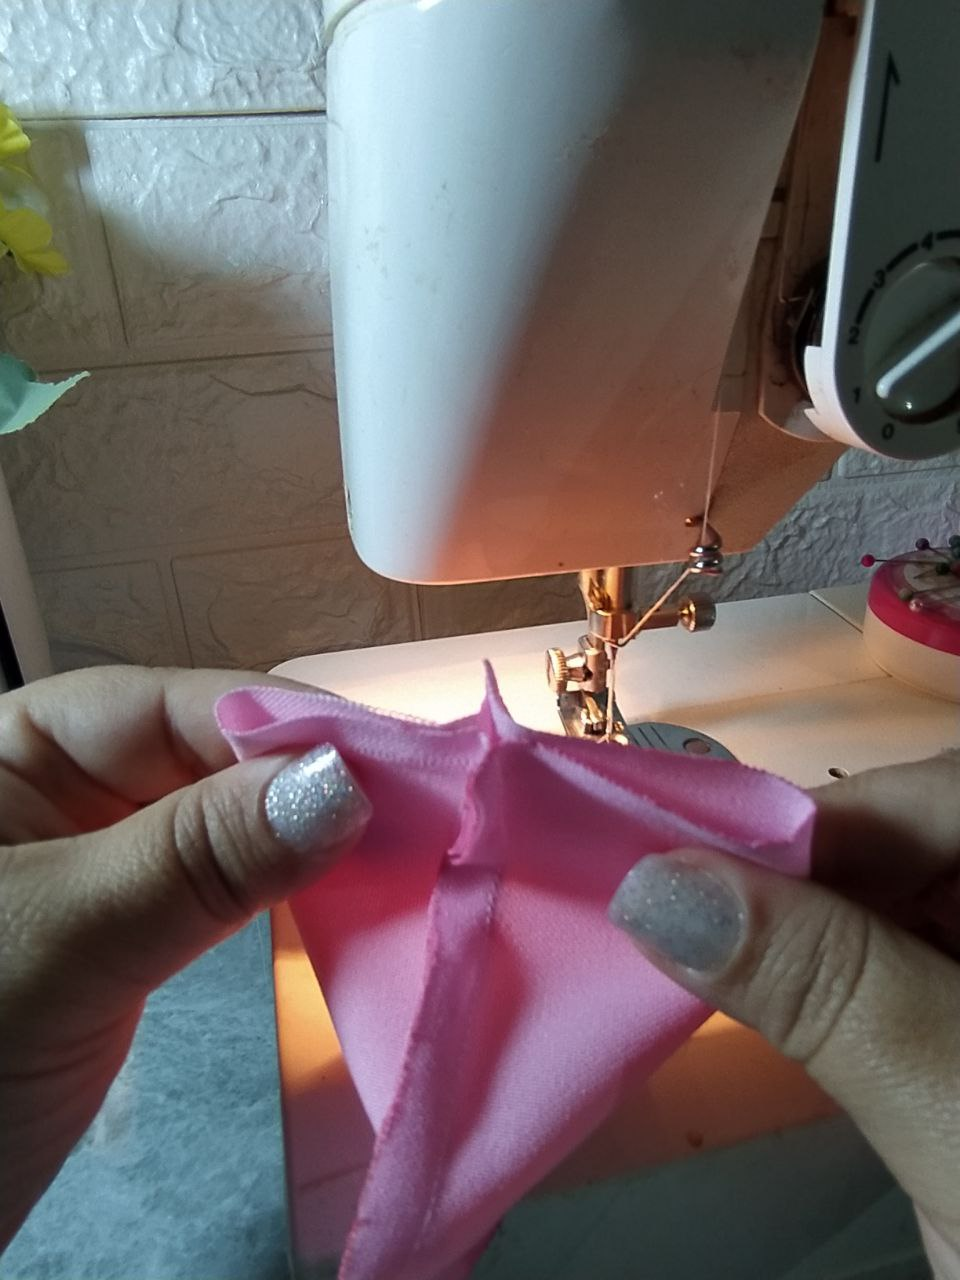
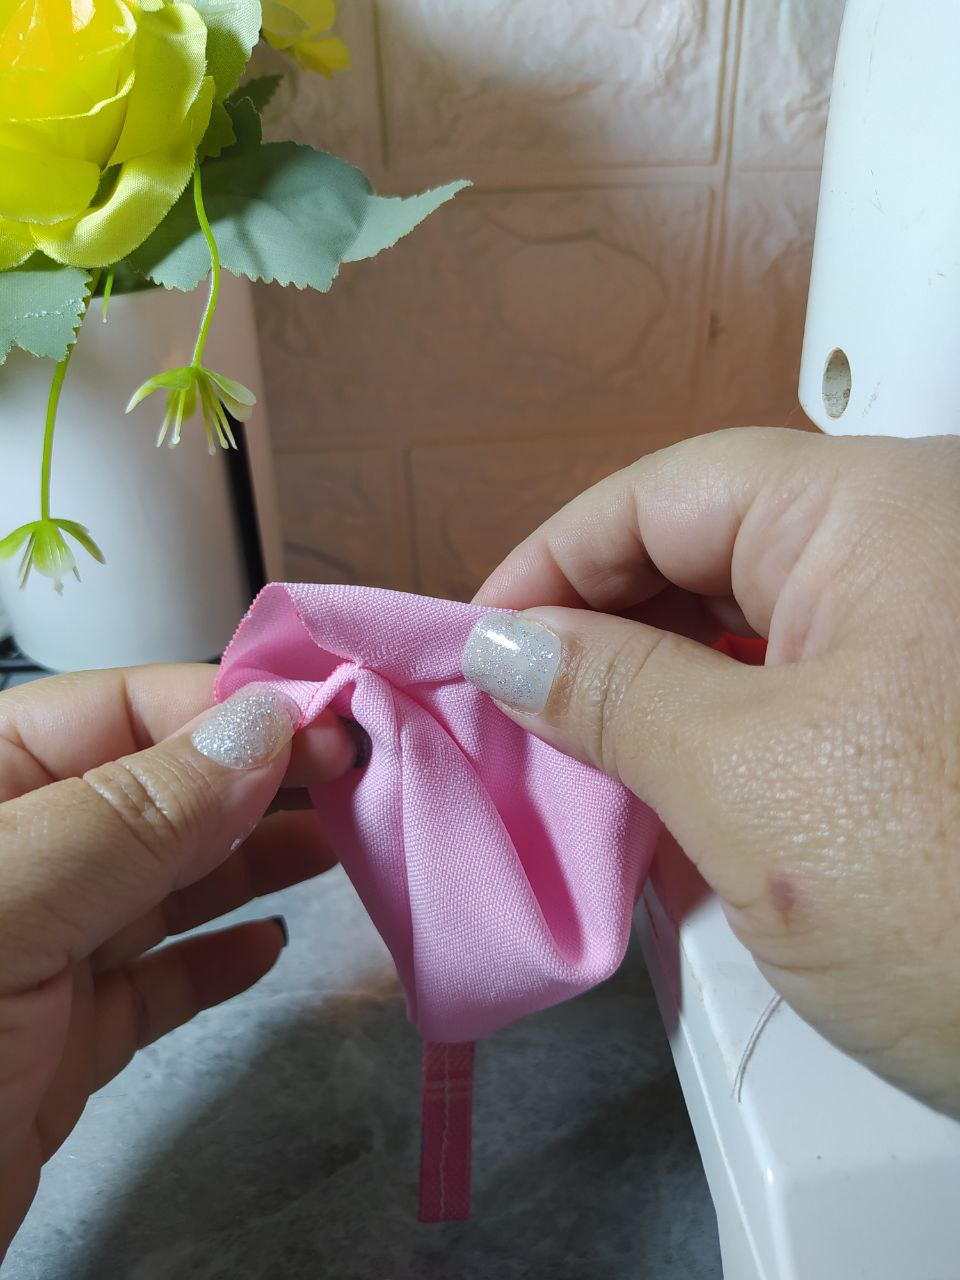
Here we can see the side that wasn't sewn. I'm going to open it to face the middle of each side, and opening that seam, I sewed a straight seam only halfway, leaving a gap.
Aquí podemos apreciar el lado que no se pasó costura. Lo voy a abrir para enfrentar los medios de cada lado y abriendo esa costura, pasé costura recta solo hasta la mitad, dejando libre un espacio.
 |  |  |  |
|---|
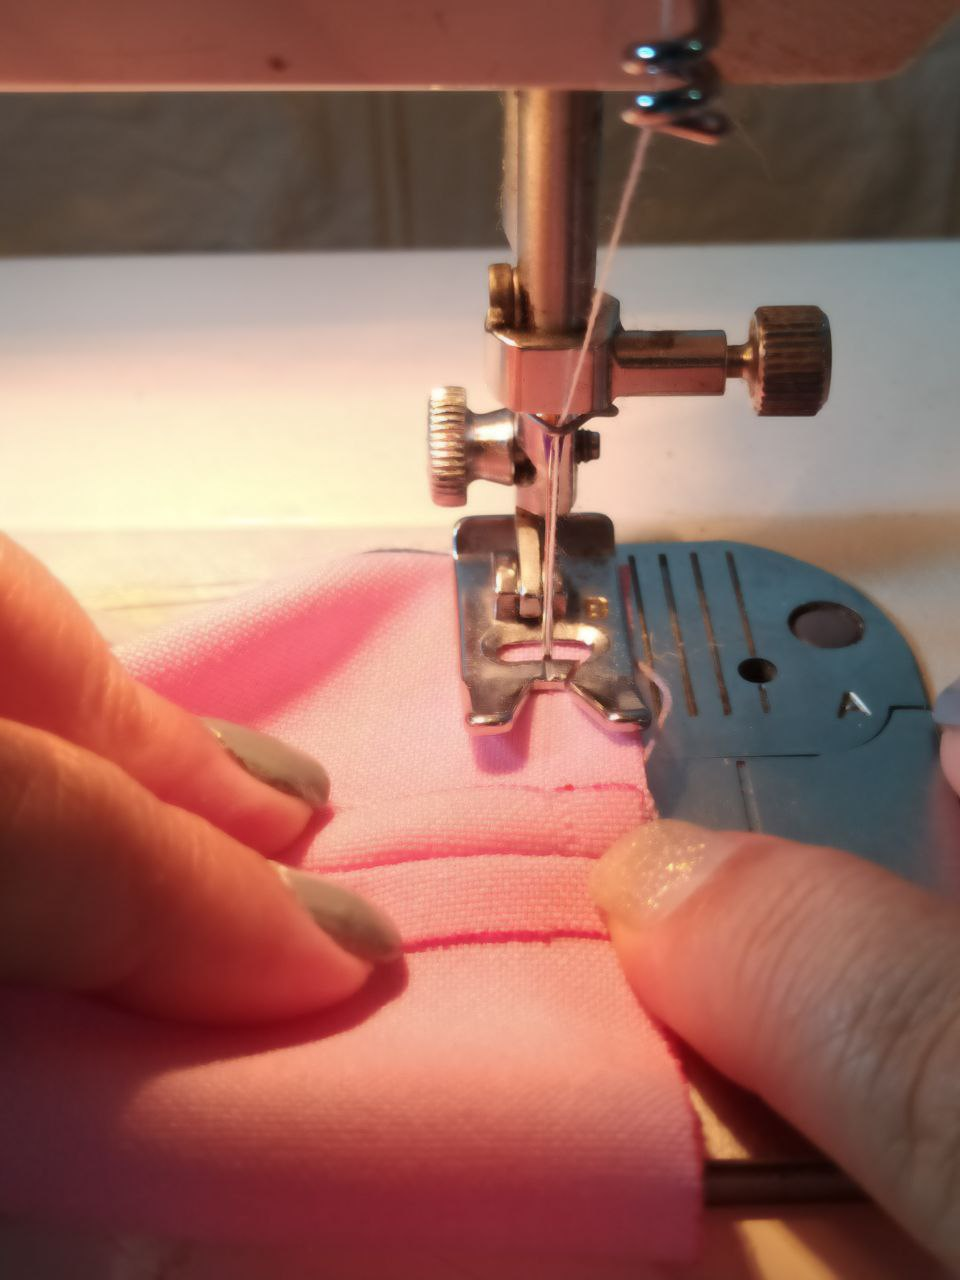
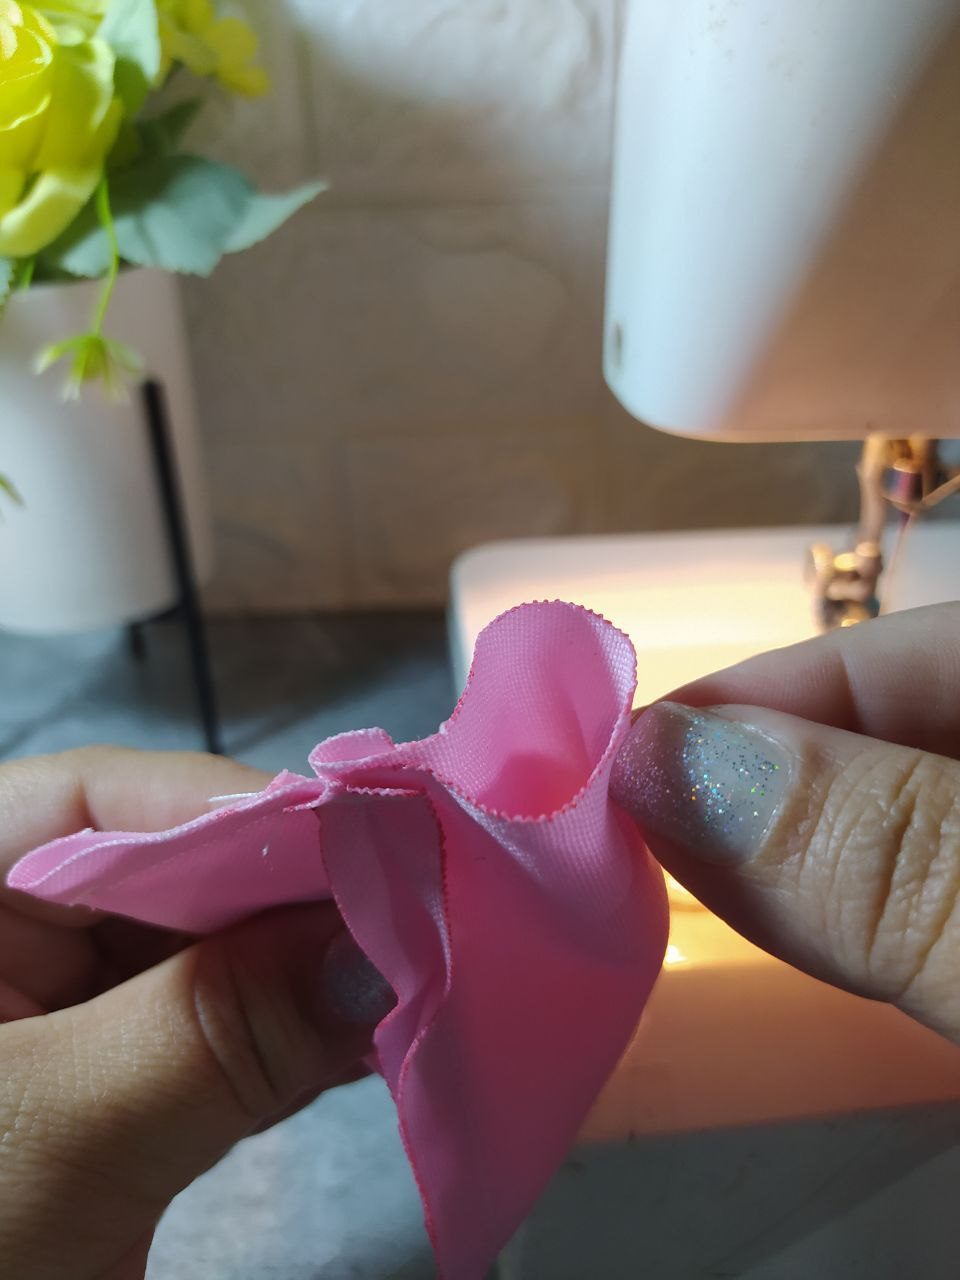
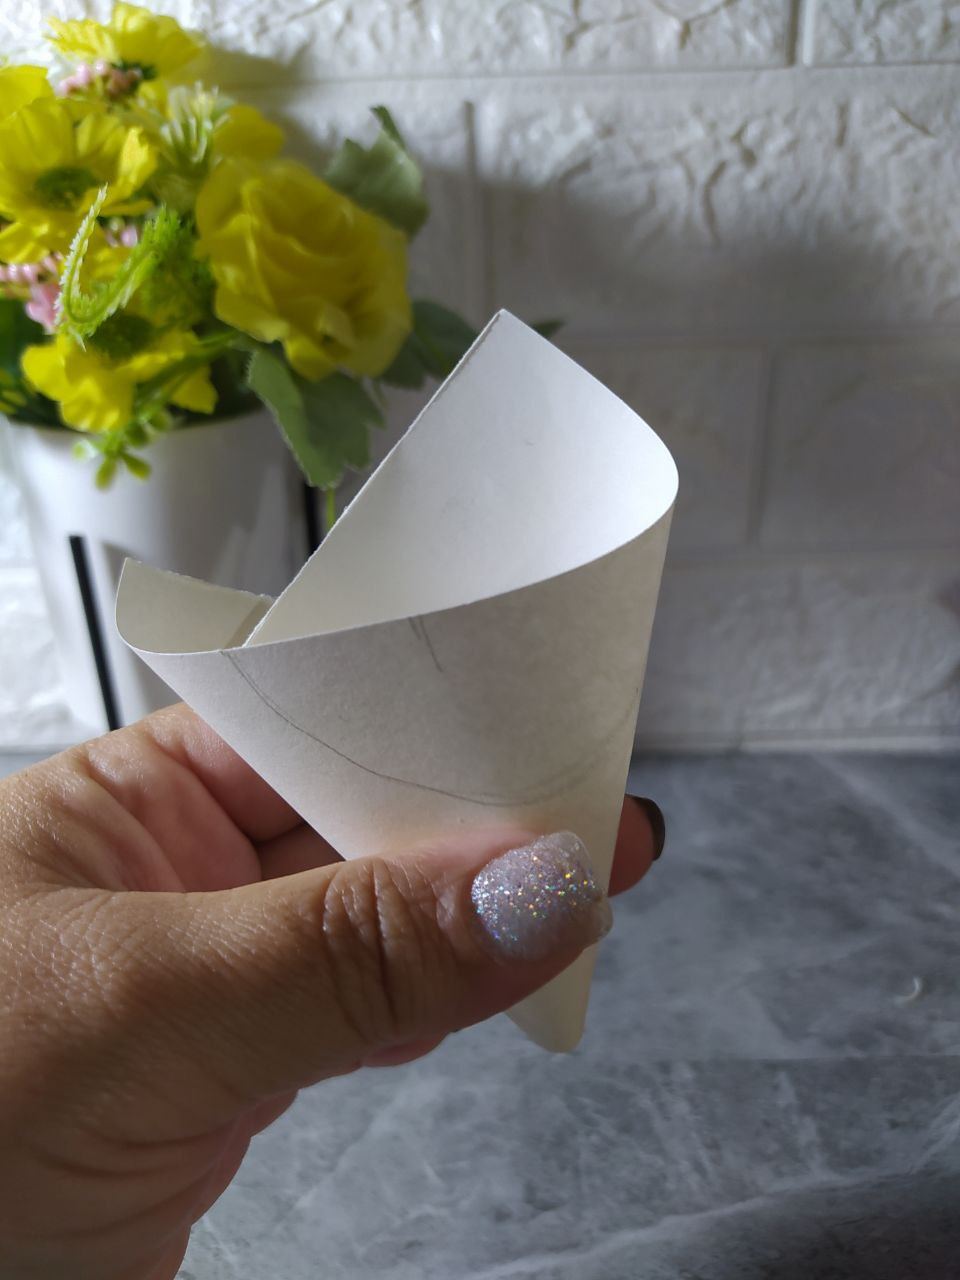
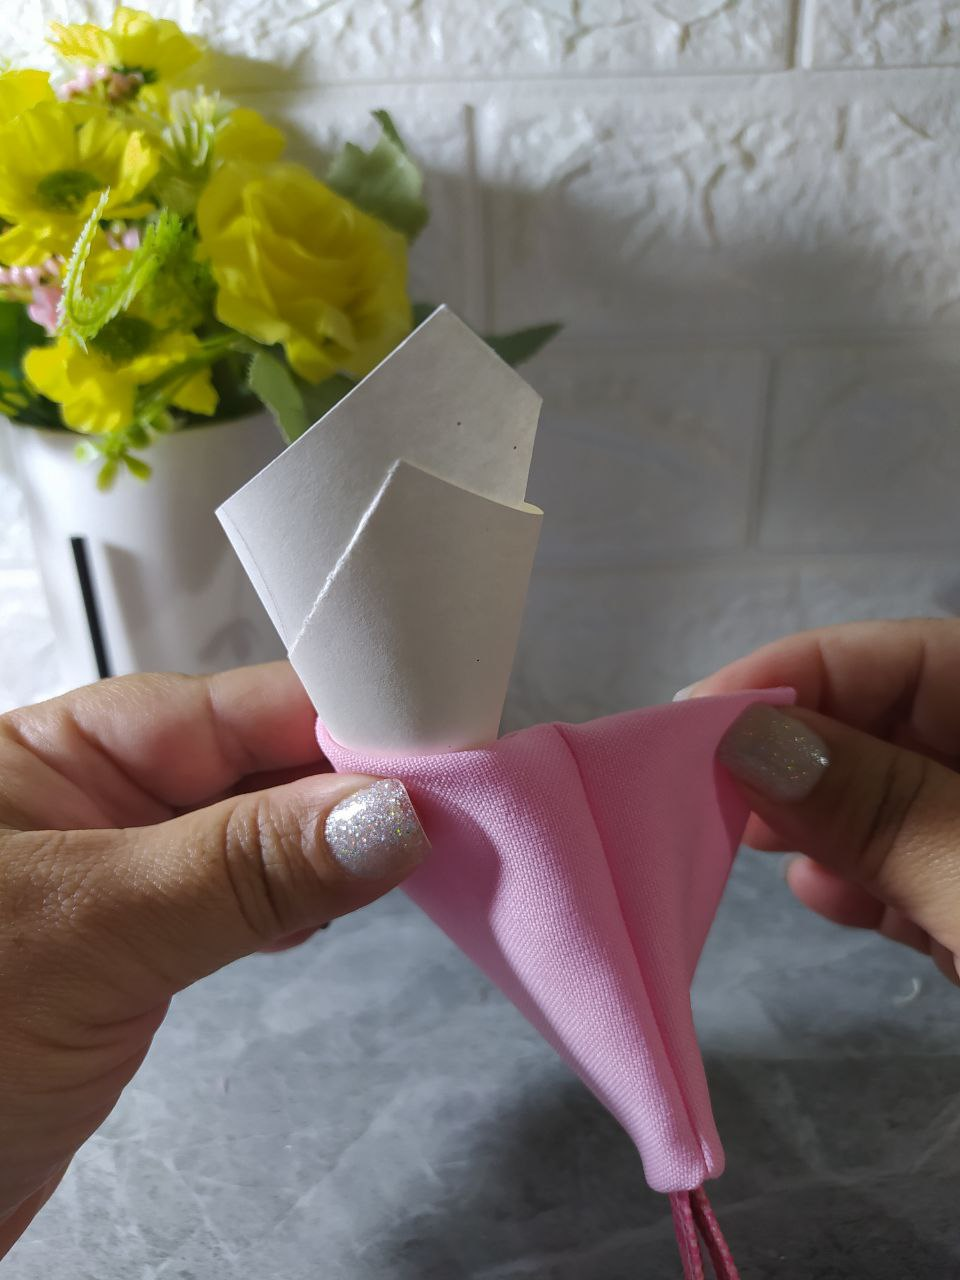
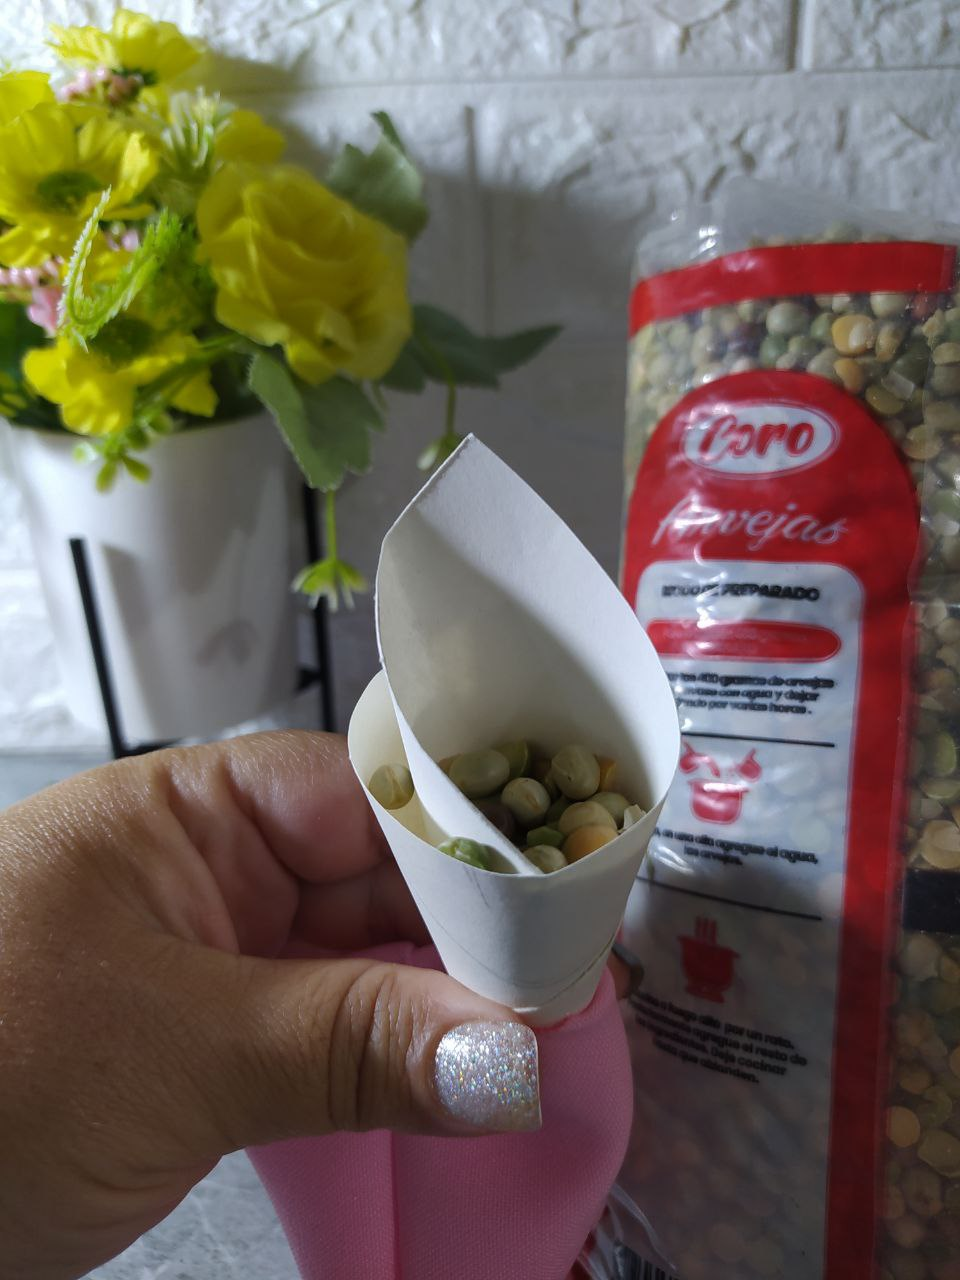
Through the free space, I turn the entire piece right side out. Now, with a piece of cardboard, I form a cone and place it in the free space to begin filling in the space.
Por el espacio libre volteo la pieza completa al derecho. Ahora con un trozo de cartulina, formo un cono y lo ubico en el espacio libre para comenzar a rellenar por ahí.
 | |  |  |
|---|
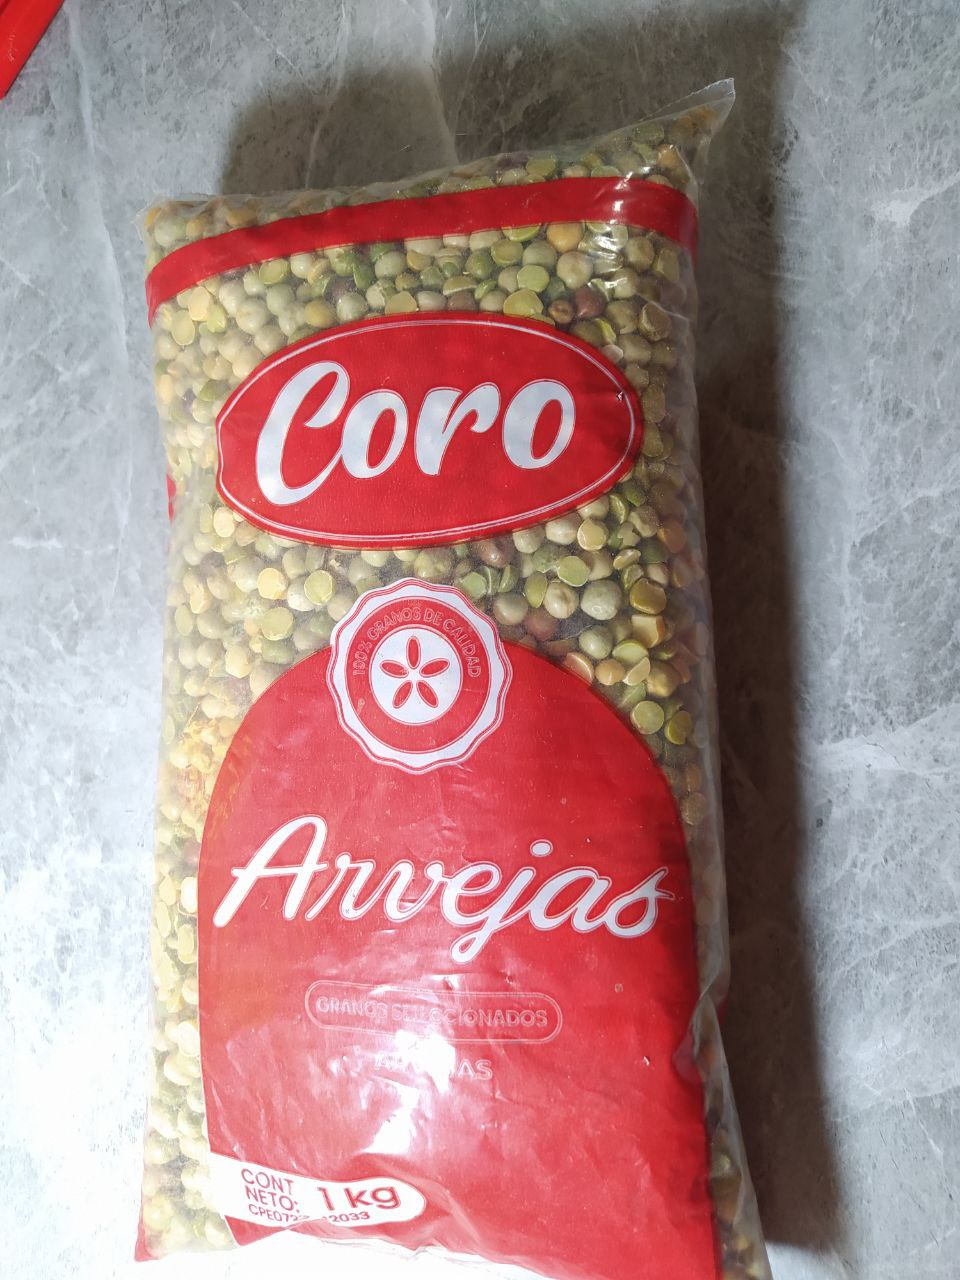
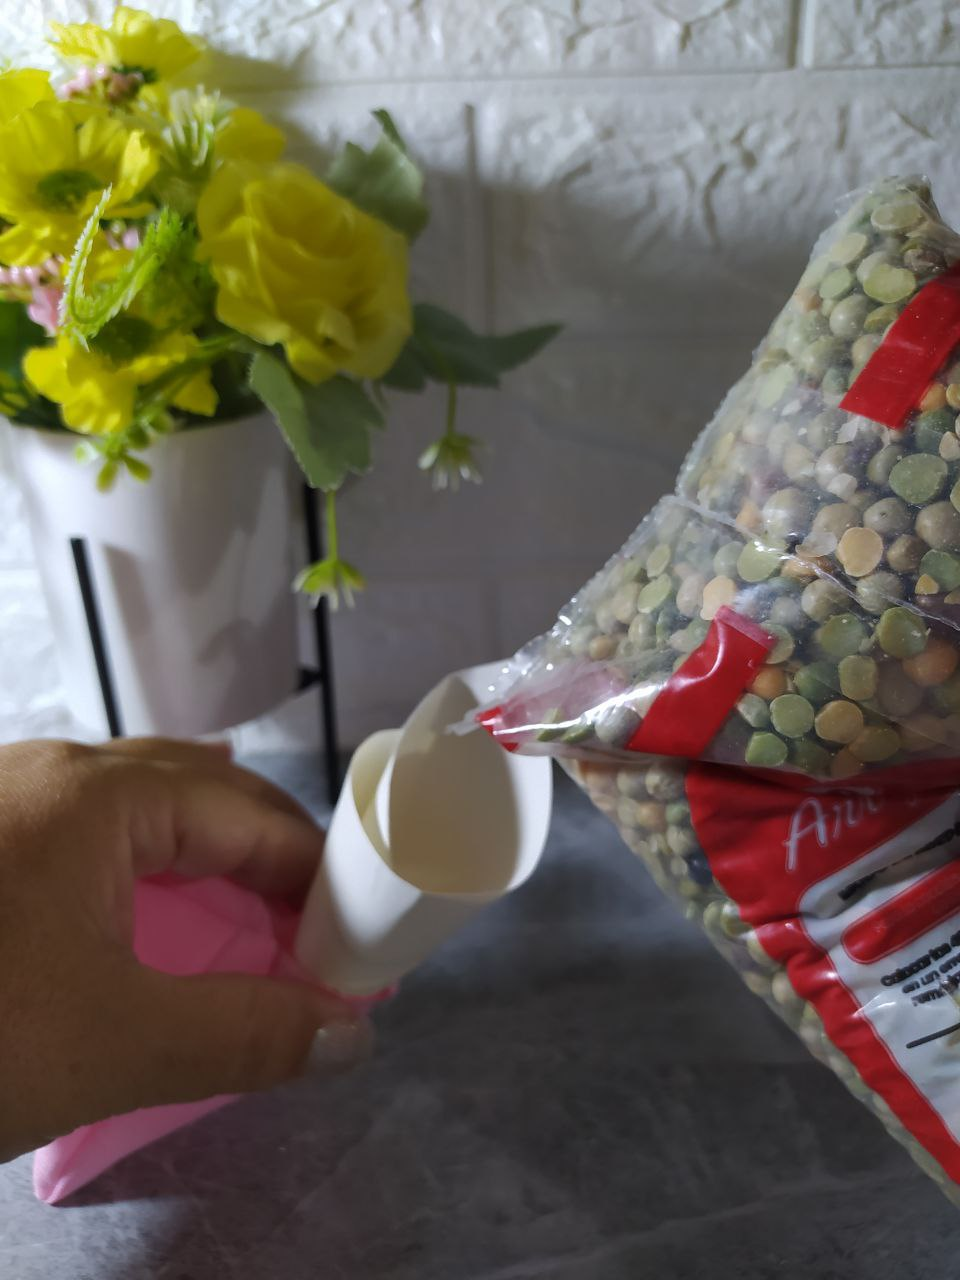
You can use any kind of filling, as this will give it more weight, which is what you want. I used peas, but I recommend using whatever you have available.
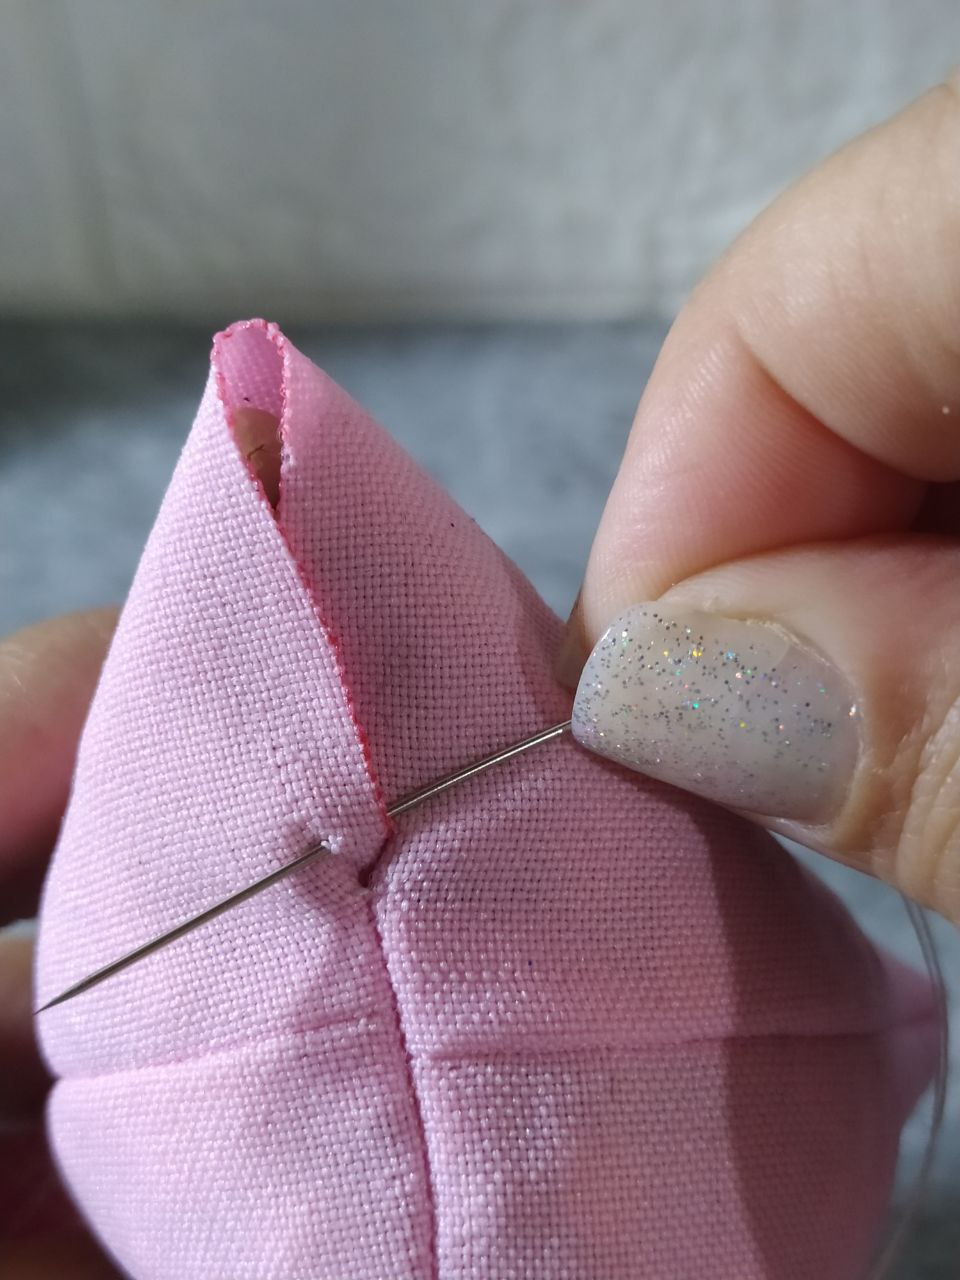
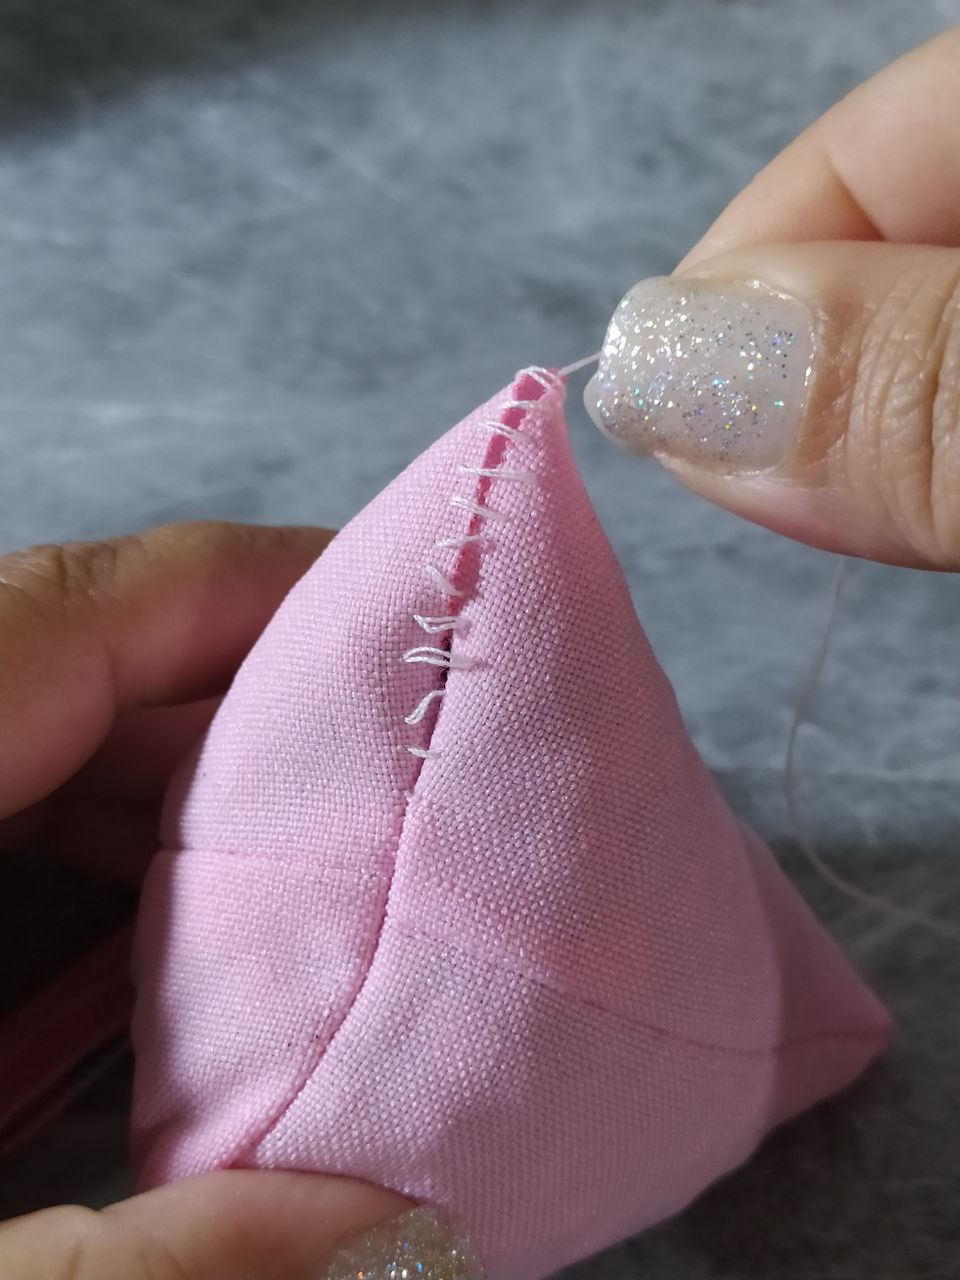
After filling to the top, I did a blindstitch. I love it when I have an excuse to do a blindstitch; it's like magic. It's as simple as going from one side to the other, over or on the outside, exposing that seam or crossover, and going down the inside of the fabric a little further, doing this over and over until you reach the end. Finally, pull it shut, and like magic, the entire seam will close and hide... I truly love it.
Para rellenar puedes utilizar cualquier grano, ya que esto le dará más peso y eso es lo que se quiere. Yo utilicé arvejas, pero si te recomiendo que utilices el que tengas a tu disposición.
Luego de rellenar hasta el tope, realicé costura invisible. Amo cuando tengo una excusa para hacer costura invisible, es como magia, y es tan simple como pasar de un lado al otro por encima o por fuera exponiendo esa costura o cruce, y bajando por dentro de la tela hacia un poco más abajo, haciendo esto una y otra vez hasta llegar al final; para terminar halando y como magia se irá cerrando y escondiendo toda la costura... Lo amo de verdad.
 |  |  |  |
|---|
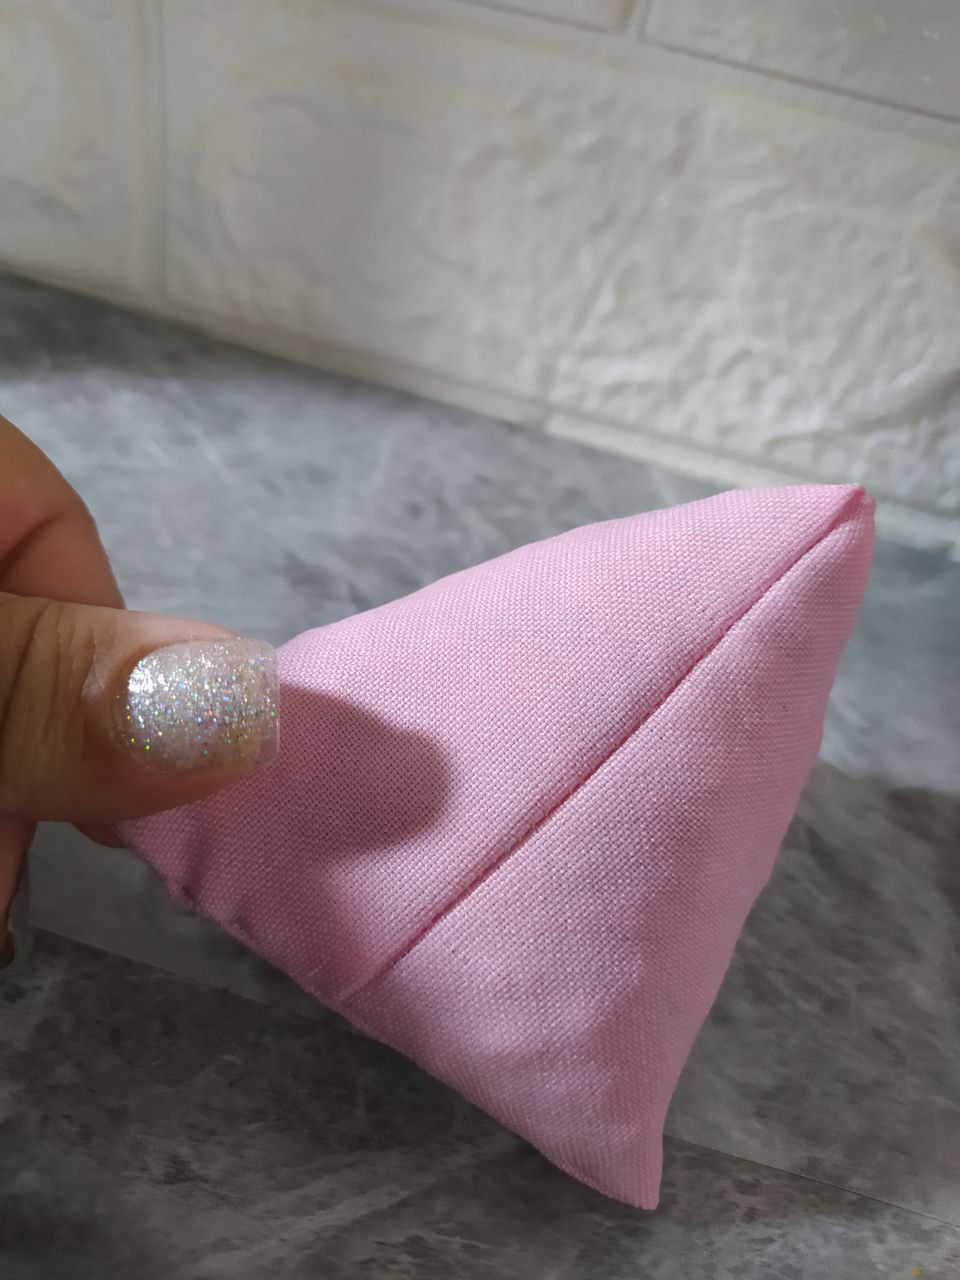
Look how beautiful the invisible seam is. The more we practice it, the better we get at the next one. I made a total of 3 weights.
Fíjate que bella es la costura invisible. Mientras más la practicamos mejor nos queda la siguiente. Hice un total de 3 pesas.
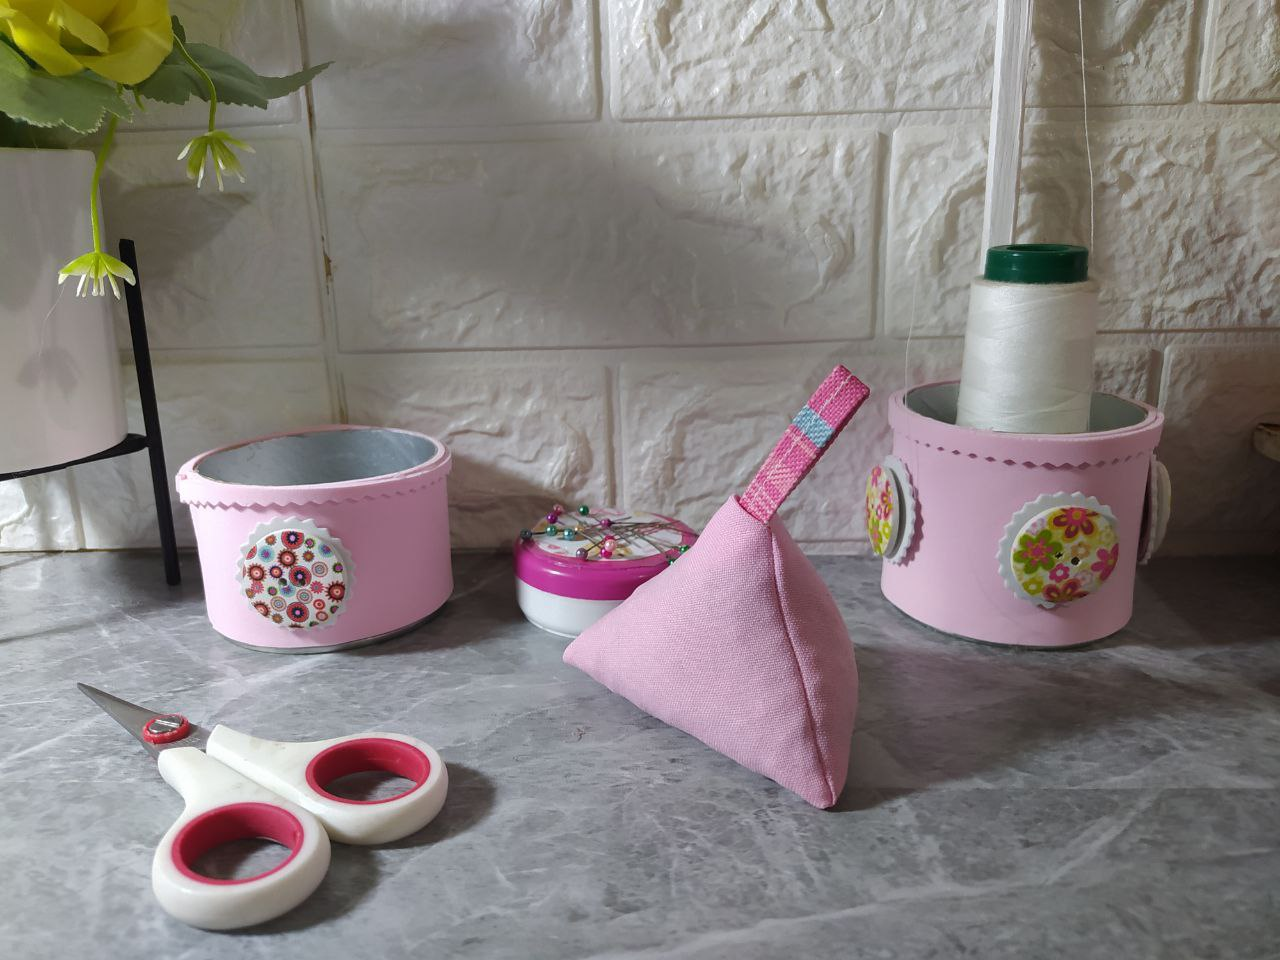
Here I have the yarn cone holder, a magnetic pincushion, and a container I made in another post, and now I have weights, all in a combination of pink or fuchsia colors, in those shades.
Aquí tengo el porta cono de hilo, un alfiletero magnético y un envase que había realizado en otro post, y ahora tengo pesas, todo en combinación de colores rosados o fucsias, en esos tonos.
I hope you enjoyed this tutorial and that you're inspired to make your sewing tools to your liking. It's so nice to be able to add a personal touch to your workspace.
Deseo que te haya gustado este tutorial y que te animes a realizar tus herramientas de costura a tu gusto, es muy agradable poder darle nuestro toque personal a nuestro espacio de trabajo.
I took the photos with my phone Redmi Note 8
Apps I used:
Canva Pro for Cover, Collage and Banners
Thankful to @coinbelly for allowing us to use their Community logo
I used Deepl Translator
My social networks:
Discord: YennysYaneth#0189
Twitter: @yennysferm
Instagram: @yennysyaneth
Las fotos las tomé con mi teléfono Redmi Note 8
Apps que utilicé:
Canva Pro para la Portada, Collage y Banners
Agradecida con @coinbelly por permitirnos utilizar su logo de la Comunidad
Utilicé el Traductor Deepl
Mi redes sociales:
Discord: YennysYaneth#0189
Twitter: @yennysferm
Instagram: @yennysyaneth