✨¡Hola amigos amantes de la creatividad! Espero que estén todos bien.✨
🔸Sin más que añadir, a continuación los dejo con el paso a paso:
✨¡Hello friends who love creativity! I hope you are all well.✨
Good evening, friends! I hope you are having a great week. For my part, I am happy to stop by here to share a new creation with you. On this occasion, I am sharing with you the step-by-step instructions for creating a nice decoration idea for the room. It was time to create something to give life to the door or the little ones' room. In this case, my mom asked me for a decoration for her room, so I wanted to add a super cute foam doll and also use some fabric scraps that provide other colors, but that combine with each other.
🔸Without more to add, then I leave you with the step by step:
♥️ESPERO QUE TE GUSTE,
¡Empecemos!
♥️I HOPE YOU LIKE IT,
Let's start!

✂️ MATERIALES | ✂️ MATERIALS
- Cartón delgado.
- Tela con diseño deseado.
- Foami escarchado rosa.
- Foami amarillo, crema, rojo y blanco.
- Pinturas y marcadores.
- Hoja blanca.
- Pegamento.
- Tijeras.
- Regla.
- Lápiz.
- Thin cardboard.
- Fabric with the desired design.
- Pink frosted foam.
- Yellow, cream, red and white foam.
- Paints and markers.
- White sheet.
- Glue.
- Scissors.
- Ruler.
- Pencil.
🌟 PROCEDIMIENTO | 🌟 PROCESS
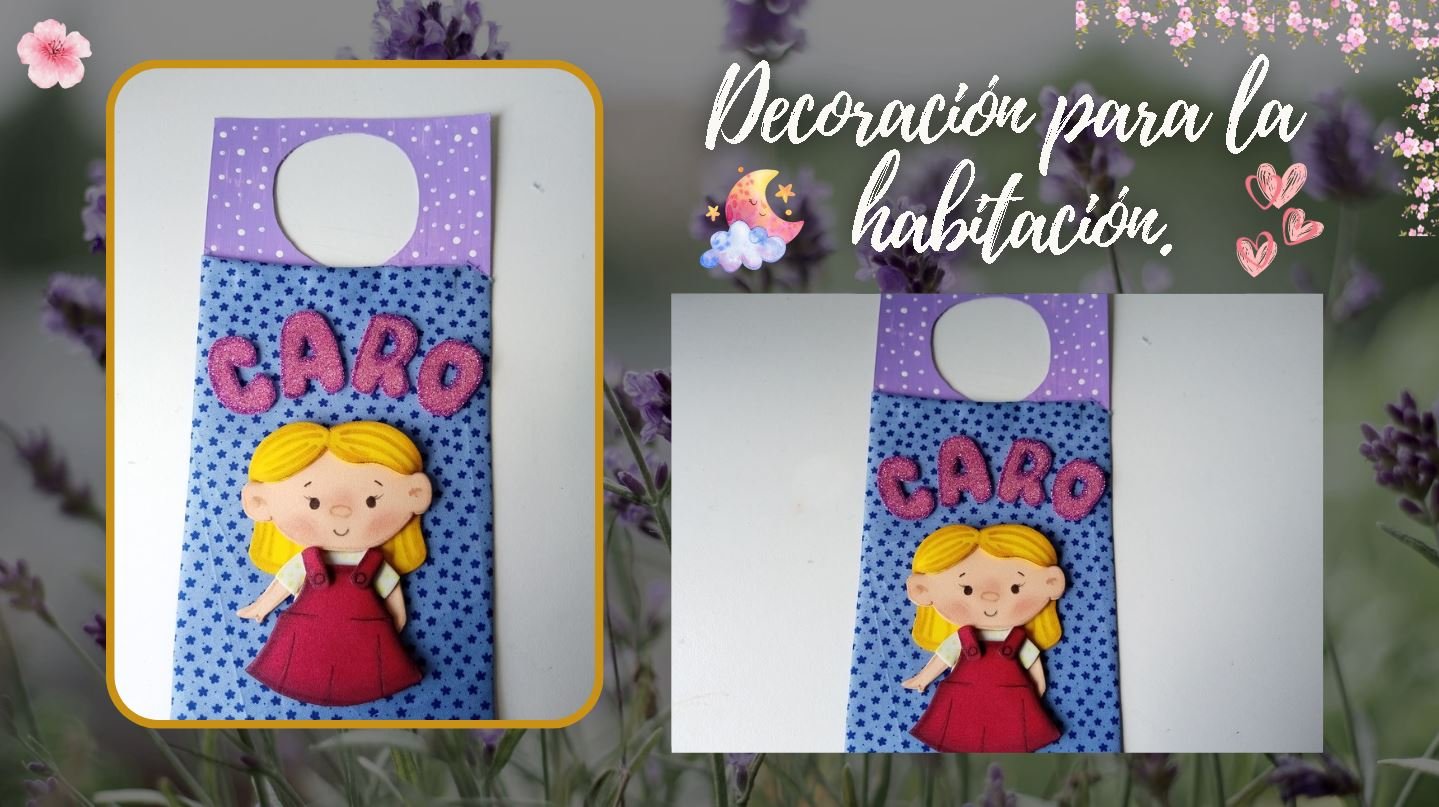
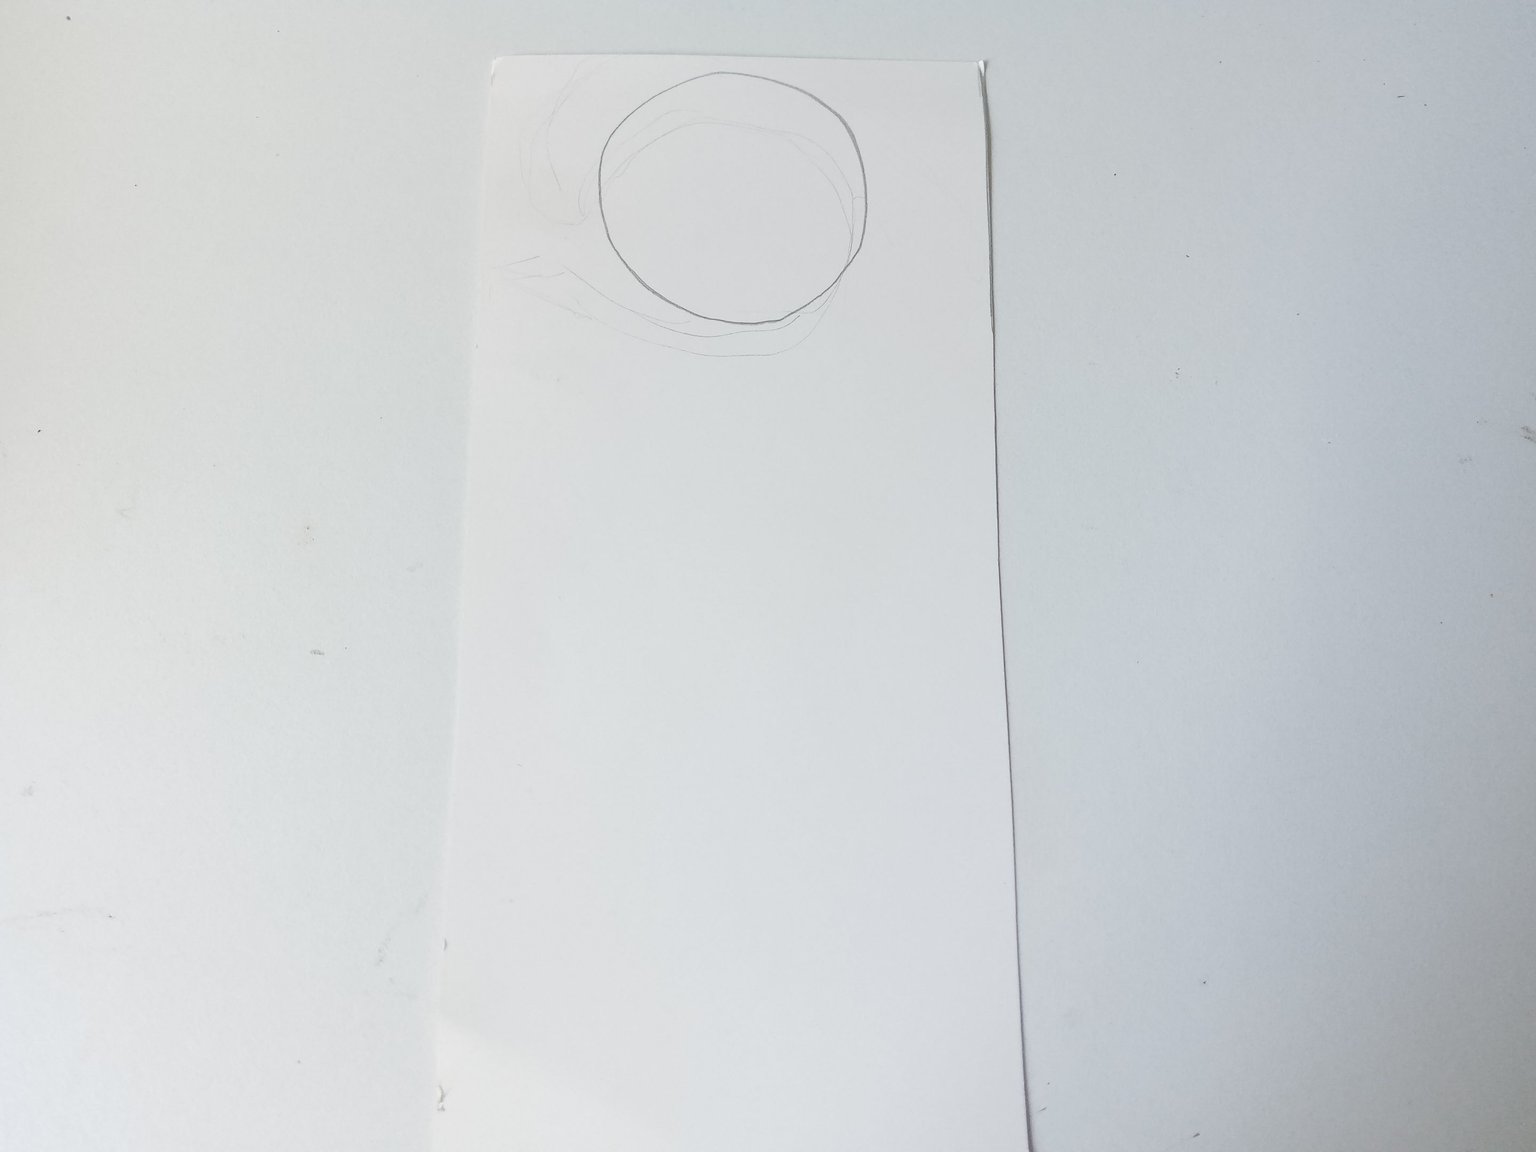
✨PASO 1:
Lo primero que hice fue trazar y recortar en el cartón delgado las medidas de la base de esta decoración. En este caso, las medidas fueron de 21 cm x 9 cm y el círculo para la cerradura depende de cada puerta, pero en este caso lo tracé a 0.5 mm de distancia de la parte superior y tiene un tamaño de 5 cm de circunferencia.
✨STEP 1:
The first thing I did was trace and cut out the measurements of the base of this decoration on the thin cardboard. In this case, the measurements were 21 cm x 9 cm and the circle for the lock depends on each door, but in this case I traced it 0.5 mm away from the top and it has a circumference of 5 cm.
 |  |
|---|
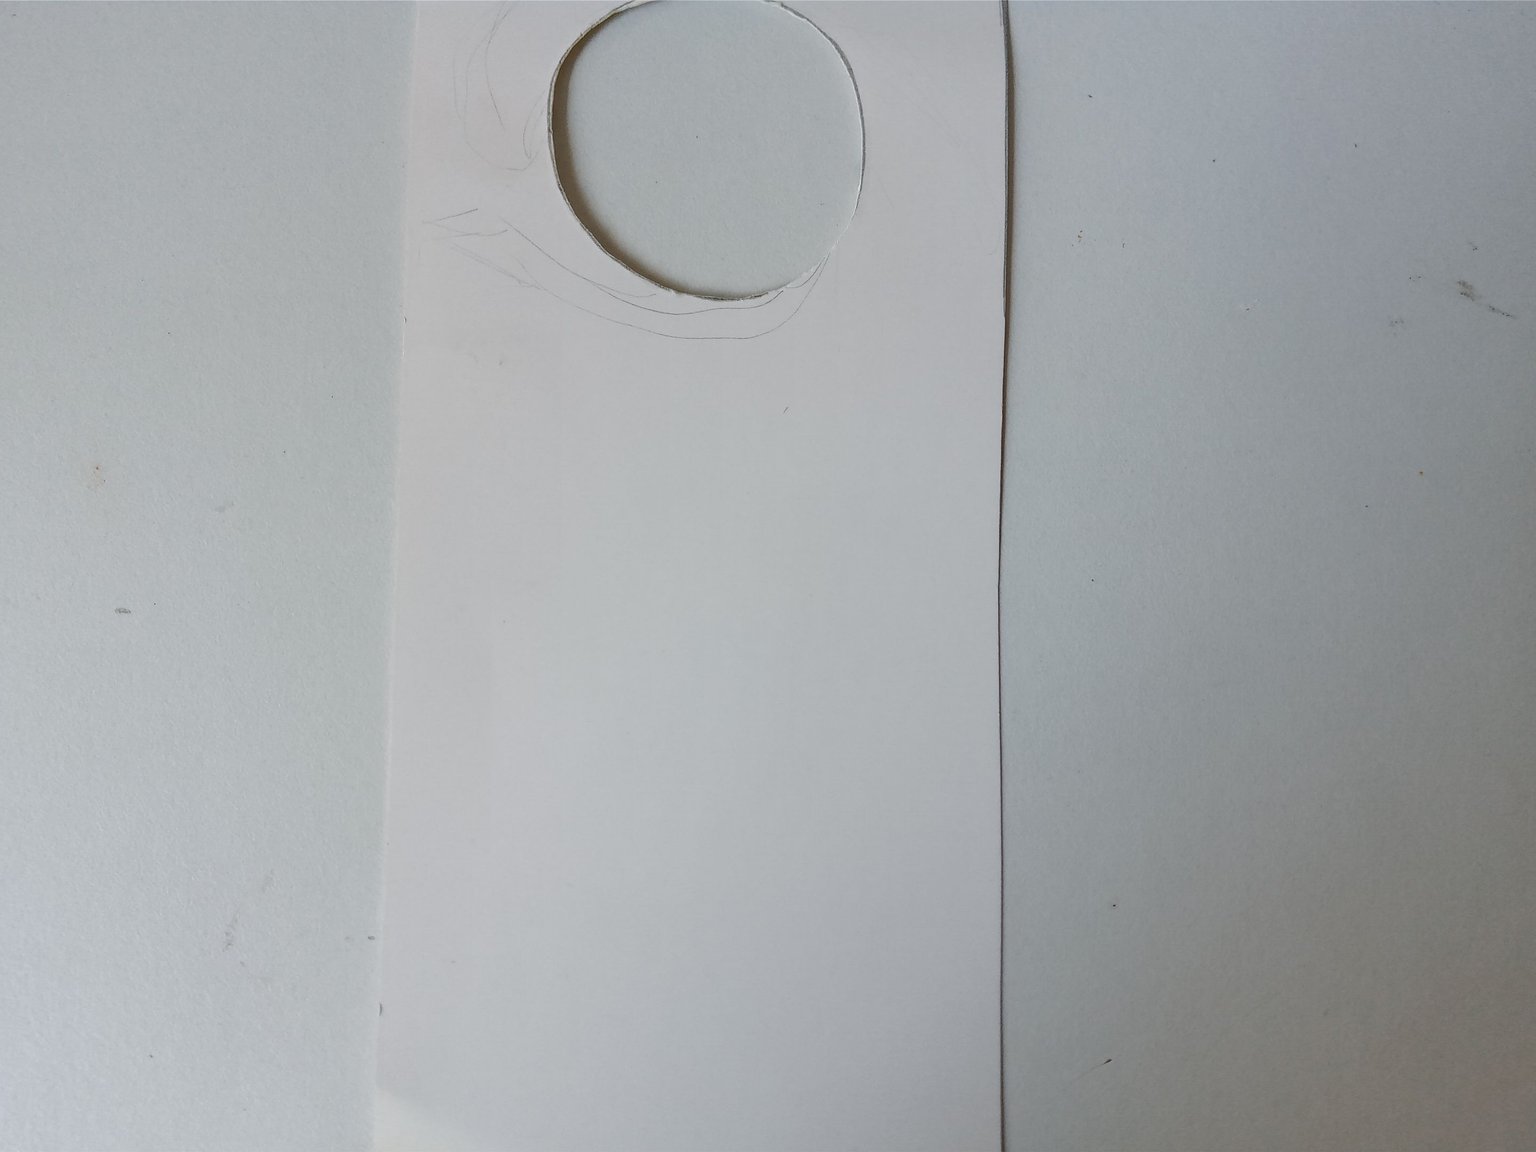
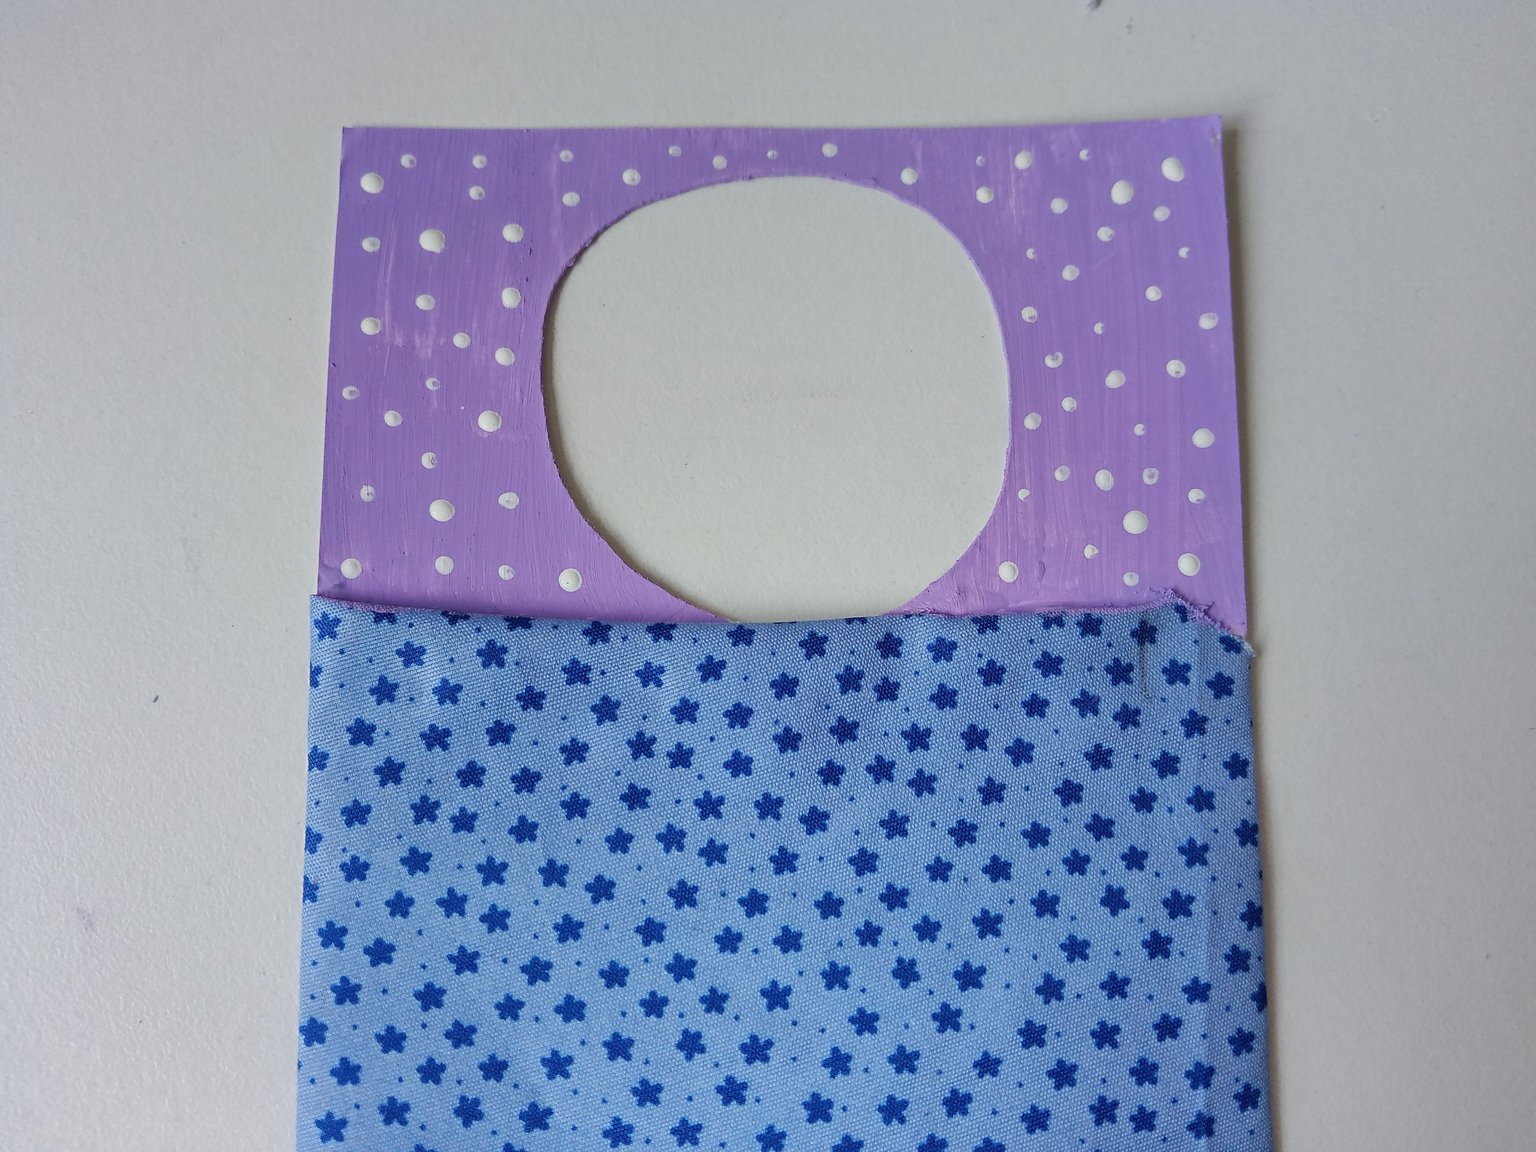
✨PASO 2:
Seguidamente, tomé la tela y la recorté 2 cm más grande de cada lado y pegué o forré, justo por debajo de la circunferencia. Además, para que se vea más prolijo, pueden forrar la parte trasera de la base. Por otra parte, y para que no se vea pálida la parte superior, pinté con un tono de pintura lila, dejé secar y luego, hice puntitos blancos como detalle extra.
✨STEP 2:
Next, I took the fabric and cut it 2 cm larger on each side and glued or covered it, just below the circumference. Also, to make it look neater, you can cover the back of the base. On the other hand, and so that the top does not look pale, I painted it with a shade of lilac paint, let it dry and then, I made white dots as an extra detail.
 |  |
|---|
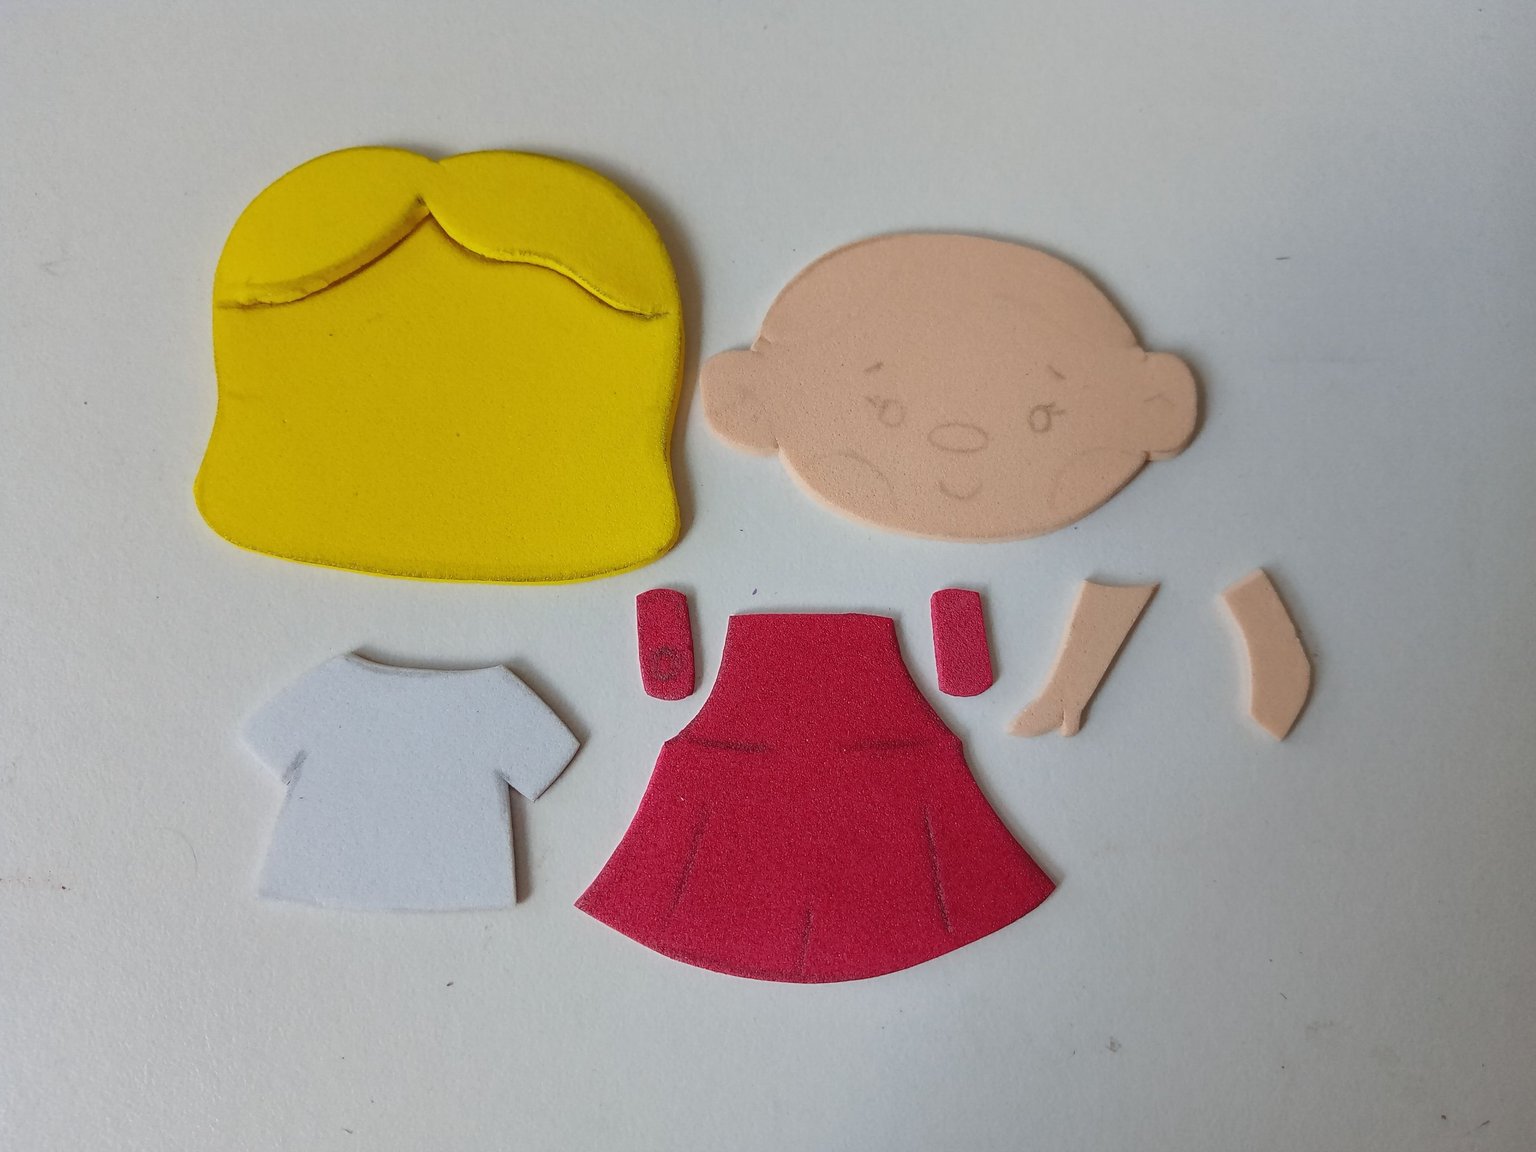
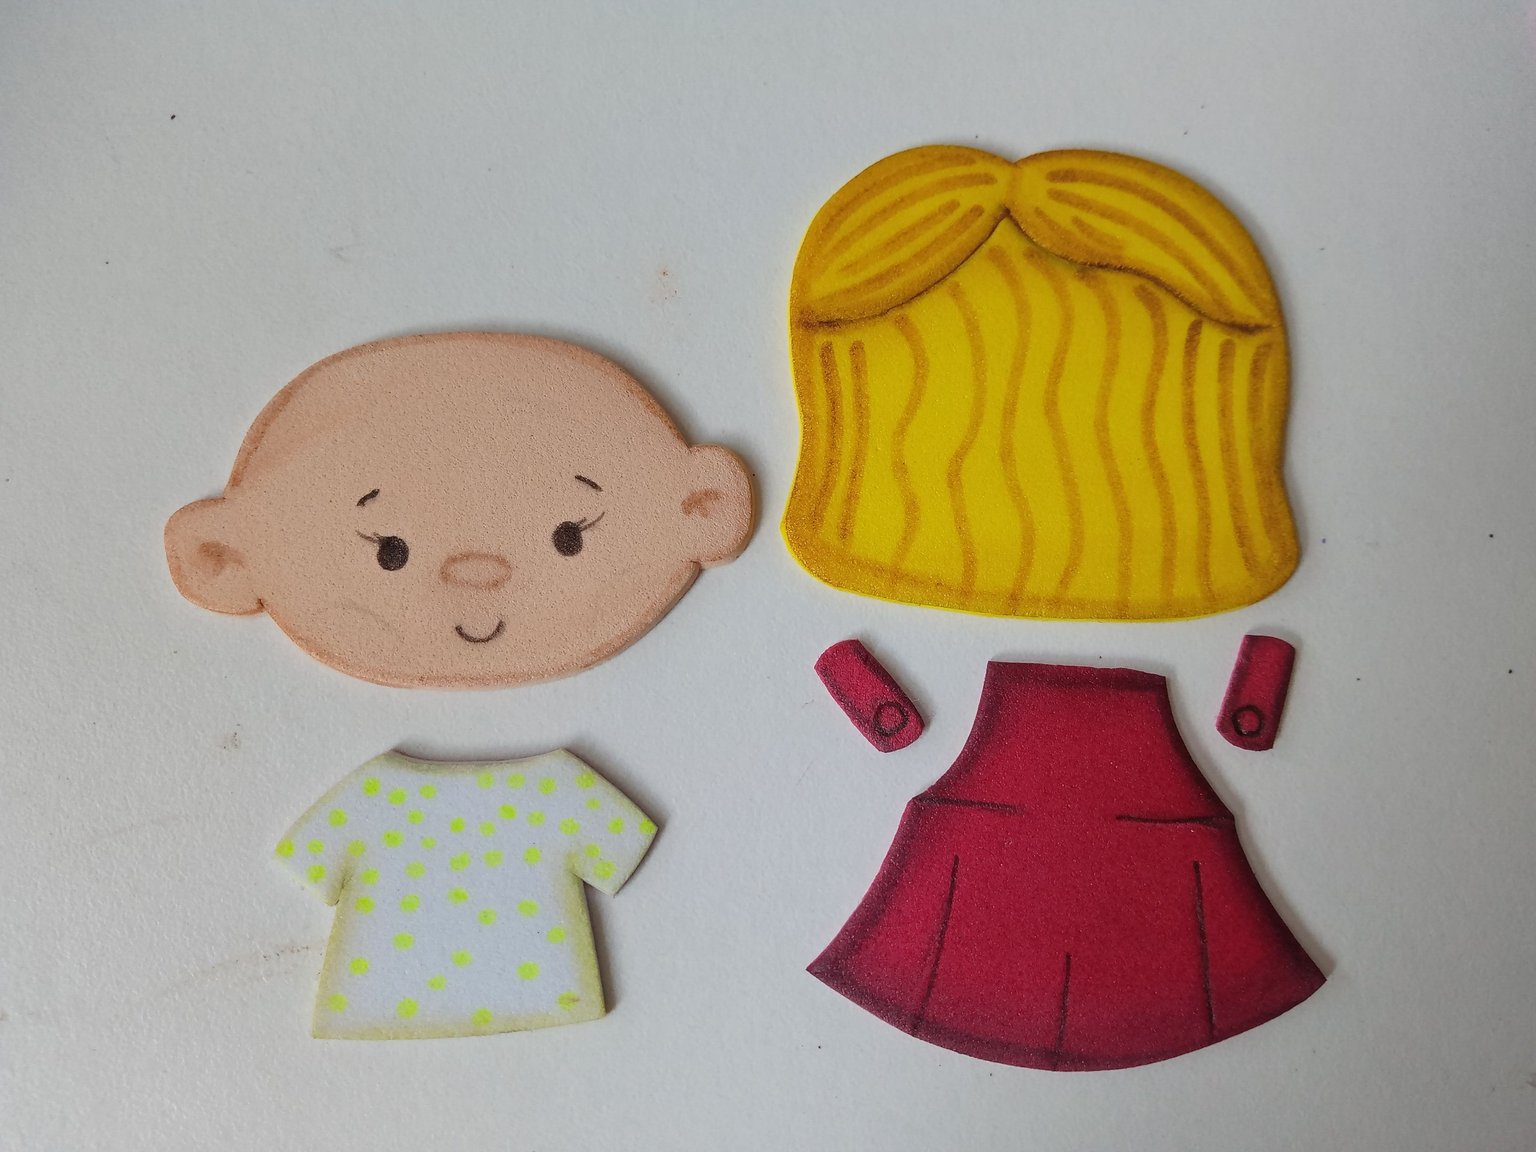
✨PASO 3:
Seguidamente, hice en una hoja blanca, un lindo dibujo con el diseño que quería para el personaje de esta decoración y las letras con el nombre. Al estar la idea lista, transferí a los colores correspondientes de foami, como explico a continuación:
✨Cabello de 5 cm en foami amarillo.
✨Cabeza junto con orejas de 6 cm en foami crema.
✨Brazos de 2 cm en foami crema.
✨Franela de 4 cm x 2 cm en foami blanco.
✨Vestido de 4 cm en foami rojo.
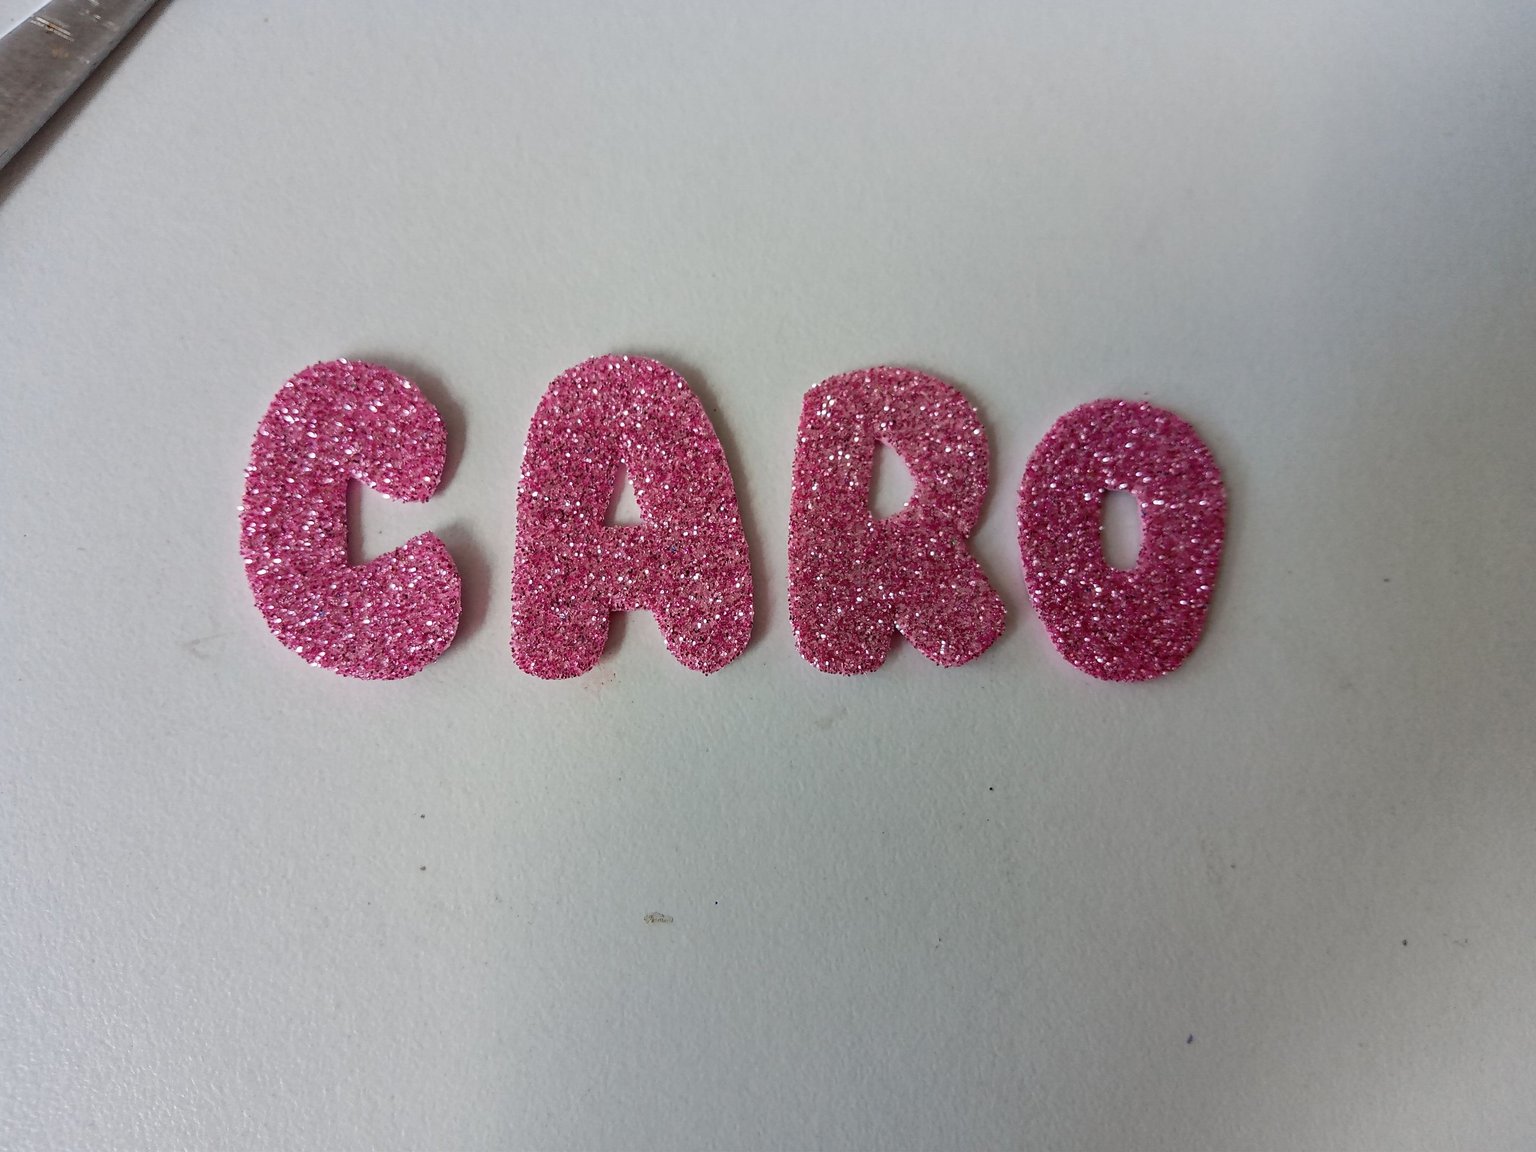
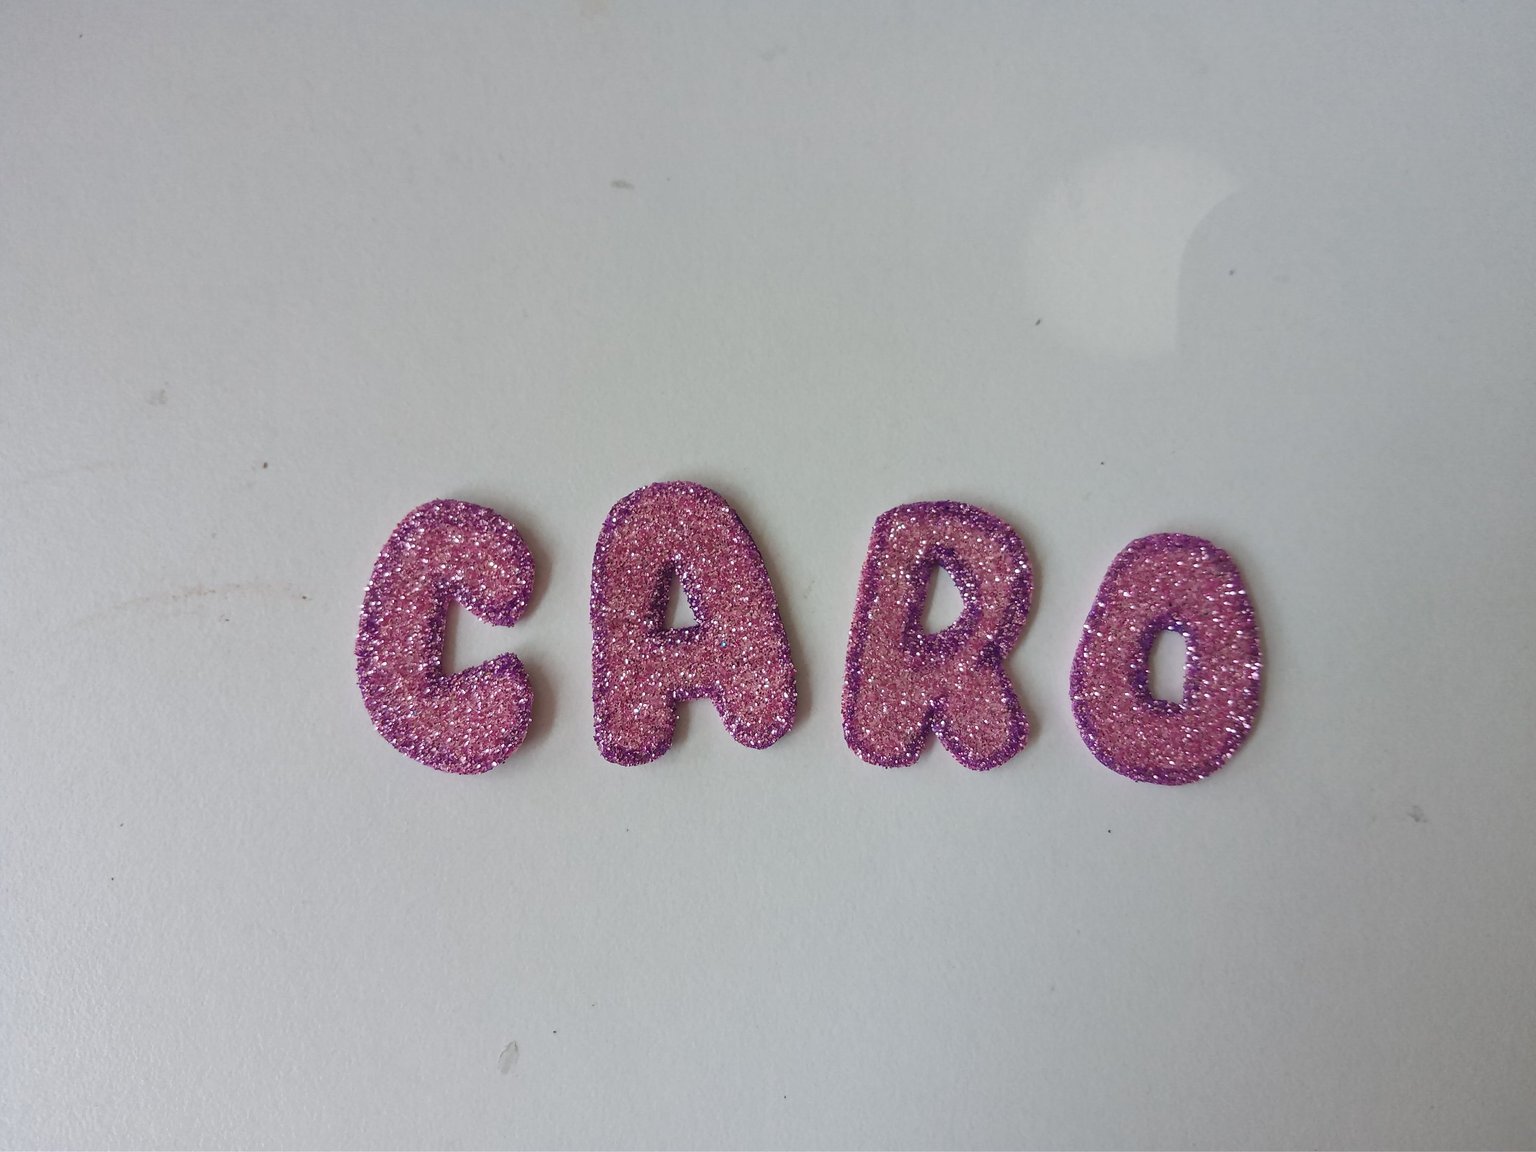
✂️Para el nombre:
✨Letras de 3 cm en foami escarchado rosa.
✨STEP 3:
Next, I made a nice drawing on a white sheet with the design I wanted for the character of this decoration and the letters with the name. Once the idea was ready, I transferred it to the corresponding colors of foam, as explained below:
✨5 cm hair in yellow foam.
✨Head with 6 cm ears in cream foam.
✨2 cm arms in cream foam.
✨4 cm x 2 cm flannel in white foam.
✨4 cm dress in red foam.
✂️For the name:
✨3 cm letters in pink frosted foam.
 |  |
|---|
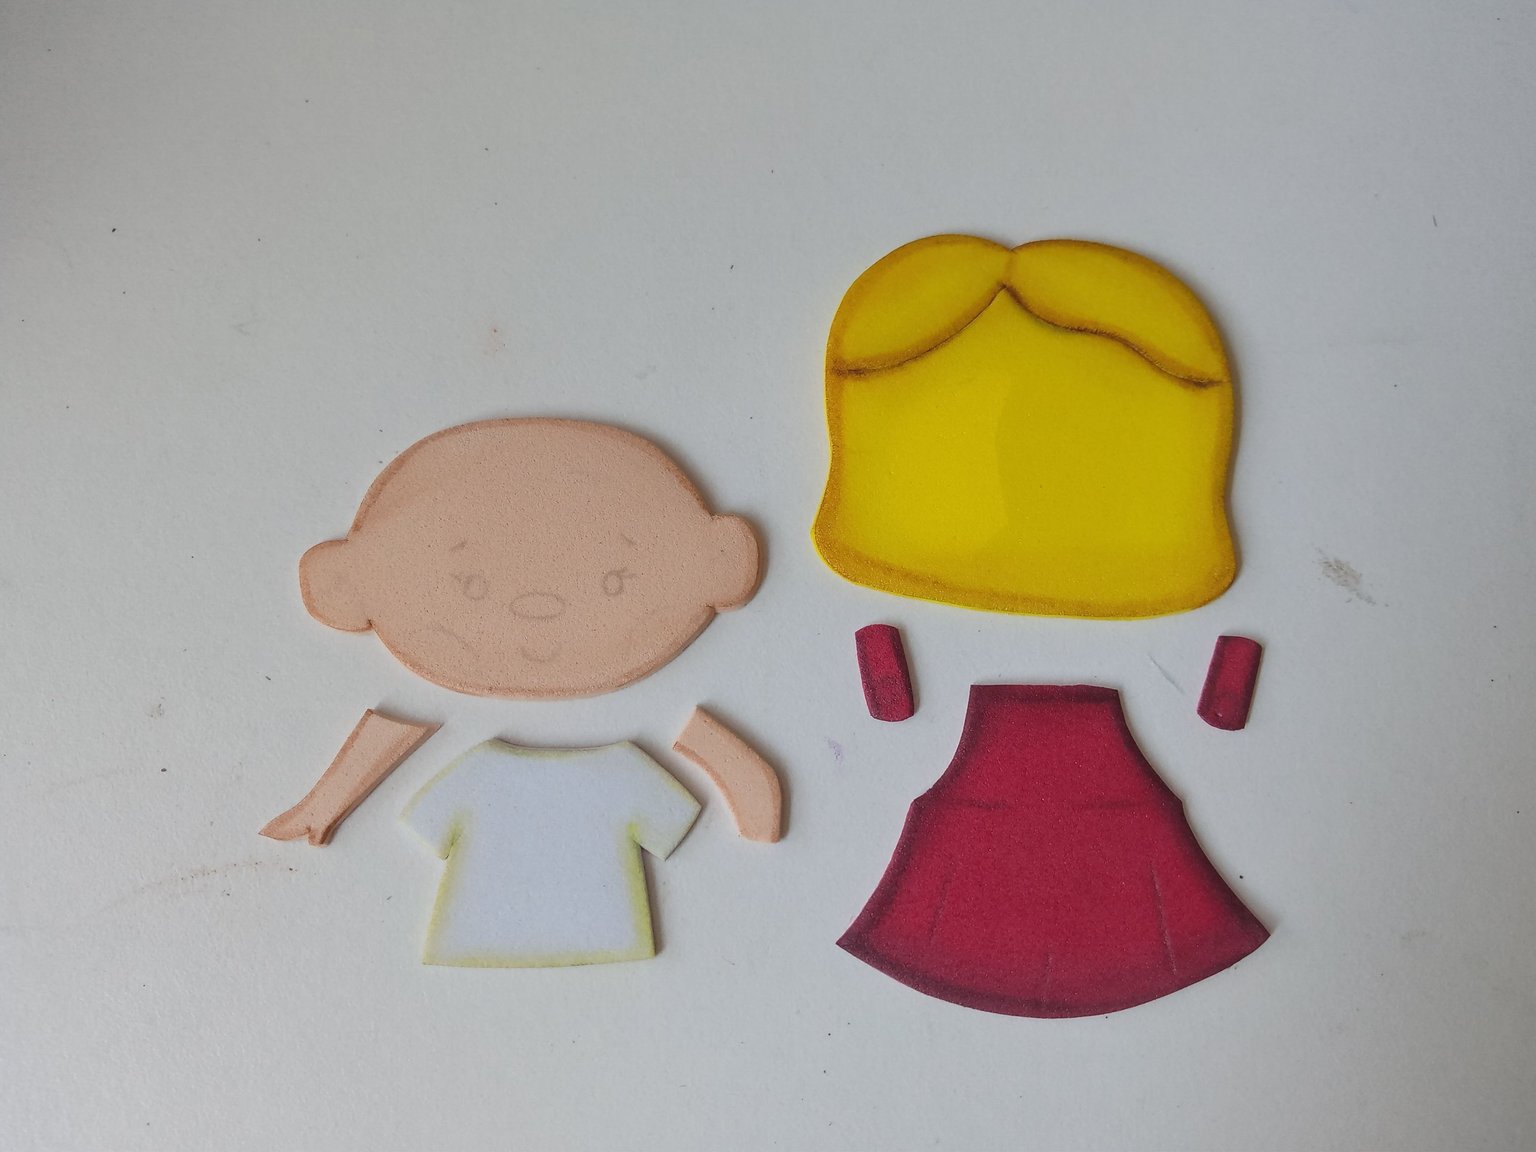
✨PASO 4:
Al tener las piezas recortadas, es momento de dar color a los bordes con pinturas que hagan contraste con cada pieza. En este caso, para el cabello, cabeza y brazos utilicé un tono marrón, para la franela un tono amarillo y para el vestido, un tono negro. Al estar secas, es momento de dar detalles con un marcador negro para el rostro, vestido y para el cabello utilicé un marcador marrón. En cuanto al nombre, simplemente le pasé marcador morado por el borde.
✨STEP 4:
Once the pieces are cut out, it's time to color the edges with paints that contrast with each piece. In this case, for the hair, head and arms I used a brown tone, for the flannel a yellow tone and for the dress, a black tone. Once they were dry, it's time to add details with a black marker for the face, dress and for the hair I used a brown marker. As for the name, I simply passed the purple marker along the edge.
 |  |  |
|---|
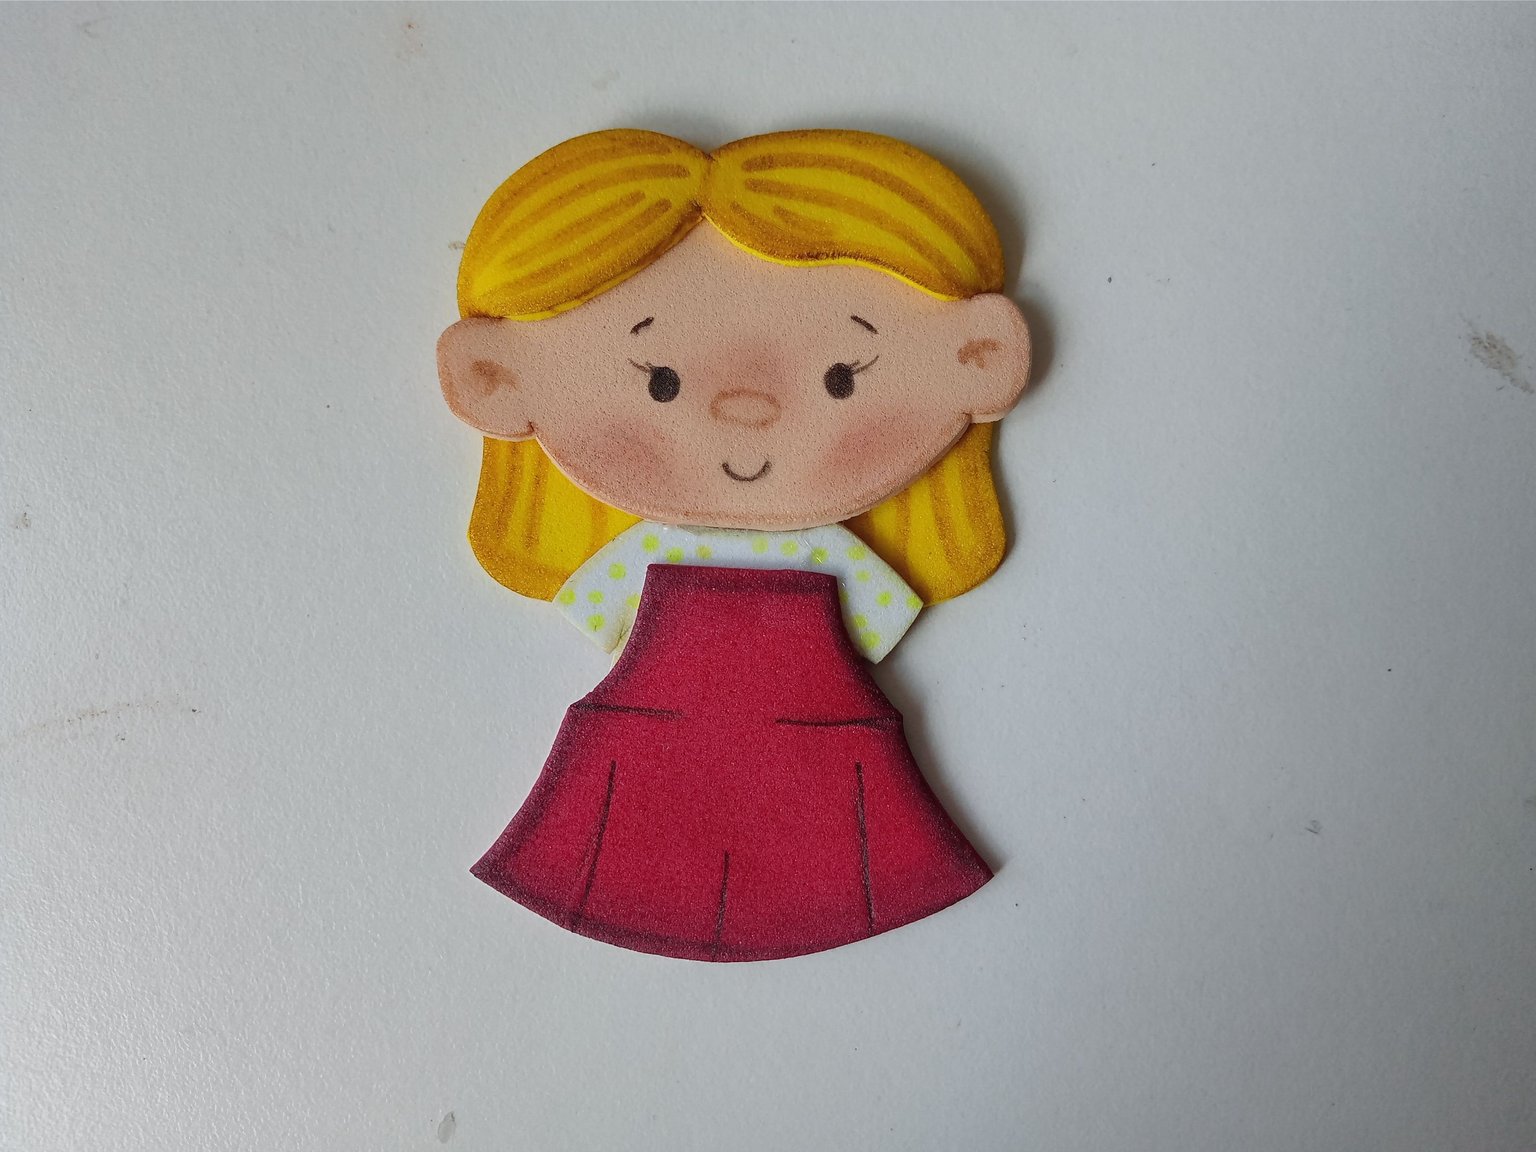
✨PASO 5:
Al estar todo listo, comencé pegando la cabeza, el cabello, luego la vestimenta y, por último, los brazos. Seguidamente, pegué en la parte baja del colgante, dejando un espacio en la parte superior para formar el nombre un poco curvo.
✨STEP 5:
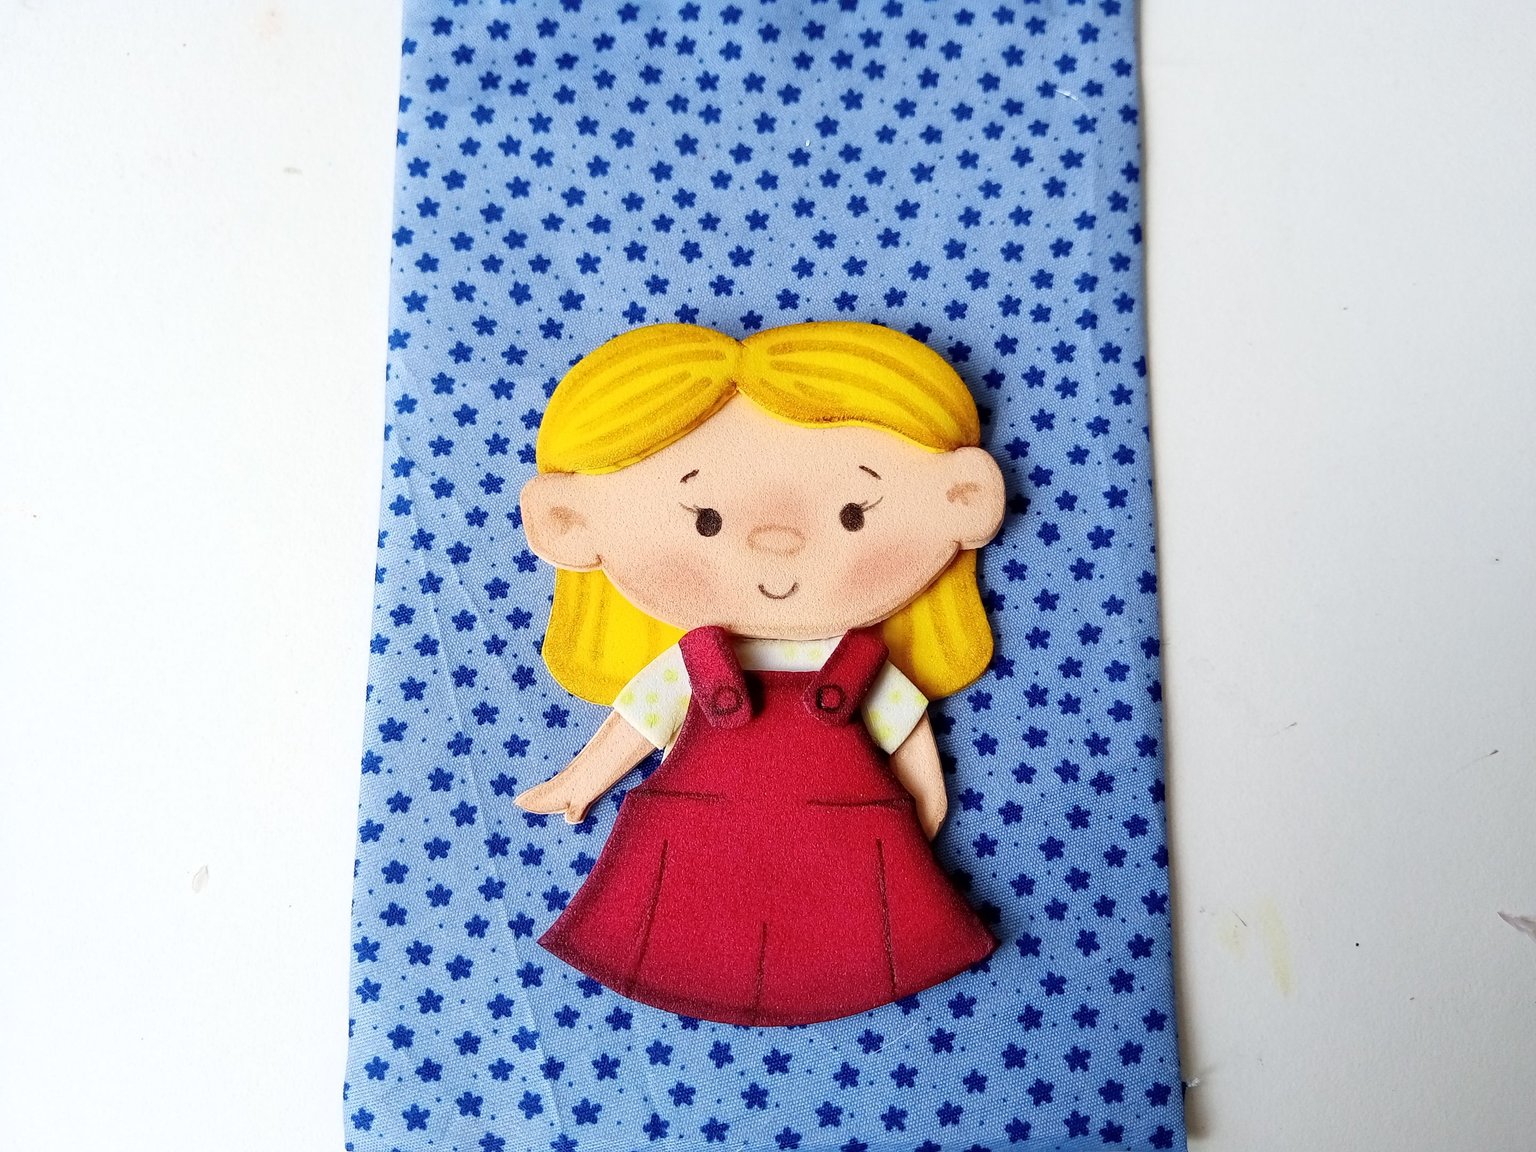
Once everything was ready, I started by gluing the head, hair, then the clothing and, finally, the arms. Next, I glued it to the bottom of the pendant, leaving a space at the top to form the slightly curved name.
 |  |  |
|---|
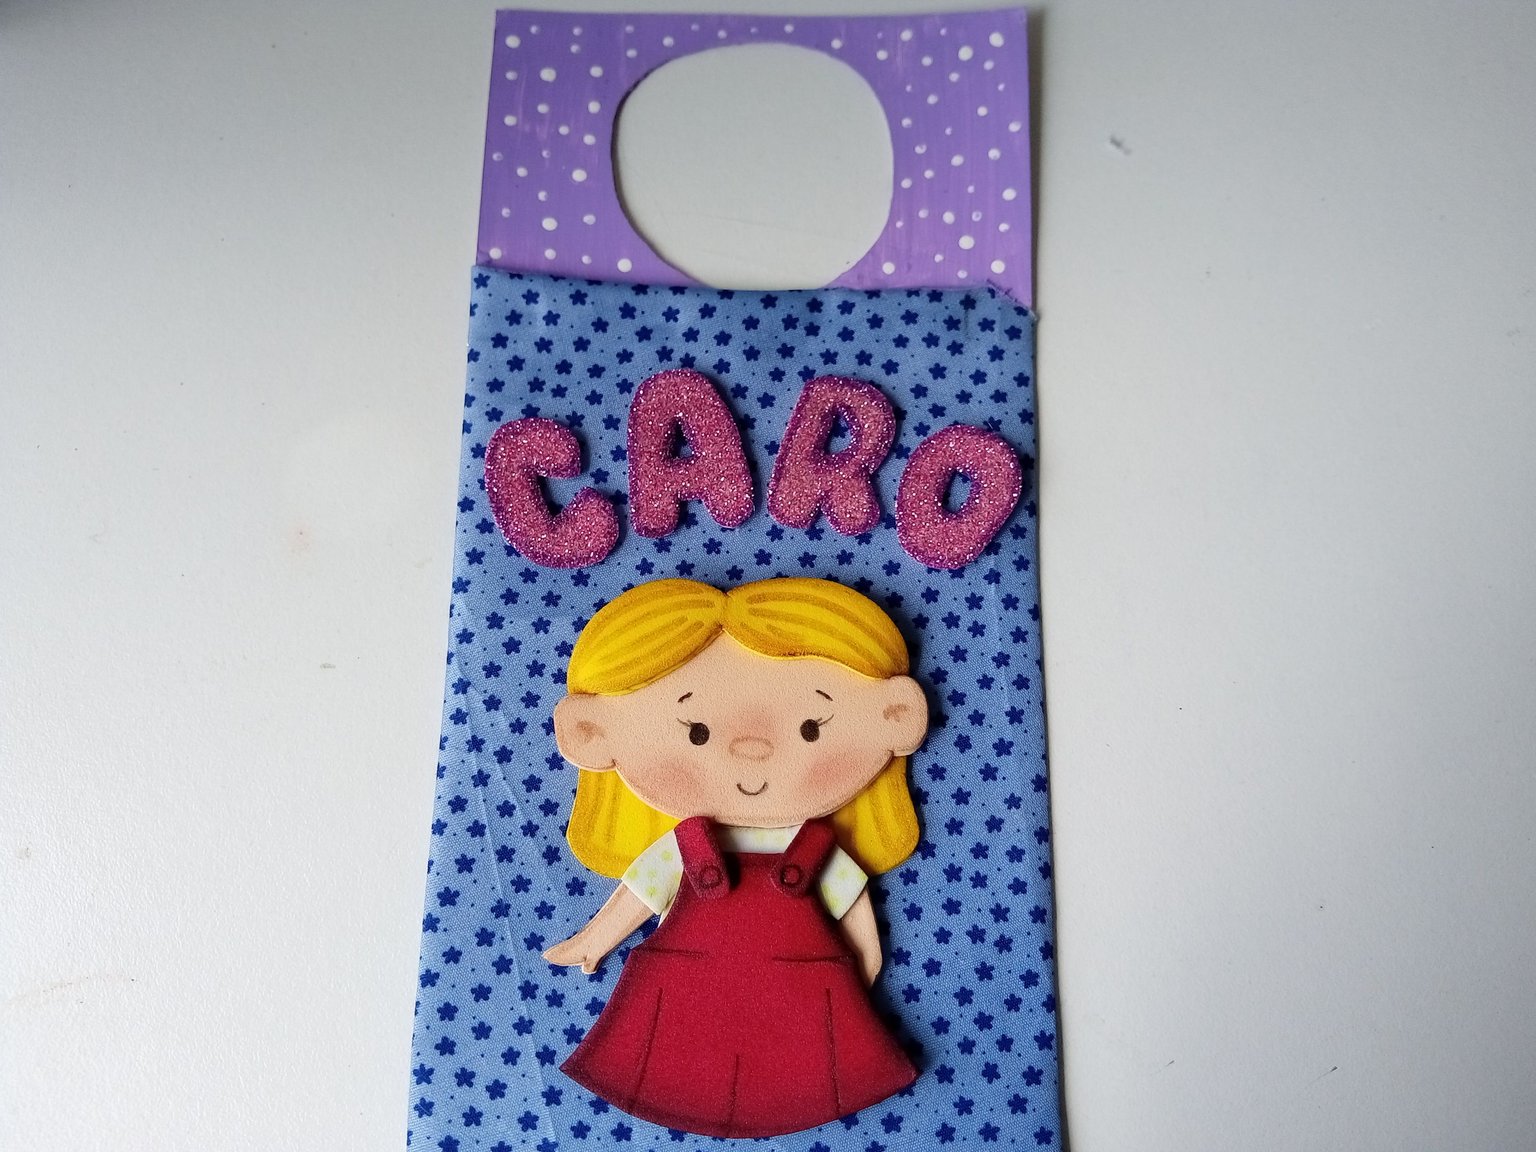
✨And that's it, friends. We have this lovely idea to decorate a room or with a different theme for another space in the house. I fell in love with the design and colors I used on this occasion. I hope you liked the step-by-step instructions and are encouraged to make it.
❤️Until the next post.
✨RESULTADO: | ✨RESULT:

Todas las fotografías son de mi propiedad.
Separador y Fotos editadas en Canva
All photographs are my property.
Photos edited in Canva
Posted Using INLEO