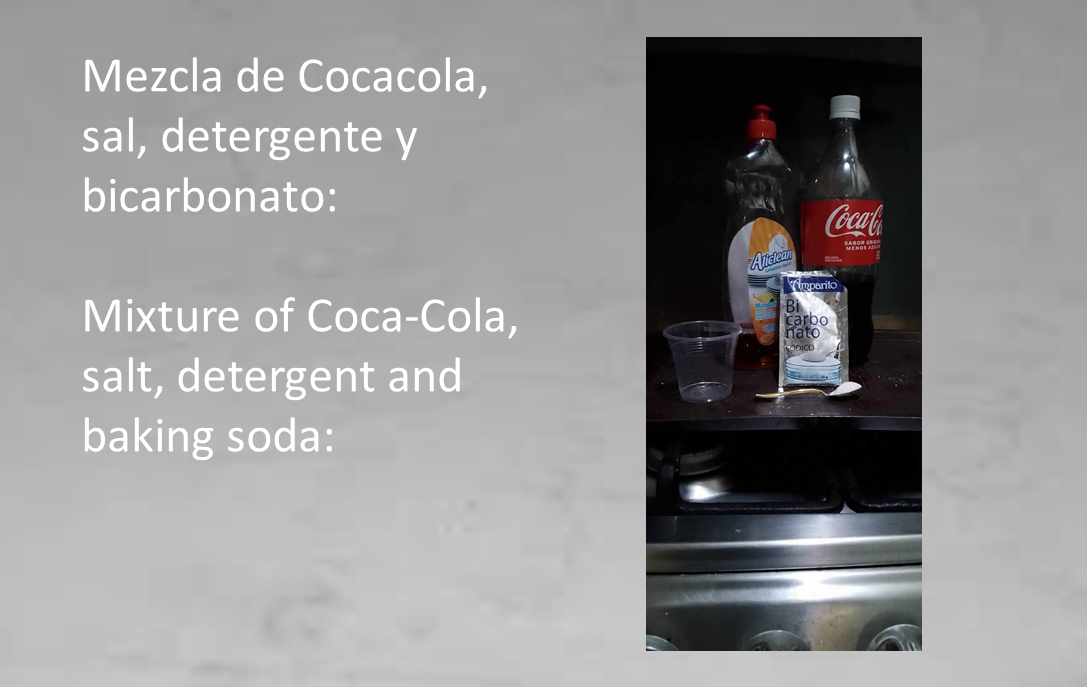
Mezcla de coca-cola y sal para limpiar las ollas y la cocina, ¿Será cierto esto? // Mixing Coca-Cola and Salt to Clean Pots and Stoves. Is This True?
(Versión en Español-English)
EN ESPAÑOL:
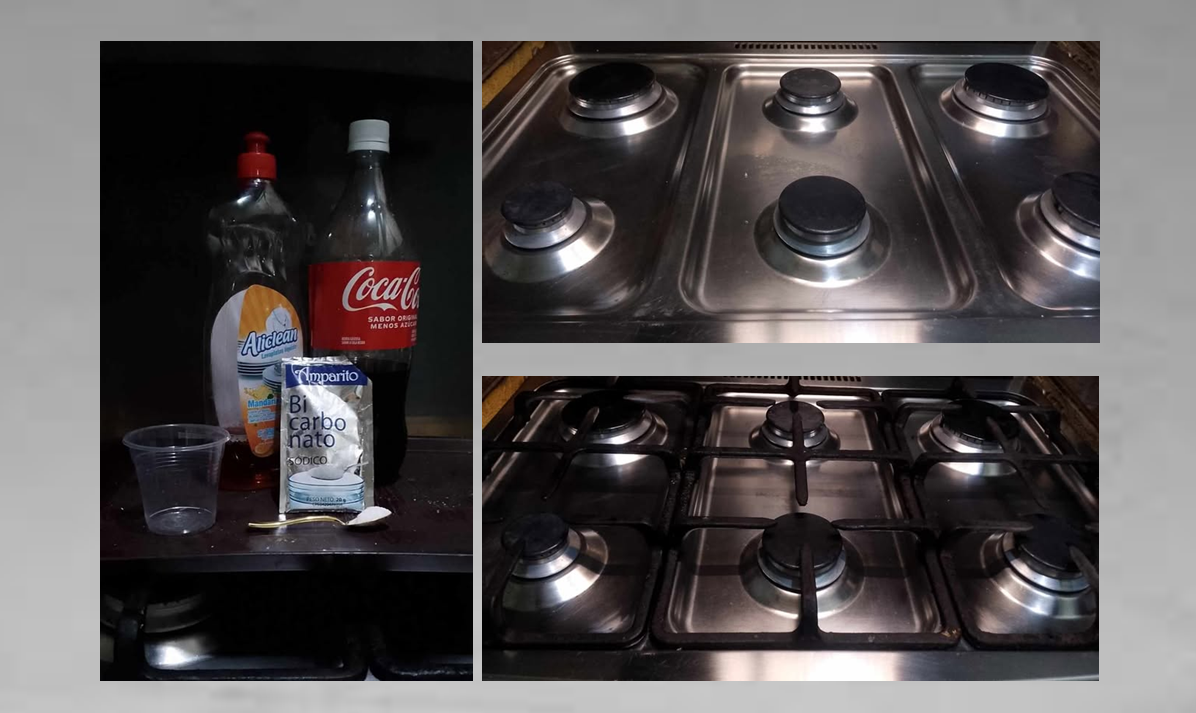
Hola amigos, es un placer compartir con ustedes una nueva experiencia relacionada con los trucos de limpieza que cada día surgen por las redes y que no sabenos si es verdad o es mentira, les cuento que ayer mi esposa me dijo que la ayudara a limpiar la cocina, porque en la hornilla que frecuentemente se usa para hervir el agua para tomar, se veia amarillenta, también se encontraban algunos quemadores con manchas quemadas.
Bueno amigos, la verdad es que la ultima vez que limpié estas hornillas tuve que frotar fuertemente cada mancha para poder quitarla, ¡PERO! hace unos días vi un video donde usaban una mezcla increible para remover la capa quemada de las ollas, esta mezcla se prepara con el refresco "coca cola" mezclado con sal, detergente liquido y bicarbonato, la verdad es que me impresionó mucho cuando le aplicaron este producto a toda la parte quemada de una olla, lo que hicieron fue, extender la mezcla por toda la parte quemada y luego con el uso de una esponja, comenzaron a frotar la olla, lo increible de esto, es que mientras frotaban esa parte quemada enseguida se podía ver el metal de aluminio de la olla, les confieso que ese video me pareció más bien un truco de mágia, por lo que decidí someter a prueba esta mezcla, así que preparé esta mezcla y me puse a limpiar la cocina.
Mezcla de coca-cola y sal para limpiar las ollas y la cocina, ¿Será cierto esto?
Si amigos, como les decía al comienzo, en un video vi que recomendaban la mezcla de Coca-cola, sal, detergente líquido y bicarbonato para remover el sucio y las manchas quemadas de las ollas y de aquellos metales de aluminio como las hornillas de la cocina, de manera que para comprobar este truco, decidí limpiar la cocina de mi casa con esta mezcla.
Link del video: en caso que quieras verlo.
Ingredientes de la mezcla segun el video.
- 250 ml de coca-cola
- Una cucharada de sal
- Una cucharada de bicarbonato
- 250 ml de detergente líquido ( lava-platos)
- Agua
Bueno mis amigos, como se trata de someter a prueba esta mezcla, no voy a preparar mucha mezcla, solo prepararé una taza de esta mezcla, pero respetando las proporciones que se indican.
- Un vaso pequeño de 60 ml de Coca-cola
- Un Vaso pequeño de 60 ml de detergente líquido
- Una cucharada pequeña de sal
- Una cucharada pequeña de bicarbonato
- 30 ml de agua
Preparación de la mezcla:
Como les decía, voy a preparar solo una pequeña cantidad de esta mezcla, pero respetando las proporciones que rse recomiendan en el video que vi por INTERNET
- Paso-1: En un vaso pequeño de 60 ml pondré un poco de Coca-Cola para luego verterlo en un vaso más grande donde haré la mezcla:
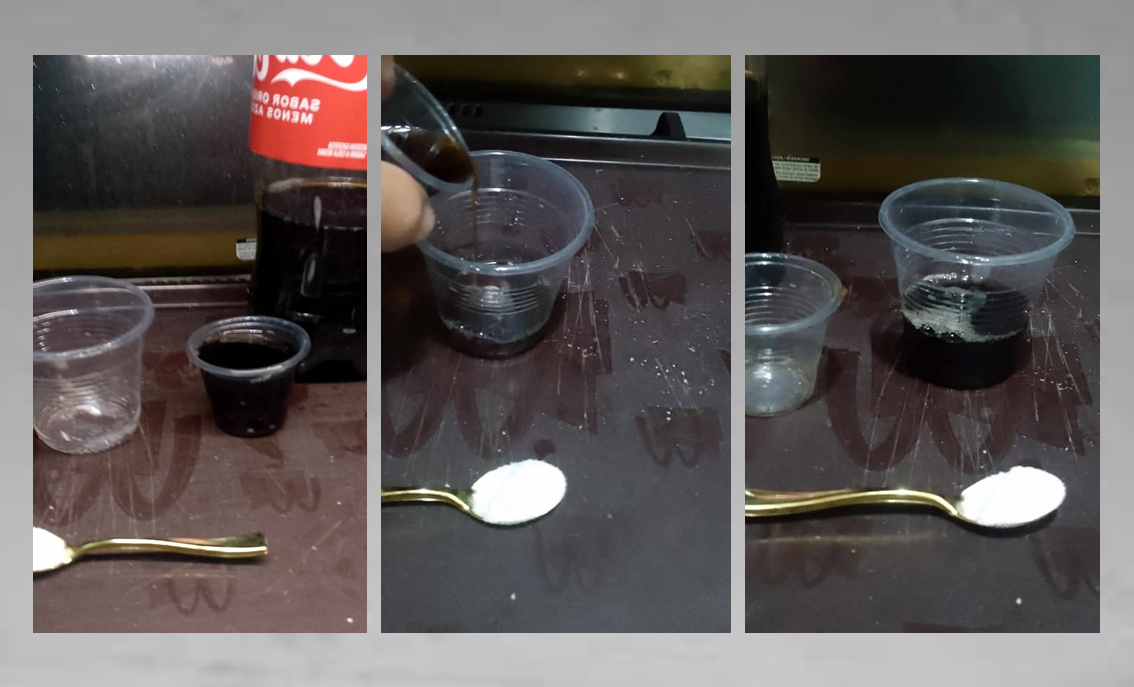
- Paso-2: Ahora agregaré una cucharada pequeña de sal al vaso que contiene el líquido de Coca-Cola y procederé a revolver la mezcla.
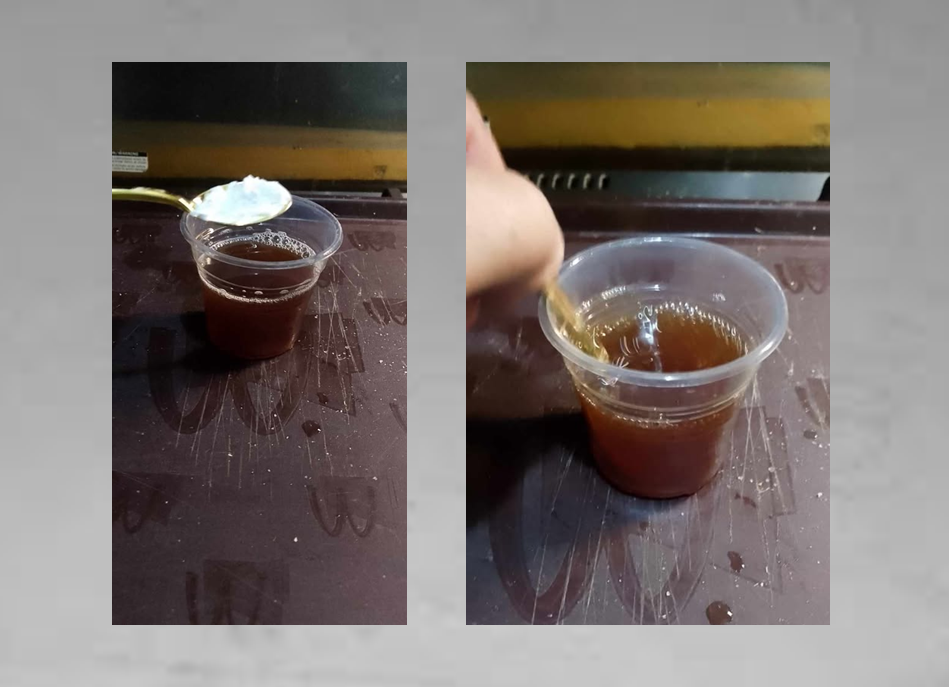
- Paso-3: Ahora le agregaré una cucharada pequeña de bicarbonado y un poquito de agua a la coca-cola y comienzo a mover la mezcla.
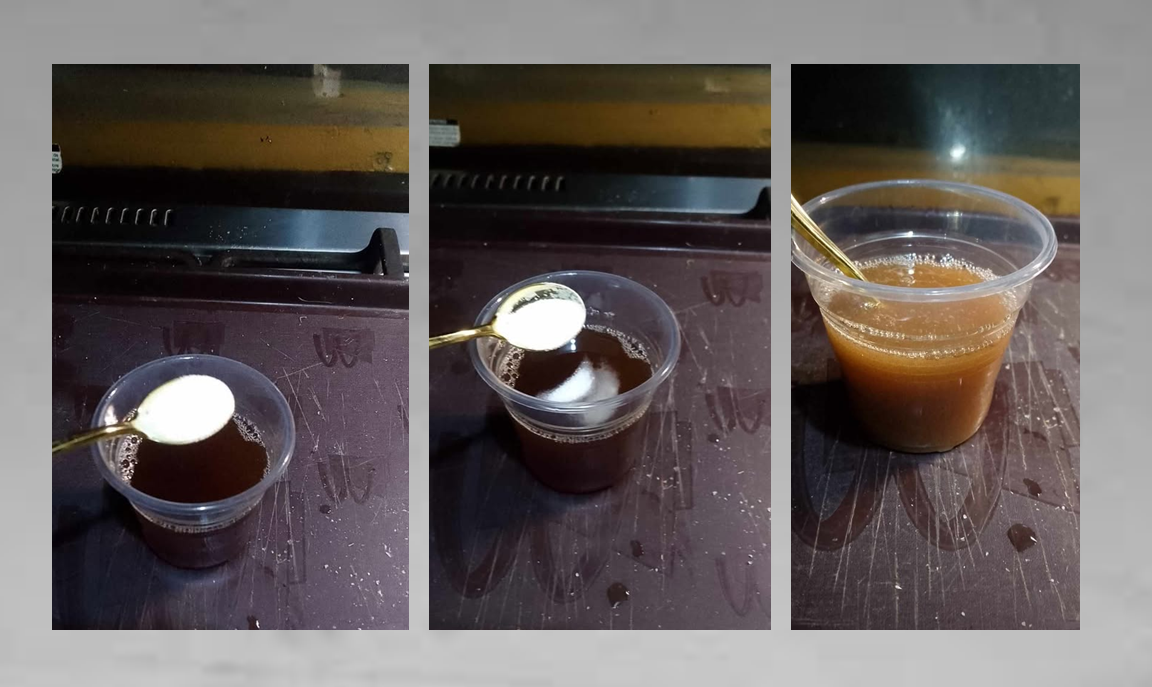
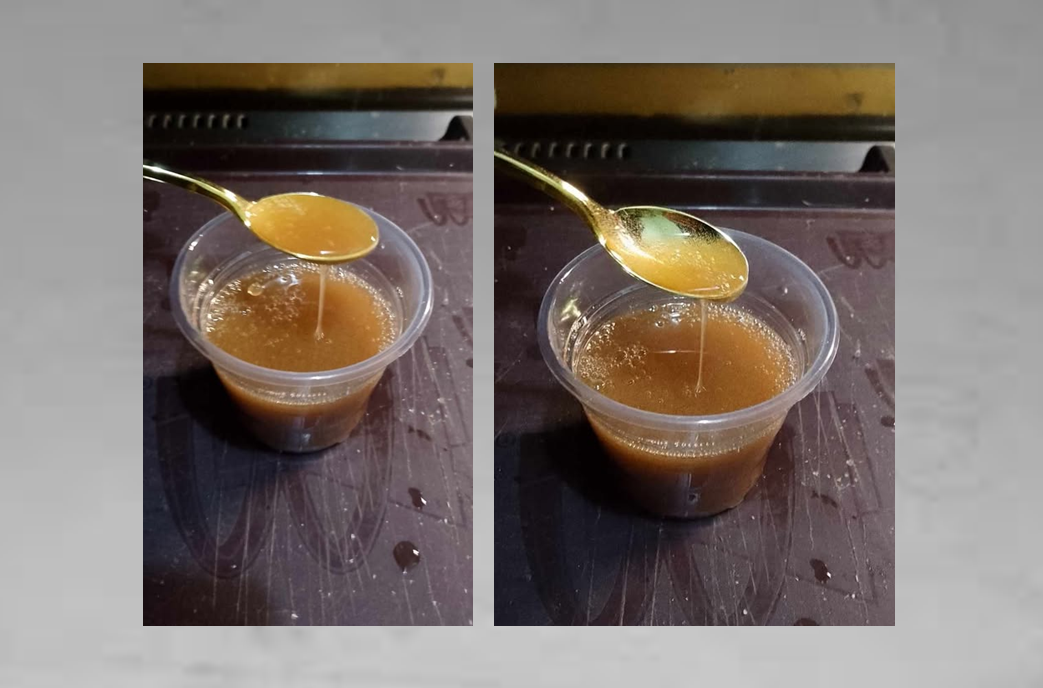
Oye amigos, mientras movía los ingredientes, la mezcla cada vez se hacía más espesa:
GIFS:

Lista la mezcla, así que a limpiar la cocina:
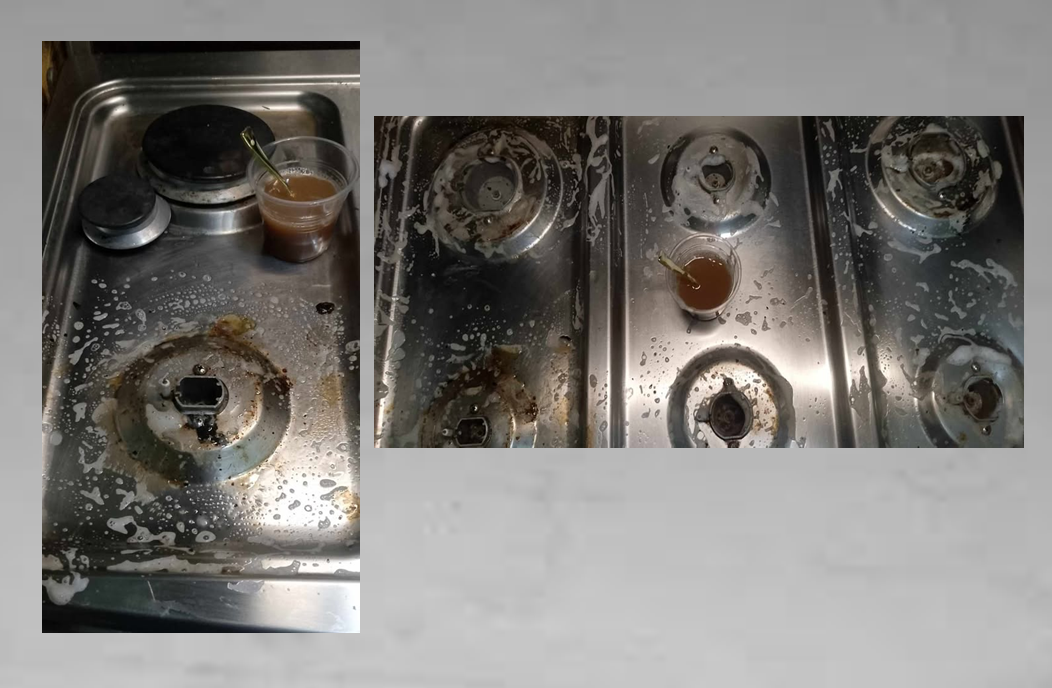
La verdad es que la cocina de mi casa ya requería una limpieza, sobre todo en las bases de las hornillas, porque normalmente, siempre limpiamos la lámina superior de acero inoxidable, pero dejamos esas bases para más luego, por lo que la suciedad se va acumulando y se va quemando hasta convertirse en una mancha negra difícil de remover.
Miren la cocina antes de limpiarla:
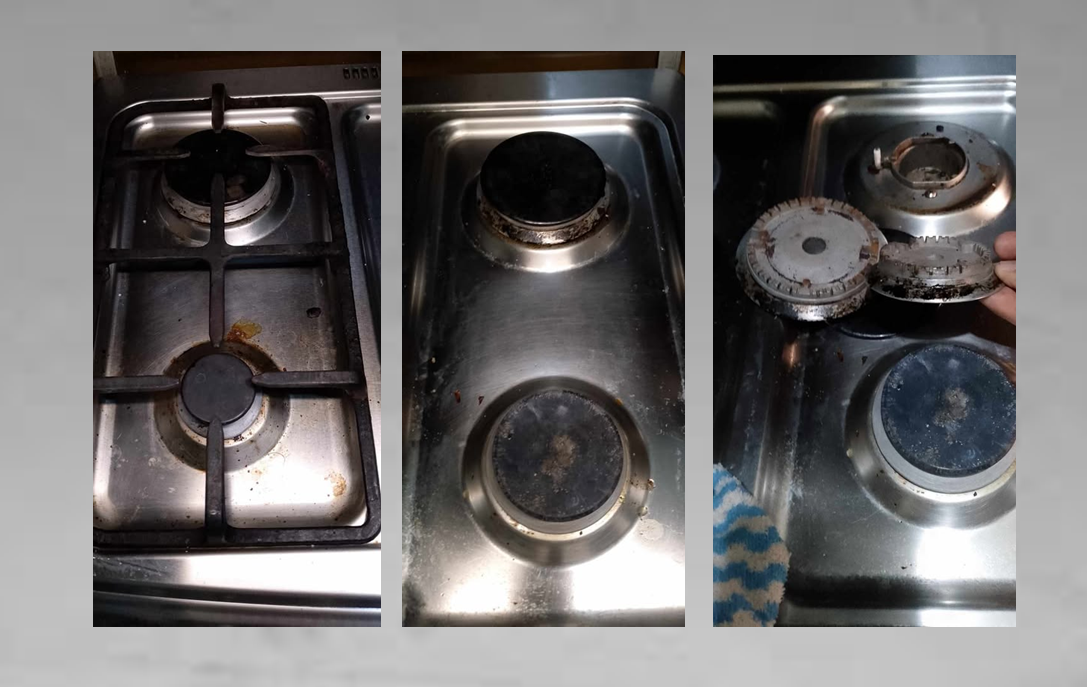
En realidad, la cocina no está tan sucia, pero las bases de los quemadores de las hornillas si tienen manchas negras:
- Paso-4: Ahora comenzaré con la limpieza de la cocina, comenzando con la lámina superior: de acero inoxidable, por lo que voy a extender cierta cantidad de la mezcla sobre las partes más sucias y manchadas, dejaré la mezcla alli por 15 a 20 minutos para darle tiempo para que actue:
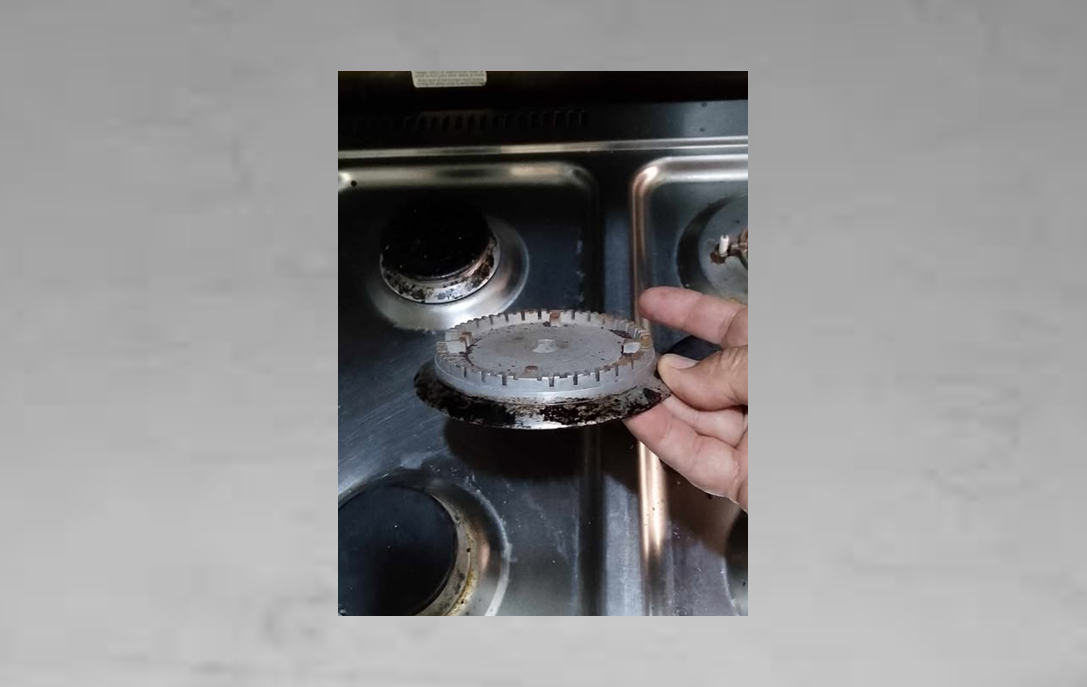
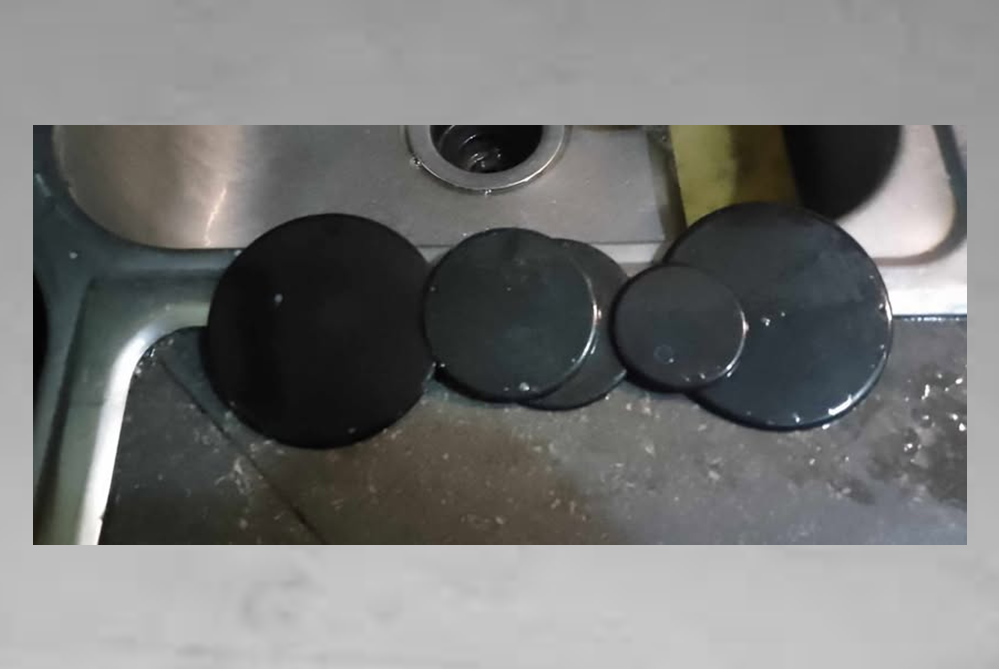
- Paso-5: Mientras la mezcla actua sobre la suciedad de la lámina superior de la cocina, voy a poner las bases de las hornillas dentro de un envase con la mezcla, allí las dejaré por 15 minutos para que la mezcla actue y pueda ablandar las manchas, así mismo lo haré con las tapas redondas de estas hornillas.
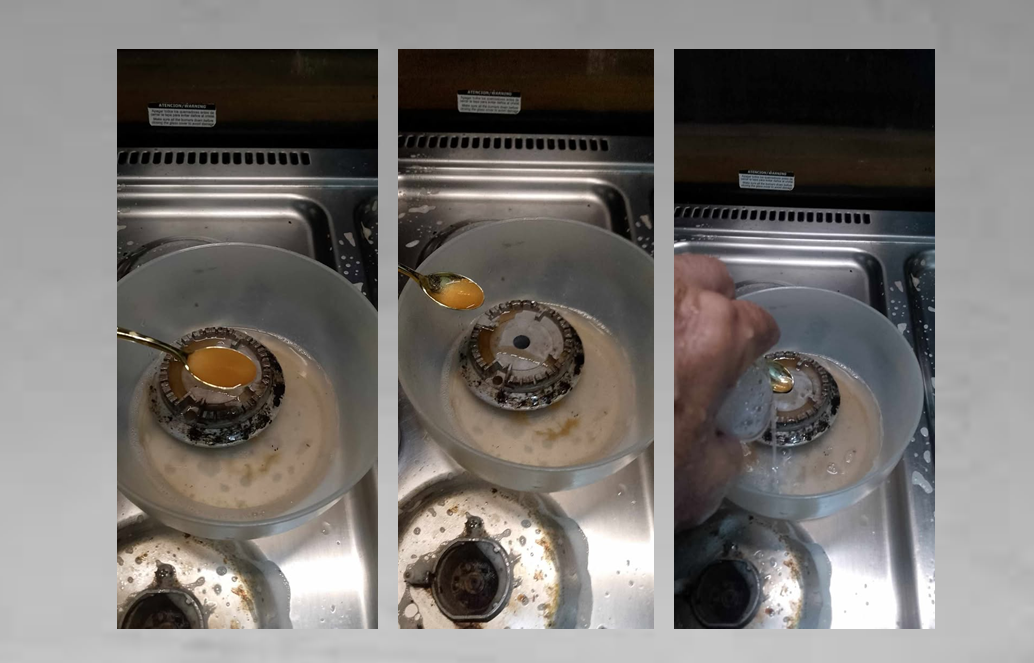
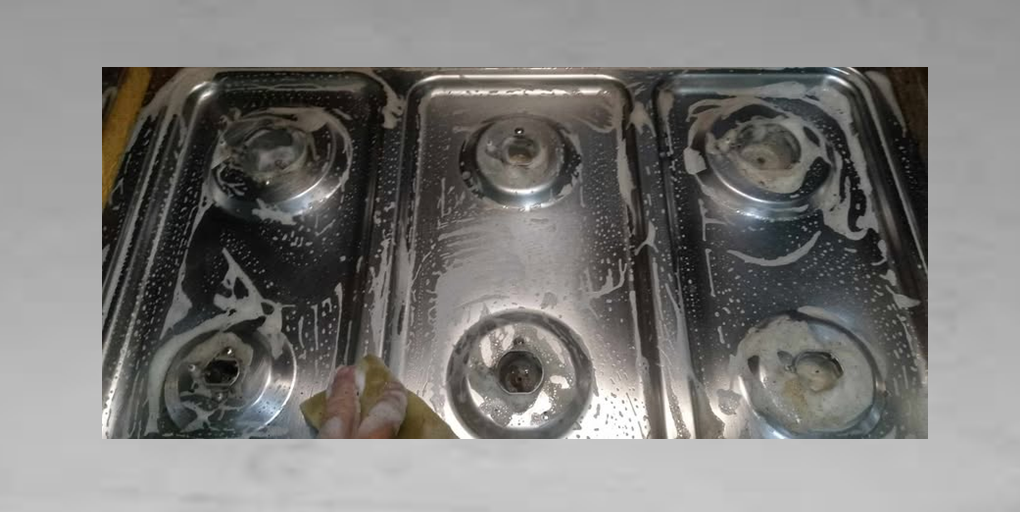
- Paso-6: Bueno amigos, ya es tiempo de intentar remover las manchas quemadas de las bases de las hornillas, para esto voy a utilizar una esponja de las que poseen con un lado abrasivo:
En realidad, la mezcla no funcionó como la mostraban en el video, porque en el video frotaban la esponja sobre las manchas y enseguida como por arte d mágia, se quitaban las manchas, fijense que deje la mezcla por más de 20 minutos sobre las bases de las hornillas, y aun así, tuve que frotar las manchas con mucha fuerza pada poder removerlas, pero al fin las quité y quedaron limpias, continuemos...
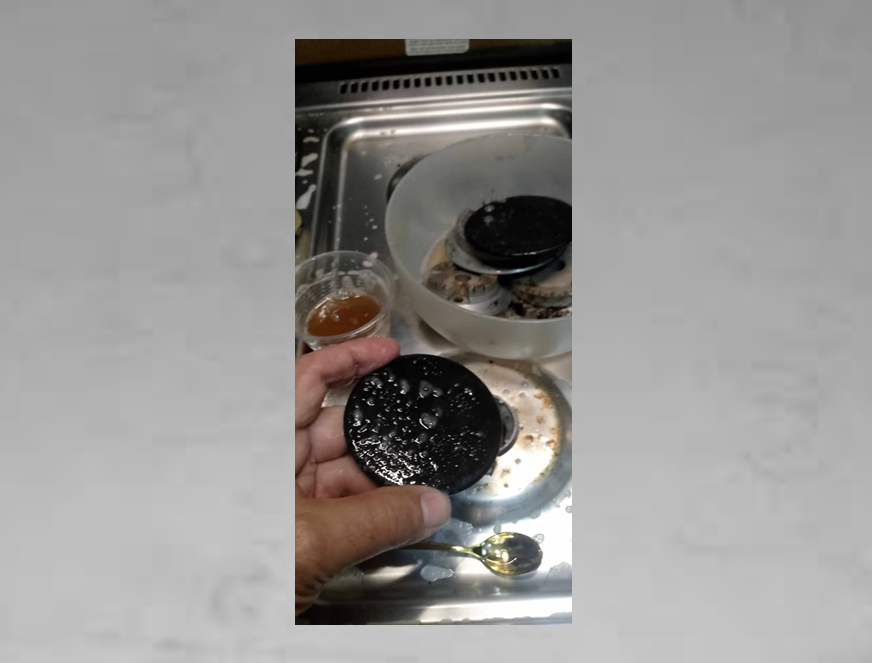
- Paso-7: Con respecto al sucio de las tapas metalicas de las hornillas, la mezcla actuó muy bien, solo froté la esponja con el lado abrasivo y se desprendió el sucio, la verdad es que quedaron limpias:
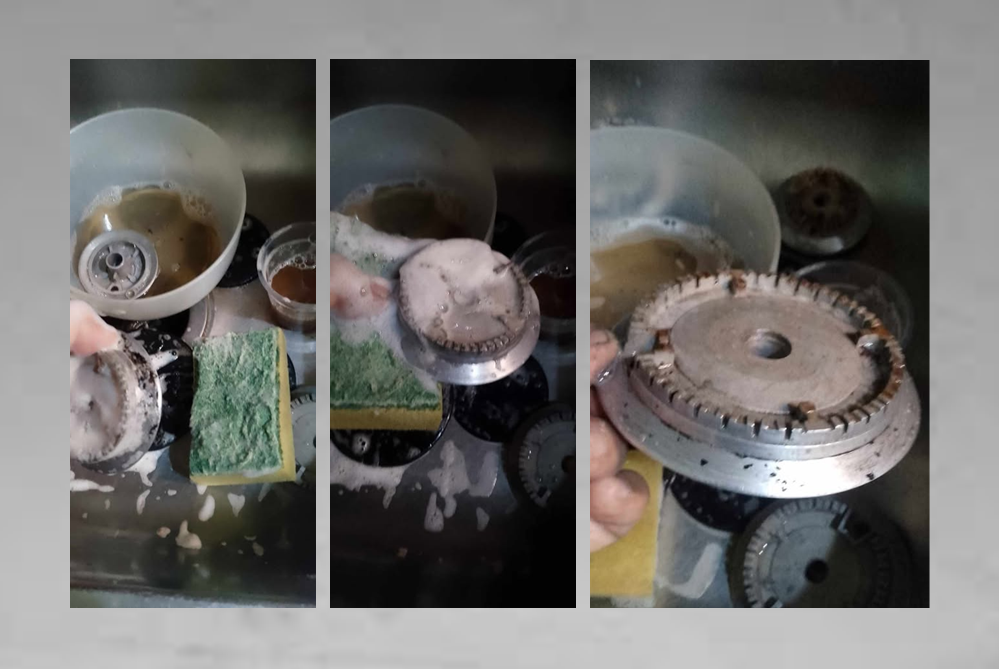
- Paso-8: Lo siguiente será, la limpieza de la lámina superior de la cocina, esta lámina es de acero inoxidable la cual posee un brillo que hace lucir maravillosa la cocina, por lo que debemos evitar rayar la superficie de esta lámina para que la cocina siempre se vea original y como nueva, por esta razón es importante conseguir un producto que sea capaz de ablandar todos eso residuos que se adhieren a esta lámina, así no ejercemos tanta fuerza sobre dichos residuos para no maltratar la lámina.
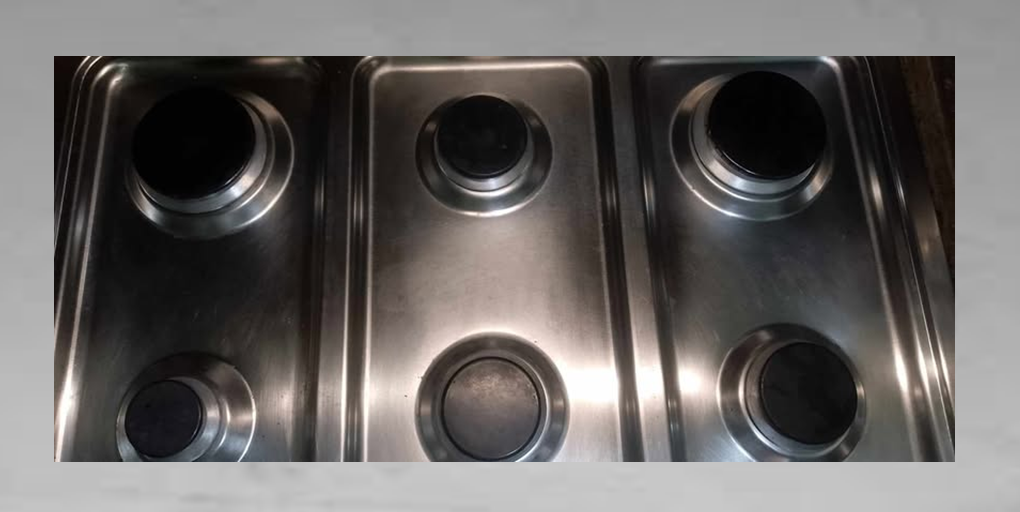
La verdad es que la mezcla actuó muy bien sobre las manchas quemadas de lalámina superior e incluso, las manchas negras que estaban debajo de las bases de las hornillas las pude remover con mucha facilidad:
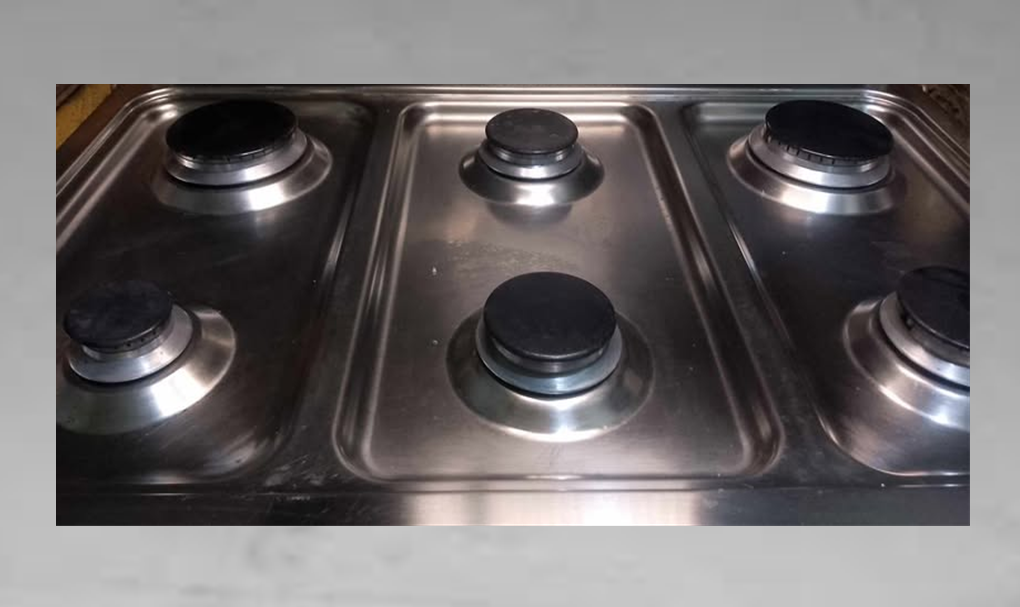
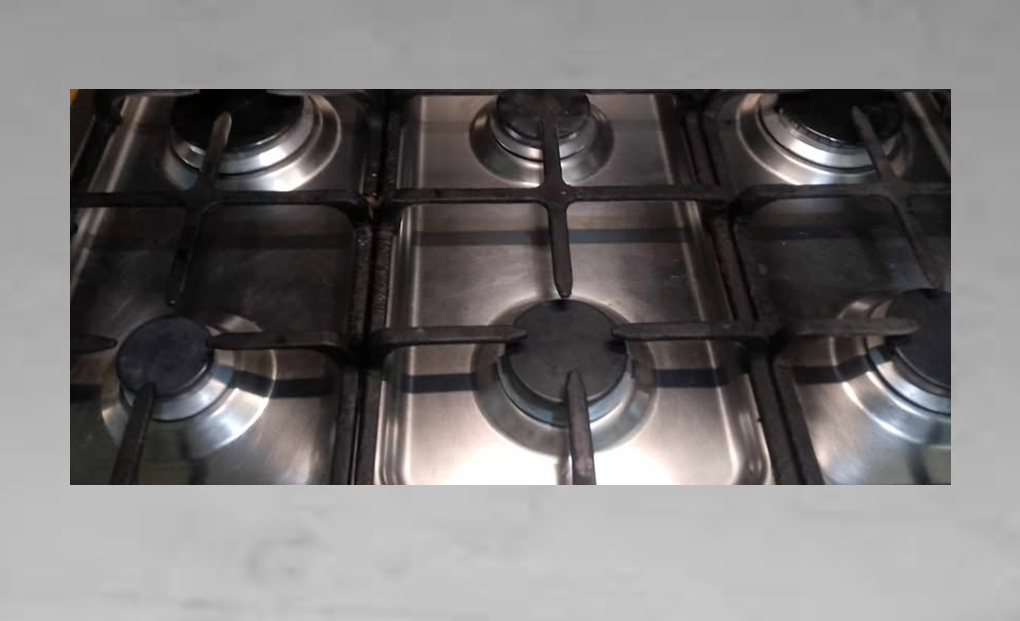
Miren como quedó la cocina después de la limpieza:
Bueno amigos, sobre la eficasia de esta mezcla les puedo decir que de un 100% yo le daría un 70%, esta mezcla actuó muy bien sobre las manchas que estaban en lámina de acero y sobre las manchas quemadas que se encontrana en las tapas redondas de los quemadores, pero en las bases de aluminio de las hornillas se me hizo más dificil remover las manchas, quizás influya el tipo de material, pero en definitiva debo decirles que la mezcla es aceptable, se las recomiendo, eso sí, no hace mágia como en el video, jajaja, saludos.
.

IN ENGLISH:
Hello friends, it's a pleasure to share with you a new experience related to the cleaning tricks that are popping up on the internet every day, and we don't know if they're true or false. I'd like to tell you that yesterday my wife asked me to help her clean the kitchen because the stove that's frequently used to boil drinking water was looking yellowish, and some of the burners also had burnt spots.
Well friends, the truth is that the last time I cleaned these burners I had to rub hard on each stain to get it out, BUT! A few days ago I saw a video where they used an incredible mixture to remove the burnt layer from the pots, this mixture is prepared with the soft drink "coca cola" mixed with salt, liquid detergent and baking soda, the truth is that I was very impressed when they applied this product to the entire burnt part of a pot, what they did was, spread the mixture all over the burnt part and then with the use of a sponge, they began to rub the pot, the incredible thing about this is that while they rubbed that burnt part you could immediately see the aluminum metal of the pot, I confess that that video seemed to me more like a magic trick, so I decided to put this mixture to the test, so I prepared this mixture and began to clean the stove.
A mixture of Coca-Cola and salt to clean pots and the stove. Is this true?
Yes, friends, as I mentioned at the beginning, I saw in a video that recommended a mixture of Coca-Cola, salt, liquid detergent, and baking soda to remove dirt and burnt-on stains from pots and aluminum metals like stovetops. So, to test this trick, I decided to clean my kitchen with this mixture.
Link del video: en caso que quieras verlo.
Mixture ingredients according to the video I saw online
- 250 ml of Coca-Cola
- 1 tablespoon of salt
- 1 tablespoon of baking soda
- 250 ml of liquid detergent (dishwashing liquid)
- Water
Well my friends, since this is about testing this mixture, I'm not going to prepare much of the mixture, I'll just prepare one cup of this mixture, but respecting the proportions indicated.
- One small 60 ml glass of Coca-Cola
- One small 60 ml glass of liquid detergent
- One small spoonful of salt
- One small spoonful of baking soda
- 30 ml of water
Mixture Preparation:
As I said, I'm only going to prepare a small amount of this mixture, but respecting the proportions recommended in the video I saw online.
- Step-1: In a small 60 ml glass I will put a little Coca-Cola and then pour it into a larger glass where I will make the mixture:
- Step-2: Now I will add a small spoonful of salt to the glass containing the Coca-Cola liquid and proceed to stir the mixture.
- Step-3: Now I will add a small spoonful of baking soda and a little bit of water to the coca-cola and start stirring the mixture.
I'll tell you, friends, that while I was stirring the ingredients, the mixture was getting thicker and thicker. Look at its texture:
GIFS:
The mixture is ready, so let's clean the stove:
The truth is, my kitchen was already in need of a clean, especially the aluminum stove bases. We normally clean the stainless steel top plate, but we always leave those bases for later, so the grime builds up and burns into a hard-to-remove black stain.
Check the stove before cleaning it:
The stove isn't actually that dirty, but the burner bases do have black stains:
- Step-4: Now I will start with the kitchen cleaning, starting with the top sheet: stainless steel, so I will spread some amount of the mixture on the dirtiest and stained parts, I will leave the mixture there for 15 to 20 minutes to give it time to act:
- Step 5: While the mixture is working on the dirt on the top of the stove, I'm going to put the burner bases inside a container with the mixture. I'll leave them there for 15 minutes so that the mixture can work and soften the stains. I'll do the same with the round burner lids.
- Step-6: Well friends, it's time to try to remove the burnt stains from the bases of the burners, for this I'm going to use a sponge with an abrasive side:
Actually, the mixture didn't work as shown in the video, because in it, they rubbed the sponge over the stains and, instantly, as if by magic, they disappeared. It's worth noting that I left the mixture on the stove for over 20 minutes, and even then, I had to scrub the stains quite vigorously to get them out, but I finally got them out and they were clean. Let's continue...
- Step 7: Regarding the dirt on the metal stove tops, the mixture worked very well. I simply rubbed the sponge with the abrasive side and the dirt came off. They were spotlessly clean.
Step 8: Next, I'll clean the stove. This stainless steel surface has a shiny finish that gives it a flawless look, so we need to prevent scratches to keep it looking like new. It's important to find a product that softens stuck-on residue. This way, you won't have to apply as much force to remove it and damage the surface.
The mixture worked very well on the burnt-on stains on the stove, and I was even able to remove the black stains under the burner bases very easily.
Look how the kitchen looked after cleaning it: