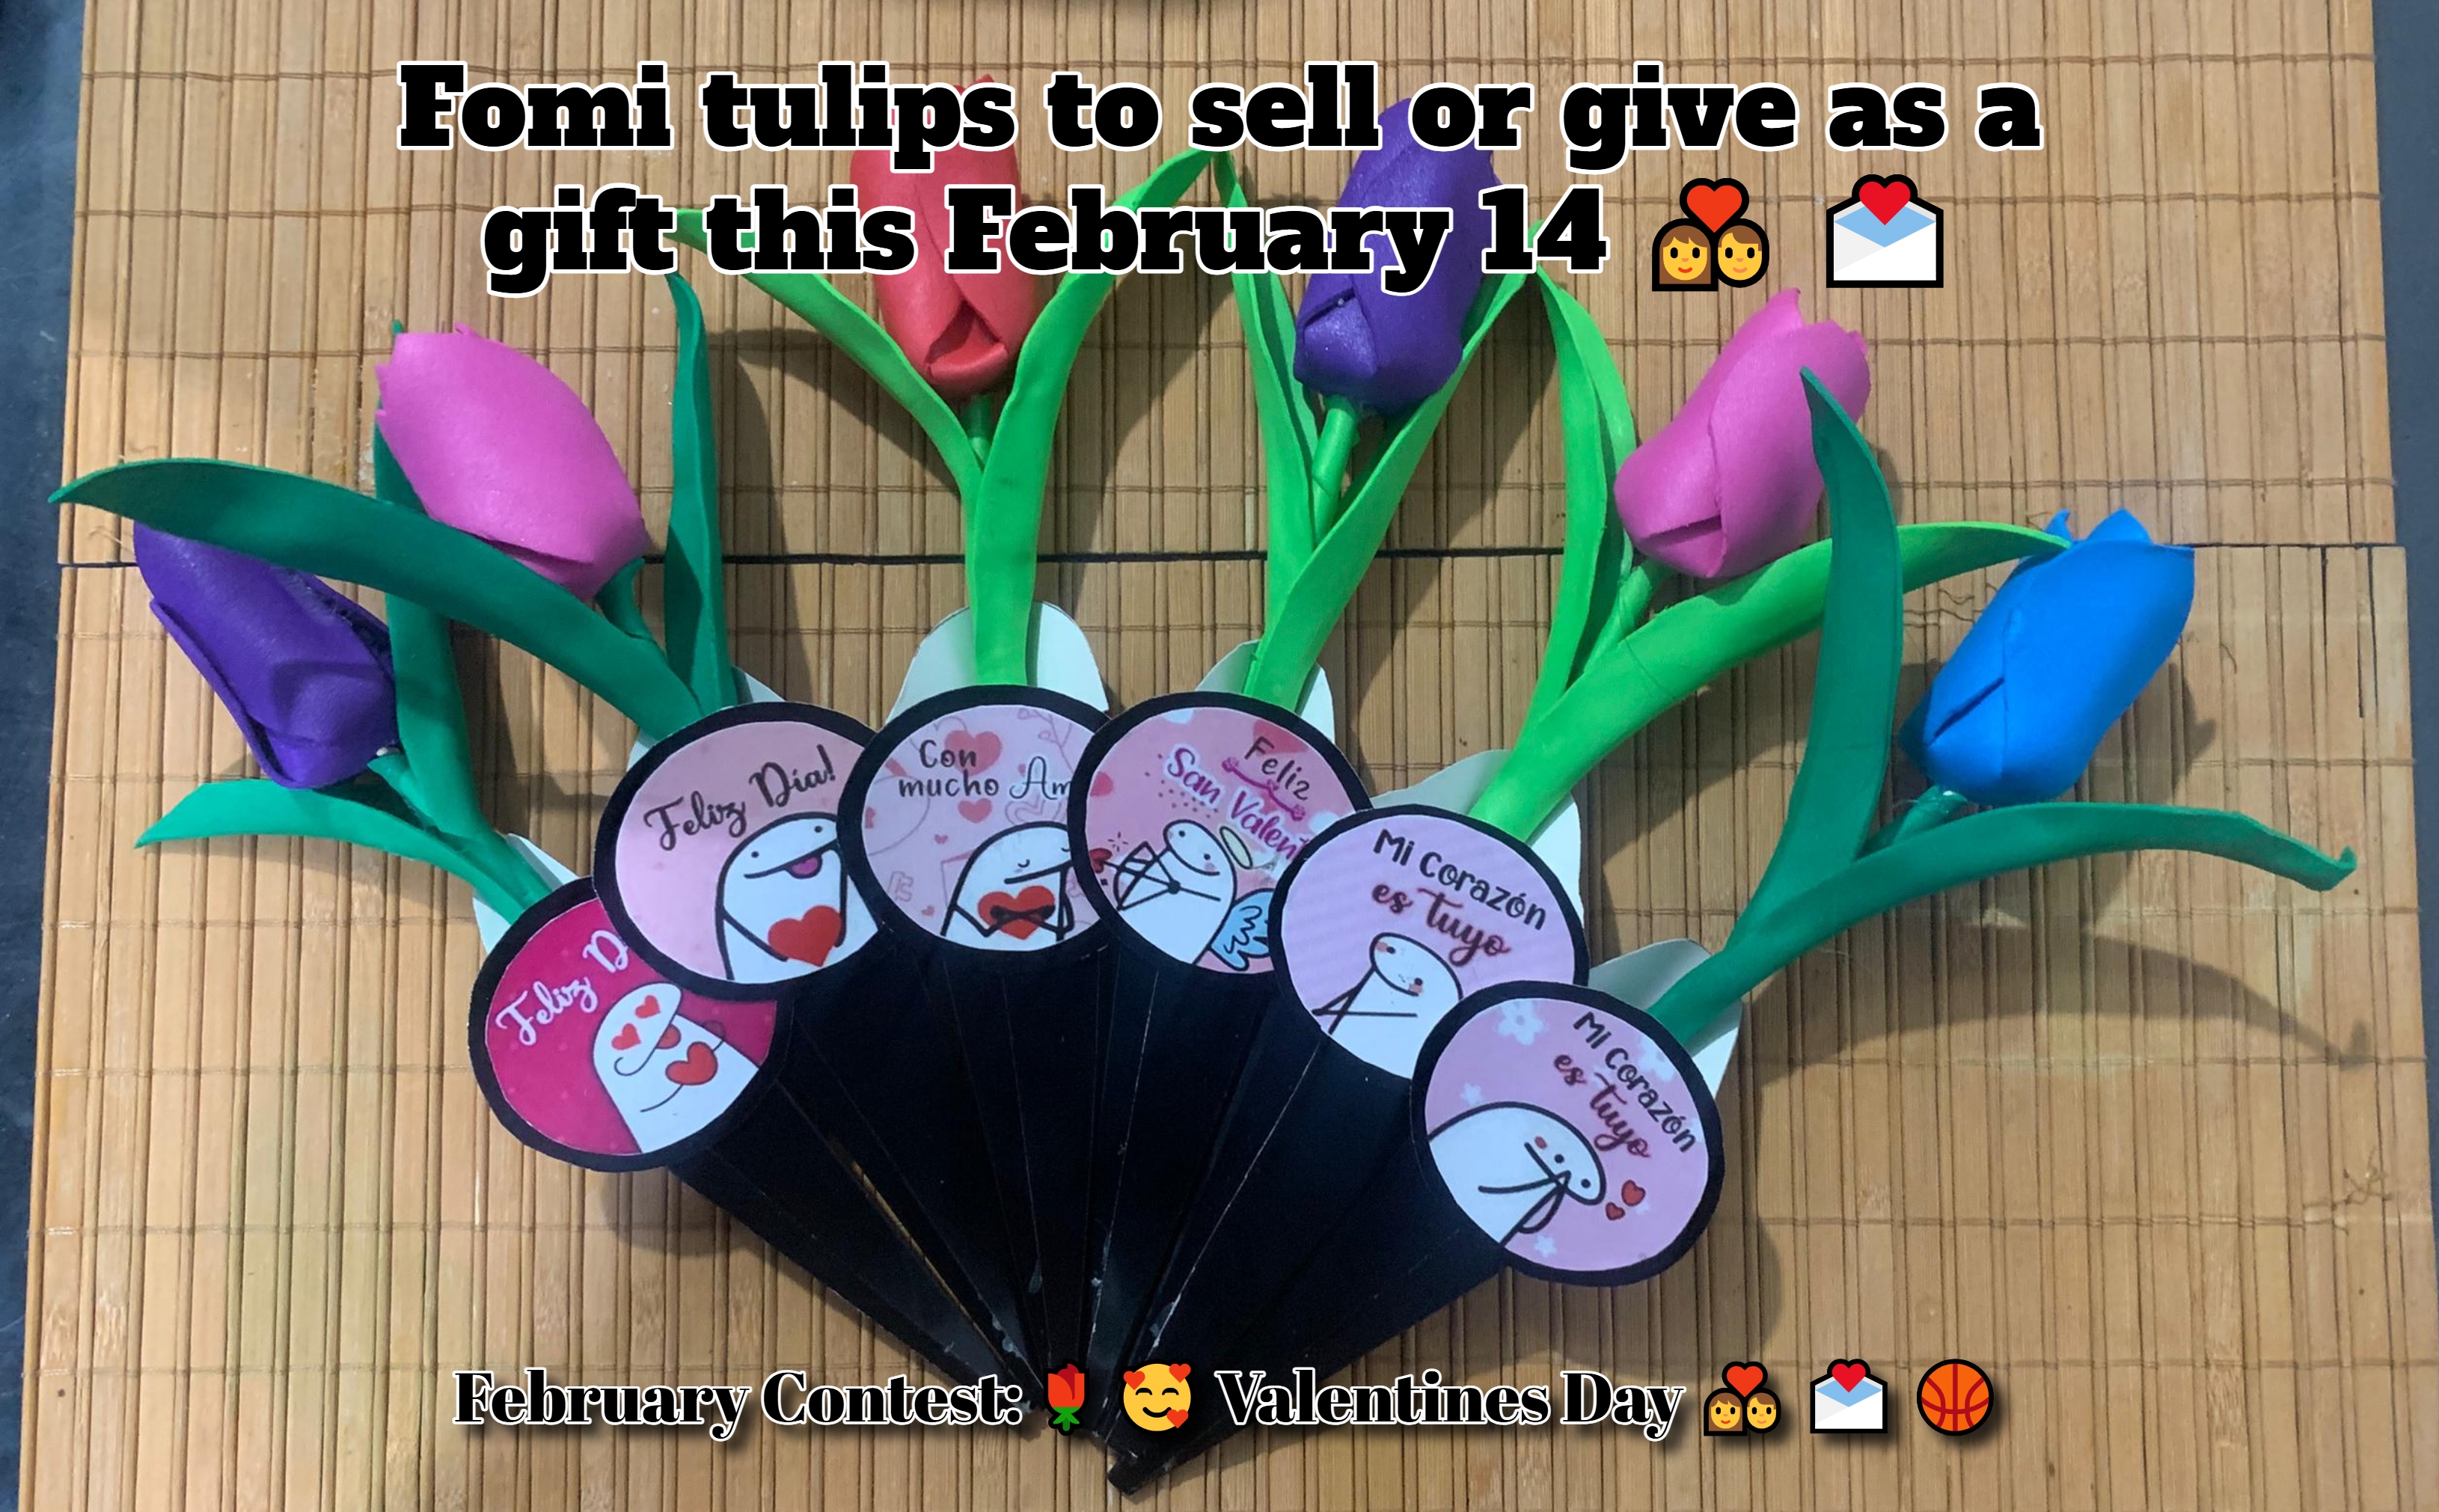
Hello dear friends of the DIYhub community, it's a pleasure to greet you again through this medium and share with you a little bit of what I do in my day-to-day life. This time, participating in the February Contest: 🌹 🥰 Valentines Day 💑 💌
It's nice to dedicate time to celebrate Valentine's Day in one way or another, and there are people like me who don't have a partner but have a strong desire to create small crafts for these beautiful and special occasions. So, I got down to work and also took the opportunity to start offering and selling the little things I make. Today, I bring you the step-by-step process of how I made these small foam tulips to give away or sell this February 14th.
To begin with, I made 6 of these details, and the materials needed are:
- 3 colored foams for the petals (one for every two tulips)
- 2 green foams for the stem and leaves (2 for every 3 tulips)
- 6 tall toothpicks for the stems (one for each tuliapn)
- Two hot glue sticks and a glue gun for them
- A sheet of double-sided cardboard
- A sheet of stickers related to the date
Other tools to use:
- A clothes iron to mold the foam
- A cutter or scissors
- A ruler, pen, pencil and a sheet of paper to make molds
For the flower petals:
 | .jpeg) | .jpeg) |
|---|
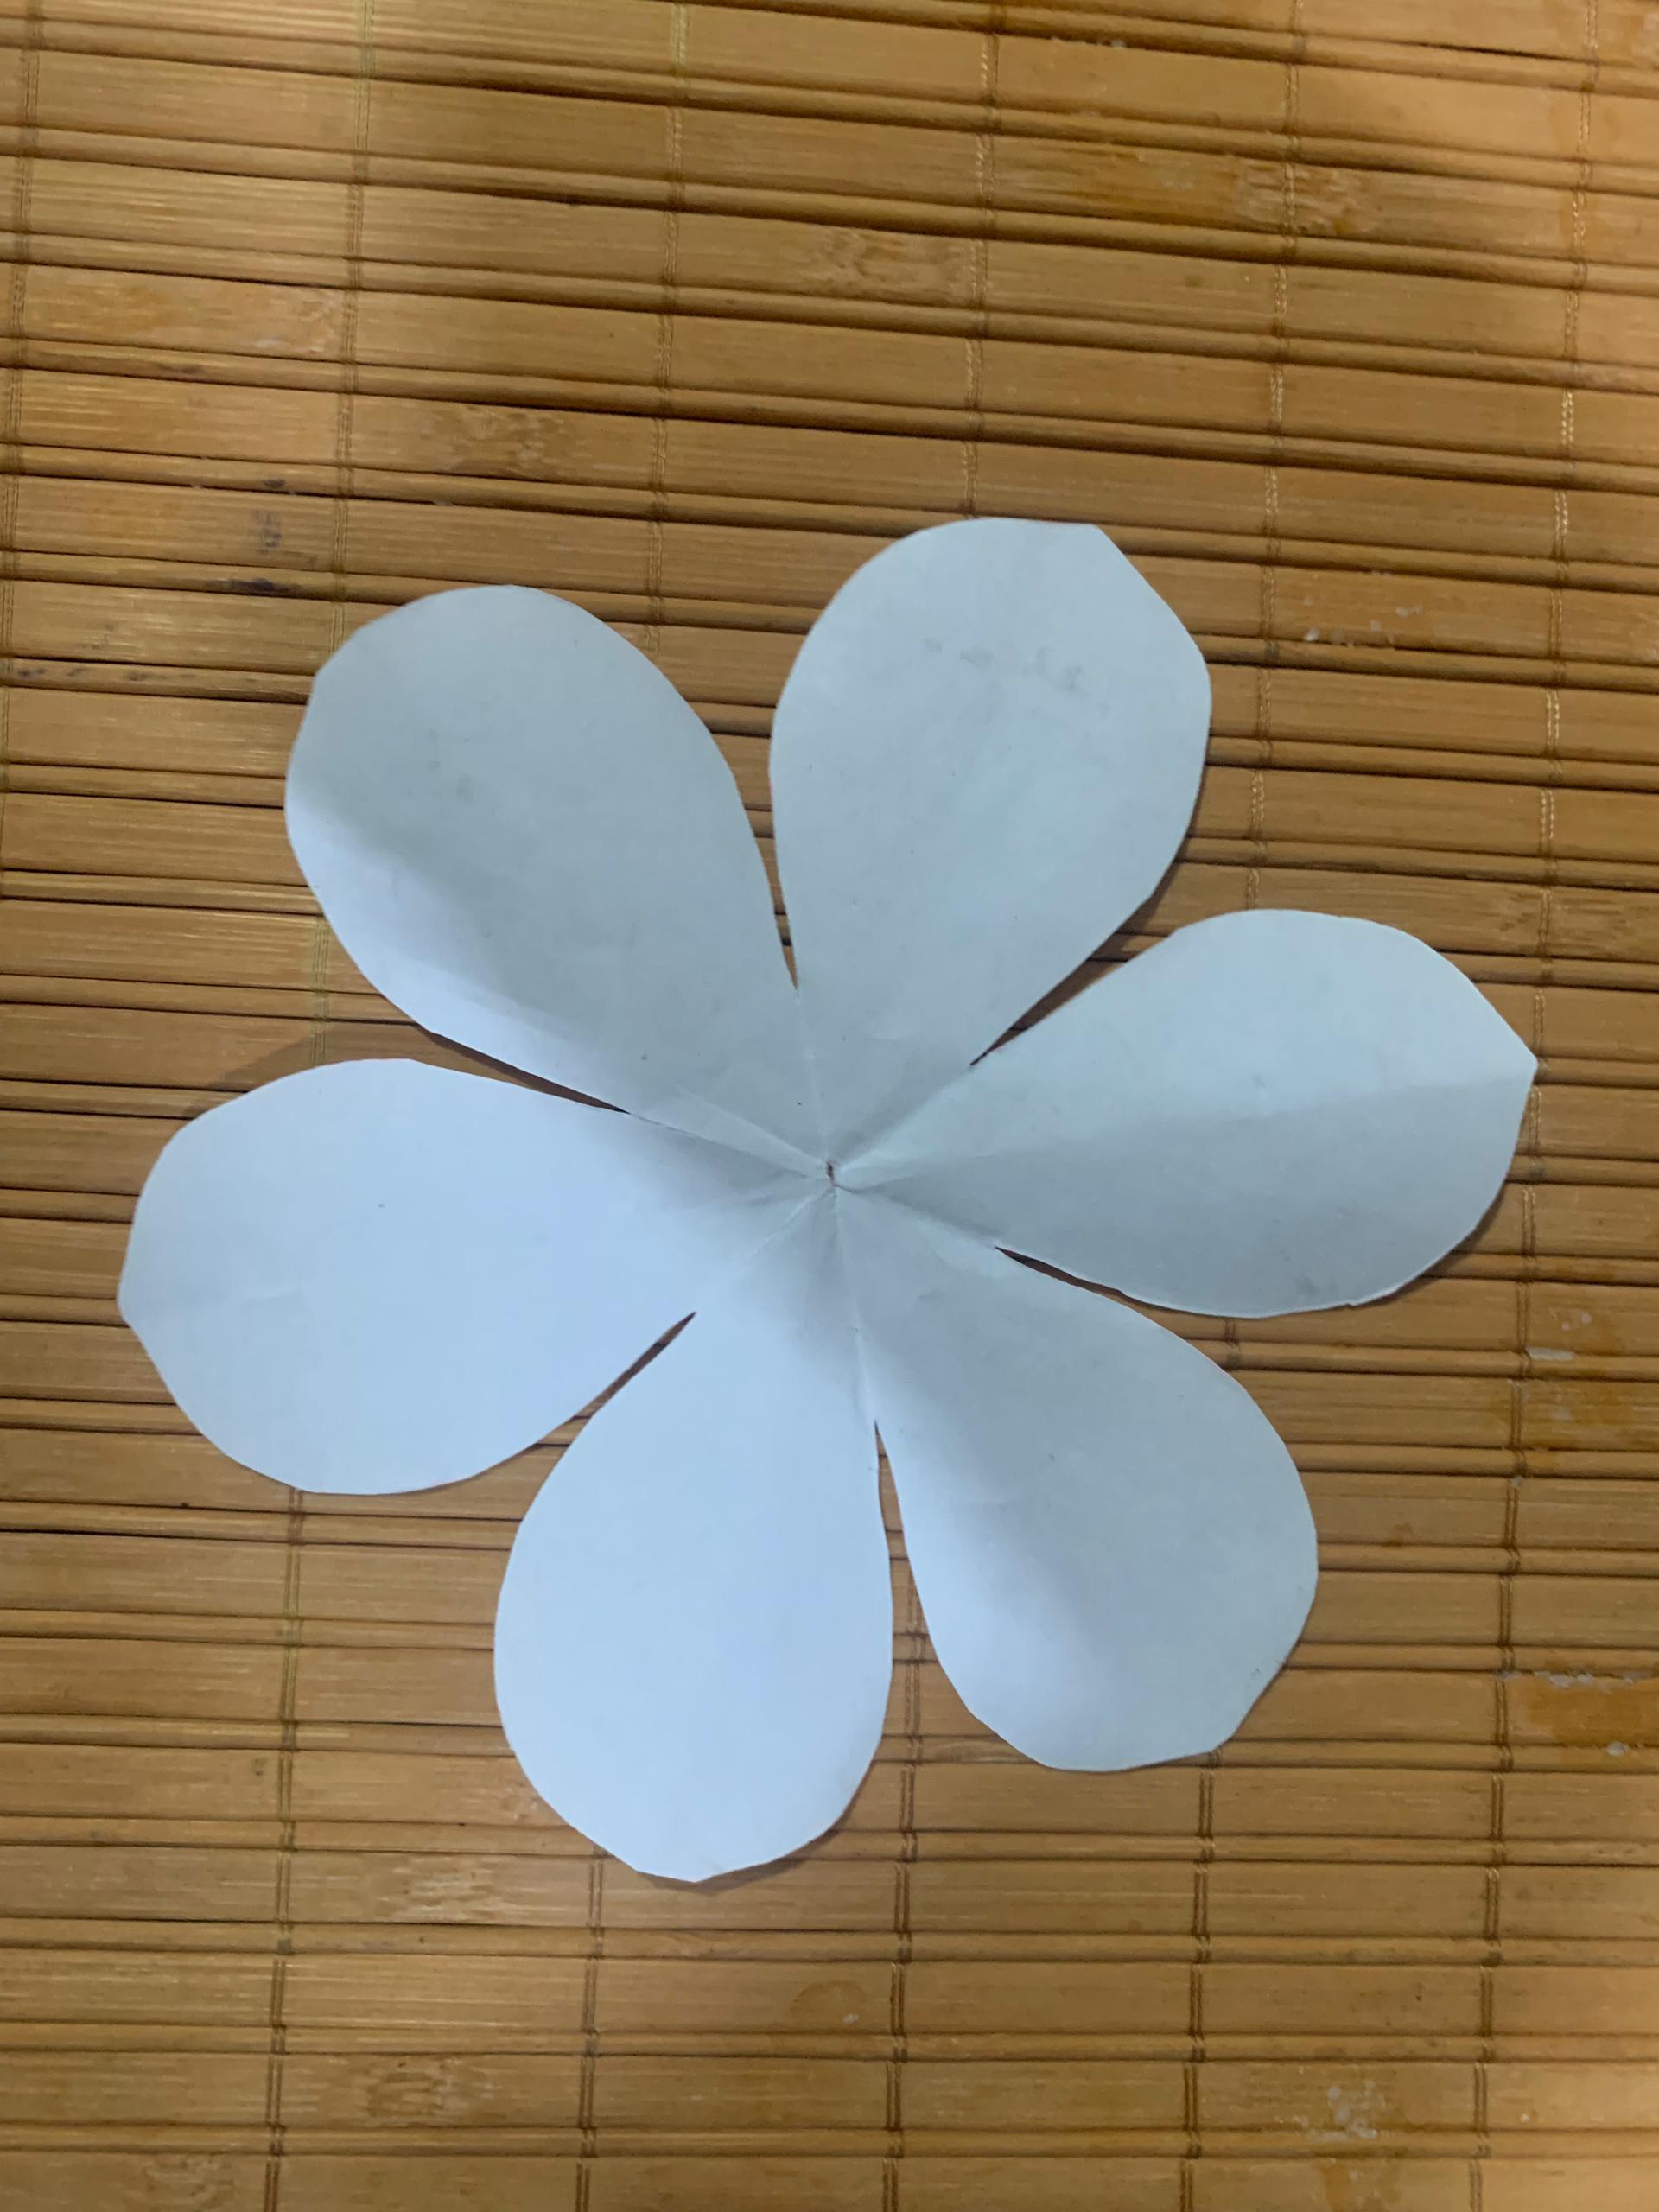
I started by creating a mold using a piece of paper, pencil, and scissors. I made this mold from a circle folded in half and then into three equal parts, from which I cut out the shape of a water drop. When I unfolded the paper, the shape of a flower with 6 petals emerged.
I repeated the figure of this mold 6 times on colored foam, tracing it with a pencil and cutting it with a cutter and scissors in small spaces. I was able to make two of these figures on each foam sheet.
For the leaves and stem:
.jpeg) |
|---|
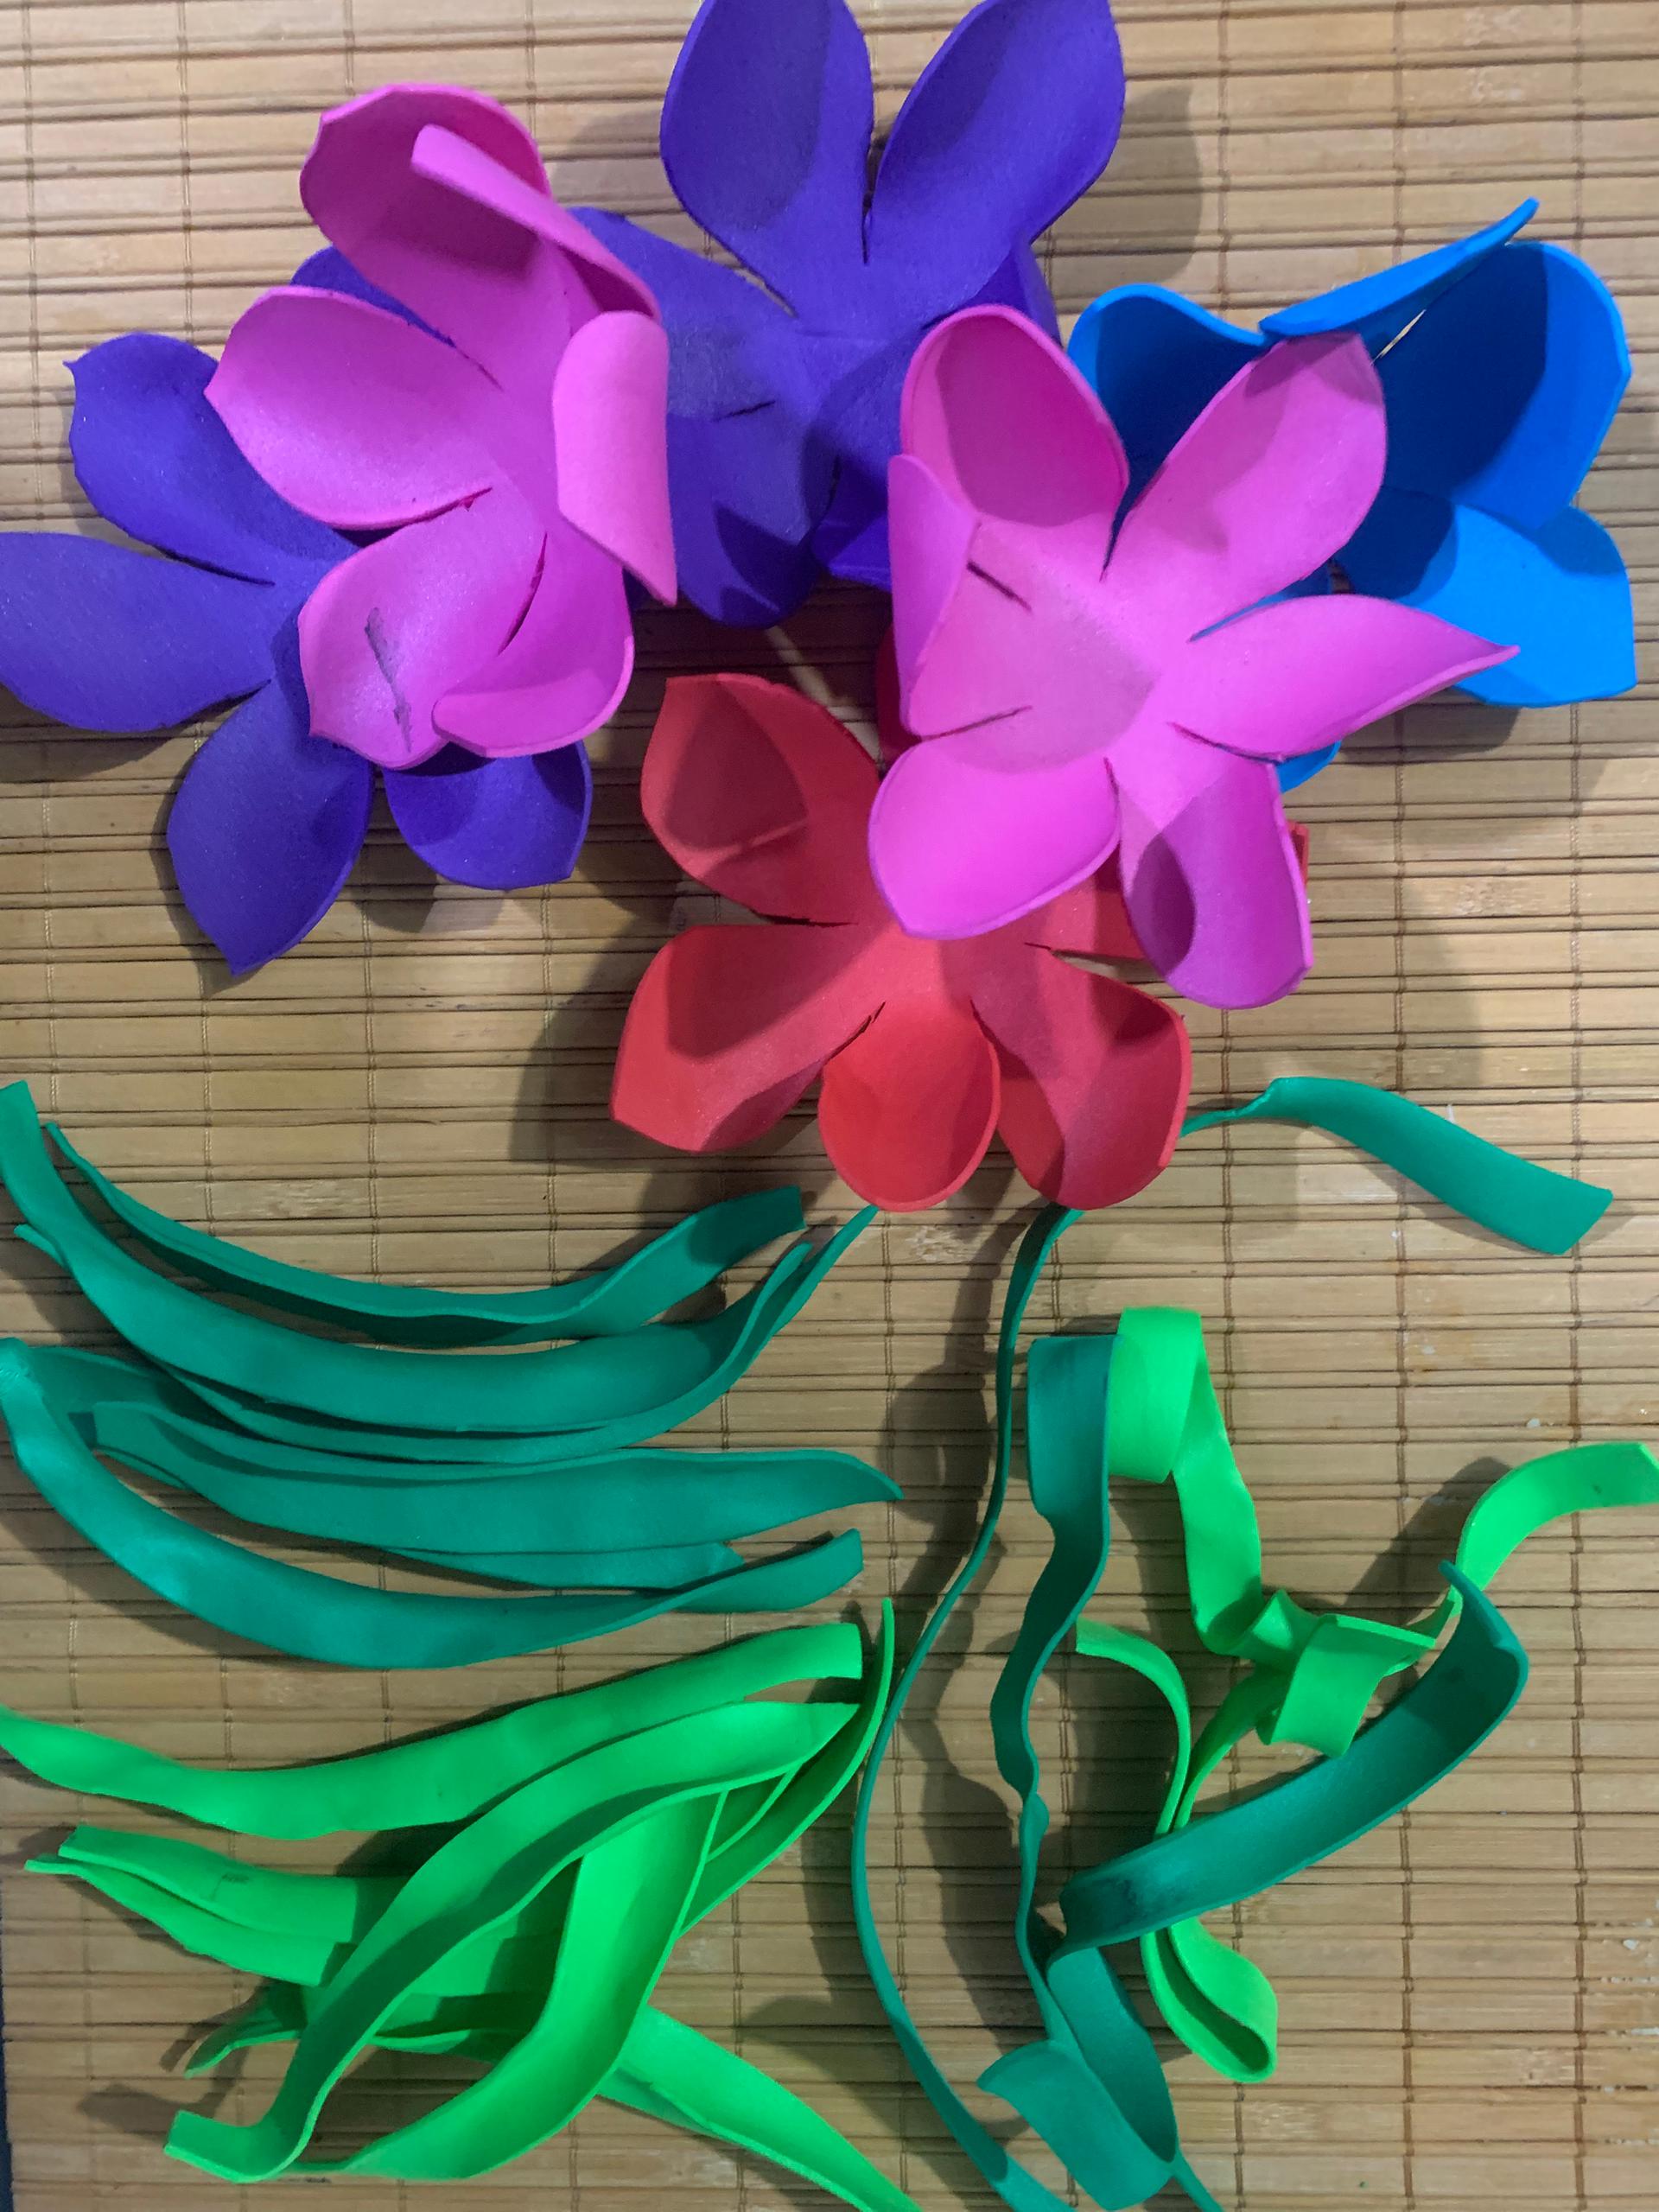
For the leaves, just like for the petals, I made a small mold that was simply an elongated rectangle folded in half and cut into a D shape, and one with the same shape but smaller. Using these molds as a guide, I traced 6 figures of each on the green foam, thus leaving a pair of leaves for each flower. I alternated by making 3 pairs of leaves with light green foam and 3 with darker green foam.
For the stem, I simply made a long strip of 1.5cm wide for each flower.
For the box:
.jpeg) |
|---|
Just like in the previous steps, I also made a template for this and traced it onto double-sided cardboard 6 times to obtain a figure for each flower. Following the folds of the template, I assembled each of these boxes and glued them with hot glue. I also added a small detail by sticking stickers that I had custom-made at a print shop onto a piece of the same cardboard, which I then cut out and glued to the front of each box.
To assemble:
 | .jpeg) | .jpeg) | .jpeg) |
|---|
And lastly, but I think most importantly, all that was left was to assemble each of my flowers. It was quite an easy and fun process, as I first had to heat up each of the foam pieces I had previously made with the help of a clothes iron to shape them.
I pierced the center of the petal part with a tall toothpick which I secured with a small dot of hot glue. I glued together 3 of the petals, leaving one in between each and then placing the remaining ones on top.
I covered the tall toothpick with the green foam strip I had made for the stem, and on top of this, I placed the respective pair of leaves for each flower, consisting of a small leaf and a larger one.
Once all the flowers were ready and assembled, I simply glued them onto the boxes, and they turned out like this:
.jpeg)
All photos are my property taken with my Iphone XR, the cover were edited with the befunky website