
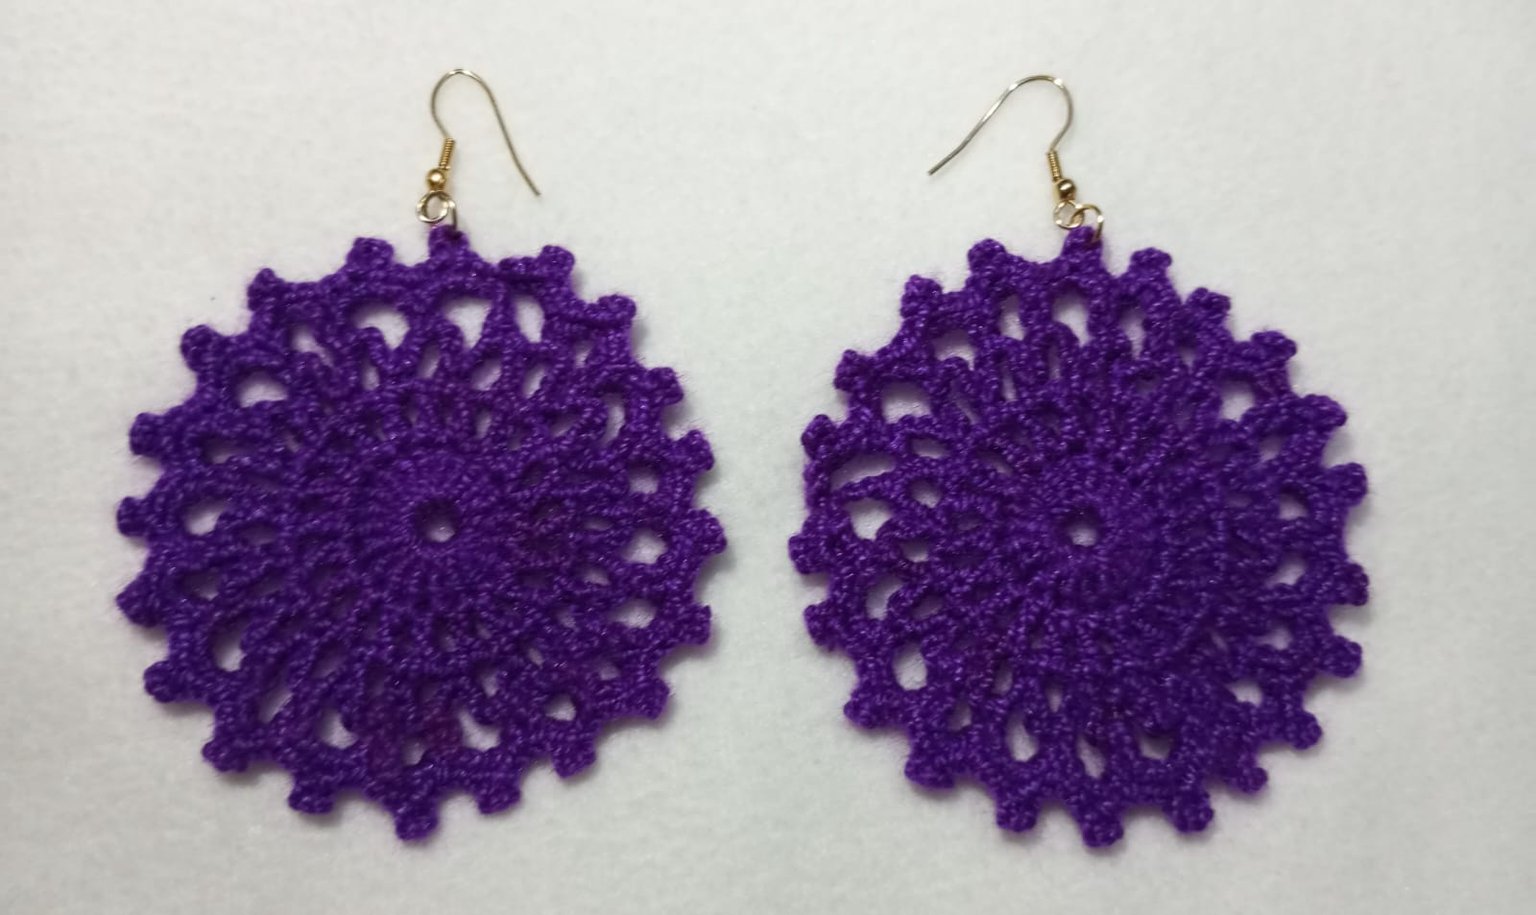
Hola mi gente linda, nuevamente me encuentro por acá con un nuevo diseño, hoy opte por un diseño más elaborado y muy lindo, después de terminarlo me di cuenta que tiene la forma de un timón, así que, serán los aretes en forma de timón 🤭 deseo de todo corazón que les guste y ahora sí,vamos con los materiales y el paso a paso.
Hello my lovely people, I'm back here with a new design. Today I opted for a more elaborate and very pretty design. After finishing it, I realized it's shaped like a rudder, so these will be rudder-shaped earrings. 🤭 I sincerely hope you like them. Now, let's get to the materials and the step-by-step instructions.
Materiales / Materials 💜✨
Hilo coral / Coral thread ✨
Aguja (número 3) / Needle (size 3) ✨
Anzuelos / Hooks ✨
Argollas / Rings ✨
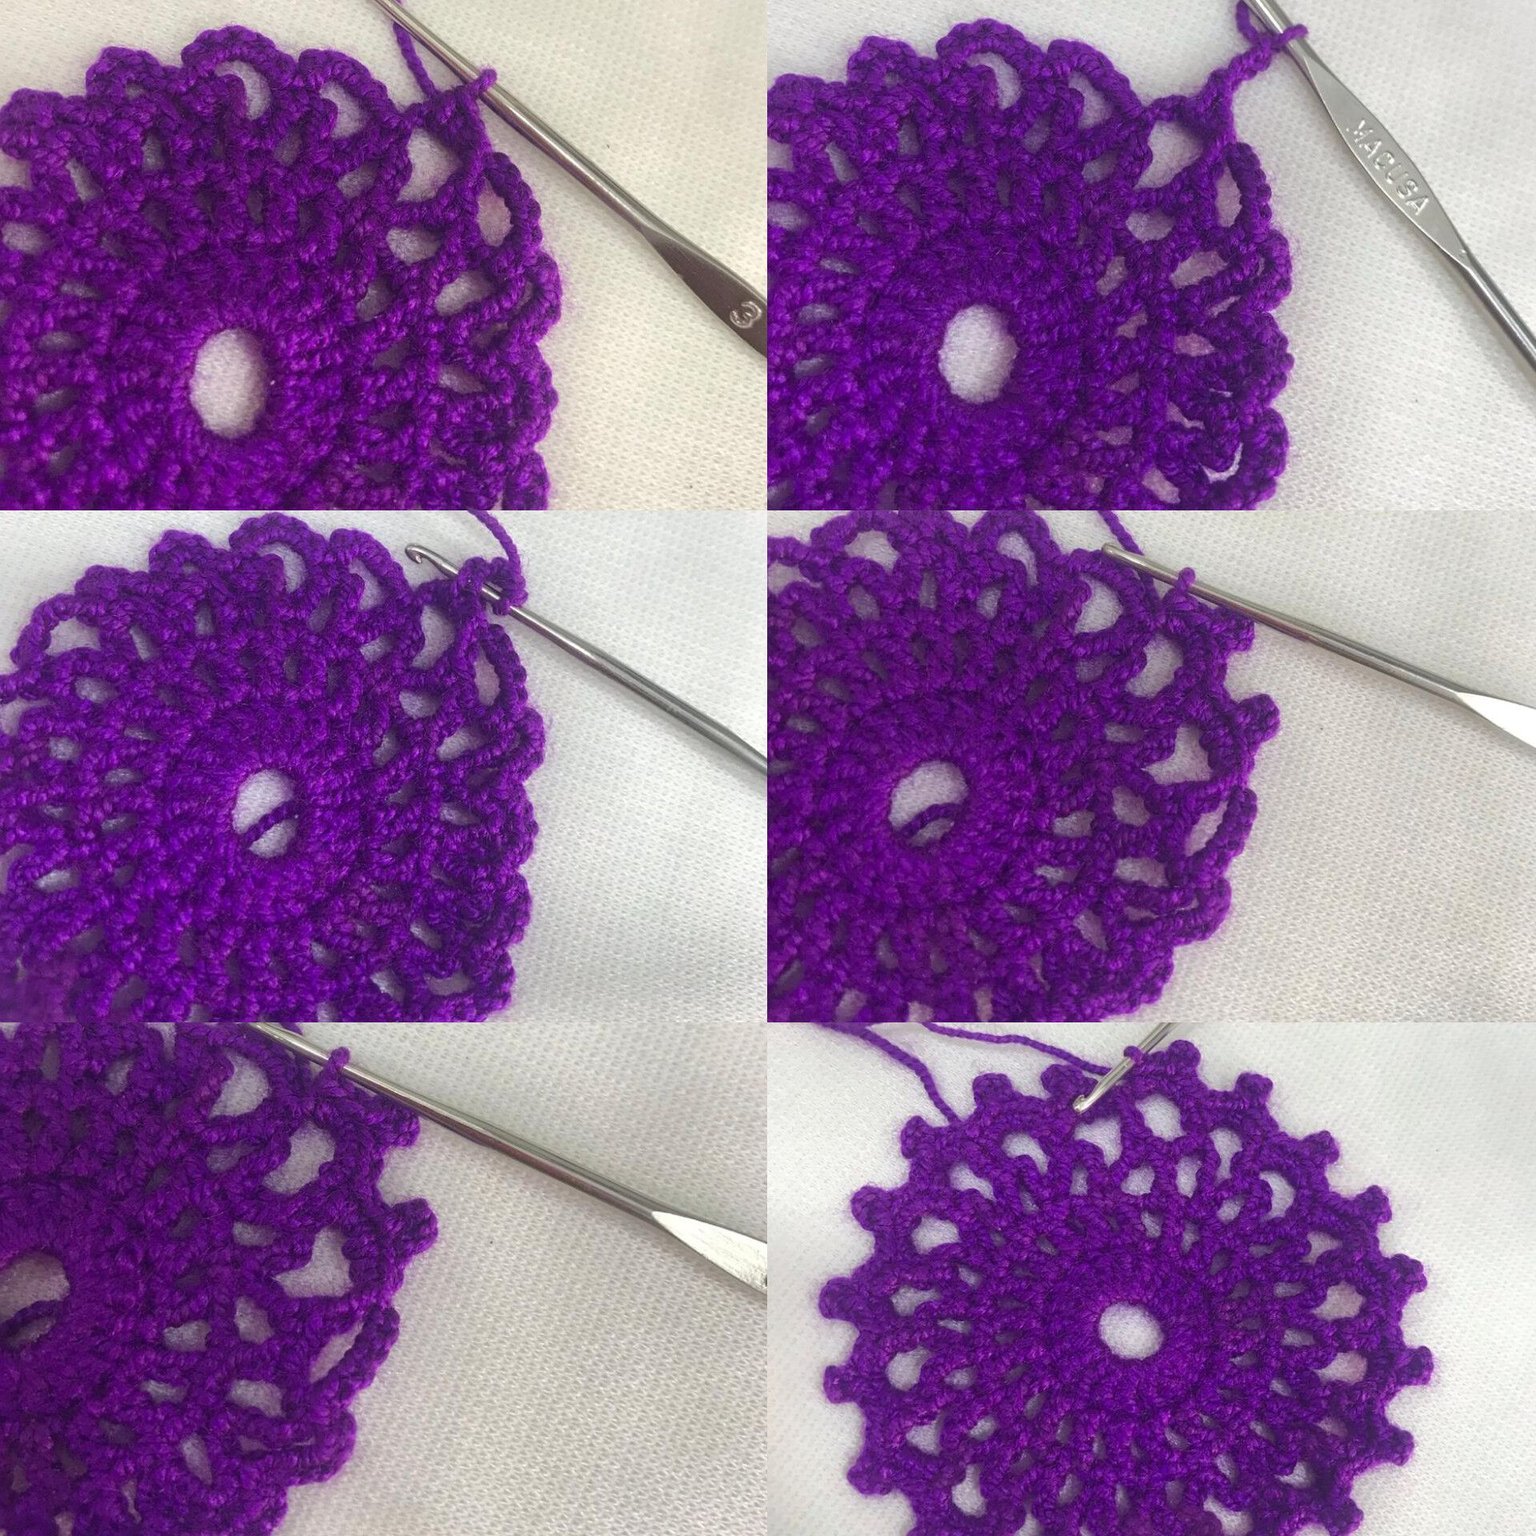
Paso 1️⃣ / Step 1️⃣
Lo primero que haremos será un nudo mágico, consecuente a eso levantamos 3 cadenas y procedemos a realizar 20 puntos altos pasando por el círculo, tomamos la hebra y jalamos hasta cerrar el círculo, terminamos con un punto deslizado en la tercera cadena del comienzo.
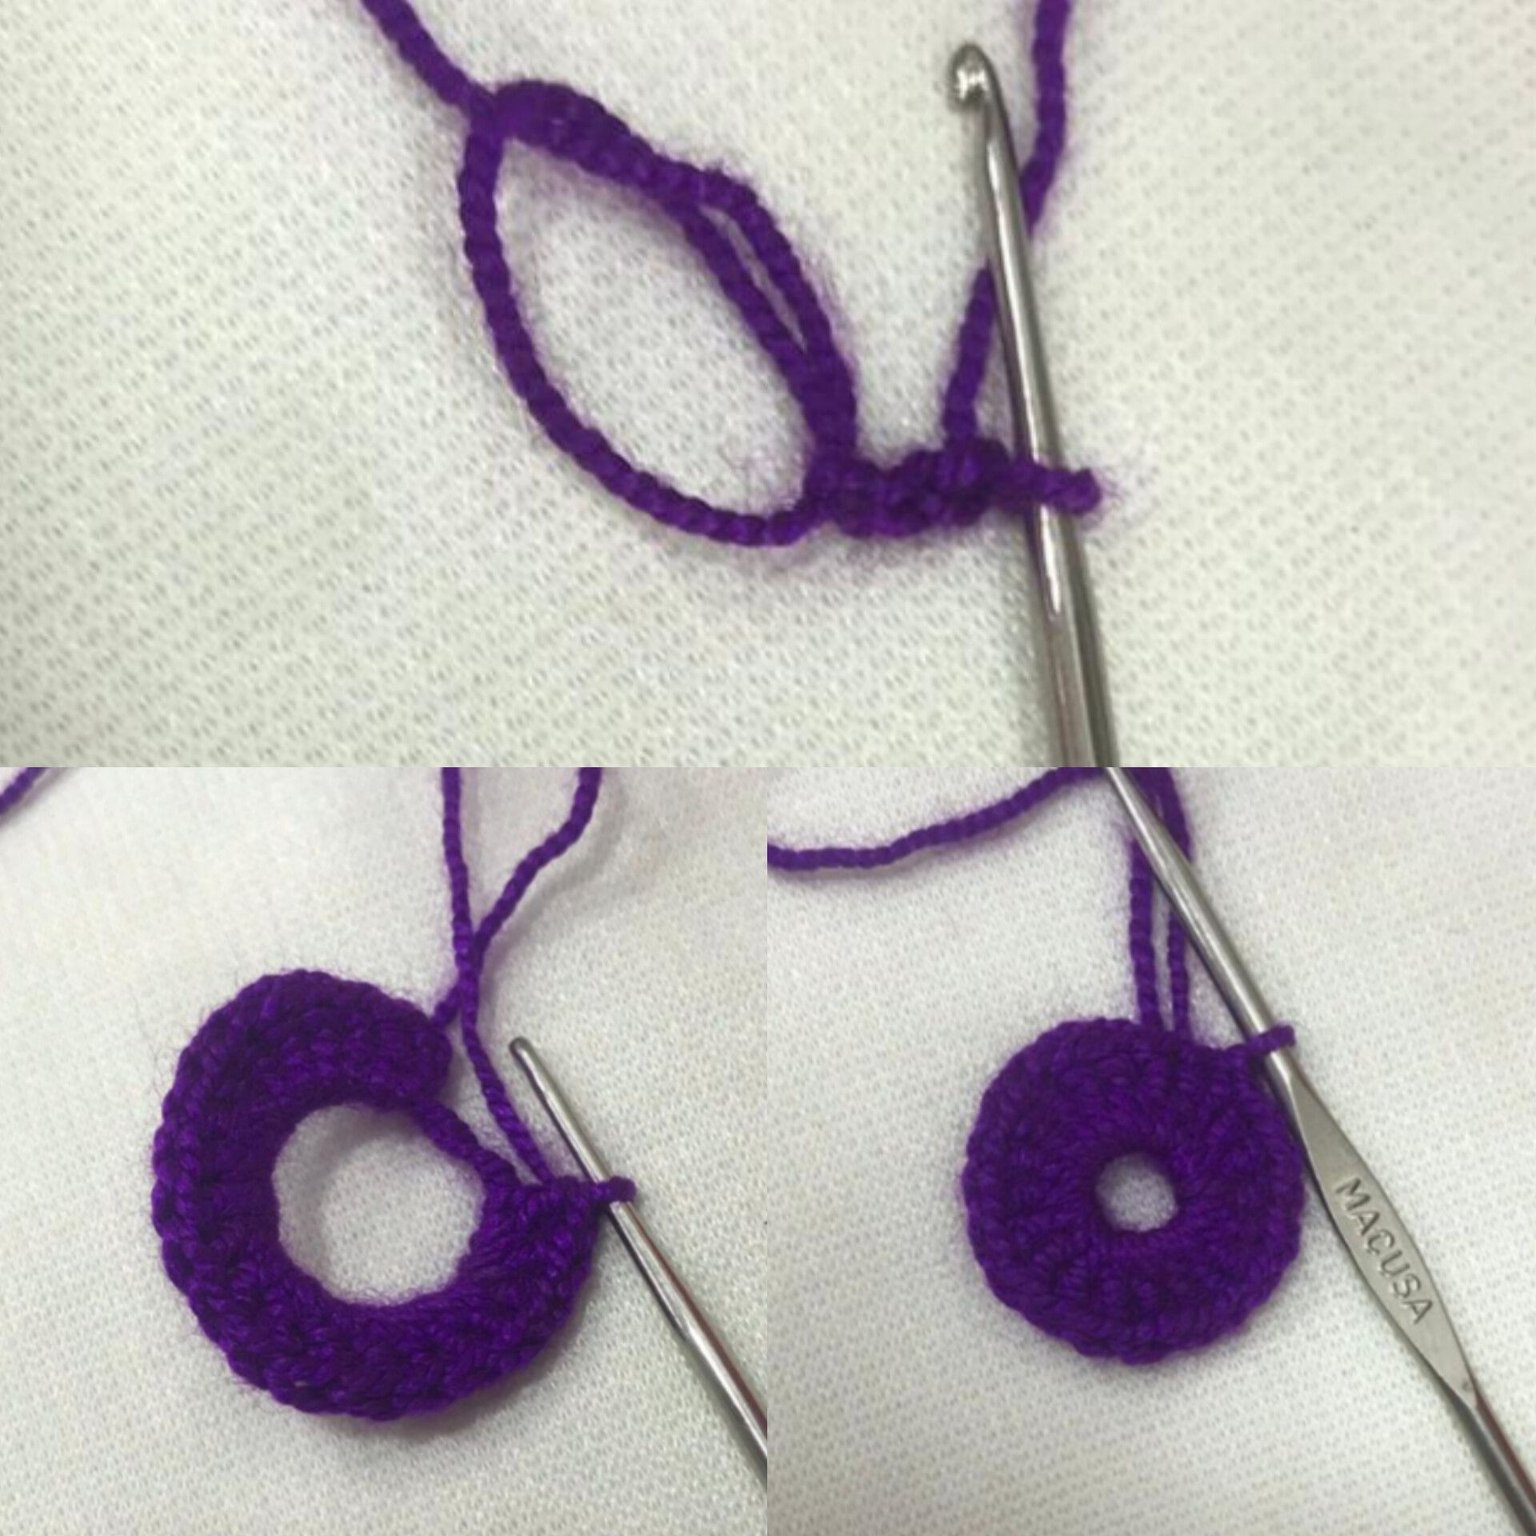
The first thing we'll do is a magic knot. Following this, we'll pick up 3 chains and proceed to make 20 double crochet stitches, going around the circle. We take the thread and pull it until the circle is closed, finishing with a slip stitch in the third chain from the beginning.
Paso 2️⃣ / Step 2️⃣
Para la segunda vuelta vamos a levantar 4 cadenas, enlazamos en el siguiente punto alto de la vuelta anterior vamos a hacer un punto alto, separamos con una cadena y en el punto que sigue realizamos nuevamente un punto alto y así sucesivamente hasta llegar hasta el final, donde cerraremos con un punto deslizado en la tercera cadena de las 4 cadenas del comienzo.
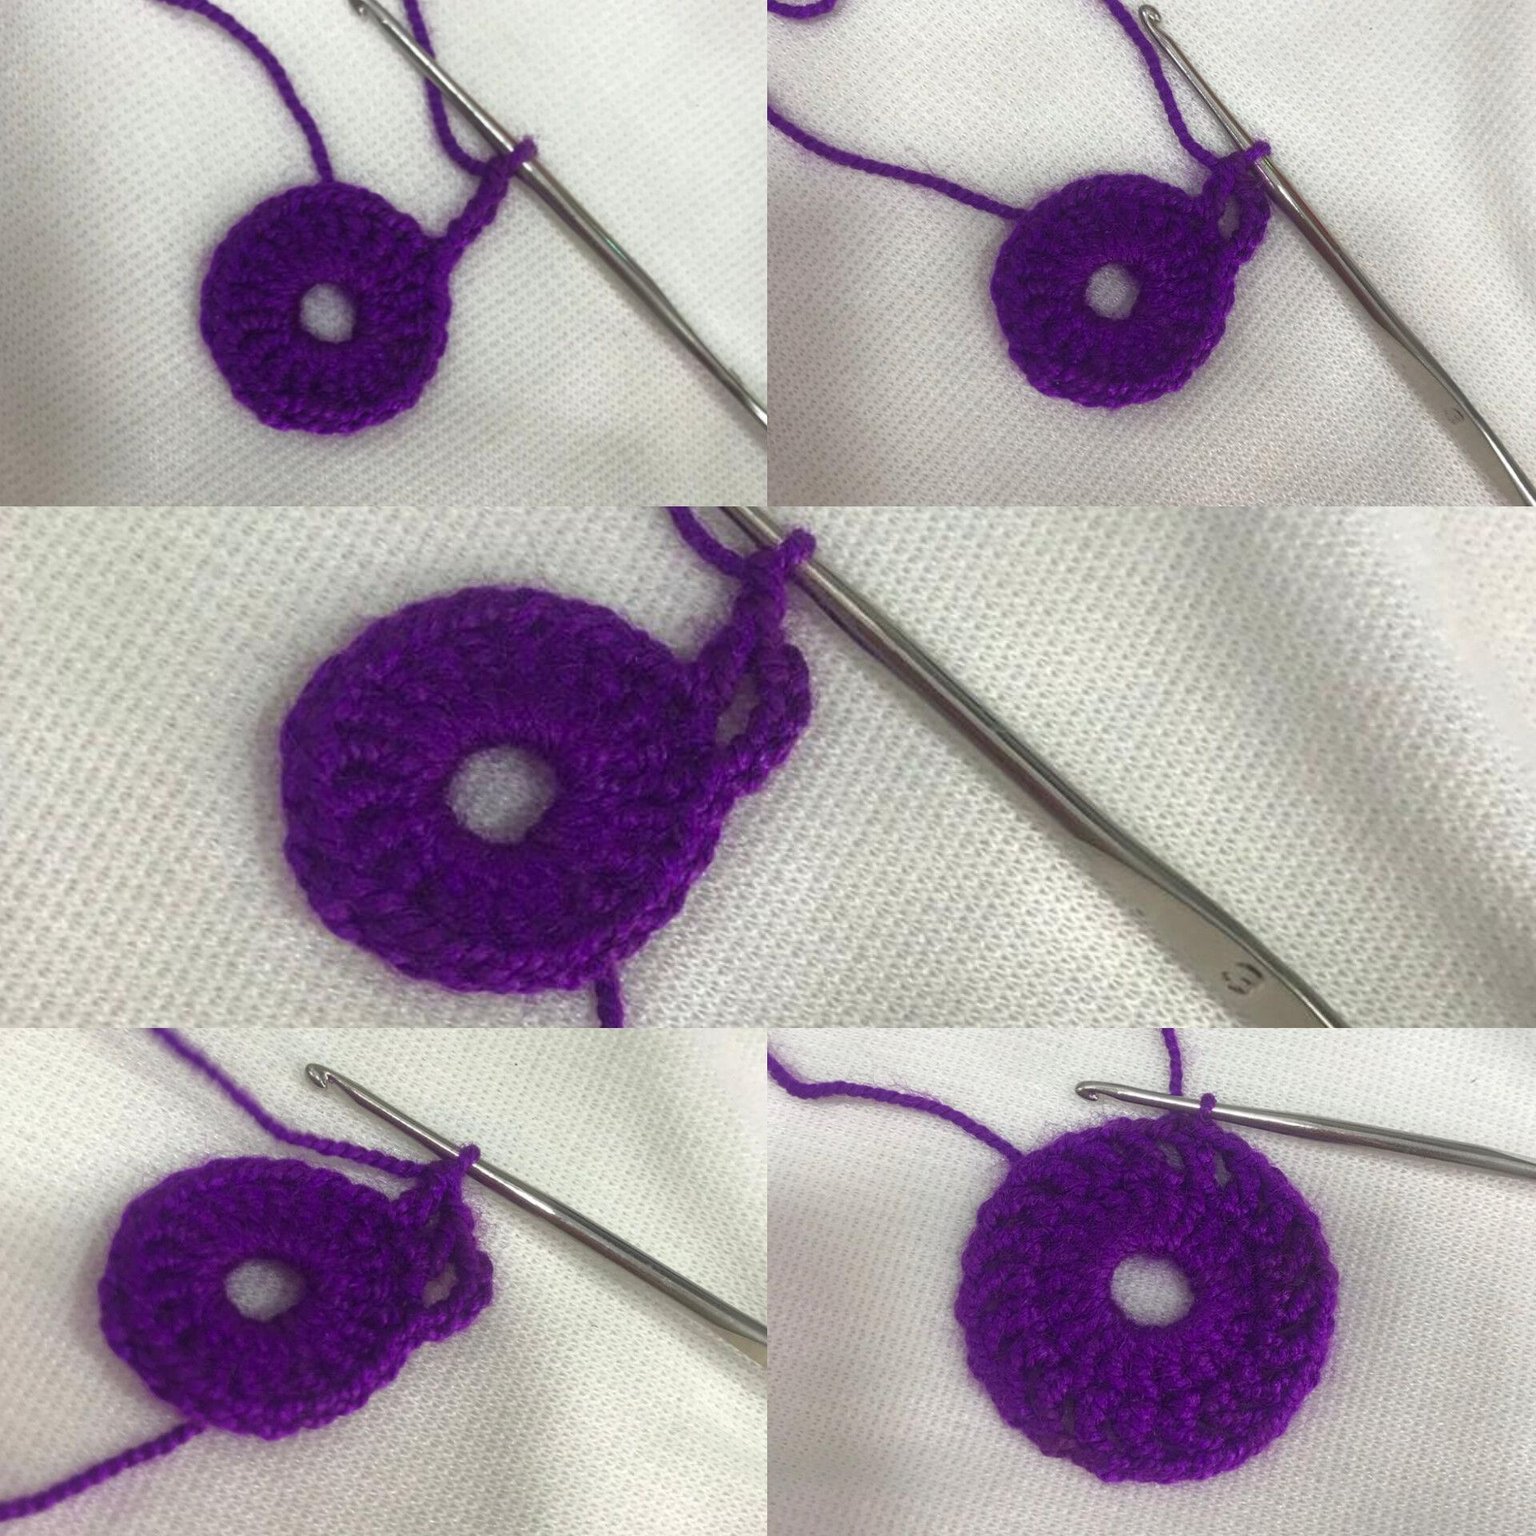
For the second round, we'll pick up 4 chains. We'll link them in the next double crochet from the previous round, make a double crochet, separate them with a chain, and in the next stitch, make a double crochet again. We'll continue until we reach the end, where we'll close with a slip stitch in the third chain of the 4 chains from the beginning.
Paso 3️⃣ / Step 3️⃣
Vamos con la tercera vuelta donde vamos a ubicar el primer espacio que de la vuelta anterior y haremos un punto bajo, luego subiremos 5 cadenas, saltamos al siguiente espacio con un punto bajo, volvemos a levantar 5 cadenas y en el siguiente espacio hacemos un punto bajo, repetiremos este paso hasta llegar al final y cerramos con un punto deslizado en la tercera cadena del comienzo.
We'll move on to the third round, where we'll locate the first space from the previous round and make a single crochet. Then we'll go up 5 chains, skip to the next space with a single crochet, pick up 5 chains again, and in the next space, make a single crochet. We'll repeat this step until we reach the end and close with a slip stitch in the third chain from the beginning.
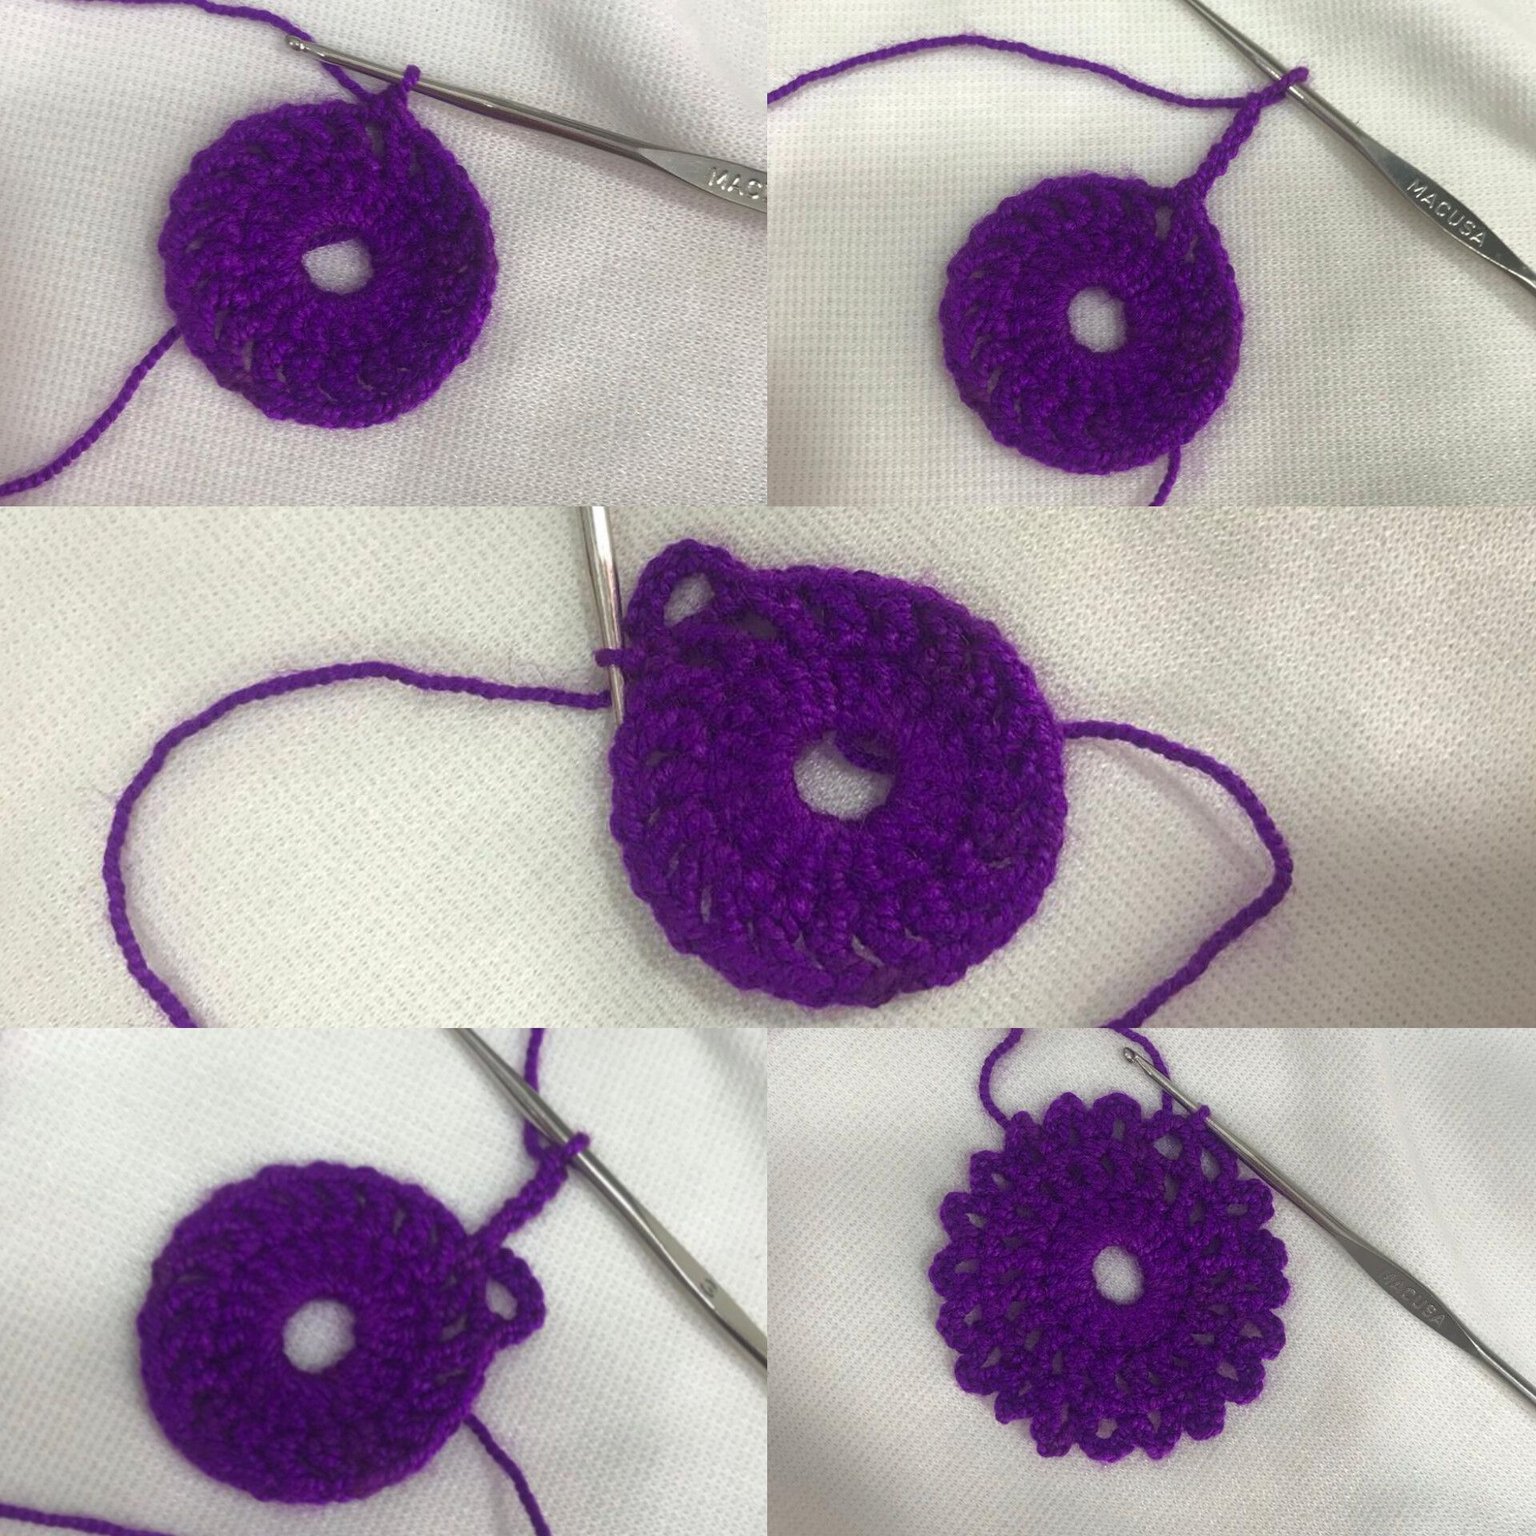
Paso 4️⃣ / Step 4️⃣
Para la cuarta vuelta, sabemos que el cierre de la vuelta 3 fue en la tercera cadena, lo cual nos deja 2 cadenas libres porque en ese espacio habían 5, entonces en la cuarta cadena vamos a hacer un punto deslizado, consecuente a ello vamos a hacer un punto bajo pasando por el espacio de las cadenas, ahora subiremos 5 cadenas y en el siguiente espacio haremos un punto bajo, nuevamente levantamos 5 cadenas y un punto bajo en el siguiente espacio y así hasta completar la vuelta, volvemos a cerrar en las cadenas del comienzo y pasamos a la última vuelta.
For the fourth round, we know that the cast-off for round 3 was on the third chain, which leaves us with 2 free chains because there were 5 in that space. So, on the fourth chain, we'll slip stitch. Following this, we'll single crochet through the chain space. Now, we'll raise 5 chains and single crochet in the next space. We'll lift 5 chains again and single crochet in the next space. We'll continue until the round is complete. We'll cast off the chains again and move on to the last round.
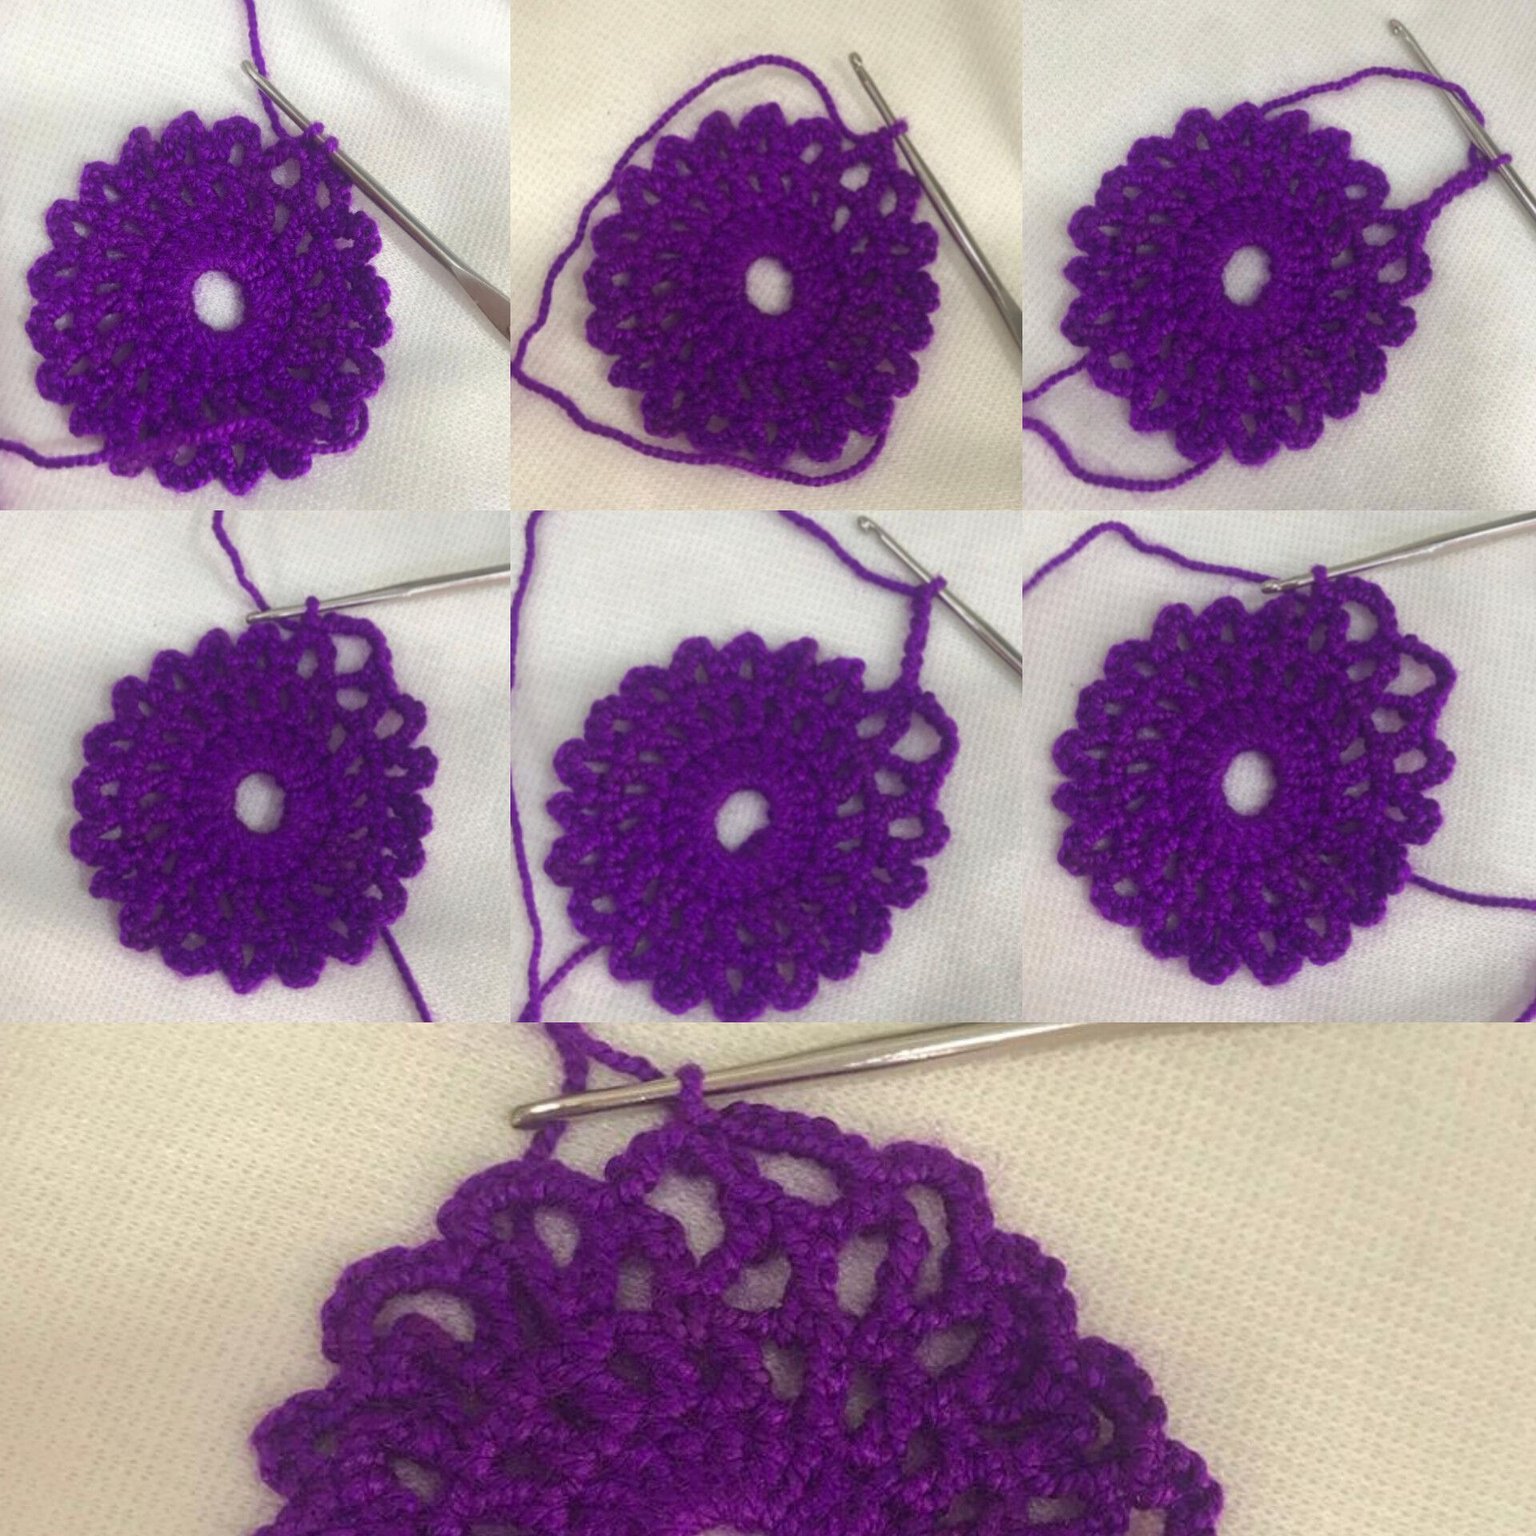
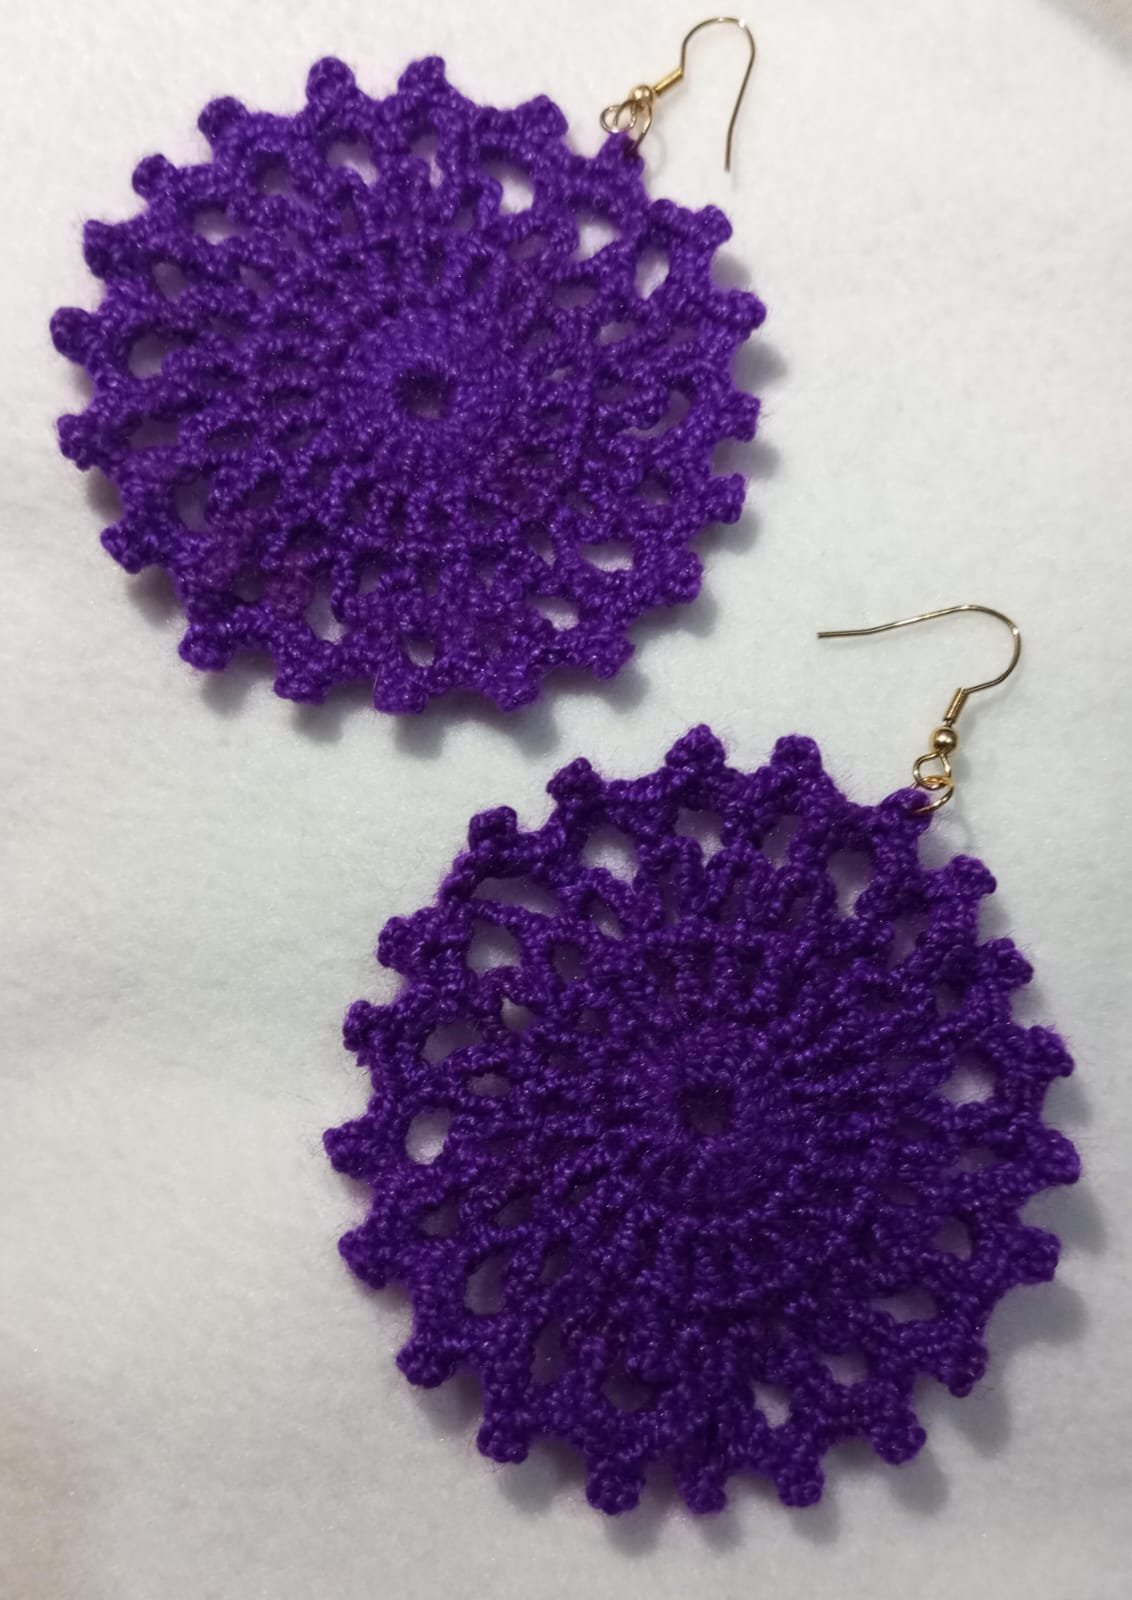
Paso 5️⃣ / Step 5️⃣
Para la quinta y última vuelta, haremos el diseño del borde,vamos a comenzar haciendo en el primer espacio dos puntos bajos, luego subimos 3 cadenas y en la primera cadena vamos a cerrar con un punto deslizado, nos quedará una especie de bolita, en el mismo espacio haremos nuevamente 2 puntos bajos para cerrar y pasamos al siguiente espacio con dos puntos bajos nuevamente y repetimos exactamente la misma secuencia hasta llegar al final, sacamos suficiente hebra, cortamos y escondemos las hebras, ahora sí procedemos a poner las argollas y los anzuelos, y es así como queda listo nuestro arete.
Espero les haya gustado y muchísimas Gracias por su apoyo siempre, les mando un fuerte abrazo ❤️
For the fifth and final round, we'll create the border design. We'll start by making two single crochets in the first space, then we'll chain 3, and in the first chain we'll close with a slip stitch. We'll have a kind of ball. In the same space, we'll make 2 single crochets again to close, and we'll move on to the next space with two single crochets again. We'll repeat the exact same sequence until we reach the end. We'll pull out enough thread, cut and hide the threads. Now we'll proceed to add the jump rings and hooks, and that's how our earring is ready.
I hope you liked it and thank you so much for your support always. I send you a big hug ❤️