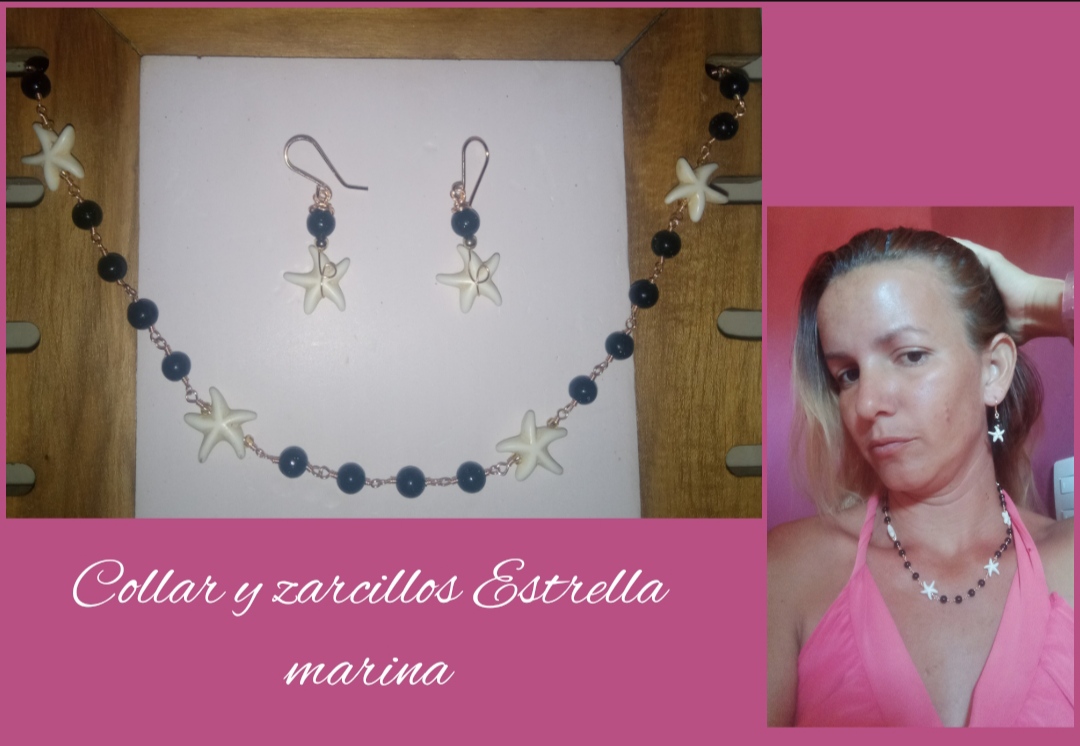
Feliz y bendecida noche tengan todos ustedes, es para mí un gusto y un placer el saludarlos y compartir con todos ustedes una vez más, en esta oportunidad quiero compartirles un muy sencillo tutorial con el cual podrán aprender a elaborar este hermoso set de collar y zarcillos con lindas estrellitas marinas. Este es un muy hermoso diseño ideal para lucir en cualquier ocasión, además acá podrán observar que también es súper sencillo de elaborar.
Have a happy and blessed night all of you, it is a pleasure and a pleasure for me to greet you and share with all of you once again, on this occasion I want to share with you a very simple tutorial with which you can learn to make this beautiful set of necklace and earrings with cute little sea stars.
This is a very beautiful design ideal to show off on any occasion, and here you can see that it is also super easy to make.
Join me in this tutorial and learn with me step by step how to obtain this beautiful result.
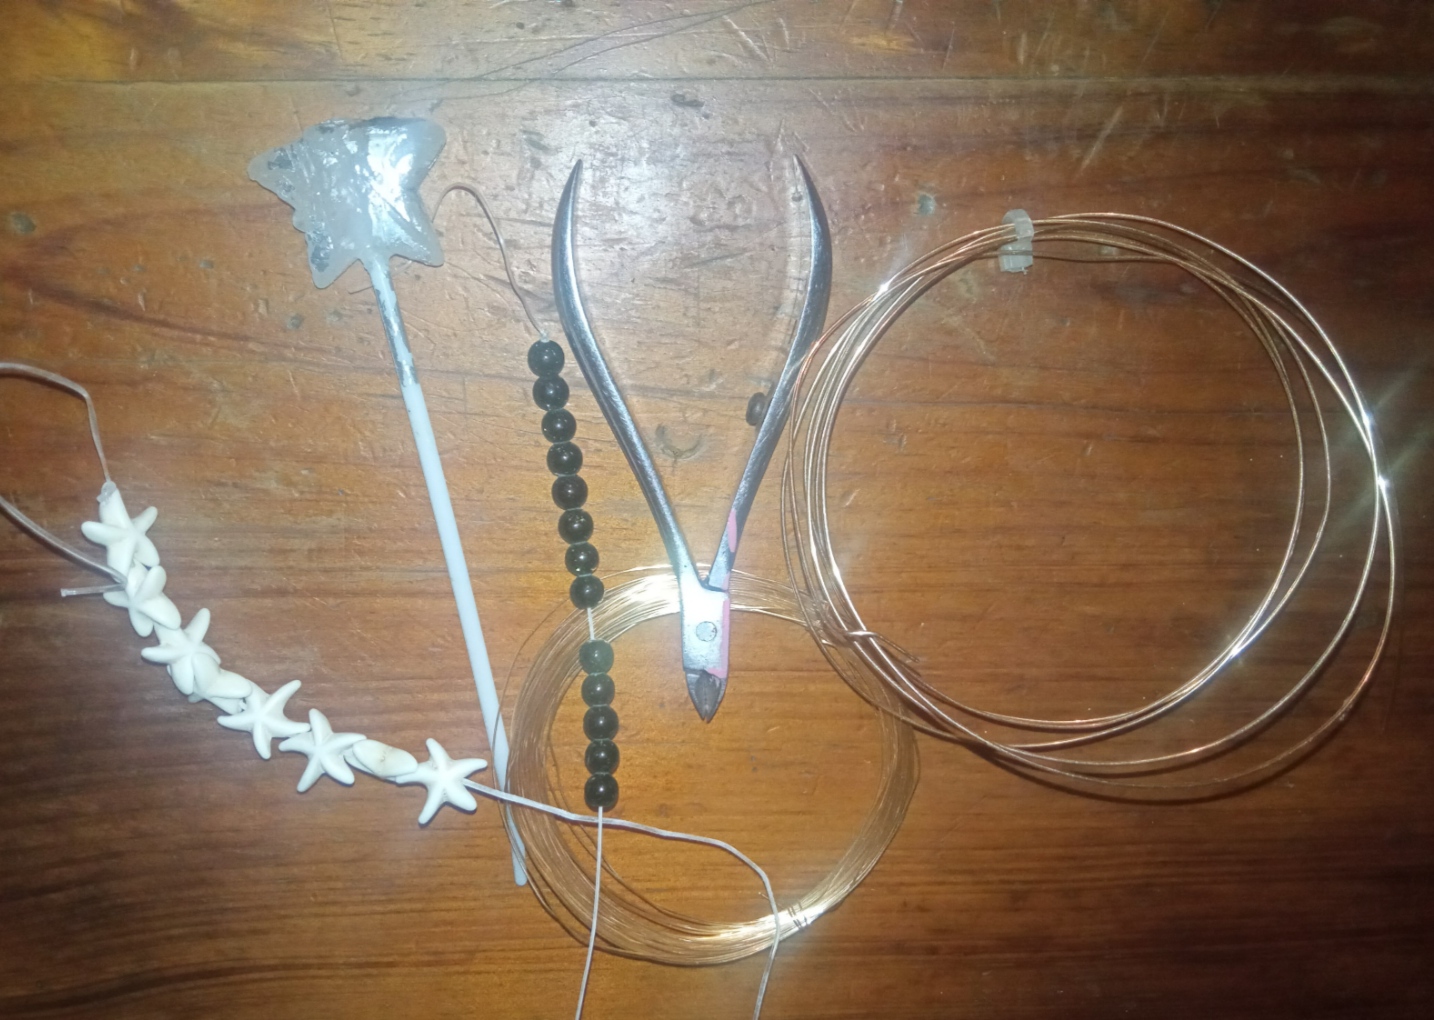
- Alambre de bisutería calibre 20.
- Alambre de bisutería calibre 26.
- piedras brillantes color negro verdoso.
- Estrellitas de mar.
- pinza de bisutería.
- Palillo delgado.
- 20 gauge jewelry wire.
- 26 gauge jewelry wire.
- shiny greenish-black stones.
- Starfish.
- jewelry clamp.
- Thin toothpick.
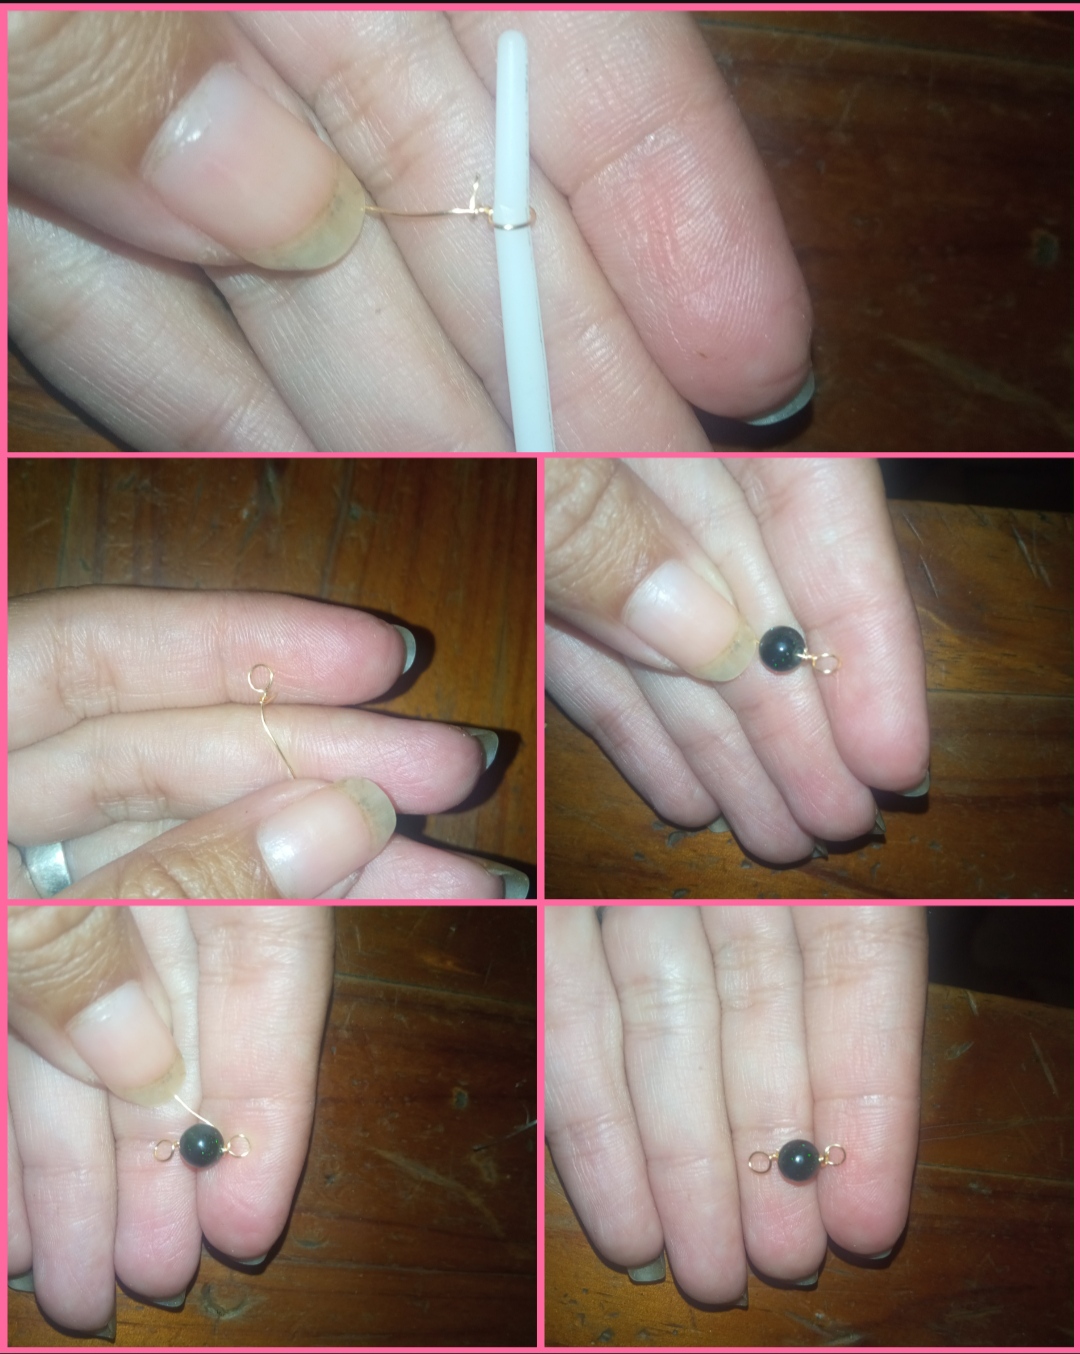
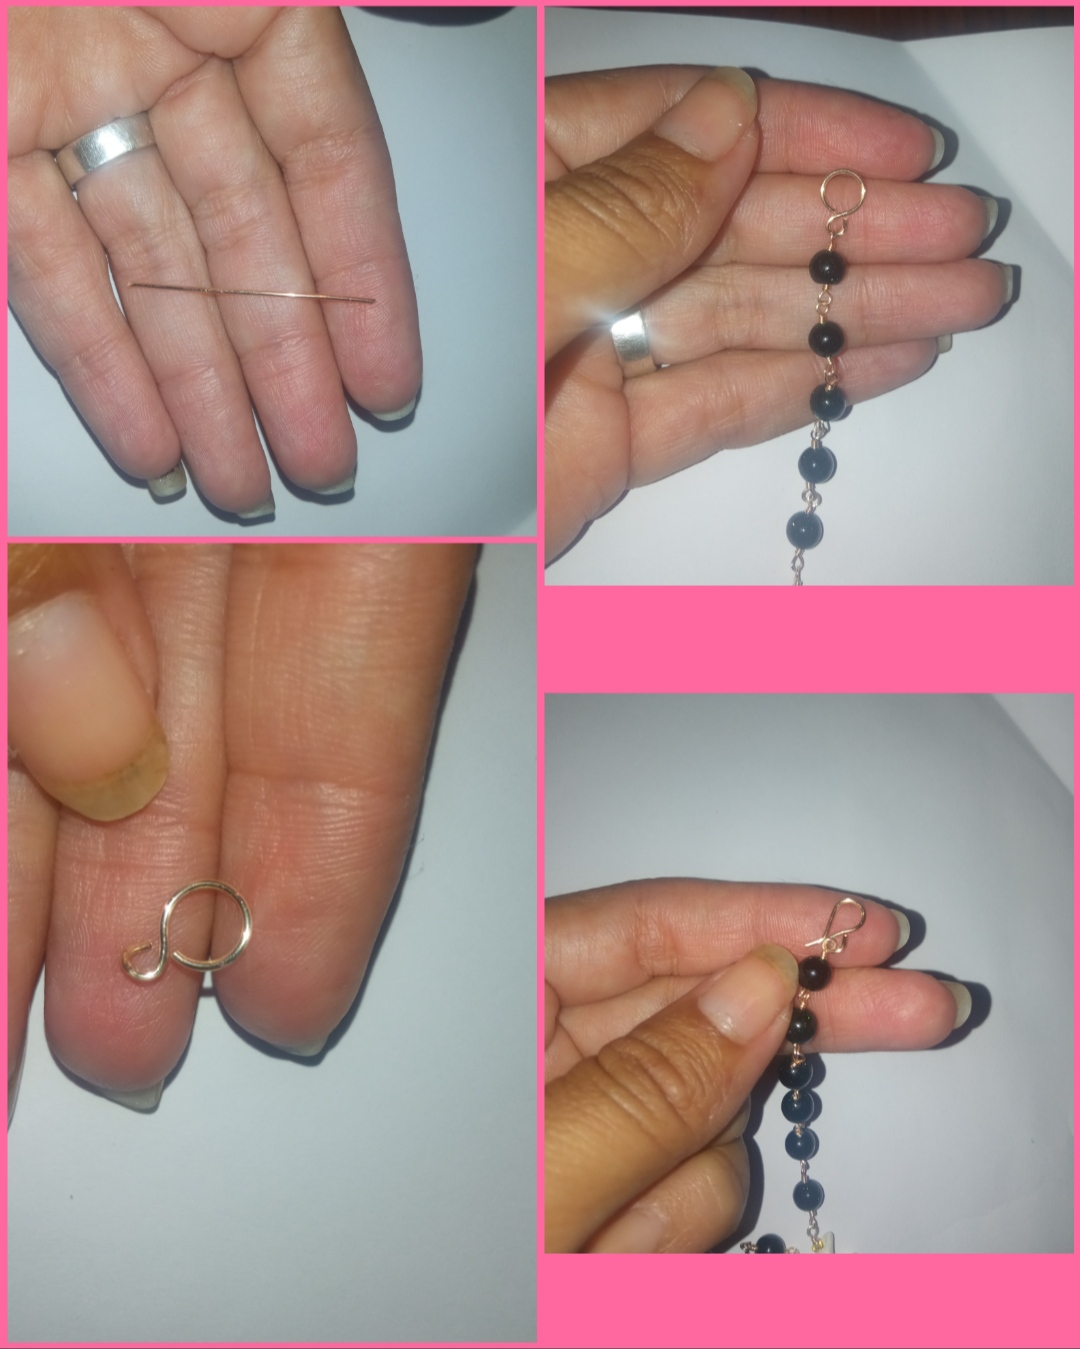
⭐ Paso 1: para iniciar este tutorial iniciaremos elaborando el collar, para ello tomaremos el alambre de bisuteria calibre 26, y cortamos un pedazo, y ayudándonos con un palillo muy delgado moldearemos la punta del alambre realizando una muy pequeña forma circular, por el otro extremo introduciremos una pequeña piedra negra verdosa y seguidamente a esta realizaremos una pequeña forma circular exacta a la elaborada al principio y cortamos el exceso de alambre quedándonos la pequeña pieza que pueden observar a continuación.
⭐ Step 1: to start this tutorial we will start by making the necklace, to do this we will take the 26 gauge jewelry wire, and cut a piece, and using a very thin toothpick we will shape the tip of the wire making a very small circular shape, At the other end we will introduce a small greenish-black stone and then we will make a small circular shape exactly like the one made at the beginning and we will cut off the excess wire, leaving us with the small piece that you can see below.
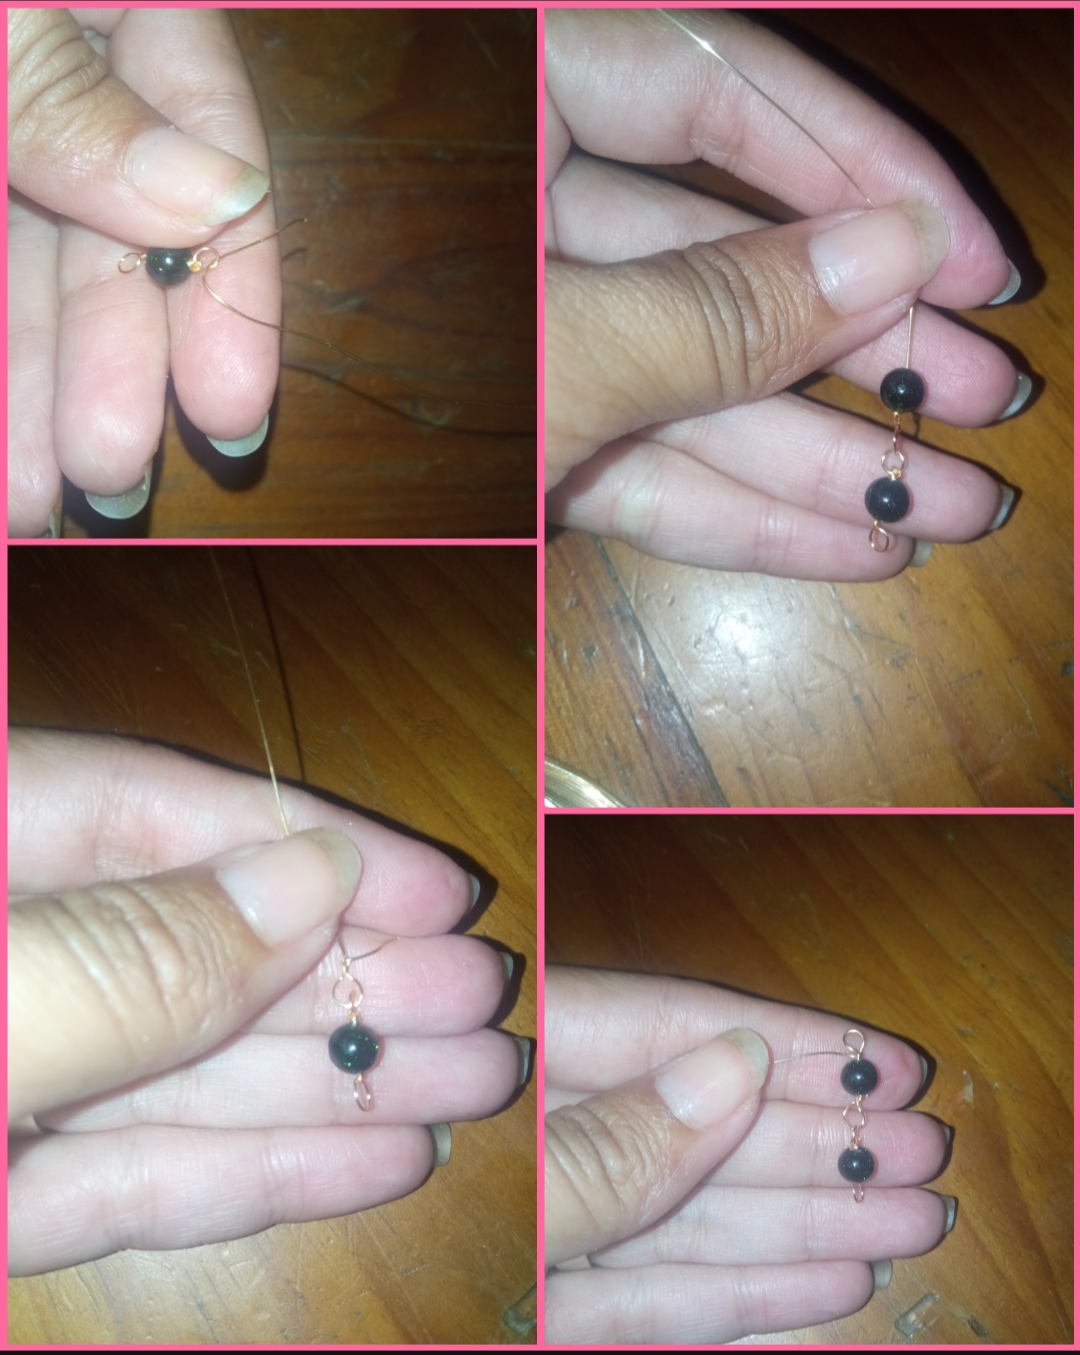
⭐ Paso 2: para continuar tomaremos nuevamente el alambre de bisutería calibre 26 y lo introduciremos por la última forma circular de la pieza elaborada en el primer paso y con ayuda de el palillo elaboraremos una pequeña forma circular, luego por la otra punta del alambre introducimos una piedra negra y cerramos con una forma circular. Y así sucesivamente iremos uniendo y elaborando una pequeña cadena, para esta primera parte elaboraremos un total de seir pieza.
⭐ Step 2: to continue we will take the 26 gauge jewelry wire again and introduce it through the last circular shape of the piece made in the first step and with the help of the toothpick we will make a small circular shape, then through the other end From the wire we introduce a black stone and close with a circular shape. And so on we will join and make a small chain, for this first part we will make a total of six pieces.
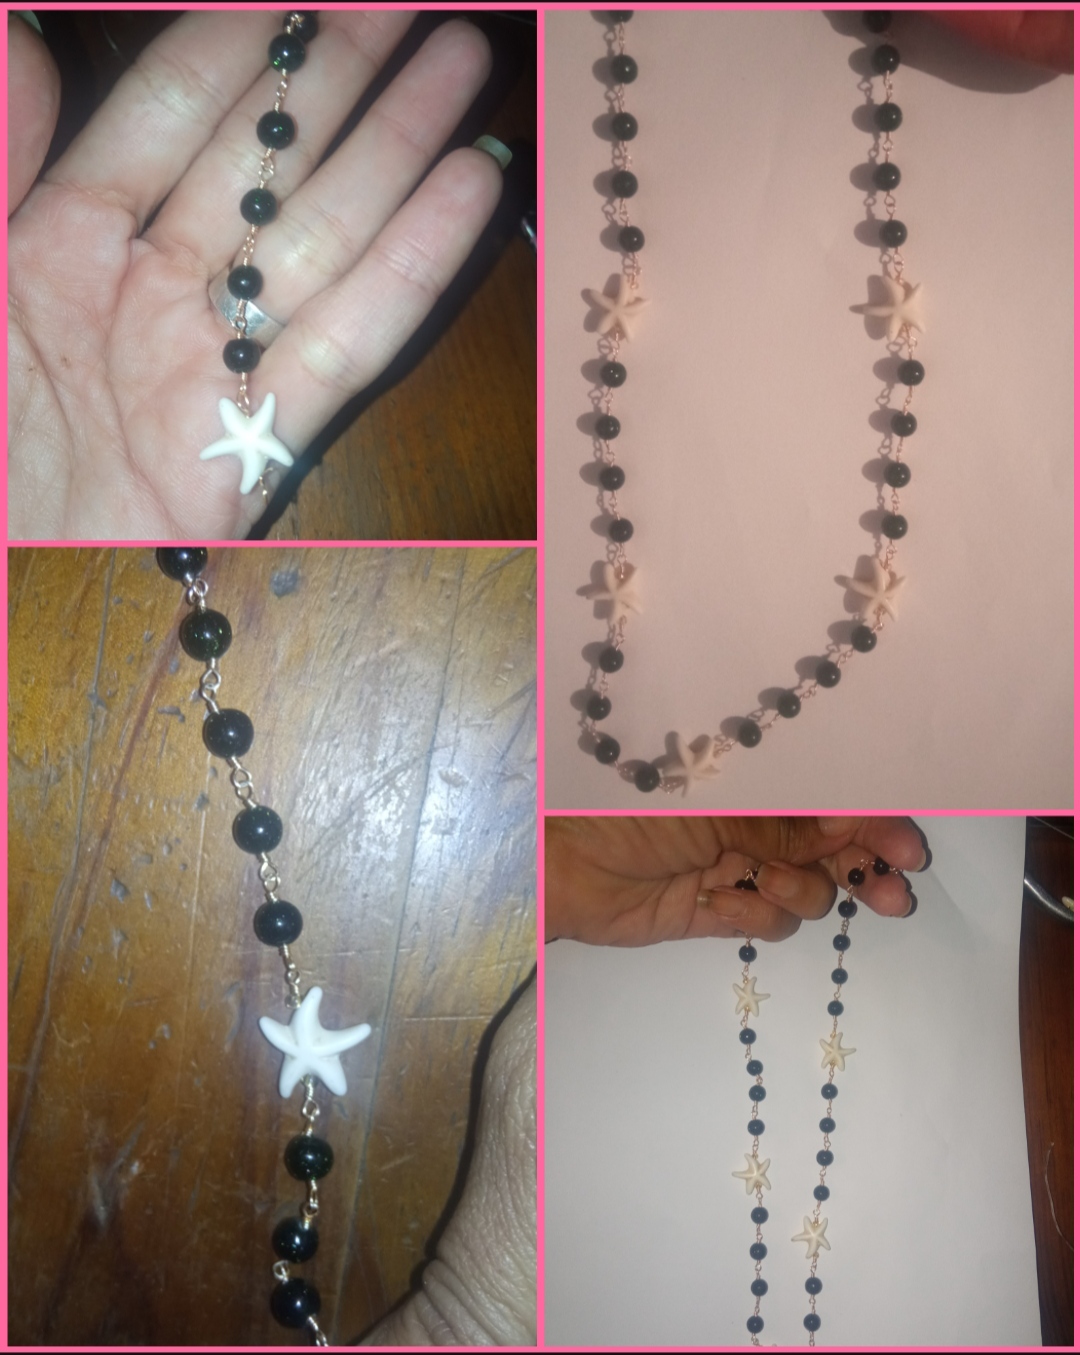
⭐ Paso 3: una vez tengamos las seis piezas de piedras negras verdosas procedemos a introducir el alambre por la última argolla circular y de igual manera elaboramos una pequeña forma circular pero ahora introduciremos una estrella de mar y cerramos con una forma circular y procedemos a seguir la cadena pero está vez con separación de 4 piezas de piedras negras separadas por las estrellas marinas. En total yo coloque cinco separaciones con estrellitas, Pero debemos recordar que el último tramo debe tener 6 piezas negras como el primero.
⭐ Step 3: once we have the six pieces of greenish black stones, we proceed to introduce the wire through the last circular ring and in the same way we make a small circular shape but now we will introduce a starfish and close with a circular shape and We proceed to follow the chain but this time with the separation of 4 pieces of black stones separated by the sea stars. In total I placed five separations with stars, but we must remember that the last section must have 6 black pieces like the first.

⭐ Paso 4: ahora tomaremos un pedacito de alambre de bisutería calibre 20 y elaboraremos trancas o terminales manuales para nuestra cadenita como pueden observar en las siguientes imagenes apoyándonos en la pinza de bisutería, y cada una de ellas la colocaremos en un Extremo y así culminamos nuestra bello collar.
⭐ Step 4: now we will take a small piece of 20 gauge jewelry wire and make manual bars or terminals for our chain as you can see in the following images, relying on the jewelry clamp, and we will place each of them on one end and so we finish our beautiful necklace.
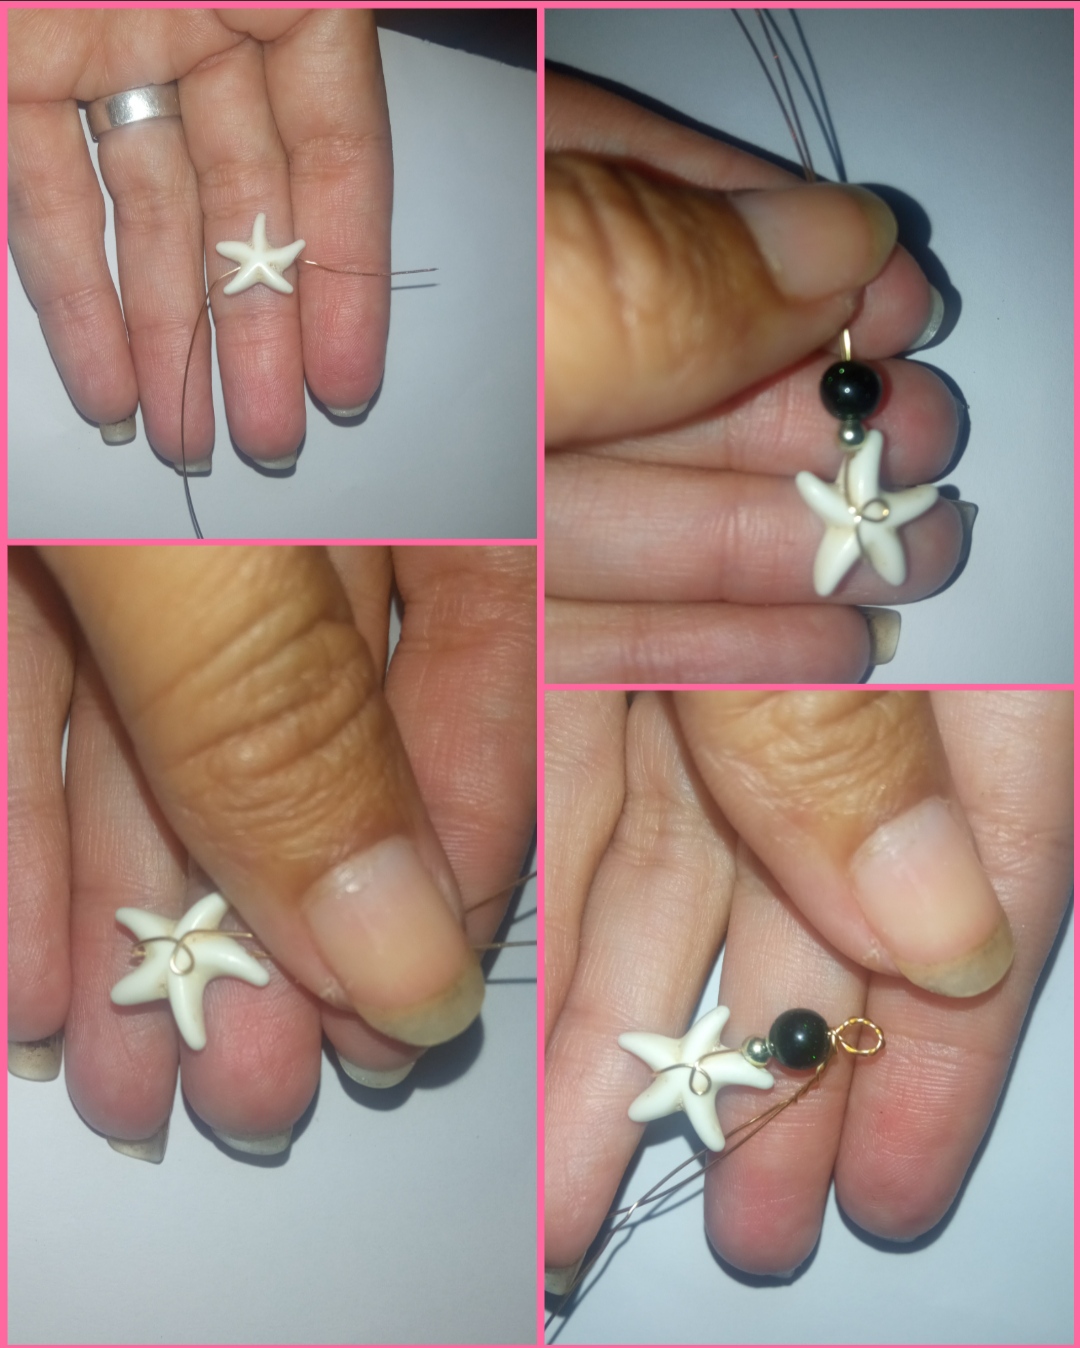
⭐ Paso 5: para la elaboración de los zarcillos tomaremos un pedazo de alambre de bisutería calibre 26 de aproximadamente 12 cm e introduciremos una estrellita marina la cual dejaremos a la mitad del alambre y seguidamente doblaremos la parte de abajo del alambre por encima de la estrellita, y elñn su parte frontal elaboraremos una forma de decoración y unimos ambos alambres encima de la estrellita Ahora introducimos un balín dorado por ambos alambres y los enrrollamos las dos tiras de alambre, introducimos una piedra negra y encima de ella doblamos el alambre y elaboramos una argolla circular y el exceso de alambre lo enrrollamos encima de la piedra. Por últimos con alambre 20 elaboramos los anzuelos para zarcillos y lo unimos a la pieza elaborada.
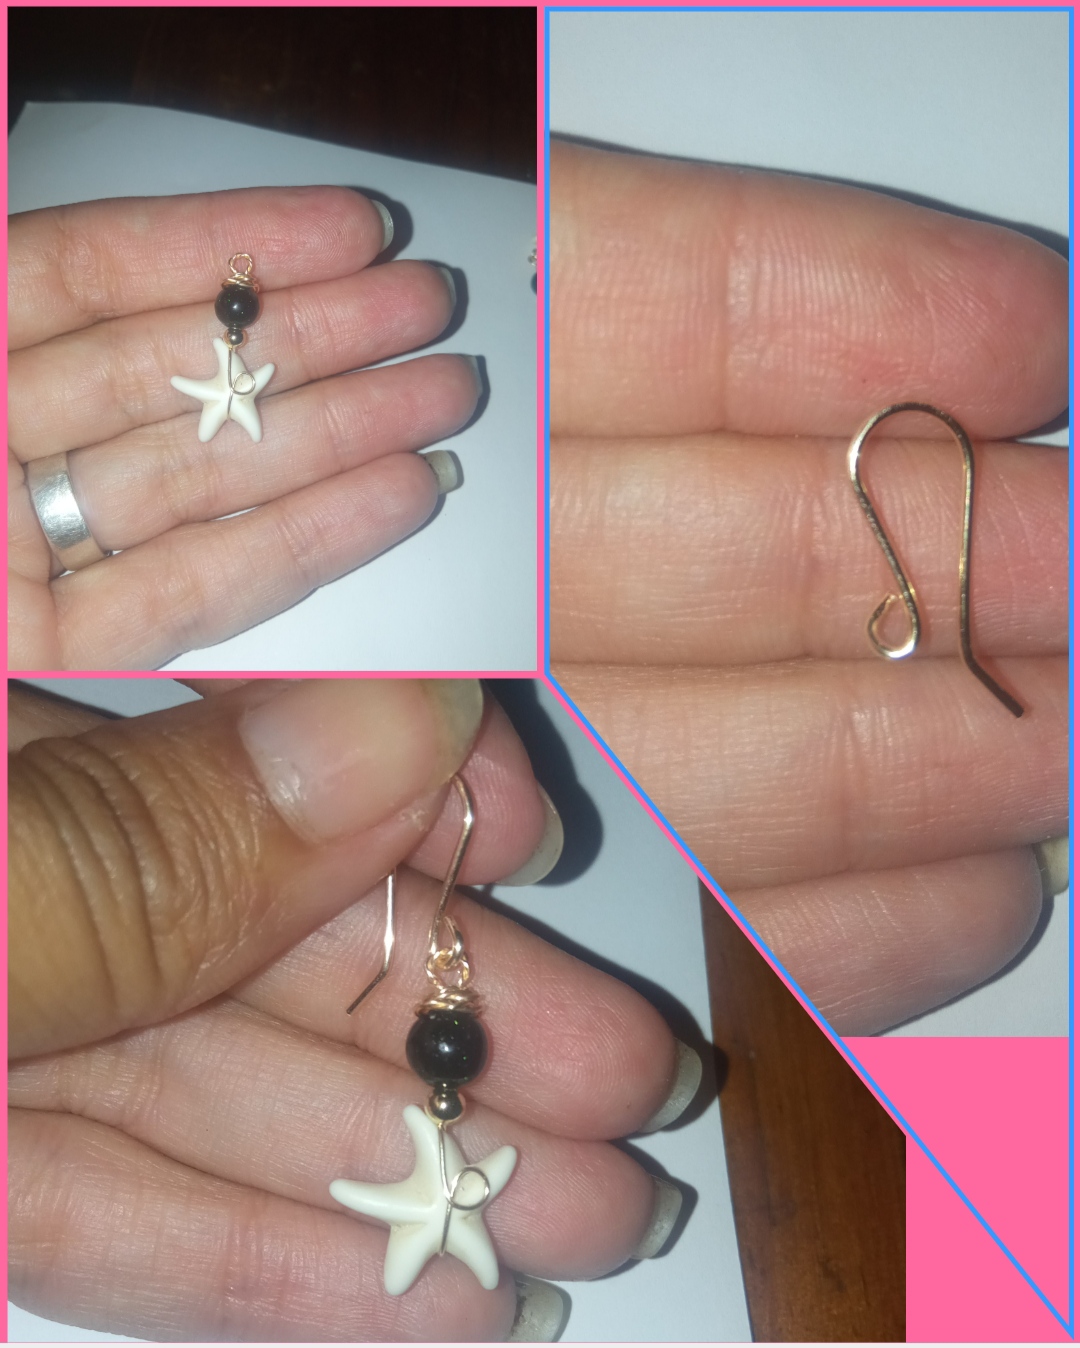
⭐ Step 5: to make the tendrils we will take a piece of 26 gauge jewelry wire of approximately 12 cm and we will introduce a little sea star which we will leave in the middle of the wire and then we will fold the bottom part of the wire over the top of the little star, and the front part we will make a form of decoration and join both wires on top of the little star Now we introduce a golden ball through both wires and we wind the two strips of wire, we introduce a black stone and on top of it we bend the wire and make a circular ring and we wind the excess wire on top of the stone.
Finally, with wire 20 we make the hooks for tendrils and attach them to the made piece.
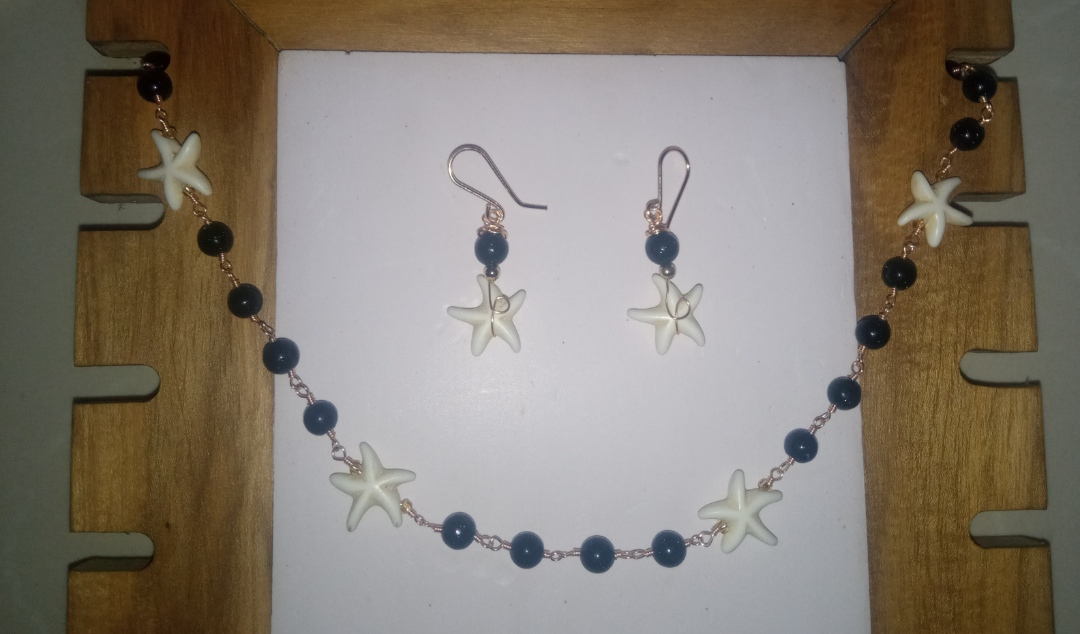
And so my dear and appreciated friends we will obtain this beautiful and very charming jewelry set, the black stones used in this elaboration in the sun look bright green, and I selected the white stars to combine and it also looks a little more natural than the colors, but you can select the colors of your preference.
Well, my dear friends, I hope that this simple design is to the liking of all of you, and goodbye until the next opportunity. Good day.
My dear friends I hope this simple design is to the liking of all of you, I say goodbye for this opportunity, grateful for your visit.
All Photos are my authorship and were taken with my Redmi 9 Cellphone