Hola, hola, queridos amigos y visitantes que hoy están por aquí.
Bienvenidos sean todos.
Para ello vas a necesitar:
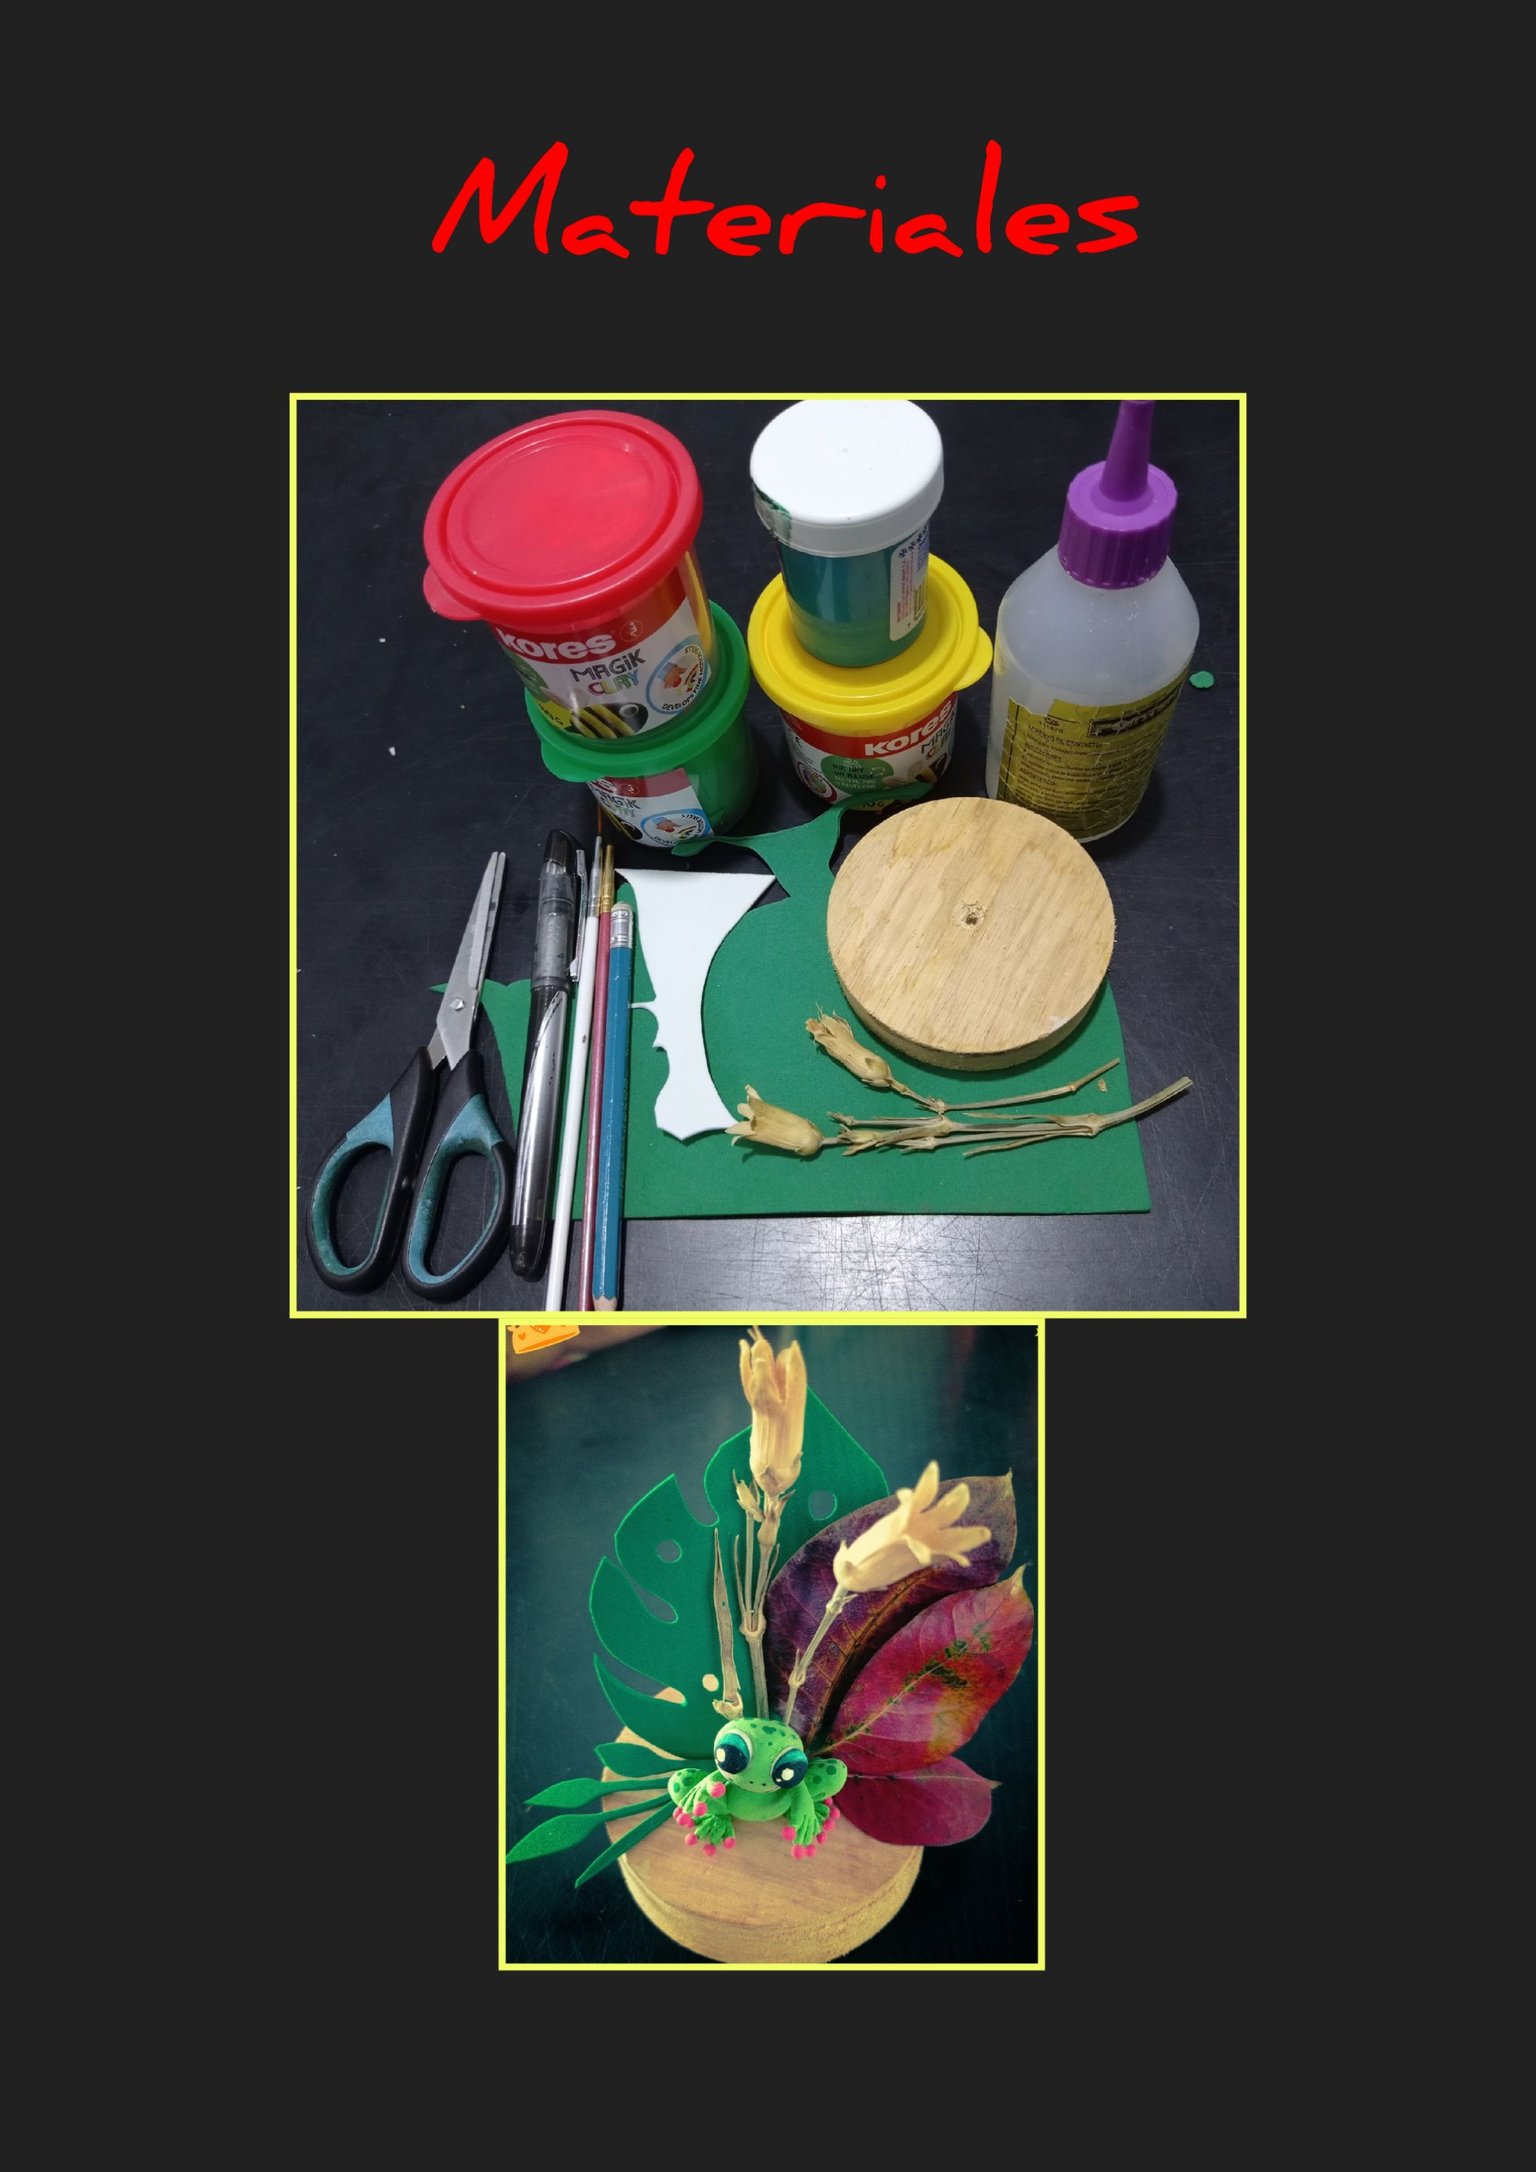
| Foami moldeable Amarillo, verde y rojo | Pinturas y pinceles |
|---|---|
| Círculo o trozo de madera | Flores y hojas secas |
| Foami verde y blanco | Marcador y lápiz |
| Tijera | Silicón y pega blanco |
| Plancha eléctrica |
Paso 1:

- Tomamos dos porciones de foami moldeable amarillo y verde, mezclamos hasta unir bien los colores, luego haremos una bolita y con un acocador haremos presión donde pondremos los ojos, tal como se vé en la foto.
Paso 2:
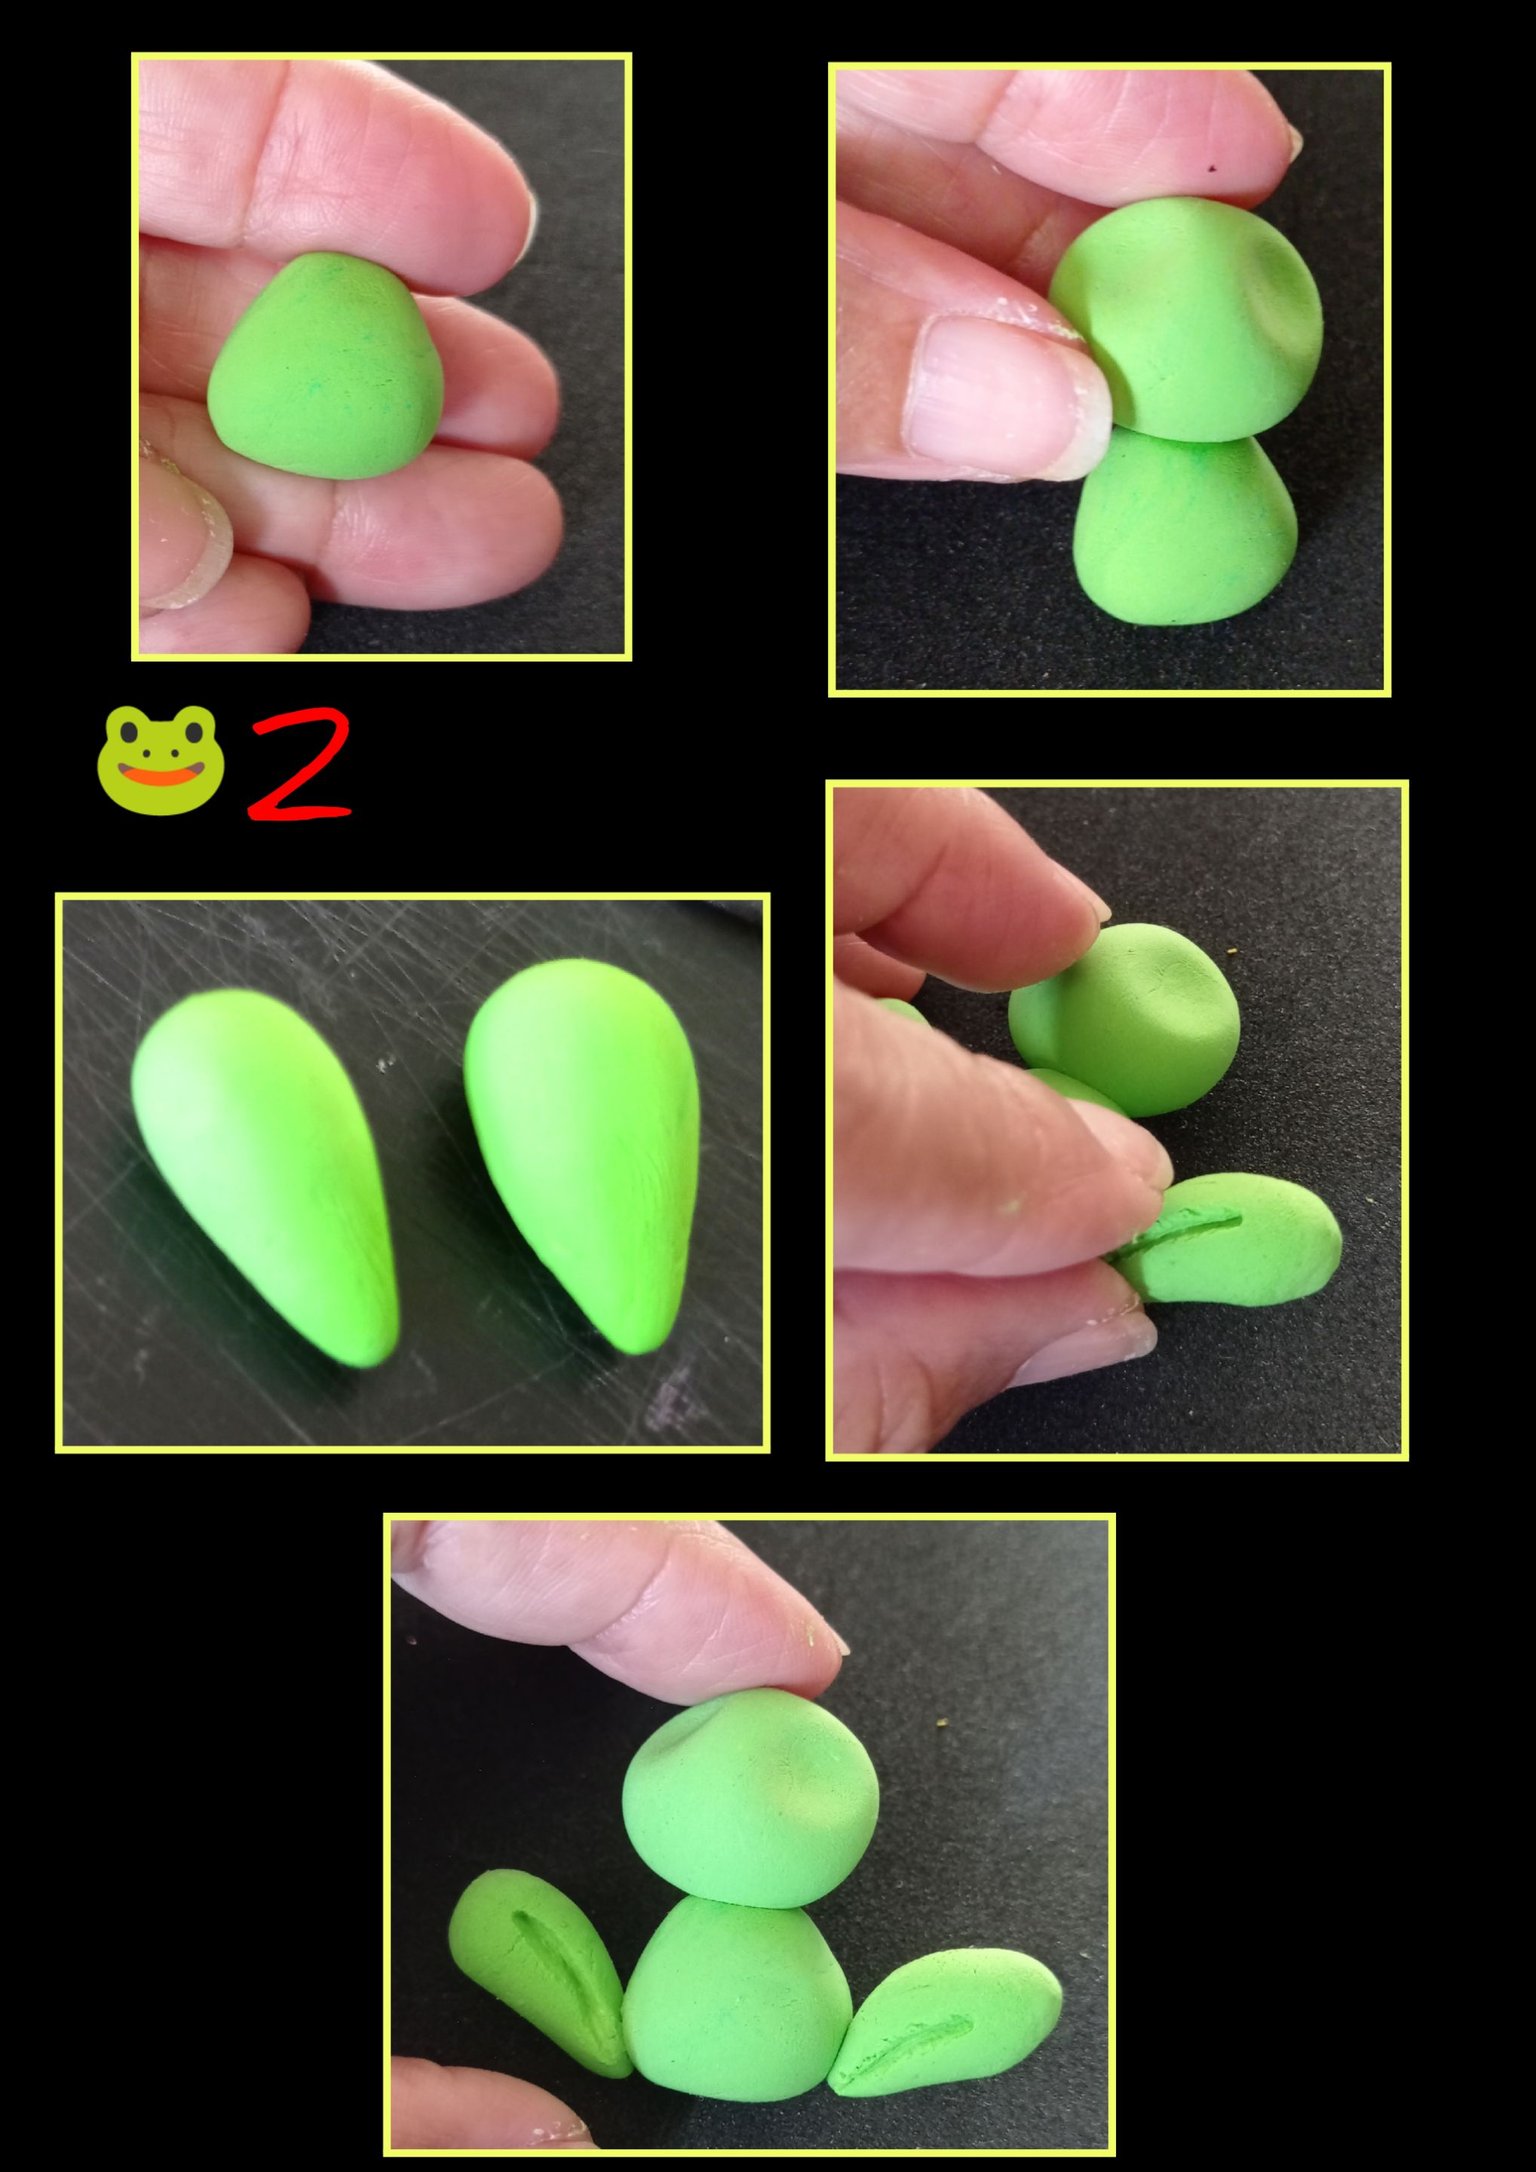
- Ahora haremos el cuerpo con otra bolita y le daremos un poco de forma triangular y pegamos con cola blanca o un poquito de agua.
- Para hacer las paticas, haremos dos bolitas y le daremos forma de gotas, luego con un palito o la tijera haremos una pequeña incisión en el centro (Ver foto) y pegamos a los lados del cuerpo.
Paso 3:
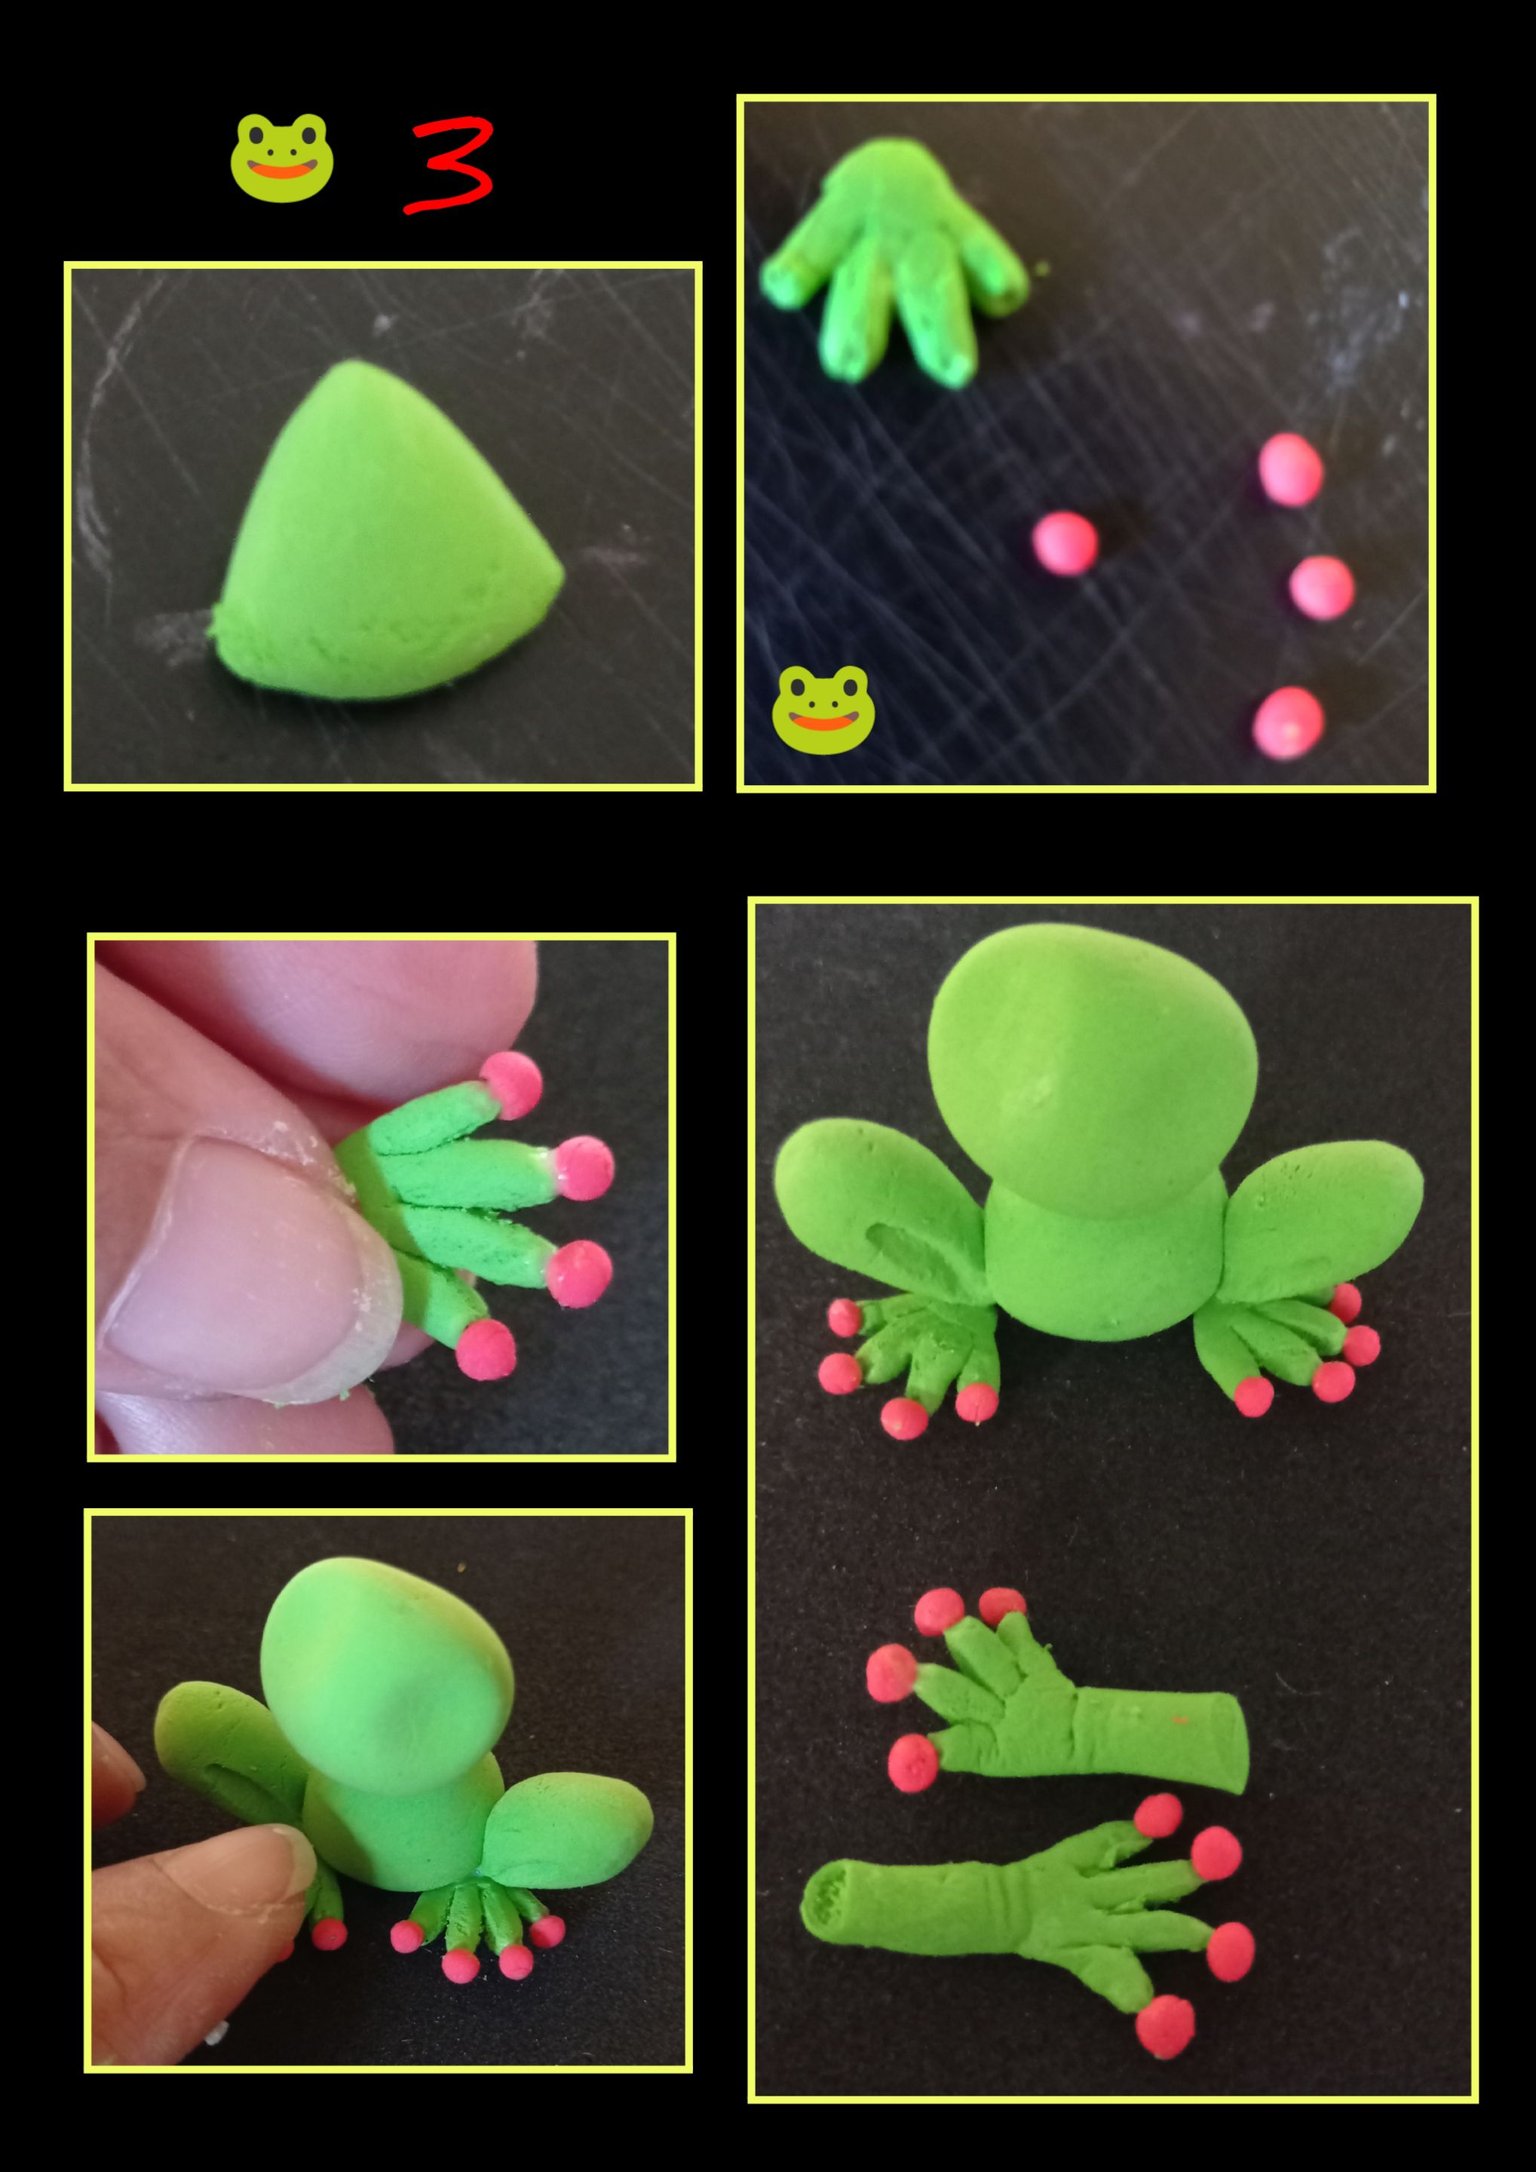
- Para realizar las manitos, realiza dos bolitas, aplana, dale forma de triángulo y saca 4 deditos, también haz 4 mini bolitas rojas, para cada dedo y pega justo debajo de las patitas.
- Para los brazos haz dos cilindros, aplana en las puntas y saca los dedos y pega las bolitas rojas también.
Paso 4:

- Para hacer los ojos marca dos círculos en foami blanco y recorta, luego con el marcador en el centro haz dos círculos como se ve en la foto y rellena con el color deseado, lo rellené con azul y la pupila en negro y deja secar.
- Calienta la plancha y pon los círculos a termoformar.
- Ahora con un pincel pinta lunares o manchas verdes sobre la ranita, deja secar y luego pega los ojos, haz presión hasta que peguen bien.
Paso 5:
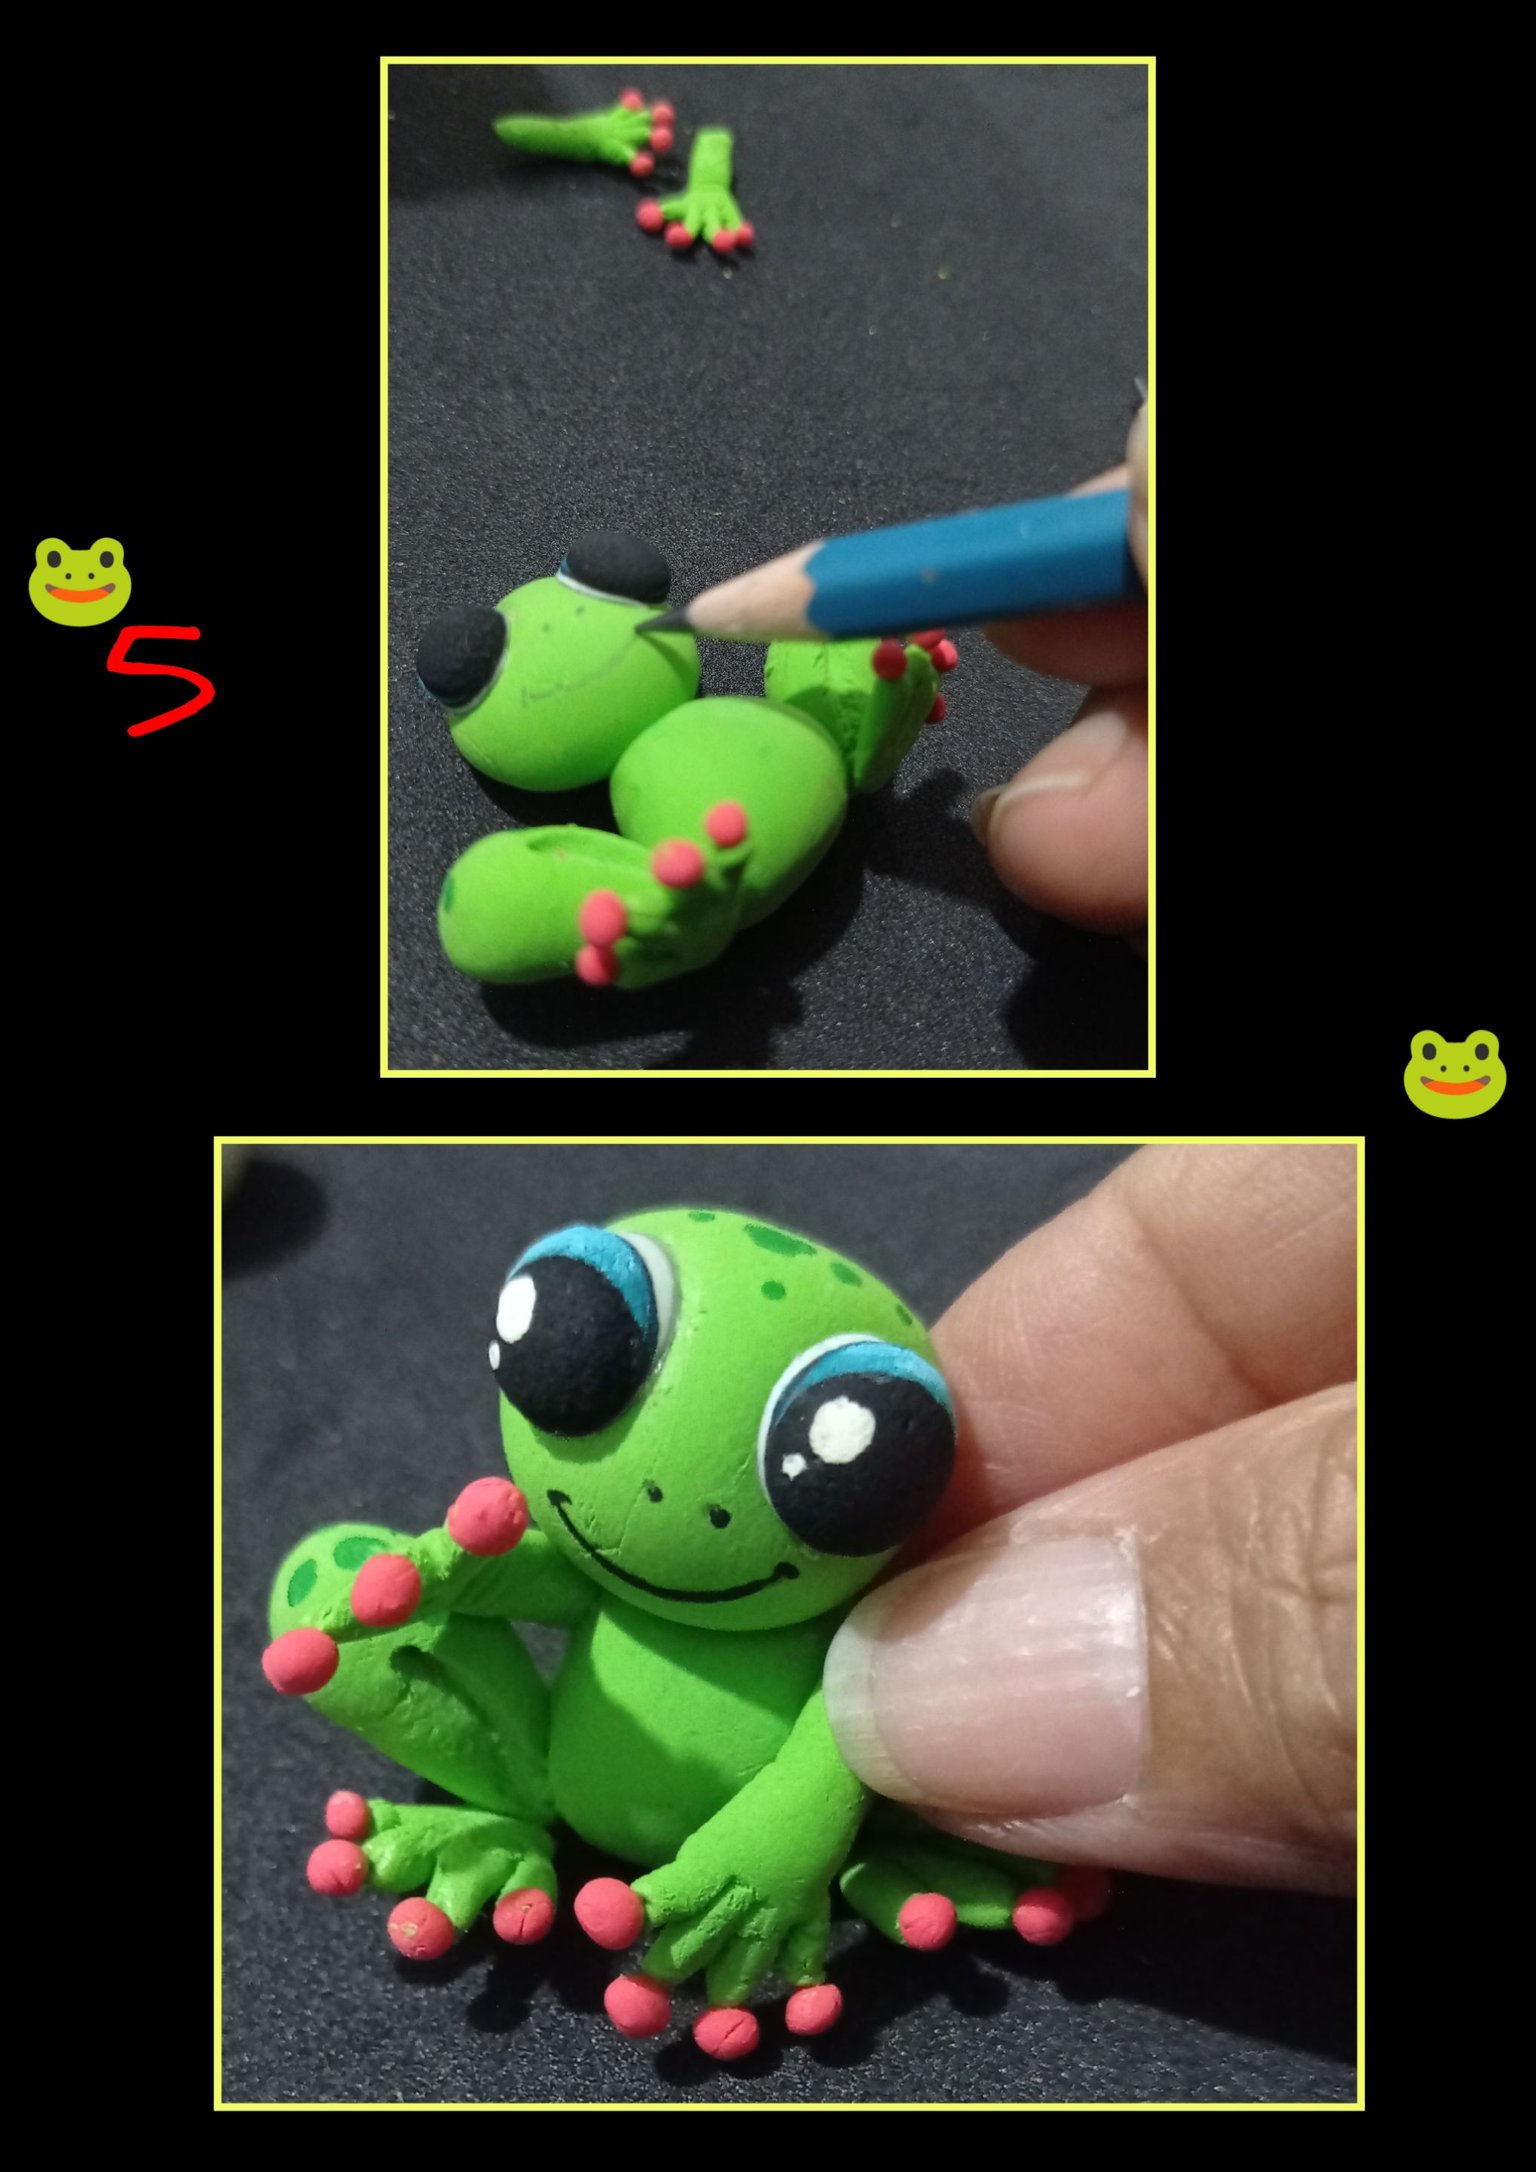
Con un lápiz, marca los puntos de la nariz y boca.
Pega las patitas superiores o delanteras y deja secar.
Paso 6:
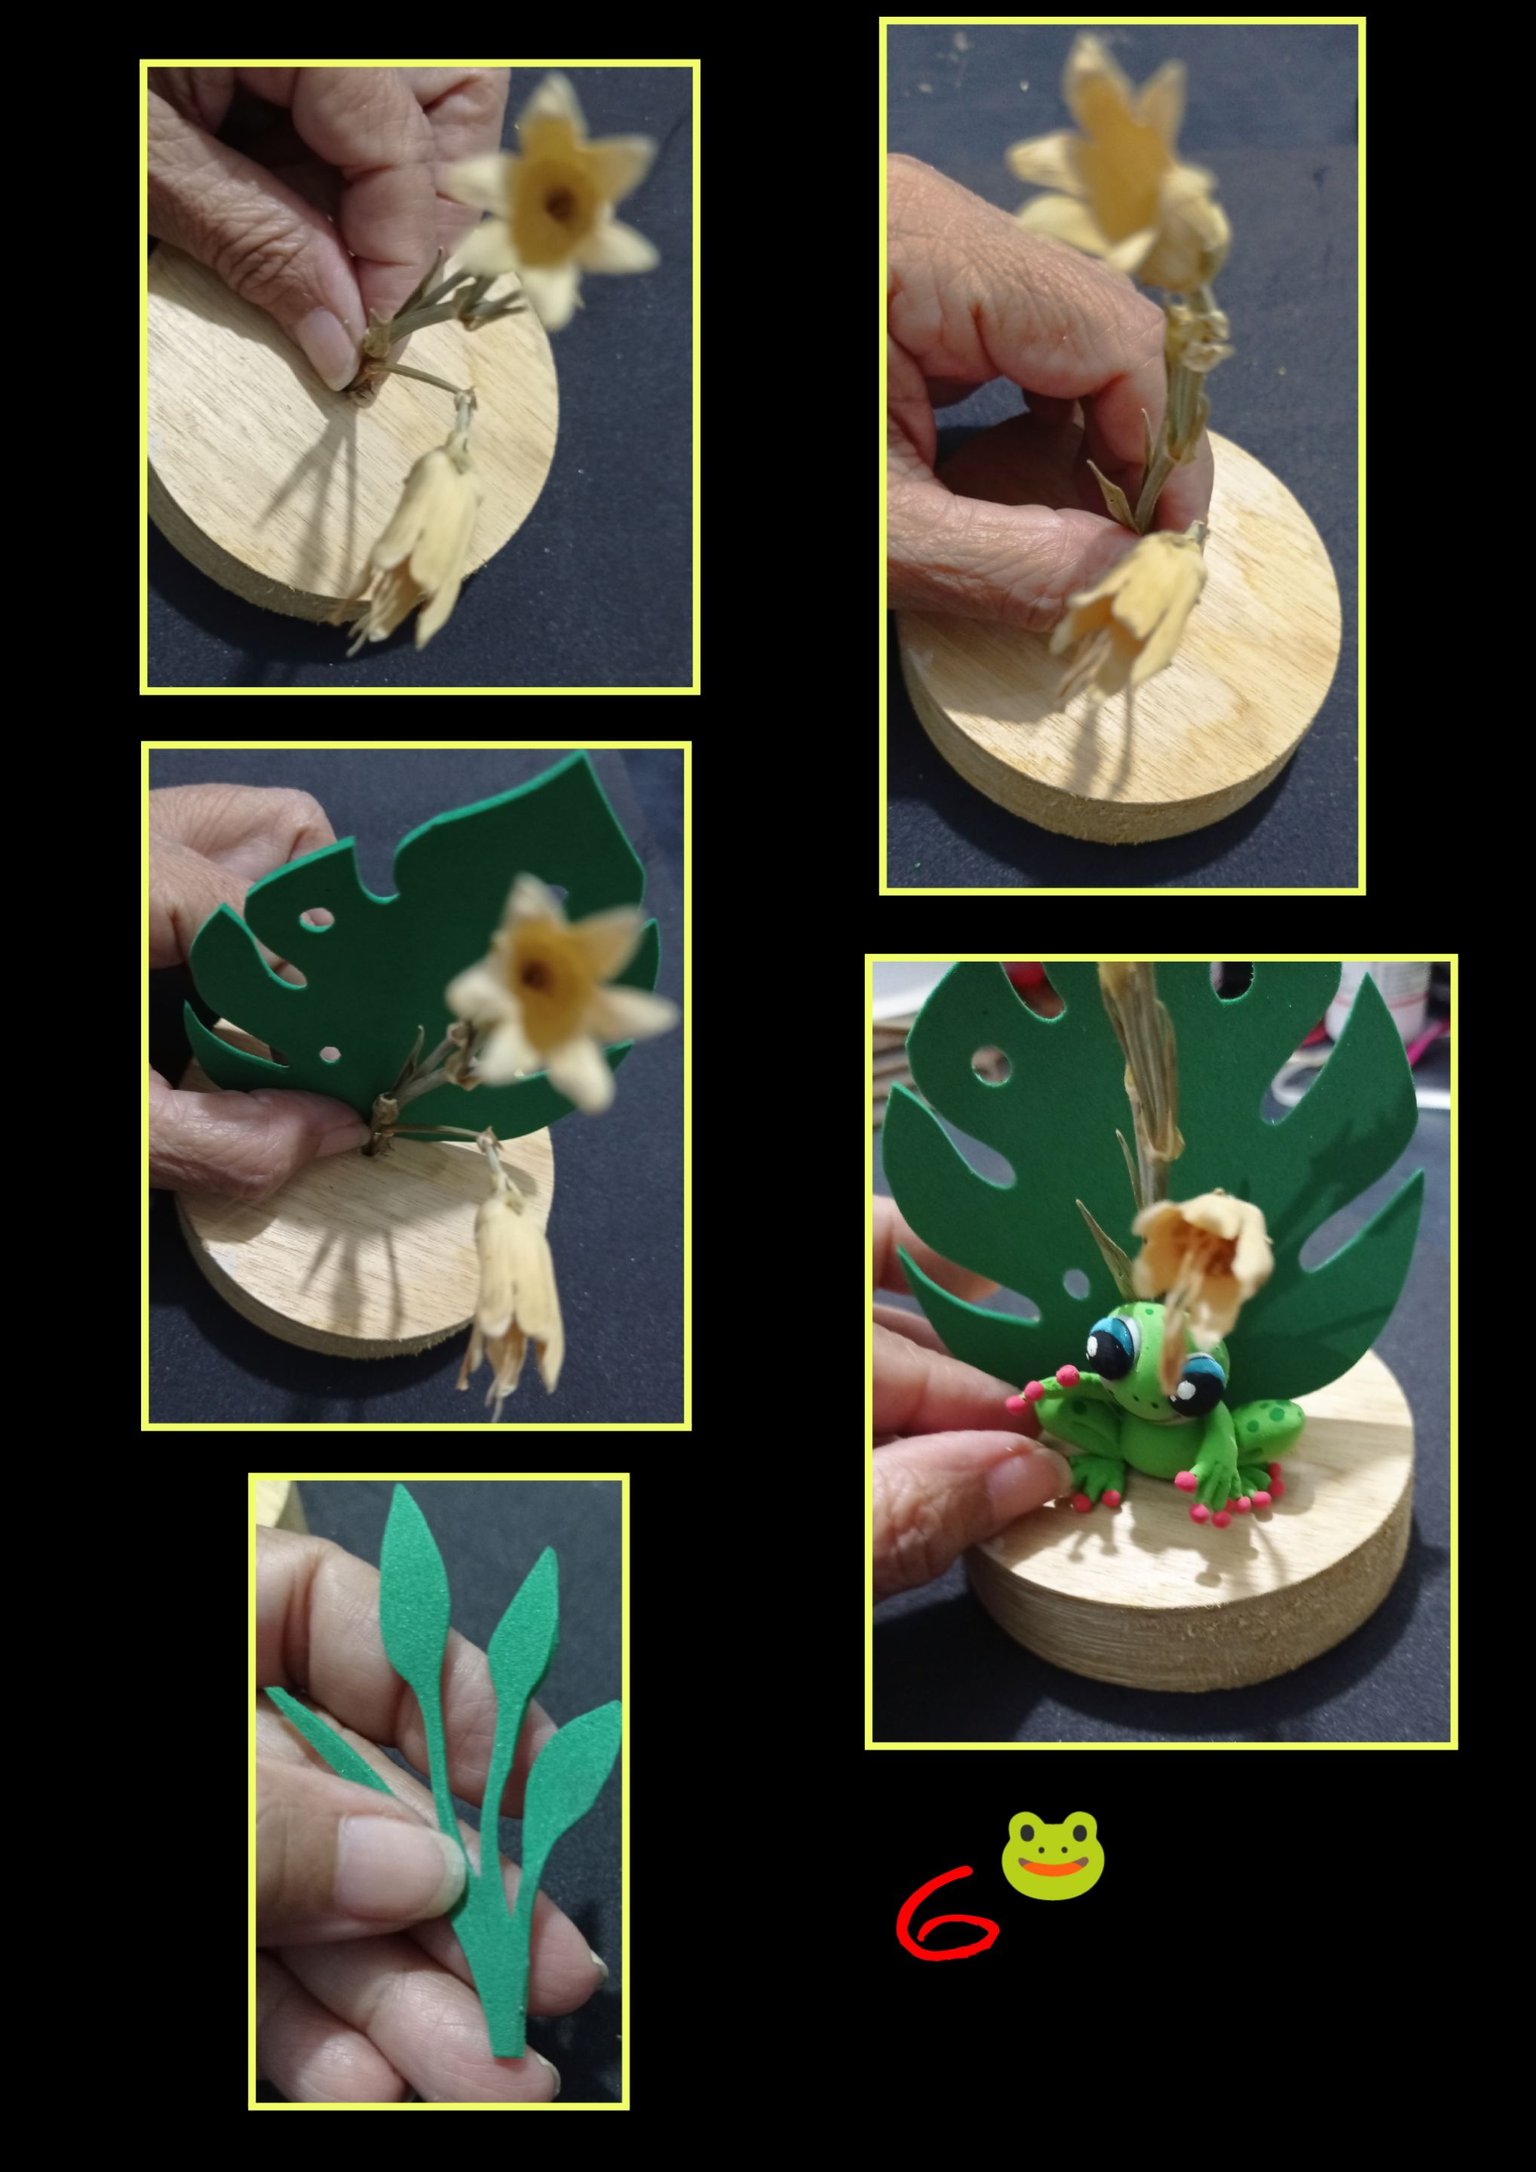
- Pega las flores secas en el centro de la madera, luego recorta una hoja grande en foami y monta la ranita para ubicar donde se vé mejor y pega con silicón, luego recorta una ramita en foami.
Paso 7:
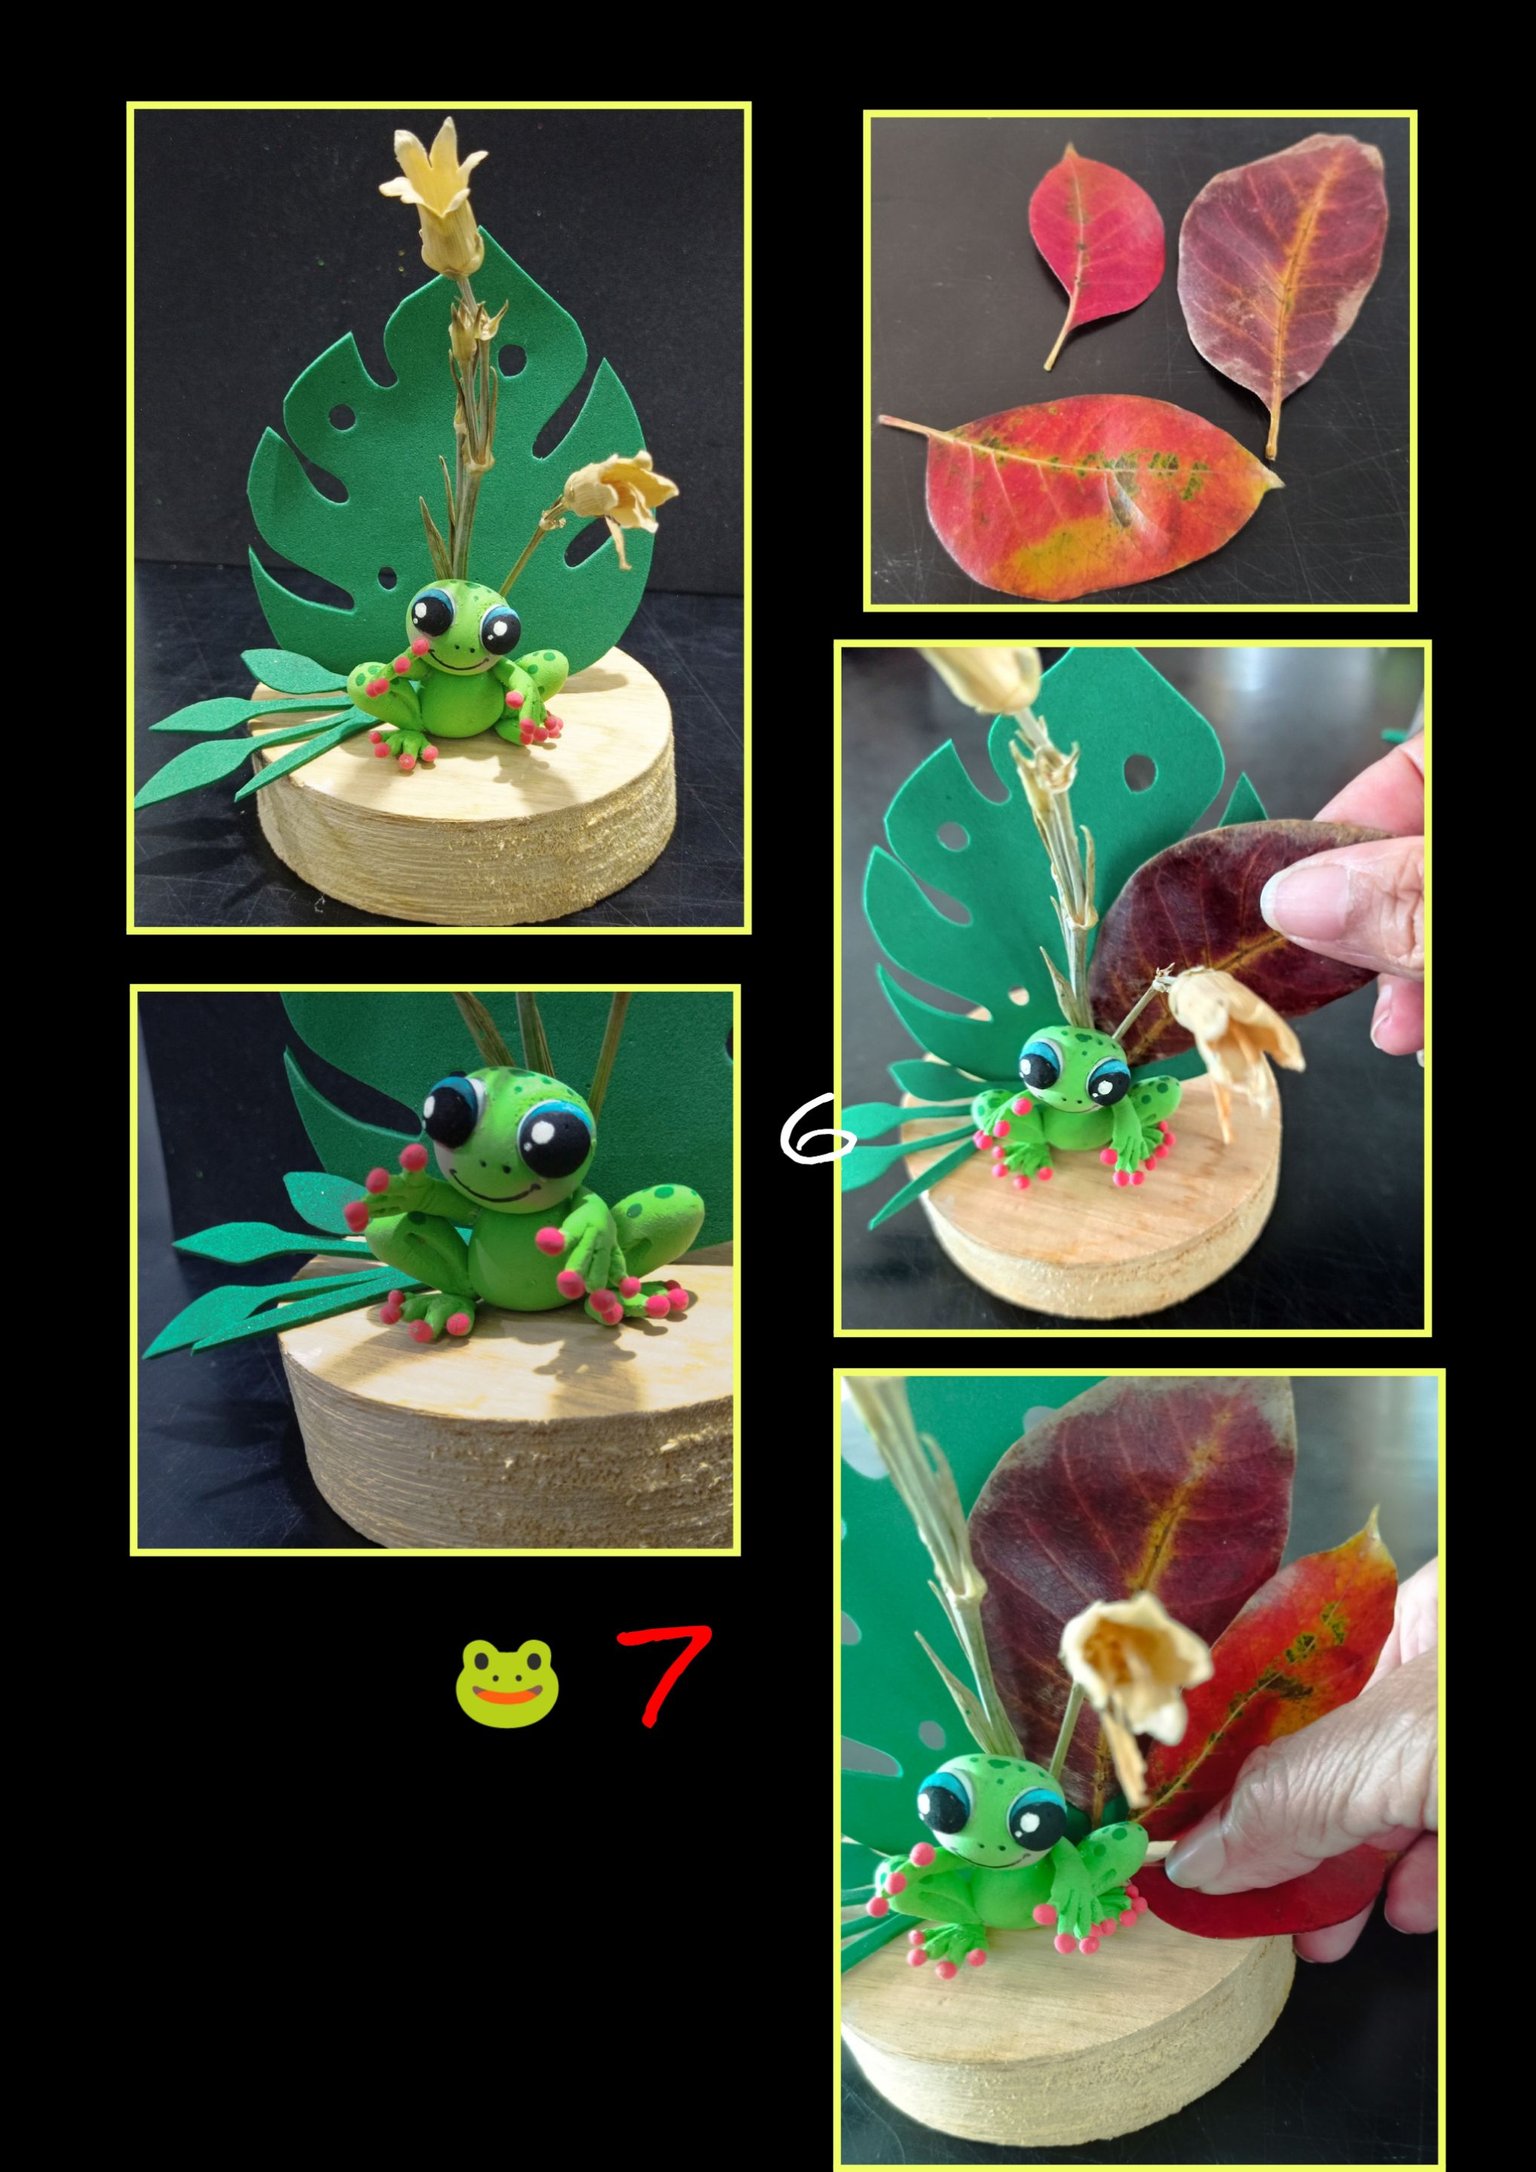
Pega la ramita de foami a un lado y luego pega las hojas secas.
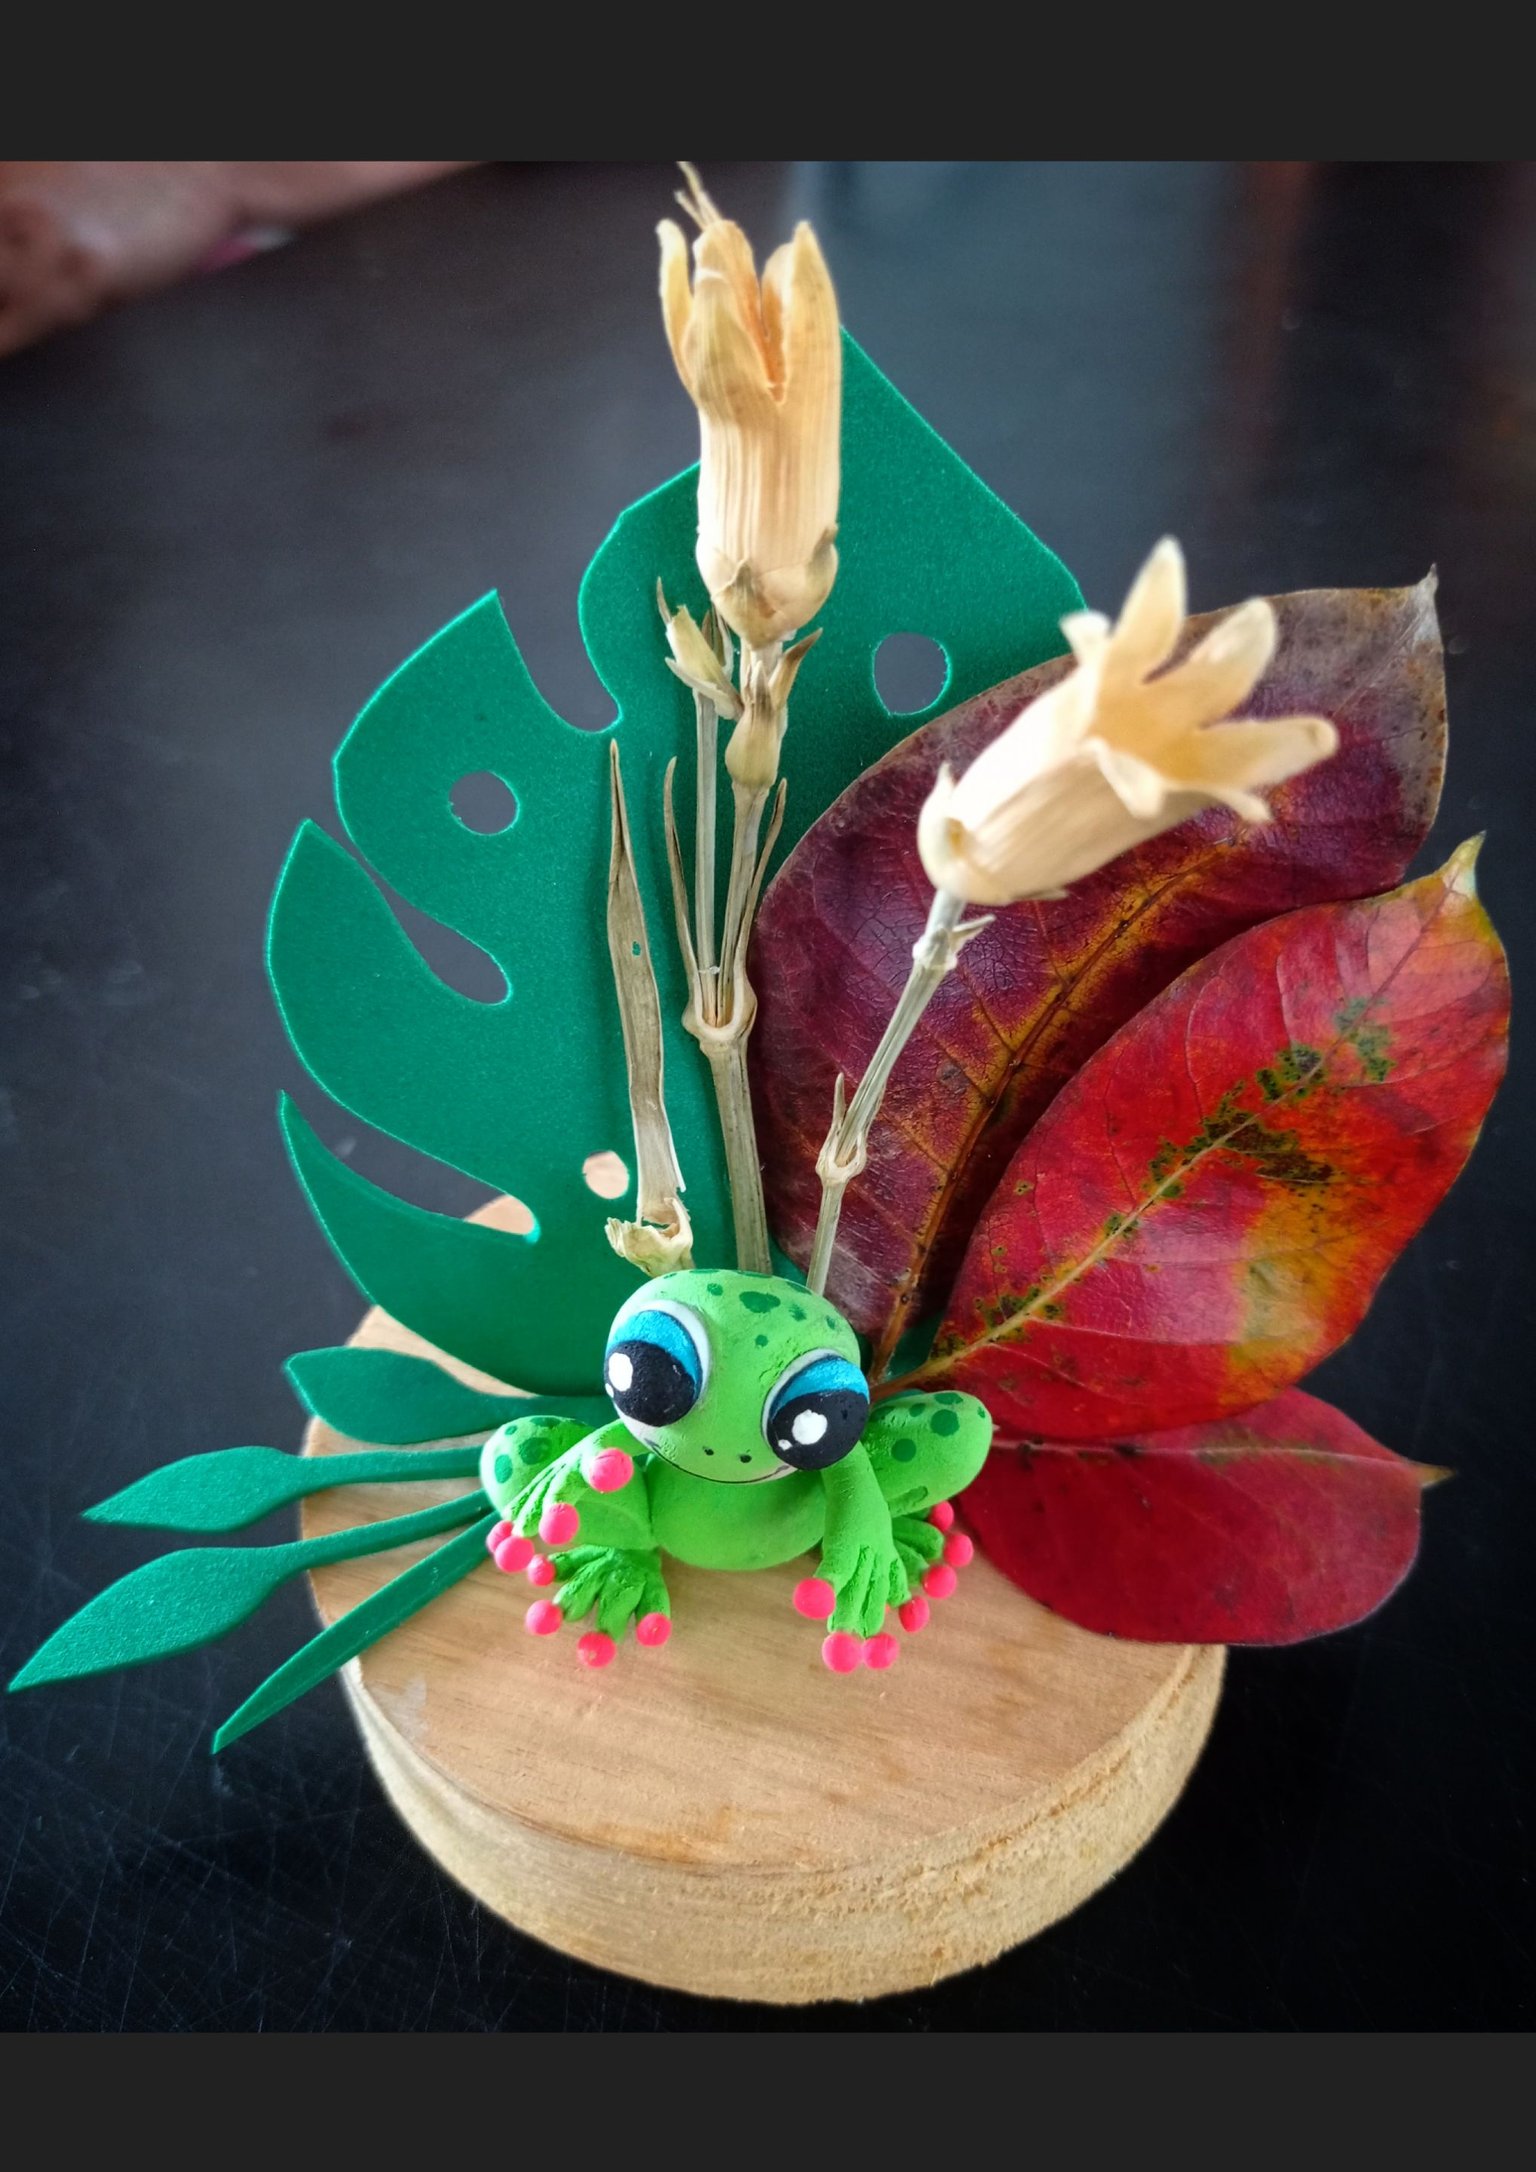
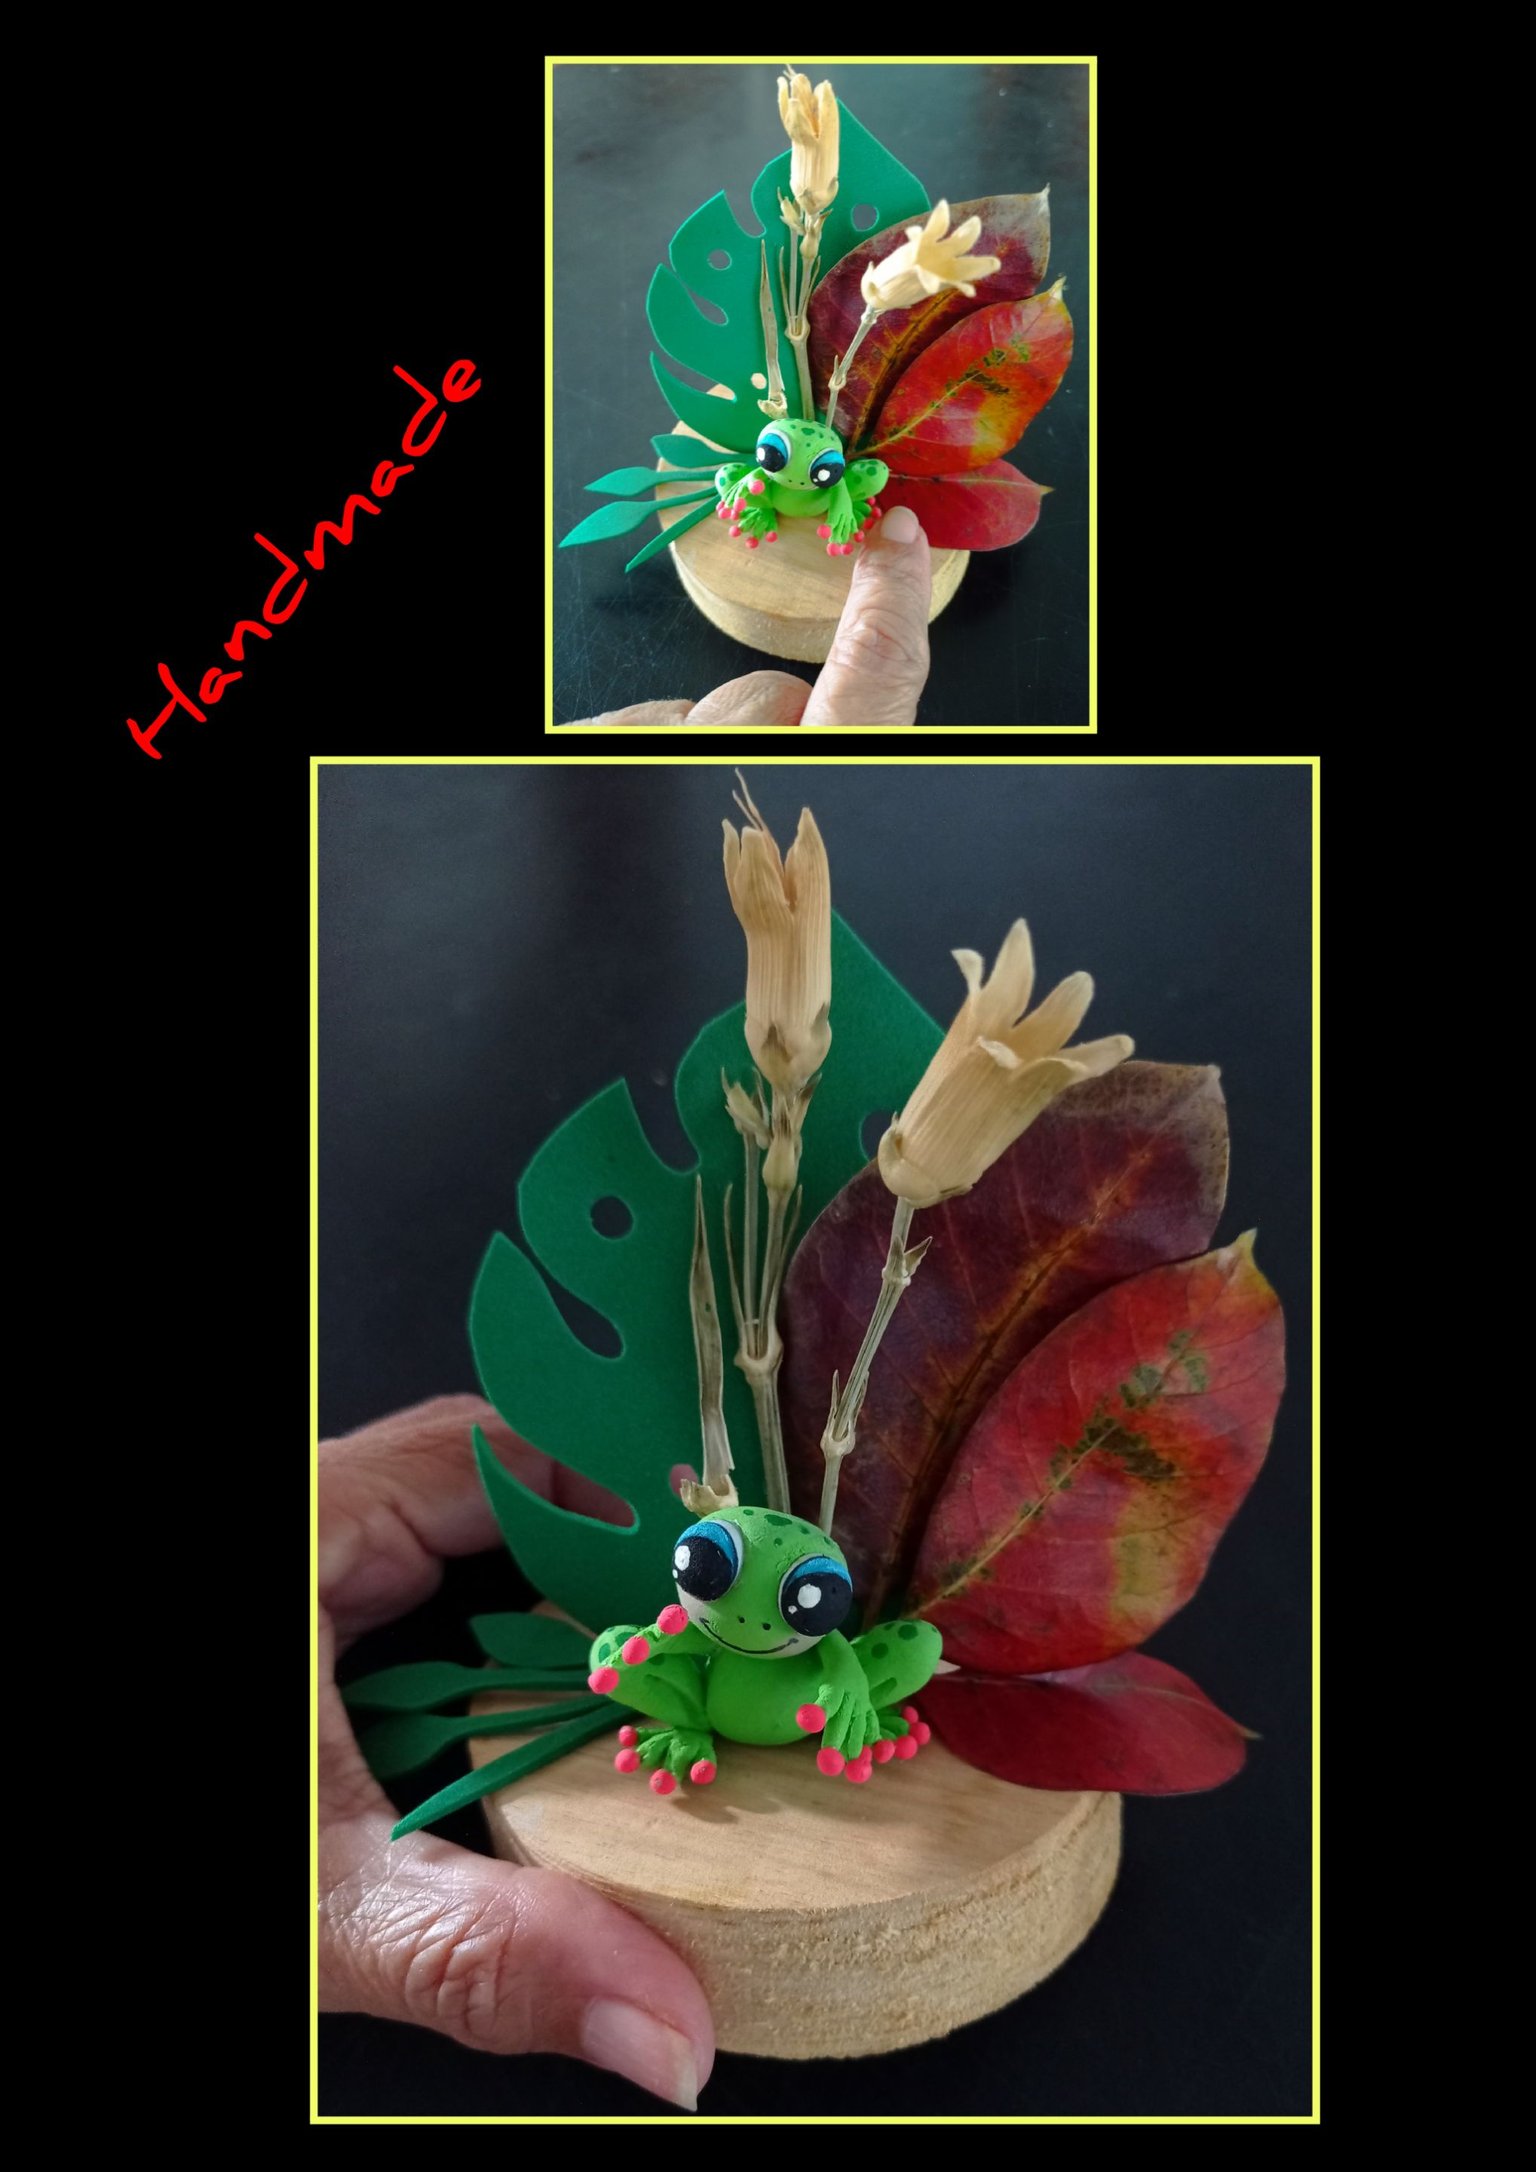
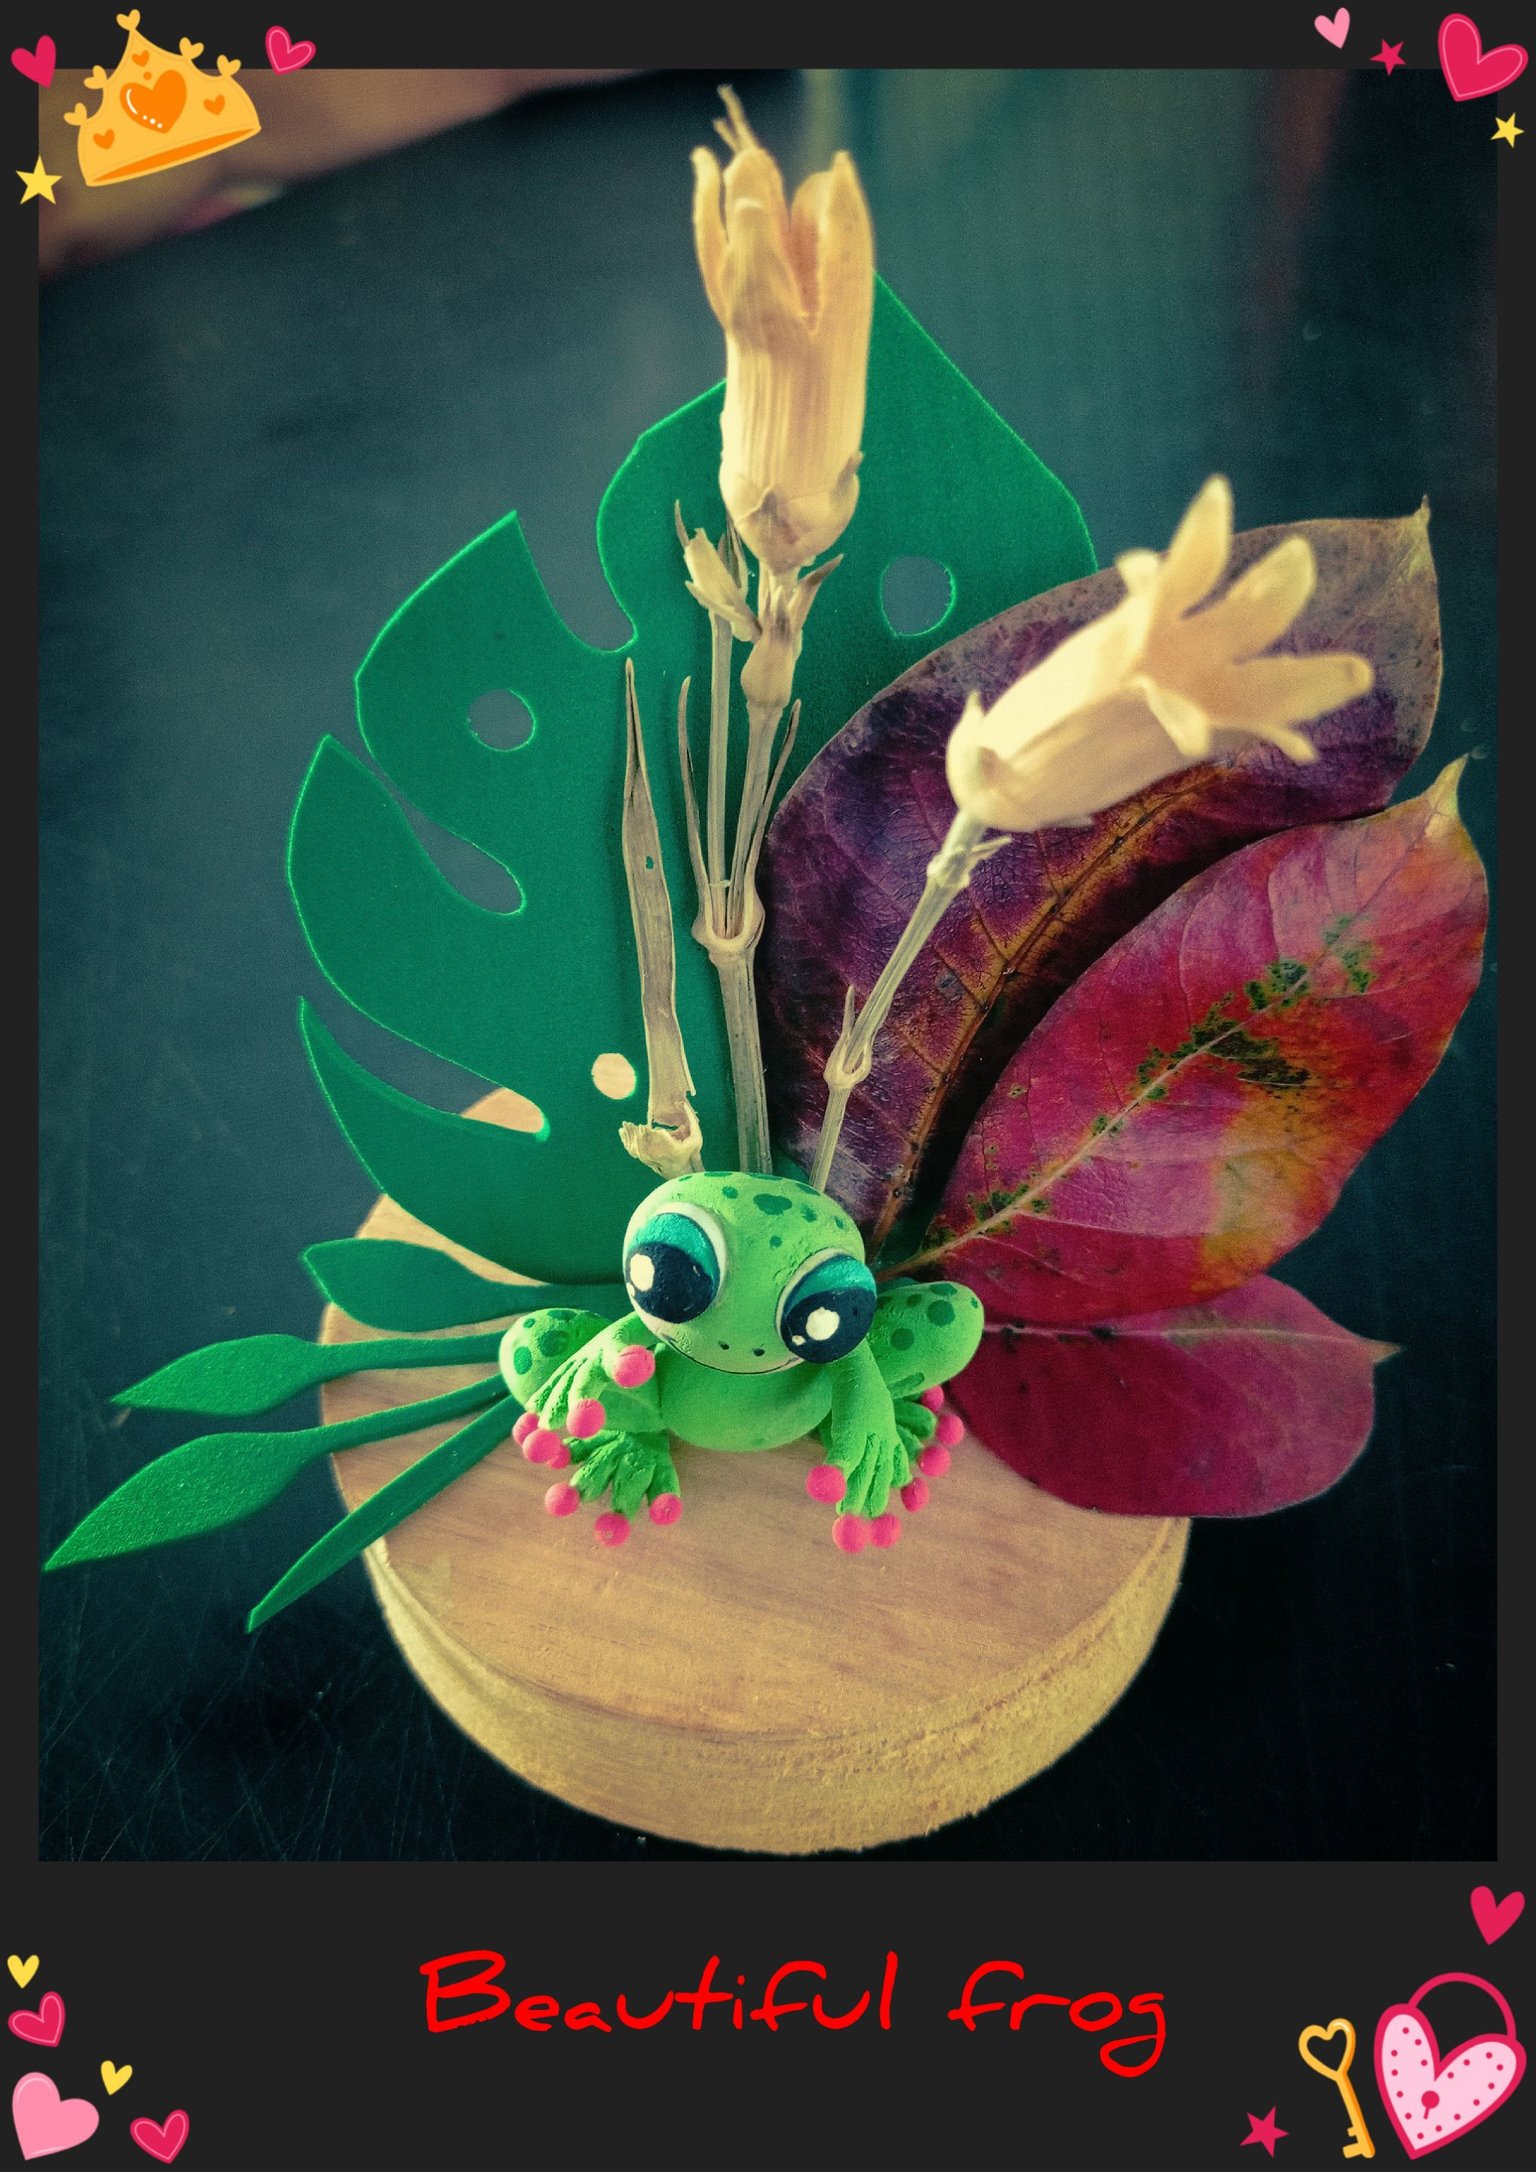
Así queda lista esta linda Ranita con la cual podrás decorar cualquier espacio.
Espero te guste y te animes a trabajar con el foami moldeable con el que puedes realizar sencillas y fáciles figuras.
Las fotos Editadas con GridArt.
Teléfono Redmi Note 9.
Me despido feliz de haber compartido con ustedes este fácil y bonito trabajo.
Espero les sirva de guía y le saquen provecho.
Saludos y hasta mi próximo tutorial.
Recuerda Pon tu imaginación a volar y crea cosas bellas.
English:
Hello, hello, dear friends and visitors who are here today.
Welcome to all of you.
For this you will need:
| Yellow, green and red moldable foami | Paints and brushes |
|---|---|
| Circle or piece of wood | Dried flowers and leaves |
| Green and white Foami | Marker and pencil |
| Scissors | Silicone and white glue |
| Plancha eléctrica |
Step 1:
- Take two portions of yellow and green moldable foami, mix until the colors are well combined, then make a little ball and with an applicator we will press where we will put the eyes, as shown in the picture.
Step 2:
- Now we will make the body with another little ball and give it a little triangular shape and glue it with white glue or a little bit of water.
- To make the paws, we will make two small balls and shape them into drops, then with a stick or scissors we will make a small incision in the center (see photo) and glue them to the sides of the body.
Step 3:
- To make the little hands, make two small balls, flatten them, give them a triangle shape and take out 4 little fingers, also make 4 mini red balls for each finger and glue them just below the paws.
- For the arms, make two cylinders, flatten at the ends and remove the fingers and glue the red balls as well.
Step 4:
- To make the eyes mark two circles in white foami and cut out, then with the marker in the center make two circles as shown in the photo and fill with the desired color, I filled it with blue and the pupil in black and let dry.
- Heat the iron and put the circles to thermoform.
- Now with a brush paint polka dots or green spots on the frog, let dry and then glue the eyes, press until they stick well.
Step 5:
- With a pencil, mark the points of the nose and mouth.
- Glue the upper or front legs and let dry.
Step 6:
- Glue the dried flowers in the center of the wood, then cut out a large sheet of foami and mount the frog to place it where it looks best and glue with silicone, then cut out a twig in foami.
Step 7:
- Glue the foami twig to one side and then glue the dry leaves.
- This way you have this cute little frog ready to decorate any space.
I hope you like it and I encourage you to work with the moldable foami with which you can make simple and easy figures.
Photos Edited with GridArt.
Phone Redmi Note 9.
I say goodbye happy to have shared with you this easy and nice work.
I hope you use it as a guide and take advantage of it.
Greetings and until my next tutorial.
Remember to put your imagination to fly and create beautiful things.