Tenia unas grandes ganas de hacer algo alusivo al carnaval, pero por cuestiones de tiempo y dinero no podía darme el lujo de comprar un disfraz. Por esa razón me inspiré en un cintillo alegórico ya que me inspiré en unos disfraces que ví en la escuela de mi primo que sus compañeras llevaban.☺️
😋I thought first of a material that was inexpensive, easy to get and also easy to work with. So when I went to the nearest Chinese to see what could inspire me with the materials they sell, it was then that I saw a wonderful package of pipe cleaners.
😋Pensé primero en un material que fuera económico, fácil de conseguir y también fácil de trabajar. Así que cuando fui a los chinos más cercanos a ver qué me podía inspirar con los materiales que venden, fue entonces que vi un maravilloso paquete de limpia pipas.
This material seemed great and practical and when I saw its price😍 it came to me like a glove and without thinking much I bought it.
Este material me pareció genial y práctico y cuando vi su precio 😍 me vino como anillo al dedo y sin pensarlo mucho lo compré.
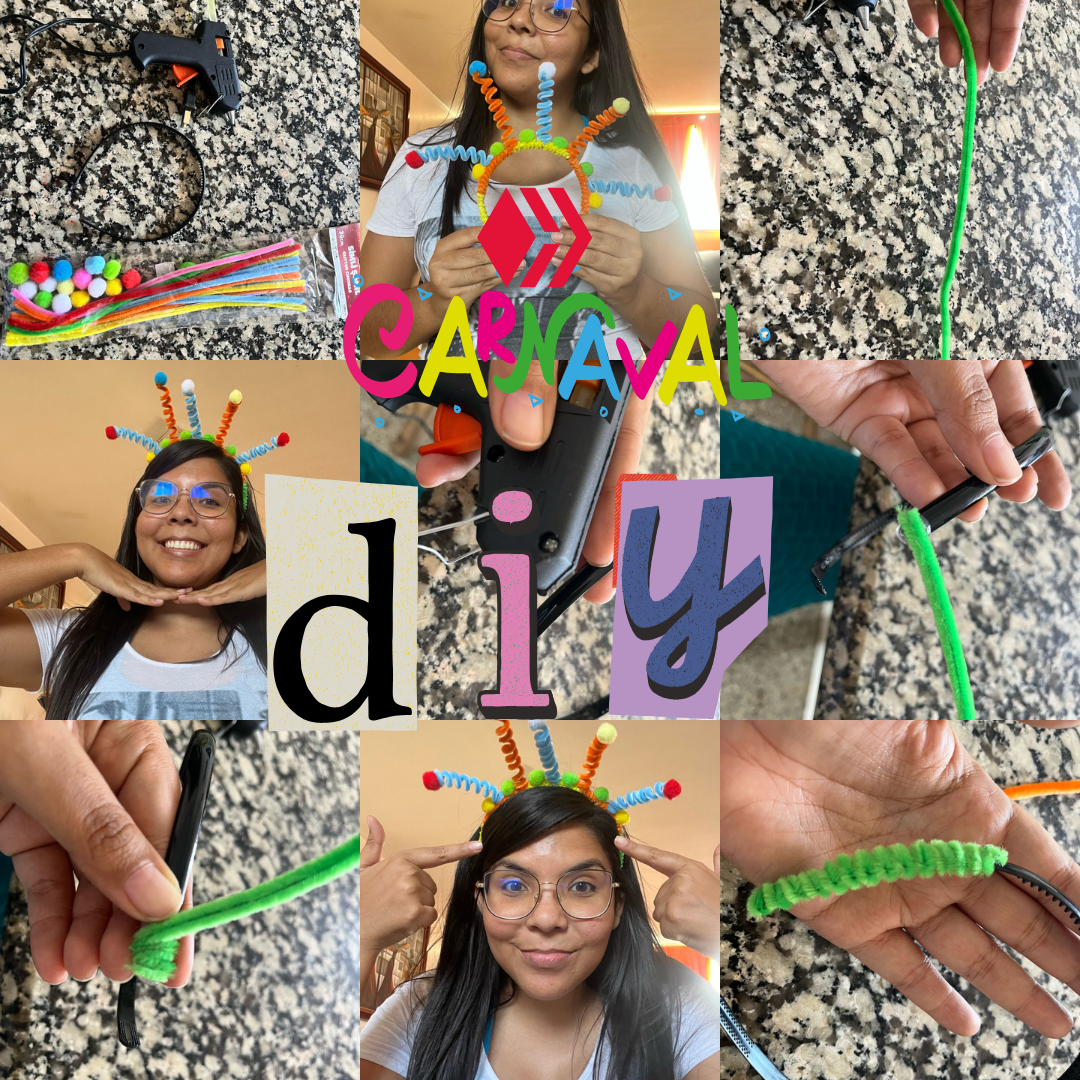
😙Once at home I decided to give free rein to the imagination, so I titled this craft as:
😙Ya una vez en casa decidí dar rienda suelta a la imaginación, por lo que titulé a esta manualidad como:
Carnival headband / Cintillo de Carnaval
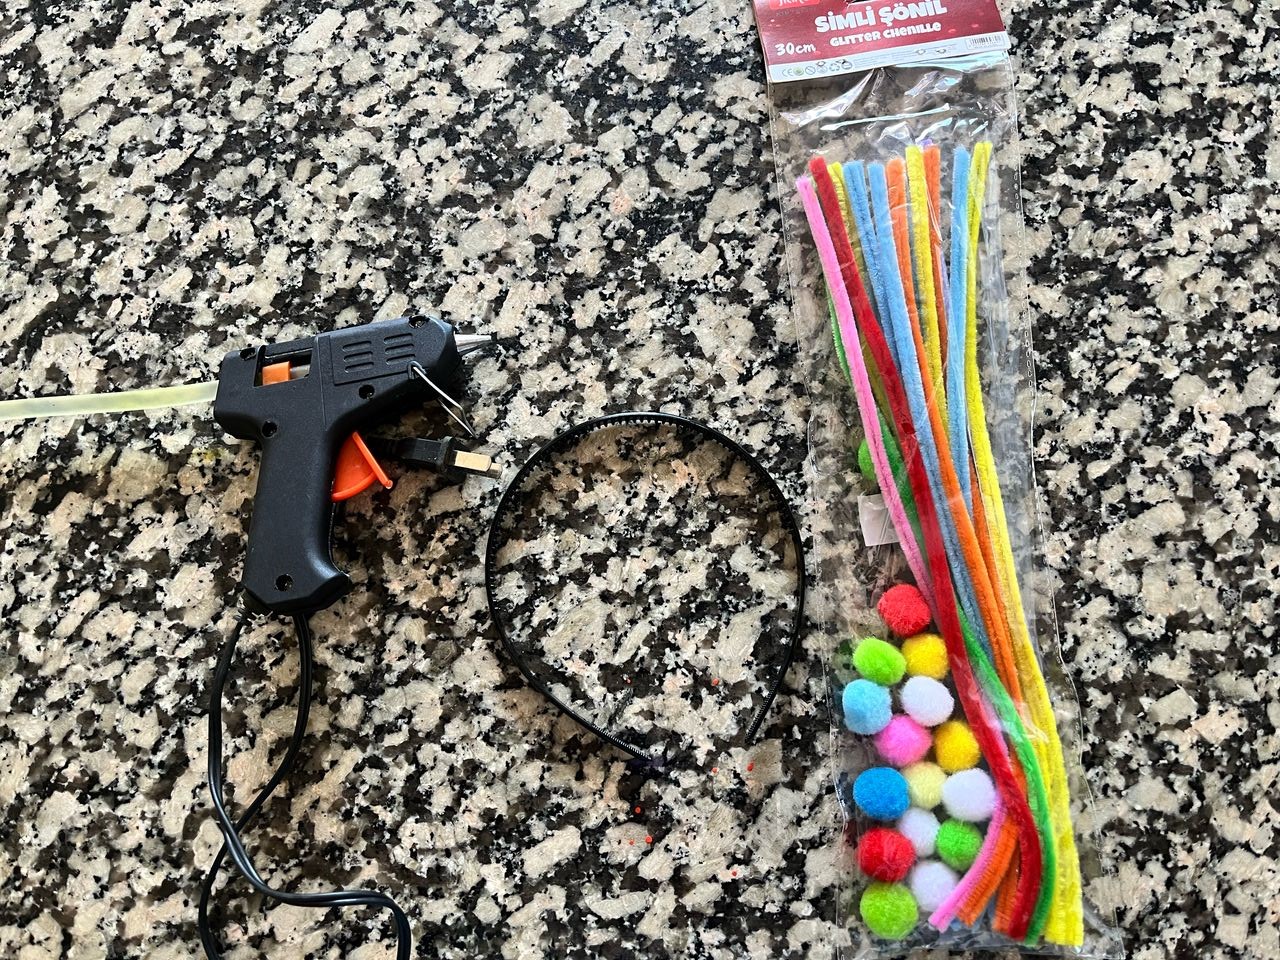
Now, let's take a look at the materials I needed😛:
Ahora bien, veamos los materiales que necesité😛:
- Headband / Cintillo
- Silicone gun and silicone stick / Pistola de silicón y barra de silicón
- Pipe cleaner / Limpia Pipas
- Colored balls / Pelotas de colores
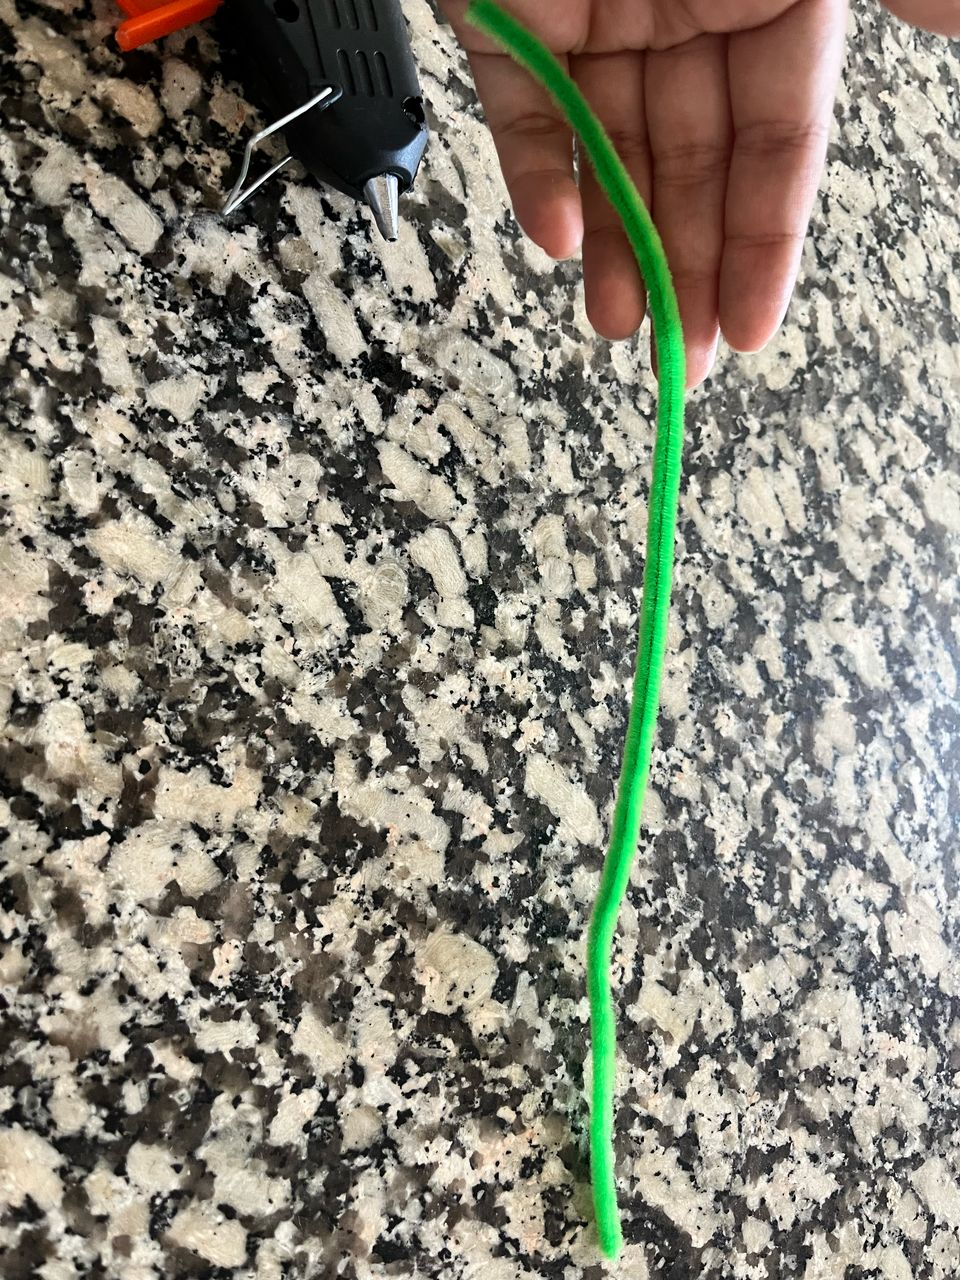
Step 1 / Paso 1
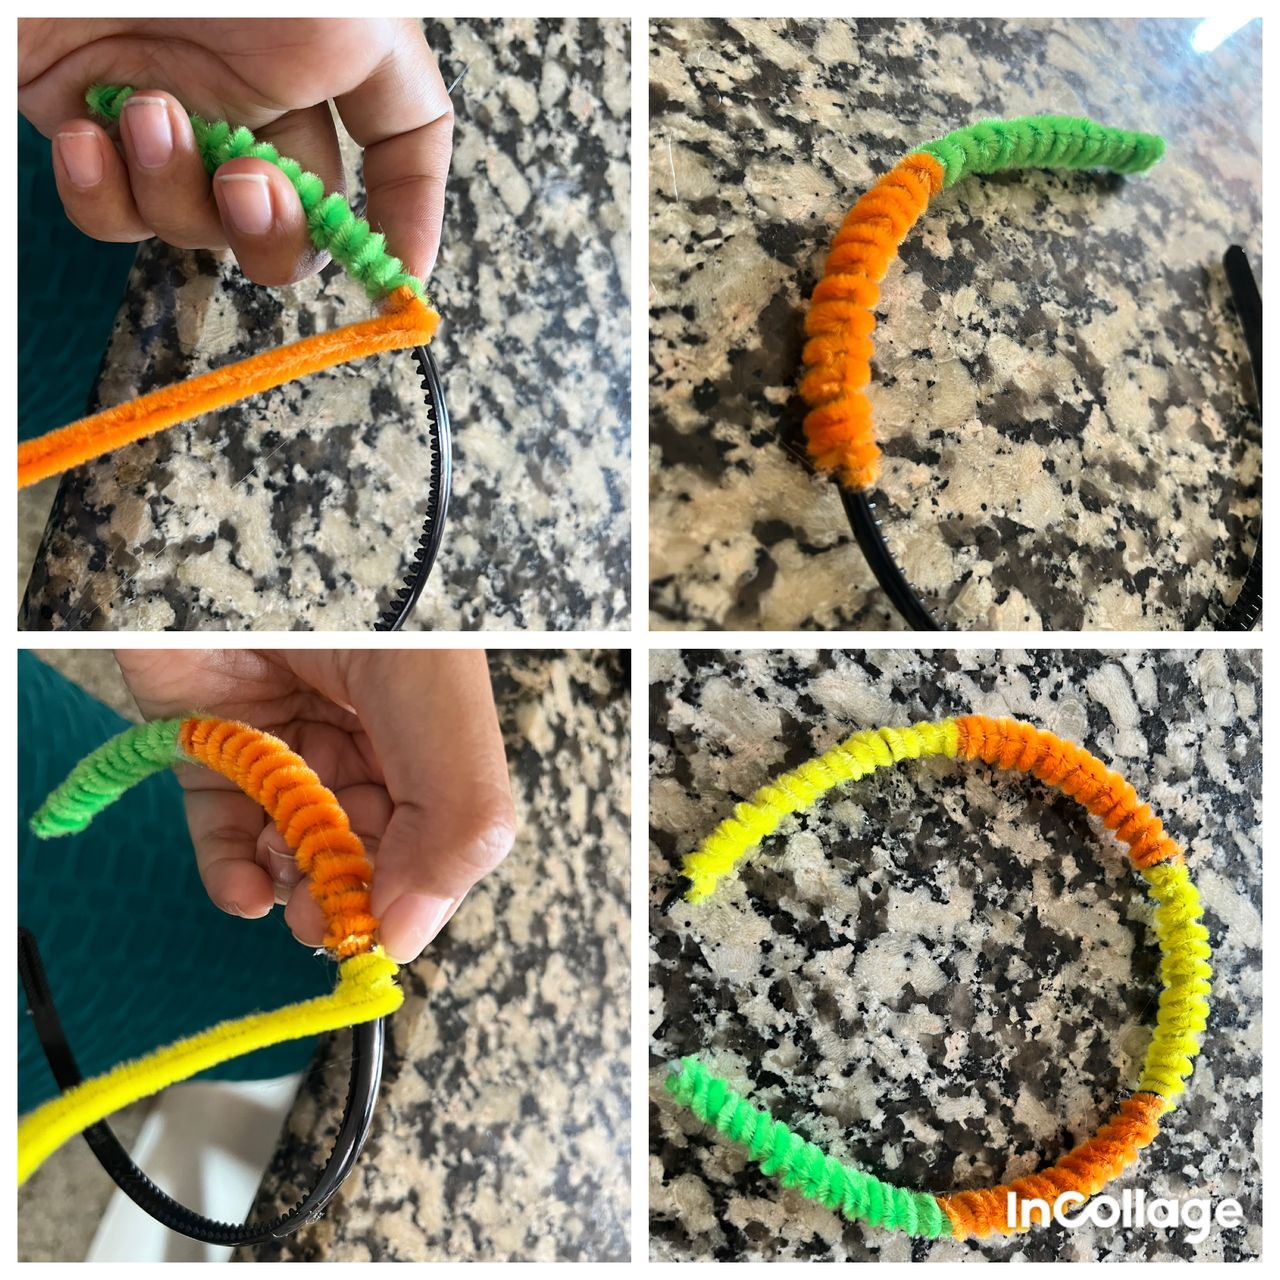
🤗Identify the color of the pipe cleaner with which you are going to start decorating the headband.
🤗Identifica el color de limpia pipas con el que vas a comenzar a decorar el cintillo
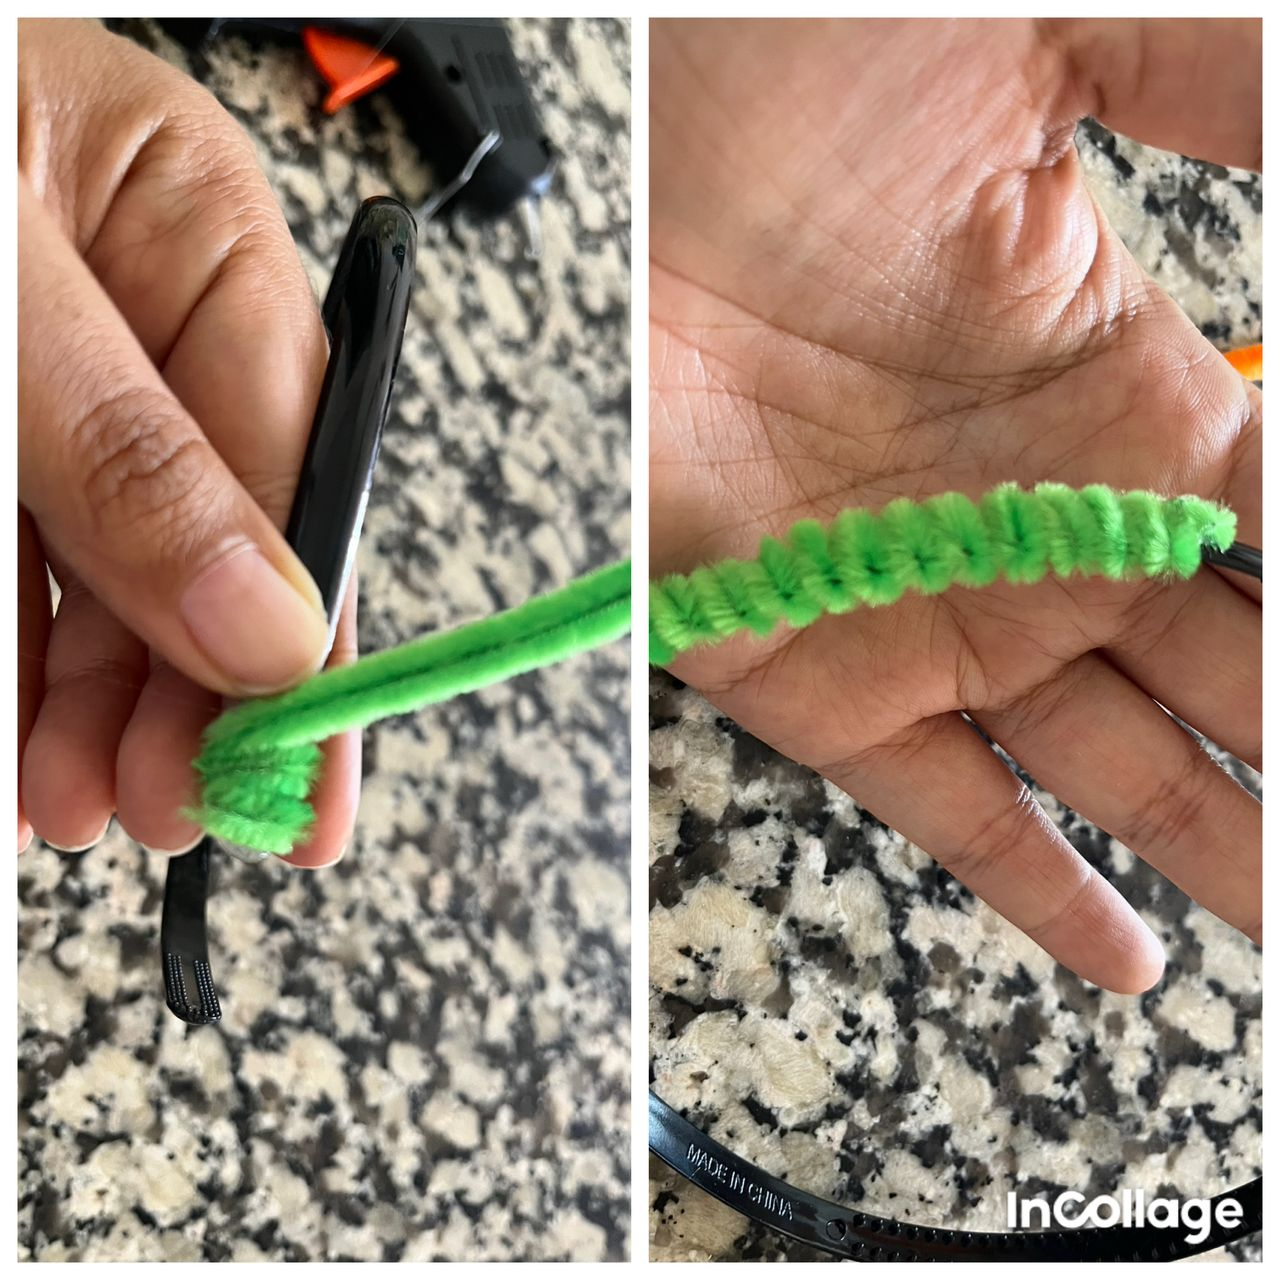
Step 2 / Paso 2
Place a dot of silicone on the leg of the headband to glue the pipe cleaner you selected🤭.
Coloca un punto de silicón en la pata del cintillo para pegar el limpia pipas que seleccionaste🤭.

Step 3 /Paso 3
🤫Once glued, start to spiral around the headband, without leaving any visible gaps.
Once you finish with that color, place a dot of silicone at the end of the pipe cleaner to fix it.
🤫Una vez pegado se comienza a dar vuelta en espiral sobre el cintillo, sin que queden huecos visibles.
Una vez que termines con ese color, se coloca un punto de silicón en el final del limpia pipas para que quede fijado.
Step 4 / Paso 4
Take another color and place a silicone dot where the other color ended and repeat the operation of going around the headband.🤔
Take the necessary colors of your choice and repeat the operation.
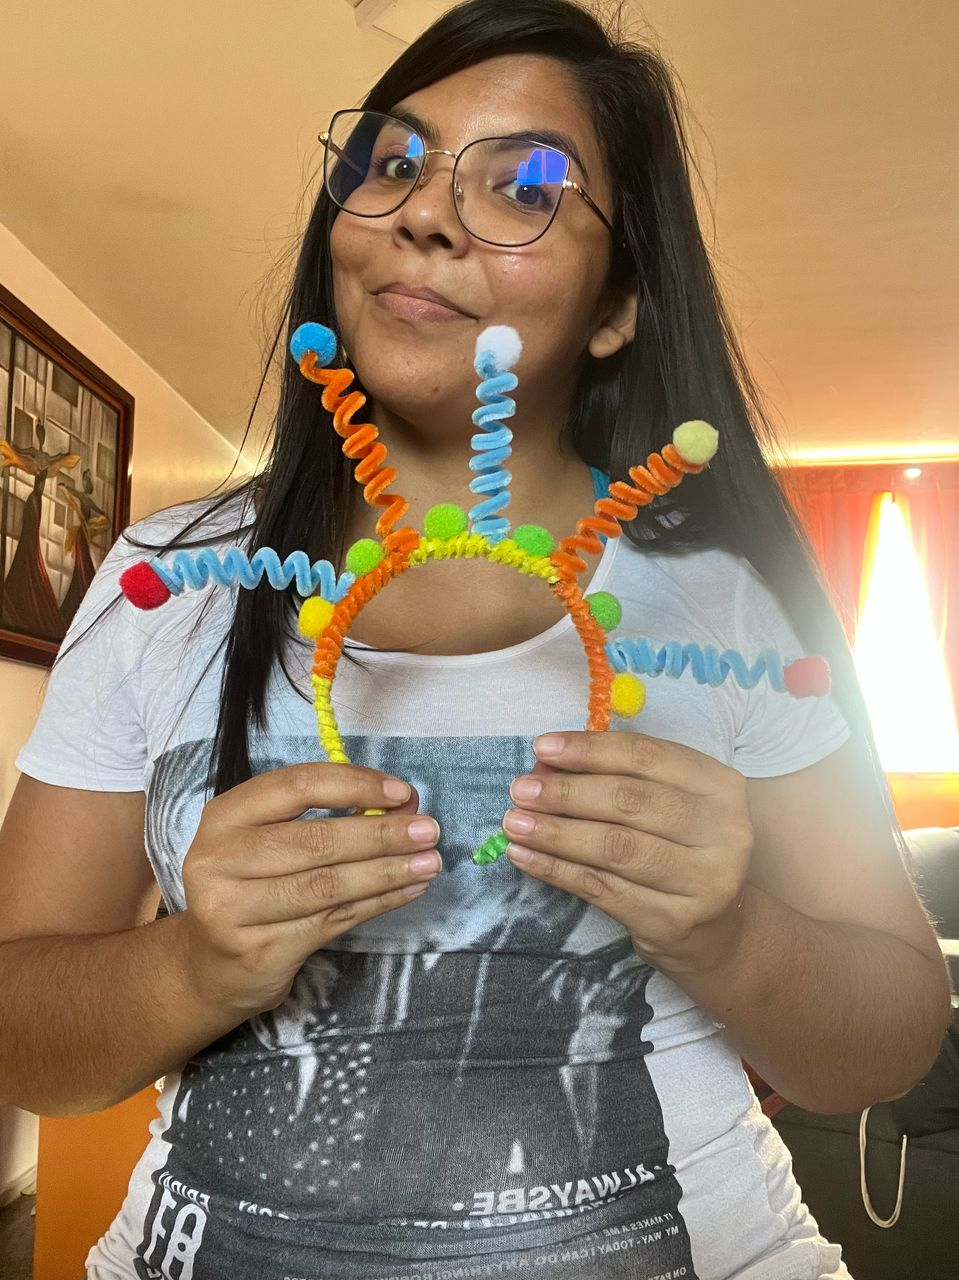
The headband itself should look like this once the colors are completed.
Se coje otro color y se coloca un punto de silicón en donde se dio término al otro color y se repite la operación de dar vueltas alrededor del cintillo.🤔
Toma los colores necesarios y de tu preferencia y repite la operación.
El cintillo en sí debe quedar así una vez se completen los colores.
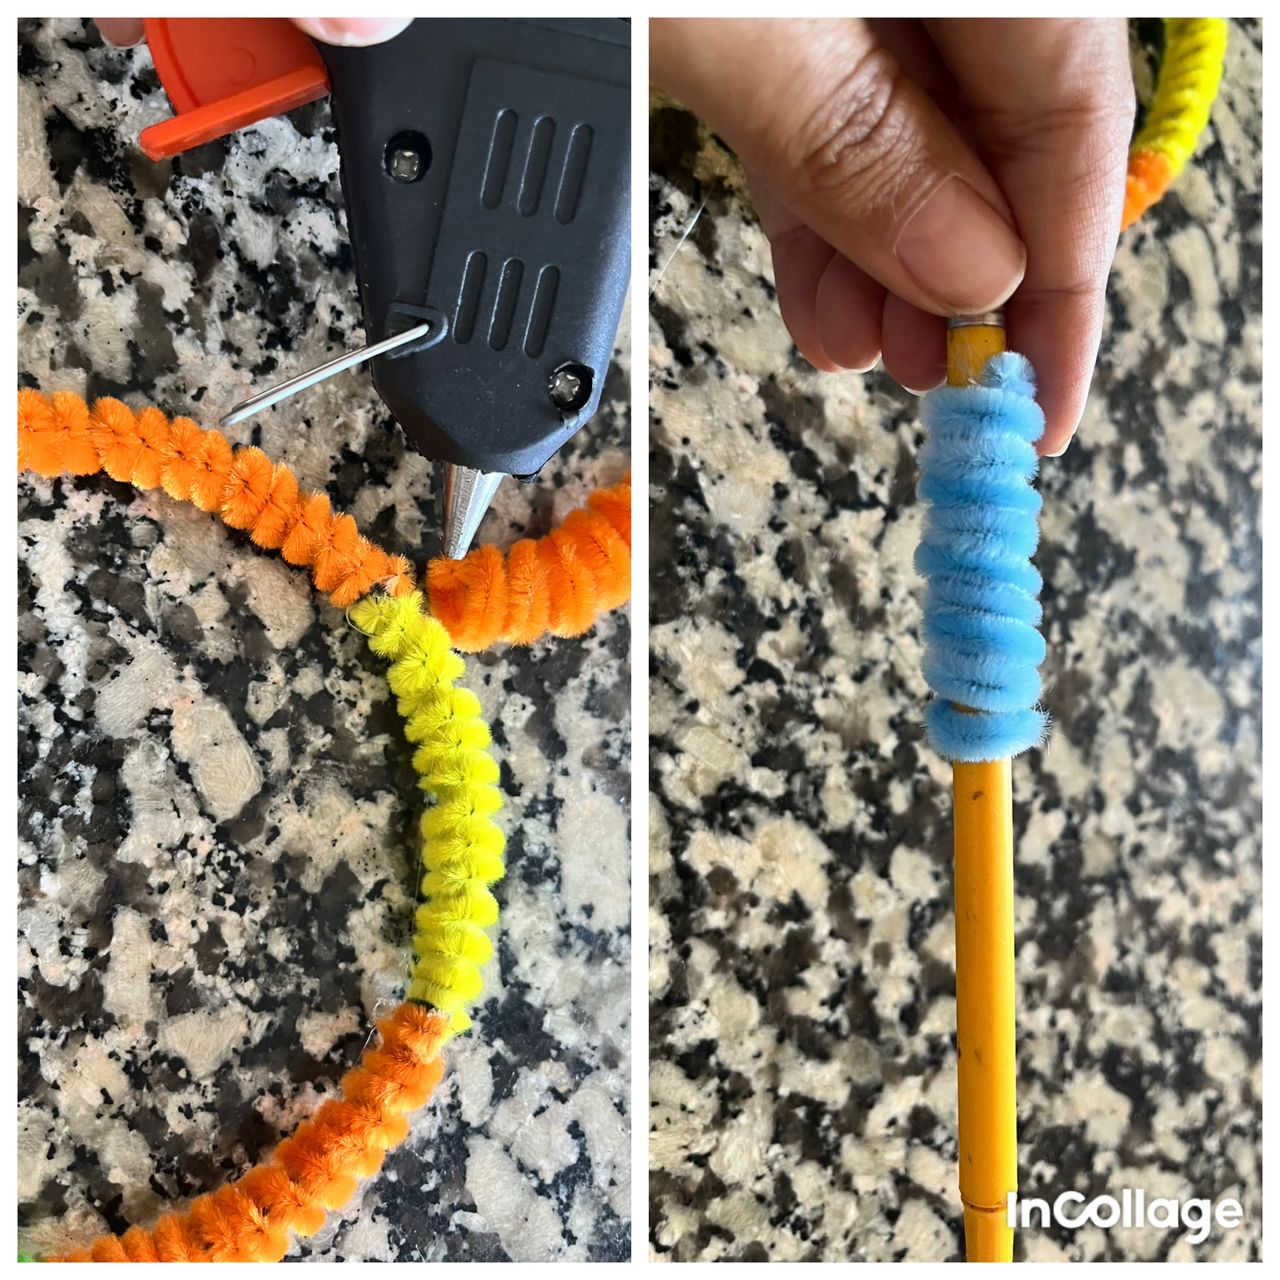
Step 5 / Paso 5
😮💨Now with the help of a pencil, you are going to roll the pipe cleaner of the color of your preference around the pencil in a spiral shape and take it out.
It should fit like a spring.
😮💨Ahora con la ayuda de un lápiz, vas a enrollar el limpiapipas del color de tu preferencia alrededor del lápiz en forma de espiral y lo sacamos.
Debe quedar como un resorte.

Step 6 / Paso 6
Place a silicone dot on the headband and glue the spring we made with the pencil.
Place a dot of silicone on the headband and glue the spring we made with the pencil.
Do the same procedure with another color of pipe cleaner and glue.
I made a total of 4 springs, but you can make as many as you like.😌
Se coloca un punto de silicón en el cintillo y se pega el resorte que hicimos con el lápiz.
Hacemos el mismo procedimiento con otro color de limpia pipas y pegamos.
Yo en total, hice 4 resortes, pero tu puedes hacer los que gustes.😌
Step 7 / Paso 7
The colored balls that come in the package will be used as intermediates between the springs😎. In the same way, place a dot of silicone and glue the color you like the most.
In the end, I decided to use 6 colored balls.
Las bolas de colores que vienen en el paquete las vamos a usar de intermedios entre los resortes😎. De igual manera, se coloca un punto de silicona y se pega el color que más te guste.
Al final, yo decidí usar 6 pelotas de colores.
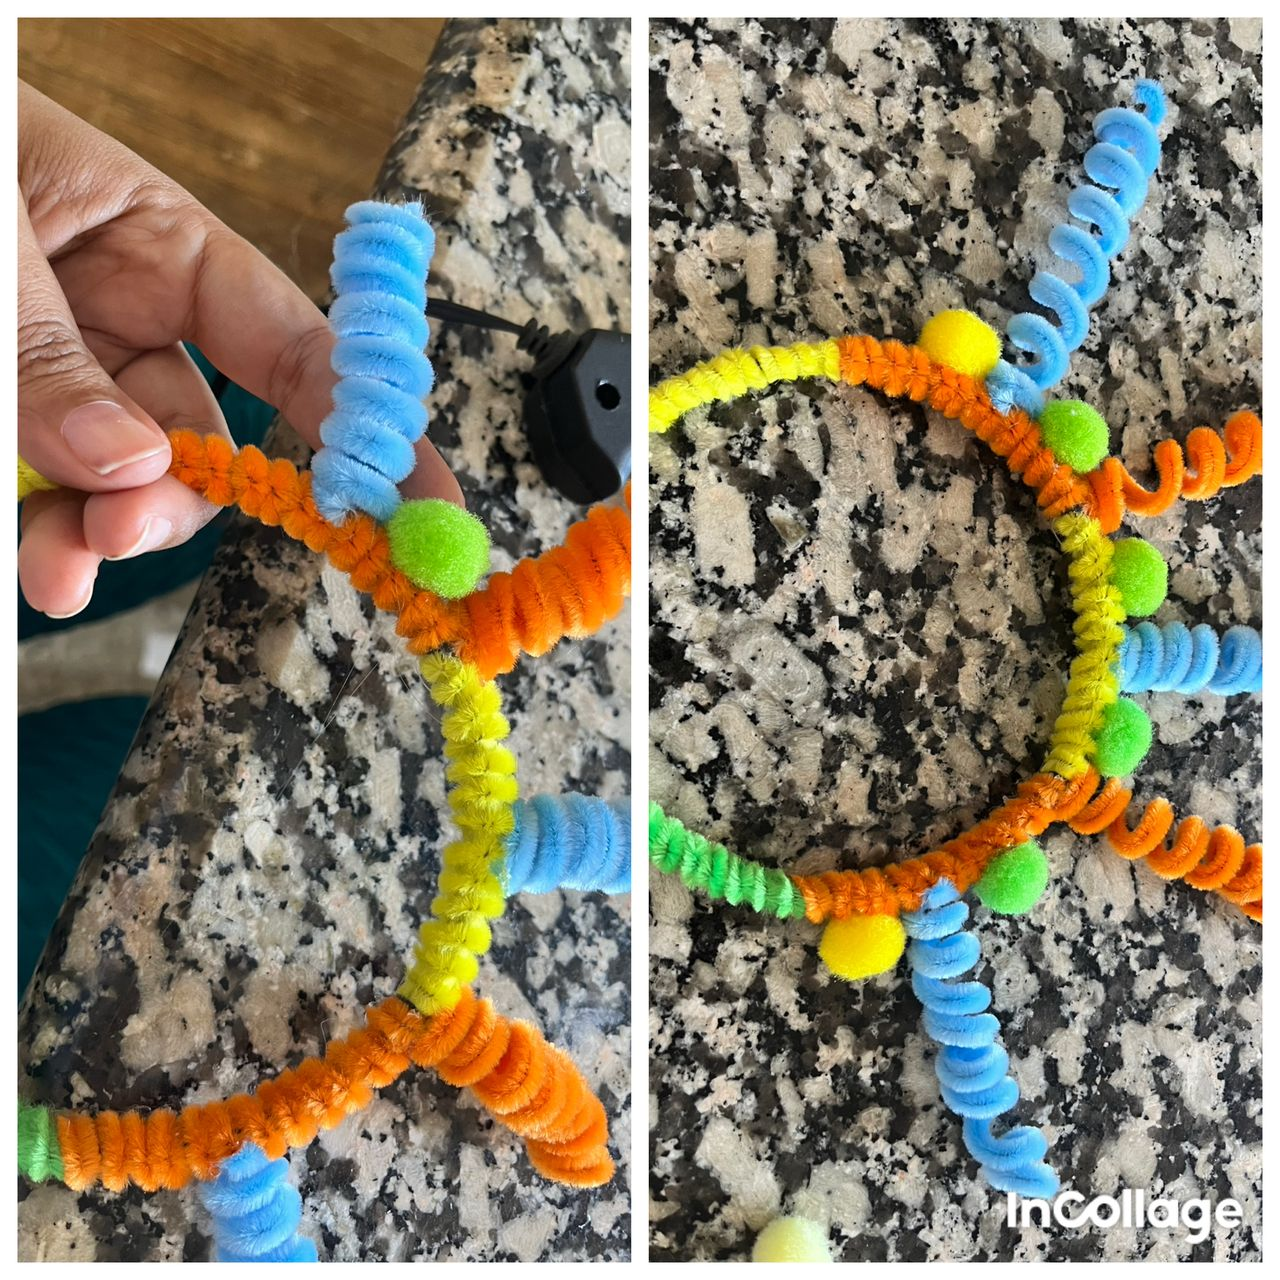
Step 8 / Paso 8
🤓With the remaining colored balls, we are going to glue them with a dot of silicone on the springs.
🤓Con las bolas de colores que quedan, vamos a pegarlas con un punto de silicón en los resortes.
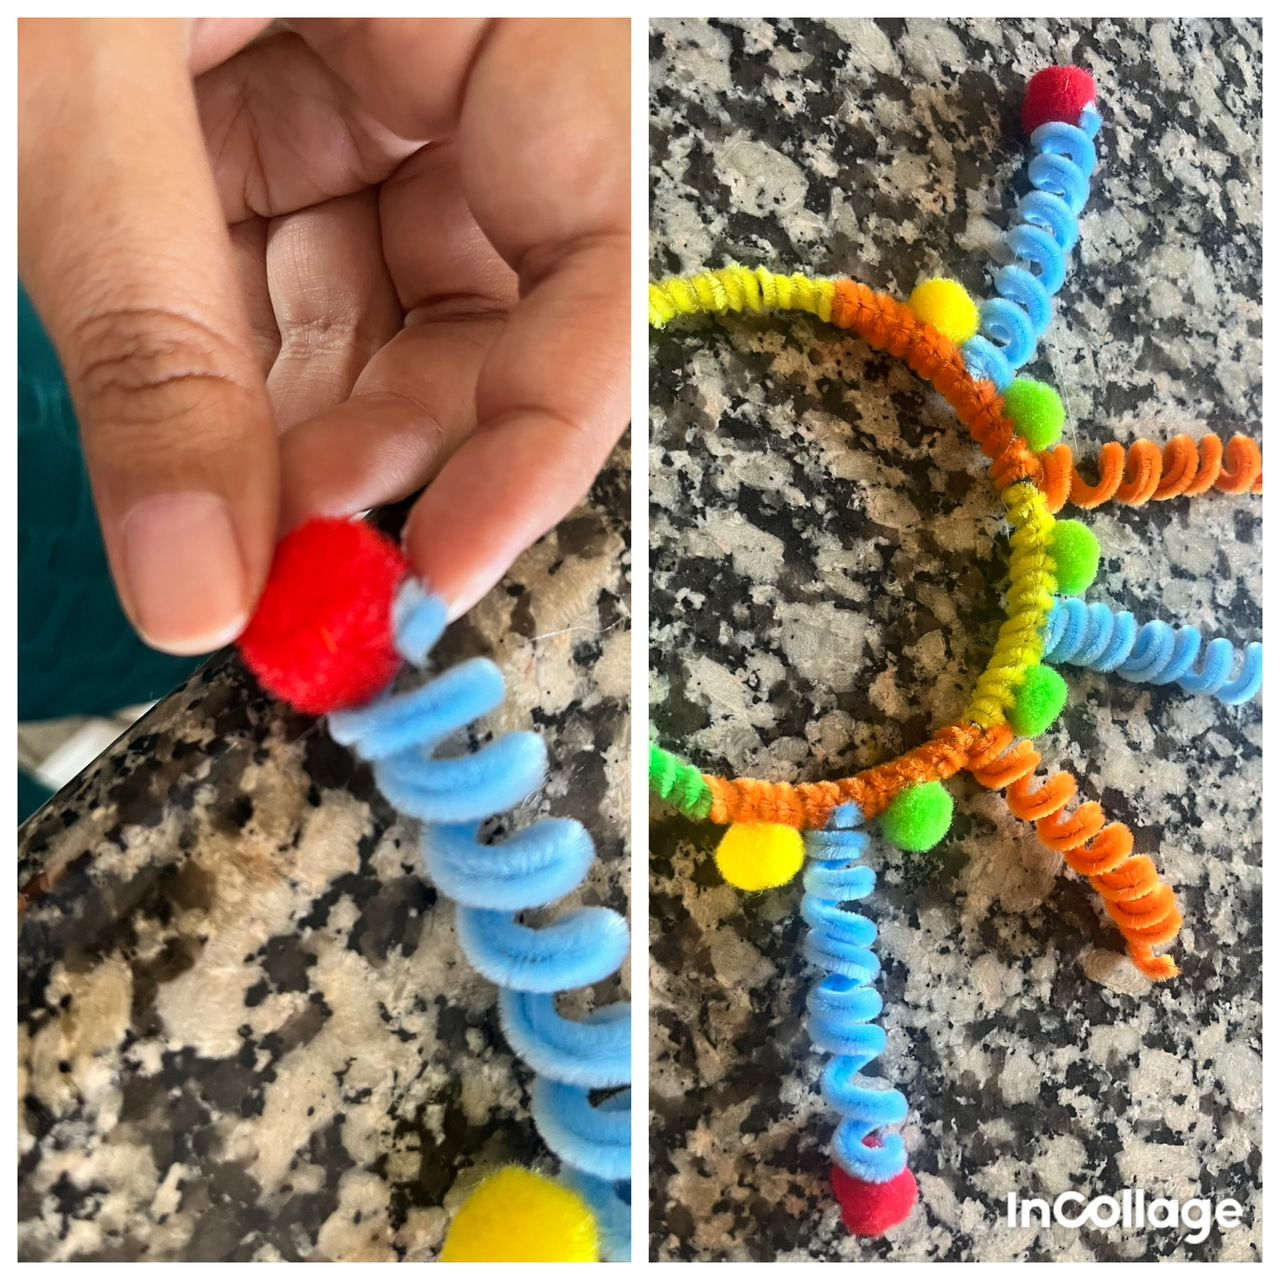
Step 9 / Paso 9
Carefully open the springs a little, to the point you like. The more you stretch them, the more they will jump sideways, and the tighter they are, the more stable they will be.🧐
Abre cuidadosamente un poco los resortes, al punto que más te guste. Mientras más los estires más van a saltar para los lados, y mientras más recogidos estén entonces mayor será su estabilidad🧐.

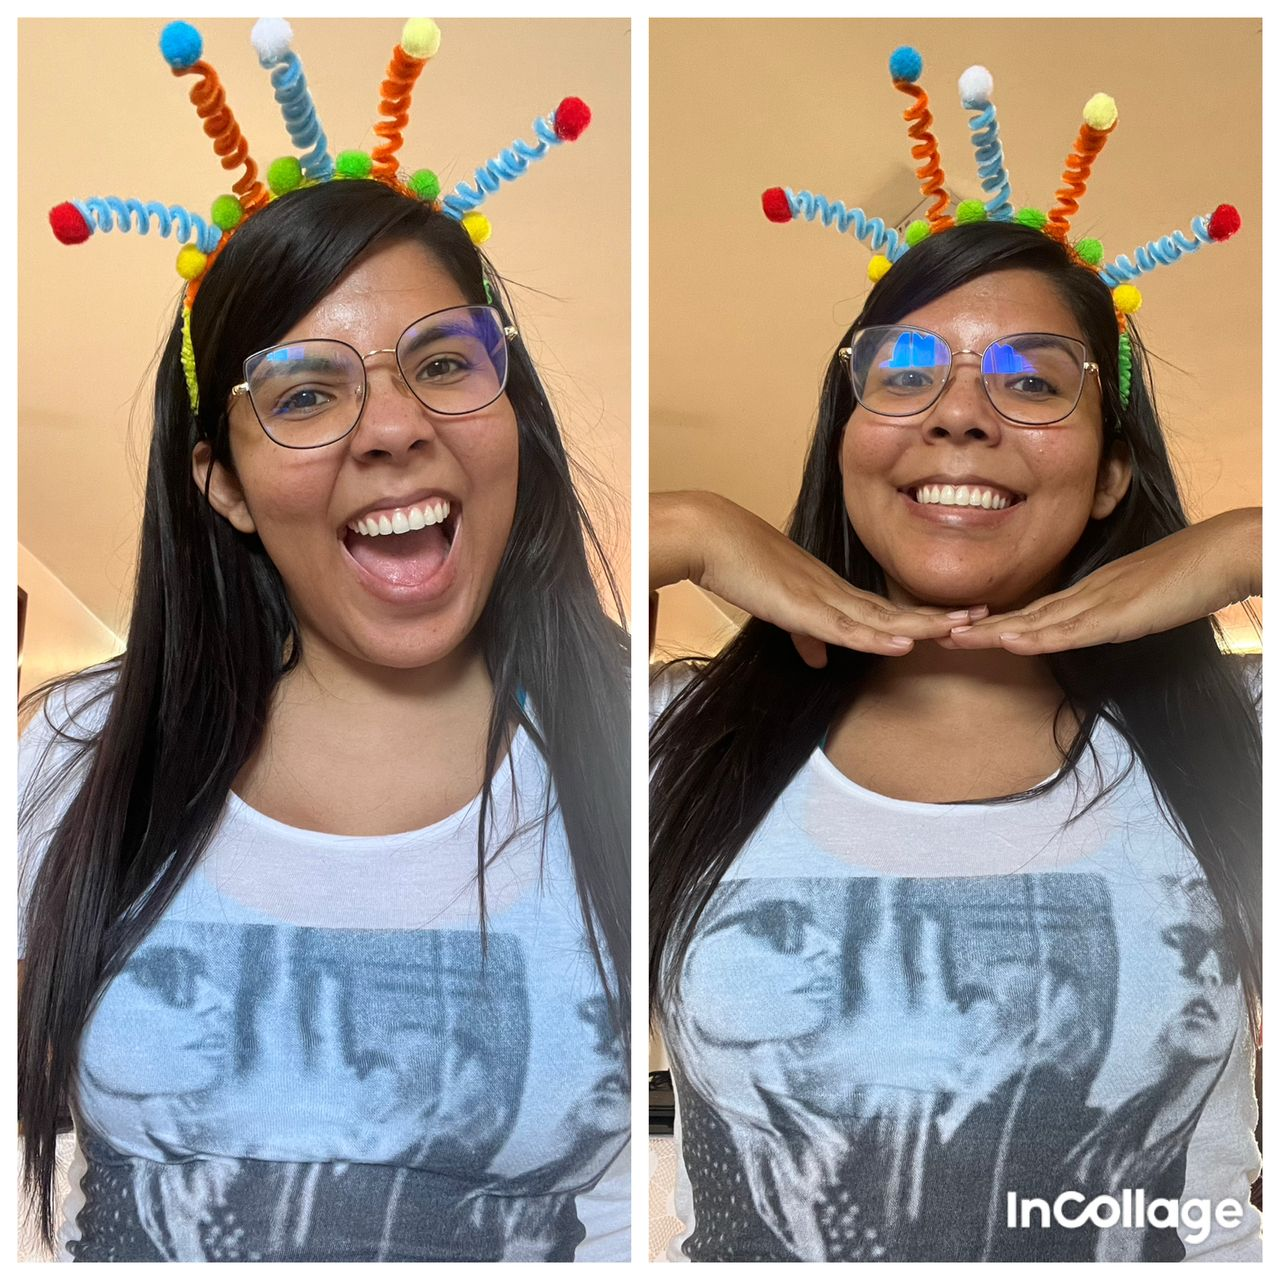
AND THAT'S IT, WE HAVE OUR 😳CARNIVAL HEADBAND!
Y LISTO, YA TENEMOS NUESTRO 😳CINTILLO DE CARNAVAL
Do you think it will steal looks?😯😯
¿Ustedes creen que robe miradas?😯😯
✏️ Texto traducido con DeeplTranslate versión gratuita
📷 Fotos tomadas por mi con mi Iphone 13
📷 Imagen de portada creadas con CANVA
📷 Collage hechos con App InCollage
Y LISTO, YA TENEMOS NUESTRO 😳CINTILLO DE CARNAVAL
¿Ustedes creen que robe miradas?😯😯
📷 Fotos tomadas por mi con mi Iphone 13
📷 Imagen de portada creadas con CANVA
📷 Collage hechos con App InCollage